Palate's Desire

  • Home
  • Recipe Index
  • Diet Recipes
  • Videos
  • Work with me
  • Subscribe
menu icon
go to homepage
  • Home
  • Recipe Index
  • Diet Recipes
  • Videos
  • Contact
    • Facebook
    • Instagram
    • Pinterest
    • Twitter
    • YouTube
  • subscribe
    search icon
    Homepage link
    • Home
    • Recipe Index
    • Diet Recipes
    • Videos
    • Contact
    • Facebook
    • Instagram
    • Pinterest
    • Twitter
    • YouTube
  • ×

    Badanekayi Ennegayi | Stuffed Baingan

    Published : December 12, 2013 | Last Update on September 18, 2020 By Muktha Gopinath

    Stuffed Baingan
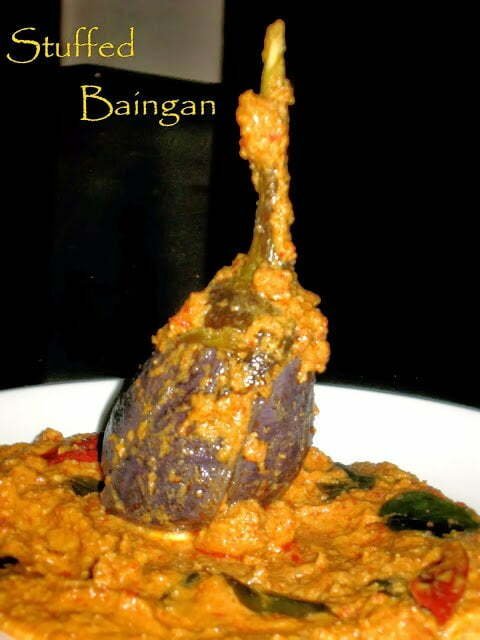
    Badanekayi Ennegayi | Stuffed Baingan

    Badanekayi Ennegayi | Stuffed Baingan recipe with step by step photos and video.

    Tender small baingan are stuffed with spicy blend of masala and cooked .

    Badanekayi in Kannada refers to Brinjal / Egg plant  and Ennegayi means cooked in Oil . Hence this recipe calls for more usage of oil around ⅓ cup but as I always prefer balance in my cooking , I have used 3.5 - 4 tablespoon of  oil in this recipe. Just trying to give juistice to the taste without using more oil. Its not about calorific values , its about balancing what I follow. When you can achieve the same taste with less oil and bring out the flavours why to load on more just because the recipe calls for?????  Makes sense , right .....!

    There are wide varities of recipe and methods followed across India , as  small brinjal / eggplant varitiey is quite popular throughout India. But this particular recipe is native of Karnataka and few parts of Maharashtra.

    Though , I have tried and tested many eenegayi recipes but this one is the most delicious amongst all the recipes , I have tried so far. Hence making on my blog post.

    This recipe is from a TV show, I don't actually remember, I got it from my recipe file , handwritten on a old piece of paper shared by my sister. With few changes to the orginally recipe , finally hooked up to this one. This gets best when served with jowar roti or rice flour roti also called as bhakri . Can also serve with Roti , Chapathi or Phulka.

    Pair with Jowar roti / bhakri , it tastes super delicious and definitely you'll wipe the plate clean . Believe me , though it's not authentic recipe, its best ever Ennegayi/ stuffed baingan recipe .  You must consider trying it for its rich, thick , perfectly cooked , tasty tender baingan.

    This gravy goes on well with Jowar Roti, Rice flour Roti, Pathri and Bili Holige/ Stuffed Rice Flour Paratha. You can also have it with Chapathi too.

    If you are looking for more baingan recipes , then don't forget check this super delicious recipes from my blog

    • Baingan Biryani | Brinjal Biryani
    • Baingan Bharta
    • Eggplant Tawa fry

    RECIPE CARD FOR BADANEKAYI ENNEGAYI | STUFFED BAINGAN

    Recipe

    stuffed Baingan
    5 from 1 vote

    Badenkayi Ennegayi | Stuffed Baingan Masala Recipe

    Tender small baingan are stuffed with spicy blend of masala and cooked to perfection.
    Prep Time20 minutes mins
    Cook Time15 minutes mins
    Total Time35 minutes mins
    Course: Main Course, Side Dish
    Cuisine: Indian, Karnataka, konkan, Maharstarian
    Keyword: Gluten Free, Vegan
    Servings: 6
    Calories: 172kcal
    Author: Muktha H S

    Ingredients

    • 250-300 grams Small Brinjals
    • 2 no’s Onion medium size
    • 2 no’s Tomato medium size
    • ⅓ Cup Peanuts
    • 6- 8 garlic cloves
    • 6-7 no’s Dry Red Chillies
    • ½ teaspoon Jeera / Cumin Seeds
    • 1 tablespoon Poppy seeds / kus kus
    • ¼ Cup Fresh Coconut
    • ½ teaspoon Jaggery
    • ¾ teaspoon Tamarind Pulp
    • 3 Curry leaves sprig
    • 4.5 tablespoon Oil 4Tbsp + ½ tablespoon divided
    • 1 ½ teaspoon Salt as required

    Instructions

    • Dry roast peanuts and set aside.
    • In a pan add 1 teaspoon oil , add cumin seeds , dry red chillies , poppy seeds, fresh coconut and saute till fragrant.
    • Add roughly sliced onions and fry till translucent.
    • Now slide in chopped tomatoes, turmeric, salt , jaggery , red chilli powder ( optional , I use to get good colour ) , tamarind in order and fry well till tomatoes are cooked completely.
    • Grind together dry roasted peanuts, raw garlic and above fried onion ,tomato spices. Add ¼ cup water and blend into a smooth paste.
    • Wash the brinjals and slit lengthwise into four,with quarters held together at the stalk.
    • Stuff all the slit brinjals with grounded masala and reserve the remaining masala.
    • Heat oil in a kadai,add curry leaves , 1-2 broken red chilli and saute for a minute.
    • Add the stuffed brinjals and remaining masala and gently saute for 2-3 minutes.
    • Let it cook in oil for about 5 minutes , add 1.5 cups of water and salt .
    • Cover lid and cook for 10-15 minues, till baingan cooked well and oil floats on top .
    • Turn off the stove , gently mix and serve with jowar bhakri.

    Video

    Notes

    1.You can reduce the amount of poppy seeds to 1 teaspoon and add 1 ½ tablespoon of white sesame seeds.
    2.Alternatively to dry red chilly ,you can use red chilly powder 1 Tbsp.
    3. As you'll stuff masala into brinjal, make sure to cook the onion,tomato and spices mixture completely before grinding.
    4.Taste the masala before stuffing and adjust salt. Salt should be added into masala before stuffing inside the brinjal,  later to the curry , adjust salt by ½ teaspoon or less , if required only.

    Nutrition

    Calories: 172kcal

    Step-by Step directons to make Badanekayi  Eennegayi / Stuffed Baingan :

    Dry roast peanuts.Take a pan add 1 teaspoon oil and fry onion, dry red chillies , poppy seeds,cumin seeds,fresh coconut till fragrant, add tomatoes, turmeric, salt , jaggery , tamarind in order and fry well till tomatoes cooked completely.

    Turn of the heat and allow it to cool completely.Badanekayi Ennegayi | Stuffed Baingan
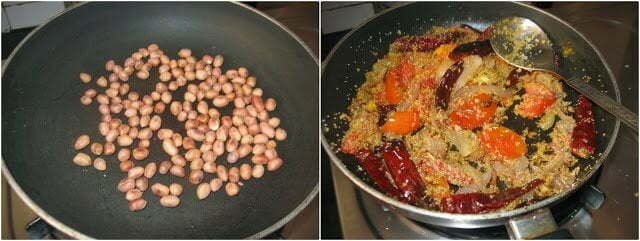
    Transfer it to a mixer and grind together dry roasted peanuts,raw garlic,tamarind and above fried onion ,tomato spices.

    Add ¼ cup water and blend into a smooth paste.
    Badanekayi Ennegayi | Stuffed Baingan
    Wash the brinjals and slit lengthwise into four,with quarters held together at the stalk. Stuff all the slit brinjals with grounded masala and reserve the remaining masala.Badanekayi Ennegayi | Stuffed Baingan
    Heat oil in a kadai,add curry leaves , 1 broken red chilly and saute for a minute.Add the stuffed brinjals and saute for about ten minutes.

    Badanekayi Ennegayi | Stuffed Baingan
    Add reserved masala and mix gently. Add 1 ½ cup of water, cover and cook over a low heat till the brinjals are completely cooked and oil rises to the surface.
    Badanekayi Ennegayi | Stuffed Baingan
    Badanekayi Ennegayi | Stuffed Baingan

    Serve hot with Jowar Roti,Akki Roti / Rice flour roti, Stuffed Rice Flour Roti or chapathi .

    Badanekayi Ennegayi | Stuffed Baingan

    Mooli Paratha | Stuffed Radish Flat Bread

    Published : December 10, 2013 | Last Update on December 13, 2018 By Muktha Gopinath

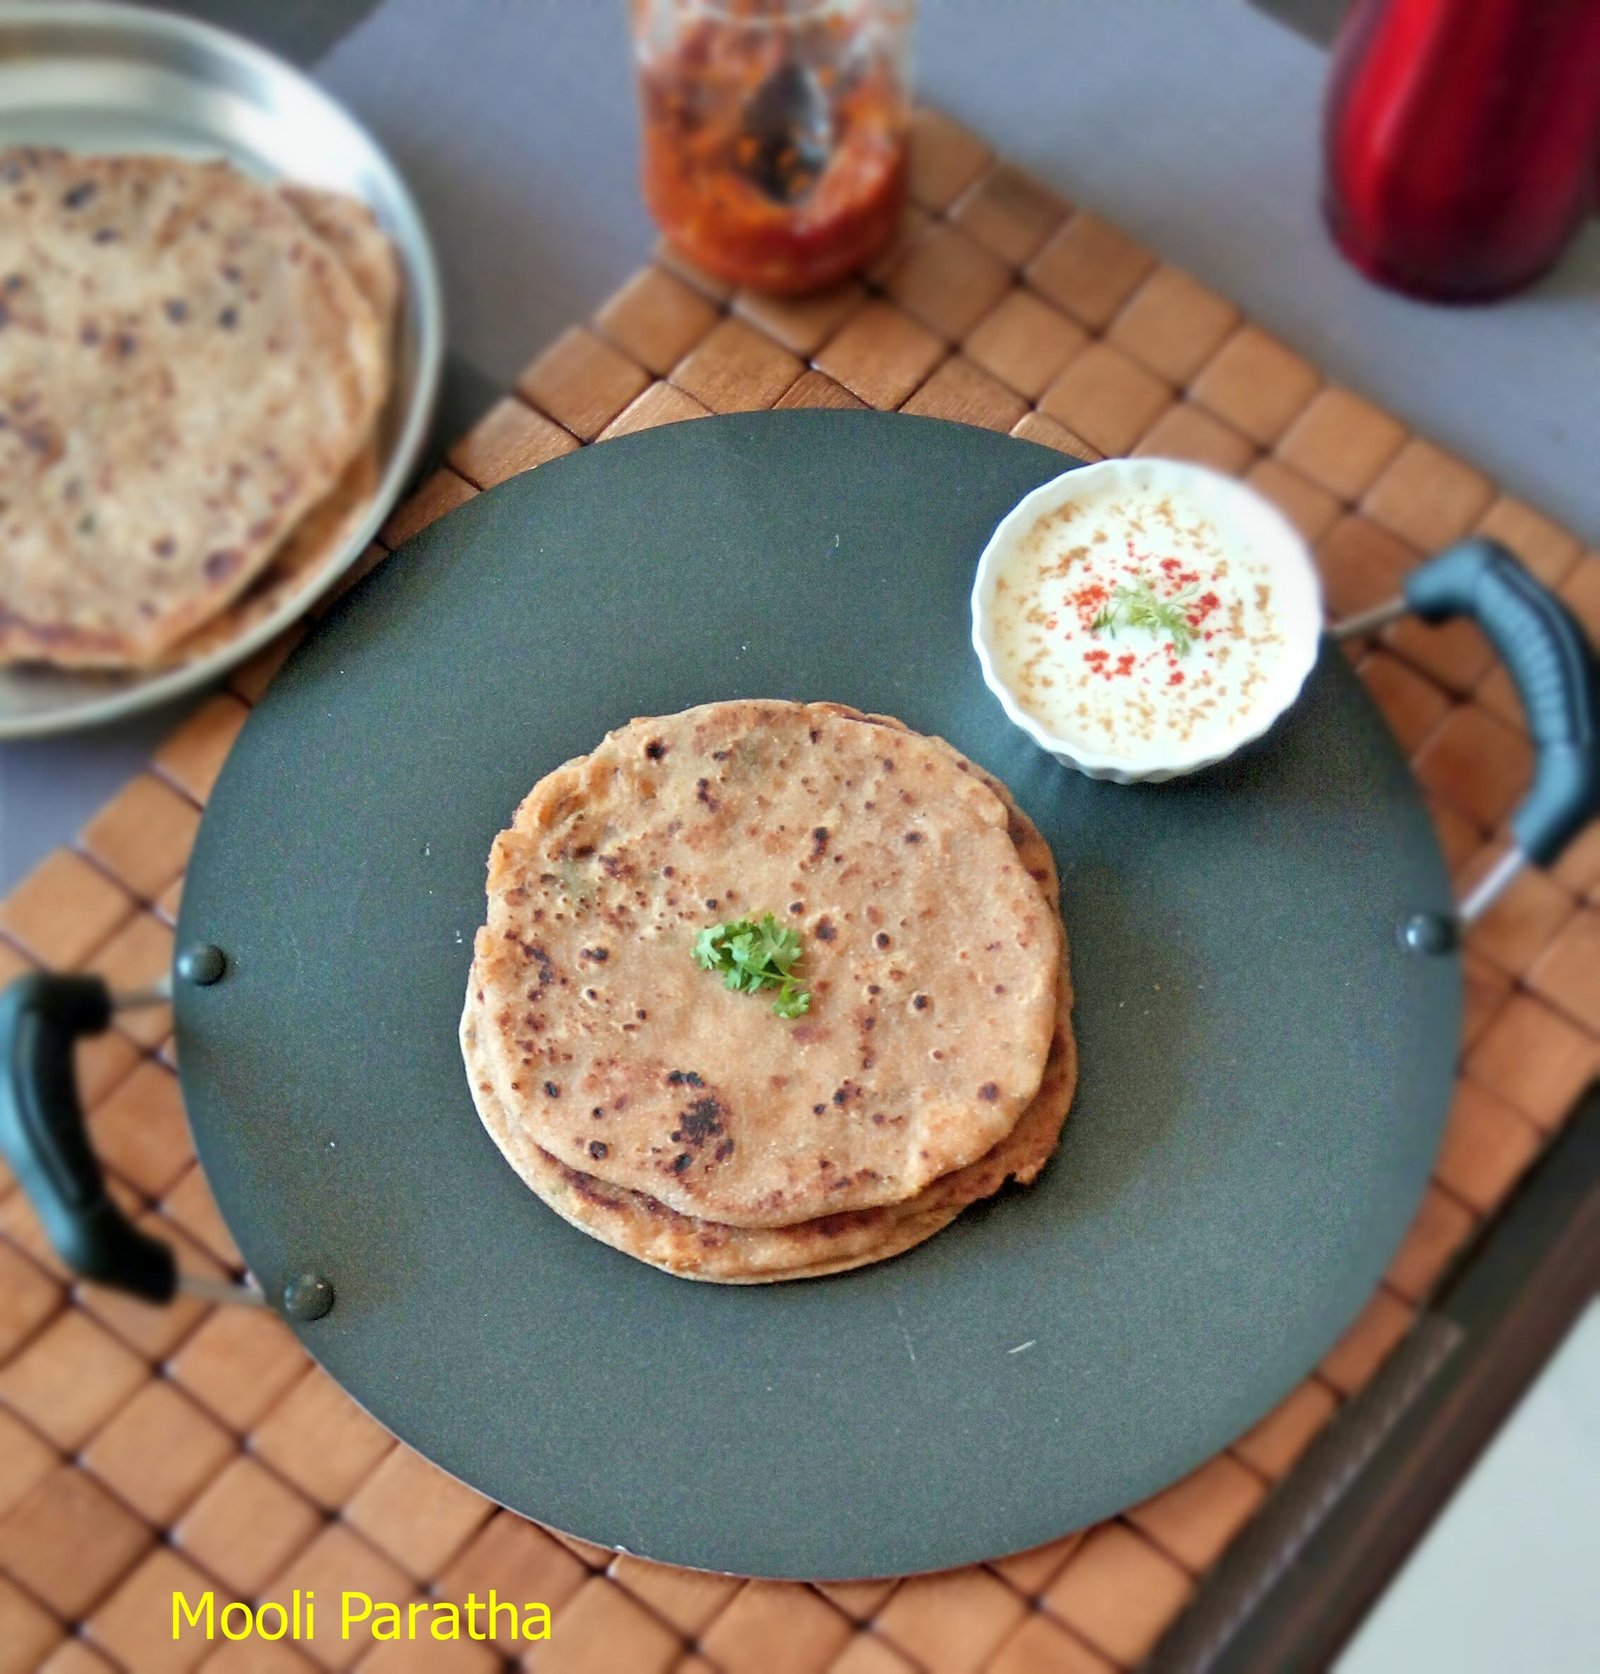
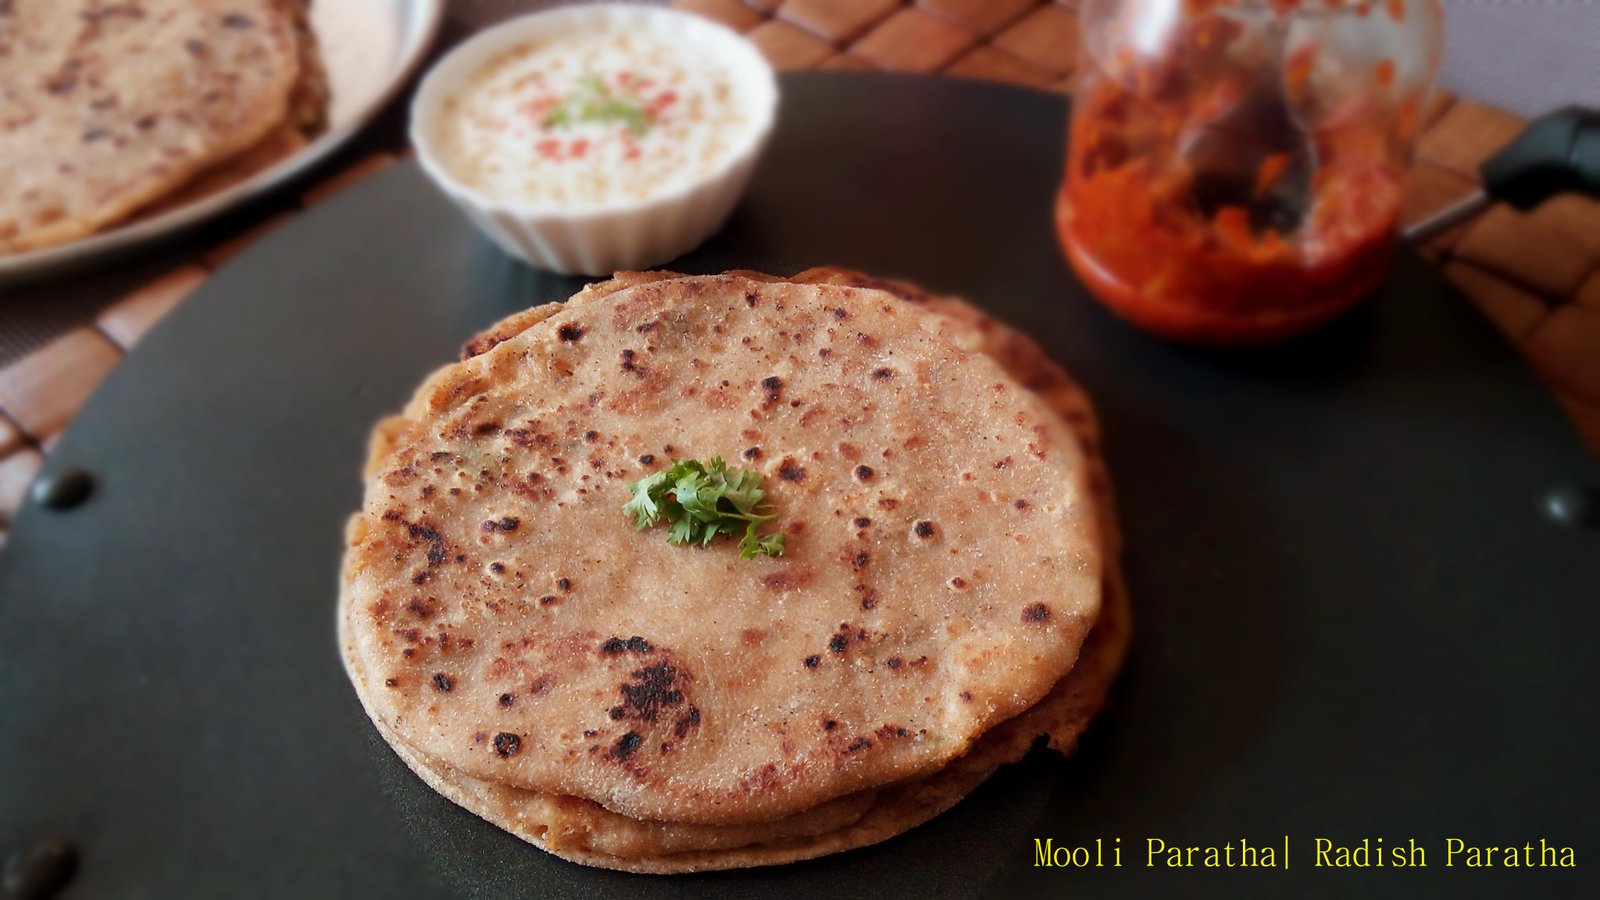
    Mooli Paratha or Radish Paratha is a healthy paratha that can be prepared for morning breakfast. Also ,stuffed Parathas are one of the easiest way to make kids eat vegetables without their knowledge.

    Mooli Paratha

    Why I prefer Mooli Paratha for breakfast is..., it's a wholesome meal and can keep full for longer hours. Most importantly , Carbs , Protein and Fat are needed to start the day because our body will be in a building mode when we break the fast and eat food. Eating healthy seasonal veggies is always a bless for the body to get the complete nutrients.Root vegetables are in season during winter , so add lots of Radish , Carrot , Beetroot and their greens to your diet this season.

    Radishes are a non starch vegetable with lots and loads of health benefits. This root vegetable is very low in calorie and rich in vitamin C,beta carotene and also aids digestion. Radish has been proved to be very good for diabetics as well. Radishes has low glycemic index(GI) . So eating uncooked radishes are much more beneficial than cooked ones. So I'm here with a diabetic friendly recipe Mooli Paratha.

    Other Paratha recipes on blog are :Aloo Paratha , Chinese Stuffed Paratha, Sattu Paratha and Onion Paratha 

    Recipe Card for Mooli Paratha | Stuffed Radish Indian Flat Bread


    Recipe

    Mooli Paratha
    5 from 1 vote

    Mooli Paratha | Stuffed Radish Indian Flat Bread

    Grated Radish along with spices ,stuffed inside a roti and cooked =on a griddle till crisp.
    Prep Time10 minutes mins
    Cook Time20 minutes mins
    Resting Time30 minutes mins
    Total Time30 minutes mins
    Course: Breakfast, Main Course
    Cuisine: Indian
    Keyword: Diet, Healthy, Indian Breads
    Servings: 4 People
    Calories: 180kcal
    Author: Muktha H S

    Ingredients

    • 3 Cup Radish Grated
    • 1 No Onion Medium Size chopped
    • 2 No Green Chilli , finely chopped
    • 1 teaspoon Garlic paste or 4 cloves garlic chopped finely
    • 1 teaspoon Ginger Paste or ½ inch Ginger finely chopped
    • 2 tablespoon Mint Leaves Chopped
    • 2 tablespoon Coriander Leaves Chopped
    • 1 teaspoon Cumin Seeds / Jeera
    • 1 .5 teaspoon Salt or as required
    • ½ teaspoon Turmeric Powder
    • ½ teaspoon Amchur Powder
    • 1 teaspoon Garam Masala
    • 2 teaspoon Oil and extra oil for frying

    For Paratha Dough

    • 2 Cups Whole wheat flour
    • ½ teaspoon Salt
    • 1 teaspoon Oil
    • ½ -¾ Cup Radish Juice extracted

    Instructions

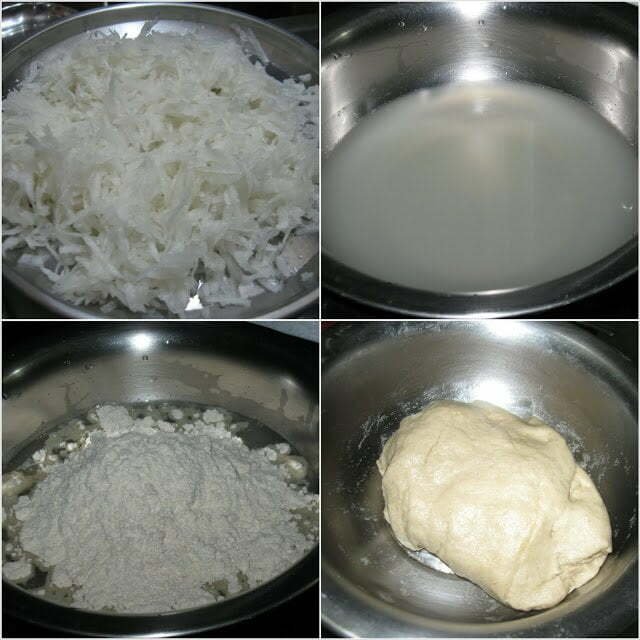
    • Wash, peel and grate radish, sprinkle ½ teaspoon of salt over it and set aside for 15 minutes. Squeeze out excess water from the grated radish .
    • To this water add wheat flour, salt,oil and knead it a smooth dough Keep it close aside for 20-30 minutes.
    • In a wok, heat oil ,add cumin seeds once it crackles .
    • Add onions,ginger garlic paste,green chillies saut. Add fresh coriander ,mint leaves, turmeric, amchur powder and salt ,fry well.
    • Turn off the heat.Add grated radish and mix well. Stuffing will be ready.
    • Take a small ball of dough , dust some flour and roll into a small size as shown in the picture. 
    • Place a spoonful of filling at the center , pleat and bring the edges together and close. Now roll it into a paratha .
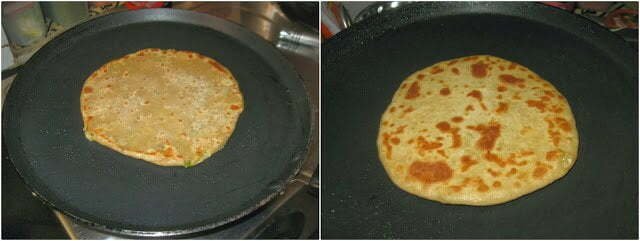
    • Heat tawa/griddle drizzle some oil/ghee place paratha over it and cook on both the sides till you seen brown spots or till cooked.
    • Serve hot with curds and pickle of your choice.

    Notes

    1. It's important to extract the juice of radish , or else it becomes soggy and can't roll paratha.
    2. I have not cooked radish here , if you want you can just sautee for 2-3 minutes.

    Nutrition

    Calories: 180kcal

    Step by Step directions on making of Mooli Paratha:

    Wash, peel and grate radish, sprinkle ½ teaspoon of salt over it and set aside for 15 minutes. Finally, squeeze out excess water from the grated radish as much as you can. Orelse the stuffing will be watery and wouldn't be able to roll paratha.

    Mooli Paratha | Stuffed Radish Flat Bread

    Add this extracted radish juice to wheat flour,add salt,oil and knead it a smooth dough. Keep it close aside for 30 minutes.

    In a wok, heat oil ,add  cumin seeds once it crackles .

    Mooli Paratha | Stuffed Radish Flat Bread

    Add onions,ginger garlic paste,green chillies saut. Add fresh coriander ,mint leaves, turmeric, amchur powder and salt ,fry well.

    Mooli Paratha | Stuffed Radish Flat Bread

    Turn off the heat.Add grated radish and mix well. Stuffing will be ready.

    Mooli Paratha | Stuffed Radish Flat Bread

    Take a small ball of dough , dust some flour and roll into a small size as shown in the picture. Place a spoonful of filling at the center and close the edges ,refer picture. Now roll it into a paratha of desired size.

    Mooli Paratha | Stuffed Radish Flat Bread

    Heat tawa/griddle drizzle some oil/ghee place paratha over it and cook on both the sides till you seen brown spots or till cooked. 

    Mooli Paratha | Stuffed Radish Flat Bread

    Finally, serve hot  paratha's with curds and pickle of your choice.

    Mooli Paratha


    Post is updated along with few new photos on 28/11/2018


    Paneer Tikka / Grilled Cottage Cheese

    Published : December 9, 2013 | Last Update on June 30, 2020 By Muktha Gopinath

    Paneer Tikka / Grilled Cottage Cheese
    Paneer Tikka / Grilled Cottage Cheese

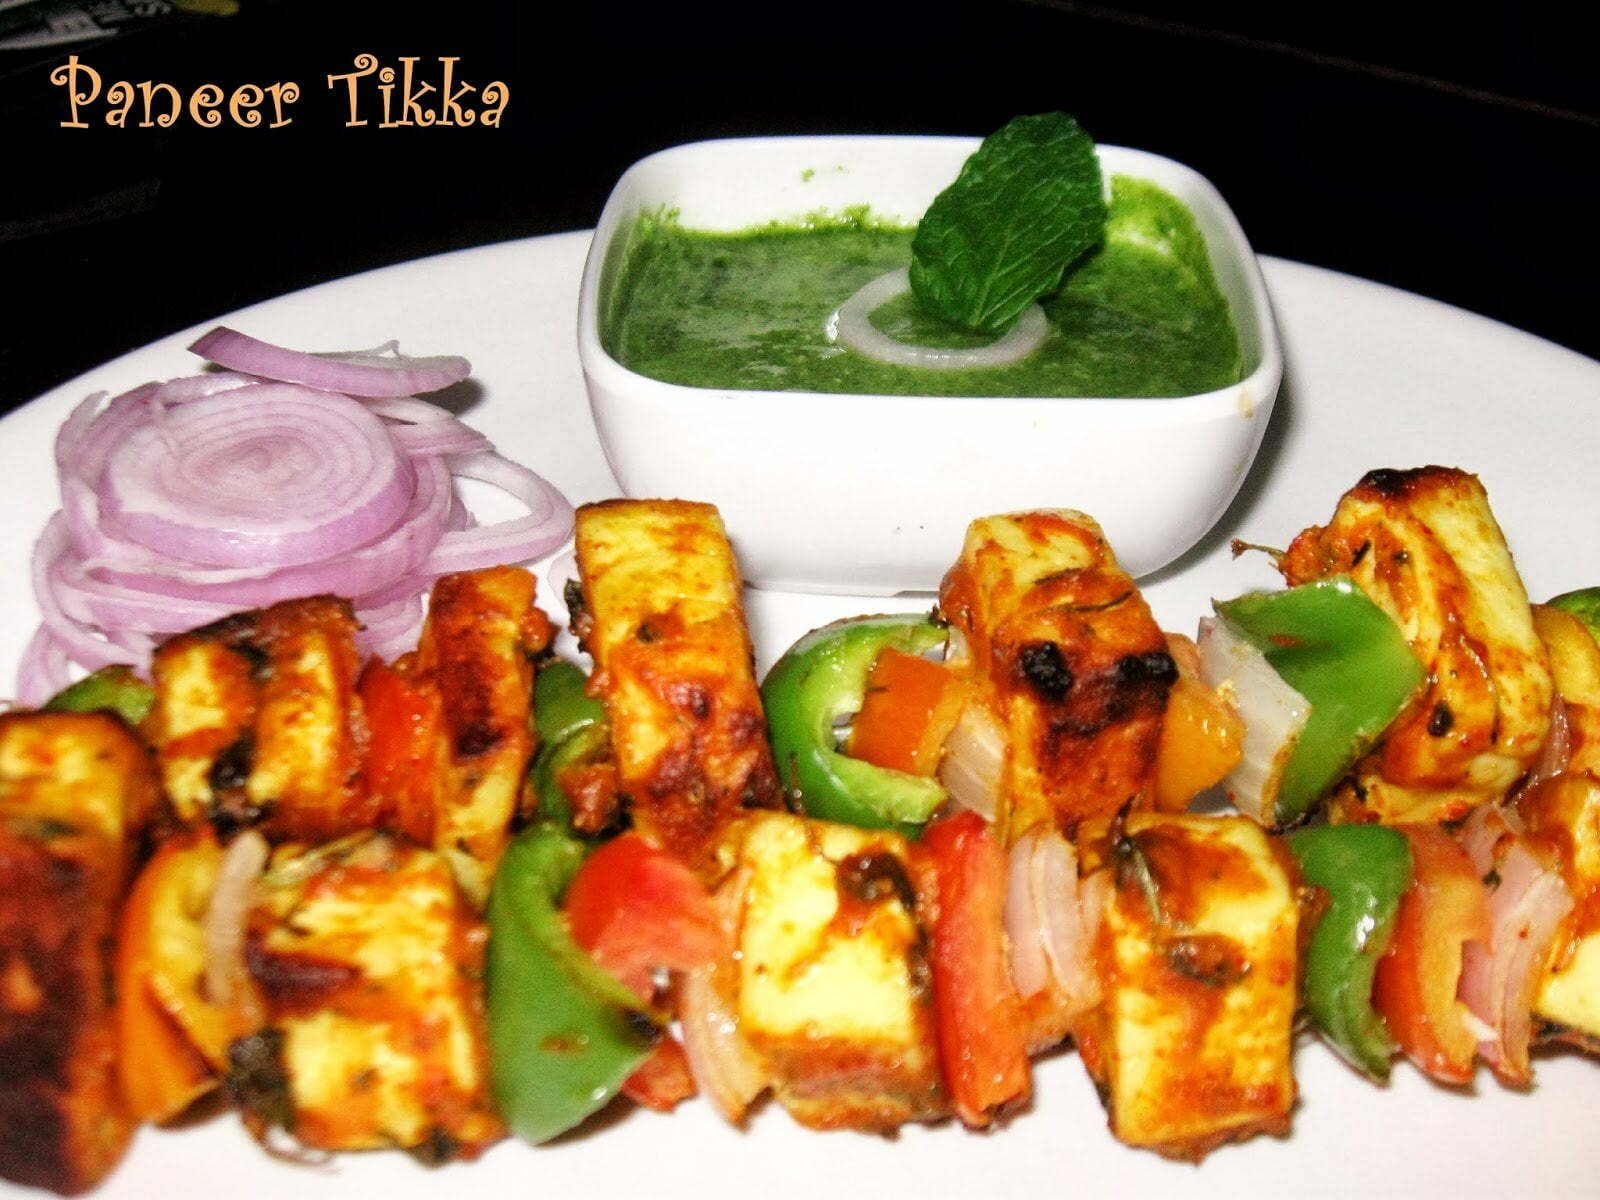
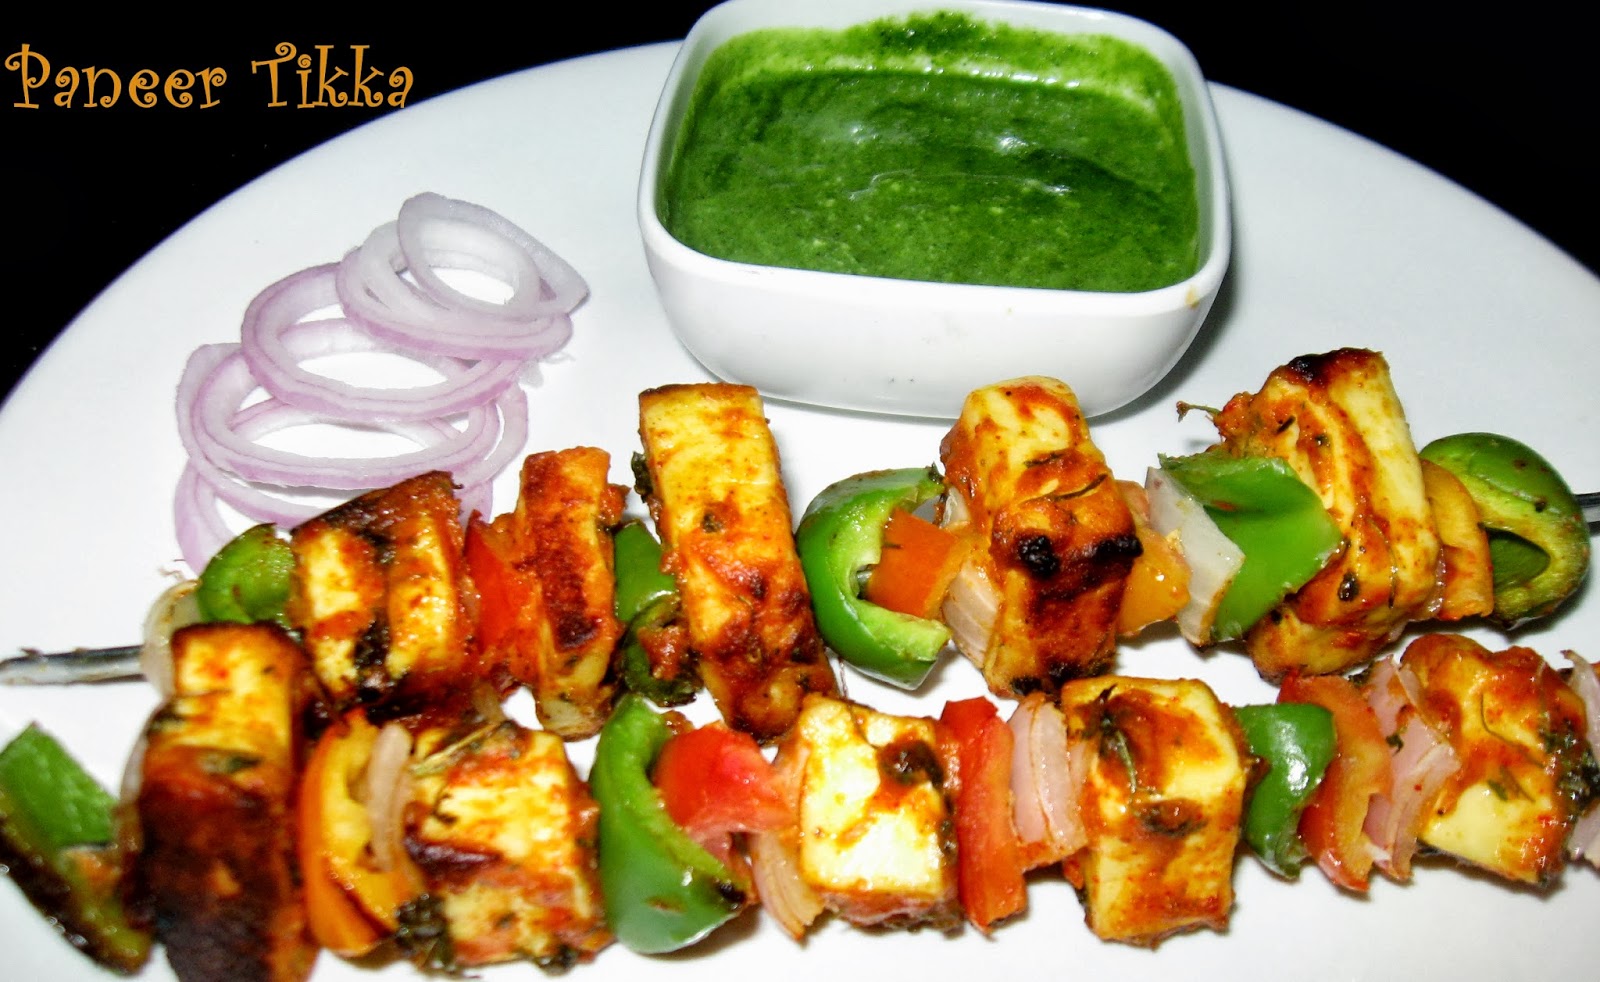
    Paneer Tikka / Indian Cottage Cheese a very popular vegetarian tandoori snack which is delicious. Paneer is storehouse of calcium and very rich source of protein. It is very good for growing children and also for


    pregnant and lactating mothers.Adding a portion of paneer to children diet  is there by essential. We all can eat it provided we are not calorie conscious 🙂 So let us all use paneer made out of skimmed milk so that we can enjoy health benefits as well as taste.

    Ingredients:

    Category:Vegetarian | Cusine : India | Course: Starter / Snack
    PrepTime : 1 Hour (inactive) |Cooking Time: 10 Minutes | Serves: 4

    Paneer Tikka / Cottage Cheese : 200 grms

    Curds: ½ Cup hung for ½ hour
    Corn Flour : ¾ Tbsp 
    Ginger Garlic  Paste: 1 Tsp
    RedChilly Powder:½ Tsp
    Turmeric Powder: ¼ Tsp
    Kasoori Methi :½ Tbsp
    Oil:½ Tbsp + oil for basting
    Salt:¾ Tsp
    Tandoori Masala: ½ tablespoon or Garam Masala: ½ teaspoon ,Chaat Masala :½ Tsp

    Other Ingredients (Optional):

    Onion Chunks :½ Cup
    Capsicum Chunks: ½ Cup
    Tomato Chunks:½ Cup
    Some Chat Masala to sprinkle

    Method:


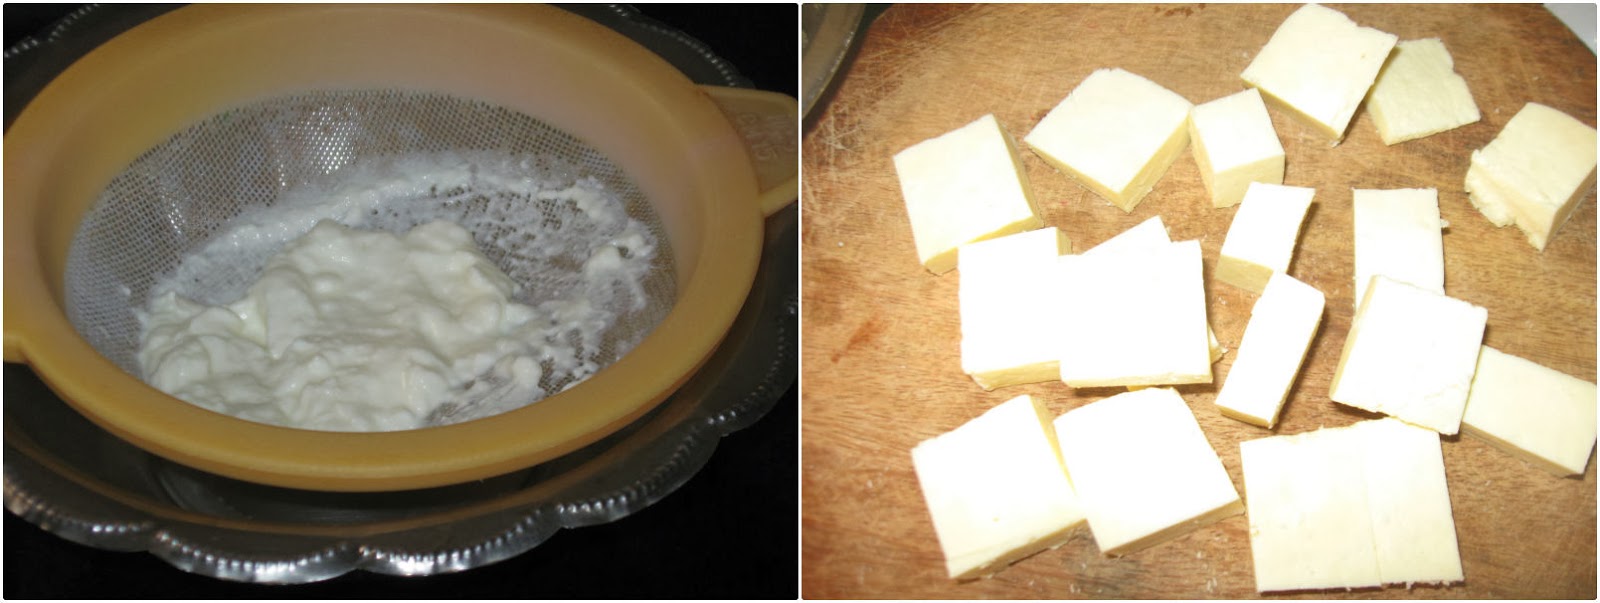
    Hung curd for 30 minutes.Cut paneer into 1 ½ " long and rectangles of ½ " thickness and keep it aside. 


    Paneer Tikka / Grilled Cottage Cheese


    Beat hung yogurt till smooth and add all the above ingredients( except vegetables and paneer) and make a smooth paste.Add the above paneer cubes and marinate for minimum 30 minutes or till serving time.


    Paneer Tikka / Grilled Cottage Cheese

    Cut all the above mentioned vegetables into cubes .Take a skewer ,arrange all vegetables and marinated panner alternatively. Drizzle some oil over it.

    Paneer Tikka / Grilled Cottage Cheese


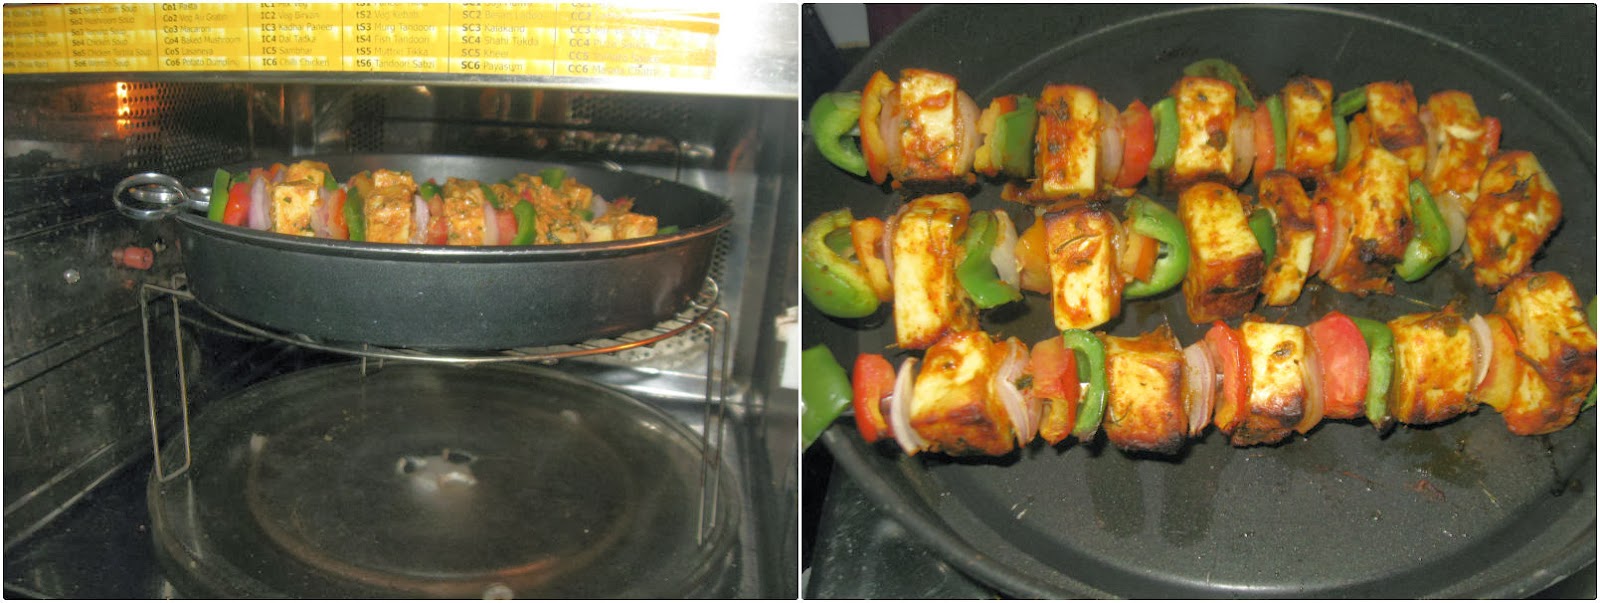
    Place the skewer on a oven tray/pan and place the tray on high rack and grill paneer for 9 minutes.Turn side once in between and baste some oil over it.


    Paneer Tikka / Grilled Cottage Cheese


    If the tikkas are not golden brown then grill for 1-2 minutes more.Serve sprinkled with chaat masala , pudina chutney (refer my post) and onion rings.


    Paneer Tikka / Grilled Cottage Cheese

    Copyright Your Blog Name 2009 at palatesdesire.blogspot.com

    Pudina Chutney | Mint Chutney

    Published : December 8, 2013 | Last Update on September 27, 2022 By Muktha Gopinath

    mint-chutney-recipe

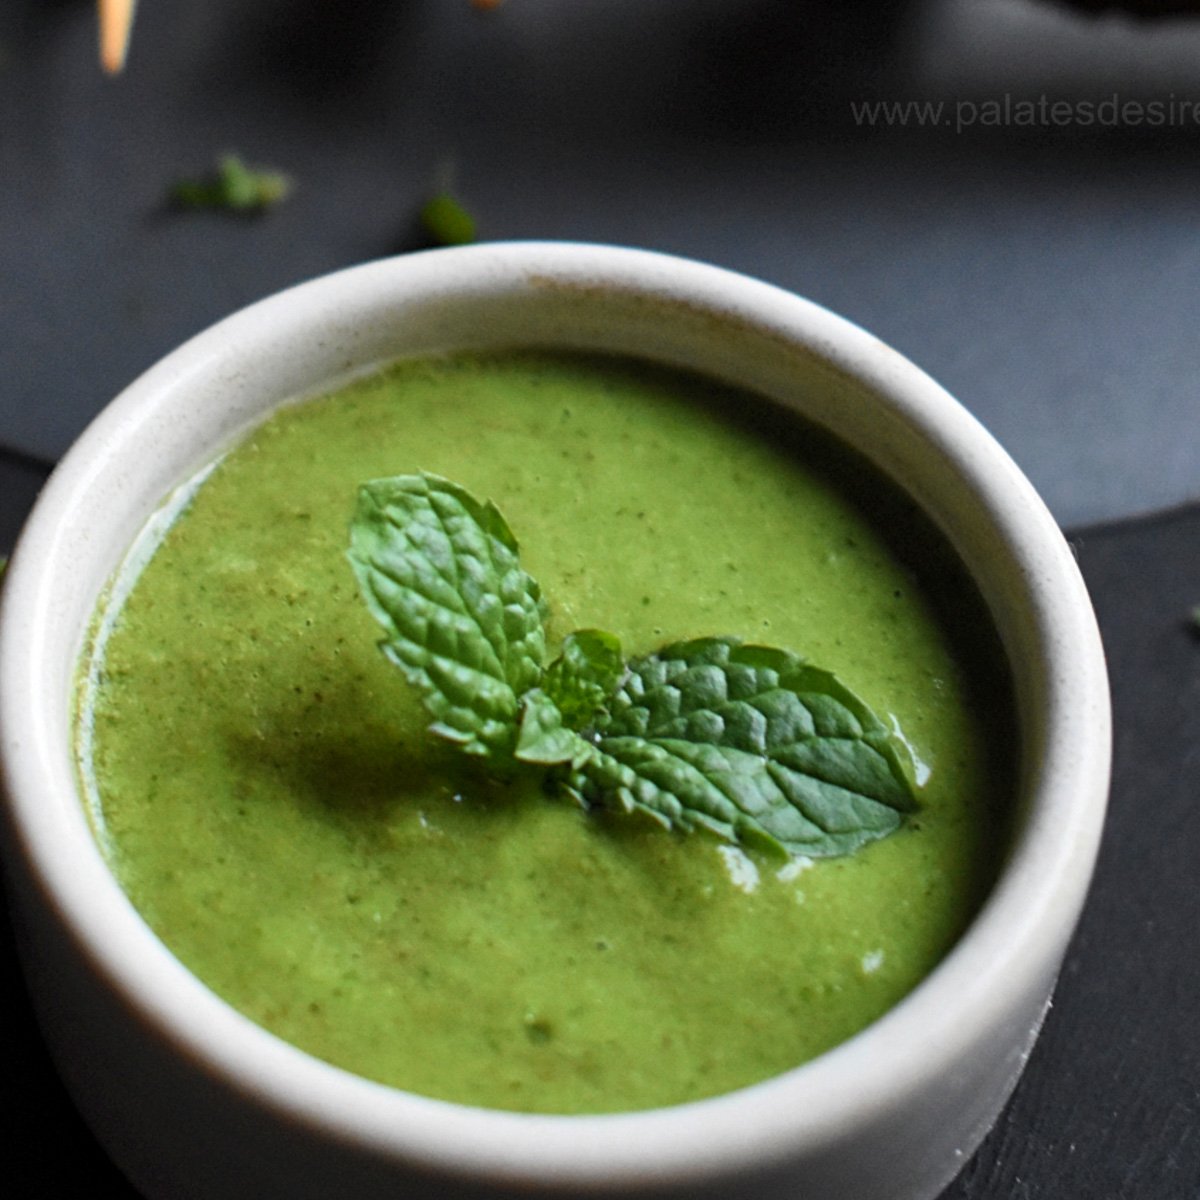
    Pudina Chutney or Mint Chutney recipe for tandoori dishes with step by step photos and video. Mint Chutney or mint dip used for tandoor dishes is a delicious dipping sauce made with fresh mint leaves, coriander leaves , yogurt and spices. This is a quick and easy chutney or dipping sauce recipe that can be made under 5 minutes.

    mint chutney_dipping sauce
    [feast_advanced_jump_to]

    About this recipe

    This version of Pudina Chutney is used as a dipping sauce for many of the tandoor snacks and starters. This post shares pudina chutney recipe that is served in restaurants with tandoori dishes like chicken tikka , tandoori gobi, tandoori chicken , hara bhara kabab, paneer tikka and many more.

    Fresh thick curd / yogurt is the most important ingredient in this recipe as it adds thickenss and creamy texture to this chutney along with a nice sour taste. Also raw onion in this recipe imparts a distinct taste to this chutney , so never skip onion in this pudina chutney.

    There is one more variety of mint chtuney that is usually served along with indian snacks , if you are looking for snacks green chutney recipe then do check here.

    Tips and variations

    Vegan / Dairy free option : Replace dairy yogurt with almond yogurt or cashew yogurt

    If you are making pudina chutney in large quantities or planning to make this chutney / dip in advance , then skip yogurt while blending .

    Only at the time of serving , add whisked yogurt into the chutney , mix well and serve immediately.

    Watch Video

    Recipe

    mint chutney dip
    5 from 1 vote

    Pudina Chutney | Mint Chutney Dip for Tandoori Dishes

    Mint Chutney or mint dip used for tandoor dishes is a delicious dipping sauce made with fresh mint leaves, coriander leaves , yogurt , onion and spices.
    Prep Time5 minutes mins
    Cook Time0 minutes mins
    Total Time5 minutes mins
    Course: Accompaniment
    Cuisine: Indian
    Keyword: Basic, Chutney, Dips and Sauces
    Servings: 4 People
    Calories: 10kcal
    Author: Muktha H S

    Ingredients

    • 1 Cup Pudina/Mint leaves
    • ½ Cup Coriander Leaves
    • 2 Green Chillies
    • ½ Onion medium size
    • ½ inch Ginger
    • 1 teaspoon Lemon Juice
    • ½ teaspoon Cumin Powder
    • ⅓ cup Curds thick
    • Salt to taste

    Instructions

    • Clean and wash pudina leaves , coriander leaves, onion , green chillies and ginger.
    • Add all the above ingredients in a mixer or blender . add lemon juice, cumin powder , salt and blend to a smooth paste. If preparing in small batch then you can directly add thick curds into the blender and blend everything together.
    • Beat curds till smooth . Just before serving add the above prepared chutney to the curds and mix well .
    • Serve as a dip/ accompaniment along with any tandoori dishes

    Video

    Nutrition

    Calories: 10kcal

    How to make Pudina Chutney Recipe

    Clean and wash pudina leaves , coriander leaves, onion , green chillies and ginger.

    Pudina Chutney | Mint Chutney

    Add all the above ingredients in a mixer or blender . add lemon juice, cumin powder , salt and blend to a smooth paste. If preparing in small batch then you can directly add thick curds into the blender and blend everything together.

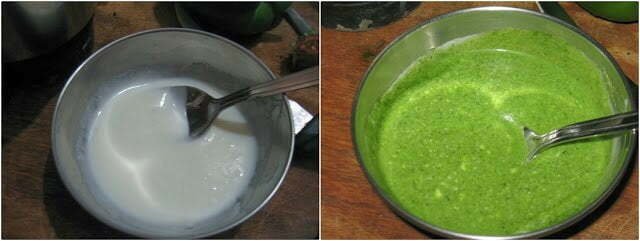
    Beat curds till smooth . Just before serving add the above prepared chutney to the curds and mix well .

    Pudina Chutney | Mint Chutney

    Serve as a dip/ accompaniment along with any tandoori dishes . In frame paneer tikka with mint chutney .

    Pudina Chutney | Mint Chutney

    Serving Suggestions

    Serve this chutney or dip immediately along with any kind of vegetarian or non vegetariant tandoori dishes . Also this can be served as a dipping sauce with other snacks , starters like kebabs and varities of barbeques . This chutney is mostly served with tandoori dishes because the taste of mint , yogurt and spices blend well with flavourful and less spiced tandoori snacks , hence it is a perfect dip with tandoori snacks.

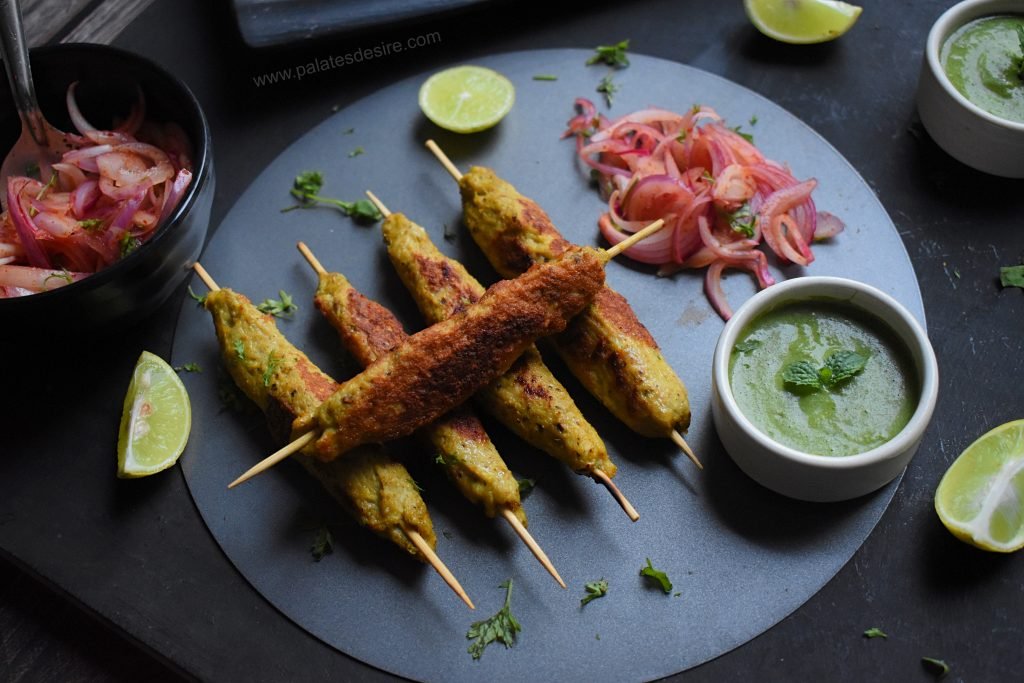
    Latest updated picture , inframe chicken sheek kebab with mint dip

    Pudina Chutney | Mint Chutney

    Babycorn 65

    Published : December 6, 2013 | Last Update on May 2, 2021 By Muktha Gopinath

    Babycorn 65
    Babycorn  65


    Couple of days back when i was going through a article i got to know about nutritional benefits of babycorn 

    and brought it from store the same day. Babycorn is a low calorie vegetable with 25 calories per  ½ cup serving.Though i wanted to try salad out of it some how i ended up cooking babycorn fries and ended up in very high calorie diet 🙁 .Apart from calorie count  this Babycorn 65 was so good in taste that plates were empty in no time. It is a perfect snack/starter. 

    Ingredients:

    Category:Vegetarian | PrepTime: 10-15 Minutes
    Cooking Time:5-10 Min | Serves: 2-3 | Course: Starter

    All Purpose Flour / Maida : 2 Tbsp
    Cornflour:2 Tbsp
    Rice Flour:1 tablespoon (Optional)
    Curds:11/2 Tbsp
    Ginger Garlic Paste:1 ½ Tsp
    Green Chilly:2 
    Red Chilly::1 Tsp
    Back Pepper Powder:½ Tsp
    Cooking Soda:Pinch
    Curry Leaves: 4 Strings
    Garlic:4-5 Cloves
    Hot Oil:1 teaspoon (Optional)
    Oil :1 tablespoon + to deep fry
    Salt to taste

    Method:
    Wash babycorns, diagonally slit them lengthwise and cut .Add salt and parboil babycorns ,drain water and keep it aside. 


    Babycorn 65


    Take a bowl add cornflour,all purpose flour,rice flour,soda, ginger garlic paste, red chilly powder,salt, black pepper powder, hot oil  and prepare the batter.


    Babycorn 65

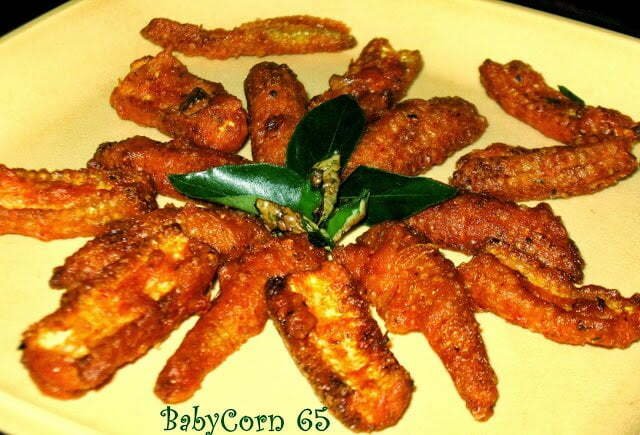
    Heat oil and deep fry baby corns till golden .Drain on absorbent paper.

    Babycorn 65

    Heat 1 tablespoon oil,Add curry leaves,chopped garlic,chopped green chilies saute for a minute and add fried babycorns and serve hot as a starter.

    Babycorn 65


    Yummy Babycorn Fries/Babycorn 65,Enjoy!

    Babycorn 65

    My Notes:
    Adding rice flour and hot oil gives more crispness to any fritters.

    Copyright Your Blog Name 2009 at palatesdesire.blogspot.com

    MoongDal Rice Recipe| Easy Hesaru Bele anna Recipe

    Published : December 5, 2013 | Last Update on July 23, 2022 By Muktha Gopinath

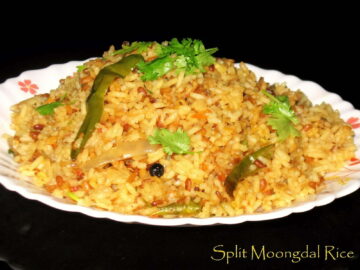
    moong Dal rice

    Moong Dal rice is one of the easiest , healthy , light on stomach lunch box recipe. This is an easy recipe one of the version of Pongal / Khichdi types you can say ,but like Khichdi or pongal its not runny , rather it's a perfectly cooked rice along with moong dal. Its tastes good with or without chutney. As this is healthy and gets cooked easily ,  its one of the complete protein healthy lunch box recipe. At times, if there are no veggies at home , then definitely this is my to go recipe for lunch box , along with some raita or coconut chutney and salad.  Healthy and easy recipe for an hustle free morning.

    moongdal_rice

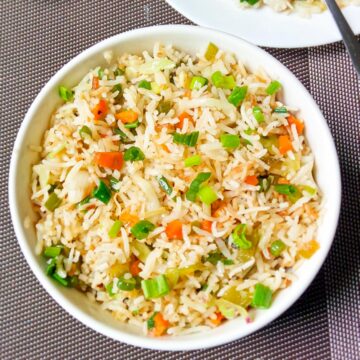
    Other rice varieties recipe on blog are Vegetable Pulao , Tomato Pulao , Bisibelebath , Surti Papdi Pulao/Avarekalu bath  , Khara Pongal Karnataka Style , Green Peas Jeera rice and Chinese Veg Fried Rice.

    RECIPE CARD FOR MOONG DAL RICE |HESARUBELE ANNA

    Recipe

    MoongDal Rice Recipe| Easy Hesaru Bele anna Recipe
    5 from 2 votes

    Easy Moong Dal Rice Recipe | Hesaru Bele anna Recipe

    A variety of fluffy rice made with moong dal.
    Prep Time5 minutes mins
    Cook Time25 minutes mins
    Total Time30 minutes mins
    Course: Breakfast
    Cuisine: South India
    Keyword: Lunchbox Recipe
    Servings: 3 People
    Calories: 148kcal
    Author: Muktha H S

    Ingredients

    Measurement Size 1 Cup = 200 ml

    • 1 cup Regular rice
    • ⅓ cup Split moong dal
    • 21/3 cups Water for cooking
    • 2 Onions Sliced
    • 1 Tomato Chopped
    • 3-4 Green Chillies Slit or as required
    • ¾ teaspoon Blackpepercorns
    • ½ tablespoon Fresh coconut pieces
    • ½ Tsp Turmeric Powder
    • 1 teaspoon Jeera Powder
    • 3 tablespoon Cooking Oil
    • 1 ½-2 teaspoon Salt or as required
    • 2 tablespoon Fresh Coriander leaves chopped
    • 1 teaspoon Lemon Juice

    Instructions

    • Soak rice for 10 minutes,drain water and keep aside.
    • Wash Moong Dal and keep it aside.
    • Shred onions,slit green chilies,cut coconut into small bits and finely chop tomatoes.
    • In a pressure Cooker, heat oil,add black peppercorns,onion,chilies ,moong dal and saute for 5 minutes.
    • Now add turmeric powder,jeera powder  ,tomatoes,small bits of coconut and fry well.
    • Add rice and mix well  and cook for a minute.
    • Add 2 ⅓ cup of hot water,salt and pressure cook for a whistle.
    • Allow to release pressure on its own,add lemon juice ,coriander leaves ,Mix well and serve.

    Nutrition

    Calories: 148kcal

    Step By Step Directions:

    Soak rice for 10 minutes,drain water and keep aside.Wash Moongdal and keep it aside. Slice onions,slit green chilies,cut coconut into small bits and  finely chop tomatoes.

    Take a pressure cooker ,add oil ,black peppercorns, onion, chilies , moongdal and saute for 5 minutes. Add tomatoes,small bits of coconut ,turmeric and fry well.

    MoongDal Rice Recipe| Easy Hesaru Bele anna Recipe


    Now add in rice and saute for few minutes, add hot water, salt and pressure cook for a whistle.


    MoongDal Rice Recipe| Easy Hesaru Bele anna Recipe

       
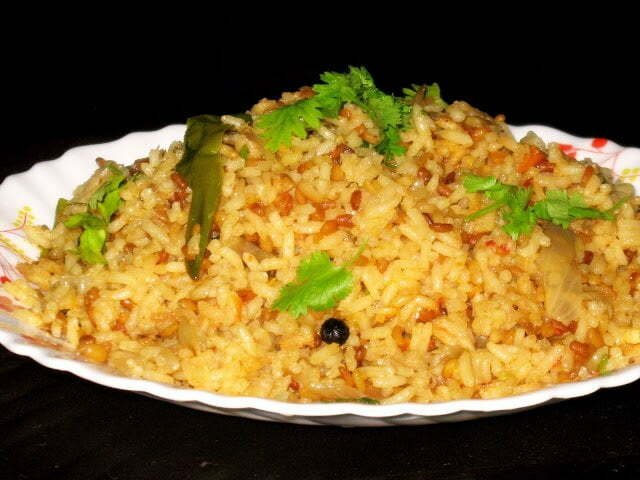
       Once pressure is released on its own add  lemon juice, coriander leaves. Serve hot accompanied with coconut chutney and pickle.

    MoongDal Rice Recipe| Easy Hesaru Bele anna Recipe

    Penne Pasta in Tomato Sauce

    Published : December 4, 2013 | Last Update on July 23, 2022 By Muktha Gopinath

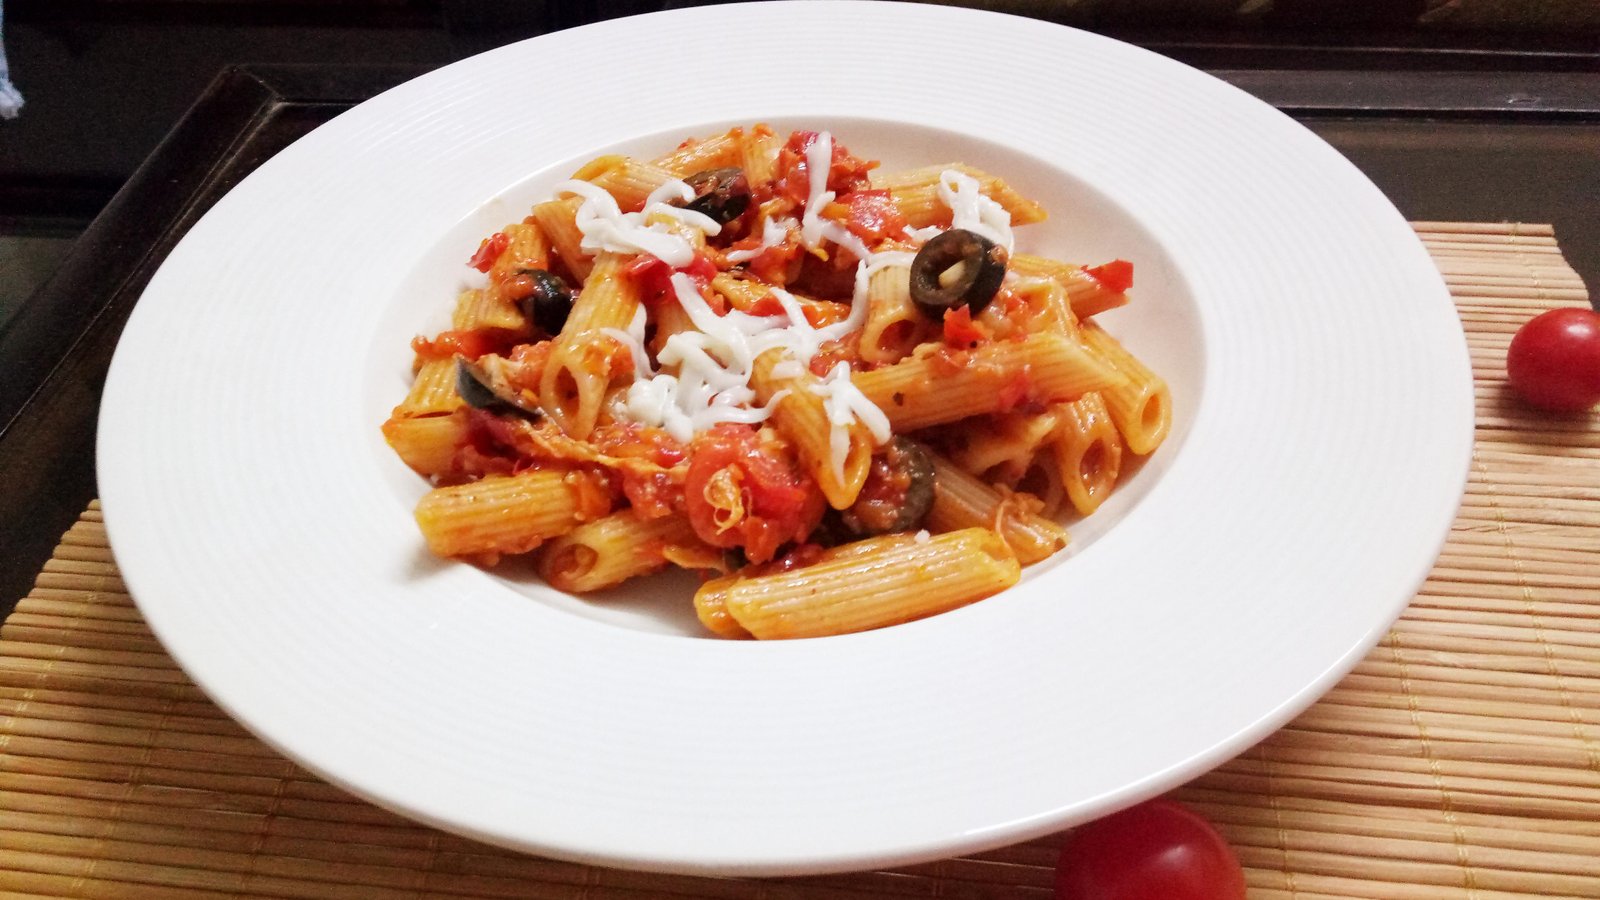
    Penne Pasta in Tomato Sauce, is one of my favourite pasta recipe. I love tomato sauce , Arrabiata sauce pasta than white sauce Pasta. The deliciousness of this Pasta lies in the Tomato Sauce. Whenever there is lots of Tomato at home , I prepare this Sauce and keep it ready. You can get this Pasta sauce ready with very fewer ingredients. Try this delicious Pasta Recipe , which is undoubtedly lovable among all ages.

    Penne Pasta in Tomato Sauce

    This pasta recipe is adapted to suit our indian palate. Here I have used a homemade 2-in-1 pizza-pasta sauce. I call it as 2-in-1 Pizza-Pasta-Sauce because it can be used with both pizza as well as pasta and it tastes awesome, believe me it even tastes great with Idli ROFL 🙂 🙂 😉 . As it is a common Sauce which I use it on Pizza as well as Pasta . I don't dare to call this Spicy Tomato Sauce has Arrabiata  Sauce.

    If this sauce is ready then with in few minutes you can relish the tasty pasta. Everyone at our home loves this pasta a lot....,even Sahishnu my lil boy loves to eat this.

    At home , friday night dinner will be usually from any world cuisine like Fried Rice , Manchurian , Pizza , Pasta , Garlic Bread , Taco , Burgers , Mexican Rice and Quesadilla . Hope to share all the recipes soon , you can even request me for any recipe in the comment , so that I'll share it ASAP.

    Serve this Penne Pasta in Tomato Sauce  along with some Baked Potato wedges for weekend dinner , just like me 🙂

    RECIPE CARD FOR PENNE RIGATE IN SPICY TOMATO SAUCE

    Recipe

    Penne Pasta in Tomato Sauce
    5 from 1 vote

    Penne Rigate with spicy Tomato Sauce

    Penne Pasta cooked and mixed with spicy tomato sauce,truly Italian recipe adapted for indian palate.
    Prep Time5 minutes mins
    Cook Time20 minutes mins
    Total Time25 minutes mins
    Course: Main Course
    Cuisine: Italian
    Keyword: Pasta
    Servings: 4 People
    Calories: 133kcal
    Author: Muktha H S

    Ingredients

    • 2 Cups Penne Pasta
    • 3 Tomatoes
    • ½ Cup Spicy Tomato Pasta Sauce refer notes
    • 10 Garlic cloves finely chopped
    • 1 tablespoon Fresh Cream
    • 2 tablespoon Parmesan Cheese or processed cheese grated
    • 1 teaspoon Red Chilly Flakes
    • 1 tablespoon Pasta Seasoning refer notes
    • 2 Tbsp Olive Oil
    • 1 tablespoon Black Olives optional
    • ¼ teaspoon Sugar
    • 11/2 teaspoon Salt or as required

    Instructions

    • Take a wide vessel and boil water,once water starts to boil add 1 teaspoon Salt ,Pasta and cook pasta till done (follow the cooking time instructions on pasta  cover).
    • Drain water,wash pasta with cold water and keep it aside.
    • In a pan heat olive oil, add chopped garlic,small broken pieces of dried red chilli/chilly flakes and finely chopped tomatoes. 
    • Cook  tomatoes well till you get sauce consistency.
    • And then add pizza/pasta sauce (refer notes) ,fresh cream, grated cheese ,½ teaspoon salt ,sugar and pasta seasoning.
    • Add cooked pasta ,olives and mix well so that pasta gets nicely coated with sauce. Turn of the heat.
    • Serve pasta hot with cheese grated on top and italian/pasta seasoning,if required. 

    Notes

    1.If you don't have pasta/pizza sauce ,you can add more tomatoes around 10-12 and cook till you get sauce consistency. Don't overcook or else it becomes dry.
    2.Don't overcook  pasta as it becomes soggy ,to ensure it is perfectly cooked take one penne prick it with fork and check.
    3.Sauce should be juicy and it should coat pasta evenly .Sauce should neither be runny or very thick.
    4.If you don't have Pasta Seasoning ,mix ½ teaspoon crushed black peppercorns, ½ teaspoon Oregano ,½ teaspoon Basil,¼ teaspoon Thyme, ¼ teaspoon Sage ,¼ teaspoon Rosemary.

    Nutrition

    Calories: 133kcal

    Step by Step Directions on making of Pasta in Tomato Sauce:


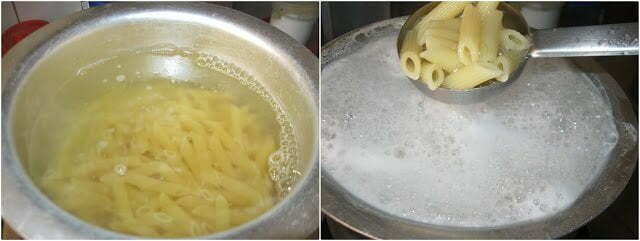
    Take a wide vessel and boil water,once water starts to boil add  1 teaspoon Salt ,Pasta and cook pasta till done   (follow the cooking time instructions on pasta packet ).Drain water,wash pasta with cold water and keep it aside.

    Penne Pasta in Tomato Sauce

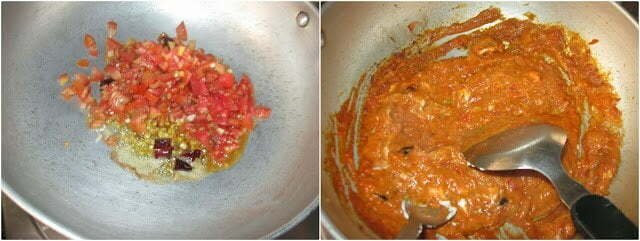
    Take a pan ,put oil,chopped garlic,small broken pieces of dried red chilli/chilly flakes and finely chopped tomatoes. Cook the tomatoes well till you get sauce consistency. And then add pizza/pasta sauce , fresh cream (optional), grated cheese ,½ teaspoon salt ,sugar and pasta seasoning.


    Penne Pasta in Tomato Sauce


    Once Cheese melts add cooked pasta,mix it on high flame,add sliced black olives and serve hot.


    Penne Pasta in Tomato Sauce

    Serve Pasta hot with grated cheese on top  and pasta seasoning if required.
    Penne Pasta in Tomato Sauce


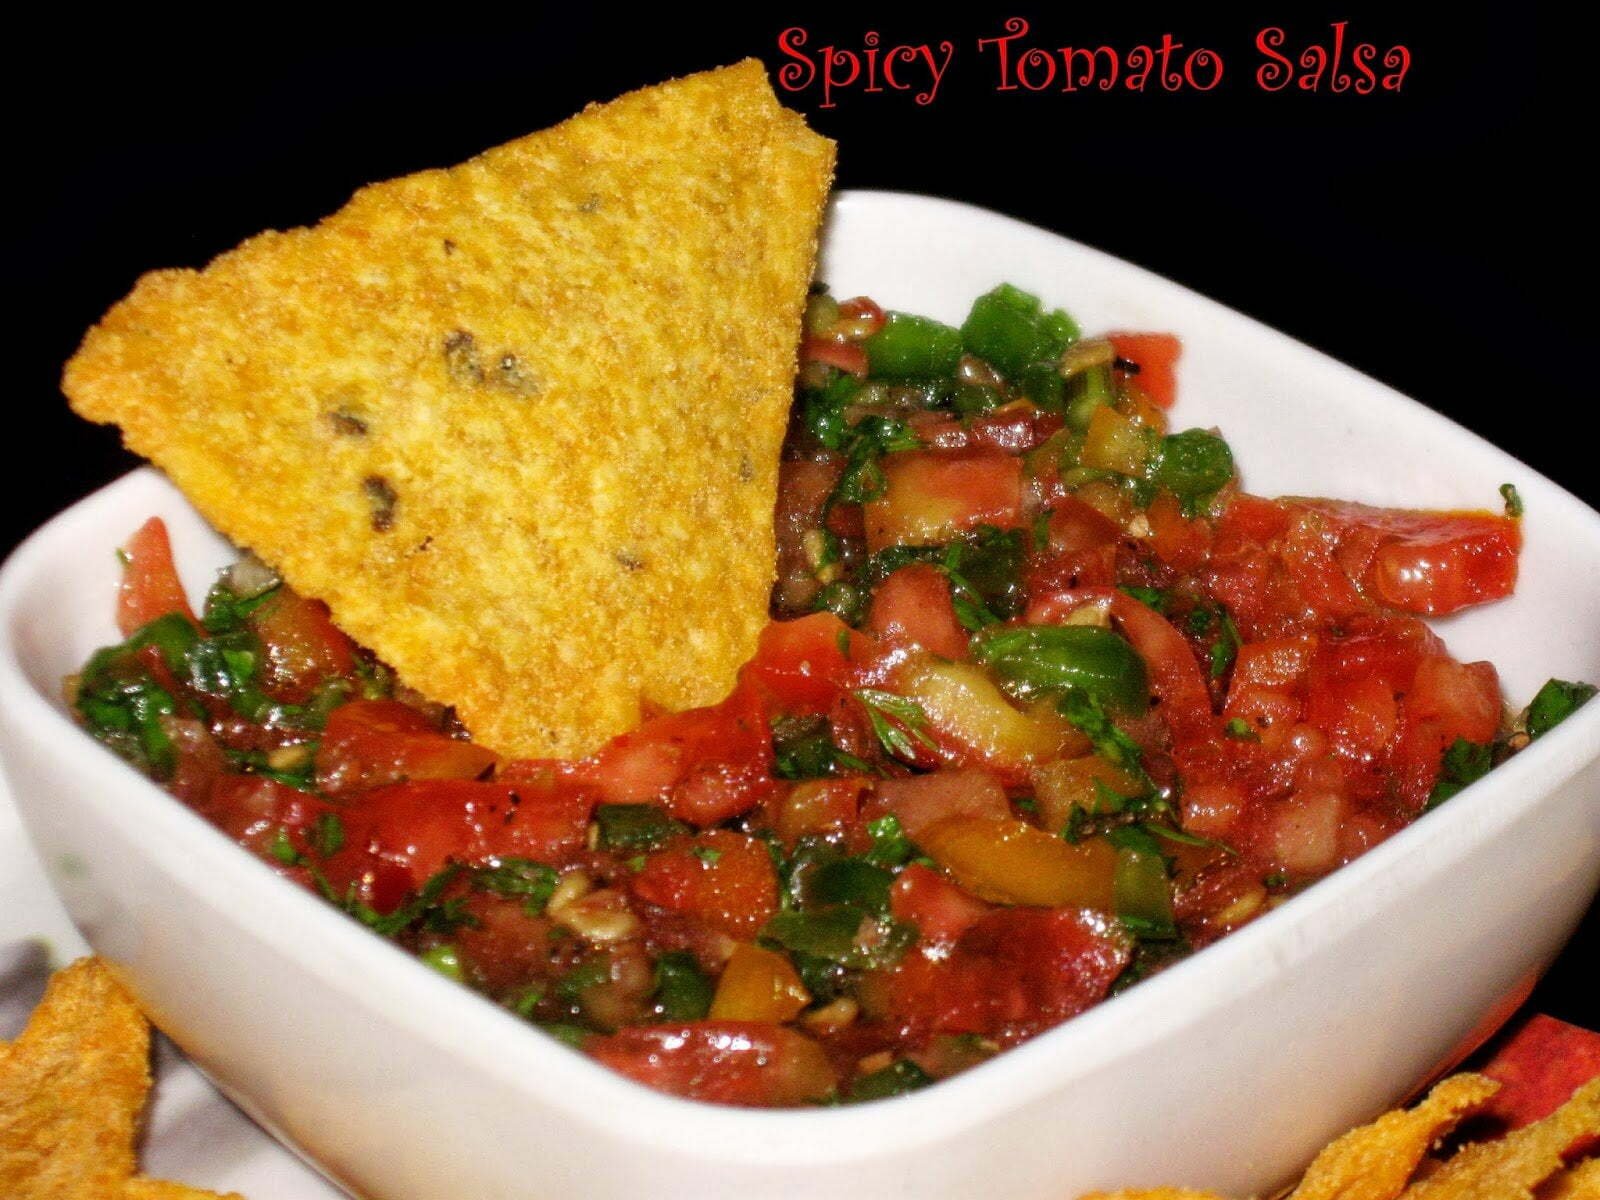
    Spicy Tomato Salsa

    Published : December 3, 2013 | Last Update on July 25, 2018 By Muktha Gopinath

    Spicy Tomato Salsa
    Spicy Tomato Salsa

    Salsa roja  meaning red sauce is used as a condiment in Mexican and South Western cuisines.Mexican Salsa is traditionally produced using mortar and pestle but can also be done using blenders .There are wide
    varieties of salsa which will be accompanied with lot many dishes.I got this recipe from food.com sometime back and tried it only when one of my friend who is a health freak had visited my house.As this is fat free i made this salsa to accompanied with Tortilla Chips. Wow........! it was just too good with those mild spice and flavours. .

    Ingredients:
    Category: Continental | Prep Time: 5 Minutes
    Tomatoes Chopped : 1 Cup
    Green Bell Pepper: ¼ Cup
    Garlic Clove: 2 
    Extra Virgin Olive Oil: 2 Tbsp
    Fresh Orange Juice: 2 Tbsp
    Cilantro Leaves: 3 Tbsp
    Red Pepper Flakes: ½ Tsp
    Grounded Blackpepper : ½ Tsp
    Salt to taste

    Method:
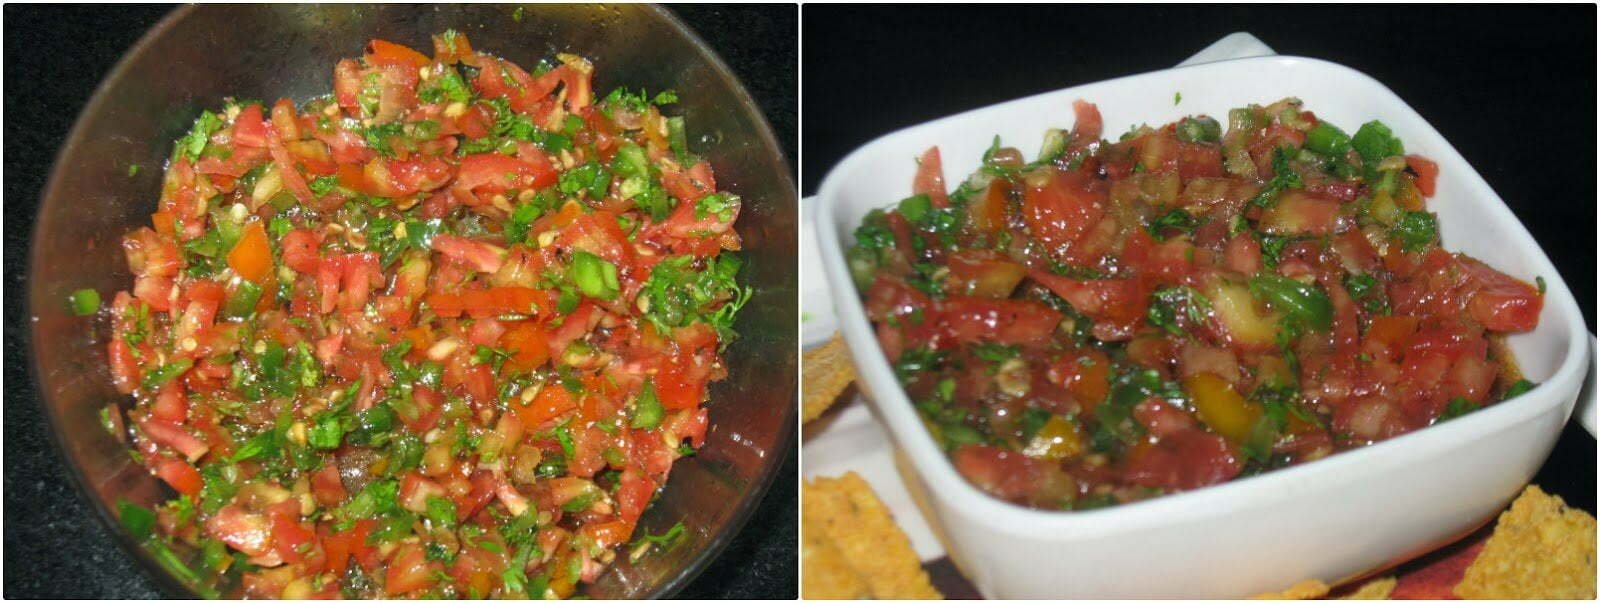
    Finely chop all the raw ingredients . Take a bowl add all the ingredients and gently mix everything with a 
    spoon ( Original recipe asks to blend everything using a mortar & Pestle/ blender,but i didn't do it).
    Spicy Tomato Salsa
    Keep it in refrigerator for flavours to infuse.You can serve it chilled.
    Spicy Tomato Salsa

    Serve it as a snack with Tortilla chips.

    Spicy Tomato Salsa

    Copyright Your Blog Name 2009 at palatesdesire.blogspot.com

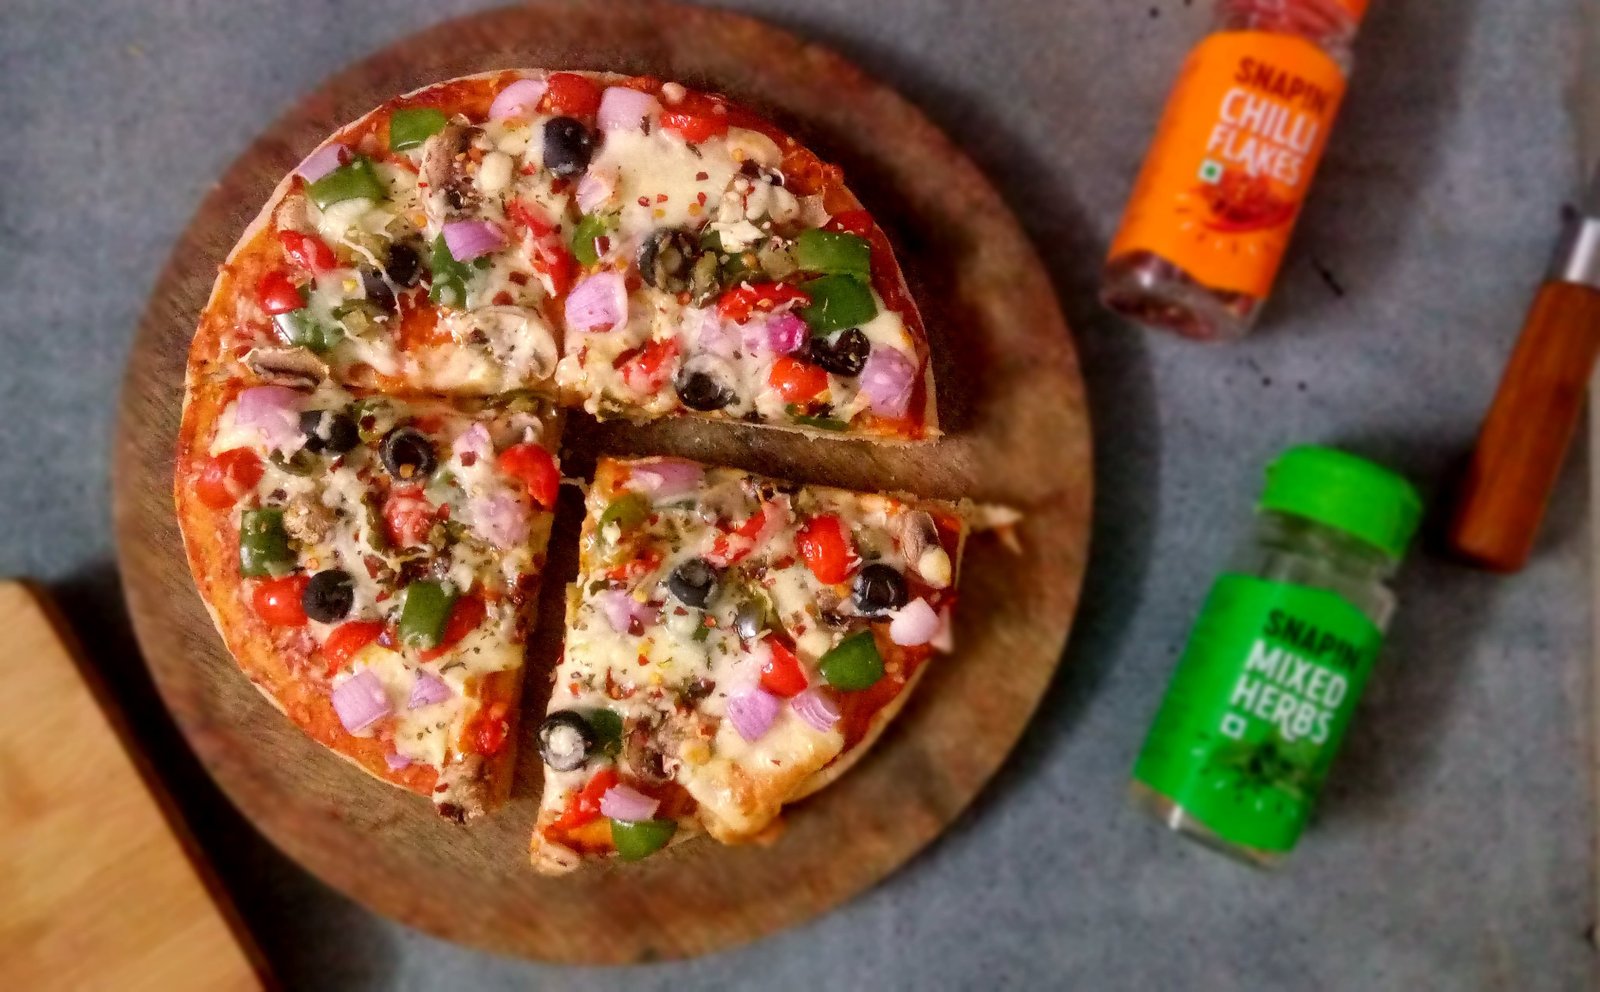
    Veg Pizza

    Published : December 2, 2013 | Last Update on June 30, 2020 By Muktha Gopinath

    After trying out Pizza base at home ,i have stopped eating pizza's from outside. I found pizza's from domino's and pizza hut bit dry which need to be accompanied with a coke but its not the case with  home made pizza base.To get  those perfect pizza base , yeast is main key.

    Veg Pizza

    Once pizza base and pizza sauce are ready you can do it anytime with jiffy. Toppings of pizza is always left to your choice and creativity.I even do healthy version of pizza i.e, whole wheat pizza /multi grain pizza ,i'll  post it shortly .

    Ingredients
    Category:Continental  | Prep time : 5 minutes
    Cooking Time: 15 -20 Minutes |Serves:4
    Pizza Sauce : 2-3 Tbsp( To cover the pizza base)
    Onion: ½
    Tomato Deseeded : ½
    Capsicum Deseeded: ½
    Mushroom Sliced : 3
    Sweet Corns: 1- 2 Tbsp
    Mozzarella Cheese:200 gms
    Italian/Pizza Seasoning:1-2 Tsp
    Sliced Black Olives:1 Tbsp
    For  Pizza Seasoning :
    Black pepper Corns:1 Tbsp
    Dried Oregano:1 Tbsp
    Dried Basil:1 Tbsp
    Garlic Powder:½ Tbsp
    Dry Roasted Red Chilly:2
    Salt
    Method:
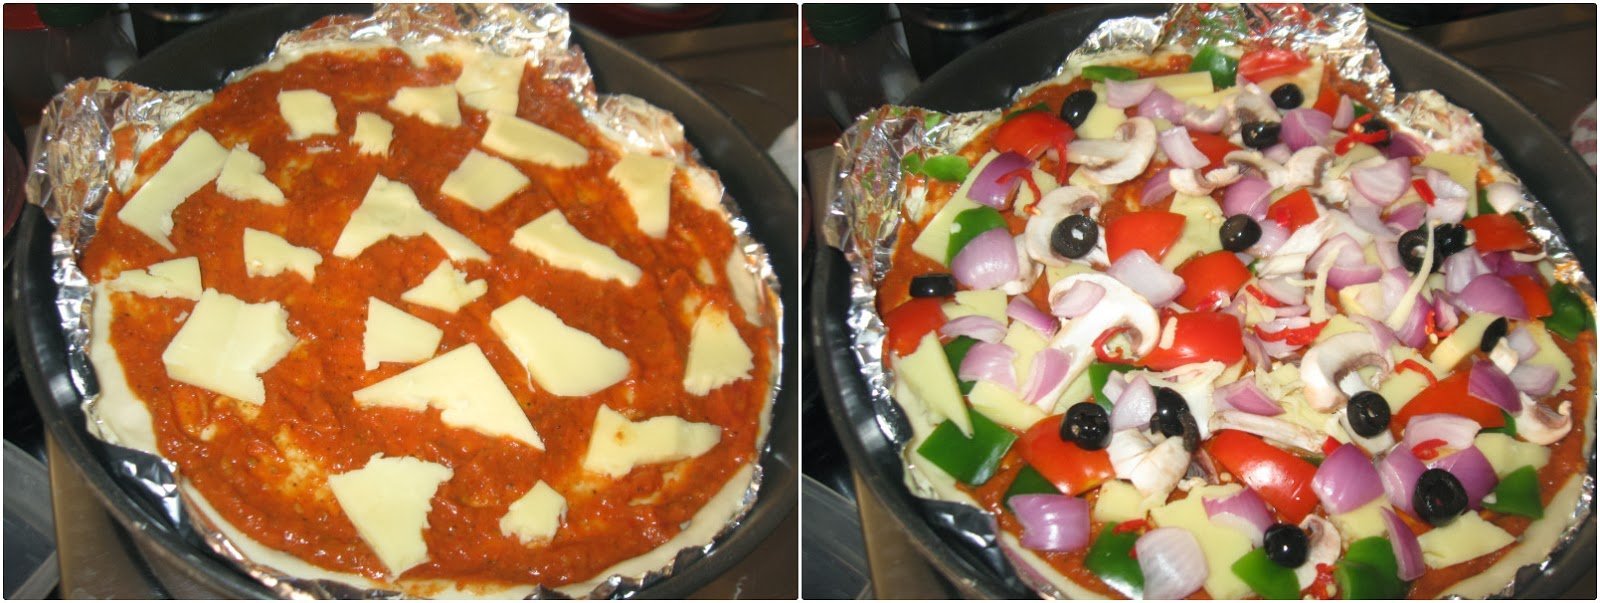
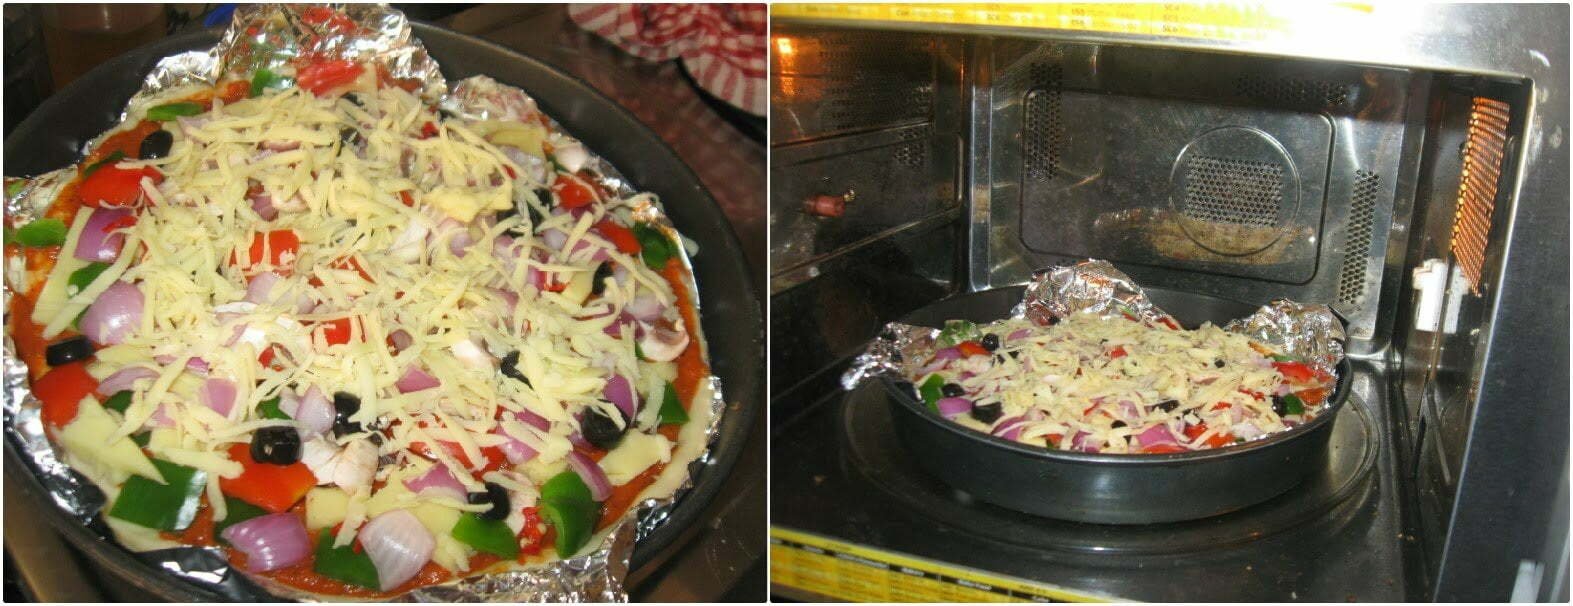
    Once the pizza base is ready (refer to my post pizza base), transfer it on a greased pizza pan( I don't have pizza pan so i lined my oven tray with aluminium foil) Spread pizza sauce and sprinkle cheese over it.

    Veg Pizza
    Arrange the toppings of your choice as desired and put some grated cheese over it.( I had forgotten to add sweet corns ,later i added while baking in between ;), so you can see it only in the final photo)

    Veg Pizza

    Preheat the oven to 210 Deg celsius and bake the pizza to 15- 20 min till the base becomes firm and cheese melts completely. 

    Veg Pizza
    Grind all the ingredients under pizza seasoning to coarse powder and store it in a shaker. Sprinkle Italian seasoning/ pizza seasoning over the pizza .Veg Pizza

    Cut pizza into wedges and enjoy moist and delicious Yummy Pizza's.

    2-in-1 Pizza Pasta Sauce

    Published : December 2, 2013 | Last Update on July 23, 2022 By Muktha Gopinath

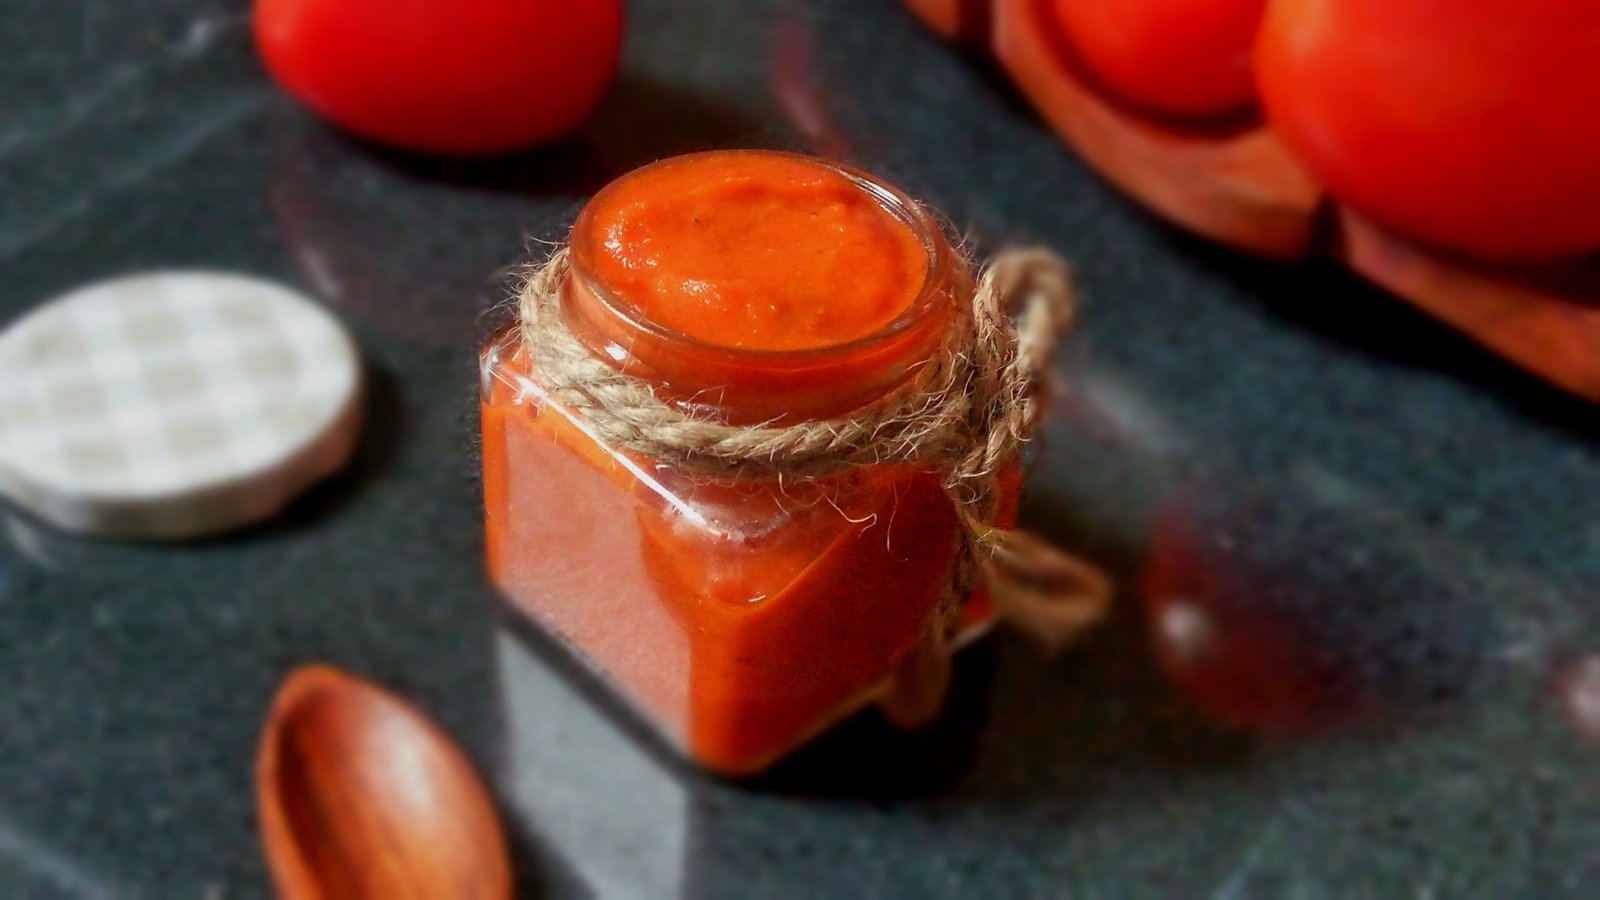
    2-in-1 Pizza Pasta Sauce is a version of  Spicy Tomato Sauce ,quite similar to Arrabiata Sauce with slight variations. This spicy tomato sauce can be used  for pizza as well as pasta , so  named it as 2 in 1 Pizza Pasta Sauce. Making this sauce is simple , you  need some good ripe sweet juicy tomatoes, onion, garlic, spices and herbs. 

    2-in-1 Pizza Pasta Sauce

    I don't claim this as authentic version because this  recipe is tailored to suit a Indian Taste. Personally I don't like anything that is store bought . I prefer doing at this kind of simple sauces , jams and pickles at home. As ,I often feel  the store bought ones are loaded with preservatives and loads of sugar and salt within it.

    There are many processed food items like cheese , sauces like Soy Sauces which are inevitable and I use at home. But try to cut down these processed food usage as much as possible by using an healthy alternative. 

    I make variations to Pasta sauce but never with pizza sauce. Quite often I do this 2-in-1 pizza pasta sauce and store it in refrigerator in an airtight glass jar containers. The shelf life of this sauce is for about 15 days and more . Try making this as and when needed and use . Best thing about home made pizza and pasta sauce is , you'll be  using the fresh sauce which tastes yummy and fingferlicking good.

    As my friends says , this recipe sauce of mine is compulsory at their home for Pasta , Pizza and also for Idli  , ROFL 🙂 🙂 . So I can even call this as a Multipurpose Sauce . Undoubtedly this Sauce is very delicious, you can use it however you want.

    Other DIY recipes on my blog which I have shared are : Puliyogare Mix, Biryani Masala  , Tandoori Masala , Mixed Chutney Powder , Chai Masala and Spicy Curry Paste | Upsaaru Khara

    RECIPE CARD FOR 2-IN-1 PIZZA PASTA SAUCE

    Recipe

    2-in-1 Pizza Pasta Sauce
    5 from 3 votes

    2-in-1 Pizza Pasta Sauce

    2-in-1 Pizza Pasta Sauce is a mild sweet and spicy Tomato based sauce which can be used as Pasta as well as pizza sauce .
    Prep Time8 minutes mins
    Cook Time15 minutes mins
    Total Time23 minutes mins
    Course: Condiments
    Cuisine: Fusion, World
    Keyword: Basic
    Servings: 1 Small Jar ,300 grams
    Author: Muktha H S

    Ingredients

    • 6 no's Tomatoes , Large ripen
    • 2 no's Onion ,medium to small size
    • 15 no's Garlic cloves , medium to big size
    • ½ teaspoon Red Chilli powder
    • ½ teaspoon Black pepper powder
    • 1 teaspoon Mixed Herbs seasoning , refer notes
    • 1 tablespoon Maggi Hot sweet Tomato Sauce
    • 1 tablespoon Butter
    • 1 teaspoon Sugar
    • ½-3/4 teaspoon Salt or as required

    Instructions

    • Wash and clean onions, tomatoes and garlic. 
    • Cut onion and tomatoes into wedges and keep aside.
    • Take a wok/pan add butter once its clarified add garlic, onions sauté for a minute and then add tomatoes,½ teaspoon of salt so that it cooks fast.
    • Cook tomatoes till water is completely dried .Allow it to cool.
    • Once its cooled, take a blender add cooked tomato onion mixture , 1 teaspoon of mixed seasoning, paprika/chilli powder ,sugar, salt and tomato sauce (I use Maggi ,Hot and Sweet tomato sauce) blend to a smooth paste without adding water.
    • Adjust salt and seasoning if required.
    • Store it in a refrigerator and use it as required.

    Notes

    • if you don't have mixed  herbs seasoning , blend 1 tablespoon oregano , 1 tablespoon Basil and 1 tablespoon black pepper to a fine powder and use. If you are using this seasoning then skip adding black pepper powder individually in the recipe.  

    Step by Step Directions on making of  2-in-1 Pizza Pasta Sauce:

    Wash and clean onions, tomatoes and garlic. Cut onion and tomatoes into wedges and keep aside.

    2-in-1 Pizza Pasta Sauce

    Take a wok add butter once its clarified add garlic, onions sauté for a minute and then add tomatoes,½ teaspoon of salt so that it cooks fast.

    2-in-1 Pizza Pasta Sauce

    Cook tomatoes till water is completely dried, it should be pulpy with no water, refer the picture below. Allow it to cool completely.

    Once its cooled, add all the cooked ingredients into a blender ,add  1 teaspoon of mixed seasoning, paprika/chilli powder ,sugar, salt and tomato sauce (I use Maggi ,Hot and Sweet tomato sauce) grind it to a smooth paste without adding water.

    2-in-1 Pizza Pasta Sauce

    Adjust salt , sugar and seasoning if required. Store it in a refrigerator and use it as required.

    2-in-1 Pizza Pasta Sauce

    Pepper Chicken with Curry Leaves

    Published : December 1, 2013 | Last Update on June 27, 2022 By Muktha Gopinath

    pepper-chicken-with-curry-leaves

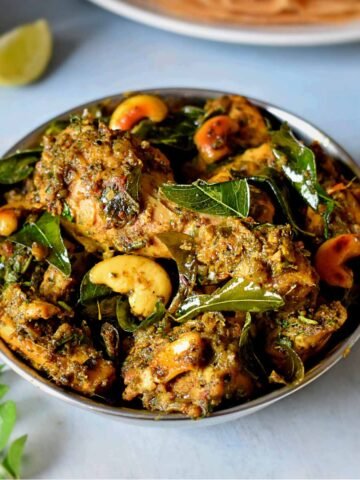
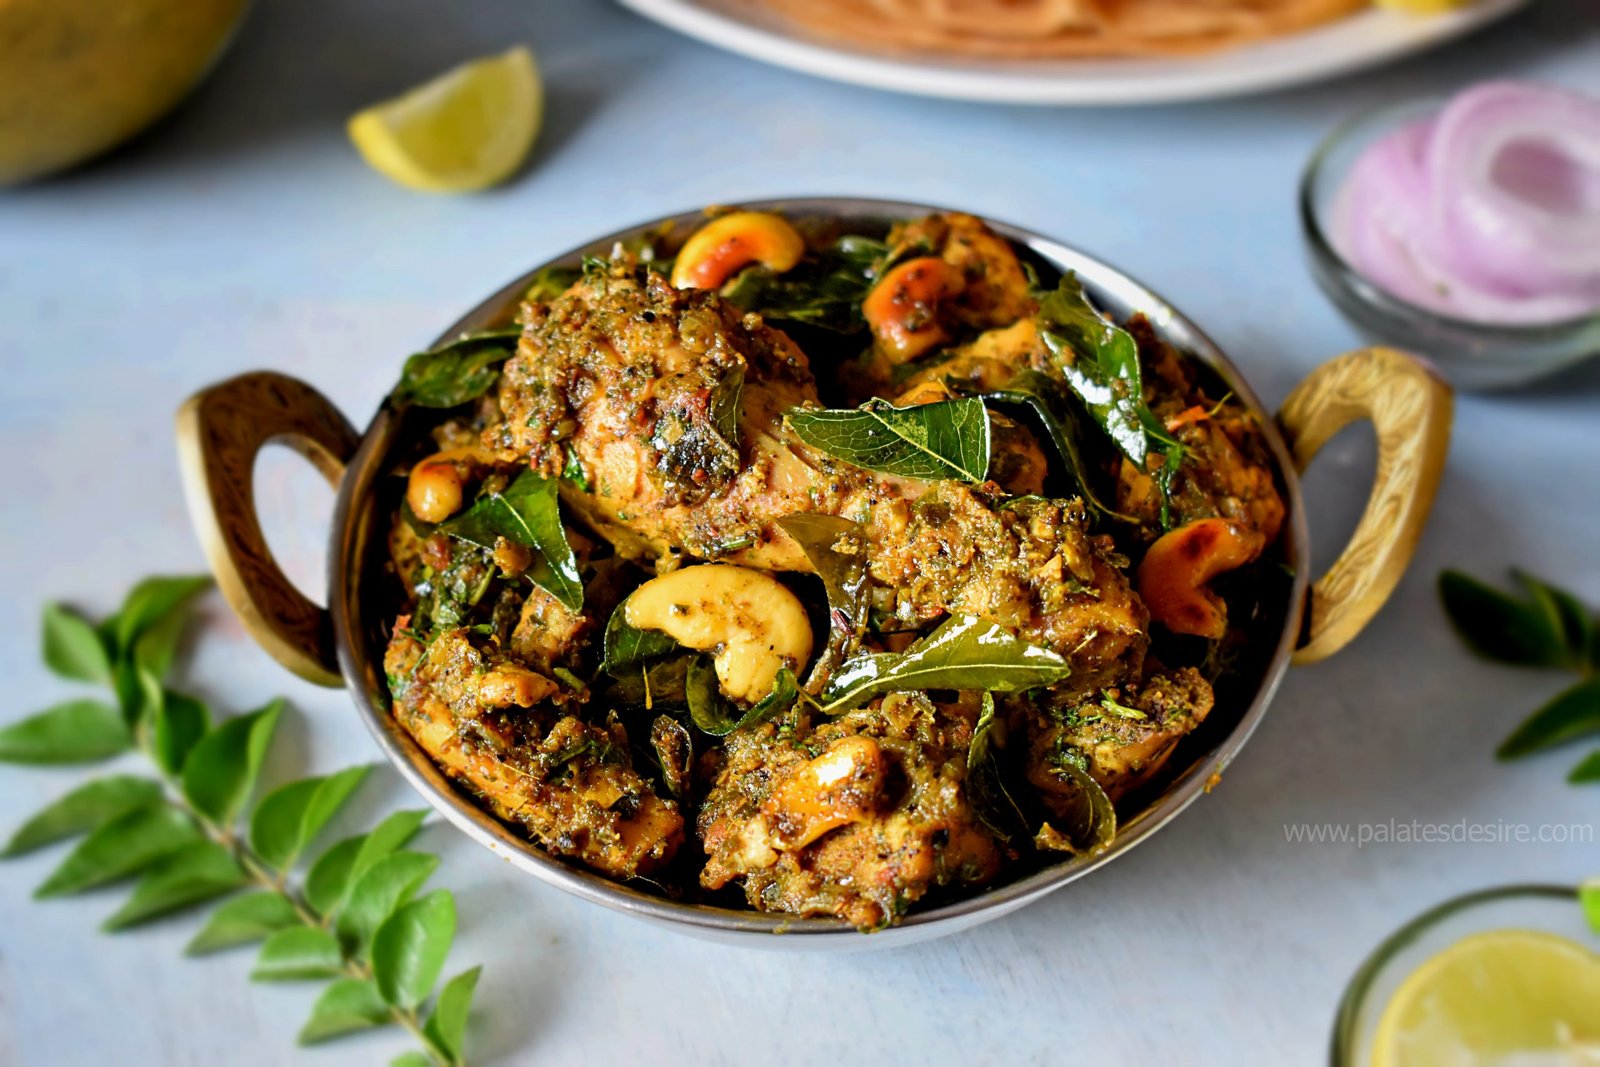
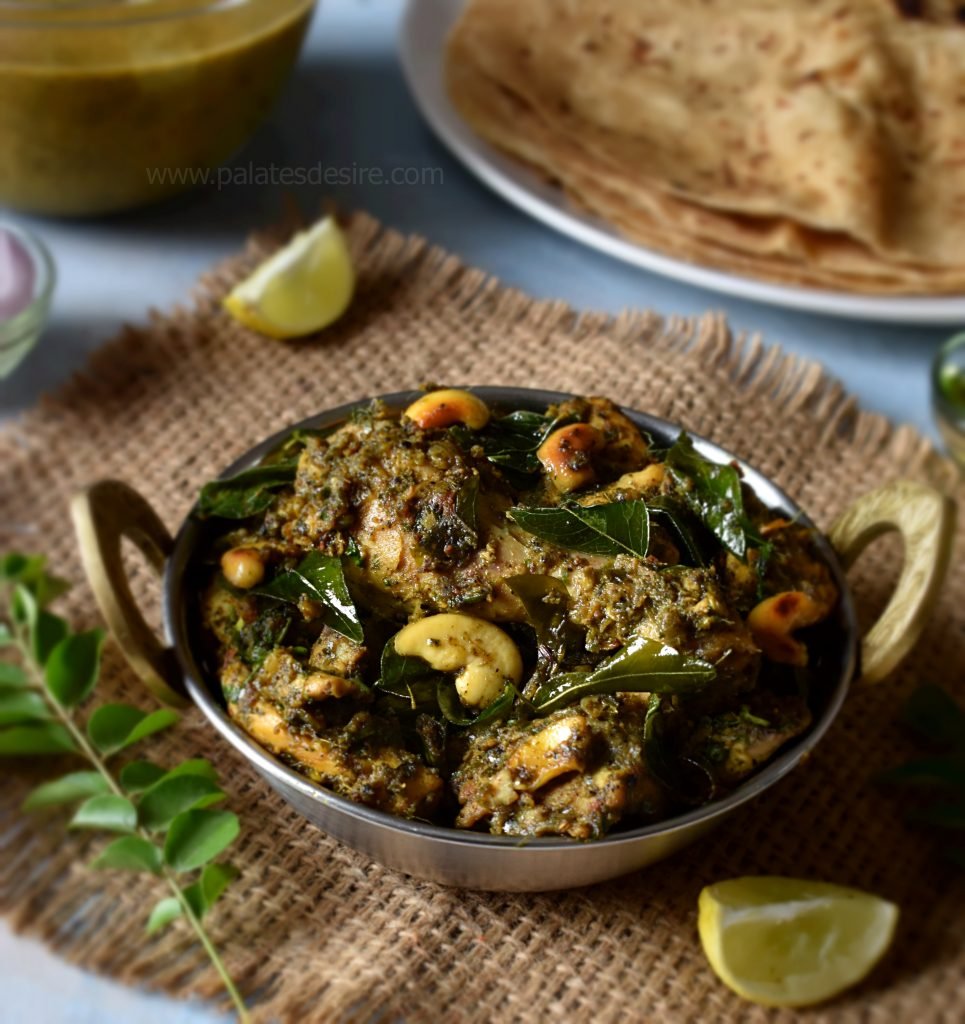
    Pepper and Curry leaves Chicken is a tasty side dish/ starter made with lots black pepper powder and curry leaves .

    This chicken has a distinct flavours from black pepper , curry leaves and fennel seeds.

    It's a simple chicken recipe that can be made easily without any fancy ingredients and tastes delicious

    pepper chicken with curry leaves

    Recipe

    pepper-chicken-with-curry-leaves-in-a-serving-bowl
    4.89 from 9 votes

    Pepper Chicken with Curry leaves

    Pepper Chicken with Curry Leaves is a spicy and tasty ,Andhra style chicken which has distinct flavours from black pepper corns ,curry leaves and fennel seeds .

    Prep Time8 minutes mins
    Cook Time25 minutes mins
    Total Time32 minutes mins
    Course: Side Dish, Starters
    Cuisine: Andhra, Indian, South India
    Keyword: Chicken, Quick & Easy
    Servings: 5 people
    Calories: 469kcal
    Author: Muktha H S

    Ingredients

    • 750 grams Chicken , skin out curry cut pieces
    • 3 no's Onion , finely chopped
    • 6-8 no's Garlic Cloves , crushed ½ tablespoon paste
    • 1 inch Ginger , crushed ½ tablespoon paste
    • 1 no Tomatoes , finely chopped
    • 3 no's Green Chilli,finely Chopped
    • 12 Sprigs Curry leaves
    • 1 ½ tablespoon Black Peppercorns
    • 1 teaspoon Fennel Seeds
    • ½ teaspoon Jeera/Cumin Seeds
    • ½ teaspoon Turmeric Powder
    • 1 teaspoon Salt or as required
    • 2 tablespoon Oil
    • 2 tablespoon Coriander Leaves , chopped
    • 1 teaspoon Lime Juice

    To Temper

    • 1 tablespoon Ghee / Clarified Butter
    • 1 tablespoon Cashews
    • 3 no's Green Chilli , chopped
    • 3 sprigs Curry leaves

    Instructions

    • Wash and clean the chicken thoroughly and keep aside, for water to drain completely.
    • Finely chop onions,tomatoes and slit green chillies. 
    • Dry roast  black peppercorns, jeera/ cumin seeds, and fennel seeds . Add 6-7 sprigs of curry leaves and dry roast till curry leaves turns crisp .
    • Then transfer it into a blender/ mixer jar and blend to a fine powder. 
    • Take a wok, add oil add 3 sprigs of curry leaves, onions, ginger , garlic paste , green chillies and fry well till the raw smell goes off . 
    • Add tomato,turmeric powder,and saute for a minute. 
    • Now add chicken,1 teaspoon salt and 1 tablespoon of ground jeera ,pepper , fennel seeds and curry leaves powder mix well.
    • Close the lid and cook on a medium heat for  about 15 minutes or till chicken is almost cooked. (Don't overcook the chicken or else it becomes hard).
    • Whilst take a small pan/ tadka pan ,add ghee once its hot add cashews, chopped garlic cloves, 3 green chilies and remaining curry leaves fry well .
    • Once curry leaves turns crisp add ¼ teaspoon of salt and 1 teaspoon of curry and pepper powder and mix well.
    • Add this mixture to above prepared chicken.
    • Add remaining curry leaves and pepper powder, ½ teaspoon of salt  and mix well .
    • Keep on a high flame, fry for a minute till it becomes semi dry. Turn off the stove .
    • Finally add lemon  juice and garnish with coriander leaves.
    • Serve as a starter or a side dish .

    Video

    Notes

    • You can also add ½ cup of water in the last step and cook on a high heat till you get a thick semi gravy chicken ..
    • This is a spicy chicken dish , you can reduce the amount of green chillies , for less spice.
    • 150 grams per serving

    Nutrition

    Calories: 469kcal

    How to make Pepper Chicken with Curry Leaves:

    Wash and clean the chicken thoroughly and keep aside, for water to drain completely.

    Finely chop onions,tomatoes and slit green chillies.

    Dry roast  black peppercorns, jeera/ cumin seeds, and fennel seeds . Add 6-7 sprigs of curry leaves and dry roast till curry leaves turns crisp

    Then transfer it into a blender/ mixer jar and blend to a fine powder

    Take a wok, add oil add 3 sprigs of curry leaves, onions, ginger , garlic paste , green chillies and fry well till the raw smell goes off .

    Add tomato,turmeric powder,and saute for a minute

    Add chicken,1 teaspoon salt and 1 tablespoon of ground jeera ,pepper , fennel seeds and curry leaves powder mix well.

    Pepper Chicken with Curry Leaves

    close the lid and cook on a medium heat for  about 15 minutes or till chicken is almost cooked. (Don't overcook the chicken or else it becomes hard)

    Whilst take a small pan/ tadka pan ,add ghee once its hot add cashews, chopped garlic cloves, 3 green chilies and remaining curry leaves fry well

    Once curry leaves turns crisp add ¼ teaspoon of salt and 1 teaspoon of curry and pepper powder and mix well

    Add this mixture to above prepared chicken

    Pepper Chicken with Curry Leaves

    Add remaining curry leaves and pepper powder, ½ teaspoon of salt  and mix well .

    Keep on a high flame, fry for a minute till it becomes semi dry. Turn off the stove

    Finally add lemon  juice and garnish with coriander leaves

    Serve as a starter or a side dish

    pepper chicken with curry leaves

    Tomato Bath Recipe | Easy Tomato Rice Recipe in Pressure Cooker

    Published : November 27, 2013 | Last Update on January 6, 2022 By Muktha Gopinath

    Tomato_Bath

    Tomato Bath Recipe with step by step photos. Tomato Bath is a  most popular recipe from Karnataka . "Bath" means rice in Marathi and In Kannada it means a kind of variety rice. As name says,  lots of Tomato is needed to make this Tomato Bath . You can even refer this to as "Tomato Pulao " . For any bath preparation , basically fresh grated coconut is used but if it is not available , feel free to use coconut milk for similar kind of enhanced taste.

    Tomato Bath | Tomato Pulao
    Tomato Bath

    There are many versions of tomato bath. I have tried and tested many versions too but this modified version of tomato bath is the best  , which I always opt for.  May be because it is my Mom's recipe and everyone just loves this as , I do. What makes this tomato bath/pulao different from other tomato rice is the use fenugreek/methi leaves which adds more taste and flavor  to tomato bath. And also the fresh masala paste , enhances taste of this rice. Serve Tomato Bath with onion raita or potato raita.

    It's one of the best lunch box recipe that can be packed . Other Karnataka special rice varieties recipes which I have shared are Hesaru Bele anna , Puliyogare , Mavinakayi Chitranna , Masala Chitranna , Heralekai Chitranna , Easy Chitranna, Gojjavalakki , Sihi Avalakki, Khara Pongal  and Sihi Pongal  

    The word- recipe " bath " has lot of affinity for Mysorians and me being one among them. It's not unusual to see these bath recipes in functions and marriages in and around Mysuru , it is that popular. I would like to highlight few more bath recipes from my space , if interested , you can find other Rice Varieties here.

    • Capsicum bath Recipe | Vangibath mock recipe
    • Vegetable bath Recipe
    • Bisi bele Bath Recipe
    • Avarekalu Bath Recipe 

    RECIPE CARD FOR TOMATO BATH | TOMATO PULAO

    Recipe

    Tomato Bath Recipe | Easy Tomato Rice Recipe in Pressure Cooker
    5 from 3 votes

    Tomato Bath Recipe | Easy Tomato Rice recipe in Pressure Cooker

    Rice cooked with Tomato, Fresh Fenugreek Leaves and Spices is a dish from Karnataka.
    Prep Time10 minutes mins
    Cook Time25 minutes mins
    Total Time35 minutes mins
    Course: Main Course
    Cuisine: South India
    Keyword: Karnataka
    Servings: 4 People
    Calories: 210kcal
    Author: Muktha H S

    Ingredients

    • 1 ½ Cup Rice Jeera/Seeragam
    • 2 Medium Onions finely sliced
    • 4 Large Tomatoes
    • 1 Cup Fresh Methi Leaves /Fenugreek Leaves
    • 3 tablespoon Oil
    • 1 ½ tablespoon Ghee/Clarified Butter
    • 1 tablespoon Coriander Leaves Chopped
    • 2 teaspoon Red Chilly Powder or as required
    • 1 teaspoon Lime Juice
    • 2 teaspoon Salt or as required

    For Masala Paste

    • ⅓ Cup Fresh Coconut grated
    • ½ teaspoon Jeera/Cumin Seeds
    • 1 Green Cardamom Seeds
    • ¼ teaspoon Turmeric Powder
    • 1.5" inch Ginger
    • 8 Garlic cloves medium
    • 4 Cloves
    • 1.5 " inch Cinnamon Sticks
    • 2 tablespoon Coriander Leaves

    Instructions

    • Wash and soak rice for 15 minutes,drain water and keep it aside.
    • In a Pressure Cooker,heat 1 tablespoon Ghee and 3 tablespoon Oil.
    • Add Sliced onions and fry well till lightly brown. Add cleaned and washed  chopped methi leaves,fry well till water content in methi dries up.
    • In a mixer jar, add all the ingredients listed under "Masala Paste"  and ground to a smooth fine paste ,add little water if required.
    • Add masala paste to above fried onion and methi,fry till oil starts releasing from the corners.
    • Add chopped tomatoes and ½ teaspoon of salt and saute till tomatoes are cooked. 
    • Add red chilli powder and fry well till oil starts releasing from the corners.
    • Add drained rice ,mix well .
    • Add 2.5 cups of  hot water and salt.Close the lid and pressure cook for 1 whistle.
    • Once pressure releases on its own, open the lid.Mix well everything,add chopped coriander leaves,½ tablespoon ghee and lime juice.
    • Mix well everything and serve along with Onion raita.

    Notes

    1.Water content is what you need to take care.As the above recipe is cooked using a pressure cooker and also we add grounded paste and tomato which has water content  so the water used in the above recipe is less.
    2.Soaking rice helps you get smooth rice.Soaking rice helps you get smooth rice.
    3.Adding hot water while cooking helps to cook food faster.


    Nutrition

    Calories: 210kcal

    Step By Step Directions to make Tomato Bath :

    Soak rice for 10-15 minutes.Drain and keep it aside.

    Grind all the ingredients,listed under Masala Paste to a smooth paste, if required add very little water. Take a pressure pan/ cooker and heat 3 tablespoon oil, and 1 tablespoon Ghee.Add onions and fry till it looks pink,add methi leaves fry till water content disappears.Tomato Bath Recipe | Easy Tomato Rice Recipe in Pressure Cooker


    Add the above grounded masala paste and fry well for 2-3 minutes till you get nice aroma then add finely chopped tomatoes saute for a minute and add red chilly powder saute on a medium heat till tomatoes are nicely cooked and oil leaves the corner. Now add rice and mix well and saute for 3 minutes.

    Finally add hot water ,salt and pressure cook for a whistle.Tomato Bath Recipe | Easy Tomato Rice Recipe in Pressure Cooker

    Once pressure is released, add ghee,lemon juice,coriander leaves and mix well. Serve with onion  raita or potato raita.

    Tomato Bath Recipe | Easy Tomato Rice Recipe in Pressure Cooker

    Masala Oats Upma

    Published : November 26, 2013 | Last Update on December 13, 2018 By Muktha Gopinath

    Masala Oats Upma
    Masala Oats Upma

    Oats is very rich in fiber and also it help in weight management.Though i'm aware of the fact,still it becomes so difficult for me to eat oats along with milk.I normally used take 30 minutes to complete a cup of oats
    hence i tried saffola / horlicks oats that comes in different flavours. I finally liked the taste of masala oats and thought savoury oats is much better.But those packed masala oats contains many preservatives as they contain veggies in their recipe.So i gave a try and was a huge success. I loved the taste of this Masala oats upma so much that i can eat  this upma any time a day.So all weight watchers here is a healthy vegetable Masala Upma.

    Ingredients:

    Category: Breakfast|Prep Time:5 Minutes
    Cook Time: 5 Minutes|Serves:1

    Oats:⅓ cup
    Oats Bran: 1 tablespoon (Optional)
    Wheat Bran :1 Tbsp( Optional)
    Water : 1 Cup
    Onion; 1 Small finely Chopped
    Carrot:½ Chopped
    French Beans: 2 Chopped
    Capsicum:¼ Cup Chopped
    Baby Potato: 1 Chopped
    Green Chilly: 1 Chopped
    Fresh Green Peas:1 Tbsp
    Pepper Powder:½ Tsp
    Chilly Powder:½ Tsp
    Jeera Powder:¼ Tsp
    Coriander leaves:1 Tbsp
    Lemon Juice:2 drops

    For Tempering:
    Oil:1 Tsp
    Mustard seeds:½ Tsp
    Urud Dal:½ Tsp
    Channa Dal :¾ Tsp
    Curry Leaves:1 teaspoon chopped

    Method:

    Take a sauce pan,add oil when its hot add mustard seeds once it crackles add channa dal,urud dal and curry leaves.Add onions,green chilly and fry well. Add green peas and all vegetables(your choice of veggies you can add)  and saute for a minute.
    Masala Oats Upma
    Add chilly powder,pepper powder,jeera powder mix well and pour water,once water starts to boil add salt ,oats,wheat bran and oat bran( i always add bran to make it more healthier) cook for 5 minutes stirring occasional. Once water gets absorbed turn off the gas.Add lemon juice and coriander leaves. Serve hot

    Masala Oats Upma

    Copyright Your Blog Name 2009 at palatesdesire.blogspot.com

    Gojju Avalakki

    Published : November 25, 2013 | Last Update on September 26, 2022 By Muktha

    gojjuavalakki

    Gojju Avallakki | Huli Avalakki with step by step photos and video. Huli Avalakki is a spicy , tangy poha with hint of sweetness from jaggery . Its tasty and gets ready within 15 minutes. This post shares a quick and easy , instant gojju avallakki recipe made using sambar powder.

    It's a popular recipe from Karnataka , usually prepared for breakfast or evening snack . In Kannada ,"Hulli " means tang and Avalakki is poha. The recipe tastes very similar to puliyogare , spicy , tang and sweet all together.

    Other recipes which I often make with Poha at home are Sweet Poha , Diet Poha , Veg Poha cutlets , Indore Poha , Kanda Poha and Aval Payasam

    gojju_avalakki

    [feast_advanced_jump_to]

    About this recipe

    Gojju avalakki recipe or huli avalakki recipe is simple breakfast recipe prepared from coarsely powdered avalakki. Though it is a common breakfast it's popularly prepared during Janmashtami . As poha is considered as Lord Sri Krishna's favorite dish.

    Traditionally Gojju Avalakki is made by coarsely grinding poha and then mixing with puliyogarre powder .

    This is No Onion ,No Garlic recipe .There are 2  methods of doing Gojju Avalakki ,one is using Puliyogare mix  and the other one is by using Tamarind juice and rasam powder or Sambar Powder. I do it the second way, as it is easy and tastes very delicious.
    This recipe can be scalable easily , you can make in large or small batches.

    Gojju_avalakki

    Ingredients

    Use Thick variant Poha ( beaten rice) to make Huli avalakki . If it's not available go for medium variant , never use thin poha.
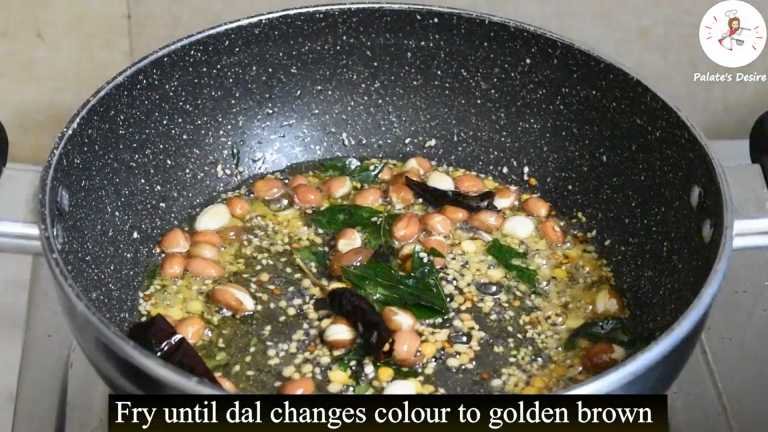
    Sambar Powder - Use either sambar powder or rasam powder to make this dish.

    Sesame Oil - It's highly recommended to use sesame oil incase of non-availability , use peanut oil or any vegetable oil.

    Tamarind - One more main and star ingredient is Tamarind . Extract juice from it's pulp and use it as mentioned in the recipe.
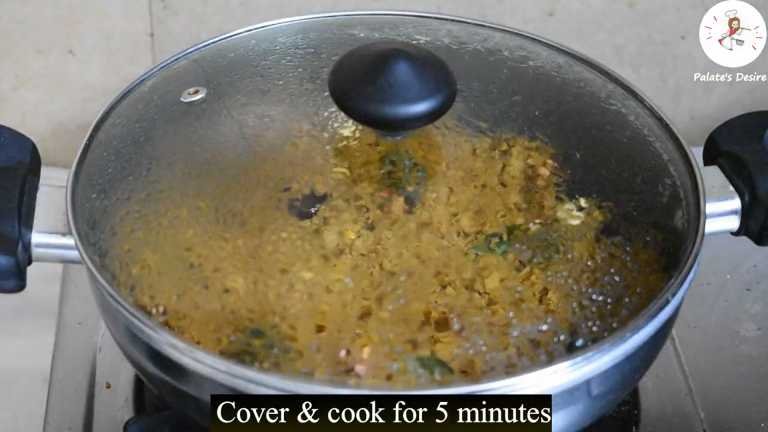
    You must use Jaggery to get all flavors right in the dish. - If not available , at least use pinch of sugar for sweetness.

    Peanuts , Chana dal and Urad dal are used for that crunchiness .

    Other seasoning ingredients includes - mustard seeds, curry leaves, turmeric powder , Hing /asafoetida and dry red chillies.

    Tips and Variations

    Use Thick variant poha only to make this. As thin variant gets soggy while soaking in tamarind juice. As an alternative to thick poha , you can use medium variant poha. But need to be very carefully while making coarse powder .

    To make coarse powder , you just need to pulse in a mixer grinder once or twice for less than 5 seconds. If you grind more , it becomes fine powder, so be sure to pulse it.

    As a variation , you can follow the same recipe to make with puliyogre powder or rasam powder.

    Be generous enough to add oil for tempering ,about 3 tablespoon for the given measurement.

    FAQ's

    Why did It turn out lumpy ?

    It's the liquid ratio what you have missed. Be sure to use 1 cup of water for 2 cups of poha . Later check for tightness of the soaked poha and sprinkle 2 -3 tablespoon of water , if required.

    Why was it too dry ?

    Again it's the liquid ratio, before seasoning poha , do check whether it needs some more liquid or not . Sprinkle if needed. Also you don't cut on fat , add oil as per mentioned measurement .

    You might also like

    • sihi avalakki
      Sihi Avalakki | Sweet Poha
    • Easy Lemon Rice
      Easy Lemon Rice | No Onion No Garlic Recipe
    • sweet pongal recipe
      Sihi Pongal |Sweet Pongal
    • Heralekai Chitranna
      Heralekai Chitranna | Citron Lime Rice

    Watch Video

    How to make Gojju Avalakki

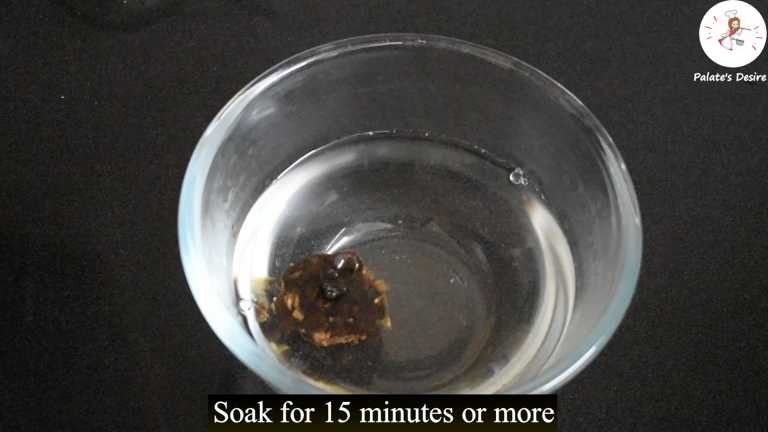
    Soak tamarind in warm water for 15 minutes.

    Gojju Avalakki

    Meanwhile , dry roast poha (beaten rice) for 2 minutes and powder to coarse with help of a mixer jar . Make sure just to pulse for 3-4 seconds only.

    Gojju Avalakki

    Pulse it twice for not more than 5 seconds to get coarse powder , it should look similar to dalia (Broken Wheat).

    Gojju Avalakki

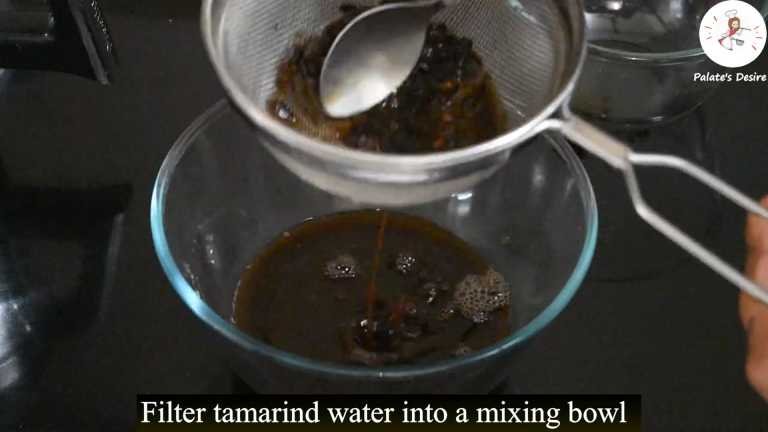
    After 15 minutes, squeeze tamarind pulp to extract juice . Discard the fibres and residue from tamarind. 

    Gojju Avalakki

    In to tamarind juice , add rasam / sambar powder, hing, jaggery and 1 teaspoon salt and stir it well.

    Gojju Avalakki

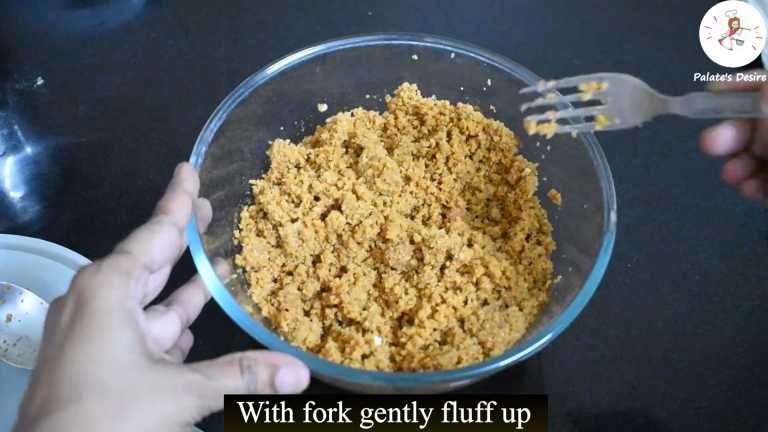
    For this tamarind – spice mixture , add powdered poha and mix well. Cover and keep it aside for 10 minutes so that poha absorbs all the water completely and looks dry.

    add powdered poha into tamarind juice

    Make sure to gently fluff with fork before seasoning.

    poaha soaks up water and looks dry completely

    Now heat oil in a pan , add mustard seeds ,peanuts, urad dal, chana dal, curry leaves and  dry red chillies ( broken into pieces).

    Gojju Avalakki

    Once chillies start to changecolour , add soaked poha .

    Gojju Avalakki

    Mix it well and cover lid and cook for 4-5 minutes.

    Gojju Avalakki

    Taste and adjust salt , if required .

    Add grated dry coconut (you can even add powder dry coconut along with 1 teaspoon of dry roasted white sesame seeds ) and mix well.

    Gojju Avalakki

    Serve Gojju Avalakki . You can eat it on itself but can also be served with coconut chutney .

    instant gojju avalakki

    This post has been updated from the archives, was first published in Nov 2013.

    Recipe

    Gojju Avalakki
    5 from 5 votes

    Instant Gojju Avalakki Recipe | Hulli Avalakki

    Gojju avalakki aka Huli Avalakki is a spicy , tangy poha with hint of sweetness from jaggery . It's tasty and gets ready within 15 minutes.
    Prep Time10 minutes mins
    Cook Time5 minutes mins
    Soaking Time30 minutes mins
    Total Time15 minutes mins
    Course: Breakfast, Snack
    Cuisine: South India
    Keyword: Fasting, Festivals, Prasadam
    Servings: 3 People
    Calories: 304kcal
    Author: Muktha H S

    Ingredients

    For Soaking

    • 1 ¼ Cup Water
    • 1 tablespoon Tamarind pulp , small lemon sized
    • 1.5 Tbsp Rasam Powder or Sambar Powder
    • 1 ½ teaspoon Salt or as required
    • 2 teaspoon Jaggery Powder
    • ⅛ teaspoon Asafoetida
    • 2 Cups Thick Beaten Rice / Thick Poha

    For seasoning

    • 3 tablespoon Sesame Oil
    • ½ teaspoon Mustard Seeds
    • 2 sprigs Curry Leaves
    • 2 tablespoon Groundnuts /peanuts
    • 1 teaspoon Chana Dal
    • 1 teaspoon Urad Dal
    • 2 Dry Red Chillies ,broken

    Other Ingredients

    • 2 - 3 tablespoon Grated Dry Coconut
    • 1 teaspoon Sesame Seeds , roasted Optional

    Instructions

    • Soak tamarind in warm water for 15 minutes.
    • Meanwhile , dry roast poha (beaten rice) for 2 minutes and powder to coarse with help of a mixer jar . Pulse it twice for not more than 5 seconds to get coarse powder , it should look similar to dalia (Broken Wheat).
    • After 15 minutes, squeeze tamarind pulp to extract juice . Discard the fibres and residue from tamarind.
    • In to tamarind juice , add rasam / sambar powder, hing, jaggery and 1 teaspoon salt and stir it well.
    • For this tamarind – spice mixture , add powdered poha and mix well.
    • Cover and keep it aside for 10 minutes so that poha absorbs all the water completely and looks dry.
    • Now heat oil in a pan , add mustard seeds ,peanuts, urad dal, chana dal, curry leaves and dry red chillies ( broken into pieces).
    • Once chillies start to change , add soaked poha .
    • Mix it well and cover lid and cook for 4-5 minutes.
    • Taste and adjust salt , if required .
    • Add grated dry coconut (you can even add powder dry coconut along with 1 teaspoon of dry roasted white sesame seeds ) and mix well.
    • Serve Gojju Avalakki . You can eat it on itself but can also be served with coconut chutney .

    Video

    Notes

    • Only Thick Quality Poha Works well for this Recipe.
    • Be careful in adding water ,measure the ratio of water and add. If poha is very thick ,it may take up to 1  ⅓ cups of water or else poha to water ratio will be 2 :1 .
    • If you add less water , it will be very dry to eat , if you add more water it becomes soggy . So add water carefully ,as it depends on the quality of poha you use.

    Nutrition

    Calories: 304kcal

    Masala Akki Roti | Rice Flour Roti

    Published : November 25, 2013 | Last Update on October 11, 2022 By Muktha Gopinath

    Masala Akki Roti

    Masala Akki Roti recipe with step by step photos. Akki Roti is very famous and popular Indian Flat bread  from Karnataka , it is made with rice flour and assorted vegetables. 

    Masala Akki Roti | Rice Flour Roti
    [feast_advanced_jump_to]

    About this recipe

    Basically , Akki means rice in kannada  and roti prepared with it is Akki Roti/ Bhakri . A easy breakfast as well as  tiffin  recipe of Karnataka . Many versions of Akki roti are there but this one is simple and delicious recipe prepared using Dill Leaves / Sabbasige Soppu  / Shepu  leaves. 

    For variations in the recipe , replace Dill leaves with methi leaves or Palak/spinach leaves. Also all green leafy vegetables can be combined and  added along with some grated carrot.

    Akki roti prepared using dill leaves is one of the best combination. Even Akki roti is prepared using drumstick leaves . With every combinational greens , you get different taste , but all variations goes well with rice flour.

    Mom prepares ultimate akki roti but till date I haven't excelled to her level .But still, you can rely on this recipe to get soft and good roti's. Akki roti tastes better with Coconut Chutney and also with Groundnut Chutney . 

    Masala Akki Roti tastes good on its own but you can also serve it with any of the chutney , Mollake Hurali Saaru , Massida Soppu Saaru. It even goes well with  Stuffed Baingan and Baingan Bharta.

    How to make Masala Akki Roti :

    Take water in a wide vessel and keep it on a high flame. When water comes to boil, lower the flame and sprinkle rice flour and salt .

    Mix it well with the help of a spatula and add oil to it and mix thoroughly such that there are no lumps.

    Close it with a lid and keep it on a sim for 5 minutes.

    Meanwhile chop all the greens and onions. Now open the lid again mix  and turn off the flame. Once cooled add all the chopped greens, onions, green chilies and cumin seeds to the rice flour mixture.

    Knead well into a smooth dough but it should be stiff.

    Masala Akki Roti | Rice Flour Roti

    Then take some handful of dough and make balls out of it. If you feel the dough is not stiff enough to make balls . sprinkle little rice flour to make a stiff but smooth dough.

    The above mentioned water and rice flour is precise but still at times because of salt and onion it might become little watery. Also quality of flour plays a important role.

    Take care of it or else you'll be not able to roll the dough. Now take butter paper or oil cover , smear some oil and place dough ball .

    Gently press the dough ball and flatten it . Using hands you can spread it easily  into a round roti as thin as you required, if dough is stiff wet your palm and spread.

    Alternatively , dust some flour on worktop and roll roti using rolling pin. Also if you can roll roti/bhakri using hands. 

    Now heat the iron griddle or non stick tawa . When it's hot place the paper plate facing roti side on to the griddle.  After a second remove the paper plate gently.

    Masala Akki Roti | Rice Flour Roti

    Drizzle some oil/ghee on sides of roti and cook on both sides. It gets cooked within 3 minutes

    Serve akki roti with ghee , coconut chutney or with Upsaaru Khara ( authentic Karnataka style spicy chutney )

    Images uploaded are from 2 different time. The one in frame has methi leaves and grated carrot in masala roti.

    Masala Akki Roti | Rice Flour Roti

    Recipe

    Akki Roti
    5 from 4 votes

    Masala Akki Roti | Rice Flour Roti | Gluten Free Roti

    Masala akki Roti is a Gluten Free and Healthy Roti from Karnataka ,it is made out of rice flour ,green leafy vegetables , herbs and spices. 
    Prep Time5 minutes mins
    Cook Time20 minutes mins
    Resting Time10 minutes mins
    Total Time35 minutes mins
    Course: Breakfast
    Cuisine: Indian
    Keyword: Gluten Free, Karnataka, South Indian
    Servings: 5 Makes
    Calories: 154kcal
    Author: Muktha H S

    Ingredients

    • 1 Cup Rice Flour
    • 1 ½ - 1 ¾ Cup Water or as required
    • ¾ Cup Dill Leaves or Methi Leaves or Palak
    • 1 Big Onion finely Chopped
    • 1 Green Chilli Finely Chopped
    • 2 Sprigs Curry Leaves Chopped
    • 1 no Carrot grated ,optional
    • 2 tablespoon Coriander Leaves Chopped
    • 1 teaspoon Cumin Seeds Optional
    • 1 tablespoon Oil
    • 1 teaspoon Salt or as required

    Instructions

    • Bring water  to boil in a wide open vessel. 
    • Add Rice flour ,Salt and oil to boiling water . Mix everything thoroughly such that there are no lumps.
    • Close it with a lid and keep it on a sim for 5 minutes.
    • Turn off the flame and allow it to get warm. Add all the chopped greens, onion ,carrot,green chillies and cumin seeds.
    • Mix everything with rice flour and knead well till it's smooth. Pinch dough and make 4-5 balls. 
    • Dust some flour , using rolling pin, roll  5-6 " inch round  roti. 
    • Heat Iron griddle/ tawa ,Put roti on tawa, cook evenly on both sides by drizzling some oil. Takes 3-4 minutes to cook. 

    Notes

    • Amount of water depends on the quality of rice flour, 1 ½ cup water was sufficient for me it may take up to 1 ¾ cup .
    • If dough becomes too thin, add some more rice flour . If it becomes tight sprinkle some hot water and knead the dough.
    • After adding greens and onions , it does leaves some water. So make a firm dough before adding veggies.

    Nutrition

    Calories: 154kcal

    Huruli Bassaru Palya | Stewed HorseGram Curry

    Published : November 18, 2013 | Last Update on April 25, 2021 By Muktha Gopinath

    Huruli Bassaaru

    Huruli Bas Saaru and Hurali Bas Palya is most popular dish around Bangalore - Mysore regions of Karnataka. This is one of the authentic recipe and very common in most of the villages . Bas or Basidu in kannada means strain the stew ,as we prepare a curry ( Saaru) out of the stew it has got the  name Bas Saaru. Generally it is served along with RagiBalls( Raggi Mudde) and Rice.

    Huruli Bassaaru

    Researchers have even found that regular intake of horsegram aids in weight loss.  Horsegram curry can be done either using sprouted horse gram or regular one. You can cook horse gram  by soaking overnight or can even be cooked directly  but it takes more time. This curry is my home's  all time favorite. Especially the sauteed Horse Gram with greens, tastes delicious.  Curry enhances in taste when you reheat and eat on following day.

    Other similar Curries/ Saaru from Karnataka Cuisine are : Molake Huruali Kaalu Saaru , Masida Soppu Saaru , Obbattu/ Holige Saaru and Drumstick Sambar 

    RECIPE CARD FOR HURULI BASSAARU AND PALYA

    Ingredients:
    Category:Vegetarian|Prep Time:15 Minutes
    Cooking Time:30 Minutes|Serves: 4-5

    Sprouted Horsegram: 11/2 Cup
    Amaranth Leaves: 1 Large Bunch
    Tamarind Extract :2 Tbsp

    Grinding for Curry:
    Onion Raw :1 Medium
    Garlic Raw:4-5 Cloves
    Burnt Onion:1 Small/Medium
    Burnt Garlic:4 Cloves
    Tomatoes:1-2
    Jeera/Cumin Seeds:½ Tbsp
    Black pepper Corns: ½ Tbsp
    Fresh Grated Coconut:2 Tbsp
    Red Chilly powder:1 Tsp
    Coriander Powder: 1Tsp
    Sambar/Curry Powder: 3 Tbsp
    Turmeric:¼ Tsp

    Tempering for Curry:
    Onion: ½
    Garlic:4 Cloves
    Curry Leaves: 2 Strings
    Redchilly: 2 Broken
    Black Mustard Seeds: ½ Tsp
    Oil: 2 Tbsp

    For Palya:
    Onions:3 Medium
    Green Chillies: 4-6
    Mustard Seeds: ½ Tsp
    Fresh Coconut grated: 2 Tbsp
    Fresh Coriander leaves chopped: 2 Tbsp
    Lemon Juice:½ Tsp
    Oil: 1 Tbsp
    Salt

    Step by Step Directions :

    Clean & wash sprouted horsegram ( you can even add without Sprouts) ,add  3 cups of water,1 teaspoon salt put it in a pressure cooker and cook for 1 whistle( if not sprouted it takes 3-4 whistles).

    Once pressure is released add Amaranth leaves (you can use Drumstick leaves also,it tastes awesome) and cook for another 5 minutes and turn off the gas.

    Once its cooled strain the stew using colander and separate stew  which is used for preparing curry and horsegram for palya/Stir fry, keep it aside.

    Huruli Bassaru Palya | Stewed HorseGram Curry

    Put onion and garlic into a skewer and burn it on direct flame,till outer layer of onion looks dark.Once done grind it into a smooth paste along with the above mentioned ingredients  for grinding.

    Huruli Bassaru Palya | Stewed HorseGram Curry

    Take a pressure pan add oil, mustard seeds,curry leaves,crush onion and garlic fry and add the grounded paste fry well till oil leaves and nice aroma comes for this add stew and water and leave it to boil,adjust salt.

    Huruli Bassaru Palya | Stewed HorseGram Curry

    You can cook for one whistle also. Bas Saaru/Stewed horse gram Curry is ready to serve with ragi balls and rice.

    Palya / Stir fried Horse Gram
    Above cooked horse gram and amaranth leaves is used for preparing Palya/Stir fry.

    Take a wok ,add oil,mustard seeds once crackles ,add onions and green chillies fry till onion looks translucent and cooked horse gram and amaranth leaves saute it adjust salt.

    Huruli Bassaru Palya | Stewed HorseGram Curry

    Garnish with coconut,coriander leaves and lime juice.

    Tasty and delicious sauteed horsegram/urali bas palya is ready to serve.

    This will become a side dish for the above curry 🙂

    Huruli Bassaru Palya | Stewed HorseGram Curry

    Spicy Peanut Chutney | Kara Shenga Chutney

    Published : November 13, 2013 | Last Update on July 23, 2022 By Muktha Gopinath

    Spicy Peanut Chutney

    Spicy peanut chutney with step by step photos . A protein rich spicy peanut chutney along with Pesarattu is a best breakfast, to start your day. Having a protein rich meal plays a very crucial role in one's diet,so add protein to each meal of your day. Be it a breakfast,lunch,dinner or snack,just make sure that there is a protein in your diet.

    Spicy Peanut Chutney | Kara Shenga Chutney

    This is one of my favorite breakfast as it tastes really really good. A typical South Indian protein packed breakfast. Peanuts has many health advantages like boosting memory power, fertility, blood sugar regulation and also fights depression. Adding this to our diet in moderation helps to  keep healthy and fit !

    If interested do check my other chutney recipes :

    • Coconut Chutney
    • Peanut Chutney 
    • Masala Dosa Red and coconut chutney
    • Tomato Chutney
    • Pumpkin | Kaddu Chutney
    • Radish | Mooli Chutney
    • Gavar | Cluster Bean Chutney 

    RECIPE CARD FOR SPICY PEANUT CHUTNEY

    Recipe

    Spicy Peanut Chutney
    5 from 1 vote

    Spicy Peanut Chutney

    Spicy Peanut Chutney is a accompaniment , side dish for idli , dosa , roti
    Prep Time5 minutes mins
    Cook Time15 minutes mins
    Total Time20 minutes mins
    Course: Accompaniment
    Cuisine: South India
    Keyword: Bachelor's Cooking, Basic, Chutney
    Servings: 5
    Calories: 157kcal
    Author: Muktha H S

    Ingredients

    • ½ cup Peanuts/ Groundnuts
    • 1 Onion , large
    • 1 Tomato , Medium size
    • 2-3 no's Green Chillies
    • ½ inch Ginger
    • ½ teaspoon Jeera/ Cumin Seeds
    • 1 teaspoon Oil
    • ½ teaspoon Salt

    Tempering

    • 1 tablespoon Edible Oil
    • 1 teaspoon Mustard Seeds
    • 1 pinch Asafoetida
    • 1 sprig Curry Leaves
    • 1-2 broken Red Chilly

    Instructions

    • Dry Roast or microwave Peanuts till skin starts to peel.
    • Heat 1 teaspoon of oil,add jeera,once it starts to change colour,add sliced onion ,ginger and green chillies fry till the raw smell goes off.
    • Add tomatoes and add salt as it helps tomatoes to cook early.Once tomato is cooked turn off the heat,let it cool.
    • Transfer it into a chutney jar and blend to smooth paste by adding very little water,about ¼ cup.
    • Temper all the ingredients under tempering in order ,and pour it over the chutney.

    Nutrition

    Calories: 157kcal

    Step-By-Step  directions to make spicy peanut chutney :

    1.Dry roast peanuts in a pan and transfer to a mixer jar.Spicy Peanut Chutney | Kara Shenga Chutney

    2.In the same pan add oil once it's hot add jeera once it starts changing color, add green chillies fry.Add sliced onions and ginger till the raw smell goes off.Spicy Peanut Chutney | Kara Shenga Chutney

    3.Then add tomatoes and add salt as it helps tomatoes to cook early.Once water content in tomato goes off turn off the gas,let it cool.Spicy Peanut Chutney | Kara Shenga Chutney

    4.Then transfer to the mixer jar with peanuts and grind to a smooth paste adding little water.Temper it with mustard,Asafoetida,curry leaves and red chillies.Spicy Peanut Chutney | Kara Shenga Chutney

    Healthy peanut chutney is ready to serve along with Pesarattu/green gram dosa.

    Spicy Peanut Chutney | Kara Shenga Chutney

    Pesarattu Recipe|Green gram Dosa Recipe |Hesarukalu Dosa

    Published : November 13, 2013 | Last Update on July 23, 2022 By Muktha Gopinath

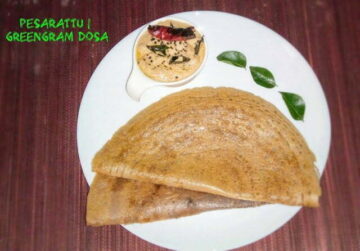
    Pesarattu is a green gram dosa  aka mung bean dosa which is more nutritious and healthy.What makes it different from regular dosa is rice-urad dal is not used here and also its not fermented. It's only green grams, spoonful of rice and spices makes it a healthy tasty and super nutritious dosa.

    Pesarattu Recipe|Green gram Dosa Recipe |Hesarukalu Dosa

    Nutrition : This humble size green grams provides you with high range of nutrients and offers you healthy benefits. Green grams are high in fiber , protein and various vitamin B ,as it is rich in dietary fiber,it keeps you full and satisfied for long without any hunger pangs till your next meal. And it's even ideal for weight loss ,as its fibrous rich,nutrients rich and also protein rich. 100 grams of this green grams provides approximately 367 calories ,so even a  small serving can meet your calorie requirements per meal.

    Eating in moderation is only key for success in your weight loss regime ,just don't be on bland diet  ,have a thoughtful diet ,which keeps you full of energy,always be active to stay fit. Serve this nutritious Pesarattu hot, with ghee and Spicy Peanut Chutney. This dosa tastes ultimate when accompanied with Spicy Peanut Chutneyonly, so if your trying this recipe make sure you serve it with Spicy Peanut Chutney or Tomato Chutney.

    RECIPE CARD FOR PESARATTU

    Recipe

    Pesarattu Recipe|Green gram Dosa Recipe |Hesarukalu Dosa
    5 from 1 vote

    Pesarattu Recipe | Greengram Dosa Recipe

    High protein,nutritious and healthy dosa made from mung beans.
    Prep Time10 minutes mins
    Cook Time20 minutes mins
    Soaking Hours7 hours hrs
    Total Time30 minutes mins
    Course: Breakfast
    Cuisine: South India
    Keyword: Dosa
    Servings: 10 Makes
    Calories: 87kcal
    Author: Muktha H S

    Ingredients

    • 1 Cup Green grams
    • ⅓ Cup Rice
    • ¾ teaspoon Jeera /Cumin Seeds
    • 1-2 Dry red chilly
    • 1 teaspoon Salt
    • Pinch Coking soda optional

    Instructions

    • Soak green grams and rice overnight  or 6-8 hrs.Wash and rinse well,drain water completely and set aside.
    • Take a wet mixer jar and grind soaked green grams, rice along with jeera and red chillies to a smooth batter .
    • Prepare batter to the consistency of regular dosa ,it should not be too thick or too watery.Add salt and pinch of cooking soda.
    • Once batter is prepared,you can prepare dosa instantly as fermentation is not required.
    • Heat griddle/tawa,pour a laddel full of batter on tava and spread to make dosa and cook for a minute by closing the lid ,open the lid smear some ghee
    • Drizzle ghee on top and serve hot with Spicy Peanut Chutney

    Nutrition

    Calories: 87kcal

    Step by Step directions for making of Pesarattu :

    Wash and rinse green gram and rice well.

    Pesarattu Recipe|Green gram Dosa Recipe |Hesarukalu Dosa

    Soak green grams and rice overnight  or for 6-7 hrs.

    Pesarattu Recipe|Green gram Dosa Recipe |Hesarukalu Dosa

    In a wet mixer jar ,add soaked green grams, rice , jeera and red chillies.

    Pesarattu Recipe|Green gram Dosa Recipe |Hesarukalu Dosa

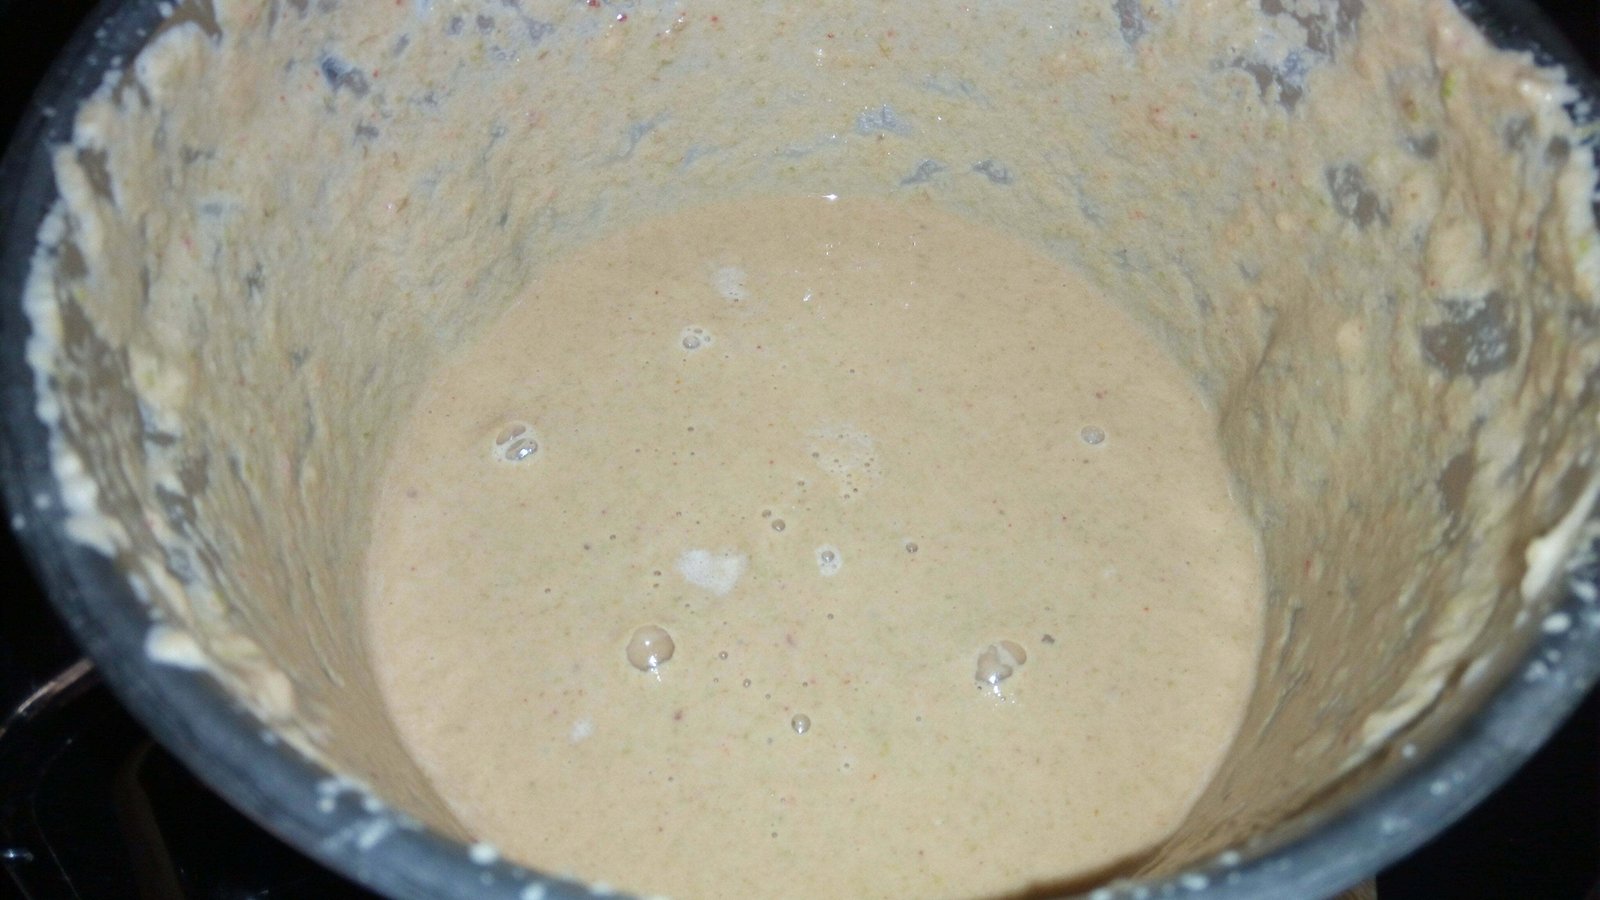
    Grind to a smooth batter by adding water.Prepare batter to the consistency of regular dosa ,it should not be too thick or too watery. Add salt and pinch of cooking soda.Once batter is prepared,you can prepare dosa instantly as fermentation is not required.

    Pesarattu Recipe|Green gram Dosa Recipe |Hesarukalu Dosa

    Heat griddle/tawa,pour a ladle full of batter on tawa/griddle and spread to make dosa .

    Pesarattu Recipe|Green gram Dosa Recipe |Hesarukalu Dosa

    Close lid and cook for 1-2 minutes, once cooked open the lid smear some ghee.

    Pesarattu Recipe|Green gram Dosa Recipe |Hesarukalu Dosa

    Serve hot with Spicy Peanut Chutney.

    Pesarattu Recipe|Green gram Dosa Recipe |Hesarukalu Dosa

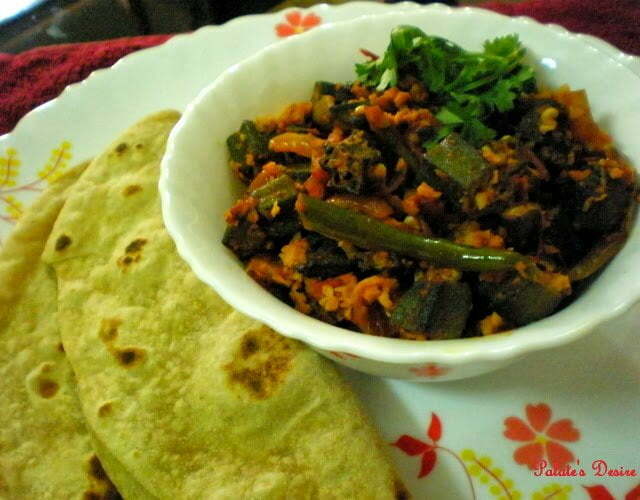
    Tangy Stir Fried Okra /Bendekai Palya

    Published : November 12, 2013 | Last Update on March 20, 2021 By Muktha Gopinath

    Tangy Stir Fried Okra /Bendekai Palya
    Stir Fried Okra / Bendekai Palya

    Hi Everybody, if your are looking for something healthy dish then you can always try this simple yet delicious okra recipe. Okra is commonly known as Ladies Finger or Gumbo.It has got amazing health benefits, it is
    rich in folate ,good to reduce obesity,constipation and many more.Regular consumption of Okra also keeps asthma at bay ! So looking into these benefits eventually i have developed love for this vegetable.I love this vegetable so much that all 3 times a day i can just have it on its own 🙂
    Well many of them does not like Okra as it is sticky,but if we fry it well then the stickiness wont be there. So i recommend this vegetable to all healthy freaks 🙂
    Ingredients:

    Category: Vegetarian | Prep Time: 5 Min

    Cooking Time::20 min| Serves:3

    Okra/Ladies Finger:½ Kg

    Onions:2
    Tomatoes :2
    Greenchillies:2
    Oil:2 Tbsp + 1 Tsp
    Mustard Seeds:½ Tsp
    Tamarind :½ Tbsp
    Water:¼ Cup
    Redchilly Powder: 1 Tsp
    Coriander Powder: 1 Tsp
    Turmeric:½ Tsp
    Kitchen King Masala: ½ Tsp
    Fresh Coriander Leaves:2 Tbsp
    Fresh Coconut Grated:2 Tbsp( Optional)
    Salt to taste

    Method:

    Wash Okra and pat it dry with a kitchen towel,its actually necessary to dry it so that you'll not get more stickiness.Take tamarind and soak it in warm water.Once okra is dry trim the edges and cut it small.

    Tangy Stir Fried Okra /Bendekai Palya


    To remove the stickiness from okra you need to roast it well so on a tawa/griddle (Don't use a nonstick Tawa,iron griddle would be better) add 1 teaspoon of oil and put the cut okra.

    Tangy Stir Fried Okra /Bendekai Palya


    Once in a while stir it and allow it to fry till you don't see any  string of stickiness .This is the most time consuming part takes almost 15 minutes. Parallely cut chunks of onion,tomatoes and green chilies Take a pan add oil,mustard seeds once it crackles add  cut onions and green chilies fry well till onions turn translucent,and tomatoes fry well,add ½ teaspoon salt (adding salt to tomatoes makes it to cook early) ,turmeric,red chilly powder,coriander powder fry well, add tamarind juice,fried okra and  mix it well.

    Tangy Stir Fried Okra /Bendekai Palya


    Adjust salt and finally add Kitchen King masala( you can use garam masala instead) ,coconut and coriander leaves. That's it, your  Okra is ready to serve with Chapathi or dosa,you can even eat as a side dish along with curd rice,it tastes Yum 😉

    Tangy Stir Fried Okra /Bendekai Palya


    Copyright Your Blog Name 2009 at palatesdesire.blogspot.com

    Sihi Avalakki | Sweet Poha

    Published : November 11, 2013 | Last Update on September 26, 2022 By Muktha Gopinath

    sihi avalakki

    Sihi Avalakki aka Sweet Poha recipe with step by step photos and video. Sihi Avalakki is a simple recipe made with flattened rice , jaggery , coconut , milk and flavored with cardamom powder.

    sihi-avalakki
    [feast_advanced_jump_to]

    About this recipe

    Sihi Avalakki is a Kannada word which means sweet poha or sweet flattened rice. This is no cook recipe , usually offered as prashad to Lord Krishna during Janmashtami .

    Most important Naivedyam offered to Lord are Banana Rasayana, Sajigge / Kshera , Panchamrut and Panchakajjaya.

    Other popular recipes of Janmashtami are Gopalkala,  Gojju Avalakki |Spicy  Tangy Poha and Makhana Kheer  

    Watch Video

    Step by step directions to make Sihi Avalakki | Sweet Poha :

    Rinse thick poha and drain water completely.

    Sihi Avalakki | Sweet Poha

    Into a mixing bowl add fresh grated coconut ,powdered jaggery,

    Sihi Avalakki | Sweet Poha

    poha , milk , honey , cardamom powder, chopped nuts and fruits , mix well everything .

    Sihi Avalakki | Sweet Poha

    Cover and set aside for 5 minutes for flavors to meld well.

    Sihi Avalakki | Sweet Poha

    Mix and serve

    Sihi Avalakki | Sweet Poha

    Offer to lord and then distribute as prasad to everyone.

    sihi-avlakki

    Variations

    If looking for a vegan option then replace cow's milk with almond milk and honey with maple syrup . Poha, Cococnut , Jaggery with cardamom flavor itself is a great way to indulge with this.

    Frequently asked questions

    Can I use thin Poha?

    No , either thick or medium thick Poha works well for this recipe. As thin variant poha turns soggy with milk and powdered jaggey .

    Why did my recipe turned soggy?

    If you don't drain water well and rinse for longer time, then there are chances of poha turning soggy.

    Why was Poha, very dry to swallow?

    Incase if you use thick variant poha and if you don't give more resting time, then poha may be dry to swallow. In that case , sprinkle 1-2 tablespoon more milk and let it sit for extra 5 minutes more .

    Is this recipe same as Poha Panchakajaya?

    No , this is different . Panchakajaya is a dry version and thin variant Poha is used along with Ghee, Coconut , Jaggery and sesame seeds.

    Recipe

    sihi avalakki
    5 from 2 votes

    Sihi Avalakki | Sweet Poha

    Sihi Avalakki | Sweet Poha is a simple and basic prashad recipe offered to Lord Sri Krishna 
    Prep Time10 minutes mins
    Total Time10 minutes mins
    Course: Sweets
    Cuisine: Indian, South India
    Keyword: Festivals, Karnataka, Naivedhyam, Prasadam
    Servings: 4 people
    Calories: 259kcal
    Author: Muktha H S

    Ingredients

    • 11/2 Cup Thick Poha
    • ½ Cup Fresh grated coconut
    • ¼ Cup Milk
    • ½ teaspoon Cardamom Powder
    • 4 tablespoon Jaggery Powder
    • 1 pinch Edible Camphor
    • 1 tablespoon Chopped Cashew nuts
    • 1 tablespoon Chopped Almond Nuts
    • 1 tablespoon Honey

    Instructions

    • Wash  and rinse thick poha with water and soak  poha in milk and set aside for 8 minutes.
    • Add fresh grated coconut , honey , jaggery powder ,cardamom powder , edible camphor and nuts.
    • Gently mix well everything and keep it aside for 5 minutes ,so that juices gets blend together and serve.

    Video

    Nutrition

    Calories: 259kcal

    Similar Recipes

    • Gopalkala
      Gopalkala Recipe
    • gojjuavalakki
      Gojju Avalakki
    • Mathura Peda Recipe , Easy Sweets for Festivals
      Mathura Peda Recipe , Easy Sweets for Festivals
    • Makhana-kheer-recipe
      Makhana Kheer Recipe

    Vegetable Fried Rice | Indo-Chinese Fried Rice Recipe

    Published : November 11, 2013 | Last Update on September 29, 2022 By Muktha Gopinath

    vegetable fried rice

    Vegetable Fried Rice is a Indo -chinese fusion food ,Step by step photos and  directions on making of Vegetable fried rice is shared here in detail.

    Who doesn't like Indo-Chinese fusion food ?Gobi Manchurian , Noodles and Fried rice are most popular and oldest street foods from indo-chinese,that is loved by all even today. Then going for authentic chinese fried rice , which most of us find it  too bland ,this Indo - Chinese fried rice is always a winner among Indians , as it is adapted to suit our Indian Palate.

    vegetable fried rice

    The main ingredient in any Chinese food is ajinomoto / MSG / Tasting powder ,these are the different names given to mono sodium glutamate , which is used as flavour enhancer but it is said to have very harmful effects on the body. So lets avoid it completely . I always aim to cook food as healthy as possible without compromising in taste , this Veg fried rice recipe is one such healthy plate with well balanced flavours and loaded with veggies. 

    If you like Indo chinese food then do try Mushroom garlic fried rice, Chicken fried rice and crispy gobi manchurian recipe

    How to make vegetable fried rice

    Wash and rinse Basmati rice / Jeera rice with water, 2-3 times, till the water runs clear.

    Vegetable Fried Rice | Indo-Chinese Fried Rice Recipe


    Soak rice for 15 minutes, drain and cook rice with 2 cups of water, ½ teaspoon of salt and 1 teaspoon of oil.

    Vegetable Fried Rice | Indo-Chinese Fried Rice Recipe

    Make sure rice is cooked perfectly with each grain separated. I cooked using Rice Cooker.

    Vegetable Fried Rice | Indo-Chinese Fried Rice Recipe

    Whilst , chop all the vegetables and keep it ready.

    Vegetable Fried Rice | Indo-Chinese Fried Rice Recipe

    Heat 2 tablespoon sesame oil / olive oil in a Wok or pan.Add chopped garlic, grated ginger and green chilli paste, fry well.

    Vegetable Fried Rice | Indo-Chinese Fried Rice Recipe

    Add white part of spring onion and fry on high heat, till the raw smell goes off.

    Vegetable Fried Rice | Indo-Chinese Fried Rice Recipe

    Keep the flame/ heat on high and add chopped carrot and chopped beans fry for 3-4 minutes.

    Vegetable Fried Rice | Indo-Chinese Fried Rice Recipe

    Add capsicum and shredded cabbage, cook on high heat for 3-4 minutes. Make sure not to overcook veggies, if done it becomes soft. Veggies in fried rice should always be crunchy.

    Vegetable Fried Rice | Indo-Chinese Fried Rice Recipe

    Now add cooked rice and mix well,take care not to break rice grain.

    Vegetable Fried Rice | Indo-Chinese Fried Rice Recipe


    Add white vinegar, soya sauce, salt ,pepper powder ,mix well.

    Vegetable Fried Rice | Indo-Chinese Fried Rice Recipe

    Fry well on a high heat for 2-3 minutes ,turn off heat, add chopped spring onions.

    Vegetable Fried Rice | Indo-Chinese Fried Rice Recipe

    Gently mix well everything and serve hot.

    Vegetable Fried Rice | Indo-Chinese Fried Rice Recipe

    Serve hot vegetable fried rice with Tomato hot and sweet sauce.

    Vegetable Fried Rice | Indo-Chinese Fried Rice Recipe

    Recipe

    vegetable fried rice
    5 from 2 votes

    Vegetable Fried Rice Recipe | Indo Chinese Veg Fried Rice

    Stir fried veggies ,mixed with rice and sauces to get perfect balance of flavours.
    Prep Time15 minutes mins
    Cook Time25 minutes mins
    soaking time for rice15 minutes mins
    Total Time40 minutes mins
    Course: Main Course
    Cuisine: Indo-Chinese
    Keyword: Rice Varities
    Servings: 4 People
    Calories: 238kcal
    Author: Muktha H S

    Ingredients

    For cooking rice

    • 1 Cup Basmati Rice
    • ½ teaspoon Salt
    • 1 teaspoon Oil
    • 2 Cups water

    For Fried Rice

    • 2 tablespoon Sesame Oil / Til Oil or Olive Oil
    • ⅓ Cup White part of Spring onion or regular onion , finely chopped
    • 1 tablespoon Finely Chopped Garlic
    • ½ tablespoon Grated ginger
    • 1 teaspoon green chilli paste or 2 green chilli finely crushed
    • ¼ cup chopped carrot
    • ¼ cup french beans finely chopped
    • ⅓ cup capsicum finely chopped
    • ⅓ cup Shredded cabbage
    • ¼ cup Spring onions chopped
    • 1 teaspoon Soya Sauce
    • ½ tablespoon White Vinegar
    • ½ teaspoon Pepper Powder
    • ¾ teaspoon Salt or as required

    Instructions

    • Wash and rinse Basmati rice / Jeera rice with water, 2-3 times, till the water runs clear.
    • Soak rice for 15 minutes, drain and cook rice with 2 cups of water, ½ teaspoon of salt and 1 teaspoon of oil. Make sure rice is cooked perfectly with each grain separated. 
    • Whilst , chop all the vegetables and keep it ready.
    • Heat 2 tablespoon sesame oil / olive oil in a Wok or pan.
    • Add chopped garlic, grated ginger and green chilli paste, fry well.
    • Add white part of spring onion and fry on high heat, till the raw smell goes off.
    • Keep the flame/ heat on high and add chopped carrot and chopped beans fry for 4 minutes.
    • Add capsicum and shredded cabbage, cook on high heat for 3-4 minutes. Make sure not to overcook veggies, if done it becomes soft. Veggies in fried rice should always be crunchy.
    • Now add cooked rice, add white vinegar, soya sauce, salt and pepper powder, mix well. Fry well on a high heat for 2-3 minutes.
    • Turn off heat, add chopped spring onions, and mix well.
    • Serve hot vegetable fried rice with Tomato hot and sweet sauce.

    Notes

    • Sesame Oil / Til oil tastes the best for fried rice , if you don't have ,you can use Olive oil also
    • Be careful while adding salt , as soya sauce contains lots of salt.
    • Always fry veggies and rice on high heat only.
    • Never add salt to veggies while cooking as we do for many of Indian Cuisine.

    Nutrition

    Calories: 238kcal

    GreenGram Usal|HesaruKallu Usali

    Published : November 8, 2013 | Last Update on March 24, 2020 By Muktha

    Green Gram Usal

    Green gram Usal recipe with step by step photos . Usual is generally referred to a dry lentil preparation with good tempering of curry leaves , mustard seeds and Hing. Each region has their own style of making this usal . I usually make Usal without Onions and Garlic , as it is often distributed as prasadam during many festivals.

    Green Gran usal

    There are many types of Usal | usali prepared at home , but most common are Green Gram usal , Chickpeas Usal , Kabuli Chana Usal ,  Avarekalu Usal , Green Peas Usal and Matki(mothi seeds) Usal.  Green gram Usal and Avarekalu Usual are mainly prepared during Makar Sankranti Festivals.

    Recipe of Usal remains same for all lentils . It's only difference in soaking hours and cooking time of lentils. All types of Usal are rice in protein and is one of the best way to include in our lunch menu . It's always recommended and essential to soak lentils overnight , it releases phytic acid , which is referred antinutrient . Also soaking lentils / beans for long hours prevents bloating. Hence soak these beans and use it for better absorption and assimilation of nutrients in the body.


    Ingredients:

    Green Gram :11/2 Cups
    Green chillies : 6-8
    Fresh Coconut grated: ½ Cup
    Turmeric:½ Tsp
    Mustard Seeds : ½ Tsp
    Oil:2 Tsp
    Asafoetida big pinch
    Salt to taste

    Step By Step Directions:

    Wash Green grams thoroughly and Soak Green Grams Overnight ( You can soak it for 4-5 hours also).

    Take a pressure cooker add the soaked green grams along with water and add ½ teaspoon of salt and steam cook for one whistle.

    Meanwhile grind the grated coconut,green chillies and turmeric without adding water,it should be coarse.GreenGram Usal|HesaruKallu Usali

    After 3 minutes remove the pressure from the pressure cooker manually so that green grams does not become mushy or over cooked.

    Now strain the water and reserve the water for doing sambar( Bas Saaru - you can refer to my post ).

    GreenGram Usal|HesaruKallu Usali

    Take a wok add oil,mustard seeds and asafoetida to this add cooked green grams saute and finally add grinded coconut chilly paste,salt as per taste  mix thoroughly saute and serve .

    GreenGram Usal|HesaruKallu Usali
    Can serve this as a side dish for dal roti or with rasam rice.
    • « Previous Page
    • 1
    • …
    • 8
    • 9
    • 10

    Hey ! Nice To Meet You

    Muktha-about-me

    Hi ! I'm Muktha , Blogger , Nutrition Advisor & Recipe Creator behind Palate's Desire . I share tried & tested everyday meal recipes for healthy living and occasional indulgence. Palate's Desire helps even a novice to cook like a pro. Happy Cooking...! Read More about me →

    Stay Connected

    • Instagram

    Baking Recipes

    • pumpkin bread
      Pumpkin Bread
    • coconut-cookie-sandwich
      Cookie Sandwich
    • crispy-coconut-cookies
      Coconut Cookies
    • peanut butter cookies
      Peanut Butter Cookies
    • crinkle-cookies
      Chocolate Crinkle Cookies
    • crispy chicken nuggets
      Chicken Nuggets Recipe

    Baking Recipes→

    Popular Recipes

    • bisi bele bath powder
      Bisi bele bath powder recipe - how to make
    • pineapple-salsa
      Pineapple Salsa - How to make spicy salsa
    • dry gobi manchurian recipe
      Gobi Manchurian Dry | Cauliflower Manchurian
    • okra-peanut-stir-fry
      Moongphali Bhindi | Peanut Okra Stir fry
    • Mangalore Fish Curry
      Fish Curry | Meen Gassi - Mangalore Style
    • moringa-tea-to-burn-fat
      Moringa Tea Recipe | Sip everday to Burn Fat easily

    Rice Recipes

    • bellada-anna-recipe
      Bellada Anna - Gudanna
    • Rice Varities
      Masala Lemon Rice | Nimbehuli Chitranna Recipe
    • huggi anna recipe
      Huggi Anna | how to make Huggi
    • mavinakayi-chitranna
      Mavinakayi Chitranna | Raw Mango Rice
    • chicken-fried-rice-recipe
      Chicken Fried Rice
    • Donne-Biryani-Recipe
      Donne Biryani Recipe
    • chicken-pulao
      Chicken Pulao Recipe
    • vegetable fried rice
      Vegetable Fried Rice | Indo-Chinese Fried Rice Recipe

    Egg Recipes

    • scrambled mushroom eggs
      Scrambled Egg with Mushroom
    • spanish-potato-omelette-cut-into-wedges
      Spanish Potato Omelette
    • scrambled Egg Curry
      Scrambled Egg Curry
    • kerala egg curry
      Kerala Egg Curry | Easy Egg Recipes
    • shakshuka recipe
      Shakshuka | How to make Shakshuka recipe
    • Kolhapuri Egg Masala
      Kolhapuri Egg Masala
    • Mumbai Style Egg Burji
      Mumbai Style Egg Bhurji
    • onion egg bhurji
      Onion Egg Bhurji

    Sweets & Desserts

    • bhapa-doi-recipe
      Bhapa Doi
    • Ragi-coconut-milk-pudding-recipe
      Ragi Coconut Milk Pudding
    • easy-shrikhand-recipe-photo
      Shrikhand
    • Thandai-kulfi
      Thandai Kulfi Recipe
    • eggless chocolate mousse
      Eggless Chocolate Mousse
    • Besan halwa recipe
      Besan Halwa Recipe
    • kayi -hollige-obbattu
      Kayi Holige Recipe
    • mango-phirni-topped-with-pistachios-rose-petals
      Mango Phirni Recipe

    Footer

    ↑ back to top

    ABOUT

    • ABOUT MUKTHA
    • MEDIA KIT

    STAY CONNECTED

    • SIGN UP ! FOR E MAILS
    • CONTACT ME

    POLICIES

    • PRIVACY POLICY
    • TERMS & CONDITIONS

    COPYRIGHT © 2025 PALATE'S DESIRE

    Rate This Recipe

    Your vote:


    A rating is required
    A name is required
    An email is required