Palate's Desire

  • Home
  • Recipe Index
  • Diet Recipes
  • Videos
  • Work with me
  • Subscribe
menu icon
go to homepage
  • Home
  • Recipe Index
  • Diet Recipes
  • Videos
  • Contact
    • Facebook
    • Instagram
    • Pinterest
    • Twitter
    • YouTube
  • subscribe
    search icon
    Homepage link
    • Home
    • Recipe Index
    • Diet Recipes
    • Videos
    • Contact
    • Facebook
    • Instagram
    • Pinterest
    • Twitter
    • YouTube
  • ×

    Pumpkin Bread

    Published : October 27, 2024 | Last Update on November 29, 2024 By Muktha

    pumpkin bread

    Pumpkin bread is easy to make moist bread with bursting flavors of pumpkin to shine through mildly sweet and bold spice flavors. Fall favorite pumpkin bread is worth all the hype as it tastes delicious, simple to make and easily adaptable.

    Pumpkin bread
    [feast_advanced_jump_to]

    About this recipe

    I always wondered why fall pumpkin recipes are so hyped until I tried this pumpkin bread recipe soon realized what was hype all about. I had sourced organic sweet yellow pumpkin from my mom's place , with my very first sight towards this yellow sweet Pumpkin , I instantly knew , what I'll be cooking with this fall's favorite Pumpkin.

    To start with ,I made fresh home made pumpkin puree and then baked this moist, warm spiced delicious pumpkin flavor bread. Making this pumpkin bread from those sweet yellow pumpkin was first thing in my mind.

    For me fall season always reminds me of cup of apple cinnamon tea, pumpkin walnut cake and baked sweet potato chips in my snacks. But this time ,literally I'm in love with this moist pumpkin bread. Though it is a moist cake , it is not loaded with fat or loaded empty calories of sugar. Hence making it a healthy choice for breakfast/ snack .

    Definitely you must try this Pumpkin bread recipe because it is

    • Delicious and Decadent
    • Simple to make
    • Easily adaptable to Vegan recipe or with /without Eggs.

    Ingredients

    Pumpkin Bread is a easy to make recipe with most basic ingredients that are available at home. Below are the actual list of ingredients and details briefs out its equivalent substitutes.

    pumpkin_bread_ingredients@Palates_Desire

    Pumpkin, of course a star ingredient ! This loaf uses a full cup of pumpkin puree, which gives moist texture and loads bread with delicious pumpkin flavor. You can either make it at home or use store bought. Always use deep yellow ,sweet pumpkins to make pumpkin breads, pumpkin muffins and also cakes.

    All-purpose flour - You can use 1.5 cups of APF . For more healthier version you can also half APF and Half whole wheat flour. Avoid packing too much into your measuring cup , just spoon and level the cup.

    Vegetable oil – Use any neutral oil ,fat helps to give moisture and richness to the bread.

    Milk - You can use any milk here, dairy or non dairy milk like almond milk or homemade oat milk.

    Yogurt - Yogurt is used in place of eggs . You can replace yogurt with egg if required.

    Baking powder, baking soda, and Apple cider Vinegar – used as leavening agents , helps the loaf puffs up as it bakes.

    Raw sugar – For sweetness, I have used ½ cup of sugar ,it can go up to ⅔ cup depends on the sweetness of the pumpkin.

    Cinnamon, dry ginger , clove, nutmeg, and allspice – Warm spices for cozy flavor.

    Vanilla extract – helps to enhances the spices’ warm flavor.

    Sea salt – To make all the flavors pop.

    Variations

    This recipe is highly adaptable

    • Vegan Recipe : Turn this into Vegan , by replacing yogurt with Flax Eggs and milk with almond milk / oat milk or even water.
    • Gluten Free : Replace APF with Almond flour and add extra ¼ teaspoon of baking soda for leavening.

    Watch Video

    How to make Pumpkin Bread

    1.Preheat the oven to 3500 F/1800 C and grease an 8x4-inch loaf pan.

    2. In a large mixing bowl, add hung curd, raw sugar and whisk well.

    making-pumpkin-bread-recipe

    To this add pumpkin puree

    making-pumpkin-bread-recipe

    Add oil, milk, apple cider vinegar and vanilla essence;

    making-pumpkin-bread-recipe

    whisk until it is smooth.

    making-pumpkin-bread-recipe

    3. Place a flour sifter directly on top of the wet ingredients bowl and sift flour, baking powder, baking soda, salt, cinnamon powder, nutmeg and all spice powder (mixture of cinnamon, cloves, nutmeg and dry ginger powder) together.

    making-pumpkin-bread-recipe

    Sift everything together

    making-pumpkin-bread-recipe

    4.Mix well everything until well incorporated. Do not over mix.

    Pumpkin Bread

    5. Transfer batter into a prepared 8x4 inch loaf pan.

    making-pumpkin-bread-recipe

    Tap couple of times to release trapped air, if any.

    making-pumpkin-bread-recipe

    6. Bake in a preheated oven for 45 to 50 minutes, until skewer inserted comes out clean.

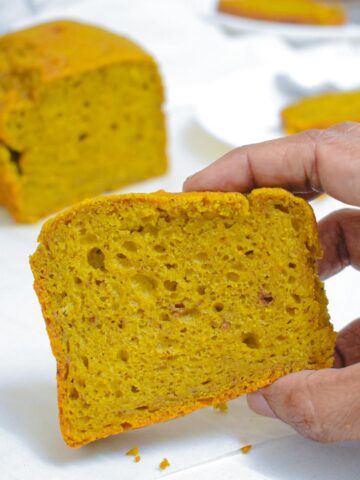
    7. Cool on a wire rack and cut into thick slices and serve warm with a cup of tea.

    making-pumpkin-bread-recipe

    You can either spread butter or cream cheese on warm pumpkin bread before you serve.

    Pumpkin-spice-bread@palates-desire

    Recipe

    pumpkin bread
    5 from 1 vote

    Pumpkin Bread

    Easy to make Pumpkin Bread recipe - moist ,mildly sweet with warm spices and loaded with bursting flavors of pumpkin , makes it a absolute falls favorite treat!
    Prep Time10 minutes mins
    Cook Time45 minutes mins
    Total Time55 minutes mins
    Course: Breakfast, Snack
    Cuisine: World
    Keyword: Baking, Bread, Breakfast_Ideas
    Servings: 12
    Calories: 144kcal
    Author: Muktha H S

    Ingredients

    • 1.5 cup All-purpose flour
    • ½ cup raw sugar
    • 1 teaspoon baking powder
    • ½ teaspoon baking soda
    • 1 teaspoon Cinnamon Powder
    • ¼ teaspoon Nutmeg powder
    • 1 teaspoon All spice powder
    • 1 dash salt
    • 1 tablespoon apple cider vinegar
    • 1 cup pumpkin puree
    • 1 teaspoon vanilla essence
    • ¼ cup Yogurt
    • ½ cup milk
    • ¼ cup oil flavorless

    Instructions

    • Preheat the oven to 350 F/180 C and grease an 8x4-inch loaf pan.
    • In a large mixing bowl, add hung curd, raw sugar and whisk well. To this add pumpkin puree, oil, milk, apple cider vinegar and vanilla essence; whisk until it is smooth.
    • Place a flour sifter directly on top of the wet ingredients bowl and sift flour, baking powder, baking soda, salt, cinnamon powder, nutmeg and all spice powder (mixture of cinnamon, cloves, nutmeg and dry ginger powder) together.
    • Mix well everything until well incorporated. Do not over mix.
    • Transfer batter into a prepared 8x4 inch loaf pan. Tap couple of times to release trapped air, if any.
    • Bake in a preheated oven for 45 to 50 minutes, until skewer inserted comes out clean.
    • Cool on a wire rack and cut into thick slices and serve warm with a cup of tea. You can either spread butter or cream cheese on warm pumpkin bread before you serve.

    Video

    Notes

    • Alternatively, replace APF with half whole wheat flour and other half with APF.
    • You can also completely replace APF with whole wheat flour. If doing so, you may need to increase milk by another 2-3 tablespoon . 
    • To make this recipe vegan: In a small bowl, whisk together 2 tablespoons ground flaxseed and 3 tablespoons warm water. Let it sit for 5 minutes, until thickened, and use in place of  yogurt .
    • You can also replace yogurt with 1 egg.

    Nutrition

    Calories: 144kcal

    Serving Suggestions

    I love to eat this lightly sweet pumpkin bread with butter spread. But you can serve it along with cream cheese spread or eat as it is. Serve for morning breakfast or evening snack , this can will definitely become anyone's favorite within no time.

    You may also like

    • pumpkin-soup-recipe
      Pumpkin Soup | Healthy Easy Pumpkin Soup Recipe
    • pumpkin-walnut-cake-recipe
      Pumpkin Walnut Cake
    • pumpkin halwa recipe
      Kaddu Halwa Recipe | Easy Pumpkin Halwa
    • banana-bread-recipe
      Easy Banana Bread | Eggless Bread Recipe

    Vegan Mayonnaise

    Published : February 15, 2023 | Last Update on February 15, 2023 By Muktha

    vegan mayo

    Vegan Mayonnaise is a low fat thick mayo spread that can be whipped up in less than 8 minutes. Tastes very similar to regular egg Mayonnaise but with lesser fat vegan version. This vegan mayonnaise recipe can be used in salad dressing, sandwich spread and also in dips.

    Out of all my personal favorite is vegan cold potato salad , this potato side dish tastes awesome and I insist you to try it out. Apart from that you can also add this into your Classic Egg Salad and Coleslaw , I bet it tastes Yum !

    low fat mayo

    This post shares Low Fat Vegan Mayonnaise recipe which has thick spreadable consistency in case if you are looking for a thin Mayonnaise then there is work around with the same recipe . So be sure to go through the variation section where you can find the details.

    [feast_advanced_jump_to]

    About this recipe

    Initially it used to happen that while adding Mayo in any of the recipes , my hands automatically draws back the actual amount of Mayo and end up adding less. That is because of the calories Mayonnaise carries. But after coming up with this recipe there is no cutting back on Mayo , I generously add on my salad dressing , sandwich spreads and dips.

    If you are worried by the Mayonnaise calories and amount of preservatives it contains then you should definitely try out this recipe. For sure you'll enjoy your food with lesser calories.

    You must try this low fat mayonnaise recipe because

    • simple ingredients
    • quick & easy to make
    • low on Calories
    • economical

    Ingredients

    With just 5 main ingredients , you can mock a perfect , vegan , budget friendly best mayonnaise recipe. For actual recipe measurements refer recipe card

    vegan mayonnise ingredients

    Tofu – For a thicker spreadable mayo use firm tofu . For a thinner mayo use silken tofu as it gives the mayo its body and silkiness with a neutral flavor so you can build on the flavor with the spices.

    Cashews - For sure you need some creaminess for which use about 2 tablespoon of whole cashews.

    Sunflower oil or any neutral flavor Oil - Let me be honest here mayo is all about that perfect fatty rich emulsion. But as I'm opting for a low fat version , I'm using a neutral flavor oil along with some cashews.

    Dijon mustard – for a little tang, it’s what gives mayonnaise that classic taste but without overpowering everything else.

    Apple cider vinegar or lemon – acidity is very important to balance out the richness of the mayo and wake up the taste buds.

    Sugar , Salt and ice cubes as required.

    Variations

    This post shares thick spreadable mayonnaise recipe but incase if you like to make thin mayonnaise then add silken tofu in place of firm tofu .

    Also add 2 extra tablespoon of oil to make to more shiny , gorgeous looking Mayo.

    Incase you are very strict on low fat version , then add few extra ice cubes while blending so that you get creamy thin mayo without increasing on calories.

    Top Tip : Prefer to keep Mayo on thicker side without adding much water or oil . Depending on the recipe you are creating, take required amount of mayo from glass jar and thin out with ice water and 1 tablespoon of oil .

    Watch Video

    How to make Vegan Mayonnaise

    Into a blender , add tofu ( firm or silken) , add cashews , Dijon mustard , oil, salt, sugar and ice cubes.

    Vegan Mayonnaise

    Blend until everything comes together. Add another 2-3 ice cubes and continue to blend , until it is smooth and creamy.

    Vegan Mayonnaise

    You can taste and adjust salt or sugar accordingly. Also feel free to add 1 - 2 tablespoon of oil or ice cubes , if you feel mayonnaise is little thick.

    Blend until mayo is shiny and smooth . Transfer to a tight glass jar and refrigerate . Stays good up to 10 days.

    Vegan Mayonnaise

    Notes : Prefer to keep vegan mayonnaise on thicker side without adding much water or oil. Later depending on the recipe you are creating, take required amount of mayo from glass jar and thin out with ice water and 1 tablespoon of oil .

    I always keep Mayo thick to spread on sandwiches where as in my salad dressing , I thin out using ice water and 1 tablespoon of oil.

    Recipe

    vegan mayo
    5 from 1 vote

    Vegan Mayonnaise Recipe

    Vegan Mayonnaise is a low fat thick mayo spread that can be whipped up in less than 8 minutes. Tastes very similar to regular egg Mayonnaise but with lesser fat vegan version. This vegan Mayonnaise can be used in salad dressing, sandwich spread and also in dips.
    Prep Time5 minutes mins
    Cook Time0 minutes mins
    Total Time5 minutes mins
    Course: Condiments
    Cuisine: American
    Keyword: Basic, Gluten Free, plant based, Vegan
    Servings: 6 People
    Calories: 59kcal
    Author: Muktha H S

    Ingredients

    • 200 grams firm tofu for thick mayo use silken tofu for thin mayo
    • 2 tablespoon cashews skip for thin Mayo
    • 2 tablespoon sunflower oil
    • 1.5 teaspoon Dijon mustard
    • 1 tablespoon Apple cider vinegar
    • 6-8 tablespoon ice cold water
    • 1 teaspoon cane sugar
    • ½ teaspoon salt

    Instructions

    • Into a blender , add tofu ( firm or silken) , add cashews , Dijon mustard , oil, salt, sugar and ice cubes.
    • Blend until everything comes together.
    • Add another 2-3 ice cubes and continue to blend , until it is smooth and creamy.
    • You can taste and adjust salt or sugar accordingly. Also feel free to add 1 - 2 tablespoon of oil or ice cubes , if you feel mayonnaise is little thick.
    • Blend until mayo is shiny and smooth . Transfer to a tight glass jar and refrigerate . Stays good up to 10 days.

    Video

    Notes

    • Prefer to keep Mayo on thicker side without adding much water or oil .
    • Later depending on the recipe you are creating, take required amount of mayo from glass jar and thin out with ice water and 1 tablespoon of oil .

    Nutrition

    Serving: 55grams | Calories: 59kcal

    Faq's

    What is vegan mayonnaise made of?

    Vegan Mayonnaise are generally made either with tofu or nuts. This post shares Tofu mayonnaise.

    Is vegan mayonnaise healthier than regular mayonnaise?

    Yes, depending on the amount of fat it contains .

    Does vegan mayo taste like regular mayo?

    It tastes very similar . In fact you can't really make out incase if you use vegan mayonnaise in wraps, sandwiches or in salads.

    You may also like

    • rose-syrup-at-home
      Rose Syrup and Instant Gulkand
    • Tahini paste
      Easy Homemade Tahini Recipe
    • oat-milk
      How to make Oat milk
    • Anti Bloating Tea Recipe
      Anti Bloating Tea Recipe

    Bhapa Doi

    Published : September 14, 2022 | Last Update on October 17, 2022 By Muktha

    bhapa-doi-recipe

    Bhapa doi is a tasty Bengali dessert made with just 3 main ingredients yogurt, sweetner and cardamom to flavor. This reicpe is a healthy and simple to make steamed dessert that gets ready under 20 minutes .

    If you are just like me , who loves Bengali desserts then do check on how to make Rasgulla and Rasmalai in a most simple and easy way.

    bhapa-doi-recipe
    [feast_advanced_jump_to]

    About this recipe

    Bhapa doi is a popular Bengali sweet dish traditionally made with mith Yogurt, milk , sugar and flavoured with cardamom powder.

    In Bangla language Bhapa means steamed and Doi means curds (Yogurt ). So the direct translation of Bhapa Doi means steamed yogurt . It's a satiating and delectable dessert .

    Texture and taste of this dessert is similar to that of Kharwas ( desert made with colostrum milk) .

    It has a texture of properly set pudding , you can cut into slices just like any cheese cake.

    bhapa-doi-cut-into-slice

    You must try this recipe because it is

    • simple and easy to make
    • minimal ingredients
    • satiating Dessert
    • healthy with no transfats
    • easily scalable

    If you are dessert lover then here are few healthy , tasty and easy to make recipes which I think , you need to check :

    Ragi Coconut Milk Pudding , Makhana ( fox nuts) Kheer , Dates Kheer and Chocolate Mousse

    Ingredients

    This easy Bhapa doi recipe with condesnsed milk , needs just 3 basic ingredients to make. Other add on's are optional to enhance taste and flavour.

    bhapa-doi-ingredients

    Yogurt - Traditionally , you need thick yogurt ( homemade / storebought Indian curds) to make this recipe. You need to hung the curd first ( just as we do it to make shrikhand ) and then used in bhapa doi recipe. But as a shortcut method, you can also use greek yogurt.

    Condensed Milk -This recipe is Bhapa doi with condensed milk. You can use either store bought condensed milk or use homemade condensed milk. I have used condensed milk from stores. Or as an alternative , you can reduce milk to half the quantity and use any sweetener like sugar or jaggery to make this dessert.

    Cardamom Powder - I prefer to use freshly pound cardamom powder for flavorful Bhapadoi. But you can also use store bought.

    Optional Addon's

    Saffron Milk - Soak 3-4 crushed saffron strands in ¼ cup of milk and use in this recipe to get a light saffron flavour in bhapa doi dessert. Also it adds pale yellowish tinge to the dessert .Though it's optional , I recommend to add this as it adds a tone of flavour and aroma to the dish.

    Chopped Nuts - I have used 1 tablespoon of chopped pistachios and almonds alltogether in this desert. You can choose to add any nuts of your choice or skip it totally.

    Tips and Variations

    Instead of using stor bought condensed milk ,you can make your own condensed milk at home.

    Or else as an alternative , you can use whole milk . Keep on simmer and reduce milk to half the quantity and use in this recipe.

    If using reduced milk , then add any sweetener like sugar or jaggery in this dessert.

    For every 500 ml of whole milk reduced to 200-250 ml , use 4-5 tbsp of sugar or any sweetener as per your taste. Just as you make Basundi ( except for adding nuts)

    To shorcut the time and process, you can directly use plain greek yogurt from stores instead of making hung curd.

    Watch Video

    How to make Bhapa Doi

    Preparations

    Soak 1 pinch of saffron in a ¼ cup warm milk .

    Chop almonds and pistachios, set aside.

    To make hung curd ( skip these steps, if using Greek yogurt)

    Place a strainer over a deep bowl. Then line a muslin cheesecloth or kitchen cotton towel on the strainer.

    hung-curd

    Pour the fresh curd (yogurt) over the muslin cloth . Use fresh curd and not the one which is sour.

    Bring all the edges of the muslin together and tie one edge tightly around the rest.

    Gently press , you can see the whey dripping , Refrigerate for 2 hours , let the whey drips off.

    Now hung the muslin cloth for 1.5 to 2 hours . So that whey water drips off completely and collects inside the bowl.

    To make Bhapa doi

    Into a mixing bowl , add hung curd approximately about 1 cup ( or plain Greek yogurt ) .

    hung-curd

    Add saffron milk and condensed milk . Alternatively ,instead of condensed milk you can use reduced milk ( ½ litre milk reduced to 250ml ) and 4-5 tablespoon of sugar ( as required) .

    add-condensed-milk

    Now add in freshly pound green cardamom powder.

    Whisk well, until it is smooth and has a pourable consistency.

    whisk-well

    Grease bowl / tin with ghee and pour the yogurt mix into a bowl. You can use either a small serving bowls or 1 large bowl as per your choice.

    pour-yogurt-mix

    Sprinkle some chopped nuts and saffron on top , optional.

    chopped-nuts

    Cover the bowl with a lid (or plate ) or foil , so that steamed vapour  doesn’t fall back into the yogurt mix.

    For steaming

    Place water in a steamer and bring to boil .

    Keep the covered bowl into the steamer.

    Steam on medium heat for 20 minutes , giving 2 minutes extra standing time.

    steam-for-20-minutes

    Remove from the steamer and set aside to cool down.

    steamed bhapa doi

    When it cools down completely , refrigerate for minimum 2 hours .

    After 2 hours in refrigerator, slightly shake the bowl to loosen bhap doi from bowl.

    cover a plate and demould

    De-mould it on a plate , garnish with nuts if required , cut into slice and serve.

    Bhapa Doi

    If using small ramekin bowls , then you can serve directly in bowls without de-moulding .

    Tastes best when served chilled.

    Recipe

    bhapa-doi-recipe
    5 from 2 votes

    Bhapa Doi

    Bhapa doi is a tasty Bengali dessert made with just 3 main ingredients yogurt, sweetner and cardamom to flavor.
    Prep Time5 minutes mins
    Cook Time20 minutes mins
    Resting Time2 hours hrs
    Total Time25 minutes mins
    Course: Dessert
    Cuisine: Bengali, India
    Keyword: Desserts, Gluten Free, Sweets
    Servings: 5 People
    Calories: 189kcal
    Author: Muktha H S

    Ingredients

    • 400 grams yogurt / homemade curs set from ½ litre milk
    • 200 grams condensed milk
    • ½ teaspoon cardamom powder

    Optional Add on’s

    • ¼ cup milk
    • 1 pinch saffron strands
    • ½ tablespoon almonds chopped
    • ½ tablespoon pistachios chopped
    • Ghee to grease the bowl/tin

    Instructions

    Preparations

    • Soak 1 pinch of saffron in a ¼ cup warm milk .
    • Chop pistachios , almonds and set aside.

    To make hung curd ( skip these steps, if using Greek yogurt)

    • Place a strainer over a deep bowl. Then line a muslin cheesecloth or kitchen cotton towel on the strainer.
    • Pour the fresh curd (yogurt) over the muslin cloth . Use fresh curd and not the one which is sour.
    • Bring all the edges of the muslin together and tie one edge tightly around the rest.
    • Gently press , you can see the whey dripping , Refrigerate for 2 hours , let the whey drips off.
    • Now hung the muslin cloth for 1.5 to 2 hours . So that whey water drips off completely and collects inside the bowl.

    To make Bhapa doi

    • Into a mixing bowl , add hung curd approximately about 1 cup ( or plain Greek yogurt ) .
    • Add saffron milk and condensed milk . Alternatively ,instead of condensed milk you can use reduced milk ( ½ litre milk reduced to 250ml ) and 4-5 tablespoon of sugar ( as required) .
    • Now add in freshly pound green cardamom powder.
    • Whisk well, until it is smooth and has a pourable consistency.
    • Grease bowl / tin with ghee and pour the yogurt mix into a bowl. You can use either a small serving bowls or 1 large bowl as per your choice.
    • Sprinkle some chopped nuts and saffron on top , optional.
    • Cover the bowl with a lid (or plate ) or foil , so that steamed vapour doesn’t fall back into the yogurt mix.

    For steaming

    • Place water in a steamer and bring to boil .
    • Place the covered bowl into the steamer.
    • Steam on medium heat for 20 minutes , giving 2 minutes extra standing time.
    • Remove from the steamer and set aside to cool down.
    • When it cools down completely , refrigerate for minimum 2 hours .
    • After 2 hours in refrigerator, slightly shake the bowl to loosen bhap doi from bowl.
    • Demould it on a plate , garnish with nuts if required , cut into slice and serve.
    • If using small ramekin bowls , then you can serve directly in bowls without demoulding .
    • Tastes best when served chilled.

    Video

    Nutrition

    Calories: 189kcal

    FAQ's

    Difference between Bhapa Doi and Mishti Doi?

    Mishti Doi is a sweetened curd . To make mishti doi , sweetened milk is allowed to sit for 8-10 hours in a clay pot to set and becaome curds , i.e, Mishti ( Sweet) Doi ( Curds)

    How to store Bhapa Doi ?

    Store in refrigerator , if you are consuming it within a 2 days. Stays good in refrigeratore for 2-3 days.

    Is it freezer friendly?

    Yes , you can freeze the dessert in a air tight container. stay good in refrigerator for about 3 months.

    Why was my dessert , did not set ?

    Water content in the dessert would have been more , in such cases cooking time needs to be increassed.

    Can I make Bhapa Doi in Oven ?

    Yes, you can make it in instant pot or in oven . Preheat the oven to 350 degrees and place the dish in the middle rack. Bake for 45 minutes. Remove the dish from the oven and let it cool down a bit before placing in refrigerator.

    Ragi Coconut Milk Pudding

    Published : August 7, 2022 | Last Update on October 17, 2022 By Muktha

    Ragi-coconut-milk-pudding-recipe

    Ragi Coconut milk pudding is a delicious and healthy vegan dessert made with Ragi, Coconut milk , sweetened with jaggery and flavoured with cardamom. Serve topped with tossed poppy seeds and pistachios .

    This is a vegan , gluten free and tasty dessert loaded with good fat . Its smooth and silky , melt in mouth dessert.

    Ragi is super grain and is very nutritios . It's staple at my home. I have few best of best ragi recipes , if you wish to try check out Ragi Soup , Ragi Ambli , Ragi Almond Cookies, Ragi banana smoothie and Ragi Banana Cake

    ragi-coconut-milk-pudding-topped-with-pistachios
    [feast_advanced_jump_to]

    About this recipe

    Ragi coconut milk pudding is a inspiration from a traditional dessert Halbai from Karnataka. Basically cereals like ragi , rice or wheat are soaked for few hours and blend along with coconut to extract milk . Later,milk is cooked until it reaches the desired thickens, sweetened with jaggery and flavoured with cardamom.

    If intrested , do check godhi manni (Godhi Halbai / Wheat Coconut Milk Pudding ), which I have already shared recipe along with video on blog.

    To set Halbai , It is spread on a grease plate and later cut into squares or rectangles. To be honest , here with this recipe , I have changed the name and presentation.

    Recently , I was in a healthy food and styling event where I was making Ragi Halbai . But while presenting the dish somehow I was not happy with the final look . Hence , I instantly changed the name and look of the dish . As it got so much of appreciation and published in many media , I retained the same name and look of the dish.

    You must try Ragi Halbai as it is

    • Very Healthy
    • Delicious
    • Gluten Free , Vegan
    • Super Nutritious
    • Scalable
    • Minimal ingredients
    • No Flour / No thickening agents

    Ingredients

    To make this dessert , you just need basic and minimum ingredients , Yes, you just need 4 ingredients to make this delicious dessert.

    Ragi-coconut-milk-pudding-ingredients

    Ragi / Finger Millet - This tiny millets are super grain and are very nutritios. Ragi as a earthen flavour. This dessert is basically a cereal and coconut extracted milk recipe. I have tried with whole wheat and rice grains to make this dessert. You can use finger millet or Whole wheat or rice to make this dessert. Other millets , I havent used,

    Coconut - Extracted fresh coconut milk is recommended , as you can mix both cereals and coconut together to extract milk. However, you can use store brought coconut milk also but for sure it will alter the taste.

    Jaggery - I always use organically sourced raw jaggery powder . If you don't have powdered jaggery , you can use block jaggery also. To use jaggery blocks, first soak jaggery in water ( use water just to immerse jaggery) for 30 -60 minutes . After that boil jaggery blocks along with water, when jaggery melts completely strain and use the syrup in the recipe.

    Flavouring - Cardamom is the most basic flavouring done her.

    Others - Coconut oil ( or ghee) , poppy seeds and pistaschios are used .

    Tip

    Cooking extracted milk on low heat and stirring continuously is the key to get silky smooth ,melt in mouth ragi coconut halbai.

    No flours or any kind thickening agent are used here , it's only milk that thickens to give the structure the dessert . So you need to be cautious while making this , low heat and stirring is the key to get perfect pudding.

    Watch Video

    How to make Ragi Coconut Milk Pudding

    Soak Ragi for 3+ hours.

    soak-ragi

    Add soaked ragi, fresh coconut and ½ cup of water to any juicer mixer grinder and process.

    Add water (up to 2 cups) part by part while processing ragi and coconut.

    process to get both thick and think milk

    Use a muslin/ cheese cloth, strain and extract milk.

    extract-ragi-coconut-milk

    You get about 4- 4.5 cups of extracted milk.

    coconut and ragi milk

    In a thick pan, dry roast poppy seeds and set aside for later use.

    Heat 1 tablespoon of coconut oil (alternatively you can use ghee). Pass milk through strainer and add extracted milk to pan.

    Ragi Coconut Milk Pudding

    On a low heat, keep stirring the milk continuously.

    Ragi Coconut Milk Pudding

    When milk turns warm, add organically sourced powdered jaggery and mix well.

    add powdered jaggery

    Cook on low heat , continuously stir milk until it starts to thicken.

    starts to thicken

    Add freshly pound cardamom powder , mix well.

    flavour ragi coconut milk pudding with cardamom

    Further stir until it reaches spoon dropping consistency. Turn off stove. transfer to a serving bowl.

    Set in a serving bowl , garnish with roasted poppy seeds, coconut flakes and pistachios.
    Let it set for 30 minutes before serving.

    set in cups

    Tastes best when served chilled

    You may also like

    • strawberry chia pudding
      Strawberry Chia Pudding
    • eggless chocolate mousse
      Eggless Chocolate Mousse
    • Rabdi-dessert
      Rabdi Recipe, how to make best rabri at home
    • mango mousse recipe
      Mango Mousse Recipe

    Recipe

    ragi-coconut-pudding-recipe
    5 from 3 votes

    Ragi Coconut Milk Pudding

    Ragi and Coconut Milk Pudding is a healthy ,gluten free vegan dessert made with finger millets Ragi) and fresh coconut milk , sweetened with jaggery and flavoured with cardamom powder.
    Prep Time20 minutes mins
    Cook Time30 minutes mins
    soaking time3 hours hrs
    Total Time50 minutes mins
    Course: Dessert
    Cuisine: South India
    Keyword: Festivals, Gluten Free, ragi, Sweets, Vegan
    Servings: 8 people
    Calories: 216kcal
    Author: Muktha H S

    Ingredients

    • 250 grams Ragi / finger Millet soaked 3+ hours
    • 1.5 cups of Fresh coconut pieces
    • 2.5 to 3 Cups of water to process
    • 1 tablespoon Coconut Oil optional
    • ¾ Cup Organic powdered Jaggery
    • ½ teaspoon Cardamom Powder freshly pound
    • To garnish
    • 1 teaspoon Poppy seeds
    • Few fresh Coconut flakes
    • Few chopped Pistachios

    Instructions

    • Soak Ragi for 3+ hours.
    • Add soaked ragi, fresh coconut and ½ cup of water to any juicer mixer grinder and process.
    • Add water (up to 2 cups) part by part while processing ragi and coconut.
    • Use a muslin/ cheese cloth, strain and extract milk.
    • In a thick pan, dry roast poppy seeds and set aside for later use.
    • Heat 1 tablespoon of coconut oil (alternatively you can use ghee)
    • Pass milk through strainer and add extracted milk to pan.
    • On a low heat, keep stirring the milk continuously.
    • When milk turns warm, add organically sourced powdered jaggery and mix well.
    • Cook on low heat , continuously stir milk until it starts to thicken.
    • Add freshly pound cardamom powder , mix well.
    • Further stir until it reaches spoon dropping consistency. Turn off stove.
    • Set in a serving bowl , garnish with roasted poppy seeds, coconut flakes and pistachios.
    • Let it set for 30 minutes before serving. Tastes best when served chilled.

    Video

    Notes

    • Cooking extracted milk on low heat and stirring continuously is the key to get smooth , silky , melt in mouth ragi coconut halbai.
    • No flours or any kind thickening agent are used here , it's only milk that thickens to give the structure the dessert . So you need to cautious while making this , low heat and stirring is the key to get perfect pudding.
    • You can use  either ghee or coconut oil 

    Nutrition

    Calories: 216kcal

    FAQ's

    Is Ragi coconut milk pudding same as Ragi Manni?

    Yes, Ragi Coconut milk pudding is also called as Ragi Halbai or Ragi Manni .

    Is Ragi Ragi Manni good for health?

    Of course , Ragi manni is one of the healthiest dessert to indulge. It is very rice in calcium and healthy fats too. Best for babbies, pregnanat women and also lactating mothers.

    What are health benefits of Ragi?

    Ragi is a rich source of calcium , also rich in folic acid hence great for women, elderly people and growing kids. As it is low in GI , it is highly recommende for diabetic patients too.

    How can we use Ragi in different recipes?

    Ragi can be used to make Ragi milk , Ragi ganji ( Ragi ambli ) , Vegetable ragi soup , Ragi mudde , Ragi rotti , Ragi Dose , instant ragi Idli and also Ragi smoothie , Ragi almond cookies and ragi banana cake for healthy freaks .

    Cookie Sandwich

    Published : August 5, 2022 | Last Update on September 15, 2022 By Muktha

    coconut-cookie-sandwich

    Cookie sandwich are flavourful coconut cookies with saffron cream filling. A crispy cardamom flavoured cookies are filled with saffron cream and sprinkled with nuts. These cookies are so tasty and awesome .

    Trust me ,this can be your kids nexr favourite recipe.

    I must admit that these eggless cookie sandwiches have true Indian flavours in it.

    Crispy coconut cookies are loaded with cardamom flavoured and it has got a saffron , cardamom cream filling . This saffron cream filling used her is nothing but Shrikhand.

    If you love trying similar recipes then I insist you to try my Low fat Spiced Orange Cake and Pumpkin Walnut Cake .

    coconut-cookie-sandwich
    [feast_advanced_jump_to]

    About this recipe

    Cookie sandwich is a flavour crispy cookies with saffrom cream filling. The 2 elements used in this recipe - coconut cookies and shrikhand are my absolute favourites. And as the flavours goes so well together with each other , I thought to make a cookie sandwich out of my two favourite combinations.

    These flavours are truly desi , Indian flavours . Saffron , coconut , cardamom , nutmeg and nuts are something what we have grown up eating in our sweets and desserts. Hence I thought to combine these 2 elements together and trust me , this was worth giving a try.

    And also this comes handy for me to pack into my kid's snack box on busy mornings. My little boy is so proud to share this cookie sandwich with his friends at school , mentioning his food blogger mom made it for him ! These are my small wins and joy associated with this recipe.

    You must try this cookie sandwich because

    • Flavourful
    • Easy recipe
    • Scalable
    • No fancy ingredients
    • Eggless Baking
    • Kids favourite

    Ingredients

    For Coconut Cookies

    coconut-cookies-ingredients

    Flour : I have used All purpose flour , if you wish you can replace with 1:1 Apf to wholewheat flour

    Fresh Coconut : I highly recommend to use Fresh coconut as it adds fresh flavours. Mosture content in the fresh grated coconut is helps in baking and no extra liquid is required in the recipe . Also healthy fat from the fresh coconut helps to get a crisp toned cookies. Having said so , incase if it is not available then feel free to use dessicated coconut ( ½ cup dessicated coconut - 1 cup fresh coconut)

    Unsalted Butter : I am habituated to use softened butter to make cookies . Vegans can substitute with coconut oil.

    Sweetner : I use Brown sugar in all my baking goodies. Feel free to use coconut sugar ot white crystal sugar in this recipe. These cookies are lightly sweet, you can add 1-2 tablespoon extra sweetner if required

    Flavours : Cardamom , dry ginger powder and nutmeg goes very well with this recipe.

    Others : To make your cookies rise , you need baking powder , baking saoda and salt.

    Optional : Dessicate coconut to sprinkle on top of cookies .

    For Cream Filling

    To make this smooth cream filling , rest other ingredients are add-on's . I have made hung yogurt using homemade curds . You can make hung curd yourself or use greek yogurt , in this recipe.

    shrikhand-ingredients

    Homemade Curds / yogurt - Use homemade full fat yogurt to make hung yogurt and the use it to make shrikhand. As an alternative you can also directly use plain greek yogurt and follow the recipe without hanging the yogurt. For vegan's non-dairy Greek style yogurt can be used to make Shrikhand.

    Cardamom powder - Green Cardamom pods are crushed in mortar and pestle. Freshly pound cardamom adds definite flavour to this simple dessert. If using store bought cardamom powder directly in the recipe , then incresse the amount of cardamom powder in the recipe.

    Saffron Strands - Try to use premium quality saffron strands to make Shrikhand as it imparts a good flavour and colour to the final dish. If not available , just skip it but you'll be definetely missing out flavours from saffron but still shrikhand tastes good.

    Chopped Nuts - I love to use almonds and pistachios on shrikhand for crunch taste in between. You can add any nuts of your choice.

    Powdered Sugar - Use fine powdered sugar to make this dessert. As crystal sugar does not dissolves easily in chilled hung yogurt.

    Please refer recipe card for actual measurements.

    Substitues & Tips

    If swapping APF to whole wheat flour ( 1:1) , then use ½ teaspoon of ACV in the recipe. Also you use substitute, 1 cup APF with ½ cup APF + ½ cup Whole wheat flour.

    If cookie dough is too tight , then use 1-2 tablespoon of buttermilk or milk in the recipe to loosen it.

    For every 1 cup of fresh coconut , substitute with ½ cup dessicated coconut,

    When cookies are out from the oven , unlike coconut cookies , it should be firm at the centre. Give a sitting time of 5 minutes in the baking tray itself . Heat from the baking tray is enough to further harden the cookies . Then transfer it on a wired rack to cool further.

    Watch Video

    How to make Cookie Sandwich

    To make coconut cookies

    Preheat oven to 180 deg celsius

    Into a blender add brown sugar, cardamom pods and blend to fine powder.

    sugar-and-cardamom-in-a=blender

    To the same blender add freshly grated coconut .

    fresh-coconut-to-blend

    blend oncee or twice for 30 seconds until it is coarse.

    blend coconut with sugar and cardamom

    Transfer coconut and sugar blend into a mixing bowl . Add softened unsalted butter.

    beat coconut-sugar -and-butter

    Beat well either with a wired hand whisker or electric blender , until smooth and light.

    creamy-coconut-butter

    Place a sieve over a mixing bowl , add flour, baking powder, cooking soda , salt , ginger powder and pinch of nutmeg.

    sift flour -salts-and-spices

    Sift flour into the wet ingredients.

    mix-t0-make-cookie-dough

    Mix well everything, cover with a cling wrap and refrigerate for 30  minutes.

    cover-cookie-dough-with-cling

    After 30 minutes, check whether cookie dough is stiff enough . Incase if it is not stiff, place it back into refrigerator for some more time.

    Scoop out 1 tablespoon of cookie dough mixture , shape into a cookie and place on a baking tray.

    shape-cookie-dough-into-cookies

    Sprinkle some dessicated coconut on top of the cookies .

    sprinkle-dessicated-coconut-before-bakng-cookies

    Bake in a preheated oven for 20-22 minutes until its golden on top, firmer and gets crisp like biscuits . (For more regular coconut cookie texture you need to bake for about 17-20 minutes only and cool on wired rack)

    bake

    Remove baking tray from oven , let cookies sit on tray for another 5 minutes.

    coconut-cookies-sfter-baking

    Later transfer on to a wired rack to cool down completely.

    cooking cookies on wired rack

    Once cooled .  you can proceed with sandwiching the saffron cream filling between cookies.

    To make saffron cream filling

    Take chilled hung curd or Greek yogurt in a mixing bowl.

    collect-hung-curd

    Add saffron dissolved milk , cardamom powder , powdered sugar and chopped nuts.

    add-nuts-powdered-sugar-saffron-milk-cardamom

    Using an wired whisker or a spoon , whip the hung curd tillsmooth , creamy and light . Tip : If you beat in hands , you need to do morearm workout. Shortcut is to use a electric blender to make the things simple.

    Whip till powdered sugar blends well , check the taste and adjust more sugar if required.

    whip-shrikhand-till-smooth

    To assemble cookie sandwich

    If you ever wonder on How cookie sandwiches are made? It's simple and easy , here is how you assemble cookie sandwich .

    Fill saffron cream into a piping bag. Pipe cream at centre of the inside surface of a cookie leaving some space around.

    sandwich cream between biscuits

    Cover the cream filled cookie with another cookie and gently press.

    cover and sandwich

    Sprinkle some chopped nuts on sides of cream and serve cookie sandwiches.

    Recipe

    cookie-sandwich-with toasted coconut
    5 from 2 votes

    Cookie Sandwich Recipe

    Cookie sandwich are flavourful coconut cookies with cream filling. A cruncy and crispy biscuit texture cardamom flavoured cookies are filled with saffron cream and nuts.
    Prep Time15 minutes mins
    Cook Time25 minutes mins
    Resting Time30 minutes mins
    Total Time40 minutes mins
    Course: Snack
    Cuisine: Fusion, Indian
    Keyword: Baking, Cookies, Diabetic friendly, Diet, Eggless, Gluten Free, Healthy, Kids Snacks
    Servings: 12 Makes
    Calories: 217kcal
    Author: Muktha H S

    Ingredients

    For Cookies

    • 1 Cup All purpose flour
    • 1 Cup Fresh Coconut , grated
    • ½ Cup Butter softened
    • ⅔ Cup Brown sugar
    • ½ teaspoon Baking Powder
    • ¼ teaspoon Baking soda
    • ⅛ teaspoon Salt
    • ½ teaspoon Cardamom Powder
    • 1 pinch Nutmeg
    • ¼ teaspoon Dry ginger powder

    For Cream Filling

    • 1.5 cups Greek yogurt or hung curds
    • ½ cup powdered sugar
    • 35-40 saffron strands soaked in 1 tablespoon Milk
    • 2 tablespoon chopped nuts ( almonds and pistachios) , optional
    • ½ teaspoon cardamom powder

    Instructions

    • Preheat oven to 180 deg celsius
    • Into a blender add brown sugar, cardamom pods and blend to fine powder.
    • To the same blender add freshly grated coconut and blend once for 30 seconds until it is coarse.
    • Transfer coconut and sugar blend into a mixing bowl . Add softened unsalted butter.
    • Beat well either with a wired hand whisker or electric blender , until smooth and light.
    • Place a sievert over a mixing bowl , add flour, baking powder, cooking soda , salt , ginger powder and pinch of nutmeg.
    • Sift flour into the wet ingredients.
    • Mix well everything, cover with a cling wrap and refrigerate for 30 minutes.
    • After 30 minutes, check whether cookie dough is stiff enough . Incase if it is not stiff, place it back into refrigerator for some more time.
    • Scoop out 1 tablespoon of cookie dough mixture , shape into a cookie and place on a baking tray.
    • Sprinkle some dessicated coconut on top of the cookies .
    • Bake in a preheated oven for 20-23 minutes until its golden on top.
    • Remove baking tray from oven , let cookies sit on tray for another 5 minutes.
    • Later transfer on to a wired rack to cool down completely.

    To make cream filling

    • Take chilled hung curd or Greek yogurt in a mixing bowl.
    • Add saffron dissolved milk , cardamom powder , powderedsugar and chopped nuts.
    • Using an wired whisker or a spoon , whip the hung curd tillsmooth , creamy and light . Tip : If you beat in hands , you need to do morearm workout. Shortcut is to use a electric blender to make the things simple.
    • Whip till powdered sugar blends well , check the taste andadjust more sugar if required.

    To make cookie sandwich

    • Fill saffron cream into a piping bag.
    • Pipe cream at centre of the inside surface of a cookie leaving some space in between.
    • Cover the cream filled cookie with another cookie and gently press.
    • Sprinkle some chopped nuts on sides of cream and serve.

    Video

    Notes

    • If swapping APF to whole wheat flour ( 1:1) , then use ½ teaspoon of ACV in the recipe.
    • If cookie dough is too tight , then use 1-2 tablespoon of buttermilk or milk in the recipe to loosen it.
    • When cookies are out from the oven , even if it is slightly soft at the centre , i'ts perfect . Give a siting time of 5 to 7 minutes in the baking tray itself . Heat from the baking tray is enough to harden the cookies and then transfer it on a wired rack to cool further.
    • For more crisper and firmer cookies just like biscuits , you may need to bake for extra 2 -3 minutes.

    Nutrition

    Calories: 217kcal

    You may also like

    • whole-wheat-biscuits
      Whole Wheat Biscuits
    • spiced orange cake
      Low Fat Orange Cake
    • lamingtons
      Lamington - how to make Australian Lamington Cake
    • banana-bread-recipe
      Easy Banana Bread | Eggless Bread Recipe

    Coconut Cookies

    Published : August 4, 2022 | Last Update on September 15, 2022 By Muktha

    crispy-coconut-cookies

    Coconut cookies are easy to make crunchy cookies made with fresh coconut, flavoured with cardamom and nutmeg. This is one of the easy peasy cookie recipe with full of flavours . Trust me , it's a fail proof recipe which I'm following since a decade.

    With basic ingredients and minimal effort , this Iyengar bakery style cookies gets ready within 30 minutes from start to finish, including preparations.

    If you are a cookie lover then don't forget to try out my Ragi Almond Cookies , whole wheat biscuits , peanut butter cookies and crinkle cookies recipes, I'm sure you'll love it as much as I do.

    coconut-cookies-bakery-style
    [feast_advanced_jump_to]

    About this recipe

    Coconut cookies are easy to make cookies made with APF , butter , fresh coconut and brown sugar . These cookies burst with fresh flavours of coconut and cardamom . For more halthier option you can replace APF with wholewheat flour .

    These cookies are low on calories and 1 cookie has just 87K cals making it a best option for snacking.

    This coconut cookies recipe is a copy cat recipe of old fashioned Iyengar bakeries from streets of Bengaluru. When I say authentic Iyengar bakery , it is needless to mention that they are popular for eggless baking. As Iyengar community are from pure vegetarian background.

    You must try this cookies because

    • Tasty and crispy
    • Flavourful
    • Easy peasy recipe
    • Scalable
    • No fancy ingredients
    • Eggless Baking

    Ingredients

    coconut-cookies-ingredients

    Flour : I have used All purpose flour , if you wish you can replace with 1:1 Apf to wholewheat flour

    Fresh Coconut : I highly recommend to use Fresh coconut as it adds fresh flavours. Mosture content in the fresh grated coconut is helps in baking and no extra liquid is required in the recipe . Also healthy fat from the fresh coconut helps to get a crisp toned cookies. Having said so , incase if it is not available then feel free to use dessicated coconut ( ½ cup dessicated coconut - 1 cup fresh coconut)

    Unsalted Butter : I am habituated to use softened butter to make cookies . Vegans can substitute with coconut oil.

    Sweetner : I use Brown sugar in all my baking goodies. Feel free to use coconut sugar ot white crystal sugar in this recipe. These cookies are lightly sweet, you can add 1-2 tablespoon extra sweetner if required

    Flavours : Cardamom , dry ginger powder and nutmeg goes very well with this recipe.

    Others : To make your cookies rise , you need baking powder , baking saoda and salt.

    Optional Add on's : Dessicate coconut to sprinkle on top of cookies .

    Substitues & Tips

    If swapping APF to whole wheat flour ( 1:1) , then use ½ teaspoon of ACV in the recipe. Also you use substitute, 1 cup APF with ½ cup APF + ½ cup Whole wheat flour.

    If cookie dough is too tight , then use 1-2 tablespoon of buttermilk or milk in the recipe to loosen it.

    For every 1 cup of fresh coconut , substitute with ½ cup dessicated coconut,

    When cookies are out from the oven , even if it is slightly soft at the centre , it's perfect. Give a sitting time of 5 to 7 minutes in the baking tray itself . Heat from the baking tray is enough to harden the cookies and then transfer it on a wired rack to cool further.

    For more crisper and firmer cookies just like biscuits , you may need to bake for extra 2-3 minutes.

    Watch Video

    How to make Coconut Cookies

    Preparations

    Preheat oven to 180 deg celsius

    Into a blender add brown sugar, cardamom pods and blend to fine powder.

    sugar-and-cardamom-in-a=blender

    To the same blender add freshly grated coconut .

    fresh-coconut-to-blend

    blend oncee or twice for 30 seconds until it is coarse.

    blend coconut with sugar and cardamom

    Transfer coconut and sugar blend into a mixing bowl . Add softened unsalted butter.

    beat coconut-sugar -and-butter

    Beat well either with a wired hand whisker or electric blender , until smooth and light.

    creamy-coconut-butter

    Place a sieve over a mixing bowl , add flour, baking powder, cooking soda , salt , ginger powder and pinch of nutmeg.

    sift flour -salts-and-spices

    Sift flour into the wet ingredients.

    mix-t0-make-cookie-dough

    Mix well everything, cover with a cling wrap and refrigerate for 30  minutes.

    cover-cookie-dough-with-cling

    After 30 minutes, check whether cookie dough is stiff enough . Incase if it is not stiff, place it back into refrigerator for some more time.

    Scoop out 1 tablespoon of cookie dough mixture , shape into a cookie and place on a baking tray.

    shape-cookie-dough-into-cookies

    Sprinkle some dessicated coconut on top of the cookies .

    sprinkle-dessicated-coconut-before-bakng-cookies

    Bake in a preheated oven for 17-20 minutes until its golden on top. (For more crisper and firm biscuit style cookies , bake for extra 2 minutes . I baked the second batch of coconut cookies for 22 minutes to make cookie sandwiches)

    bake in oven

    Remove baking tray from oven , let cookies sit on tray for another 5 minutes.

    Later transfer on to a wired rack to cool down completely.

    cooking cookies on wired rack

    Once cooled , serve and store remaining coconut cookies in a air tight jar.  

    Recipe

    crispy-coconut-cookies
    5 from 2 votes

    Coconut Cookies Recipe

    Coconut cookies are easy to make crunchy cookies made with fresh coconut, flavoured with cardamom and nutmeg. This is one of the easy peasy cookie recipe with full of flavours .
    Prep Time10 minutes mins
    Cook Time18 minutes mins
    Resting Time30 minutes mins
    Total Time28 minutes mins
    Course: Snack
    Cuisine: Fusion, Indian
    Keyword: Baking, Cookies, Diabetic friendly, Diet, Eggless, Gluten Free, Healthy, Kids Snacks
    Servings: 24 Makes
    Calories: 87kcal
    Author: Muktha H S

    Ingredients

    • 1 Cup All purpose flour
    • 1 Cup Fresh Coconut , grated
    • ½ Cup Butter softened
    • ⅔ Cup Brown sugar
    • ½ teaspoon Baking Powder
    • ¼ teaspoon Baking soda
    • ⅛ teaspoon Salt
    • ½ teaspoon Cardamom Powder
    • 1 pinch Nutmeg
    • ¼ teaspoon Dry ginger powder

    Instructions

    • Preheat oven to 180 deg celsius
    • Into a blender add brown sugar, cardamom pods and blend to fine powder.
    • To the same blender add freshly grated coconut and blend once for 30 seconds until it is coarse.
    • Transfer coconut and sugar blend into a mixing bowl . Add softened unsalted butter.
    • Beat well either with a wired hand whisker or electric blender , until smooth and light.
    • Place a sievert over a mixing bowl , add flour, baking powder, cooking soda , salt , ginger powder and pinch of nutmeg.
    • Sift flour into the wet ingredients.
    • Mix well everything, cover with a cling wrap and refrigerate for 30 minutes.
    • After 30 minutes, check whether cookie dough is stiff enough . Incase if it is not stiff, place it back into refrigerator for some more time.
    • Scoop out 1 tablespoon of cookie dough mixture , shape into a cookie and place on a baking tray.
    • Sprinkle some dessicated coconut on top of the cookies .
    • Bake in a preheated oven for 18-20 minutes until its golden on top. ( for more crisper and firm biscuit style cookies , bake for extra 2 minutes )
    • Remove baking tray from oven , let cookies sit on tray for another 5 minutes.
    • Later transfer on to a wired rack to cool down completely.
    • Once cooled serve and store remaining cookies in a air tight jar.

    Video

    Notes

    • If swapping APF to whole wheat flour ( 1:1) , then use ½ teaspoon of ACV in the recipe.
    • If cookie dough is too tight , then use 1-2 tablespoon of buttermilk or milk in the recipe to loosen it.
    • When cookies are out from the oven , even if it is slightly soft at the centre , i'ts perfect . Give a siting time of 5 to 7 minutes in the baking tray itself . Heat from the baking tray is enough to harden the cookies and then transfer it on a wired rack to cool further.
    • For more crisper and firmer cookies just like biscuits , you may need to bake for extra 2 -3 minutes.

    Nutrition

    Calories: 87kcal

    FAQ's

    What are coconut cookies made of?

    Coconut cookies are made of either fresh coconut or desiccated coconut.

    Can you bake with unsweetened coconut?

    Can you bake with unsweetened coconut?

    Should you use sweetened or unsweetened coconut in cookies?

    Use unsweetened coconut and then add required amount of sweetener , so that you have better control on amount of sugar added dependong on your sweet preferences.

    What can I do with a lot of shredded coconut?

    If it is fresh shredded coconut then you can dry or dehydrate it and store it in freezer as a dessicated coconut. Or with fresh coconut , extract milk and store coconut milk to use in many other recipes. Or check few of my recipes like Ragi coconut Milk Pudding, Coconut Barfi , Coconut Holige ( Sweet flat bread) , Fried Modak , Steamed Modak

    You may also like

    • crinkle-cookies
      Chocolate Crinkle Cookies
    • ragi-cookies
      Ragi Almond Cookies with Jaggery
    • whole wheat banana muffins
      Banana Muffins
    • pumpkin-walnut-cake-recipe
      Pumpkin Walnut Cake

    Bellada Anna - Gudanna

    Published : August 1, 2022 | Last Update on October 17, 2022 By Muktha

    bellada-anna-recipe

    Bellada anna is a traditional sweet rice made with rice , jaggery , fresh coconut and /or optional lentils ( split chickpea lentils) . Apart from being tasty this is very nutritious and can be served as a breakfast or as a part of any meal.

    It takes less than 30 minutes to make this recipe in a one pot or pressure cooker. You can also pack in bento boxes.

    This jaggery rice dish is a main component on many religious festivals and rituals in South India. It is also distributed as Prasasam in Temples across South India.

    Similar recipes from South India Includes Moongdal Payasam , Sweet Pongal , Sihi Avalakki ( Sweet Poha) and Pineapple Kesari Bath

    jaggery-rice-with-cashews-coconut
    [feast_advanced_jump_to]

    About this recipe

    In Kannada language , Bella means jaggery and anna means rice ,direct translation to English means Jaggery Rice . This bellada anna (jaggery rice ) is a South Indian style of jaggery rice , however there is a different version of Jaggery Rice (Gud ke chawal )from North regions of India.

    Consitency of this bellada anna is more like a pongal . It's texture looks like that of a thick porridge. Where as North Indian Gud ke chawal(Jaggery Rice) is a fluffy , with sticky seperated rice grains.

    Bellada anna is most popular recipe in South Indian , every house has their own style and uniqueness to make jaggery rice . This recipe of bellada anna is my mom's recipe with chana dal , jaggery , ghee and rice.  

    Few make jaggery rice with or without chana dal ( split chickpea lentil ) . But I prefer to add lentils into this as it adds creamy texture and enhance taste of the rice.

    Preparing bellada anna needs less time with very less preparations and minimal ingredients.

    You must try this recipe as it is

    • Simple to make
    • Quick and Easy
    • Healthy and nutritious
    • Tasty and Delicious

    Ingredients

    You need few basic ingredients that are readily available in any Indian Kitchen to make this recipe.

    Chana Dal ( Split Chickpeas ) - Lentils are use to make this bellada anna. If you don't have then you can skip it also. I prefer to add this because it gives a creamy texture and tastes good when you get it in between while eating.

    Rice - You can use any variety of rice to make this bellada anna. As rice grain need not be sepearted and also it becomes slightly mushy . I use short grain rice to make this rice.

    Ghee / Clarified Butter - Adds lot of taste to jaggery rice. If you are a vegan then you can always use coconut oil instead of ghee.

    Jaggery - I always use organic powdered jaggery . But , traditionally jaggery blocks are used to make this rice. Jaggery blocks are crushed into pieces , soaked in water and gently boiled until jaggery dissloves completely . Then jaggery syrup is filtered to remove impurities and filtered jaggery syrup is used in the recipe. You can use whichever is available.

    Coconut - It's one of the important ingredient in this rice ,so don't miss out to use this in the recipe. If fresh coconut is not availble then you can use dessicated coconut or dry coconut as a substitue.

    Saffron Milk - I add saaffron soaked milk here as it is considered auspicious in religious rituals . But you can always skip , as saffron and milk both are optional ingredients here in this recipe.

    Cardamom- I use freshly pound green cardamom powder to flavour this jaggery rice. make this recipe.

    Others - Rasinis , Cashews , Cloves are used , along with required amount of water to make this recipe.

    Watch Video

    How to make Bellada Anna

    Rinse well chana dal for 3-4 times and soak for minimum 30 minutes. But , I always soak lentils for good 3 to 6 hrs as it helps to reduce it's antinutrient properties.

    soak-chana-dal

    Rinse well rice and soak for 10 -15 minutes. Drain water and keep it aside.

    In a pressure cooker, heat 1.5 tablespoon ghee .Add raisins and cashews ,fry till golden and set it aside.

    fry cashews and raisins

    In to the same pressure cooker , add cloves, chana dal , rice and coconut , fry on low flame for about 3- 4 minutes till water content evaporates completely .

    saute-lentilis-rice-coocnut-in-ghee

    Now add 2 cups of hot water and pressure cook for 2 whistles on a medium flame. Allow pressure to settle down on its own.

    pressure-cook

    Once pressure settles, open the lid and add powdered jaggery , grated fresh coconut , saffron soaked milk and mix well.

    after-pressure-cooking

    Regulate flame to low and cook for about 3-4 minutes until jaggery melts completely.

    add-powderd-jaggery

    Check for the consistency , if it is too thick you can thin it out by adding ½ -1 cup of water. Beladda anna consistency will be similar to pongal consistency .

    add-water-if-required

    Once it reaches the desired consistency , turn off the stove. Add fried cashews , raisins , cardamom powder and remaining 1.5 tablespoon of ghee.

    add-fried-cashews-cardamom-powder

    Stir well everything and serve hot or warm.

    mix-well-and serve bellada-anna

    Recipe

    bellada-anna-with-coconut
    5 from 2 votes

    Bellada Anna -Jaggery Rice Recipe (South India)

    Bellada anna is a traditional sweet rice made with rice , jaggery , fresh coconut and ghee with optional lentils ( split chickpea lentils) . Along with being tasty this is nutritious and can be served as a breakfast or part of any meal.
    Prep Time5 minutes mins
    Cook Time20 minutes mins
    Soaking Time3 hours hrs
    Total Time25 minutes mins
    Course: Breakfast, Sweets
    Cuisine: Andhra, Karnataka, South India, Tamil Nadu
    Keyword: Desserts, Festivals, Sankranti, Sweets
    Servings: 4 People
    Calories: 398kcal
    Author: Muktha H S

    Ingredients

    • ¼ Cup Chana Dal ( Split Chickpeas ) de skinned
    • ½ Cup Rice any variety
    • 3 tablespoon Ghee / Clarified Butter divided into 1.5 + 1.5 Tbsp
    • 1 tablespoon Raisins
    • 1 tablespoon Cashews split
    • 2 no's Cloves
    • ¾ Cup Jaggery Powder ( use as required)
    • ½ Cup Fresh Coconut (divided into ¼ + ¼ cup each)
    • ½ Cup Milk warm optional
    • 2.5 Cups Water (adjust if required)
    • ½ teaspoon Cardamom Powder
    • 1 Pinch saffron strands optional
    • 1 Pinch Edible Camphor if available

    Instructions

    • Rinse well chana dal for 3-4 times.
    • Soak for minimum 30 minutes or upto 3 hours. Soak rice for 30 minutes.
    • Drain water and keep it aside.
    • In a pressure cooker, Heat 1.5 tablespoon ghee, add raisins and cashews ,fry till golden and set aside.
    • In the same pressure cooker , add cloves , chana dal , fresh coconut (¼ cup) and rice , fry on low flame for about 3-4 minutes till water content evaporates completely .
    • Now add 2 cups of water and pressure cook for 2 whistles. Allow pressure to settle down on its own.
    • Once pressure settles, open the lid. Add powdered jaggery , grated coconut ¼ cup
    • Mix well , everything . Regulate flame to low and cook for about 3-4 minutes , until jaggery dissolves and mix well with rice.
    • Now add in saffron soaked milk ( optional ) and cardamom powder . Mix well everything. If you find it thick , you can add little hot water to thin it out.
    • Turn off the stove. Add fried cashews , rasins and remaining 1.5 tablespoon of ghee / clarified butter .
    • Mix well everything and serve hot or warm.

    Video

    Notes

    • I have used ¾ cup of powdered jaggery. You can increasse or decreasse sweetness as per your taste.
    • Edible camphor wasnt available with me  hence I have not added , Adding pinch of it enhaces the taste.
    • Adding Saffron milk is optional , traditionally it is  ot added . You can add if you wish.

    Nutrition

    Calories: 398kcal

    You might also like

    • rava-pongal-recipe
      Rava Pongal
    • easy-shrikhand-recipe-photo
      Shrikhand
    • sweet pongal recipe
      Sihi Pongal |Sweet Pongal
    • bisi-bele-bath-with-khara-boondi
      Bisi Bele Bath Recipe


    Shrikhand

    Published : July 28, 2022 | Last Update on October 17, 2022 By Muktha

    easy-shrikhand-recipe-photo

    Shrikhand is a simple and delicious yogurt based dessert flavoured with saffron , nuts and cardamom. You can choose to make shrikhand either with homemade hung curd or store bought Greek yogurt.  

    This easy dessert is the perfect along with a meal or as dessert.

    To put up this delicious sweetened yogurt, you just need 4 basic ingredients and 15 minutes of work , a delectable dessert gets ready !

    If you love , similar traditional desserts then do check Kesar Badam Milk , Rabdi , Shahi Tukda , Shakarkhand ( Sweet potatao Halwa) and Basundi.

    shrikhand-with-saffron-and-nuts
    [feast_advanced_jump_to]

    About this recipe

    Shrikhand is a thick , creamy , dense dessert with strong cardamom and saffron flavours.  It is one of the easiest and tasty dessert popular in Gujarat and Maharashtra,  states of India.

    Shrikhand and Amarkhand is a part of religious ceremonies, weddings and festivals in Maharashtra and Gujarat.

    To make this delicious sweetened yogurt, you just need 4 basic ingredients and only 15 minutes of work.

    Traditional shrikhand is made using hung curd , where a homemade yogurt is tied in a muslin cloth to drain off the whey water from curds.

    But one can always use Greek yogurt , as it has no whey( water ) content in it . All you need is to mix Greek yogurt with powdered sugar and add flavours in to it.  With this shortcut , Shrikhand takes less than 5 minutes to put up and it tastes better than any store brought.

    Consistency and creaminess of shrikhand resembles to that of cream cheese.

    You need to try shrikhand as it is

    • Tastes delicious
    • Easy to make
    • Economical
    • Scalable
    • Freezes well in refrigerator

    Ingredients

    To make this smooth and delicious swetened yogurt dessert you just need basic 4 ingredients , rest other ingredients are add-on's

    shrikhand-ingredients

    Homemade Curds / yogurt - Use homemade full fat yogurt to make hung yogurt and the use it to make shrikhand. As an alternative you can also directly use plain greek yogurt and follow the recipe without hanging the yogurt. For vegan's non-dairy Greek style yogurt can be used to make Shrikhand.

    Cardamom powder - Green Cardamom pods are crushed in mortar and pestle. Freshly pound cardamom adds definite flavour to this simple dessert. If using store bought cardamom powder directly in the recipe , then incresse the amount of cardamom powder in the recipe.

    Saffron Strands - Try to use premium quality saffron strands to make Shrikhand as it imparts a good flavour and colour to the final dish. If not available , just skip it but you'll be definetely missing out flavours from saffron but still shrikhand tastes good.

    Chopped Nuts - I love to use almonds and pistachios on shrikhand for crunch taste in between. You can add any nuts of your choice.

    Powdered Sugar - Use fine powdered sugar to make this dessert. As crystal sugar does not dissolves easily in chilled hung yogurt.

    Please refer recipe card for actual measurements.

    Watch Video

    Tips

    While making hung curd , Use a deep bowl below, so that there is some distance between the curd in the strainer and the collected whey. Otherwise the whey will touch the strainer and whey mixes with curds .

    Use the whey ( greenish water dripped from hung curds) to make rotis , curries , dal and smoothies as it is very nutritious.

    To whip the hung curd , use electric blender . It makes the whole process lot more easier, alternatively you can whip in blender too.

    FAQ's

    How to serve Shrikhand?

    Shrikhand is generally served with poori. But you can also serve it as a dessert . Or just go creative and sandwich between cookies or crackers. I recently tried piping shrikhand between coconut cookies and it tasted awesome.

    Can I make shrikhand ahead of time?

    Of course , that is the way it should be done ! I actually recommend that you make it ahead of time so that shrikhand gets chilled in refrigerator and flavours meld well.

    Can I freeze shrikhand?

    Yes you can freeze shrikhand upto 2 months in a covered container . And also you can refrigerate it for 1 week.

    How to make Shrikhand

    To make Hung Curd ( hung yogurt)

    Place a strainer over a deep bowl. Then line a muslin cheesecloth or kitchen cotton towel on the strainer.

    Note : Use a deep bowl below, so that there is some distance between the curd in the strainer and the collected whey. Otherwise the whey will touch the strainer and whey mixes with curds as well .

    place-a-strainer-over-a-deep-bowl

    Pour the fresh curd over the muslin cloth . Use fresh curd and not the one which is sour.

    strain-yogurt

    Bring all the edges of the muslin together and tie one edge tightly around the rest.

    tie-and-hang-yogurt

    Gently press , you can see the whey dripping.

    Now place a heavy on the tied muslin or if you have a hook, hung the muslin cloth for 4 to 5 hours or overnight. So that whey drips off completely and collects inside the bowl.

    After 4-5 hours , the whey will be drained and the hung curd will be ready. You can use the collected nutrient rich water ( whey ) to preparate chapatis, curries , dals and etc.

    whey-water

    Collect the hung curd in a mixing bowl . With the hung curd you can now proceed to make the shrikhand. If you are using Greek Yogurt , you can straight away follow the next steps.

    hung-yogurt

    How to make shrikhand with hung curd or greek yogurt

    Take warm milk in a glass and add 2 pinches of saffron strands, about 35 to 40 strands . Stir well and keep aside.

    saffron-soaked-in-milk

    In a mortar pestle ,  pound 5 to 6 green cardamoms. Keep aside.

    Take hung curd in a mixing bowl.

    collect-hung-curd

    Add saffron dissolved milk , cardamom powder , powdered sugar and chopped nuts.

    add-nuts-powdered-sugar-saffron-milk-cardamom

    Using an wired whisker or a spoon ,whip the hung curd till smooth , creamy and light . Tips : If you beat in hands , you need to do more muscle arm workout. Shortcut is to use a electric blender to make the things simple.

    Whip till powdered sugar blends well , check the taste and adjust more sugar if required.

    whip-shrikhand-till-smooth

    Chill the shrikhand in fridge  until you serve.  While serving shrikhand, top with some saffron strands and chopped nuts. I added some crushed pistachios , almonds and dry rose petals for garnish.

    shrikhand-topped-with-nuts

    Recipe

    kesar-pista-shrikhand
    5 from 3 votes

    Shrikhand Recipe

    Shrikhand is a simple and delicious yogurt based dessert flavoured with saffron , nuts and cardamom. You can choose to make shrikhand either with homemade hung curd or store bought Greek yogurt.  
    Prep Time15 minutes mins
    Cook Time0 minutes mins
    Total Time15 minutes mins
    Course: Dessert, Sweets
    Cuisine: Gujarati, Maharstarian
    Keyword: Basic, Festivals, Holi
    Servings: 4 People
    Calories: 277kcal
    Author: Muktha H S

    Ingredients

    • 1 kg Curds made from 1 litre milk
    • ½ cup powdered sugar or add as required
    • ½ teaspoon cardamom powder or 6 green cardamoms – crushed fine in a mortar
    • 30-40 saffron strands or 2 pinches
    • 1 tablespoon warm milk
    • 7 to 8 pistachios crushed or chopped – add any nut of choice
    • 5 to 6 almonds sliced or chopped

    Instructions

    To make hung yogurt

    • Place a strainer over a deep bowl. Then line a muslin cheesecloth or kitchen cotton towel on the strainer.
    • Pour the fresh curd over the muslin cloth . Use fresh curd and not the one which is sour.
    • Bring all the edges of the muslin together and tie one edge tightly around the rest.
    • Gently press , you can see the whey dripping.
    • Now place a heavy on the tied muslin or if you have a hook, hung the muslin cloth for 4 to 5 hours or overnight. So that whey drips off completely and collects inside the bowl.
    • After 4-5 hours , the whey will be drained and the hung curd will be ready. You can use the collected nutrient rich water ( whey ) to preparate chapatis, curries , dals and etc.
    • Collect the hung curd in a mixing bowl . With the hung curd you can now proceed to make the shrikhand. If you are using Greek Yogurt , you can straight away follow the next steps.

    To make shrikhand with hung yogurt

    • Take warm milk in a glass and add 2 pinches of saffron strands, about 35 to 40 strands . Stir well and keep aside.
    • In a mortar pestle , pound 5 to 6 green cardamoms. Keep aside.
    • Take hung curd in a mixing bowl.
    • Add saffron dissolved milk , cardamom powder , powdered sugar and chopped nuts.
    • Using an wired whisker or a spoon ,whip the hung curd till smooth , creamy and light . Tip : If you beat in hands , you need to do more arm workout. Shortcut is to use a electric blender to make the things simple.
    • Whip till powdered sugar blends well , check the taste and adjust more sugar if required.
    • Chill the shrikhand in fridge until you serve. While serving shrikhand, top with some saffron strands and chopped nuts. I added some crushed pistachios , almonds and dry rose petals for garnish.

    Video

    Notes

    • Use a deep bowl below, so that there is some distance between the curd in the strainer and the collected whey. Otherwise the whey will touch the strainer and whey mixes with curds as well .
    •  

    Nutrition

    Calories: 277kcal

    You may also like

    • gujiya
      Gujiya Recipe|Karanji | Karjikai Recipe
    • Kesar-badam-milk
      Kesar Badam Milk
    • kayi -hollige-obbattu
      Kayi Holige Recipe
    • gulab-jamun-milkpowder-recipe
      Gulab Jamun | Soft Gulab Jamun with Milk Powder

    Papaya Oat Smoothie

    Published : July 17, 2022 | Last Update on October 10, 2024 By Muktha

    papaya-oat-turmeric-milkshake

    Papaya Oat Smoothie is nutritious anti-inflammatory milkshake with goodness of turmeric, flaxseeds and oat milk. Serve this smoothie as a part of breakfast or for snacking . It's filling and is great for those on liquid diet.

    I made this papaya oat milkshake with the homemade oat milk . It is delicious and gets ready under 5 minutes.

    Few of my favourites breakfast smoothies are Peanut Butter Smoothie , Strawberry Overnight Oats , Makhana Smoothie , Ragi Banana Smoothie and Strawberry smoothie.

    papaya-turmeric-oat-shake
    [feast_advanced_jump_to]

    About this recipe

    Papaya Oat Smoothie is a gorgeous looking , delicious smoothie that can be made under 5 minutes. You can serve this tasty , anti inflamatory papaya oat smoothie either for breakfast or snacking.

    You can call this as a milk shake or smoothie , because it is made with oat milk instead of yogurt. It's simple to make , blend everything in a juicer and smoothie is ready to serve under 5 minutes.

    As I prefer to serve this for breakfast , I prefer to keep it thick just like a smoothie. But you can also think it bby adding more milk and serve as milkshake.

    I have used Oat milk here , but can use any non-dairy or dairy milk here.

    You must try this Papaya Oat Smoothie recipe because it's very

    • Healthy
    • Tasty
    • Easy to make
    • Under 5 minutes
    • Good for weight watchers

    Ingredients

    papaya-oat-smoothie-ingredients@palates-desire

    To make this gorgeous papaya smoothie , you need minimal ingredients like

    • Papaya - Use fully ripe papaya for better taste. Peel , core and cut papaya into chunks and chill in refrigerator before using in the recipe.
    • Oat Milk - I have used Oat milk , but you can use almond milk , coconut milk or cow's milk too
    • Sweetener - I'm not vegan and I always prefer to use raw honey for its health benefits but you are free to use any healthy sweetner of your choice. Vegan's choice coconut sugar , dates syrup , monk fruit extract or maple syrup.
    • Turmeric powder - I use it because it's healthy and this smoothie is anti-inflamatoy too.
    • Others - Vanilla extract and cinnamon powder for flavouring . Pinch of flaxseed powder before you serve for a light nutty taste.

    Refer recipe card for actual measurements

    Watch Video

    How to make Papaya Oat Smoothie

    Into a blender add , fully ripe chilled cut papaya , turmeric powder , cinnamon powder , vanilla essence and 150 ml of oat milk .

    add oat-milk-into -papaya

    Blend everything.

    blend -papaya-into-smoothie

    Depending on the sweeteness of the papaya fruit, adjust the sweetener. I use raw honey, Vegan’s can use Maple syrup or coconut sugar or monk fruit extract .

    add honey for sweetening

    Check for consistency, add remaining 150 ml of oat milk, honey and blend to thick shake.

    papaya-smoothie

    Sprinkle roasted flaxseed powder , drizzle sweetener and serve for breakfast or for snacking.

    serve payaya-oat-smoothie

    Recipe

    papaya-oat-smoothie-with-honey
    5 from 3 votes

    Papaya Oat Smoothie

    Papaya Oat Smoothie is nutritious anti-inflammatory milkshake with goodness of turmeric, flaxseeds and oat milk. Serve this smoothie as a part of breakfast or for snacking .
    Prep Time5 minutes mins
    Cook Time0 minutes mins
    Total Time5 minutes mins
    Course: Breakfast
    Cuisine: World
    Keyword: Bachelor's Cooking, Healthy, Weight Loss
    Servings: 2 People
    Calories: 158kcal
    Author: Muktha H S

    Ingredients

    • 2 cups Papaya
    • ½ teaspoon Turmeric Powder
    • 300 ml Oats Milk
    • ¼ teaspoon Cinnamon Powder
    • ¼ teaspoon Vanilla Essence
    • 1 pinch of Flaxseed Powder
    • 1.5-2 Tbsp Honey or as required

    Instructions

    • Into a blender add , fully ripe chilled cut papaya , turmeric powder , cinnamon powder , vanilla essence and 150 ml of oat mil and blend.
    • Check for consistency, add remaining 150 ml of oat milk, sweetener and blend to thick shake.
    • Depending on the sweetness of the papaya fruit, adjust the sweetness. I use raw honey, Vegan’s can use Maple or Agave Syrup .
    • Sprinkle roasted flaxseed powder , drizzle sweetener and serve for breakfast or for snacking .

    Video

    Nutrition

    Calories: 158kcal

    FAQ's

    Can I use Oats instead of Oat milk ?

    Yes you can use instant or rolled oats . Firstly , blend dry oats into a powder and then add Pappaya . Also you can add any non dairy milk or dairy milk. It's upto your choice.

    You may also like

    • strawberry chia pudding
      Strawberry Chia Pudding
    • Oats-omelette-breakfast
      Spicy Masala Oats Omelette Recipe
    • strawberry-banana-overnight-oats-with-drizzled-honey
      Strawberry Banana Overnight Oats
    • oat-milk
      How to make Oat milk

    Spanish Potato Omelette

    Published : July 12, 2022 | Last Update on October 7, 2022 By Muktha

    spanish-potato-omelette-cut-into-wedges

    Spanish Potato Omelette is a thick omelette made with potatoes , onions and eggs. Its very tasty and easy to make , gets ready under 30 minutes from start to finish.

    Spanish omelette is one of the popular dish from Spain. Traditional spanish omeletteIt is called as Tortilla Espanola and is served as a appetizer or a light dinner. Texture and thickness of this potato omelette varies from region to region .

    I love to serve this Spanish Omelette in my breakfast just like Shakshuka , Mushroom Frittata , Savoury French Toast , Scrambled Peas Mushroom along with a bread toast.

    spanish-potato-omelette
    [feast_advanced_jump_to]

    About this recipe

    Spanish Omelette aka Tortilla Espanola a thick omelette , a very popular dish from spain. It is served as a appetizer or a light dinner.

    Crispy , shallow fried golden potatoes are mixed with eggs and poured into an omeltte. It's thick and usually cut into wedges and served along with a drink. Its quite popular in cafe's.

    Depending on the number of eggs and pan size , the thickness of the omelette varies. Also texture depends varingly in th way potatoes are sliced and cooked.

    Make sure to slice potataoes evenly and cook it completely before mixing with eggs.

    This recipe need no special equipments , just a frying pan and spatula is enough to make this omelette.

    You must try this spanish potato omelette recipe as it is very easy to make , less ingredients , tasty , under 30 minutes , No monitoring , No skills required - its cooking level is easy , serve for breakfast / snack or light dinner.

    Ingredients

    You just need minimum imgredients to put up this spanish omelette.

    spanish-omelette-ingredients

    Potatoes - less starchy potatoes works well here.

    Onion - White or red onions, anything works fine. Though white onions are traditionally used , I have used red onions as it is readily available with me.

    Chillies and Cilantro are optional add on's . But I love omelette with these 2 ingredients eveytime. Heat from chillies add lot of taste in this omelette.

    Eggs - brown or white any eggs works fine here.

    Olive Oil - I have used olive oil here as traditionally , spanish omelette is made with it. You can use any vegetable oil to make this dish.

    Seasonings- Salt and pepper powder

    Top Tip

    Slice potatoes into 3-4mm uniform thickness , soak in warm water for 5 minutes and drain completely before using in the recipe. Cook potatoes until lightly crisp and golden in colour.

    Watch Video

    How to make Spanish Omelette

    Preparations

    Rinse and peel potatoes . Slice potatoes uniformly into 3mm thickness . Cut sliced potatoes into 2 halves.

    Chop onion , chillies , cilantro leaves , if adding and set aside.

    Crack open 4 eggs , season with ½ teaspoon salt and pepper powder. Whisk well together and set aside .

    To make Spanish Omelette

    Heat 3 tablespoon of olive oil in a small 8.5 " inch diameter frying pan.

    heat-olive-oil

    Add potataoes , spread in one layer and fry until lightly crisp and golden in colour. Takes around 8 to 10 minutes to cook on a medium heat.

    cook-potatoe-slices

    When potataoes are completely cooked and lightly crisp ,

    lightly-crisp-and-golden

    drain excess oil and transfer into a bowl.

    crisp-cooked-potatoes

    Into the same pan , add onions and chilles .

    saute-onions

    Saute onions until it turns translucent. Pour eggs into the frying pan.

    pour-egg

    Add lightly crisp potatotes over the egg and spread evenly.

    cooked-potatoes-mixed-with-eggs

    Sprinkle some finely chopped cilantro ( optional) . And season with remaining salt and pepper powder.

    sprinkle-cilantro

    Cover with a lid and cook on medium heat until the base turns firm, takes about 6-8 minutes.

    cover-lid-and-cook

    Open the lid and loosen the corners with help of a spatula. Shake the frying pan so that base loosens up and moves completely.

    loosen-sides

    At this point, omelette will be still runny at centre of the pan . Cover the fry pan with a plate and upside down the frying pan.

    Spanish Potato Omelette

    Now slide back the runny side of the omlette onto the frying pan.

    slide-other-side-into-pan

    Now slide the uncooked side on to skillet and cook for 3 minutes on medium heat.

    gently-press-and-cook-omelette

    Gently press the omlette and cook for 1-2 minutes , until the base firms up.

    When it's completely cooked on both the sides. Turn of the heat.

    Transfer into a plate and finally garnish with chopped cilantro , cut it into wedges and serve hot .

    spanish-omelette-cut-into-wedges

    Recipe

    spanish-potato-omelette-cut-into-wedges
    5 from 5 votes

    Spanish Potato Omelette

    Spanish Omelette aka Tortilla Espanola it is a thick omelette made with potatoes and onions. It tastes great and gets ready under 30 minutes from start to finish. Serve as a breakfast , appetizer or light dinner, fits in everywhere !
    Prep Time5 minutes mins
    Cook Time20 minutes mins
    Total Time25 minutes mins
    Course: Appetizer, Breakfast, Snack
    Cuisine: World
    Keyword: Egg
    Servings: 3 People
    Calories: 269kcal
    Author: Muktha H S

    Ingredients

    • 4 Eggs
    • 2 Potatoes - Medium to large ,sliced
    • 1 Onion Chopped
    • 1 or 2 Red or green chillies , chopped , optional
    • 2 tablespoon Fresh Coriander leaves chopped
    • 1 teaspoon Pepper Powder
    • ¾ to1 teaspoon Salt or as required
    • 3 tablespoon Olive Oil

    Instructions

    Preparations

    • Rinse and peel potatoes . Slice potatoes uniformly into 3mm thickness . Cut sliced potatoes into 2 halves.
    • Chop onion , chillies , cilantro leaves , if adding and set aside.
    • Crack open 4 eggs , season with ½ teaspoon salt and pepper powder. Whisk well together and set aside .

    To make Spanish Omelette

    • Heat 3 tablespoon of olive oil in a small 8.5 " inch diameter frying pan.
    • Add potataoes , spread in one layer and fry until lightly crisp and golden in colour. Takes around 8 to 10 minutes to cook on a medium heat.
    • When potataoes are completely cooked and lightly crisp , drain excess oil and transfer into a bowl.
    • Into the same pan , add onions and chilles . Saute onions until it turns translucent.
    • Pour eggs into the frying pan.
    • Add lightly crisp potatotes over the egg and spread evenly.
    • Sprinkle some finely chopped cilantro ( optional) . And season with remaining salt and pepper powder.
    • Cover with a lid and cook on medium heat until the base turns firm, takes about 6-8 minutes.
    • Open the lid and loosen the corners with help of a spatula. Shake the frying pan so that base loosens up and moves completely.
    • At this point, omelette will be still runny at centre of the pan . Cover the fry pan with a plate and upside down the frying pan.
    • Now slide back the runny side of the omlette onto the frying pan.
    • Now slide the uncooked side on to skillet and cook for 3 minutes on medium heat
    • Gently press the omlette and cook for 1-2 minutes , until the base firms up.
    • Wgen it's completely cooked on both the sides.Turn of the heat.
    • Transfer into a plate , garnish with chopped cilantro , cut it into wedges and serve hot .

    Video

    Nutrition

    Calories: 269kcal

    You may also like

    • Beans-egg-bhurji-recipe
      French Beans Egg Bhurji
    • scrambled Egg Curry
      Scrambled Egg Curry
    • mushroom-frittata
      Mushroom Frittata
    • Classic Egg Salad recipe
      Classic Egg Salad

    Onion Raita

    Published : July 8, 2022 | Last Update on September 21, 2022 By Muktha

    onion-raita-with-cumin-powder-sprinkled

    Onion Raita is one of the most basic , simple and popular yogurt based accompaniment that goes well with any Indian meal. It is tasty and gets ready under 5 minutes .

    Raita is a part of Indian meal ; be it a pulao , paratha or roti , it is one of the most loved and comforting accompaniment .

    Though raita goes well with any Indian Meal , I always serve this with onion raita with Biryani's and Pulao , out of all Egg plant Biryani and Mushroom Pulao are my favourite .

    onion -raita-served
    [feast_advanced_jump_to]

    About this recipe

    Onion Raita is a spiced yogurt with onions and cucumbers . It is made using fresh yogurt, crunchy onions , spices and herbs.

    Raita is cooling in nature , you can make this in summer or anytime. It comes together in less than 5 minutes ,

    Serve fresh Onion raita as a side dish with any Indian meals . I prefer to serve this onion ka raita with Chicken pulao , Donne biryani or Vegetable bath or goes well with any kind of Indian flat breads meal.

    This onion ka raita is

    • Easy to make
    • Simple
    • Tastes delicious
    • Need just 5 minutes

    Ingredients

    onion-raita-ingredients

    Onion – I use red Onions, you can use white onions too make this recipe.

    Yogurt – I always prefer to use homemade curds as it will be creamy , thick and has natural probiotics. You can use any thick plain yogurt or Greek yogurt to make this raita.

    Others- Flavor raita with sugar, cumin powder, green chilies, and cilantro (fresh coriander leaves). Using sugar balances the peppery taste of red onions . Adjust green chillies as per your taste.

    Optional add-on's

    Whenever I serve raita with any kind of pulao , I like to keep it simple . Hence I didn't use tempering, If serving with any kind of flat breads , I highly recommend to give tadka as it elevates the taste.

    Tempering - You can give basic tempering in vegetable oil with mustard seeds, cumin seeds and dry red chillies.

    Watch Video

    How to make mooli raita

    Preparations

    Peel cucumber , onion outer dry skin and rinse well. Finely chop onions , cucumbers , green chilies , cilantro and set aside.

    To make Raita

    Into a mixing bowl, add chilled curds and whisk well until smooth and creamy.

    whisk-yogurt-until-smooth

    Add chaat masala powder, red chilli powder , cumin powder, salt , sugar and give a stir.

    add-spices-into-yogurt

    Mix well everything, make sure sugar crystals dissolves .

    mix-well

    Now add finely chopped onions, cucumber , green chillies , coriander leaves ,

    add-onions-cucumbers-and-herbs

    Mix well everything. Serve onoin raita with Chicken Biryani or Pulao.

    mix-to-serve-onion-raita

    Top Tip

    Add salt just before serving Raita , this way onion does not release its juices making raita watery.

    Recipe

    onion-raita-sprinkled-with-cumin-powder
    5 from 2 votes

    Onion Raita Recipe

    Onion Raita is one of the most basic , simple and popular yogurt based accompaniment that goes well with any Indian meal. It is tasty and gets ready under 5 minutes .
    Prep Time10 minutes mins
    Cook Time0 minutes mins
    Total Time10 minutes mins
    Course: Accompaniment
    Cuisine: Indian
    Keyword: Bachelor's Cooking, Basic
    Servings: 3 People
    Calories: 84kcal
    Author: Muktha H S

    Ingredients

    • ½ cup onions chopped
    • ¼ cup cucumber chopped
    • 1 cup thick curds
    • ½ teaspoon chaat masala powder
    • ¼ teaspoon sugar
    • ¼ teaspoon cumin powder
    • ¼ teaspoon red chilli powder
    • ½ green chilli chopped optional
    • 2 tablespoon fresh coriander leaves
    • Salt to taste

    Instructions

    • Into a mixing bowl, add chilled curds and whisk well until smooth.
    • Add chaat masala powder, red chilli powder , cumin powder, salt , sugar , and give a stir.
    • Now add finely chopped onions, cucumber , green chillies ( if adding ) , coriander leaves , mix well everything.
    • Serve onion raita with Pulao’s or Biryani.

    Video

    Notes

    • Ad salt just before serving , as salt with onions releases water and raita becomes thin.
    • Left overs are not recommended to store as sugar,  salt and curds reacts soon and tastes sours. It starts to ferment when yogurt is mixed with salt and sugar.

    Nutrition

    Calories: 84kcal

    FAQ's

    Can I store the leftovers?

    No , I don't recommend . When salt , sugar and curds comes in contact , it starts to turn sour fast. As this raita tastes bests when served fresh .

    You may also like

    • South-Indian-Curd_Rice-with-fruits
      Curd Rice Recipe
    • Ragi_ambli_recipe
      Salted Ragi Ambli
    • mooli-raita-radish-raita-with-chilli-powder
      Mooli Raita Recipe
    • beetroot-pachadi-recipe
      Beetroot Pachadi Recipe| how to make Beetroot Pachadi

    Strawberry Banana Overnight Oats

    Published : July 5, 2022 | Last Update on October 10, 2024 By Muktha

    strawberry-banana-overnight-oats-with-drizzled-honey

    Strawberry banana Overnight Oats is a no cook easy , breakfast recipe made with rolled oats, banana, yogurt and chilled milk . Everything is mixed and soaked overnight ( or minumun 4 hrs) and serve ; top with fresh fruits, nuts and seeds for extra zing and nutritional punch.

    Prep time is less than 5 minutes and next day all you need is to grab your bowl and enjoy your breakfast on the go !

    If you love to eat oats just like me then you should check this One oats many taste ( 3 flavours) , Mango Overnight Oats, Peanut Butter Oats smoothie , Papaya Oat Smoothie , Strawberry Oat smoothie and Green Peas Oat Pancake .

    strawberry-oats-with-honey
    [feast_advanced_jump_to]

    About this recipe

    Basically Overnight Oats is made with basic ingredients like rolled oats and are soaked overnight (or for 6-8 hours) in a milk of your choice ( dairy or non dairy ) , yogurt, and fruits of choice to flavour up.

    Strawberry Overnight Oats is full of fresh flavours along with banana gives a power boost to kick start your day.

    What makes this overnight oats more like a dessert is , addition of banana ! Yes, it adds a creaminess to the dish making you to ask for more.

    It's delicious , nutritious ,quick and simple what more one can ask in a breakfast. It gives everything from protein , fibre, carbs , minerals and vitamins.

    Oh Yes , It's my superfood breafast bowl !

    With overnight oats , there is nothing much of recipe or steps involved but trust me, right flavours and the measurement really matters. If you don't take right meaurements then you may end up with either soggy oats or thick lumpy oats !

    I recommend you to follow the recipe card measurements for doing it right!

    Ingredients

    strawberry-banana-overnight-oatts-ingredients

    Oats – Overnight oats are best when made using rolled oats . Though instant oats tastes good too , it becomes too soggy . Whereas steel cut oats are not recommended as it becomes too hard to digest.

    Yogurt – I use plain , homemade yogurt to soak the oats . You can use either full fat yogurt or skim yogurt in this recipe. Also plain greek yogurt , works fine here. For vegan version , replace dairy yogurt with any plant-based yogurt.

    Milk – I use whole milk to soak the oats as it makes the dish creamy and rich. You can definitely use skim milk to make it low calories.

    For vegan version , replace dairy milk with any plant-based milk like coconut milk , almond milk or oat milk.

    Strawberries – Choose any sweet , ripe and juicy strawberries to make this overnight oats. You can either use fresh or frozen strawberries to make this tasty overnght oats recipe.

    Banana- Robusta Banana works best here , along with adding creaminess it adds flavours that get along with strawberries . You can add small banana (Indian Elachi Banan variety ) too in this recipe .

    Others – You will also need chia seeds, honey, and vanilla extract. Vegan's can replace honey with maple syrup or agave nectar.

    Toppings - I add slivered almonds with fresh strawberries and banana . Feel free to add any seeds and nuts of your choice to make your super healthy breakfast bowl.

    Top Tip

    To make it more healthy , you can add some extra protein to your strawberry oats , stir in a scoop of protein powder just before serving and top it with your favourite toppings.

    Watch Video

    How to make Strawberry Banana Overnight Oats

    Into a mason jar, add rolled oats, chia seeds , milk , yogurt and give a stir.

    mix rolled oats with chia seeds and milk

    Add honey and vanilla extract. Add freshly chopped strawberries and banana .

    add chopped banana and strawberries

    Give a stir,

    stir well

    cover lid and refrigerate overnight or for 6 to 8 hours.

    cover and refreigerate

    Next day, just before serving stir well and add fresh fruits, nuts of your choice

    stir well just before serving

    Drizzle honey and serve chilled with any of your favourite toppings.

    top with fruits and drizzle honey

    Recipe

    strawberry-banana-overnight-oats
    5 from 1 vote

    Strawberry Banana Overnight Oats Recipe

    Strawberry Banana Overnight Oats is a no cook easy breakfast recipe made with rolled oats, banana, yogurt and milk . It's dessert like breakfast , super easy to make and nutritious .
    Prep Time5 minutes mins
    Cook Time0 minutes mins
    Total Time5 minutes mins
    Course: Breakfast
    Cuisine: Fusion, World
    Keyword: Bachelor's Cooking, Breakfast_Ideas, Healthy, Quick & Easy, Weight Loss
    Servings: 2 people
    Calories: 298kcal
    Author: Muktha H S

    Ingredients

    • ⅓ cup Rolled Oats
    • 1 cup milk
    • ¼ cup yogurt
    • ½ cup chopped strawberries
    • ¼ cup chopped banana
    • 1.5 teaspoon chia seeds
    • 1 tablespoon honey
    • 2 drops of vanilla extract

    For toppings

    • Chopped Strawberries
    • Chopped Banana
    • Sliced Almonds
    • Honey to drizzle

    Instructions

    • Into a mason jar, add rolled oats, chia seeds , milk , yogurt , honey and vanilla extract.
    • Mix well everything.
    • Add freshly chopped strawberries and banana .
    • Give a stir, cover lid and refrigerate overnight or for 6 to 8 hours.
    • Next day, just before serving stir well .
    • Add fresh fruits, nuts of your choice and serve.

    Video

    Nutrition

    Calories: 298kcal

    FAQ's

    How can I serve make my overnight oats hotter / warm?

    You can warm overnight oats in microwave for 1-2 minutes . On stove top , cook on a low heat intil it turns just warm. Don't over cook as it may split.

    Can I give this to kids?

    This dish is a great option for school going kids and babbies too ! The oatmeal is soft, sweet , tasty and easy to eat with loaded nutrition. If you plan to give for a baby , then don't top it with nuts are seeds . You may need to skip chia oats , if giving to babies. Note : Please check with your doctor before introducing new foods to your baby.

    You may also like

    • strawberry chia pudding
      Strawberry Chia Pudding
    • oat-milk
      How to make Oat milk
    • Oats Recipe
      One Oats Many Tastes | Oats Recipes
    • Oats-omelette-breakfast
      Spicy Masala Oats Omelette Recipe

    Mooli Raita Recipe

    Published : June 30, 2022 | Last Update on September 21, 2022 By Muktha

    mooli-raita-radish-raita-with-chilli-powder

    Mooli Raita (Radish Raita ) is a healthy , simple and tasty yogurt based accompaniment that goes well with any Indian meal. It hardly needs 10 minutes to put up this dish .

    Raita is a part of Indian meal ; be it a pulao , paratha or roti , raita is most loved and comforting accompaniment .

    Few of my favourite raita includes Onion raita , Cucumber carrot raita , Boondi Raita Mint Raita and Aloo Raita.

    mooli-raita-with-dash-of-chilli-powder
    [feast_advanced_jump_to]

    About this recipe

    Mooli Raita aka Radish Raita is a spiced yogurt with radish. It is made using fresh yogurt, radish , spices and herbs.

    Though radishes are seasonal in winters ; one can find in market throughout the year . As mooli raita is cooling in nature , you can make this in summer or anytime as it comes together in less than 10 minutes.

    Serve fresh mooli raita as a side dish with any Indian meals . I prefer to serve this mooli ka raita with Vegetable bath , Tomato bath or with any kind of Indian flat breads.

    This simple radish raita has many health benefits too. Radishes are rich in minerals like calcium and prosperous , Vitamin C and antioxidants. They are also rich in natural fibers and are hence very effective to overcome constipation . Also , radish juice and radish salad are effectively used in treatment of piles and constipation.

    Ingredients

    Radish (Mooli - Mullangi) – Buy fresh radishes for the best taste.

    Yogurt – I always prefer to use homemade curds as it will be creamy , thick and has natural probiotics. You can use any thick plain yogurt or Greek yogurt to make this raita.

    Others- Flavor radish raita with sugar, cumin powder, green chilies, and cilantro (fresh coriander leaves). Using sugar balances the peppery taste of radish . Adjust green chillies as per your taste.

    Optional add-on's

    Whenever I serve raita with any kind of pulao , I like to keep it simple . Hence I didn't use tempering, If serving with any kind of flat breads , I highly recommend to give tadka as it elevates the taste.

    Tempering - You can give basic tempering in vegetable oil with mustard seeds, cumin seeds and dry red chillies.

    Watch Video

    How to make mooli raita

    Preparations

    Peel radish skin and rinse well. Grate the radish using the small hole side of a grater . We will need 1 cup of grated radish to make this raita.

    Chop the green chilies , cilantro and set aside.

    To make Raita

    Using a wired whisker, whisk 1.5 cup of chilled plain yogurt in a mixing bowl until smooth and creamy.

    whick plain yogurt

    Add sugar, salt , cumin powder and green chillies,

    add spices into curds

    Add grated radish and chopped coriander leaves to the bowl.

    add coriander leaves and mooli

    Mix well such that raita is thick and still retains a flowing consistency. Tip – If the raita is too thick, thin it down with some chilled water.

    mix well everything

    Serve immediately with a dash of chilli powder and chopped cilantro.

    just before serving dash of chilli powder

    Optional :

     If you want to temper, heat 1 tablespoon of oil in a small seasoning pan (tadka pan) , add mustard seeds, cumin seeds, curry leaves, asafoetida and dry red chilli.

    Finally , pour over the prepared raita and serve immediately.

    Recipe

    mooli-raita-radish-raita-with-chilli-powder
    5 from 1 vote

    Mooli Raita Recipe

    Mooli Raita (Radish Raita ) is a healthy , simple and tasty yogurt based accompaniment that goes well with any Indian meal. It hardly needs 10 minutes to put up this dish .
    Prep Time10 minutes mins
    Cook Time0 minutes mins
    Total Time10 minutes mins
    Course: Accompaniment
    Cuisine: Indian
    Keyword: Bachelor's Cooking, Basic
    Servings: 3 People
    Calories: 78kcal
    Author: Muktha H S

    Ingredients

    • 1 cup grated radish
    • 1.5 cups chilled plain yogurt
    • ½ teaspoon cumin powder
    • ½ teaspoon green chilli chopped
    • ¼ teaspoon sugar
    • 2 tablespoon chopped cilantro
    • salt to taste
    • 1 dash red chilli powder

    Instructions

    Preparations

    • Peel radish skin and rinse well. Grate the radish using the small hole side of a grater . We will need 1 cup of grated radish to make this raita.
    • Chop the green chilies , cilantro and set aside.

    To make Raita

    • Using a wired whisker, whisk 1.5 cup of chilled plain yogurt in a mixing bowl until smooth and creamy.
    • Add sugar, salt , cumin powder, green chillies, grated radish and chopped coriander leaves to the bowl
    • Mix well such that raita is thick and still retains a flowing consistency.Tip – If the raita is too thick, thin it down with some chilled water.
    • Serve immediately with a dash of chilli powder and chopped cilantro.

    Optional

    • If you want to temper, heat 1 tablespoon of oil in a small seasoning pan (tadka pan) , add mustard seeds, cumin seeds, curry leaves, asafoetida and dry red chilli.
    • Pour over the prepared raita and serve immediately.

    Video

    Notes

    • If the raita is too thick, thin it down with some chilled water.

    Nutrition

    Calories: 78kcal

    You may also like

    • South-Indian-Curd_Rice-with-fruits
      Curd Rice Recipe
    • majjige-huli
      Sorekai Majjige Huli
    • beetroot-pachadi-recipe
      Beetroot Pachadi Recipe| how to make Beetroot Pachadi
    • Ragi_ambli_recipe
      Salted Ragi Ambli

    Spicy Chicken Wings

    Published : June 29, 2022 | Last Update on September 15, 2022 By Muktha

    sweet-and-spicy-chicken-wings-recipe

    Spicy chicken wings recipe is a flavourful crispy chicken tossed in a zesty garlic hot sauce. These chicken wings appetizers are absolute crowd pleaser with spicy and sticky hot sauce. From prep to finish , you need just 30 minutes all together to put up this madly loved dish.

    This may sound crazy but trust me without any oil you can bake this flavourful super crispy wings ! Tossing these crispy wings in a spicy hot garlic sauce makes it just irrestiable .

    Be it a weekend dinner or holiday gatherings , sweet and spicy sticky chicken wings are superhit and can be anyone's favourite in a minute !

    Love chicken ? Check these party appetizers Chicken Lollipop , Chicken Nuggets , Southern Fried Chicken , Chicken Tikka , Tandoori Chicken and Non -fried Chilli Chicken

    spicy-chicken-wings
    [feast_advanced_jump_to]

    About this recipe

    My verison spicy chicken wings are tossed in Asian flavour sauce . It is a delicious crispy chicken tossed in a spicy sriracha hot chilli garlic sauce.

    To make this recipe , chicken wings are generously rubbed with favorite spices dusted in flour and baked until extra crisp . The magical ingredient is baking powder ( aluminium free baking powder) which makes chicken wings super crisp.

    Bake chicken at 220 degrees C ( about 425 F ) for 25 minutes , halfway flip and continue to cook until crisp and golden brown on both sides. Then toss in hot chilli sauce on stove top on high flame .

    Slightly sweet , hot sauce coats all over the crispy chicken and finally turns into a sticky finger licking spicy hot wings.

    You must try this recipe as it is

    • Super Tasty
    • Scalable
    • Simple
    • Crowd Pleaser

    Ingredients

    To make spicy chicken in hot sauce , you need spices to flavour chicken and few assorted sauces to make a zesty sauce.

    Crispy chicken wings ingredients@palates-desire

    Chicken Wings - Drumettes and Wingettes (or whole chicken wings; each wing separated at the joint into 2 pieces) .

    Flour - You can choose either APF or corn flour . I have used cornflour but you can choose whichever is available. If you don't want to use any flour , you can totally skip without offence.

    Baking Powder ( Aluminium Free ) - Oh Yes ! It gives extra crisp chicken . A tip from Jamie Oliver , don't hesitate to try. It is baking powder and NOT Baking Soda. You can check my crispy fried chicken recipe too !

    Spices - I use garlic powder , smoked paprika , onion powder , salt and pepper to load with added flavours. You can choose to use any flavours you wish.

    To make my version of spicy hot garlic sauce , you'll need

    Spicy-sauce-ingredeints@palates-desire

    Minced Garlic - Is a must ingredient to bring on flavours in this sauce.

    Minced Ginger , optional

    Green chillies - You red or green , hot chiies

    Soy sauce - You can use either sweet soya sauce or light soya sauce.

    White Vinegar - White vinegar or rice vinegar

    Honey - For sweetness , I use Honey . You can choose to use either honey or brown sugar.

    Sirracha Hot Chilli Garlic Sauce - This is what , I have used. But you can use any spicy Hot chilli sauce like Frank’s Original Red Hot Sauce .

    Butter - to give a nice suacy glaze. For non dairy , you can use sesame oil.

    Watch Video

    How to make spicy chicken wings

    For Crispy Chicken

    Preheat oven to 220 deg Celius ( 425 deg F)

    Pat dry each wing on a kitchen towel.

    wipe-chicken-wings-with-paper-towel

    In a mixing bowl , add flour, onion powder, garlic powder, salt , pepper powder, baking powder , paprika powder and mix well everything.

    spices-and-flour

    Nicely mix chicken wings with spiced flour and dust off any extra flour.

    mixing=chicken-wings-with-flour

    Line baking pan with parchment paper , grease or use baking spray.

    ready-to-bake-chicken-wings

    Arrange chicken wings and bake at 220 deg Celsius ( 425 deg F) for 25 minutes.

    baking temperature

    Half way through (around 15 minutes)  , flip chicken to other side and bake until crisp and golden brown on both sides.

    crispy-baked-chicken-wings

    For Sauce

    In a frying pan , heat 2 tablespoon of butter on a stove top.

    in-butter-ginger-garlic-greenchilli

    Add minced garlic, ginger ,  green chillies and saute for a 30-60 seconds.

    sauteing-garlic-ginger-in-butter

    Add hot Sriracha Hot sauce , soya sauce , vinegar , honey and give a quick stir.

    making-sauce

    It comes to bubble and slightly thickens.

    sauce-consistency

    While serving

    When it starts to bubble , finally add crispy chicken wings and toss on a high heat for sauce to nicely coat over the chicken.

    tossing-baked-wings-in-hot-sauce

    Turn off the stove , garnish with tossed sesame seeds, chopped cilantro and onion greens.

    final-garnis-tossed-sesame-seeds

    Serve hot with any of your favourite sauce.

    Recipe

    sweet-and-spicy-chicken-wings-recipe
    5 from 1 vote

    Spicy Chicken Wings Recipe

    Spicy chicken wings recipe is a flavourful crispy chicken tossed in a zesty garlic hot sauce. These chicken wings appetizers are absolute crowd pleaser with spicy and sticky hot sauce.
    Prep Time5 minutes mins
    Cook Time25 minutes mins
    Total Time30 minutes mins
    Course: Appetizer
    Cuisine: World
    Keyword: Baking, Chicken
    Servings: 3 People
    Calories: 387kcal
    Author: Muktha H S

    Ingredients

    For Crispy Chicken

    • 500 grams 1 lbs chicken wing nibbles -- Drumettes and Wingettes or whole chicken wings; each wing separated at the joint into 2 pieces
    • 1 teaspoon Onion Powder
    • 1 teaspoon Garlic Powder
    • 1 teaspoon Smoked Paprika powder
    • ½ teaspoon Pepper powder
    • 1 teaspoon Salt
    • 2 tablespoon Cornflour or APF
    • 1 teaspoon Baking powder Aluminium free
    • Melted butter for greasing

    For Spicy Hot Garlic sauce

    • 2 tablespoon Butter
    • 1 tablespoon garlic minced
    • 1 tablespoon ginger minced
    • 1 no chilli , finely chopped
    • 4 tablespoon Hot Sirracha Chilli Garlic Sauce
    • 1 tablespoon Light Soya Sauce
    • 1.5 tablespoon Honey or Brown sugar
    • 1 teaspoon rice vinegar

    For garnish

    • 1 tablespoon Tossed sesame seeds optional
    • Onion greens or cilantro optional

    Instructions

    For Crispy Chicken

    • Preheat oven to 220 deg Celsius ( 425 deg F)
    • Pat dry each wing on a kitchen towel.
    • In a mixing bowl , add flour, onion powder, garlic powder, salt , pepper powder, baking powder , paprika powder and mix well everything.
    • Nicely mix chicken wings with spiced flour and dust off any extra flour.
    • Line baking pan with parchment paper , grease or use baking spray.
    • Arrange chicken wings and bake at 220 deg Celsius ( 425 deg F) for 25 minutes.
    • Hal way through (around 15 minutes) , flip chicken to other side and bake until crisp and golden brown on both sides.

    For Sauce

    • In a frying pan , heat 2 tablespoon of butter on a stove top.
    • Add minced garlic, ginger , green chillies and saute for a 30-60 seconds.
    • Add hot Sriracha Hot sauce , soya sauce , vinegar , honey and give a quick stir. Let it come to bubble

    While serving

    • When sauce is ready , Add baked crispy chicken wings and toss on a high heat for sauce to nicely coat over the chicken.
    • Turn off the stove , garnish with tossed sesame seeds, chopped cilantro and onion greens.
    • Serve hot with any of your favourite sauce.

    Video

    Nutrition

    Calories: 387kcal

    FAQ's

    Can I deep fry instead of baking ?

    Yes , of course . You can deep fry or air fry chicken until crispy.

    Instead of wings can I use boneless chicken ?

    Yes , you can use.

    Can I make it ahead ?

    You can bake chicken ahead and keep in refrigerator. Just before serving broil / grill for 4 minutes and then toss in spicy sauce.

    You may also like

    • chicken-pulao
      Chicken Pulao Recipe
    • chicken-sukka-recipe
      Chicken Sukka - Mangalore Style
    • chicken-seekh
      Seekh Kebab
    • pepper-chicken-with-curry-leaves
      Pepper Chicken with Curry Leaves

    Mango Overnight Oats

    Published : June 22, 2022 | Last Update on October 10, 2024 By Muktha

    mango-overnight-oats

    Mango Overnight Oats is a no cook easy , breakfast recipe made with rolled oats, mangoes, coconut, yogurt and milk . Everything is mixed and soaked overnight ( or minumun 4 hrs) and serve ; top with fresh fruits, nuts and seeds for extra zing and nutritional punch.

    Prep time is less than 5 minutes and next day all you need is to grab your bowl and enjoy your breakfast on the go !

    If you love to eat oats just like me then you should check this One oats many taste ( 3 flavours) , Strawberry Overnight Oats , Peanut Butter Oats smoothie , Papaya Oat Smoothie , Strawberry Oat smoothie and Green Peas Oat Pancake .

    mango-oats-with-nuts-seeds-topped
    [feast_advanced_jump_to]

    About this recipe

    Basically Overnight Oats is made with basic ingredients like rolled oats and are soaked overnight (or for 6-8 hours) in a milk of your choice ( dairy or non dairy ) , yogurt, and fruits of choice to flavour up.

    Mango Overnight Oats is full of tropical flavours with coconut and mangoes , a heavenly combination to taste .

    What makes this overnight oats more like a dessert is , addition of mango puree ! Yes, it adds a creaminess to the dish making you to ask for more.

    It's delicious , nutritious ,quick and simple what more one can ask in a breakfast. It gives everything from protein , fibre, carbs , minerals and vitamins.

    Oh Yes , It's my superfood breafast bowl !

    With overnight oats , there is nothing much of recipe or steps involved but trust me, right flavours and the measurement really matters. If you don't take right meaurements then you may end up with either soggy oats or thick lumpy oats !

    I recommend you to follow the recipe card measurements for doing it right!

    Ingredients

    mango-oats-ingredients

    Oats – Overnight oats are best when made using rolled oats . Though instant oats tastes good too , it becomes too soggy . Whereas steel cut oats are not recommended as it becomes too hard to digest.

    Yogurt – I use plain , homemade yogurt to soak the oats . You can use either full fat yogurt or skim yogurt in this recipe. Also plain greek yogurt , works fine here. For vegan version , replace dairy yogurt with any plant-based yogurt.

    Milk – I use whole milk to soak the oats as it makes the dish creamy and rich. You can definitely use skim milk to make it low calories.

    For vegan version , replace dairy milk with any plant-based milk like coconut milk , almond milk or oat milk.

    Mangoes – Choose any sweet variety of ripe and juicy mangoes to make this overnight oats. I have used Indian variety , Kesar to make this recipe. You can use Alphonso or any other variety which is sweet to taste with less fibres. You will need both mango puree and mango cubes to make this recipe.

    Coconut - Fresh grated coconut adds lots of flavour to this recipe , making it truly tropical . Though coconut adds lot of fresh flavour , if not available just skip it or as an alternative use dessicated coconut .

    Others – You will also need chia seeds, honey, and vanilla extract. Vegan's can replace honey with maple syrup or agave nectar.

    Toppings - I add some raisins , chia , pimpkin seeds, chopped almonds and pistachios with some fresh mangoes and coconut. Feel free to add any seeds and nuts of your choice to make your super healthy breakfast bowl.

    Top Tip

    To make it more healthy , you can add some extra protein to your mango oats , stir in a scoop of protein powder just before serving and top it with your favourite toppings.

    Watch Video

    How to make Mango Overnight Oats

    Into a blender , add 1 cup mangoes ( or ½ cup mango puree ), milk , curds and vanilla extract .

    blending mango cubes , milk and yogurt

    Blend everything together to smooth puree.

    mango smoothie

    Into a mixing bowl , add rolled oats , chia seeds

    rolled oats and chia seeds

    Stir in mango smoothie

    mix oats with mango milkshake

    Add ½ cup chopped mangoes , fresh grated coconut, honey to taste , mix well everything.

    mix mango cubes and coconut

    Cover and set in refrigerate overnight ( or for minimum 4hrs ) .

    oats covered and set in refrigerator

    Next day , mix well everything.

    mixing overnight oats next day before serving

    Top it with few mango cubes, grated coconut, chia seeds, pistachios, almonds , raisins and melon seeds.

    toppings on overnight oats

    Drizzle honey and serve chilled with any of your favourite toppings.

    Recipe

    mango-overnight-oats
    5 from 1 vote

    Mango Overnight Oats Recipe

    Mango Overnight Oats is a no cook easy breakfast recipe made with rolled oats, mangoes, coconut, yogurt and milk . It's dessert like breakfast , super easy to make and nutritious .
    Prep Time5 minutes mins
    Cook Time0 minutes mins
    Total Time5 minutes mins
    Course: Breakfast
    Cuisine: Fusion, World
    Keyword: Bachelor's Cooking, Breakfast_Ideas, Healthy, Quick & Easy, Weight Loss
    Servings: 2 people
    Calories: 279kcal
    Author: Muktha H S

    Ingredients

    • ⅓ cup Rolled Oats
    • ½ cup milk dairy or non-dairy
    • ⅓ cup yogurt
    • 1 cup Chopped Mangoes to get ½ cup puree
    • ½ cup Mango cubes
    • 4 tablespoon Fresh grated coconut
    • 1.5 teaspoon chia seeds
    • 1 tablespoon honey

    For toppings

    • ¼ cup chopped mangoes
    • 1 tablespoon grated coconut
    • 2-3 sliced almonds
    • ½ tablespoon of chopped pistachios
    • 1 tablespoon roasted pumpkin seeds
    • Honey to drizzle as required

    Instructions

    • Into a blender , add 1 cup mangoes ( or ½ cup mango puree ), milk , curds and vanilla extract .
    • Blend everything together to smooth puree.
    • Into a mixing bowl , add rolled oats , chia seeds and mango puree, stir everything.
    • Add ½ cup chopped mangoes , fresh grated coconut, honey to taste , mix well everything.
    • Cover and set in refrigerate overnight ( or for minimum 4hrs ) .
    • Next day , top it with few mango cubes, grated coconut, chia seeds, pistachios, almonds , raisins and melon seeds.
    • Drizzle honey and serve chilled with any of your favourite toppings.

    Video

    Nutrition

    Calories: 279kcal

    FAQ's

    How can I serve make my overnight oats hotter / warm?

    You can warm overnight oats in microwave for 1-2 minutes . On stove top , cook on a low heat intil it turns just warm. Don't over cook as it may split.

    Can I give this to kids?

    This dish is a great option for school going kids and babbies too ! The oatmeal is soft, sweet , tasty and easy to eat with loaded nutrition. If you plan to give for a baby , then don't top it with nuts are seeds . You can even mash some bananna and add into oats. You may need to skip chia oats , if giving to babies. Note : Please check with your doctor before introducing new foods to your baby.

    You may also like

    • strawberry chia pudding
      Strawberry Chia Pudding
    • oat-milk
      How to make Oat milk
    • Oats Recipe
      One Oats Many Tastes | Oats Recipes
    • Oats-omelette-breakfast
      Spicy Masala Oats Omelette Recipe

    Rose Syrup and Instant Gulkand

    Published : June 20, 2022 | Last Update on February 15, 2023 By Muktha

    rose-syrup-at-home

    Rose Syrup and instant gulkand is a simple and easy recipe that you can make at home.

    This recipe gets ready under 30 minutes and has a great shelf life too. Both rose syrup and gulkand are extremely beneficial with lot of health benefits.

    Beauty of this recipe is you get both rose syrup and instant gulkand ( rose petals jam) in a go , to use in versatile recipes.

    You can use this syrup recipe to make make Paan Milkshake , Falooda , rose laddo, rooafzha and also in flavoring cakes , beverages, mocktails and more.

    rose-syrup-in-a-glass
    [feast_advanced_jump_to]

    About this recipe

    Homemade rose syrup is not only easy to make but it is very economical . It's lingering aroma is not only soothing but it has a refreshing flavour too.

    In India , it is widely used during summer to beat the heat . Going Desi ( Indian ) , you can use this homemade flavourful rose syrup to make desserts, milkshakes , rose milk , falooda, rose lassi and drizzle over ice creams.

    Also it is a great cordial to add into sparkling water , soda , cocktails and mocktails.

    Roe syrup is mixed with milk to make rose syrup milk ; great way to uplift mood , combat mood swings , fight against acidity , heart burn and keeps the body cool. Where as Gulkand is great for reliving constipation and acidity.

    Ingredients

    To make this flavorful syrup , you only need 3 ingredients ! Rose petals , sugar and water .

    rose-syrup-ingredients

    Rose Petals - Source some organic dry rose petals . You can use either dry rose petal or fresh rose petals. If using fresh ones use 3 cups of fresh rose petals for every 1 cup of dry rose petals used. Choose rose petals that are free from pesticides and diseases. You can pick

    Sugar - is the sweetener , I have used in this syrup. Other sweeteners like agave , monk fruit or maple syrup can be used. But jaggery doesn't tastes great in this syrup. Sugar to dry peatls ratio is 1:1 .

    Water used to make rose syrup is twice the amount of sugar in the recipe.

    Watch Video

    How to make Rose Syrup

    In a sauce pan add rose petals , sugar and water.

    sugar-water-and-rose-petals

    Keep on low heat and stir well to dissolve sugar completely.

    Rose Syrup and Instant Gulkand

    Cover sauce pan with a lid and keep on simmer for 25 -30 minutes.

    Rose Syrup and Instant Gulkand

    After 30 minutes, open lid , stir and continue to cook uncovered until it reaches the slightly thick , syrup consistency.

    how-to-make-rose-syrup

    Turn off heat ,  place saucepan on kitchen counter top and wait for the syrup to turn lukewarm.

    Strain the liquid from the petals and collect in a glass bottle , this liquid is Rose syrup .

    strain

    And collected rose petals in strainer are used to make gulkand .

    To make Gulkand

    Add collected rose petals back into the same sauce pan . To this add ½ cup of rose syrup.

    cooked rose petals

    Mix well everything and cook on a medium heat .

    Continue to cook until rose petals absorbs all the sugar syrup

    Rose Syrup and Instant Gulkand

    At this point , colour changes to deep reddish brown.

    Rose Syrup and Instant Gulkand

    Turn off the stove and keep it aside on counter top until it cools down.

    homemade instant gulkand

    Store in a clean airtight jar and use it as required.

    gulkand-rose-syrup

    Recipe

    rose-syrup-at-home
    5 from 1 vote

    Homemade Rose Syrup and Instant Gulkand Recipe

    Rose Syryp and instant gulkand is made with just 3 ingredients. Flavorful and aromatic rose syrup is a great cordial with milk , mocktails cocktails, sparkling water and to beautify to icecrean and desserts.
    Prep Time0 minutes mins
    Cook Time50 minutes mins
    Total Time50 minutes mins
    Course: DIY
    Cuisine: India
    Keyword: Baking, Cake, DIY
    Servings: 237 ml
    Calories: 33kcal
    Author: Muktha H S

    Ingredients

    • 1 cup Oraganic Dry Rose Petals
    • 1 cup sugar
    • 2 cups water

    Instructions

    • In a sauce pan add rose petals , sugar and water.
    • Keep on low heat and stir well to dissolve sugar completely.
    • Cover sauce pan with a lid and keep on simmer for 25 -30 minutes.
    • After 30 minutes, open lid , stir and continue to cook uncovered until it reaches the slightly thick , syrup consistency.
    • Turn off heat , place saucepan on kitchen counter top and wait for the syrup to turn lukewarm.
    • Strain the liquid from the petals and collect in a glass bottle , this liquid is Rose syrup .
    • And collected rose petals in strainer are used to make gulkand .
    • To make Gulkand
    • Add collected rose petals back into the same sauce pan . To this add ½ cup of rose syrup.
    • Mix well everything and cook on a medium heat .
    • Continue to cook until rose petals absorbs all the sugar syrup
    • At this point , colour changes to deep reddish brown.
    • Turn off the stove and keep it aside on counter top until it cools down.
    • Store in a clean airtight jar and use it as required.

    Video

    Nutrition

    Serving: 15grams | Calories: 33kcal

    FAQ's

    Can I replace sugar with jaggery ?

    No , it's doesn't taste that great ! If you are experimental and want to try new taste , go ahead and let me know too.

    What is the shelf life of Rose Syrup?

    In refrigerator, this rose syrup stays good upto 4 months and Gulkand stays good for 2 months.

    How to use Gulkand to get relief from constipation ?

    Mix ½ tablespoon of Glukand with 1 teaspoon of butter and eat everyday morning on empty stomach. Or Mix 1 tablespoon of gulkand in 1 glass of milk , and drink at bedtime everyday . These 2 are known home remedies to relive constipation and also piles when practiced regularly.

    You may also like

    • strawberry-salsa-recipe
      Strawberry Salsa Dip
    • Virgin Mojito
      Virgin Mojito Recipe with 3 flavours
    • strawberry-lassi-recipe
      Strawberry Lassi Recipe
    • strawberry chia pudding
      Strawberry Chia Pudding

    Bael Sharbat Recipe

    Published : May 6, 2022 | Last Update on September 5, 2022 By Muktha

    bael-sharbat-recipe-with jaggery

    Bael Sharbat recipe is a summer's favourite, thirst quenching wood apple juice mixed with powdered jaggery and flavoured with cardamom and spices . It's simple to make, refreshing and works as a natural cooler in reducing body temperature.

    When Mercury rises high during months of April and May in India ,drinks like sharbat , chaas , lassi becomes everyone's favourite. Out of everything , few of the best juices that helps to lower the body temperature are Variyalli Sharbat , Sattu Sharbat , Shikanji and Aam Panna.

    bael-sharbat-recipe
    [feast_advanced_jump_to]

    About this recipe

    Wood Apple / Bael fruit is a summer fruit and is highly effective against sunstroke and other health issues related to the summer season. 

    Bael Sharbat recipe is a summer's favourite drink. It's simple to make , refreshing and effective against fatigue and loss of energy during summer.

    Wood apple has a peculiar and strong sour taste with a sweetish tone. Depending on how sour the fruit is , you can either incresse or decresse the amount of sweetner in the juice.

    Ideally , jaggery is used as a sweetener to make this juice as it is a well known combination and is effective against fatigue and loss of energy that occurs during summer.

    As wood apple has lots of health benefits , drinking this juice during summer is beneficial.

    Bael sharbat is ,

    • Easy to make
    • Simple
    • Healthy
    • Effective again sun stroke

    What is Wood Apple ?

    Wood Apple is mainly cultivated in India and majorly found in Sri Lanka, Thailand and many other regions of Southern Asia. This fruit is also known as Bael fruit in North India.

    Wood apple has a tough shell with a dark brown pulp inside containing resinous hairy seeds. Bael has a sour, sweet taste with an acidic flavour.

    Benefits of Wood Apple

    Wood apple is a rich source of fibre and vitamin C. Drinking a glass of wood apple juice protects the body against sun stroke ; also helps in digestion and keeps the gut healthy.

    High in anti-oxidant properties and thus helpful against ulcer and piles.

    Wood apple is rich in thiamine and riboflavin, these chemicals are effective in detoxifying the body. And helps to diminish kidney and liver problems.

    High in vitamin C content, the fruit prevents the development bleeding gums (scurvy). Also, the fruit protects the body against all sorts of viral infections and strengths the immune system.

    Ingredients

    To make this summer drink , all you need is bael fruit , water, sweeter and flavouring agents and ome spices if required.

    bael-sharbat-ingredients@palates-desire

    Bael Fruit / Wood Apple - Always choose ripen wood apple to make this juice. Ripen pulp will be soft and dark brown in colour.

    Sweetener - I prefer to use organic powderd jaggery to make this juice .You can also use jaggery cubes . If jaggery is not available then you can use sugar.

    Flavours - Cardamom powder is used to flavour the juice. Adding pinch of Black salt helps to balance out the flavours.

    Add-on's ,optional - You can also add pinch of roasted cumin powder and blackpepper powder , if you like a hint of heat in your drink.

    Water - You can use chilled water as required to thin out the pulp and to help extract juice from pulp.

    Top Tip

    Soaking wood apple pulp in water makes the whole process of extracing juice easier.

    Watch Video

    How to make Bael Sharbat Recipe

    Crack open the hard shell of Wood apple.  If the fruit is fully ripened it looks dark brown in colour.

    crack open hard shell of bael

    Scoop out the pulp of the fruit into a bowl. I got around 1 cup of fruit pulp.

    scoop out the pulp

    Add powdered jaggery or any sweetener of your choice.

    add jaggery to pulp

    Add 1 cup of water to soak the pulp. Let it sit for 20 to 30 minutes.

    Bael Sharbat Recipe

    After 20 minutes, strain and extract the juice completely from pulp.

    extract juice

    Now add in black salt, cardamom powder and add-on’s if any (black pepper powder and cumin powder)

    flavouring-bael-sharbat

    Stir well , add 4 cups of chilled water. Taste and adjust sweetener, if required.

    Bael Sharbat Recipe

    Serve in a tall glass with some ice cubes and mint leaves .

    bael ka sharbat

    Recipe

    bael-sharbat-recipe-with jaggery
    5 from 1 vote

    Bael Sharbat Recipe

    Bael Sharbat is a summer's favourite, thirst quenching wood apple juice mixed with powdered jaggery and flavoured with cardamom and spices .
    Prep Time25 minutes mins
    Cook Time0 minutes mins
    Total Time25 minutes mins
    Course: Drinks
    Cuisine: India
    Keyword: Drinks, Summer
    Servings: 5 People
    Calories: 94kcal
    Author: Muktha H S

    Ingredients

    • 1 wood apple fully ripe , large
    • 5 tablespoon jaggery powdered or as required
    • 5 cups water or as required
    • ½ teaspoon cardamom powder
    • 1-2 pinch black salt

    Optional Add on’s

    • ¼ teaspoon black pepper powder
    • ¼ teaspoon roasted cumin powder

    Instructions

    • Crack open the hard shell of Wood apple. If the fruit is fully ripened it looks dark brown in colour.
    • Scoop out the pulp of the fruit into a bowl. I got around 1 cup of fruit pulp.
    • Add powdered jaggery or any sweetener of your choice.
    • Add 1 cup of water to soak the pulp. Let it sit for 20 to 30 minutes.
    • After 20 minutes, strain and extract the juice completely from pulp.
    • Now add in black salt, cardamom powder and add-on’s if any (black pepper powder and cumin powder)
    • Stir well , add 4 cups of chilled water. Taste and adjust sweetener, if required.
    • Serve in a tall glass with some ice cubes and mint leaves .

    Video

    Notes

    • Soaking wood apple pulp in water makes the whole process of extracing juice easier.

    Nutrition

    Calories: 94kcal

    FAQ's

    Can I store this juice?

    Yeah , you can store the concentrate in refrigerator upto1 week . Dilute it by adding water as required , stir well and serve chilled.

    What is Bel Sharbat made of?

    Bel is a fruit , it is called as wood apple in English. Sharbat is nothing but a juice . Bel sharbat or bel Panna is basically a juice made with pulp of wood apple , mixed with jaggery and flavoured with cardamom powder.

    What is the benefits of bael sharbat?

    Wood apple is a rich source of fibre and vitamin C. Drinking a glass of wood apple juice protects the body against sun stroke ; also helps in digestion and keeps the gut healthy.

    When should I drink bael sharbat?

    Bael Sharbat is generally had during summer when temperature is high , it protects the body against sun stroke.

    You may also like

    • variyalli-sharbat-recipe
      Saunf Sharbat recipe ,how to make variyali sharbat
    • homemade-pomegranate-juice
      How to make Pomegranate Juice
    • aam-panna-summer-drink
      Aam Panna Recipe
    • mango-mastani-recipe
      Mango Mastani Recipe

    Chicken Pulao Recipe

    Published : May 2, 2022 | Last Update on September 29, 2022 By Muktha

    chicken-pulao

    Chicken Pulao is a easy , finger-licking main course dish made with spice marinated chicken , coconut milk and aromatic basmati rice. This dish is perfect for a quick meal as it is a one pan dish and gets ready within 30 minutes .

    I make this easy chicken pulao in a pressure cooker on a stove top . You can make this in your one pot also.

    Serve chicken pulao with any of your favourite raita like onion raita , mint raita or burani raita .

    Here are some of the other Pulao Recipes that I often make for my weekday meal or to pack lunch box . Few of my favourite includes Chana Pulao , Chettinad Mushroom Pulao , Palak Paneer Pulao and Vegetable Bath

    Easy-chicken-pulao-with-raita
    [feast_advanced_jump_to]

    About this recipe

    Chicken Pulao is also called Chicken Tahri , it is a rice meal made using rice and is mildly flavored with Indian spices . You can also similarize this recipe with your favourite chicken biryani but with lighter version and lesser calories.

    If you are short of time and crave to eat Chicken Biryani then this recipe is really for you. From start to end , I make this chicken pulao in just 30 minutes ! Of course with proper planning and multitasking , if you want to know how I do it in such a lesser time, read the full post completely.

    Like Biryani this has no layers instead in this Pulao I have mixed everything in a pressure cooker and cooked together . You can use one-pot also to make this chicken pulao at home easily inder 30 minutes.

    This chicken biryani is ,

    • Delicious
    • Mildly Spiced
    • Cooks in 30 minutes
    • Easy to adapt

    Ingredients

    Chicken Pulao requires very basic ingredients and few whole spices which are easily available in most of Indian Pantry. Incase if any of the listed whole spicies is not available in your kitchen then skip and go ahead , still this dish tastes delicious.

    chicken-pulao-ingredients

    For marination

    Chicken – Try to use bone-in chicken to make this pulao. As bone releases a lot of juices and everything is cooked in these juices , it makes the pulao tastes delicious. If bone-in chicken is not available, you can use boneless chicken as well.

    Spice Powders - Turmeric powder , red chilli powder and garam masala are used here.

    Others – You will also need basic ingredients like ginger paste, garlic paste, salt, lemon juice and oil for marination.

    For making the Pulao:

    Rice – Use the premium quality basmati rice to make this pulao as it tastes great . If not available , you can make this with any less starch variety of rice too. But just be sure to use the correct liquid ratio to to make rice.

    Ghee and Oil – I have cooked this pulao in vegetable oil and ghee. You can also cook it in any flavourless oil or clarified butter completely.

    Liquid – I have used coconut milk and water to cook this pulao . But you can also replace water with chicken stock to cook this pulao. Adding coconut milk will enhance the flavour of this pulao.

    Spices – You will need regular whole spices like bay leaf , cloves, cinnamon, black cardamom, green cardamom , black peppercorn , star anise and fennel seeds. If any of the mentioned ingredient is not available then feel free to skip .

    Fresh Produce – You will need fresh ingredients like onion, tomatoes, green chilli, ginger paste, garlic paste, lime juice, mint, and coriander leaves.

    Coconut Milk - Adding coconut milk into this pulao add subtle flavours and sligthly creamy texture to the pulao.

    Spice Powders - You need to add basic spice powders like red chilli powder and coriander powder . Depending on your taste you can either increasse or decressse the amount used in the recipe.

    Nothing can taste without Salt , add it as per your taste.

    Variations

    Yogurt - You can replace coconut milk with ½ cup of thick curds to make this pulao.

    Saffron -You can also add saffron soaked milk while cooking the rice.

    Chicken Stock - You can also cook rice with chicken stock for more intense and flavourful biryani.

    Grain - You can use either brown rice , millets or quinoa to make this chicken pulao recipe.

    Tips

    Make sure to rinse rice 3-4 times, untill water runs out clear. And then soak the rice for minimum 15 minutes upto 30 minutes before cooking, as it will result in fluffy and separate rice.

    You can also marinate the chicken as long as you want but minimum 15 minutes is must for chicken pieces to be flavourful.

    Use long grain Basmati Rice for the best results, as they turn out be more aromatic.

    Serving Suggestions

    Serve Chicken Pulav pair well with raita's like Onion Raita , Cucumber Raita and Pudina Raita or with any of your favourite salan.

    Wlile serving , you can garnish pulao with crispy Birista, fried cashews, lime wedges, fresh mint and coriander leaves.

    Recipe Notes

    If using coconut milk , then don’t use yogurt and vice versa.

    Rice to Liquid ratio in this recipe is 1: 1.5 , that is for every 1 cup of rice 1.5 cups of liquid is used. As I have taken 2 cups rice , I have used 1 cup coconut milk and 2 cups water.  If you are using  ½ cup yogurt instead of 1 cup coconut milk , then use 2.5 cups of water to make this recipe in cooker.

    Adjust the spice levels as per your taste

    Watch the Video

    How to make Chicken Pulao Recipe

    Marination

    Into a mixing bowl add chicken, red chilli powder, turmeric powder, garam masala powder, salt, , ginger paste, garlic paste, lemon juice and oil .

    chicken marination for pulao

    Mix well everything and set aside for 15-20 minutes.

    chiecken marination

    Preparations

    Whilst start your preparations, rinse rice 3-4 times and soak in water 15 minutes.

    Make other preparations like chopping onions, tomatoes, green chillies, coriander and mint leaves.

    If extracting fresh coconut milk then you can use 1.5 cups of grated fresh coconut and process along with water to get 1 cup of coconut milk. Alternatively, you can use store bought coconut milk too.

    To make Chicken Pulao

    Heat ghee and oil in a pressure cooker or on any heavy bottom pan.

    Once the ghee is hot, add bay leaf, cloves, cinnamon, black cardamom, black peppercorns , star anise , mace few strands and fennel seeds ;  fry for a few seconds.

    fry whole spices

    Now add green chillies , ginger , garlic paste and sliced onions, fry for 2-3 minutes until raw smell goes off.

    Chicken Pulao Recipe

    Add the chicken with marinade and cook for 5-6 minutes on medium heat

    add chicken marinade

    Cook until chicken colour changes from pink to white completely.

    Chicken Pulao Recipe

    Now add in chopped tomatoes , chopped coriander and mint leaves mix well  and cook until tomatoes turns mushy.

    Chicken Pulao Recipe

    By now chicken would have cooked 50%. Now add coconut milk and mix well everything.

    Chicken Pulao Recipe

    Add red chilli powder, coriander powder, salt and mix well.

    Chicken Pulao Recipe

    Now add soaked rice

    Chicken Pulao Recipe

    and mix well everything, let it cook for 1-2 minutes before adding water.

    Chicken Pulao Recipe

    Add 2 cups of hot water and give a stir .

    Chicken Pulao Recipe

    Cover lid and pressure cook on medium heat for 1 whistle. When pressure settles down on its own , remove the lid and fluff the pulao with a fork.

    Chicken Pulao Recipe

    Drizzle some ghee , add lime juice and garnish with coriander leaves.  

    Chicken Pulao Recipe

    Mix well and serve with onion raita or any of your favourite salan.

    Recipe

    chicken-pulao
    5 from 1 vote

    Chicken Pulao Recipe

    Chicken Pulao is a easy , finger-licking main course dish made with spice marinated chicken , coconut milk and aromatic basmati rice. This dish is perfect for a quick meal as it is a one pan dish and gets ready within 30 minutes .
    Prep Time15 minutes mins
    Cook Time30 minutes mins
    Total Time45 minutes mins
    Course: Main Course
    Cuisine: Indian
    Keyword: Bachelor's Cooking, Biryani, Pulao, Rice Varities
    Servings: 8 People
    Calories: 339kcal
    Author: Muktha H S

    Ingredients

    For Marination

    • 750 g Chicken Curry Cut
    • ½ teaspoon turmeric powder
    • ½ teaspoon red chilli powder
    • ½ teaspoon garam masala powder
    • 1 teaspoon salt
    • ½ teaspoon ginger paste
    • ½ teaspoon garlic paste
    • 1 teaspoon lime juice
    • 1 teaspoon cooking oil

    To make Pulao

    • 2 cups Basmati Rice
    • ¼ cup vegetable oil
    • 2 tablespoon clarified butter/ ghee
    • 1 tablespoon Garlic Paste
    • 1 tablespoon Garlic Paste
    • 1 cup Onion Sliced
    • 2 Green Chilli Slit into half
    • ½ cup Tomato Chopped
    • ¼ cup Mint leaves Chopped
    • ¼ cup Coriander leaves Chopped
    • 1 tablespoon Kashmiri Red Chilli Powder
    • 1 tablespoon Coriander Powder
    • 1 cup coconut milk
    • 1 tablespoon Lemon Juice
    • 2.5-3 teaspoon salt or as required
    • 2 cups hot water

    Whole Spices

    • 3-4 Cloves
    • 2 inch Cinnamon Stick
    • 2 Black Cardamom
    • 4 Green Cardamom
    • 2 bay leaves
    • ½ teaspoon black peppercorns
    • 1 teaspoon fennel seeds
    • 1-2 Star anise

    Instructions

    Marination

    • Into a mixing bowl add chicken, red chilli powder, turmeric powder, garam masala powder, salt, , ginger paste, garlic paste, lemon juice and oil .
    • Mix well everything and set aside for 15-20 minutes.

    Preparations

    • Whilst start your preparations, rinse rice 3-4 times and soak in water 15 minutes.
    • Make other preparations like chopping onions, tomatoes, green chillies, coriander and mint leaves.
    • If extracting fresh coconut milk then you can use 1.5 cups of grated fresh coconut and process along with water to get 1 cup of coconut milk. Alternatively, you can use store bought coconut milk too.

    To make Chicken Pulao

    • Heat ghee and oil in a pressure cooker or on any heavy bottom pan.
    • Once the ghee is hot, add bay leaf, cloves, cinnamon, black cardamom, black peppercorns , star anise , mace few strands and fennel seeds ; fry for a few seconds.
    • Now add green chillies , ginger , garlic paste and sliced onions, fry for 2-3 minutes until raw smell goes off.
    • Add the chicken with marinade and cook for 5-6 minutes on medium heat until chicken colour changes from pink to white completely.
    • Now add in chopped tomatoes , chopped coriander and mint leaves mix well and cook until tomatoes turns mushy.
    • By now chicken would have cooked 50%. Now add coconut milk and mix well everything.
    • Add red chilli powder, coriander powder, salt and mix well.
    • Now add soaked rice and mix well everything.
    • Add 2 cups of hot water give a stir , cover lid and pressure cook on medium heat for 1 whistle.
    • When pressure settles down on its own , remove the lid and fluff the pulao with a fork.
    • Drizzle some ghee , add lime juice and garnish with coriander leaves.
    • Mix well and serve with raita or any of your favourite salan.

    Video

    Notes

    • If using coconut milk , then don’t use Yogurt and vice versa.
    • Rice to Liquid ratio in this recipe is 1: 1.5 , that is for every 1 cup of rice 1.5 cups of liquid is used. As I have taken 2 cups rice , I have used 1 cup coconut milk and 2 cups water.  If you are using  ½ cup yogurt instead of 1 cup coconut milk , then use 2.5 cups of water to make this recipe in cooker.
    • Adjust the spice levels as per your taste

    Nutrition

    Calories: 339kcal

    FAQ's

    Difference between Chicken Pulao and Chicken Biryani

    Chicken Pulao is a one-pot meal, which gets ready in just 30 minutes, whereas Chicken Biryani has a lengthy and time-consuming process.

    In Chicken Biryani, there are minimum three layers - Chicken Masala, flavoured Rice, Fried Onions , greens, etc . Chicken Masala and Rice is cooked separately ; assembled into layers and then again cooked together on dum. But in Chicken Pulao, you just put everything together, cook, and your Chicken Pulao is ready.

    Can we use Mutton to make this Pulao?

    Yes, you can use Mutton instead of Chicken to make the Pulao, but the cooking time will differ. Mutton takes longer than Chicken to cook.

    You may also like

    • Donne-Biryani-Recipe
      Donne Biryani Recipe
    • Chicken Tikka , how to make best chicken tikka
      Chicken Tikka , how to make best chicken tikka
    • spicy-ambur-style-chicken-biryani-with -boiled-eggs
      Ambur Star Chicken Biryani Recipe
    • Egg-biryani-recipe@palates-desire
      Egg Biryani Recipe | Anda Biryani

    Curd Rice Recipe

    Published : April 17, 2022 | Last Update on September 14, 2022 By Muktha

    South-Indian-Curd_Rice-with-fruits

    Curd rice is easy to make , tasty south Indian dish where cooked rice is mixed with yogurt, herbs, assorted fruits along with final tempering. Great for summers and best way to use left over rice . It is very easy to make ,light on stomach , tastes delicious and also gets ready under 5 minutes.

    Other South Indian recipes that are considered as best side dish for curd rice are - Bisi Bele Bath , Chitranna , Puliyogare , Mavinkayi Chitranna and Vangibath.

    curd-rice-recipe
    [feast_advanced_jump_to]

    About this recipe

    This recipe is simple and takes less than 5 minutes to make this provided there is left over rice. It is aa humble rice recipe from South India.

    Hailing from South India , this dish is regular in my house as we find it be one of the most comfortable food. It's very easy to make and is very light on stomach.

    To make this curd rice with fruits , cooked rice is mixed with fresh curds , assorted fruits and then basic tempering is done .

    Though India has diversified food culture , this curd rice is common across India and is called by different names . Thayir Sadam in Tamil , Oggrane Mosranna in Kannada , Dahi Bhat in Marathi , Daddojanam in Telugu and Dahi Chawal in Hindi are few diffrent names across India .

    This post shares a temple style curd rice without any onion or garlic in it. Curd rice with pomegranate or/and grapes , is upto one's choice.

    Curd rice is very light on stomach and easy to digest. It cools the body and helps in maintaining internal body temperature hence it's good to consume during summers.

    The probiotic nature of homemade curds helps in the growth good gut bacteria which aids in digestion just like Rice Kanji . Yogurt is rich in antioxidants and helps the body fight against infection.

    Eating curd rice in small portion, everyday for lunch will certainely help to improve gut health and improves digestion.

    You should try thi recipe as it is

    • Quick and easy
    • Healthy
    • Best summer meal
    • Improves digestion

    Ingredients

    To make a best curd rice recipe , 2 main ingredients include yogurt and rice . Rest other ingredients are used to make yogurt rice more tasty .

    curd_rice_recipe

    Yogurt – You can use either homemade curds or store-bought yogurt to make this recipe. Just make sure yogurt is fresh and not sour . Incase if curd is sour, then rice won’t taste good.

    Rice – Leftover rice works well for this recipe. Make sure to add little water and mash such that rice turns mushy. But If you are making fresh rice, make sure to over cook and completely cool down before procedding to the recipe.

    Milk – Adding milk helps to balance out the flavour of curd rice. Once after making curd rice if you feel its too thick then add little milk to thin it out.

    Fresh Coconut - Freshly grated coconut in curd rice tastes real good. This one ingredient makes South Indian curd rice recipe to stand out from other variations .

    Herbs - Green Chillies , Ginger and finely chopped coriander leaves adds freshness and flavours to curd rice . Optional ingredient - You can use ¼ cup grated carrot in your curd rice if you wish.

    For Tempering – For any South Indian style tempering / tadka , all you need is cooking oil , mustard seeds, cumin seeds , curry leaves, chana dal , urad dal and dry red chilies. For cooking oil , you can choose either coconut oil , sesame oil or mustard oil. I personally love mustard oil in this tempering but in authentic recipe it's either sesame oil or coconut oil is used.

    Fruits – Addition of grapes and pomegranates adds sweet and crunch taste , it's highly recommended a it tastes delicious.

    Optional Add on's – Feal free to add cashews , raisins and onions into tempering and pour over the prepared rice.

    Tips

    If you are cooking rice freshly , then over cook rice and make it mushy . If you are using left over rice then make sure to add little water and mash rice well so that it turns mushy.

    Rice should be completely cold before mixing with curds . As it rice tends to absorb water content and becomes thick . So just before serving be sure to thin it out with little milk and curds .

    This recipe tends to get sour when kept at room temperature. Hence adding a little milk while making curd rice will save them from turning sour.

    Yogurt has slight acidic nature and it might cause heartburn to some. If you are prone to acidity, then avoid eating it.

    You can eat it any time of the day, but avoid eating it at night if you are prone to cold and cough.

    If not rice, you can also use Poha, Broken Wheat, Quinoa or Millets to make this dish. With poha , it's called Gopalkala .

    Watch video

    How to do Curd rice

    In a large mixing bowl , take 2 cups of cooked rice. Add ¼ cup water and mash until it turns mushy.

    curd-rice-recipe

    Into this add thick curds (yogurt ) and milk , mix well.

    mix curds and milk

    Now add chopped green chillies, grated ginger , chopped coriander leaves , salt to taste and mix.

    curd-rice

    Add assorted fruits and grated fresh coconut mix well , set aside.

    curd-rice-with-fruits

    For Tempering ( curd rice tadka )

    In a tempering pan / tadka pan , heat oil . Add mustard seeds , when it starts to pops , add cumin seeds , chana dal , urad dal  and fry until dal turns golden in colour.

    Add pinch of hing / asafoetida , curry leaves , dry red chilli .Once curry leaves turn crisps , turn off the stove

    Curd Rice Recipe

    Pour tempering over prepared rice, mix well and serve  .

    Note -If you find curd rice has thickened . thin out by adding a part of milk and curds . Adjust salt as required.

    curd rice tempering

    Recipe

    curd-rice-recipe
    5 from 2 votes

    Curd Rice Recipe

    Curd rice is a tasty south Indian rice recipe made by mixing cooked rice with curds , assorted fruits and finally tempered with mustard seeds and lentils for a crunchy taste.
    Prep Time5 minutes mins
    Cook Time5 minutes mins
    Total Time10 minutes mins
    Course: Main Course
    Cuisine: India, South India
    Keyword: Bachelor's Cooking, Basic, Summer
    Servings: 3 People
    Calories: 310kcal
    Author: Muktha H S

    Ingredients

    • 2 cups cooked rice
    • ¼ cup water
    • 1.5 cups fresh thick curds
    • ½ cup milk
    • 1 green chilli finely chopped
    • ½ teaspoon ginger grated
    • 3 tablespoon fresh coconut grated
    • ½ cup grapes
    • 4 tablespoon pomegranate arils
    • Salt to taste

    For Tempering

    • 1.5 tablespoon cooking oil
    • ½ teaspoon mustard seeds
    • ½ teaspoon cumin seeds
    • 1 tablespoon chana dal
    • ½ tablespoon urad dal
    • 1 pinch Asafoetida
    • 2 sprigs curry leaves
    • 1 dry red chilly

    Instructions

    • In a large mixing bowl , take 2 cups of cooked rice. Add ¼ cup water and mash until it turns mushy.
    • Into this add thick curds , milk , chopped green chillies, grated ginger , chopped coriander leaves , salt to taste and mix well.
    • Add assorted fruits and grated fresh coconut mix well , set aside.

    For tempering

    • In a tempering pan / tadka pan , heat oil . Add mustard seeds , when it starts to pops , add cumin seeds , chana dal , urad dal and fry until dal turns golden in colour.
    • Add pinch of hing / asafoetida , curry leaves , dry red chilli .Once curry leaves turn crisps , turn off the stove
    • Pour tempering over prepared curd rice, mix well and serve . Adjust salt as required.

    Video

    Notes

    • While serving , If you find curd rice has thickened then thin out by adding a part of milk and curds.
    • Adding completely cooled rice and mashing it well with water is important such that rice turns mushy. This helps curd rice to retain its consistency for long time. 

    Nutrition

    Calories: 310kcal

    FAQ's

    How to store left over curd rice ?

    You can store in air tight container in fridge only ( No freezing ). It stays good for a day only. Just before serving , make sure to thin out with a part of milk and curds , adjust salt and serve.

    You may also like

    • majjige-huli
      Sorekai Majjige Huli
    • strawberry-lassi-recipe
      Strawberry Lassi Recipe
    • raw mango rasam
      Raw Mango Rasam Recipe
    • kosambari
      Kosambari Recipe | Hesaru bele kosambari

    Lemon Iced Tea

    Published : April 6, 2022 | Last Update on September 21, 2022 By Muktha

    lemon-iced-tea-recipe

    Lemon Iced Tea is a refreshing summer beverage made by flavoring regular iced black tea with lime juice . Here is how to make it easily at home.

    Here are some more refreshing summer bevrages recipes for you, to beat the heat - Iced Coffee , Saunf Sharbat and Flavoured Virgin Mojito's

    lemon-iced-tea
    [feast_advanced_jump_to]

    About this recipe

    Lemon Iced Tea is a basic usual iced tea where black tea is flavored with lemon juice and mint leaves. This sweet tea makes for a great non-alcoholic summer beverage.

    Making this sweet iced tea at home is super easy and you can have completele control on the amount of sweetness according to your taste preferences.

    You can make the lemon iced tea in advance and just assemble the iced tea when ready to serve. Once assembled, serve it immediately.

    This recipe can be easily doubled or tripled. So make it in a large pitcher and refrigerate it .

    Stays good upto 1 week in refrigerator, its great for summer parties to enjoy on a hot day. You can even freeze the tea and use it later.

    You must try this recipe as it is

    • easy to make
    • simple
    • basic ingredients
    • great for day parties
    • easily scalable

    Ingredients

    iced-tea-ingredients

    Tea leaves – I have used loose black tea leaves (regular chai patti) but you can use green tea too. Loose tea can be easily replaced with tea bags.

    Sugar – You can use any granulated sugar for sweetening , brown or reagular sugar will work fine. Sugar-free substitutes like stevia or honey also works well in this recipe. If using honey make sure to add it once tea cools down completely . Has nutritional value of honey losses if added into very hot water.

    You can replace sugar with honey or maple syrup as well. Just don’t add it while the tea is cooking. Add it when the pan is off heat.

    Lime juice – Increase or decrease the amount as per your liking. You can also use fresh lemon juice in place of lime juice.

    Mint – Make it super refreshing by adding some fresh mint leaves.

    Variations

    This is a basic lemon iced tea recipe , you make variations to this recipe by adding different fruit flavours .

    Fruit flavours like Apple , Mango , Strawberry and any citrus fruits works really well with iced tea .

    You can also add soda or sparkling water to make it more refreshing .

    To make a adult treat , add a splash of vodka, tequila, or white rum .

    Watch Video

    How to make Lemon Iced Tea

    In a saucepan, bring water to boil and switch off the flame.

    how-to-make-iced-tea

    Add 2 tablespoon of black tea powder or 4 tea bags. Also add required amount of sugar. ½ cup to ⅓ cup of sugar will be sufficient. Add ⅓ cup of sugar initially and then adjust if required. If not sugar, you can use any other sweetener as an alternative.

    how-to-make-iced-tea

    Stir well , cover and set aside for 5 minutes for steeping. For mor strong flavour , steep for 8 -10 minutes.

    how-to-make-iced-tea

    After 5 minutes , add lime juice and stir well.

    lemon-iced-tea-recipe

    Strain tea into a jar or pitcher.

    Lemon Iced Tea

    Let it cool down completely then store in a refrigerator.

    To assemble

    Into a glass, add ice cubes as required, lime roundels and pour chilled tea.

    iced-tea

    Garnish with mint leaves and lime rings and serve immediately.

    Recipe

    lemon-iced-tea-recipe
    5 from 2 votes

    Lemon Iced Tea Recipe

    Lemon Iced Tea is a refreshing summer beverage made by flavoring regular iced black tea with lime juice .
    Prep Time5 minutes mins
    Cook Time5 minutes mins
    Total Time10 minutes mins
    Course: Beverage
    Cuisine: World
    Keyword: Bachelor's Cooking, Basic, Summer
    Servings: 5 People
    Calories: 84kcal
    Author: Muktha H S

    Ingredients

    • 1 litre water or 4 cups
    • 2 tablespoon of Tea Powder
    • ½ cup sugar or less as required
    • 3 tablespoon lime juice

    To assemble

    • ice cubes as required
    • 2-3 lime roundels ,slices , as required
    • 2 mint sprigs , optional

    Instructions

    • In a saucepan, bring water to boil and switch off the flame.
    • Add 2 tablespoon of black tea powder or 4 tea bags.
    • Also add required amount of sugar. ½ cup to ⅓ cup of sugar will be sufficient. Add ⅓ cup of sugar initially and then adjust if required. If not sugar, you can use any other sweetener as an alternative.
    • Stir well , cover and set aside for 5 minutes for steeping.
    • After 5 minutes , add lime juice and stir well.
    • Strain tea into a jar or pitcher.
    • Let it cool down completely then store in a refrigerator.

    To assemble

    • Into a glass, add ice cubes as required, lime roundels and pour chilled tea.
    • Garnish with mint leaves and lime rings and serve immediately.

    Video

    Nutrition

    Serving: 200ml | Calories: 84kcal

    FAQ's

    For how many days can we store it?

    Stays good upto a week in refrigerator?

    Can we freeze ?

    Yes, of course ! It's freezer friendly

    Can I use tea bags instead of black tea powder ?

    Yes , for every 1 tablespoon of tea powder you may need to add 2 tea bags

    You may also like

    • strawberry-lassi-recipe
      Strawberry Lassi Recipe
    • Virgin Mojito
      Virgin Mojito Recipe with 3 flavours
    • iced-coffee-recipe
      Easy Iced Coffee Recipe
    • mango-mastani-recipe
      Mango Mastani Recipe

    Strawberry Lassi Recipe

    Published : March 30, 2022 | Last Update on September 21, 2022 By Muktha

    strawberry-lassi-recipe

    Strawberry Lassi is a twist to classic Indian summer drink , sweet Lassi made with yogurt , sugar and flavoured with cardamom or rose water .

    As a fun twist , add strawberry puree to sweet lassi to make this refreshing strawberry lassi in less than 5 minutes.

    Other popular summer classic recipes from different parts of India includes , Aam Panna , Variyali Sharbat , Masala Chaas , Solkadhi and Namkeen Sattu Sharbat.

    strawbeery-lassi-recipe
    [feast_advanced_jump_to]

    About this recipe

    Lassi is a popular Punjabi drink that is made using yogurt . It's known for it's refreshing taste and is most popular during summer to quench thirst.

    Lassi can be made with various flavors , either sweet or salty. Out of all , one of the most loved flavoured lassi is Mango Lassi .

    This drink comes together in just 5 minutes .

    You can serve this along with morning breakfast or as a mid day snacking.

    This straberry lassi is

    • Easy
    • Simple ingredients
    • Quick
    • Refreshing
    • Tasty

    Ingredients

    To make tasty Strawberry Lassi you just need 4 basic ingredients .

    strawberry-lassi-ingredients

    Strawberries – This lassi can be made using fresh or frozen strawberries. If using frozen strawberries, you can directly add them to the blender , There is no need to thaw them.

    If using fresh berries, choose deep red coloured strawberries , as they are juicy and sweet. Do not pick light-colored strawberries, as they are often tangy to taste. Also , don't pick those with black patches and are soft to touch. Firm and red coloured strawberries are juicy and sweet in nature.

    I buy strawberries in season and freeze them to use in my recipes thoughout the year. around the year .

    Curds / Yogurt – Always use plain full-fat curds to make classic lassi or flavoured . Though i have used plain , thick , chilled curds in this recipe as an alternative you can also use strawberry flavored greek yogurt here.

    Milk – Adding milk is optional , as it is used to thin down the lassi . If you have a thick lassi then you can skip using milk.

    Sweetener – For lassi Sugar is the traditional sweetener but you can replace it with sugar free , stevia , honeyor maple syrup.

    Flavouring - Though I alwaays prefer freshly pound cardamom powder , you can use rose water to flavour lassi

    Others – To make the lassi extra creamy, you can replace milk with low fat cream.

    Top Tip

    Once after adding curds into strawberry puree , blend only for 30-60 seconds . Incase , if you continuously blend for few more minutes then you may end up getting butter.

    Watch Video

    How to make Strawberry Lassi

    Into a blender , add hulled strawberries

    Strawberry Lassi Recipe

    blend for few minutes to make smooth puree.

    Strawberry Lassi Recipe

    Add 1.5 cups of chilled plain yogurt, ¼ cup chilled milk, 4 tablespoons sugar, and ½  teaspoon cardamom powder to the blender and blend well for 30 to 60 seconds.

    how to make strawberry lassi

    Pour the smoothie into glasses and serve chilled. If you wish , you can even add ice cubes to each glass to make it more chill.

    strawberry-lassi

    Recipe

    strawberry-lassi-recipe
    5 from 1 vote

    Strawberry Lassi Recipe

    Strawberry Lassi is a refreshing , yogurt based Indian beverage made with strawberries , sweetner and crdamom powder. Gets ready within 5 minutes and is a great way to kick start your day!
    Prep Time5 minutes mins
    Cook Time0 minutes mins
    Total Time5 minutes mins
    Course: Beverage, Drinks
    Cuisine: India
    Keyword: Bachelor's Cooking, Basic, Beverages, Breakfast_Ideas, Drinks
    Servings: 2 People
    Calories: 278kcal
    Author: Muktha H S

    Ingredients

    • 300 grams Strawberry frozen or fresh
    • 1.5 cups Thick Curds chilled
    • ¼ cup Milk chilled
    • 4- 5 tablespoon of sugar as required
    • ½ teaspoon cardamom powder

    Instructions

    • Into a blender , add trimmed and hulled strawberries and blend for few minutes to make smooth puree.
    • Add 1.5 cups of chilled plain yogurt, ¼ cup chilled milk, 4 tablespoons sugar, and ½ teaspoon cardamom powder to the blender and blend well for 30 to 60 seconds.
    • Pour the smoothie into glasses and serve chilled. If you wish , you can even add ice cubes to each glass to make it more chill.

    Video

    Nutrition

    Calories: 278kcal

    FAQ's

    Can I freeze Strawberry Lassi ?

    No , it's not recomemded to freeze lassi , as there are chances of curds getting split when thawed .

    How to store left overs?

    You can store in a refrigerator and use it within a day.

    You may also like

    • strawberry chia pudding
      Strawberry Chia Pudding
    • Virgin Mojito
      Virgin Mojito Recipe with 3 flavours
    • strawberry-salsa-recipe
      Strawberry Salsa Dip
    • mango-lassi
      Mango Lassi Recipe

    Virgin Mojito Recipe with 3 flavours

    Published : March 25, 2022 | Last Update on September 21, 2022 By Muktha

    Virgin Mojito

    Virgin Mojito is a classic non-alcholic refreshing drink made under 5 minutes with lemon juice , fresh mint leaves ,sweetner , club soda and lots of ice. It is simple to make and also great for parties as all age groups can enjoy this drink.

    This post shares a Classic Virgin Mojito recipe along with 2 of my favourite flavours - Blackgrapes Mojito and Strawberry Mojito .

    Summer always calls for refreshing drinks and my top favourite Indian classic includes Aam Panna (Raw Mango Drink ) , Sattu Drink , Mango Lassi and Variyalli Sharbat ( Fennel Seeds Juice)

    Virgin-mojito
    [feast_advanced_jump_to]

    About this recipe

    Virgin Mojito is a non-alcholic version of famous cocktail mojito drink which is an alcohol based drink made of mint leaves, lemon juice and sweetener.

    With this Virgin Mojito recipe the base ingredients - mint leaves and lime juice remain the same but the alcohol gets replaced with a bubbling drink like club soda, sprite , ginger ale or simply sparkling water.

    The combination of tangy lime, mild sweetness and mint fresshness altogether makes this a favourite refreshing drink among many . If you haven't tried this drink yet you are surely missing out.

    This recipe is

    • Quick and Simple
    • Needs basic ingredients
    • Refreshing
    • Scalable

    Let's see how to make this easy and refreshing virgin mojito recipe with different flavours at home. 

    Ingredients

    To make Virgin Mojito recipe , you just need some basic and handful ingredients like lime juice, lemon slices , fresh mint leaves , sweetner ( sugar syrup ) of your choice , lots of ice and any bubbling drink like Club soda, Sprite , Ginger Ale or simply sparkling water.

    As I'm adding variations ( flavours) to the same recipe , for 2 different flavours im using black grapes and strawberries. But you can use any fruit flavours of your choice .

    Virgin mojito recipe ingredients

    Lime - You can either use lime slices or lemon in this recipe, It's taste almost same. Always choose juice lime and thinly slice it , as it makes easy to muddle and helps to release juices easily.

    Fresh mint leaves - Use freshly plucked mint leaves because it adds tons of flovor and freshness to the drink. If it's not fresh you may need to add little more for it to release juice when muddled.

    Sweetner - I have used powdered sugar , but you can make a simple demerara sugar syrup and use in this recipe . You can also use maple syrup or honey as sweetner in this recipe, it's tottally upto one's choice.

    Salt - Though optional , I use just a pinch because it helps to pop out other flavours in the recipe. Here salt acts a taste enhancer.

    Lime Juice - Squeeze fresh lime juice here because it s a game changer in this recipe . Though store brought lemonade and other alternatives can be used , it doesn't give the same refreshing taste as fresh juice.

    Any Bubbling Water - I have used Club Soda but you can use Sprite , Ginger Ale or Sparkling water as required.

    Ice Cubes - Either ice cubes or crushed ice can be used in this recipe.

    For Flavour Variations - I have used 2 different flavours , Strawberry and black grapes here. I prefer using fresh fruits here because, when muddled the juice released along with mint leaves enhances the flavour. If you wish you can use fresh juice direclty also . You can use any other fruits like orange , sweet lime , watermelon, blueberry and mango to make flavoured Virgin Mojito's.

    Watch Video

    How to make Virgin Mojito Recipe

    To make classic virgin mojito - Into a glass , add lime slices , mint leaves , powdered sugar and pinch of salt. Note: If you are making any flavoured virgin mojito , then just replace lime slices by any fruit of your choice.

    Virgin Mojito Recipe with 3 flavours

    Add 1 tablespoon of lime juice to classic virgin mojito glass. For flavoured mojito’s you can use 1 teaspoon of Lime juice or as required.

    Virgin Mojito Recipe with 3 flavours

    Muddle using a muddler or a spoon until lime slices ( or any other fruit ) and mint leaves starts to release juices.

    Virgin Mojito Recipe with 3 flavours

    Fill the glass with required amount of crushed ice or ice cubes.

    Virgin Mojito Recipe with 3 flavours

    Top with club soda or sprite

    Virgin Mojito Recipe with 3 flavours

    Stir well and serve immediately.

    Virgin Mojito Recipe with 3 flavours

    Recipe

    Virgin Mojito
    5 from 2 votes

    Virgin Mojito Recipe with flavors

    Virgin Mojito drink is a refreshing mocktail and perfect to be served for parties. Here is how to make classic Virgin Mojito along with 2 other flavors.
    Prep Time5 minutes mins
    Cook Time0 minutes mins
    Total Time5 minutes mins
    Course: Drinks
    Cuisine: World
    Keyword: Bachelor's Cooking, Party Mocktails, Summer
    Servings: 1 People
    Calories: 48kcal
    Author: Muktha H S

    Ingredients

    • ½ Lime cut into roundels and sliced
    • 4 sprigs Fresh Mint Leaves
    • 1 tablespoon Lime Juice
    • ⅛ teaspoon Salt
    • Crushed Ice as required
    • Soda or Sprite as required
    • For Flavoured variations
    • ¼ cup chopped strawberries or black grapes or any fruit of your choice

    Instructions

    • To make classic virgin mojito, Into a glass , add lime slices , mint leaves , powdered sugar and pinch of salt. Note: If you are making flavoured virgin mojito, then just replace lime slices by any fruit of your choice.
    • Add 1 tablespoon of lime juice to classic virgin mojito glass. For flavoured mojito’s you can use 1 teaspoon of Lime juice or as required.
    • Muddle using a muddler or a spoon until lime slices ( or any other fruit ) and mint leaves starts to release juices.
    • Fill the glass with required amount of crushed ice or ice cubes.
    • Top with club soda or sprite and serve immediately.

    Video

    Notes

    • As a variation , you can also add 1 0r 2 crushed peppermint tablets to classic virgin mojito to make it more refereshing and flavorful.

    Nutrition

    Calories: 48kcal

    FAQ's

    Why did my Mojito turn bitter ?

    Mojito's are meant to drink immediately . if you keep it for long muddled lime and mint juice tends to turn bitter .

    Which are the diffrent flavours that goes well with Mojito's?

    Blueberry , Starwaberry , Oranges , Mango , Pineapple and Watermelon are few well known combinations, that works well with Mojito's.

    You may also like

    • iced-coffee-recipe
      Easy Iced Coffee Recipe
    • mango-mastani-recipe
      Mango Mastani Recipe
    • aam-panna-summer-drink
      Aam Panna Recipe
    • virgin Mary
      Virgin Mary

    Easy Homemade Tahini Recipe

    Published : March 18, 2022 | Last Update on September 21, 2022 By Muktha

    Tahini paste

    Easy homemade Tahini recipe is made with just 2 ingredients , Sesame seeds and oil, nothing else! It's simple to make , gets ready in 5 minutes , super affordable and is better than any store bought .

    easy-homemade-tahini-recipe
    [feast_advanced_jump_to]

    About this recipe

    Tahini also popularly known as tahini or tanina paste is Middle Eastern sauce made from sesame seeds and oil . Tahini paste is staple in Mediterranean cuisine and is used to make tahini sauce for dressing salads , falafel, baba ganoush , hummus and as spread for pita bread and sandwich or even used as dip.

    Going ahead further Tahini sauce is also used in cookies , cake and popsicle recipes.

    Tahini can be made either thick or thin , it's up to you ! No matter how you make, you end with a creamy and luscious result.

    Tahini is a vegan and gluten-free paste , also its a secret ingredient for hummus which makes hummus and baba ganoush , creamy and super delicious .

    This Tahini recipe is

    • simple
    • creamy
    • better than store brought
    • economical
    • scalable

    You can use this tahini to make simple salad dressing as in Chickpea Salad or in my Classic Hummus Recipe

    Ingredients

    Just 2 ingredients , nothing more and super tasty Thaini gets ready under 10 minutes from start to end.

    ingredients to make tahini

    Hulled Sesame seeds - As it the main ingredient to make Thaini , buy a good quality hulled sesame seeds . Depending on the color of the hulled sesame seeds , you get either a light or darker color Tahini . I always use a organic cream coloured sesame seeds instead of white sesame seeds (reffered as Nylon Til in India )

    Olive Oil - A good quality extra virgin olive oil is all you need to make Thaini , creamy with a free flowing consistency. Again you can choose on the amount of olive oil that gets into make Thaini paste depending on the consistency required.

    Optional Ingredient - Salt , I prefer to add pinch of salt , but its optional !

    See recipe card for quantities.

    Top Tip

    Use a good quality hulled white sesame seed to make a best ever easy homemade tahini recipe. Sesame seeds stored in pantry for longer time turns rancid and that would make your tahini sauce taste weird.

    Watch Video

    How to make Tahini at home?

    It's mandatory to roast sesame seeds before grindding to make tahini. If you have brought tossed sesame seeds from stores , even then I recommend you to warm it up before adding into the processor.

    Hint : Roasting / warming sesame seeds helps to release oil .

    roast sesame seeds

    When sesame seeds are still hot, transfer it to a processor. Add salt, if using.

    transfer warm roasted sesamse seeds into blender

    Blend for a minute, open lid and scrape the sides.

    sesame seeds powdered after processing

    Add olive oil

    add olive oil to sesame seeds powder

    and continue to process for 2 minutes until you get smooth pouring consistency tahini.

    Tip : If you want more thin flowing tahini, you can consider to add extra tablespoon of olive oil and process it further.

    tahini paste is ready

    Homemade Tahini paste will be ready and you can store in a clean glass jar .

    Stays good in refrigerator up to 4 weeks.

    Recipe

    Tahini paste
    5 from 1 vote

    Easy Homemade Tahini Recipe

    Easy homemade tahini recipe is made with just 2 ingredients , Sesame seeds and oil, nothing else! Its simple to make , gets ready in 5 minutes , super affordable and is better than any store bought .
    Prep Time3 minutes mins
    Cook Time2 minutes mins
    Total Time5 minutes mins
    Course: Sauces
    Cuisine: Mediterranean
    Keyword: Basic, DIY, Homemade
    Servings: 1 Cup
    Calories: 859kcal
    Author: Muktha H S

    Ingredients

    • 1 cup Sesame Seeds
    • 4 tablespoon Olive oil
    • 1 pinch of salt optional

    Instructions

    • It's mandatory to roast sesame seeds before grinding to make tahini. If you have brought tossed sesame seeds from stores, even then I recommend you to warm it up before adding into the processor.
    • When sesame seeds are still hot, transfer it to a processor. Add salt, if using.
    • Blend for a minute, open lid and scrape the sides.
    • Add olive oil and continue to process for 2 minutes until you get smooth pouring consistency tahini. If you want more thin flowing tahini, you can consider to add extra tablespoon of olive oil and process it further.
    • Tahini paste will be ready and you can store in a clean glass jar . Stays good in refrigerator up to 4 weeks.

    Video

    Notes

    • Roasting / warming sesame seeds helps to release oil .
    • Use a good quality hulled white sesame seed to make a best ever tahini recipe. Sesame seeds stored in pantry for longer time turns rancid and that would make your tahini sauce taste weird.

    Nutrition

    Calories: 859kcal

    Recipes using Tahini Paste

    Tahini is irreplaceable in hummus and baba ganoush.

    But that’s just not all.

    Make Tahini dressing sauce by adding olive oil , lime juice and cumin powder. And Drizzle tahini sauce over roasted vegetables or use as a salad dressing.

    You can use tahini or tahina as spread for pita bread, wraps or mediterrean inspired burgers.

    You may also like

    • homemade-peanut-butter
      Homemade Peanut Butter Recipe
    • rose-syrup-at-home
      Rose Syrup and Instant Gulkand
    • Chai Masala
      Tea Masala Powder | Chai Masala Recipe
    • oat-milk
      How to make Oat milk

    Thandai Kulfi Recipe

    Published : March 15, 2022 | Last Update on September 21, 2022 By Muktha

    Thandai-kulfi

    Thandai Kulfi is a easy and flavourful , Indian frozen dessert made with homemade thandai masala powder. This post shares my version of low calorie Kulfi recipe without any extra cream , so that one can binge on this without loading extra calories.

    Thandai-kulfi

    Kulfi is an Indian frozen dessert made with basic ingredients like milk and sugar with additional flavours.

    In India , Kulfi and summer goes hand in hand , with onset of summer one can see varities of flavorful kulfi's sold by street vendors refered as Kulfiwallahs .

    Mawa Kulfi , Pista Badam Kulfi , Thandai Kulfi , Kesar badam , Paan Kulfi and Mango Kulfi are few among the top picks !

    [feast_advanced_jump_to]

    About this recipe

    Thandai is a Holi festival's favourite cold drink ; kulfi flavored with Thandai gets the name Thandai Kulfi .

    Traditionally , Thandi is made by soaking nuts, seeds and spices overnight . But this instant version Thandai kulfi is made with Thandai Masala Powder .

    To make Thandai Kulfi , soak thandai masala powder in milk , blend to smooth paste and boil along with milk and sugar . Pour prepared mix into kulfi moulds , freeze until set , that's it ! Tasty , creamy and dense dairy based rich kulfi are ready to serve.

    It's a usual practice to add fresh cream to kulfi . But this recipe doesn't use any cream instead milk is boiled and reduced to make kulfi.

    Let see on how to make this No Cream , Low Calorie Thandai Kulfi.

    Ingredients

    To make this kulfi , you need minimal and basic ingredients provided you have Thandai Masala readily available.

    Thandai-kulfi-ingredients

    Thandai Masala Powder - You can either make your own thandai powder at home or use store bought Thandai Powder. If using , Thandai powder from stores then check whether it's sweetned or unsweetned so that sweetner can be adjusted accordingly.

    Whole Milk - Try to use full fat whole milk as it results in rich taste. You can also use half and half to make kulfi , it tastes rich and delciious. Vegans can use almond milk to make Kulfi .

    Sweetner - Sugar is the choice of sweetner to make Kulfi as it tastes best.

    Rose water - Though it's optional, I highly recommend to use rose water for a refreshing , aromatic and flavourful Kulfi. If rose water is not available then you can use 2-3 drops of rose essence.

    Cornflour - this is used as a thickening agent . Alternatively , rice flour can also be used here.

    Top Tip

    Key to make best kulfi is by simmering milk for long time until it turns slightly thick and heavy to stir. This results in a creamy and tasty Thandai kulfi's.

    How to make Thandai Kulfi

    Soak thndai masala powder in a 150 ml of warm milk for 15 to 20 minutes.

    Thandai Kulfi Recipe

    Whilst , in a thick bottom pan boil milk .

    Thandai Kulfi Recipe

    Once milk boils completely add sugar and keep on milk on simmer or low heat.

    Thandai Kulfi Recipe

    While milk is simmering , transfer soaked thandai into a mix jar .Add cornflour into the same mixer jar .

    Thandai Kulfi Recipe

    Blend everything into a fine , smooth paste.

    Thandai Kulfi Recipe

    Now add this thandai masala paste into simmering milk and stir well.

    Thandai Kulfi Recipe

    Keep on low flame and stir continuously until milk starts to thicken and becomes slightly heavy to stir briskly.

    Thandai Kulfi Recipe

    At this point, turn off the stove, add rose water and set the pan aside for milk to cool down completely.

    Thandai Kulfi Recipe

    When milk comes to room temperature, whisk well and pour milk into kulfi moulds.

    Thandai Kulfi Recipe

    Cover tightly with aluminium foil , insert wooden skewers and freeze for 6-8 hours until set.

    Thandai Kulfi Recipe

    To unmould , dip kulfi moulds in warm water ,

    Thandai Kulfi Recipe

    Gently loosen the sides and pull the wooden skewer. Serve immediately.

    Thandai Kulfi Recipe

    Recipe

    Thandai-kulfi
    5 from 3 votes

    Thandai Kulfi

    Thandai Kulfi is a easy and flavourful , Indian frozen dessert made with homemade thandai masala powder.
    Prep Time20 minutes mins
    Cook Time35 minutes mins
    Total Time55 minutes mins
    Course: Dessert
    Cuisine: India
    Keyword: Desserts, frozen dessert, Holi, Party Desserts
    Servings: 12 People
    Calories: 103kcal
    Author: Muktha H S

    Ingredients

    • ½ cup Thandai Masala Powder
    • 1 litre Whole milk divided into 850 ml and 150 ml
    • 6 tablespoon sugar or as required
    • ½ teaspoon rose water or 2 drops of rose essence
    • 1.5 tablespoon Cornflour

    Instructions

    • Soak thndai masala powder in a 150 ml of warm milk for 15 to 20 minutes.
    • Whilst , in a thick bottom pan boil milk .
    • Once milk boils completely add sugar and keep on milk on simmer or low heat.
    • While milk is simmering , transfer soaked thandai into a mix jar .
    • Add cornflour into the same mixer jar and blend everything into a fine , smooth paste.
    • Now add this thandai masala paste into simmering milk and stir well.
    • Keep on low flame and stir continuously until milk starts to thicken and becomes slightly heavy to stir briskly.
    • At this point, turn off the stove and set the pan aside for milk to cool down completely.
    • When milk comes to room temperature . pour milk into kulfi moulds.
    • Cover tightly with aluminium foil , insert wooden skewers and freeze for 6-8 hours until set.
    • To unmould , dip kulfi moulds in warm water , gently loosen the sides and pull the wooden skewer.
    • Serve immediately.

    Video

    Notes

    • Key to make best kulfi is by simmering milk for long time until it turns slightly thick and heavy to stir. This results in a creamy and tasty Thandai kulfi's.
    • Feel free to use Almond Milk , trust me it tastes delcious .
    • You can also insert the wooden skewer after kulfi's are lightly set in freezer for 1 hour , just to ensure that skewers are placed right at centre.

    Nutrition

    Calories: 103kcal

    FAQ'S

    Why did my Kulfi turned out ,icey ?

    You might have done any of these 3 mistakes -

    • Kulfi milk might have not thickened enough or reached the right consistency.
    • Prepared Kulfi milk would have been hot or warm ,while freezing. Make sure to pour milk into moulds , when it comes to room temperature.
    • Chances that you might have not covered the kulfi mould tightly.

    Can I add light / heavy cream in this recipe?

    Yes , of course . Adding cream always yields a rich , creamy and denser kulfi. Also you may not need to simmer milk for long if using cream.

    What's the Vegan Option ?

    Feel free to use Almond Milk , trust me it tastes delcious .

    You may also like

    • sheer-kurma-recipe@palatess-desire
      Sheer Khurma Recipe , How to make sheer khurma
    • aam-panna-summer-drink
      Aam Panna Recipe
    • Khoya Recipe
      Khoya| Homemade Mawa Recipe
    • Pista badam kulfi on plate
      Kulfi | Pista Badam Kulfi Recipe

    Easy Iced Coffee Recipe

    Published : February 23, 2022 | Last Update on September 21, 2022 By Muktha

    iced-coffee-recipe

    Easy Iced Coffee recipe is simple , instant , super affordable and tastes just like the gourmet café coffee-shops, if not better!

    This is one of the best and easy iced coffee recipe that can be made within few minutes at home without any blender. With Sun soaring high , this drink is perfect for any time of the day and is great during summer.

    Just like Hot Chocolate are for cold winter's day , Iced Coffee and Iced Tea are great during summer day.

    Easy-Iced-coffee-recipe
    [feast_advanced_jump_to]

    About Iced Coffee

    Be it a Iced coffee , Cold coffee , Black coffee , Instant coffee , Filter Coffee or Dalgona coffee , for me it's more than just a drink . If I start my with it, undoubtedly it keeps me alert through out the day or it refreshes me after a tried day ! So I claim Coffee is my BFF.

    Though many uses the term Iced Coffee and Cold coffee synonymously, there lies differences between these coffee's . Cold Coffee is thick and creamy , tastes more or less similar to coffee milkshake, it will be chilled and has no Ice added. Where as Iced Coffee are thin , has very less milk or half and half it it and is filled with ice.

    This is one best and easiest Iced coffee you can ever make at home . It is very economical and tastes as good as any Gourmet coffee shops or even better.

    This Iced Coffee is refreshing , flavorful , sweet and delicious. Believe me this Iced Coffee can be your BFF if you are in a tropical country. Apart from caffeine's my other summer favorites include India's most popular Aam Panna , Sattu Drink and Variyali Sharbat .

    You must try this recipe because

    • Simple and Easy
    • Quick
    • Refreshing
    • Delicious
    • Low on calories
    • Easily scalable

    Warning : it can be addictive , more caffeine intake is not good for health.

    Ingredients

    To make this gourmet style beverage , all you need is just basic ingredients that are readily available at kitchen pantry. No fancy equipment or ingredeints needed hence I call this a Easy Iced Coffee

    iced-coffee-ingredients@palates-desire

    Instant coffee - of your choice, I used caffeinated Nescafe, you can use any brand of instant coffee you have. I recommend to use plain instant coffee here , don't go for flavored coffee granules. You can anyways play with flavors while making syrup.

    Sugar - I used granulated brown sugar, you can use refined sugar, coconut sugar, sweetener, stevia or any type of sweetener you want .

    Water - I use water in room temperature to dissolve coffee, sugar granules and any other flavors , if adding to make a flavored coffee syrup.

    Milk -  Any type of milk works for this recipe. My go-to includes cow's milk , half and half, when I don’t mind the extra calories and I want to treat myself. Condensed milk works well too. For non-dairy option choose soy milk or almond milk.

    Flavors - My all time favorite and simple go -to includes few drops of vanilla extract and cinnamon powder. In fact , I'm hooked to this flavors, it adds so much flavor giving that typical Gourmet coffee kick.

    Cold Brewed Coffee - Yes , you read it right . To get the balance and right intense coffee flavors to pop along with instant coffee , brewed coffee is required. Alternatively , coffee decoction used to make filter coffee can also be used here.

    Ice: lots of it. You have to be careful how much you add because you don’t want the ice to water down the drink. Alternatively , if you need intense coffee flavor consider to add brewed coffee iced cubes than water iced cubes. You can also drink this non-alcoholic beverage with less or without ice, then you may need to change the name , I guess.

    Tips and Variations

    • You can add any flavors of choice to this drink. My favorites and easiest one are vanilla extract and salted caramel extract but you can use anything that you wish.
    • If you are using condensed milk then you my not need to add extra milk and need to be careful while adding sugar. A condensed milk already contains , sweet.
    • You can make this beverage vegan, vegetarian or keto-friendly to suit your dietary needs. Just make some smart swaps with the ingredients used and make it as per your diet.

    How to make Easy Iced Coffee Recipe

    To make syrup

    In a mixing jar , take 100 ml of water at room temperature.

    Add granulated sugar , instant coffee, vanilla extract and pinch of cinnamon powder . You can add any flavorings, as per your taste.

    coffee-syrup

    Stir well until sugar dissolves completely.

    coffee-syrup

    To serve

    In a tall glass , fill half of ice cubes. For more intense flavor , you can use brewed coffee ice cubes also.

    Pour cold brewed coffee over the ice.

    how-to-make-iced-coffee

    Now pour milk or half and half into the glass.

    Add milk or cream or half and half , as much as required depending on your taste. I have made a low calorie iced coffee , hence used less

    low-calorie-iced-coffee

    To this pour prepared coffee syrup and fill with some more ice cubes.

    easy-iced- coffee-syrup

    Sip immediately and enjoy your iced coffee .

    Recipe

    iced-coffee-recipe
    5 from 2 votes

    Easy Iced Coffee Recipe

    Easy Iced Coffee recipe is simple , instant , super affordable and tastes just like the gourmet café coffee-shops, if not better!
    Prep Time5 minutes mins
    Total Time5 minutes mins
    Course: Beverage
    Cuisine: American, World
    Keyword: Bachelor's Cooking, Basic, Beverages
    Servings: 2 people
    Calories: 106kcal
    Author: Muktha H S

    Ingredients

    To make Iced Coffee

    • 100 ml cold brewed coffee
    • 100 ml milk or half and half use as required
    • Ice cubes to serve

    For Syrup

    • 100 ml water room temperature
    • 3.5 tablespoon of sugar or as required
    • 1 tablespoon of Instant coffee unflavoured
    • 2-3 drops of Vanilla extract Optional add on’s
    • 1 pinch of Cinnamon powder optional add on’s

    Instructions

    To make syrup

    • In a mixing jar , take 100 ml of water at room temperature.
    • Add granulated sugar , instant coffee, vanilla extract and pinch of cinnamon powder . You can add any flavorings, as per your taste.
    • Stir well until sugar dissolves completely.

    To serve

    • In a tall glass , fill half of ice cubes. For more intense flavor , you can use brewed coffee ice cubes also.
    • Pour cold brewed coffee over the ice.
    • Now pour milk or half and half into the glass. Add milk or cream or half and half , as much as required depending on your taste and calorie , intake.
    • To this pour prepared coffee syrup and fill with some more ice cubes.
    • Sip on immediately and enjoy your drink !

    Video

    Notes

    • I have used less milk in this recipe to make a low calorie Iced Coffee , you can increase the amount of milk or cream or half and half , if you wish.
    • You can add any flavors of choice to this drink. My favorites are vanilla extract and salted caramel extract but you can use anything that you wish.
    • For more intense coffee flavor, use coffee ice cubes instead of water ice cubes.

    Nutrition

    Calories: 106kcal

    You may also like

    • lamingtons
      Lamington - how to make Australian Lamington Cake
    • strawberry chia pudding
      Strawberry Chia Pudding
    • apple cinnamon tea
      Apple Cinnamon Tea
    • eggless chocolate mousse
      Eggless Chocolate Mousse

    Strawberry Salsa Dip

    Published : February 9, 2022 | Last Update on September 21, 2022 By Muktha

    strawberry-salsa-recipe

    Strawberry Salsa is a sweet , spicy , tang and easy to make delicious , flavorful dip. It's loaded with fresh fruity flavors and antioxidants . All you need is just 10 minutes to make this colorful snack or bright party appetizer .

    I love strawberries and it brightens up my day instantly . So I explicitly add into most of my breakfast so that it keeps me active and energized for rest of my day.

    Few of my top favorites breakfast with strawberries include Strawberry Chia Pudding , Strawberry oatmeal smoothie and strawberry overnight oats .

    strawberry-salsa-dip
    [feast_advanced_jump_to]

    About this recipe

    Strawberry Salsa is a flavorful dip that pairs well with chips. It's low on calories and is perfect for evening snack as well as you can serve as a party appetizer.

    To make this flavorful fruit salsa dip I used my powerful Hamilton mixer jar to pulse everything together . But you can use food processor , if doing it in a large batch . Or simply use mini manual food processor to make this salsa in few minutes.

    Though few prefer to finely chop all produce to make salsa , I recommend to process / blitz for just few seconds because it helps all the juices to meld well together and you can serve immediately too.

    I served this salsa with nacho chips but I guess it can really go well on bruschetta and crostini.

    This strawberry salsa dip recipe is

    • Easy to make
    • Minimal ingredients
    • Tasty , flavorful and crowd pleasing
    • Scalable
    • Low on calories
    • Rich in antioxidants

    Ingredients

    Few basic and minimal ingredients are needed to make this tasty fruit salsa .

    strawberry-salsa-ingredients

    Strawberries - Use fresh sweet strawberries to make this salsa. If strawberries are sour then you may need to add some extra sweetener in this recipe . Also you may need to reduce the amount of lime juice. Frozen strawberries doesn't work well in this recipe.

    Onion - Use 1 small size onion which yields roughly about ⅓ cup when chopped . You can use red , white or yellow onion in this recipe.

    Pepper - Use a small jalapeno pepper . If not available you can use any pepper that is easily available. Remove seeds and use in the recipe.

    Cilantro / Coriander - You need to use both stalks and leaves of coriander in this recipe. Stalks in this salsa add really nice flavor so don't skip on this.

    Lime Juice - just few drops are sufficient to add on to a tanginess in this recipe. But be sure to taste strawberry and then increase or decrease on the adding lime juice into your salsa.

    Seasoning - Salt , Sugar and Pepper powder is what I have used here. Instead of sugar you can use any other sweetener like honey or maple syrup .

    Tips

    Don't miss on adding coriander stalks in this recipe as it is a game changer. It highlights and pops all other flavors in salsa .

    Roughly chop produces and then process in a processor or JMG for few seconds only , as it helps to release juices and still retains chunky bits in salsa.

    Before serving , let it sit at least for 10 minutes for flavors to combine together.

    Store leftovers in an airtight container in the fridge for up to 3 days.

    How to make Strawberry Salsa Dip

    Remove stems from strawberries, trim and roughly chop.

    Chop 1 small size onion to get about ⅓ cup of chopped onions. De-seed jalapeno peppers and chop. Take 4-5 talks of coriander and roughly chop.

    chopped fruits

    Into a food processor or mixer jar , add all the chopped produce , salt , sugar and pulse for 3-4 seconds. So that everything combines well releasing juices.

    Strawberry Salsa Dip

    Don’t blend , you need to process for few  seconds only. You should get small chunks of strawberries and onion in salsa.

    Strawberry Salsa Dip

    Transfer into a bowl, add chopped coriander leaves, few drops of lime juice and freshly crackled pepper powder to taste.

    Strawberry Salsa Dip

    Mix well everything, taste and adjust seasoning if required and serve with nacho chips.

    serve-salsa-with-chips

    Recipe

    strawberry-salsa-recipe
    5 from 1 vote

    Strawberry Salsa Dip Recipe

    Strawberry Salsa is a sweet , spicy , tang and easy to make delicious , flavorful dip. It's loaded with fresh fruity flavors and antioxidants .
    Prep Time8 minutes mins
    Cook Time0 minutes mins
    Total Time8 minutes mins
    Course: Appetizer, Snack
    Cuisine: World
    Keyword: Bachelor's Cooking, Party Snacks
    Servings: 4 people
    Calories: 41kcal
    Author: Muktha H S

    Ingredients

    • 350 grams of fresh strawberries
    • 1 small red onion chopped
    • 1 jalapeno pepper deseeded and chopped
    • 4-5 stalks of coriander
    • 1 tablespoon of coriander leaves
    • 1 teaspoon of sugar or to taste
    • ½ teaspoon black pepper powder or to taste
    • Salt to taste
    • Few drops of lime juice
    • Chips for serving

    Instructions

    • Remove stems from strawberries, trim and roughly chop .
    • Chop 1 small size onion to get about ⅓ cup of chopped onions. De-seed jalapeno peppers and chop. Take 4-5 talks of coriander and roughly chop.
    • Into a food processor or mixer jar , add all the chopped produce , salt , sugar and pulse for 3-4 seconds. So that everything combines well releasing juices. Don’t blend , you need to process for few seconds only. You should get small chunks of strawberries and onion in salsa.
    • Transfer into a bowl, add chopped coriander leaves, few drops of lime juice and freshly crackled pepper powder to taste.
    • Mix well everything, taste and adjust seasoning if required and serve with nachos.

    Video

    Notes

    • Don't miss on adding coriander stalks in this recipe as it is a game changer. It highlights and pops all other flavors in salsa .
    • Roughly chop produces and then process in a processor or JMG for few seconds only , as it helps to release juices and still retains chunky bits in salsa.
    • Before serving , let it sit at least for 10 minutes for flavors to combine together.
    • Store leftovers in an airtight container in the fridge for up to 3 days.

    Nutrition

    Calories: 41kcal

    You may also like

    • beetroot-pachadi-recipe
      Beetroot Pachadi Recipe| how to make Beetroot Pachadi
    • guava-dipping-sauce
      Guava Dipping Sauce
    • pineapple-salsa
      Pineapple Salsa - How to make spicy salsa
    • sprout-salad-recipe
      Sprouts Salad to raise hemoglobin levels

    Strawberry Chia Pudding

    Published : February 4, 2022 | Last Update on October 10, 2024 By Muktha

    strawberry chia pudding

    Strawberry Chia Pudding is a simple , lightly sweet and delicious breakfast loaded with fresh strawberries and chia seeds ! This quick breakfast is healthy and takes just 5 minutes to whip up together!

    This is one of the easiest and super healthy breakfast recipe that you can ever imagine. There are quite a few similar recipes, which are quick, nutritious and are on the go . Few of my favorites includes Papaya Oats Milk shake, Peanut Butter Oat Smoothie , Keto Mushroom Eggs and Strawberry Banana Overnight Oats .

    strawberry-chia-pudding-recipe
    [feast_advanced_jump_to]

    About this recipe

    Strawberry Chia Pudding is delicious and loaded with fresh fruity flavors. This satisfying treat can be served as a breakfast or dessert too , honestly it's so good.

    When ever I eat these juicy , sweet and tang berries my day brightens up instantly. So made this delicious and healthy Strawberry Chia Pudding to super charge my morning. This healthy chia pudding , super charges your morning and keep you energize for rest of the day .

    Strawberry Chia pudding is

    • Quick , Simple and Tasty
    • Loaded with Nutrients
    • No Refined Sugars
    • Healthy
    • Easily scalable

    Ingredients

    To make this dessert like breakfast , you'll only need a few simple ingredients:

    strawberry-chia=pudding-ingredients-with-toppings

    Chia Seeds - Chia seeds are superfood and one of the healthiest seeds on planet . It's perfect to add this tiny seeds to make a wholesome balanced breakfast. These tiny seeds are loaded with nutrients , fibers, essential minerals and vitamins and healthy omega 3's .

    Milk - I used Almond Milk here , but can use any non dairy milk like Oat Milk, Soya Milk in this recipe. Adding coconut milk makes this a totally new flavor pudding as it interfere with flavors. You can use skimmed low fat chilled cow's milk if you prefer.

    Strawberry - Strawberries tastes amazingly good with its sweet and sour tone. These deep red small beauties are powerhouse of nutrition with many health benefits. They are great source of fiber, vitamin C, and antioxidants. I have used only strawberries here but you can also combine with banana , as it tastes great too.

    Peanut Butter - I have used homemade natural peanut butter here . I recommend to use creamy peanut butter in this recipe . Adding Peanut butter contributes to a overall creamy texture of pudding and also nicely pairs with strawberries. Also it adds some extra nutrients, making this strawberry chia pudding more satisfying and wholesome.

    Sweetener - Though you can add any sweetener of your choice , I prefer to use raw honey as it is unrefined and has many health benefits. Depending on your taste , feel free to adjust sweetener. Vegans can use maple or date syrup here.

    Flavoring- I have used vanilla and cinnamon powder , you can use anything as per your choice and availability.

    Toppings - I totally gave this breakfast a dessert look by adding chopped strawberries , chocolate chips, chopped almonds and my kid's favorite chocolate wafer rolls. You can also go ahead and add any of your favorite toppings like assorted nuts, fruits and seeds .

    Variations

    • To make it more nutrient rich add 1 scoop of protein powder or maca root powder
    • For Vegan option use Maple syrup instead of Honey.
    • Along with strawberry another choice of fruit is banana , it pair up well in this pudding.

    Tips

    Though , it just need 20 -30 minutes for pudding to form . If planning for breakfast , you can Prep the night before - make strawberry chia pudding and put it into jar with a lid. Place it in the fridge overnight. In the morning, before serving top with fresh diced strawberries, Chocolate chips and chopped almonds or assorted nuts and fruits.

    Watch Video

    How to make Strawberry Chia Pudding

    Into mixer jar , add fresh Strawberries,  almond Milk,  vanilla extract , cinnamon powder and peanut butter.

    strawberry-and-milk-to-blend

    Blend on medium speed for 2 minutes . It takes just 2 minutes to blend everything. Taste and adjust sweetener , if required.

    strawberry and milk

    Add chia seeds into smooth Strawberries milk shake and give a nice stir.

    stir-chia-seeds

    Pour into the serving glasses,

    pour-into-glass

    Cover and set side for 20 minutes for chia seeds to form pudding.

    resting-time-for-pudding

    After 20 minutes,  top with Chopped strawberries,  almonds , chocolate chips or any of your favorite toppings. 

    strawberry-chia-pudding

    Enjoy dessert tasting nutritious strawberry chia pudding for your breakfast .

    Recipe

    strawberry chia pudding
    5 from 1 vote

    Strawberry Chia Pudding Recipe

    Strawberry Chia Pudding is a simple , lightly sweet and delicious breakfast loaded with fresh strawberries and chia seeds ! This quick breakfast is healthy and takes just 5 minutes to whip up together !
    Prep Time5 minutes mins
    Cook Time0 minutes mins
    Resting Time20 minutes mins
    Total Time25 minutes mins
    Course: Breakfast
    Cuisine: World
    Keyword: Breakfast_Ideas, Gluten Free
    Servings: 2 people
    Calories: 322kcal
    Author: Muktha H S

    Ingredients

    • ¼ cup chia seeds
    • 1 cup strawberries
    • 1 cup Almond Milk or any milk of your choice
    • 1 tablespoon Peanut Butter
    • ½ teaspoon Vanilla extract
    • ¼ teaspoon cinnamon powder optional
    • 1 -2 tablespoon Honey as per your taste

    For Toppings

    • Fresh Strawberries , chopped
    • Almonds, chopped
    • Chocolate chips
    • Chocolate Wafer rolls, optional

    Instructions

    • Into mixer jar , add fresh Strawberries, almond Milk, vanilla extract , cinnamon powder and peanut butter.
    • Blend on medium speed for 2 minutes .
    • Add chia seeds into smooth Strawberries milk shake and give a nice stir.
    • Pour into the serving glasses, cover and set side for 20 minutes for chia seeds to form pudding.
    • After 20-30 minutes, top with Chopped strawberries, almonds , chocolate chips or any of your favorite toppings.
    • Enjoy dessert tasting nutritious strawberry chia pudding for your breakfast .

    Video

    Notes

    • It needs just 20-30 minutes for pudding to form. But you can Prep the night before - make strawberry chia pudding and put it into jar with a lid. Place it in the fridge overnight.
    • For a thick pudding , instead of ¼ cup chia seeds you can use ⅓ cup chia seeds.
    • This recipe can be easily scaled up or down as per your requirement.
    Disclaimer

    Nutrition

    Calories: 322kcal

    FAQ's

    Can I use frozen strawberries?

    Though fresh strawberries works well in this recipe , frozen berries can also be used.

    What are storage suggestions ?

    Seal left overs in a air tight glass jar and store up to 2 days in the fridge.

    You may also like

    • sprout-salad-recipe
      Sprouts Salad to raise hemoglobin levels
    • aliv-makhana-smoothie
      Aliv Makhana Smoothie
    • Oats Recipe
      One Oats Many Tastes | Oats Recipes
    • carrot-apple-pineapple-juice
      Carrot Apple Pineapple Juice

    Sprouts Salad to raise hemoglobin levels

    Published : January 26, 2022 | Last Update on October 10, 2024 By Muktha

    sprout-salad-recipe

    Sprouts salad is a quick and tasty salad made with mung beans sprouts , gets ready under 10 minutes and is excellent source of Iron and Protein.

    Mung bean sprout salad is nutritious and gives your health a boost. This salad helps to increase your hemoglobin levels naturally within 2 weeks when you have regularly.

    Bean salads are wholesome on its own and it's excellent source of protein, Vit C and iron. I often add a small portion of bean salad like Kidney Bean salad, Chickpea salad and even Peanut salad along with some fresh fruit juices like Pomegranate juice, Papaya oats milk shake and Carrot-Apple Juice , ABC Juice into my breakfast .

    We'll without wasting much of your time , let me brief you on how this mung bean sprouts salad helps to boost health .

    sprout-salad
    [feast_advanced_jump_to]

    About this recipe

    Sprouted mung beans and pomegranate are well known combination that has been followed from years to increase the hb levels naturally . Since my childhood , I have grown up eating this salad.

    Going forward ,I add black raisins , dates and beets to this salad to deliver what it claims . I recommend this bean sprout salad to most of my clients as it boosts health. Its wholesome meal on its own and a great way to kick start the day.

    In India , most of them are habituated to eat mung sprouts salads for breakfast , with desired vegetables and seasoning . But this particular sprout salad recipe specially curated to cure anemia naturally. It helps to produce red blood cells . Consuming ½ cup (71 cals) of this salad in your breakfast is sure to increase hb levels.

    You can just add this 4 tablespoon of salad along with your breakfast or eat 1 complete bowl . If you are on a weight loss diet or have complaints of hair fall or feels lethargic and tired all time , low hb levels then this sprouts salad is just meant for you ! Try this from today and check all the goodness , it does for your body!

    This sprouts salad is simple and easy to make , no extra added fat , tastes delicious , low on calories and nutritious

    Health Benefits

    Moong sprouts are kind of superfood because it contains a good amount of low-fat protein, dietary fiber, potassium, manganese, magnesium, calcium, iron, folate and several vitamins.

    Helps in weight loss as it is rich in fibre and low in calories. The presence of a good amount of protein also helps in weight loss and also makes the stomach feel fuller for a longer period of time

    Good source of plant protein helps to build and repair muscles.

    Also mung beans are rich in iron , potassium and magnesium. These three nutrients helps to keep the heart rate normal and keeps the blood pressure at check apart from other benefits.

    It also has anti-inflammatory properties , rich in fibre and helps to maintain good digestive health.

    Ingredients

    sprouts-salad-ingredients@palates-desire

    Mung Bean Sprouts or green gram sprouts are the main ingredients here. Homemade sprouts are best , just make sure to rinse well before using in the recipe . One day germinated sprouts are best for this recipe as its nutrionally dense.

    Pomegranate and Beets - These two ruby reds helps a lot in producing RBC , so no compromise here.

    Black Raisins or Monukka raisins contain natural anti-oxidants and are rich in iron. They help eliminate impurities from blood, reduce blood pressure, hair loss, keep anemia at bay. Hence its must here in this recipe . If its not available , you can use golden raisins too as an alternative.

    Dry Dates - I recommend to use soaked dry dates here . Soaked dry dates will be lightly hard and chewy as compared to soft dates. This gives a slight crunch to the salad.

    Other ingredients - Salt , cumin powder, pepper powder , green chilies, coriander leaves and lime juice , all these adds flavors and taste to salad.

    Variations

    You can add any chopped onions , grated carrots and cabbage also to make more of a veggie salad.

    Incase if you have a week gut and if your body feels gassy to beans , then in such cases you can always steam sprouted mung beans and follow the recipe.

    How to make sprouts salad

    Soak dry dates in water for 1-2 hour or overnight. Cut open, remove seeds,  chop and set aside.

    Homemade sprouts are always best . Make sure to rinse sprouts before using it in any recipe.

    mung-bean-sprouts

    Into a mixing bowl add sprouted mung beans, pomegranate  arils, black raisins, chopped dates, beet juliennes , green chili and coriander leaves.

    salad-ingredients

    To season , add salt , pepper , cumin powder and lime juice

    seasoning salad

    Mix well everything and consume mung bean sprout salad instantly!

    Sprouts Salad to raise hemoglobin levels

    Recipe

    sprout-salad-recipe
    5 from 3 votes

    Sprouts Salad Recipe

    Sprout salad is a quick and tasty salad made with mung beans sprouts , gets ready under 5 minutes and is excellent source of Iron and Protein .
    Prep Time10 minutes mins
    Cook Time0 minutes mins
    Total Time10 minutes mins
    Course: Breakfast, Salads
    Cuisine: World
    Keyword: Bachelor's Cooking, Breakfast_Ideas, Diet, Gluten Free, home remedies, Vegan, Weight Loss
    Servings: 4 People
    Calories: 71kcal
    Author: Muktha H S

    Ingredients

    • 1 cup Sprouted Mung bean
    • ½ cup Pomegranate arils
    • 2 tablespoon Black Raisins
    • 4 no’s Dry Dates soaked
    • ¼ cup Beet julienne
    • 1 green chilli chopped
    • 2 tablespoon fresh coriander leaves
    • ½ lime juice freshly squeezed
    • ½ teaspoon roasted cumin powder
    • Black salt to taste
    • Pepper powder to taste

    Instructions

    • Soak dry dates in water for 1-2 hour or overnight. Cut open dates , remove seeds, chop and set aside.
    • Into a mixing bowl add sprouted mung beans, pomegranate arils, black raisins, chopped dates, beet jullienes , green chilli and coriander leaves.
    • To season , add salt , pepper , cumin powder and lime juice
    • Mix well everything and serve.

    Video

    Notes

    • Homemade sprouts are always best .
    • Make sure to rinse sprouts before using it in any recipe.
    • One day germinated sprouts are best for this recipe.
    • I have made this with 1 cup of Sprouted Moong Beans. You can  easily scale up or down this recipe .

    Nutrition

    Serving: 0.5cup | Calories: 71kcal

    FAQ's

    How to store left outs ?

    I always recommend to make this salad fresh and finish it . Though it doesn't spoil , from nutrition view point, it's better to consume fresh. Incase if you still have left over , store in air tight container and refrigerate. While serving , microwave for 20 seconds and serve.

    Can I give this to Diabetic patients ?

    Yes, of course you can. Diabetic patients can consume up to 2 tablespoon of raisins daily but moderation is always the key , don't overdo it. As it includes dates too , if serving for diabetic patients you can reduce dates and adapt this sprouts salad recipe.

    Which is the best time to have this salad?

    Morning breakfast is best . But for snacking , I would rather recommend for mid morning snack than for evening (4.00pm) snack. Because few may feel gassy and bloating ,when had during evening snacks.

    Within how many days , HB levels increases ?

    In general cases within 14 days you'll start noticing the changes but 45 days are highly recommended. But ,please note each individual and each body is different, it works differently.

    You may also like

    • Anti Bloating Tea Recipe
      Anti Bloating Tea Recipe
    • rice-kanji-recipe
      Rice Kanji | Homemade Probiotics
    • turmeric milk recipe
      Turmeric Milk Recipe
    • Moringa Ladoo
      Moringa Ladoo | How to make Moringa Energy Balls

    How to make Oat milk

    Published : January 20, 2022 | Last Update on September 21, 2022 By Muktha

    oat-milk

    Ever wondered how to make Oat milk at home, which is non slimy and creamy? This post shares one of the best oat milk recipe.

    This Oat milk is delicious, creamy and dairy-free milk. It’s super easy to make, creamy and smooth with a yummy oat-y flavor . To make this recipe , all you need are oats, ice cold water, cashews , a blender and few minutes !

    This creamy milk has right amount of sweetness and it's perfect for adding to coffee, smoothies , baking recipes & more!

    I have included all tips on how to make a non slimy Oats milk , take your time to go through the details to make a good batch of creamy and smooth oats milk.

    I usually add this milk in my breakfast smoothies , puddings and also in my overnight oats recipes. Out of which Papaya Oat Smoothie and Strawberries Chia pudding are my all time favorites.

    oat milk
    [feast_advanced_jump_to]

    About this recipe

    Oat milk has surged in popularity over last couple of years because it is one of the non-dairy , plant based milk. Also it's perfect for those with lactose intolerance and for people with nut allergies.

    In this oat milk recipe , I have used cashews for a creamier taste but if you allergic to nuts then you can skip adding this.

    Home made oat milk is non-frothy , so this recipe always works well with cold beverages, smoothies and baked products than in hot beverages. Where as, store bought oat milk has preservatives and thickening agents , which helps to froth up.

    Also ,don’t heat Oat milk as it may turn slimy. It leaves an oatmeal-like film at the bottom of your pot when you heat it up. So don't heat oat milk directly .

    This post shares flavorless Oats milk recipe , as it can be used in various other recipe. But if you wish you can surely add sweetener and flavors while serving or while making.

    Also ,oats milk tastes best when it's chilled . So you can make a large batch of it and store in fridge for up to 5 days.

    Let me show you how to make oat milk with a few tips and tricks to create the perfect consistency.

    Ingredients

    Oats - Rolled oats are the best for making oats milk . Quick Oats ( instant oats ) are too processed so it creates more slime and steel cut oats are not processed enough to extract milk easily. So choose rolled oats over any other oats for best results.

    Ice Cold Water - Yessss , to make a non slimy oats milk , always use ice cold water. Heat can make the oats more starchy and gummy. So either use ice cold water or swap a cup of water for ice cubes when blending.

    Cashews ( optional) - to make it more creamier , I prefer to add soaked cashews . You can use or skip it totally.

    Other Add-ons -You can add pinch of sea salt , dates ( or maple syrup) and vanilla essence to flavor up.

    Tips to make non-slimy oat milk

    These are few sure shot tips that worked for me to make a perfect consistency , non slimy milk.

    • Always use ice cold water- Heat can make the oats more starchy and gummy. So either use ice cold water or swap a cup of water for ice cubes when blending.
    • Don’t over blend: if you blend the ingredients too long they’ll start to warm, so don't blend for more than 45 seconds . Blend - stop - add ice cold water and repeat .
    • Strain well: strain milk through mesh lined with muslin cloth , twice to make sure there are no sediments.
    • Don’t over squeeze the cloth : as you’re straining and squeezing the milk through cloth , you need to be gentle if you over do it , you'll be squeezing out more of the starchy compounds into the milk.

    Watch Video

    How to make Oat Milk

    Blend all the ingredients.- Into a blender , add oats, soaked cashews, 1 cup of ice cold water, and any additional sweeteners ( if adding)

    how-to make-oat-milk

    Blend for 1 minute on high and stop.

    process oats and water

    Now add another ½ cup of ice cold water and process for 30-45 seconds . Again add remaining ice cold water and continue to process until smooth.

    add water part by part

    Strain the mixture - line a strainer with a muslin cloth ( or use nut milk bag) or thin towel over a large mixing bowl or pitcher and strain milk. You’ll want to double strain the mixture to make sure all the sediment is removed.

    strain milk

    Transfer to a sealed container and store it in the fridge.

    oat-milk

    Recipe

    oat-milk
    5 from 1 vote

    How to make Oat Milk Recipe

    Oat milk is a delicious and creamy dairy-free milk. It’s super easy to make ,creamy and smooth with a yummy oat-y flavor .
    Prep Time8 minutes mins
    Cook Time0 minutes mins
    Total Time8 minutes mins
    Course: DIY
    Cuisine: World
    Keyword: Basic, DIY, Gluten Free
    Servings: 3 people
    Calories: 64kcal
    Author: Muktha H S

    Ingredients

    • ¾ cup Rolled Oats
    • 8-10 no's Whole cashews , soaked
    • 2 cups Ice cold water

    Instructions

    • Blend all the ingredients.- Into a blender , add oats, soaked cashews, 1 cup of ice cold water, and any additional sweeteners ( if adding)
    • Blend for 1 minute on high and stop. Now add another ½ cup of ice cold water and process for 30-45 seconds .
    • Again add remaining ice cold water and continue to process until smooth.
    • Strain the mixture - line a strainer with a muslin cloth ( or use nut milk bag) or thin towel over a large mixing bowl or pitcher and strain milk. You’ll want to double strain the mixture to make sure all the sediment is removed.
    • Transfer to a sealed container and store it in the fridge.

    Video

    Nutrition

    Calories: 64kcal

    FAQ's

    How to store Oat Milk

    After it’s blended and strained, pour the oat milk into an airtight jar or mason jars. Then store it in the fridge for up to a week. Note: Milk will separate in the fridge and this is quite normal. Just give it a good stir before serving , it will be perfectly fine.

    Which are the ways to use Oats milk

    Use it in smoothies , baked goods or cold beverages. But it’s not the best option for hot beverages as it may thicken up and become slimy.

    What to do with left over oat pulp?

    Use it to scrub you face , its a great exfoliator . Also oats pulp is great for your plants in garden !

    You may also like

    • pumpkin bread
      Pumpkin Bread
    • vegan mayo
      Vegan Mayonnaise
    • bhapa-doi-recipe
      Bhapa Doi
    • Ragi-coconut-milk-pudding-recipe
      Ragi Coconut Milk Pudding

    How to make Pomegranate Juice

    Published : January 16, 2022 | Last Update on September 21, 2022 By Muktha

    homemade-pomegranate-juice

    Fresh homemade pomegranate juice is tasty, packed with nutrients , no artificial colors flavors and preservative . Get's ready in just 5 minutes and good to go with your breakfast.

    Fresh pomegranate juice is easy to make and it's economical than the packaged one that you will never buy it again once after you make this tasty pink juice at home.

    Though I'm not a juice person , here are few of my health pick detox juice recipes that you may want to try – Beetroot Amla Juice, Carrot Pineapple Juice , Papaya Oats Juice and Coriander Amla Detox !

    These juice-detox recipes are sure to give you nutritional boost to kick start your day !

    homemade-pomegranate-juice
    [feast_advanced_jump_to]

    About this recipe

    When it comes to fruit juices , I'm very choosy. I prefer breakfast juices over thirst quenchers . And this spicy pomegranate juice is my all time favorite. It's sweet , tart and mildly spiced homemade pomegranate juice is tastier and lighter than the store-bought one.

    To make this juice, I always remove pomegranate arils a day before and keep in fridge. Next day just put into a blender with some water , pinch of salt , pepper and juice it. Breakfast juice gets ready in 5 minutes.

    This homemade pomegranate juice is

    • Light and tasty
    • Easy to make
    • No artificial colors and flavors
    • Economical

    Health Benefits Of Pomegranate

    Pomegranate has many health benefits. It is very rich in vitamin C and vitamin E also a good source of folate, potassium, and vitamin K. Hence it is very beneficial for anemic people.

    Pomegranate juice contains higher levels of antioxidants and helps remove free radicals, protect cells from damage, and reduce inflammation.

    It is also said that pomegranate juice reduce inflammation in the gut and improve digestion.

    It is an most heart-healthy juice. It is said to protect the heart and arteries. Daily intake of this juice may also help lower systolic blood pressure.

    Pomegranate juice is also helpful to reduce the inflammation that contributes to osteoarthritis and helps to overcome cartilage damage. Hence for good bone health pomegranate is must.

    How to choose pomegranate

    Always choose the pomegranates that are hard and has shiny bright skin . I have used locally grown organic pomegranates , these pomegranates had bright pink color and were very sweet.

    Depending on the variety, the seeds may have a light pink , dark bright pink and deep crimson color. Color of the juice depends on the variety of pomegranate used.

    Top Tip 

    Make sure there is no membrane attached to the pomegranate arils, otherwise the juice will become bitter in taste.

    How to make Homemade Pomegranate Juice

    Firstly refrigerate pomegranate arils overnight or for 2-3 hours . As this juice tastes best when served fresh and chilled .

    Transfer chilled pomegranate arils into a high-speed blender or juicer.

    pomegranate-juice

    Add black salt , red chilli pepper , black pepper powder and cumin powder .You can add ¼ cup chilled water to process .

    How to make Pomegranate Juice

    Blend for 10-12 seconds until the arils are crushed but the hard seeds are still intact.

    How to make Pomegranate Juice

    Sieve the juice through a fine-mesh strainer.

    How to make Pomegranate Juice

    Keep pressing with a spoon or a spatula to get the maximum juice and discard the leftover pulp.

    pomegranate-juice

    Serve fresh juice immediately.

    spicy pomegranate juice

    Recipe

    homemade-pomegranate-juice
    5 from 2 votes

    Pomegranate Juice Recipe

    Nutritious and fresh homemade pomegranate juice is perfect for your breakfast to kick start your day.
    Prep Time5 minutes mins
    Cook Time0 minutes mins
    Total Time5 minutes mins
    Course: Beverage, Breakfast, Drinks
    Cuisine: World
    Keyword: Basic, Juices
    Servings: 2 people
    Calories: 216kcal
    Author: Muktha H S

    Ingredients

    • 2.5 -3 cups pomegranate arils chilled
    • ¼ cup water
    • ¼ teaspoon black salt
    • ¼ teaspoon cumin powder
    • 1 dash red chilli powder
    • 1 pinch black pepper powder

    Instructions

    • Firstly refrigerate pomegranate arils overnight or for 2-3 hours . As this juice tastes best when served fresh and chilled .
    • Transfer chilled pomegranate arils into a high-speed blender or juicer.
    • Add black salt , red chilli pepper , black pepper powder and cumin powder .
    • You can add ¼ cup chilled water to process .
    • Blend for 10-12 seconds until the arils are crushed but the hard seeds are still intact.
    • Sieve the juice through a fine-mesh strainer. Keep pressing with a spoon or a spatula to get the maximum juice and discard the leftover pulp.
    • Serve fresh pomegranate juice immediately

    Video

    Notes

    • Always remove pomegranate arils from membrane and store in refrigerator .
    • Never wash the seeds. If  arils come in contact with water, they get spoiled very soon.
    • Pomegranates gets well along with berries and apples, you can mix and make a new variation.
    • Can also add beetroot for improving iron  and give a nutritional boost.
    • If serving as a thirst quenchers , you can mix pomegranate juice with club soda, or seltzer.

    Nutrition

    Calories: 216kcal

    You may also like

    • Anti Bloating Tea Recipe
      Anti Bloating Tea Recipe
    • mango-mastani-recipe
      Mango Mastani Recipe
    • hot chocolate recipe
      Hot Chocolate Recipe
    • turmeric milk recipe
      Turmeric Milk Recipe

    Rava Pongal

    Published : January 11, 2022 | Last Update on September 21, 2022 By Muktha

    rava-pongal-recipe

    Rava Pongal or Semolina Pongal is a quick and healthy South Indian breakfast recipe made with rava, moong dal and tempered with spices.

    You can put up this wholesome breakfast recipe within 30 minutes by using simple kitchen staples

    I often make Pongal recipe t home because it very easy to make and healthy too . If you want to try few similar recipes, then try these too – Khara Pongal, Sihi Pongal , and Huggi Anna

    rava-pongal-recipe
    [feast_advanced_jump_to]

    About this recipe

    Rava Pongal, also called Semolina Pongal or Sooji Pongal is a South Indian breakfast recipe . Traditionally, Pongal is made using rice and lentils, but rava pongal is one of the variations to the of the classic pongal recipe.

    Just like a classic pongal , this rava pongal also tastes delicious. Always serve pongal hot with ghee and coconut chutney by side. It is a wholesome dish, tastes delicious. and is served for breakfast. It is also made on Sankranti / Pongal festival as a variation to Khara pongal.

    This Rava Pongal is,

    • Wholesome
    • Full of flavors
    • Easy to make
    • Uses minimal ingredients

    Ingredients

    rava_pongal_ingredients

    Rava – This pongal is made with a medium size , coarse variety of rava (semolina), also known as Bombay rava. Do not use the fine sooji to make this pongal.

    Dal – Split yellow moong dal is main ingredient in pongal , rinse and soak moong dal for at least 30 minutes before you add it to the cooker.

    Water – You can adjust the consistency of pongal by adding less or more water.

    Add salt , as per your taste.

    Ginger – Fresh ginger adds a nice subtle flavor to pongal. But science behind is few may find lentils as bloating and gassy , adding ginger with asafoetida will combat its effect hence do not miss this one.

    For tempering – Pongal is tempered with ghee, mustard seeds , cumin seeds, asafoetida (hing), curry leaves, green chili peppers, black peppercorns and cashews.

    I recommend to use only ghee in this recipe, as it adds a rich and authentic taste.

    Use fresh and green curry leaves for a better aroma. Just 1 or 2 slit green chili peppers are enough in this recipe , as pongal will never be spicy ! But anyhow you can adjust as you need.

    Cashew nuts are optional, but it does add a nice crunch.

    Watch Video

    How to make Rava Pongal

    Rinse and soak moong dal for minimum 30 minutes. Though it’s not necessary to soak moong dal , I recommend it as it helps for proper digestion and absorption of nutrients by the body.

    Heat 1.5 tablespoon of ghee in a pressure cooker , add soaked moongdal and saute for 3-5 minutes on medium low heat, add turmeric , ginger and mix well.

    roast moongdal in ghee

    Add 1 to 1.5 cups of water and

    cook moong dal

    pressure cook for 2-3 whistles.

    pressure cook lentils

    Let pressure settles down on its own before you open the lid. Moon dal is well cooked

    Rava Pongal

    Whilst ,in a thick bottom pan ,  roast semolina in 1 teaspoon of ghee until fragrant.

    roast rava in ghee

    Transfer roasted rava into a bowl and set aside.

    In the same pan, heat 1.5 tablespoon of ghee , add mustard seeds, cumin seeds, black peppercorns and cashews .

    Rava Pongal

    When cashews changes color , add curry leaves , green chilli and asafoetida.

    Rava Pongal

    Add roasted rava and mix well everything.

    how to make rava pongal

    To this now add, cooked moong dal ,

    Rava Pongal

    Add hot water , salt and stir well everything ,

    making of rava pongal

    cover lid and cook for 5 minutes.

    rava pongal

    You can make it either thick or thin as per your preference. If you prefer thick consistency then reduce the amount of water .

    After 5 minutes, open lid ; give a quick stir and turn off the stove.

    Drizzle ghee on rava pongal and serve hot with coconut chutney.

    Rava Pongal

    Recipe

    rava-pongal-recipe
    5 from 1 vote

    Rava Pongal Recipe

    Rava Pongal or Semolina Pongal is a quick and healthy South Indian breakfast recipe made with rava, moong dal and tempered with spices. You can put up this wholesome breakfast recipe within 30 minutes by using simple kitchen staples
    Prep Time5 minutes mins
    Cook Time25 minutes mins
    Total Time30 minutes mins
    Course: Breakfast
    Cuisine: South India
    Keyword: Bachelor's Cooking, Quick & Easy
    Servings: 3
    Calories: 270kcal
    Author: Muktha H S

    Ingredients

    To pressure cook

    • 1.5 tablespoon clarified butter/ ghee
    • ¼ cup split moong dal rinsed and soaked
    • 1 teaspoon ginger, grated
    • ⅛ teaspoon turmeric powder
    • 1.5 cups water for cooking moong dal

    To roast rava

    • 1 teaspoon ghee
    • ½ cup fine rava / sooji

    To make pongal

    • 1.5 tablespoon ghee /clarified butter
    • ½ teaspoon mustard seeds
    • 1 teaspoon cumin seeds
    • 1 teaspoon black pepper corns
    • 8 -10 no’s cashews
    • 1 sprig of curry leaves
    • 1-2 small green chilli sliced
    • ⅛ teaspoon of hing
    • 1.5 cups water

    Instructions

    To pressure cook

    • Rinse and soak moong dal for minimum 30 minutes.
    • Heat 1.5 tablespoon of ghee in a pressure cooker , add soaked moongdal and saute for 3-5 minutes on medium low heat, add turmeric , ginger and mix well.
    • Add 1 to 1.5 cups of water and pressure cook for 2-3 whistles.
    • Let pressure settles down on its own before you open the lid.

    To roast rava

    • Whilst ,in a thick bottom pan , roast semolina in 1 teaspoon of ghee until fragrant.
    • Transfer roasted rava into a bowl and set aside.

    To make rava pongal

    • In the same pan, heat 1.5 tablespoon of ghee , add mustard seeds, cumin seeds, blacke peppercorns and cashews .
    • When cashews changes color , add curry leaves , green chilli and asafoetida.
    • Add roasted rav and mix well everything.
    • To this now add, cooked moong dal , hot water and salt to taste .
    • Stir well everything , cover lid and cook for 5 minutes.
    • You can make it either thick or thin , if you prefer thick consistency then reduce the amount of water.
    • After 5 minutes, open lid ; give a quick stir and turn off the stove.
    • Drizzle ghee on rava pongal and serve hot with coconut chutney.

    Video

    Notes

    • Make sure to roast rava well before adding into the pongal , if not well roasted pongalt turns like a paste .
    • You can add water as required , if you want it thick then reduce the amount of water , if thin add  more water.
    • Pongal tends to thicken once it cools down.
    • Don't make pongal in oil , It doesn't taste good at all.
    • Also dont compromise with the amount of ghee that gets in , its minimum 3 tablespoon og ghee required for the taken measurement.

    Nutrition

    Calories: 270kcal

    FAQ's

    Is it freezer friendly ?

    No , I never recommend . In fact rava pongal tastes best when made fresh.

    How can I store left overs ?

    Store in air tight container and keep in refrigerator. Pongal tends to thicken when it cools down , add little water , loosen up and then reheat in oven or on stove top before serving.

    What all preparations can be done to speed up the process?

    Roasting rava / semolina can be done and stored in a airtight jar. You can just use it whenever required , it comes handy and saves up your time.

    You may also like

    • bisi-bele-bath-with-khara-boondi
      Bisi Bele Bath Recipe
    • Easy Lemon Rice
      Easy Lemon Rice | No Onion No Garlic Recipe
    • khara pongal recipe
      Khara Pongal
    • capsicum-vangi-bath
      Capsicum Bath Recipe

    Anti Bloating Tea Recipe

    Published : January 6, 2022 | Last Update on September 21, 2022 By Muktha

    Anti bloating tea is a quick and easy herbal tea made with few spices to keep acid reflux , heart burning and bloating at bay .

    This is a most popular home made remedy from ancient Indian Kitchen . And worry not, it's not like any medicine , it's just as good as any refreshing herbal tea !

    You can always drink this tea after 30 minutes of your food intake incase you feel gassy or acid reflux. Also any time of the day , if you ever feel bloated and indigestion, then this the first thing you should be doing for quick relief!

    I always prefer to use home remedies for indigestion , acidity, cold-flu and gut issues , it works like a charm.

    Most of my clients are even benefited with these simple home remedies recipes like Rice Kanji , Lemon Ginger concoction ,Turmeric Milk , Flaxseed Buttermilk and Moringa Energy Balls for immunity .

    anti-bloating-tea
    [feast_advanced_jump_to]

    About this recipe

    To make this herbal tea , all you need is to boil few spices in water , steep , strain and then sip warm . In India , carrom seeds , fennel seeds and cumin seeds are used from years as a home remedy to cure indigestion . Acid reflux causes acidity and heartburn for which this tea works has a magic.

    This is a recipe passed from generations .There are many remedies for acidity and heartburn available . But this one simple , quick and most effective remedy of them all!

    This remedy can provide quick relief from heartburn and acidity. It includes some basic kitchen ingredients which are available in every Indian household and have a myriad of health benefits to offer. Also you can never go wrong with this simple gift from nature.

    Ingredients

    With few spices , you can make this natural home remedy for quick relief !

    anti bloating tea ingredients

    Carom Seeds ( Ajwain ) - contains high levels of thymol, a compound that aids release of gastric juice from the stomach, thus speeding up the process of digestion.

    Fennel Seeds ( Saunf)- contains Anethole that helps to reduce inflammation . Fennel seeds are known to soothe swelling or irritation in the intestines and improve digestion. Soothing muscles in the stomach and intestines helps to relieve gassiness that’s from constipation or acid reflux.

    Cumin Seeds ( Jeera ) - increase the activity of digestive enzymes, potentially speeding up digestion.

    Asafoetida (Hing) - In Ayurvedic medicine, hing is used to aid digestion and gas. Though recommended , if not available you can skip.

    Mint Leaves - When it comes to medicinal uses, mint is most popular remedy for digestive problems and IBS.

    Addons-Optional - Honey and Lime Juice to make it more palatable.

    You may also like

    • apple cinnamon tea
      Apple Cinnamon Tea
    • beetroot amla detox
      Beetroot Amla Detox | Beetroot Amla Juice Recipe
    • turmeric milk recipe
      Turmeric Milk Recipe
    • Chai Masala
      Tea Masala Powder | Chai Masala Recipe

    How to make anti bloating tea

    In a saucepan , take 600 ml of water

    Add cumin seeds , carom seeds , fennel seeds , asafoetida and few mint leaves.

    anti bloating tea

    Bring water to rolling boil and reduce heat.

    Anti Bloating Tea Recipe

    Let water reduces to half the volume (300 ml)

    Anti Bloating Tea Recipe

    Allow to steep for 10 minutes.

    Strain tea into a cup.

    Anti Bloating Tea Recipe

    Finally , add honey if required and few drops of lime juice.

    how to make anti bloating tea

    Sip warm

    Recipe

    herbal tea
    5 from 2 votes

    Anti Bloating Tea Recipe

    Anti bloating tea is a quick and easy herbal tea made with few spices to keep acid reflux , heart burning and bloating at bay .
    Prep Time0 minutes mins
    Cook Time15 minutes mins
    Total Time15 minutes mins
    Course: Beverage
    Cuisine: Indian
    Keyword: DIY, home remedies
    Servings: 2 people
    Calories: 31kcal
    Author: Muktha H S

    Ingredients

    • 600 ml water
    • 2 teaspoon cumin seeds
    • 2 teaspoon carom seeds
    • 4 teaspoon fennel seeds
    • ¼ teaspoon asafoetida
    • 5-6 crushed mint leaves
    • ½ teaspoon honey optional
    • Lime juice few drops optional

    Instructions

    • In a saucepan , take 600 ml of water
    • Add cumin seeds , carom seeds , fennel seeds , asafoetida and few mint leaves.
    • Bring water to rolling boil and reduce heat.
    • Let water reduces to half the volume (300 ml)
    • Allow to steep for 10 minutes.
    • Strain tea into a cup.
    • Add honey if required and few drops of lime juice.
    • Sip warm

    Video

    Nutrition

    Calories: 31kcal

    Homemade Peanut Butter Recipe

    Published : December 30, 2021 | Last Update on September 24, 2022 By Muktha

    homemade-peanut-butter

    Homemade peanut butter is smooth, creamy, flavorful and ridiculously easy to make. It's super delicious and you won't be able to stop eating it !

    Here's our step-by-step guide on how to make this incredible easy Peanut Butter recipe at home , even better than any store bought ones.

    homemade-peanut-butter-recipe
    [feast_advanced_jump_to]

    About this recipe

    On some level you already know how incredibly easy it is to make this creamy peanut butter. It's an super easy yet amazing recipe , roasted peanuts meets blender and within no time you get super creamy peanut butter ready to eat !

    Doesn't it sound incredibly easy , YES it is ! Incase if you haven't tried making this tasty homemade peanut butter yet , then I insist you to try it right now.

    Ingredients

    Seriously , I'm not at all kidding here. All you need is just 2 ingredients ; peanuts and pinch of salt ! And rest all are add on's, it's always optional for extra taste , flavors and texture. And of course your 8 minutes of time , to make this utterly delicious peanut butter.

    How to use Peanut butter

    • Slather it on a toasted bread
    • Add it to smoothies and milk shakes , for extra protein
    • Make some peanut butter cookies , granola bars and even cakes
    • Energize yourself with 1 tablespoon of peanut butter whenever you wish !

    Peanut Butter Recipe Tips

    Before you jump start to make peanut butter , there are a few things you should know :

    • Making this recipe is simple and easy, but patience is the key - Though it hardly takes 6-8 minutes to make this peanut butter , you need to run your food processor for few 40 - 60 minutes , stop , scrape and again run . This is a repetitive process until the nuts become smooth and spreadable.
    • You don’t need anything except dry roasted peanuts and pinch of salt- You can use either unsalted or salted peanuts in this recipe. But if your using salted then no need to season with salt
    • Honey and oil - Though honey and oil are truly optional adding it to homemade nut butters really helps in getting that perfect shiny and runny texture to the butter.

    FAQ's

    Why did my peanut butter didn’t turn out creamy ?

    Each food processor’s strength is little bit different, it may need a few extra minutes in the food processor to make it shiny and creamy. It’ll get there!

    Can I use toasted nuts ?

    Yes ,  You can use homemade toasted nuts or pre-roasted nuts from the store. But still, I prefer to warm pre-toasted nuts in a oven or on a stovetop as this helps the oils loosen up.

    Can I use any other kinds of nuts ?

    Yes , You can absolutely substitute any nut you like in this recipe. Or use combination of almonds and peanut also . The method is exactly the same for making almond , pistachios or any other kind of nut butter.

    Do I have to add the honey or any other sweetener ?

    The honey helps balance out the saltiness and flavors of the peanuts, but if you want go for sugar-free then you can totally skip it.

    How to store my homemade peanut butter?

    Fridge or at room temp works here! It’s best in fridge in a sealed container for up to several weeks.

    Making more or less peanut butter: You can use this technique with any amount of nuts. I find that I typically end up with about a half-cup less peanut butter than the amount of nuts I originally started with (for instance, 2 cups of peanuts makes about 1 ½ cups of peanut butter).

    You may also like

    • coconut-cookie-sandwich
      Cookie Sandwich
    • crispy-coconut-cookies
      Coconut Cookies
    • bellada-anna-recipe
      Bellada Anna - Gudanna
    • papaya-oat-turmeric-milkshake
      Papaya Oat Smoothie

    How to make Peanut Butter at home

    Dry roast peanut, you can either roast in oven until lightly golden-brown or do it in a skillet on stove top.

    Homemade Peanut Butter Recipe

    Remove skin from roasted peanuts.

    Homemade Peanut Butter Recipe

    Transfer the peanuts to a food processor fitted with the blade attachment or blender.

    Homemade Peanut Butter Recipe

    Process for 1-2 minutes till you get crumble texture.

    Homemade Peanut Butter Recipe

    Stop the processor / blender , scrape sides and process again for another 1 minute.

    Homemade Peanut Butter Recipe

    When it turns smooth , tip in all add-ons like peanut oil , honey or any sweetener and cinnamon powder.

    Homemade Peanut Butter Recipe


    Process until it reaches desired creamy and shiny consistency.

    Homemade Peanut Butter Recipe

    Store in dry glass jar, stays good up to few weeks.

    Recipe

    homemade-peanut-butter
    5 from 3 votes

    Homemade Peanut Butter Recipe

    Homemade peanut butter is smooth, creamy, flavorful and ridiculously easy to make. It's super delicious and you won't be able to stop eating it !
    Prep Time6 minutes mins
    Cook Time8 minutes mins
    Total Time14 minutes mins
    Course: Condiments
    Cuisine: World
    Keyword: Basic, peanuts
    Servings: 375 grams
    Calories: 94kcal
    Author: Muktha H S

    Ingredients

    • 2 cups Peanuts
    • ¼ teaspoon Salt if using unsalted peanuts

    Add-ons (Optional' s)

    • 1.5 tablespoon Peanut oil or any vegetable oil
    • 1 tablespoon Honey
    • ¼ teaspoon Cinnamon Powder
    • 1.5 tablespoon Jaggery Powder/ Brown Sugar/ sugar to taste , optional

    Instructions

    • Dry roast peanut, you can either roast in oven until lightly golden-brown or do it in a skillet on stove top. Remove skin from roasted peanuts.
    • Transfer the peanuts to a food processor fitted with the blade attachment or blender. Process for 1-2 minutes till you get crumble texture.
    • Stop the processor / blender , scarpe sides and process again for another 1 minute.
    • When it turns smooth , tip in all add on's like peanut oil , honey or any sweetener and cinnamon powder
    • Process until it reaches desired creamy and shiny consistency
    • Store in dry glass jar, stays good up to few weeks.

    Video

    Nutrition

    Serving: 15grams | Calories: 94kcal

    Peanut Butter Cookies

    Published : December 22, 2021 | Last Update on September 21, 2022 By Muktha

    peanut butter cookies

    Peanut butter Cookies are mildly sweetened , crumbly textured cookies with bursting peanut-y-flavor. These Eggless cookies are made with whole wheat flour and are perfect for tea time snack.

    It's really simple and easy to make these peanut butter cookies !

    peanut-butter-cookies
    [feast_advanced_jump_to]

    About this recipe

    These cookies have a delicious crumbly texture with slightly chewy middles and are mildly sweet with bursting flavors of peanut. For me, these are the perfect peanut butter cookies.

    I made this peanut butter cookies with home made peanut butter , which tasted really rustic with full of peanut flavor.

    Why should I try this peanut butter cookies ?

    • It's Heathy
    • Tasty
    • Quick and Simple
    • Easily scalable
    • No fancy ingredients

    Ingredients

    The crumbly, melt-in-mouth peanut butter cookies totally delighted me and has traditional ingredients like flour, baking powder, and baking soda. Along with it , here’s what other ingredients get into these cookies

    • Peanut butter , for the best results always use creamy peanut butter as crunchy peanut butter doesn't give you the same results.
    • Ground flaxseed – Instead of egg , I have used flax eggs as a binder.
    • Brown sugar and cane sugar – This combination creates the perfect complex, look and sweet flavor.
    • Butter – Make sure your butter is softened, but not melted. It should have a creamy appearance and should mix seamlessly .
    • Vanilla extract – Just a splash is enough to add depth of flavors to these cookies.
    • And salt – A pinch of salt in in these peanut butter cookies really makes the flavor pop.

    Variations

    For Vegan - Swap butter with coconut oil .

    You can fold in some Choco chips or dry fruits and nuts into cookie dough , to make Choco chip peanut cookies.

    Top Tips

    • Use creamy peanut butter- If your peanut butter is too dry, the dough may crack, and it will be difficult to form cookies. Tip: If you store your peanut butter in the fridge, allow it to come to room temperature for an hour before making this recipe.
    • Chill the dough! It may be tempting to skip this step, but chilled dough really makes the best peanut butter cookies. Chilling prevents cookies from over spreading as they bake.
    • Leave them on the baking sheet for a few minutes to cool. Like many other cookies even these peanut butter cookies require a few minutes to set hard once they’re out of the oven. Before transferring them to a wire rack to cool completely leave them on the baking sheet for 5 more minutes to firm up.

    FAQ's

    Why did my cookie spread and couldn't make out designs on cookies ?

    Oh , sad to hear ! Next time , you increase chilling time for dough , 1 hour or more is good enough to give a nice textured peanut butter cookies.

    Can I use eggs instead flax eggs ?

    Yes of course , Eggs and flax eggs can be used alternatively in this recipe.

    Can I make it with APF?

    Sure , just swap whole wheat flour with APF/refined flour.

    You may also like

    • spiced orange cake
      Low Fat Orange Cake
    • whole-wheat-biscuits
      Whole Wheat Biscuits
    • crinkle-cookies
      Chocolate Crinkle Cookies
    • lamingtons
      Lamington - how to make Australian Lamington Cake

    How to make Peanut Butter Cookies

    Into a bowl add 1 tablespoon flaxseed meal and 3 tablespoon of water ; whisk well together and set aside undisturbed for 15 minutes.

    Peanut Butter Cookies

    After 15 minutes , it looks thick and gelatinous , hence it’s called flax egg.

    Peanut Butter Cookies

    Into a mixing bowl , add butter , cane sugar , palm sugar . With a hand blender / electric blender , whisk until sugar and butter is well incorporated.

    Peanut Butter Cookies

    To this add peanut butter, vanilla essence, flax egg and continue to blend everything together till creamy.

    Peanut Butter Cookies

    Place a flour sifter above the mixing bowl ; add flour , baking powder , cooking soda, salt and sift everything together directly onto a mixing bowl.

    Peanut Butter Cookies

    With spatula, mix everything together to form a thick and stiff dough.

    Peanut Butter Cookies

    Cover bowl with a cling film and refrigerate it for 30-60 minutes.

    Peanut Butter Cookies

    After 30 minutes , takeout the bowl from refrigerator and remove cling film.

    Scoop 1 tablespoon of  cookie dough and shape into balls and gently press to give a round shape.

    Peanut Butter Cookies

    Arrange on a lined baking tray and make design or any impressions from fork .

    Peanut Butter Cookies

    Preheat oven to 180 deg Celsius ; place the baking tray inside the oven and bake for 16-18 minutes.

    Peanut Butter Cookies

    Once baked , cool the cookies on wired rack.

    Peanut Butter Cookies

    Let cookies cool down completely , store in a air tight snack jar.

    Serve it as a snack or with hot cup of tea.

    Recipe

    peanut butter cookies
    5 from 4 votes

    Peanut Butter Cookies Recipe

    Peanut Butter Cookies are mildly sweetened , crumbly textured eggless cookies with bursting peanut-y-flavor made with whole wheat flour.
    Prep Time20 minutes mins
    Cook Time18 minutes mins
    Total Time38 minutes mins
    Course: Dessert, Snack
    Cuisine: American
    Keyword: Baking
    Servings: 20 Small Cookies
    Calories: 71kcal
    Author: Muktha H S

    Ingredients

    • ¾ cup Wholewheat flour
    • ¼ teaspoon Baking Soda
    • ¼ teaspoon Baking Powder
    • ⅛ teaspoon Salt
    • ¼ cup Cooking Butter
    • ¼ cup Brown Sugar
    • ⅛ cup Cane Sugar
    • ⅓ cup Peanut Butter
    • ½ teaspoon Vanilla
    • 1 tablespoon Flaxseed meal
    • 3 tablespoon Water

    Instructions

    • Into a bowl add 1 tablespoon flaxseed meal and 3 tablespoon of water ; whisk well together and set aside undisturbed for 15 minutes.
    • After 15 minutes , it looks thick and gelatinous , hence it’s called flax egg.
    • Into a mixing bowl , add butter , cane sugar , palm sugar . With a hand blender / electric blender , whisk until sugar and butter is well incorporated.
    • To this add peanut butter, vanilla essence, flax egg and continue to blend everything together till creamy.
    • Place a flour sifter above the mixing bowl ; add flour , baking powder , cooking soda, salt and sift everything together directly onto a mixing bowl.
    • With spatula, mix everything together to form a thick and stiff dough. Cover bowl with a cling film and refrigerate it for 30-60 minutes.
    • After 30 minutes , takeout the bowl from refrigerator and remove cling film.
    • Scoop 1 tablespoon of cookie dough and shape into balls and gently press to give a round shape. Arrange on a lined baking tray and make design or any impressions from fork .
    • Preheat oven to 180 deg Celsius ; place the baking tray inside the oven and bake for 16-18 minutes.
    • Once baked , cool the cookies on wired rack.
    • Let cookies cool down completely , store in a air tight snack jar.
    • Serve it as a snack or with hot cup of tea.

    Video

    Nutrition

    Calories: 71kcal

    Chocolate Crinkle Cookies

    Published : December 15, 2021 | Last Update on September 24, 2022 By Muktha

    crinkle-cookies

    Chocolate Crinkle cookies are deliciously soft, brownie textured center center and slightly crispy on the outside. These chocolaty cookies are perfect, easy to make and best for any celebrations including Christmas.

    Serve these cookies with any of your favorite cozy drink on a wintery day. Few of my favorites include Hot Chocolate , Apple Cinnamon Tea or Pumpkin Spice Latte

    [feast_advanced_jump_to]
    chocolate crinkle cookies

    About this recipe

    This chocolate crinkle cookies recipe is super simple to make and super decadent with no guilt afterwards.

    These rich and decadent cookies tastes just like a brownie. You can describe these cookies in many words - deliciously soft and cakey . Slightly crispy on the outside like a cookie and soft chewy fudge like inside, that's how it's intended to be.

    These chocolate crinkle cookies are made from scratch like the old fashion way, using flour, oil, eggs, sugar and cocoa powder.

    But you can still use a chocolate cake box mix has a easy solution for easy peasy cookie recipe. Just mix the cake mix with oil , eggs into cookie dough, roll cookie balls in powdered sugar and bake. 

    We'll don't get offended by thinking that these cookies are super fattening or loaded with calories. Best part is these small size cookies have just 65 calories each !

    These chocolate crinkle cookies are

    • Delicious Chocolaty Fudge
    • Easy peasy recipe
    • Crisp outside and soft inside
    • Small cookies - 65 calories each

    Ingredients

    To make these chocolate crinkle cookies all you need in basic cake ingredients

    crinkle-cookie-ingredients@palates-desire

    Flour : I have used all purpose flour here , this works fine here. Though whole wheat flour can be used , I really don't recommend . As these cookies need to be light too!

    Cocoa Powder : Be sure to use unsweetened Cocoa powder .

    Eggs : 2 large range eggs

    Sugar : use granulate white or brown organic sugar .

    Oil : You can use any flavorless oil here.

    Powdered Sugar - love those pretty looking crinkles on top, it's all because of this powdered sugar.

    Other ingredients - Baking powder , Salt and real good vanilla extract.

    Tips to bake perfect chocolate crinkle cookies

    Make sure you start with room temperature ingredients so the oil and egg mix together easier.

    Use a cookies scoop or small ice cream scoop to make even sized cookie balls, each about 1” balls. Even sized cookies bake uniform.

    Do not over crowd baking tray with cookies. Line them at least 2 inch apart to ensure they have enough space between each other. Cookies grow bigger as you bake them. You do not want cookies touching and over lapping each other.

    To get fluffy, fudgy cookies, do not flatten the cookies. Roll them into balls and place it on baking tray. It spreads and takes it's own shape.

    Tested a few batches and mine were ready by the end of 11 minutes. But do keep in mind, every oven is different and works differently. Start with 10-12 minutes time setting and keep an eye on the cookies. You do not want them to turn hard. As soon as the center almost set, remove from oven, let it stay in baking tray for 5 more minutes and then cool on wire rack completely.

    Coating in powdered sugar gives it’s signature crinkle look. So be generous in double coating with powdered sugar . Icing sugar doesn't gives that perfect crinkle look , so go for powdered sugar alone.

    crinkle cookies

    FAQ's

    Why did my Cookies spread so much?

    Oh oh , this happens mainly for 2 reasons - You may have not refrigerated the dough for long . Or while rolling you may have slightly flattened the dough . Just make sure to roll the cookie dough into a ball, while baking it spreads and get its shape on it's own.

    Can I make Eggless Crinkle Cookies?

    Yeah , you can always turn this recipe into a eggless , vegan recipe. Swap egg with flax egg. { 1 egg = 1 tablespoon flaxseed meal + 3 tablespoon water }

    Cookie dough is too sticky ,how can I fix this ?

    Let cookie dough sit for some more time in refrigerator. More time this cookie dough sit in fridge , more easier it is to roll , get good texture and looks beautiful.

    You may also like

    • lamingtons
      Lamington - how to make Australian Lamington Cake
    • whole-wheat-biscuits
      Whole Wheat Biscuits
    • ragi-cookies
      Ragi Almond Cookies with Jaggery
    • pumpkin-walnut-cake-recipe
      Pumpkin Walnut Cake

    How to make Chocolate Crinkle Cookies

    In a mixing bowl , mix together the cocoa powder, white sugar, eggs 2 no’s ,vegetable oil and vanilla.

    all wet ingredients into a mixing bowl

    Whisk well until everything is fully incorporated.

    Chocolate Crinkle Cookies

    Place a sieve over the  mixing bowl , add all purpose flour , baking powder and salt. Sift everything together into the mixing bowl.

    Chocolate Crinkle Cookies

    Mix everything together with a spatula to form a dough . Dough will be super sticky , don’t worry.

    Chocolate Crinkle Cookies

    Cover the bowl with a cling and place in refrigerator for minimum 4 hours or preferably overnight ( I kept it overnight in fridge for about 14 hours)

    cover dough with a cling

    Next day , remove the cling film and check for the thick dough.

    cookie dough after resting in refrigerator

    Whilst , preheat the oven to 180 deg Celsius. Line the baking tray and set aside.

    Scoop 1 tablespoon of cookie dough into palms and make small balls. For a smaller cookie , 1 tablespoon of dough is sufficient ! 

    Chocolate Crinkle Cookies

    Coat the dough balls in powdered sugar. Be generous enough and double roll the balls in powdered sugar for even coating.

    Chocolate Crinkle Cookies

    Arrange the prepared dough balls with ½ inch apart in a baking tray and bake for 10 to 12 minutes. (Don’t overbake , if done cookie will harden and it won’t be fudgy )

    crinkle cookies ready to bake

    Once after 10 minutes , remove from the oven. Cookies will look soft , just leave it in the baking tray for 5 minutes .

    baked crinkle cookies

    Then remove cookies from tray and let it cool on wire rack.

    chocolate-crinikle-cookies

    Recipe

    crinkle-cookies
    5 from 2 votes

    Chocolate Crinkle Cookies

    Chocolate Crinkle cookies are deliciously soft, brownie textured center and slightly crispy on the outside. These chocolaty cookies are perfect, easy to make and best for any celebrations .
    Prep Time20 minutes mins
    Cook Time12 minutes mins
    Resting time4 hours hrs
    Total Time4 hours hrs 32 minutes mins
    Course: Dessert
    Cuisine: American
    Keyword: Christmas, Cookies
    Servings: 28 small cookies
    Calories: 65kcal
    Author: Muktha H S

    Ingredients

    • 1 cup all purpose flour
    • 1 cup sugar
    • ½ cup unsweetened cocoa powder
    • 2 no’s eggs
    • ¼ cup vegetable oil
    • 1 teaspoon baking powder
    • ½ teaspoon salt
    • 1 teaspoon vanilla extract
    • ¼ cup powdered sugar

    Instructions

    • In a mixing bowl , mix together the cocoa powder, white sugar, eggs 2 no’s ,vegetable oil and vanilla. Whisk well until everything is fully incorporated.
    • Place a sieve over the mixing bowl , add all purpose flour , baking powder and salt. Sift everything together into the mixing bowl.
    • Mix everything together with a spatula to form a dough . Dough will be super sticky , don’t worry.
    • Cover the bowl with a cling and place in refrigerator for minimum 4 hours or preferably overnight ( I kept it overnight in fridge for about 14 hours)
    • Next day , remove the cling film and check for the thick dough.
    • Whilst , preheat the oven to 180 deg Celsius. Line the baking tray and set aside.
    • Scoop 1 tablespoon of cookie dough into palms and make small balls. For a smaller cookie , 1 tablespoon of dough is sufficient !
    • Coat the dough balls evenly in powdered sugar. Be generous enough to double coat the balls in powdered sugar.
    • Arrange the prepared dough balls with ½ inch apart in a baking tray and bake for 10 to 12 minutes. (Don’t overbake , if done cookie will harden and it won’t be fudgy )
    • Once after 10 minutes , remove from the oven. Cookies will look soft , just leave it in the baking tray for 5 minutes .
    • Then remove cookies from tray and let it cool on wire rack.

    Video

    Nutrition

    Calories: 65kcal

    Hot Chocolate Recipe

    Published : December 14, 2021 | Last Update on September 21, 2022 By Muktha

    hot chocolate recipe

    A rich and creamy homemade Hot Chocolate gets ready in few minutes. To make this best ever hot chocolate, you just need 3 staple kitchen ingredients. Its favorite among many on cold winter days .

    Serve a warm mug of hot cocoa , an ULTIMATE cozy drink along with some Chocolate crinkle cookies , peanut butter cookies , Almond cookies or some warm Banana bread

    Saying said my other favorites for the season are cozy Apple Cinnamon Tea and Turmeric Milk

    hot-chocolate
    [feast_advanced_jump_to]

    About this recipe

    Hot chocolate is a perfect cozy drink for cold winter or monsoon evenings. You can make this best ever hot chocolate recipe on stove top , slow cooker or in instant pot.

    To make hot chocolate , all you have to do is to add the ingredients to a saucepan . Stir it a few times keeping in simmer and your rich, creamy, chocolaty hot chocolate gets ready under 10 minutes.

    Make this comforting drink using real ingredients at home with my fail-proof recipe.

    Ingredients

    hot-chocolate-ingredients@palates-desire

    To make this best ever cozy drink , all you need is just 3 ingredients , rest all are optional ingredients

    • Chocolate – The most important and star of the recipe is of course this. Be sure to use a good quality bitter sweet 72% cocoa solids chocolate. You can use bittersweet chocolate chips, chunks, or shavings from a rich chocolate.
    • Milk – Use full fat whole milk for a creamier and rich consistency. Also fat in milk incorporates chocolate better than skim milk.
    • Fresh Cream - Yes, you read this right. For a rich and ultimate cocoa , you need to add pouring cream to make this recipe.
    • Optional Ingredients - Sugar , Vanilla extract and Hot Chocolate Toppings.

    Refer recipe card for actual measurements.

    Variations

    Espresso – Once your hot chocolate is ready, stir in a shot of espresso.

    Caramel – Add caramel sauce to the hot chocolate with the other ingredients. Skip adding extra sugar as the caramel syrup is quite sweet.

    Peppermint – Add in half a teaspoon of peppermint extract and give it a quick mix.

    Cinnamon or other warm spices – Add in a little cinnamon powder or any other warm spices powder and give it a mix.

    Top Tip

    Always make Hot chocolate on simmer or low heat settings . Making it over high temperature may burn the chocolate and spoil the entire drink.

    FAQ's

    What are the best toppings for this Hot Chocolate ?

    The BEST part about homemade hot chocolate recipe is that you can make a toppings bar for extra added flavors. My favorite is marshmallows but you can also add whipped cream , mini chocolate chips, sprinklers , cocoa dust , chocolate shavings and the list continues as per your taste and creativity.

    How to reheat hot cocoa?

    • Stovetop – Reheat in a saucepan over low heat until warm, stirring frequently.
    • Instant Pot - The best part is that instant pot keeps it warm until you are ready to serve it.
    • Slow Cooker – When serving at a party, you can also keep hot cocoa warm in a slow cooker on the low heat setting.

    How to make vegan hot chocolate?

    To make it vegan, replace dairy milk with dairy-free milk options such as almond milk, or cashew milk. Chocolate is vegan but still make sure to check the label as some brands may add dairy to their products.

    Does hot chocolate have caffeine?

    Unsweetened cocoa naturally contains small amount of caffeine hence hot chocolate does have some caffeine with it.

    You may also like

    • pumpkin-walnut-cake-recipe
      Pumpkin Walnut Cake
    • eggless chocolate mousse
      Eggless Chocolate Mousse
    • fruit-cake
      Plum Cake
    • lamingtons
      Lamington - how to make Australian Lamington Cake

    How to make Hot Chocolate

    Into a thick bottom sauce pan , add chopped chocolates , fresh cream , milk and sugar (if using).

    make-hot-chocolate-at-home

    Turn on the stove , keep on simmer and mix well everything until chocolate melts.

    tips for making hot chocolate

    Now let on simmer till it starts to bubble

    hot cocoa

    Again stir once again , you can find it thickening.

    hot chocolate thickening

    Now turn off the stove and add vanilla extract or any other flavors if you wish.

    hot-chocolate-homemade-recipe

    Mix well , pour to your mug top it with marshmallows and serve .

    hot chocolate

    Recipe

    hot chocolate recipe
    4.67 from 3 votes

    Hot Chocolate Recipe

    A rich and creamy homemade Hot Chocolate gets ready in few minutes
    Prep Time2 minutes mins
    Cook Time8 minutes mins
    Total Time10 minutes mins
    Course: Beverage, Drinks
    Cuisine: American, Fusion, World
    Keyword: Bachelor's Cooking, Christmas
    Servings: 2 people
    Calories: 312kcal
    Author: Muktha H S

    Ingredients

    • 60 grams Bitter sweet chocolate( about ⅓ cup grated ) , 72% cocoa solids
    • 1 cup Full fat milk
    • ¼ cup Fresh Cream
    • 1/.2 tablespoon sugar or to taste
    • ½ teaspoon Vanilla extract

    Instructions

    • Into a thick bottom sauce pan , add chopped chocolates , fresh cream , milk and sugar ( if using).
    • Turn on the stove , keep on simmer and mix well everything until chocolate melts.
    • Now let on simmer till it starts to bubble
    • Again stir once again , you can find it thickening.
    • Now turn off the stove and add vanilla extract or any other flavors if you wish.
    • Mix well , pour to your mug top it with marshmallows and serve .

    Video

    Notes

    • Always make sure to melt chocolate on simmer or low heat . when it starts to thicken , pull off the stove and add your favorite flavors.

    Nutrition

    Calories: 312kcal

    Classic Egg Salad

    Published : November 26, 2021 | Last Update on September 21, 2022 By Muktha

    Classic Egg Salad recipe

    Classic Egg Salad is a simple , quick and easy egg salad made with boiled eggs , mayonnaise , dijon mustard , herbs and seasoning. It's gets ready within 15 minutes.

    It’s packed with protein and nutrients, so make it often, eat it more ! It is great to serve along side of toast or to make some delicious egg sandwiches or wraps. You can also eat just like that with a fork and complete the bowl , as I often do.

    Eggs for breakfast are must for me ,either I'll end up eating some boiled eggs , make some scrambled eggs , Frittata or Oats Omlette .

    classic Egg Salad
    [feast_advanced_jump_to]

    About this recipe

    One can never get bored with this Classic Egg Salad . This is not just any ordinary salad, it packs loads of flavors in it.

    This is a protein rich, low-carb, healthy salad that you can add to your daily meal menu. It's also great for picnics , potluck and get together parties.

    You can serve this in many ways – as a salad, make egg sandwich, eat it for snack or as a low-carb meal.

    Also you just need very few ingredients from pantry to make this tasty and healthy classic egg salad. This recipe can be scalable . Check on how I make this egg salad.

    Ingredients

    Here are the list of ingredients to make this classic egg salad.

    Classic Egg Salad

    Hard boiled eggs and mayonnaise are the only two main ingredients here. Other ingredients are added to enhance the taste, texture and flavor of this salad.

    Mayonnaise - Full fat Mayonnaise works well with this recipe. You can use any flavored Mayonnaise if you wish . But my personal favorite is garlic flavored Mayonnaise.

    Dijon Mustard is used here but if not available you can go for yellow mustard also.

    Other Ingredients - Onion , Herbs , Lime juice and seasonings are used.

    Top Tip

    Perfectly boiled eggs are key to this salad. Those 12 minutes boiled eggs with deep yellow color yolk works best for this salad. Don't use over cooked eggs to make this salad.

    Chilled hard boiled eggs , works good here in this salad.

    Variations

    • Easily swap mayonnaise with Greek yogurt to make it healthy!
    • Add herbs like chives and dill leaves for more robust and depth of flavors .

    FAQ's

    Can I Make Egg Salad Without Mayonnaise?

    Not recommended . As boiled and chopped eggs gets drier, a creamy ingredient is important to bring eggs and everything else together. If not mayo , you can use mayo alternatives to make creamy and healthy egg salad recipe.

    What are Mayo alternatives , in this recipe ?

    Some of the mayo alternatives for creamier salads are – Greek Yogurt , Ricotta Cheese and Mashed avocado too

    Can I store left over Egg Salad ?

    Yes , you can store in clean air tight containers covered in fridge.

    How To Make Egg Salad Sandwich or Wraps?

    Fresh bread is great for making egg salad sandwiches. Place any salad leaf over toasted bread. Spread heaped tablespoon full of the salad mix over the toasted bread. Place the top bread and serve it.

    You might also like

    • onion egg bhurji
      Onion Egg Bhurji
    • Chickpea salad
      Chickpea Salad - Mediterranean Style
    • Beans-egg-bhurji-recipe
      French Beans Egg Bhurji
    • Spinach Salad
      Palak Paneer Salad | Spinach Salad

    How to make Classic Egg Salad

    Hard boil eggs for 12 minutes and turn off the stove. Cover with ice cold water and keep it aside for few minutes. Tap , break and peel the egg shell. You can chill eggs , before using in the recipe.

    Chop Eggs and transfer into a salad mixing bowl.

    Classic Egg Salad

    Now finely chop onion , celery , parsley or cilantro and any other herbs ,if using.

    Classic Egg Salad

    Season chopped eggs with salt and pepper .

    Classic Egg Salad

    Now add mayonnaise, dijon mustard and chilli flakes.

    Classic Egg Salad

    Add finely chopped onions and herbs into mixing bowl.

    Classic Egg Salad

    Mix well everything and serve.

    Classic Egg Salad

    Recipe

    Classic Egg Salad recipe
    4.67 from 3 votes

    Classic Egg Salad Recipe

    Classic Egg Salad is a simple , quick and easy egg salad made with boiled eggs , mayonnaise , dijon mustard , herbs and seasoning. It's gets ready within 15 minutes
    Prep Time5 minutes mins
    Cook Time12 minutes mins
    Total Time17 minutes mins
    Course: Lunch, Salads
    Cuisine: American
    Keyword: Bachelor's Cooking
    Servings: 2 people
    Calories: 224kcal
    Author: Muktha H S

    Ingredients

    • 4 Hard boiled eggs
    • 2-3 tablespoon Mayonnaise
    • 1 tablespoon Dijon Mustard
    • 4 tablespoon Onion finely chopped
    • 1 tablespoon Celery Stalk
    • 2 tablespoon Cilantro or Parsley finely chopped
    • ½ tablespoon Lime Juice
    • ½ teaspoon Pepper powder
    • ½ teaspoon Red Chilli flakes as required
    • Salt to taste

    Instructions

    • Hard boil eggs for 12 minutes and turn off the stove. Cover with ice cold water and keep it aside for few minutes. Tap , break and peel the egg shell. You can chill eggs , before using in the recipe.
    • Chop Eggs and transfer into a salad mixing bowl.
    • Now finely chop onion , celery , parsley or cilantro and any other herbs ,if using.
    • Season eggs with salt and pepper powder.
    • Add finely chopped onions and herbs into mixing bowl.
    • Now add mayonnaise, dijon mustard and chilli flakes.
    • Mix well everything and serve.

    Video

    Notes

    • A good quality, full fat mayonnaise works well here . Though , you can use and flavored mayonnaise of your choice . My personal favorite is Garlic Flavored Mayonnaise to make this classic egg salad

    Nutrition

    Calories: 224kcal

    Makhana Namkeen

    Published : November 25, 2021 | Last Update on October 17, 2022 By Muktha

    makhana namkeen recipe

    Makhana Namkeen is Foxnuts trail mix with roasted fox nuts ,dry fruits nuts and spices for seasoning. It gets ready within 15 minutes and is a healthy munching snack. This roasted phool makhana namkeen recipe is vegan, vegetarian, and gluten-free too.

    It's one of the healthiest snacking option to choose. Foxnuts are known for it's nutrition and health benefits.

    I'm very fond of these nuts and I often make Makhana Kheer , Smoothie Bowl for breakfast , Makhana Curry , raita and Roasted Makhana with different flavors.

    Makhana Namkeen
    [feast_advanced_jump_to]

    About this recipe

    Makhana Namkeen is popular during Navratri ( 9 day long Hindu festival ) or on any auspicious day where fasting is observed. As this recipe is made for fasting, ingredients are choose accordingly, however you can choose other seasonings too.

    Apart from religious fasting , this simple roasted fox nuts are great snack to munch . It's nutritious and curb your hunger when you much on . Phool Makhana, Fox Nuts, or Lotus Seeds are loaded are a good source of protein, calcium, and iron.

    Phool Makhana is known by many names like Lotus Seeds, Fox nuts, Euryale Ferox, Gorgon nut, etc. Fox nuts / Makhana are basically lotus seeds that are shelled, dried, and then sold.

    Ingredients

    Check out this image for a glance of ingredients used in this recipe. As I have made this for fasting ,I have used only ingredients that allowed in religious fasting in India. But if you are making for any other day or just to enjoy munching , feel free to add spices of your choice .

    Makhana Namkeen

    Makhana / Fox nuts -Needless to mention main ingredient for this recipe

    Dry fruits and Nuts - I have used Cashews , Almonds , Dry coconut flakes , Peanuts and golden Raisins . But you can choose to add any of your favorite nuts and fruits to make it more tasty

    Clarified Butter - I have used some homemade Desi Ghee here , Clarified Butter / Ghee for roasting fox nuts as well as dry nuts . Be sure to use clarified butter as oil doesn't taste good at all. For vegan's , Choose coconut oil

    Seasoning - Red chili powder ,black salt and sugar is what , I have used . You can add spices and seasonings as per your choice.

    See recipe card for quantities.

    Top Tips

    Always roast Makhana on low flame and thick bottom pan . Roasting on high flame makes fox nuts to brown quickly from outside and chewy inside.

    Variations

    Variations for makhana namkeen mainly play around with flavors and additional ingredients . If you are not doing this recipe for fasting then you can make this Namkeen like any other chivda recipe by adding Curry leaves , Garlic and variations with spices like black pepper powder and hing/ asafoetida .

    FAQ's

    How long you can store Makhana Namkeen ?

    Roasted makhana/ Makhana Namkeen tastes the best when it is fresh but can be stored in an airtight container up to 10 days. But I always feel the crunchiness reduces over time. In this case, you can warm it up in microwave for 10 -15 seconds just before serving.

    How to check that Makhana are roasted properly?

    You can check in two ways , firstly well roasted foxnuts will be crunchy and crushes easily between fingers . Incase if it doesn't crushes easily then continue roasting for few more minutes. Second way , just pop roasted makhana into your mouth , if its chewy and sticks to your teeth then be sure that it needs some more roasting.

    You might also like

    • cornflakes_chivda
      Cornflakes Chivda Recipe - Easy, Healthy Diet Snacks
    • trail-mix-recipe
      Healthy Trail Mix | How to make trail mix
    • Masala Peanuts
      Masala Peanuts
    • Avarekalu Mixture
      Avarekalu Mixture

    How to make Makhana Namkeen

    Heat 1.5 tablespoon of ghee or clarified butter in a deep pan .

    Makhana Namkeen

    Add 3 cup of makhana and roast on a medium-low heat until crisp.

    roasting makhana

    You can check the doneness by crushing the roasted makhana between fingers.

    check if makhana are roasted crunchy

    Transfer the roasted makhana into a bowl and set aside.

    Use the same pan to heat ½ tablespoon of ghee. Now add in peanuts and fry until peanuts skin starts to peel.

    Move roasted peanuts to a corner and add sliced almonds, cashews and raisins.

    Continue to fry dry fruits and nuts until cashews start to change color to light golden.

    Lastly, add sliced dry coconut and fry until coconut slightly changes color.

    frying dry fruits and nuts for namkeen

    Finally add roasted makhana and mix well everything.

    how to make makhana namkeen

    Make some space at the centre of the pan, add ½ tablespoon of ghee.

    Add salt , chili powder and sugar on ghee, mix well everything.

    Makhana Namkeen

    Mix everything so that spices coats makhana well.

    Makhana namkeen ready to eat

    Once it cools down , store in a air tight jar and serve when required.

    Recipe

    makhana namkeen recipe
    5 from 1 vote

    Makhana Namkeen Recipe

    Makhana Namkeen is Foxnuts trail mix with roasted fox nuts ,dry fruits nuts and spices for seasoning. It gets ready within 15 minutes and is a healthy munching snack.
    Prep Time5 minutes mins
    Cook Time15 minutes mins
    Total Time20 minutes mins
    Course: Snack
    Cuisine: India
    Keyword: Bachelor's Cooking, Diet, Gluten Free, Healthy
    Servings: 4 people
    Calories: 144kcal
    Author: Muktha H S

    Ingredients

    • 3 cups Makhana/ Fox nuts
    • 2.5 tablespoon ghee / clarified butter
    • 15 almonds sliced roughly about 2 tbsp
    • 12 cashews halves
    • 2 tablespoon raisins
    • 3-4 tablespoon of sliced dry coconut
    • ½ teaspoon rock salt or black salt
    • ½ teaspoon red chili powder
    • ¼ teaspoon sugar

    Instructions

    • Heat 1.5 tablespoon of ghee or clarified butter in a deep pan .
    • Add 3 cup of makhana and roast on a medium-low heat until crisp.
    • You can check the doneness by crushing the roasted makhana between fingers.
    • Transfer the roasted makhana into a bowl and set aside.
    • Use the same pan to heat ½ tablespoon of ghee.
    • Now add in peanuts and fry until peanuts skin starts to peel.
    • Move roasted peanuts to a corner and add sliced almonds, cashews and raisins.
    • Continue to fry dry fruits and nuts until cashews start to change color to light golden.
    • Lastly, add sliced dry coconut and fry until coconut slightly changes color.
    • Finally add roasted makhana and mix well everything.
    • Make some space at the centre of the pan, add ½ tablespoon of ghee.
    • Add salt , chili powder and sugar on ghee, mix well everything.
    • Mix everything so that spices coats makhana well.
    • Once it cools down , store in a air tight jar and serve when required.

    Video

    Nutrition

    Calories: 144kcal

    Mushroom Garlic Fried Rice

    Published : November 17, 2021 | Last Update on September 21, 2022 By Muktha

    Mushroom Garlic Fried rice

    Mushroom garlic fried rice is a flavorsome rice made with left over rice and button mushrooms and crispy fried garlic . Get ready within 20 minutes with left over rice and makes it for quick dinner or lunch. You can pair it with Chinese style curries for added flavor.

    Few of my personal favorites mushroom recipes are - Butter Garlic Mushroom, Mushroom Pulao , Mushroom Frittata and Mushroom Soup

    mushroom garlic fried rice
    [feast_advanced_jump_to]

    About this recipe

    Mushroom Garlic fried rice is a spicy lip smacking Indo-Chinese dish made using leftover rice, mushrooms, and sauces. Adding golden fried garlic chips , instantly elevates the flavor of the dish. 

    This dish is wholesome and a complete meal in itself. You can pair it with Chinese style curries like Chilli Paneer or Chilli Chicken for added flavor.

    This recipe of mushroom fried rice is very adaptable and you can play with flavors by adding different sauces according to your taste preference. You can also add more vegetables or proteins to suit your needs.

    It is a great dish to pack lunchbox , travels and picnic too.

    This Mushroom Fried Rice is,

    • Flavorsome and Delicious
    • Quick and Easy
    • Prepared with leftover rice
    • Perfect to pack
    • completely customizable

    Ingredients

    ingredients for mushroom garlic fried rice

    To make this quick and easy, fuss free Burnt Garlic Mushroom fried rice recipe, you will need,

    Rice – Use any short grain non-sticky rice for this rice recipe. Make sure to cool the rice completely before stir-frying it otherwise it will become mushy.

    Veggies – I have used celery, onion, green bell pepper, green onions, and button mushrooms. You can add any mushrooms that are available to you.

    You can add more veggies like carrots, green beans, broccoli etc to it too.

    Garlic – It single-handedly adds so much taste and flavor to this recipe , its the hero of the dish.

    Oil – I have used sesame oil, as it adds a more authentic taste to the recipe. But if you do not have the same, you can just use the regular vegetable oil for this recipe.

    Others – Surely we need few more ingredients such as soy sauce, red chili sauce , white vinegar, ground black pepper, and salt. Since we are adding soy sauce which is has lots of salt in it already , be careful while adding salt.

    Tips

    For fried rice , its always best to use leftover cooked rice. But if you want to make it using fresh rice, make sure to cool it completely in a wide plate and refrigerate it for a few hours before using.

    I have used short grain white rice to make this dish . But you can definitely use long grain rice or medium size rice, Jasmine rice , brown rice, millets , quinoa or cauliflower rice .

    Try to use a wide pan or iron wok to make fried rice.

    Variations

    Schezwan & Chilli Garlic – Add a few teaspoon of schezwan sauce or Chilli Garlic or any other sauces to this rice to make it spicy or give any respective flavors.

    Cauliflower – Replace rice with cauliflower rice and make cauliflower mushroom rice for all weight watchers.

    Veggies – You can add veggies like red and yellow bell peppers, corn, asparagus, carrot, baby corn, etc to this rice.

    Eggs and Meat  – You can scramble the eggs and add beef, chicken, bacon, chorizo, shrimp etc to this rice with the mushrooms to make an respective mushroom fried rice recipe.

    FAQ's

    Can I store the leftovers ?

    It can be stored for about 2-3 days in the refrigerator in an airtight container. Reheat only the required amount in a wok or in the microwave until nice and warm, before serving again.

    Any substitute for Button Mushrooms , in this recipe ?

    I have used button mushrooms in this recipe. However, you can make cremini mushrooms or with fresh shiitake mushrooms . Also you can use combination of various varieties of edible mushrooms.

    Is adding Celery in must ?

    Substitute fresh coriander/cilantro leaves if you do not have celery.

    Can we make it for big batch?

    The recipe can be scaled to make a big batch or small batches.

    You might also like

    • vegetable fried rice
      Vegetable Fried Rice | Indo-Chinese Fried Rice Recipe
    • paneer chilli recipe
      Chilli Paneer |Resturant Style Chilli Paneer
    • chicken-fried-rice-recipe
      Chicken Fried Rice
    • dry gobi manchurian recipe
      Gobi Manchurian Dry | Cauliflower Manchurian

    Watch Video

    How to make Mushroom Garlic Fried Rice

    Wash mushrooms to get rid of soil and pesticides if any. Pat it dry and slice them.

    In  a pan , heat 2 tablespoon of sesame oil and add slice garlic. Fry until crisp and nice golden in color. Make sure not to brown , it should only be golden in color. Frying it more will make it bitter.

    Mushroom Garlic Fried Rice

    Remove fried garlic from oil and set aside till use.

    Into the same pan , add chopped garlic, ginger, onion , white part of spring onion/scallions and fry for 1-2 minutes till raw smell vanishes. Now add celery stalks and give a quick stir.

    Mushroom Garlic Fried Rice

    Add Sliced mushroom and saute on medium high heat for 3-4 minutes

    Mushroom Garlic Fried Rice

    When it starts to release water and turns brown from edges add soya sauce, vinegar, red chili sauce and mix well.

    Mushroom Garlic Fried Rice

    Add left over rice , 1 tablespoon of sesame oil ,salt and pepper to taste.

    Mushroom Garlic Fried Rice

    Fry on high heat for 1-2 minutes, turn off the stove.

    Add green onions, celery and fried garlic .

    Mushroom-garlic-fried-rice

    Quick stir and serve with any of your favorite Indo Chinese side dish.

    Recipe

    Mushroom Garlic Fried rice
    5 from 1 vote

    Mushroom Garlic Fried Rice

    Mushroom garlic fried rice is a flavorsome rice made with left over rice and button mushrooms and crispy fried garlic
    Prep Time3 hours hrs 10 minutes mins
    Cook Time20 minutes mins
    Total Time3 hours hrs 30 minutes mins
    Course: Main Course
    Cuisine: Indo-Chinese
    Keyword: Bachelor's Cooking, Rice Varities
    Servings: 4 people
    Calories: 310kcal
    Author: Muktha H S

    Ingredients

    • 4 Cups Cooked rice
    • 200 grams Button Mushroom sliced
    • 3 tablespoon Sesame Oil divided into 2 + 1 tbsp
    • 2 tablespoon Garlic Sliced
    • 1 tablespoon Garlic finely chopped
    • 1 tablespoon Ginger finely chopped
    • 2 tablespoon Onion finely chopped
    • 2 tablespoon white part of green onions / scallions
    • 1 tablespoon Celery stalk chopped
    • 1 tablespoon Dark Soya Sauce
    • ½ tablespoon White Vinegar
    • 1 teaspoon Red Chilli Sauce
    • 1 teaspoon Black pepper powder or as required
    • Salt to taste
    • 1 tablespoon Celery leaves chopped
    • ½ Cup Scallions / green onions

    Instructions

    • Wash mushrooms to get rid of soil and pesticides if any. Pat it dry and slice them.
    • In a pan , heat 2 tablespoon of sesame oil and add slice garlic. Fry until crisp and nice golden in color. Make sure not to brown , it should only be golden in color. Frying it more will make it bitter.
    • Remove fried garlic from oil and set aside till use.
    • Into the same pan , add chopped garlic, ginger, onion , white part of spring onion/scallions and fry for 1-2 minutes till raw smell vanishes.Now add celery stalks and give a quick stir..
    • Add Sliced mushroom and saute on medium high heat for 3-4 minutes
    • When it starts to release water and turns brown from edges add soya sauce, vinegar, red chili sauce and mix well.
    • Add left over rice , 1 tablespoon of sesame oil ,salt and pepper to taste.
    • Fry on high heat for 1-2 minutes, turn off the stove.
    • Add green onions, celery and fried garlic .
    • Quick stir and serve with any of your favourite Indo Chinese side dish

    Video

    Nutrition

    Calories: 310kcal

    Chickpea Salad - Mediterranean Style

    Published : November 13, 2021 | Last Update on September 24, 2022 By Muktha

    Chickpea salad

    Mediterranean Chickpea Salad is delicious with low fat dressing and flavors are bang on. This adapted version of my Mediterranean chickpea salad uses hung curd instead of cheese . And also roasted sesame seeds instead of Tahini sauce to balance rustic flavors and yet keeping it low on fat.

    Chickpea Salad is a vegetarian high protein salad , it gets ready within 10 minutes , provided you have your chickpeas cooked or using canned chickpeas .

    Serve this salad as any wraps or collard wraps or can have as salad along with your meals . Incase if you are on a diet plan, you can have this all alone as a part of your meal. Its balanced and quite filling on its own.

    I love to eat my salads with full on flavors and not just bland . Here are my all time favorite salads shared on blog -

    • Sicilian Cabbage Salad ,
    • Spinach Cottage Cheese Salad ,
    • Kidney Bean Salad ,
    • Classic Egg Salad
    Chickpea Salad - Mediterranean Style
    [feast_advanced_jump_to]

    About this recipe

    Chickpea salad has been one of favorite for years now. I’ve made many chickpea salad variations, but this quick and easy recipe is the best . The star of the show is a hung curd dressing. It’s fresh and tangy flavors meld so well and tastes delicious.

    Because of the protein from the chickpeas, it’s hearty enough to be a meal on its own, but it can also be served as a healthy side dish.

    The garbanzo beans hold up well in the fridge, so you can easily make it ahead. And with a mix of beans, herbs, and fresh vegetables , you get a delicious blend of flavors in every bite.

    Ingredients

    For dressing, I have used most basic ingredients which are readily available at your pantry . Find the ingredients list here , refer recipe card for actual measurements.

    chickpea-salad-ingredients

    Produce - Red Onions , Cherry Tomatoes , English Cucumber , Fresh Herbs -Coriander leaves and Mint leaves , Garlic cloves , Lime Juice and Boiled Chickpeas

    Spices - Roasted Cumin powder , Paparika , Blackpepper powder and Salt

    Dairy - Hung Curds or Greek Yogurt

    Oil -Extra Virgin Olive Oil

    Variations

    • If you are not much concerned about calories from fat , you can swap Hung curd for goat cheese or feta cheese.
    • Add some soft and chewy Medjool dates for sweetness in salad
    • Try out adding some nicely roasted peanuts or roasted chickpeas for crunchy bites in your salad.

    FAQ's

    Can I make it ahead ? Yes , garbanzo beans hold up well in the fridge. You prep it ahead of time , dress and serve . Also you can pack it up for a healthy lunch.

    Can I make it Vegan ? Yes , of course, swap hung curd with any dairy free yogurt . But my personal favorite is Peanut Curd

    Can I use Tahini ? Yes , feel free to use Tahini sauce instead of toasted sesame seeds. Just to make it less fat , I didn't go for Tahini sauce. Also in India , Sesame seeds are handy at home than tahini .

    Canned Chickpeas or Boiled Chickpeas - You can use both . Just make sure to drain water completely from canned chickpeas , before using in the recipe.

    Does raw garlic be more pungent ? No , just make sure to finely chop garlic and not to paste it. It's need for flavors here.

    You might like this

    • chana-pulao-recipe
      Chana Pulao | Chickpea Pilaf
    • okra-peanut-stir-fry
      Moongphali Bhindi | Peanut Okra Stir fry
    • kosambari
      Kosambari Recipe | Hesaru bele kosambari
    • bisi-bele-bath-with-khara-boondi
      Bisi Bele Bath Recipe

    How to make Chickpea Salad ?

    For dressing

    Take 3 tablespoon of hung curd in a bowl / jar. Add olive oil, chopped garlic, roasted cumin powder, paparika, blackpepper powder, salt to taste and lime juice.

    Chickpea Salad - Mediterranean Style

    Now add in roasted sesame seeds. Along with giving nutty tasty, it adds on more rustic flavors.

    Chickpea Salad - Mediterranean Style

    Add some freshly chopped cilantro and mint leaves, adding fresh herbs into dressing helps to release out some water which make it easy for smooth mixing of spices when poured on to salad vegetables.

    Chickpea Salad - Mediterranean Style

    Stir and mix well everything.

    Chickpea Salad - Mediterranean Style

    To make salad

    Into a mixing bowl add 1 cup boiled chickpeas, chopped red onions, English cucumber and cherry tomatoes.

    Chickpea Salad - Mediterranean Style

    Pour hung curd dressing over vegetables and chickpeas.

    Chickpea Salad - Mediterranean Style

    Nicely give a stir to mix well everything.

    chickpea salad mediterranean style

    Let it sit for 5 minutes for flavors to meld together and serve.

    Recipe

    Chickpea salad
    5 from 1 vote

    Chickpea Salad - Mediterranean Style

    Mediterranean Chickpea Salad is tasty, healthy salad with low fat dressing . It gets ready soon and packs well for lunch box
    Prep Time10 minutes mins
    Cook Time15 minutes mins
    Total Time25 minutes mins
    Course: Salads
    Cuisine: Mediterranean, World
    Keyword: Bachelor's Cooking, Diet, Healthy, Weight Loss
    Servings: 3 people
    Calories: 169kcal
    Author: Muktha H S

    Ingredients

    • 1 cup Chickpeas boiled
    • ½ cup Red Onions chopped
    • ¼ cup Cherry Tomatoes quartered
    • ½ cup English Cucumber sliced and quartered

    Salad Dressing

    • 3 tablespoon Hung Curd
    • 1 tablespoon Olive Oil extra virgin
    • 1 tablespoon Fresh Lime juice
    • 1 teaspoon garlic finely chopped
    • 1 teaspoon Cumin Powder
    • ¼ teaspoon Paparika
    • ½ teaspoon Blackpepper powder or to taste
    • 1 tablespoon Sesame seeds, roasted
    • 2 tablespoon Coriander leaves
    • 1 tablespoon fresh Mint Leaves
    • Salt as required

    Instructions

    For dressing

    • Take 3 tablespoon of hung curd in a bowl / jar. Add olive oil, chopped garlic, roasted cumin powder, paparika, blackpepper powder, salt to taste and lime juice.
    • Now add in roasted sesame seeds. Along with giving nutty tasty, it adds on more rustic flavours.
    • Add some freshly chopped cilantro and mint leaves, adding fresh herbs into dressing helps to release out some water which make it easy for smooth mixing of spices when poured on to salad vegetables.
    • Stir and mix well everything.

    To make salad

    • Into a mixing bowl add 1 cup boiled chickpeas, chopped red onions, English cucumber and cherry tomatoes.
    • Pour hung curd dressing over vegetables and chickpeas.
    • Nicely give a stir to mix well everything.
    • Let it sit for 5 minutes for flavours to meld together and serve.

    Video

    Nutrition

    Calories: 169kcal
    • 1
    • 2
    • 3
    • …
    • 10
    • Next Page »

    Hey ! Nice To Meet You

    Muktha-about-me

    Hi ! I'm Muktha , Blogger , Nutrition Advisor & Recipe Creator behind Palate's Desire . I share tried & tested everyday meal recipes for healthy living and occasional indulgence. Palate's Desire helps even a novice to cook like a pro. Happy Cooking...! Read More about me →

    Stay Connected

    • Instagram

    Baking Recipes

    • peanut butter cookies
      Peanut Butter Cookies
    • crispy chicken nuggets
      Chicken Nuggets Recipe
    • crispy fried chicken
      Fried Chicken Recipe | Crispy Fired Chicken
    • Karela-chips-with-coffee
      Karela Chips Recipe | Bittergourd Chips
    • cup cake recipe
      Eggless Cup Cake Recipe
    • tres-leches-cake
      Easy Tres Leches Cake Recipe

    Baking Recipes→

    Popular Recipes

    • bisi bele bath powder
      Bisi bele bath powder recipe - how to make
    • pineapple-salsa
      Pineapple Salsa - How to make spicy salsa
    • dry gobi manchurian recipe
      Gobi Manchurian Dry | Cauliflower Manchurian
    • okra-peanut-stir-fry
      Moongphali Bhindi | Peanut Okra Stir fry
    • Mangalore Fish Curry
      Fish Curry | Meen Gassi - Mangalore Style
    • moringa-tea-to-burn-fat
      Moringa Tea Recipe | Sip everday to Burn Fat easily

    Rice Recipes

    • Rice Varities
      Masala Lemon Rice | Nimbehuli Chitranna Recipe
    • huggi anna recipe
      Huggi Anna | how to make Huggi
    • mavinakayi-chitranna
      Mavinakayi Chitranna | Raw Mango Rice
    • vegetable dum biryani
      Vegetable Dum Biryani Recipe
    • Jeera Rice
      Jeera Rice
    • Heralekai Chitranna
      Heralekai Chitranna | Citron Lime Rice
    • pumpkin-khichdi-with-pickle-ghee
      Pumpkin Khichdi , Best ever Weight Loss Recipe
    • vegetbale-bath-with-raita
      Vegetable Bath

    Egg Recipes

    • scrambled mushroom eggs
      Scrambled Egg with Mushroom
    • spanish-potato-omelette-cut-into-wedges
      Spanish Potato Omelette
    • kerala egg curry
      Kerala Egg Curry | Easy Egg Recipes
    • shakshuka recipe
      Shakshuka | How to make Shakshuka recipe
    • Kolhapuri Egg Masala
      Kolhapuri Egg Masala
    • Mumbai Style Egg Burji
      Mumbai Style Egg Bhurji
    • Egg-gravy-recipe
      Egg Gravy
    • moringa egg bhurji
      Murungai Keerai Muttai Poriyal | Moringa Egg Stir Fry

    Sweets & Desserts

    • Thandai-kulfi
      Thandai Kulfi Recipe
    • Besan halwa recipe
      Besan Halwa Recipe
    • Makhana-kheer-recipe
      Makhana Kheer Recipe
    • mango-phirni-topped-with-pistachios-rose-petals
      Mango Phirni Recipe
    • Shahi Tukda
      Shahi Tukda Recipe
    • Sweet potato Halwa
      Sweet Potato Halwa | Shakarkandi Halwa
    • moongdal-barfi-recipe
      Moongdal Barfi | how to make moongdal burfi
    • Instant Modak in 20 minutes, make festivals more special
      Instant Modak in 20 minutes, make festivals more special

    Footer

    ↑ back to top

    ABOUT

    • ABOUT MUKTHA
    • MEDIA KIT

    STAY CONNECTED

    • SIGN UP ! FOR E MAILS
    • CONTACT ME

    POLICIES

    • PRIVACY POLICY
    • TERMS & CONDITIONS

    COPYRIGHT © 2025 PALATE'S DESIRE

    Rate This Recipe

    Your vote:


    A rating is required
    A name is required
    An email is required