Palate's Desire

  • Home
  • Recipe Index
  • Diet Recipes
  • Videos
  • Work with me
  • Subscribe
menu icon
go to homepage
  • Home
  • Recipe Index
  • Diet Recipes
  • Videos
  • Contact
    • Facebook
    • Instagram
    • Pinterest
    • Twitter
    • YouTube
  • subscribe
    search icon
    Homepage link
    • Home
    • Recipe Index
    • Diet Recipes
    • Videos
    • Contact
    • Facebook
    • Instagram
    • Pinterest
    • Twitter
    • YouTube
  • ×

    Eggless Chocolate Mousse

    Published : November 10, 2021 | Last Update on September 24, 2022 By Muktha

    eggless chocolate mousse

    Eggless chocolate mousse with step by step phots and video. Mousse au chocolat , this French Dessert is delectable, creamy , light and airy is so chocoholic and is extremely simple to make in just 20 minutes with only 7 ingredients.

    Doesn't it sound interesting? It has no eggs nor gelatin to set this dessert. The complexity of folding , tempering the chocolate has broken into down into simple , easy level recipe with simple basic ingredients .

    Make this dessert effortless and enjoy with your loved ones. this melt in mouth , light dessert . Though I'm a chocolate lover and often make this dessert for weekend meals , when in season , I love to indulge with Mango Mousse too.

    eggless-chocolate -mouse
    [feast_advanced_jump_to]

    About this recipe

    Chocolate Mousse is a delectable French dessert which uses eggs ,incorporate air into it and gently fold in tempered chocolates.

    Though making egg based chocolate mousse needs proper skills and patience , this eggless chocolate mousse is entirely opposite. Needs no skills , whip everything together until light and airy and it's done .

    With just 7 ingredients and no fancy gadgets , you can make this gourmet style dessert within 20 minutes (excluding set time). All though ingredients used here are not the traditional mousse making ingredients, its sure to give rich and creamy feel for this eggless chocolate mousse.

    This is perfect to serve for weekend desserts . You can also make it before hand and set in refrigerator overnight and serve to your guests next day.

    This Eggless Chocolate Mousse is

    • Quick and easy
    • Effortless
    • Tastes Delicious
    • Creamy and light

    Ingredients

    You just need 7 ingredients to make this effortless chocolate mousse

    eggless-chocolate-mouse-ingredients

    For Ganache - Dark chocolate , fresh cream , Salted Butter , Instant coffee powder and cinnamon powder.

    Any good quality semi sweet to dark chocolate is works well for this recipe. Chop well everything and set aside.

    Adding Instant coffee powder and cinnamon powder will bring out the flavors of this dessert , making it more chocolaty . Thought its optional , I highly recommend to use these.

    Salted butter is what I prefer to bring out the flavors but incase if you use plain butter then make sure to add a dash of salt .

    Fresh cream or light cream is well enough to make this ganache.

    To whip - Whipping cream , sugar and vanilla extract is all you need here. You can go for either light or heavy whipping cream here.

    Garnishing - whipped cream , fresh fruits, berries, chocolate shavings , cherries , go with your creativity ! When chocolate mousse is set well, light and delicious., you can just go with any of your personal favorites.

    Tips

    • While using double boiler method, make sure base of the bowl doesn't touch the water. Incase if water touches the base , chocolate seizes .
    • Give time for ganche to cools down before adding it into whipping cream . This helps chocolate mousse to incorporate much air and turns light without making it lumpy.

    Variations

    Can make it completely vegan , swap whipping cream with coconut cream and replace butter with vegan butter or coconut oil.

    You can play with flavors of your own , add lemon / orange zest while making ganache to get that citrus punch. Also you can add pinch of very finely chopped red chili to make chili chocolate mousse.

    FAQ's

    Can I make a vegan version of this chocolate mousse?

    Sure! Replace whipping cream with coconut cream and use coconut oil or vegan butter.

    Why is my chocolate mousse lumpy?

    I guess, these two things might have happened:

    1. Your chocolate might have seized while melting it. To prevent this, keep the top bowl of the double boiler away from the water.

    2. You might have added hot ganache into your whipped cream . Make sure to cool ganache before adding into whipped cream .

    Why did my chocolate seize?

    I prefer melting chocolate in a double boiler. Though you can make the ganache in a microwave, in a microwave chances of the chocolate, burning is high.

    You might also like

    • pumpkin-walnut-cake-recipe
      Pumpkin Walnut Cake
    • lamingtons
      Lamington - how to make Australian Lamington Cake
    • banana-bread-recipe
      Easy Banana Bread | Eggless Bread Recipe
    • tres-leches-cake
      Easy Tres Leches Cake Recipe

    How to make eggless chocolate mousse

    To make Chocolate Ganache

    Use double boiler method : Boil water in a sauce pan and keep it on simmer.

    Place a bowl on sauce pan , make sure water shouldn’t touch the base of the bowl.

    Eggless Chocolate Mousse

    Add chopped dark chocolate , instant coffee powder , cinnamon powder, butter and fresh cream.

    Eggless Chocolate Mousse

    Stir and whisk everything briskly. So that chocolate melts and blends well with other ingredients to form shiny and silky smooth chocolate ganache.

    Eggless Chocolate Mousse

    Remove bowl from stove top and set aside to cool down.

    For whipping cream

    In a bowl , take chilled whipping cream . Add sugar and vanilla extract.

    Eggless Chocolate Mousse

    On a medium low speed , whip cream until soft peaks are formed.

    Eggless Chocolate Mousse

    Making Chocolate Mousse

    Now add prepared ganache

    Eggless Chocolate Mousse

    and continue to whip until light and fluffy.

    Eggless Chocolate Mousse

    Fill ganache into a pipping bag or just spoon ganache into a small glass serving bowl.

    Eggless Chocolate Mousse

    Seal the glass /bowl mouth with a foil cover and refrigerate for minimum 3 to 4 hours to set.

    Eggless Chocolate Mousse

    After 4 hours , remove from refrigerator . By now chocolate mousse would have been nicely set. Remove foil

    Eggless Chocolate Mousse

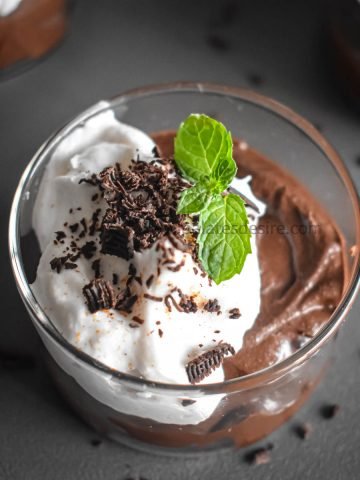
    Garnish with some whipped cream , chocolate shavings, mint sprig and serve as a dessert.

    Eggless Chocolate Mousse

    Recipe

    eggless chocolate mousse
    5 from 1 vote

    Eggless Chocolate Mousse

    Eggless Chocolate Mousse is delectable, creamy , light and airy ; it's so chocolaty and is extremely simple to make in just 20 minutes
    Prep Time20 minutes mins
    Cook Time0 minutes mins
    Setting time4 hours hrs
    Total Time4 hours hrs 20 minutes mins
    Course: Dessert
    Cuisine: Fusion, World
    Keyword: Bachelor's Cooking, Desserts, Party Desserts
    Servings: 4 people
    Calories: 348kcal
    Author: Muktha H S

    Ingredients

    For Chocolate Ganache

    • 1 cup dark chocolate chopped
    • 1 teaspoon instant coffee powder
    • ½ teaspoon cinnamon powder
    • ¼ cup fresh cream
    • 1 tablespoon salted butter softened

    For whipping cream

    • ½ cup whipping cream chilled
    • 2 tablespoon sugar
    • 1 teaspoon vanilla extract

    For garnishing

    • ½ cup whipped cream
    • chocolate shavings
    • dash of cinnamon powder
    • few mint sprigs
    • strawberry or any berries

    Instructions

    To make Chocolate Ganache

    • Use double boiler method : Boil water in a sauce pan and keep it on simmer.
    • Place a bowl on sauce pan , make sure water shouldn’t touch the base of the bowl.
    • Add chopped dark chocolate , instant coffee powder , cinnamon powder, butter and fresh cream.
    • Stir and whisk everything briskly. So that chocolate melts and blends well with other ingredients to form shiny and silky smooth chocolate ganache.
    • Remove bowl and set aside.

    For whipping cream

    • In a bowl , take chilled whipping cream . Add sugar and vanilla extract.
    • On a medium low speed , whip cream until soft peaks are formed.

    Making Chocolate Mousse

    • Now add prepared ganache and continue to whip until light and fluffy.
    • Fill ganache into a pipping bag or just spoon ganache into a small glass serving bowl.
    • Seal the glass /bowl mouth with a foil cover and refrigerate for minimum 3 to 4 hours to set.
    • After 4 hours , remove from refrigerator . By now chocolate mousse would have been nicely set.
    • Remove foil , garnish with some whipped cream , chocolate shavings, mint sprig and serve as a dessert.

    Video

    Nutrition

    Calories: 348kcal

    Turmeric Milk Recipe

    Published : November 10, 2021 | Last Update on September 24, 2022 By Muktha

    turmeric milk recipe

    Turmeric milk is a traditional healthy Indian drink made with milk, turmeric powder and some warm spices.

    Golden milk or Turmeric Milk is an ayurvedic medicinal drink used has a remedy for fever, cold and cough . It's a common practice to drink this before bed, as it induces good sleep.

    For me it's a more of warm drink on winter nights , before bed. Other cozy winter recipes which I love the most are Pumpkin Walnut Cake , Apple Cinnamon Tea , Hot Chocolate , Pumpkin soup , Besan Halwa and Sesame Ladoo

    Turmeric Milk Recipe
    [feast_advanced_jump_to]

    About this recipe

    Turmeric Milk aka Turmeric Latte / Golden milk is a ancient Indian milk . We call turmeric milk as Haldi Doodh in India and it's a compulsory bed time drink to many of us. Though it's consumed throughout the year , it's most popular during winter season. When consumed regularly ,Turmeric Milk is known to Boost Immunity .

    It's a good old known home remedy for cold, cough , common flu and sleeplessness. Drinking turmeric milk before bed helps to get good quality sleep.

    I add Turmeric milk in our family diet during seasonal transitions and also in winter season . This prevents us from catching common flu. Even if dinner is skipped , you can drink this milk, as it's a complete meal on its own .

    Though few prepares golden milk with milk and turmeric powder . According to ayurvedic preparations , along with turmeric , black pepper powder and ghee are used.

    Come lets see quickly on how to make this Turmeric Milk right to reap its total health benefits.

    Ingredients

    You need few basic spices for flavors and just 4 main ingredients to make this immunity boosting , healthy golden milk recipe.

    turmeric milk ingredients

    To make this wonderful and tasty golden milk all you need is Whole Milk . You can either use full cream milk or skimmed milk, its up to your choice.

    Organic Turmeric powder is what you need to use . If you don't have organic turmeric powder you can also grate some fresh turmeric root to make this golden latte .

    Blackpepper powder is important for absorbing curcumin from turmeric. Black pepper contains  piperine, this enhances curcumin absorption in the body by up to 2,000%, combining the spices magnifies their effects. Hence it's recommended to add blackpepper where ever turmeric is used.

    Ghee / Clarified butter , ayurvedic preparation calls for fat , either ghee from cow's milk or cold pressed almond oil or coconut oil to make this haldi doodh. Because it helps in digestion , curing sore throat -if any ; and also helps in boosting immunity.

    Other spices - cardamom and cinnamon are used to flavor the milk , you can skip if you wish. But adding it enhances taste of this healthy bed time drink.

    Sweetener - though I prefer drinking haldi doodh without adding any sweetener, you may add honey as per your taste , if required.

    Variations

    To make it vegan , you can use either coconut milk or almond milk instead of cow's milk. If using any vegan milk to make turmeric milk, then heat turmeric powder in ¼ cup of water and then add it coconut / almond milk.

    Heating turmeric powder / turmeric root is important for absorbing its nutrition.

    Also , you can replace ghee with either coconut or almond oil.

    For variations in flavors and other health benefits like joints pain , you can add extra spices like nutmeg powder along with cinnamon and cardamom powder. Also ginger and cloves can also be used for more intense spiced flavors.

    FAQ's

    Is it necessary to drink turmeric milk only at bed time ? No , though its beneficial for getting good sleep at night , You can drink this on any time.

    Can I drink this everyday ? Yes, you can drink this milk everyday irrespective of season.

    Can I make this with skimmed milk ? Yes , you can use skimmed milk . And also you can use water along with milk to make this turmeric milk.

    How to make golden turmeric milk?

    In a sauce pan boil 1 cup of whole milk .

    how to make turmeric milk

    When milk boils completely add turmeric powder , black pepper powder , cinnamon and cardamom pods.

    how to make turmeric milk

    When everything boils and froths up , turn off the stove and set sauce pan aside .

    Turmeric Milk Recipe

    Let milk warms down , strain milk with a strainer.

    Turmeric Milk Recipe

    Now add ghee and honey , stir well everything.

    how to make turmeric milk

    Serve/ sip warm before bed time.

    golden turmeric milk

    You might also like

    • Turmeric _Pickle
      Fresh Turmeric Pickle
    • apple cinnamon tea
      Apple Cinnamon Tea
    • pumpkin-walnut-cake-recipe
      Pumpkin Walnut Cake
    • trail-mix-recipe
      Healthy Trail Mix | How to make trail mix

    Recipe

    turmeric milk recipe
    4.50 from 4 votes

    Turmeric Milk Recipe

    Turmeric milk is a traditional healthy Indian drink made with milk, turmeric powder and some warm spices.
    Prep Time0 minutes mins
    Cook Time5 minutes mins
    Total Time5 minutes mins
    Course: Beverage, Drinks
    Cuisine: Indian
    Keyword: Bachelor's Cooking, Basic, Diet, Healthy, home remedies
    Servings: 1 people
    Calories: 166kcal
    Author: Muktha H S

    Ingredients

    • 1 cup whole milk
    • ½ teaspoon organic turmeric powder
    • ⅛ teaspoon black pepper powder
    • 1 “ inch cinnamon stick
    • 2 pods green cardamom
    • 1 teaspoon ghee/ clarified butter
    • Honey to taste optional

    Instructions

    • In a sauce pan boil 1 cup of whole milk .
    • When milk boils completely add turmeric powder , black pepper powder , cinnamon and cardamom pods.
    • When everything boils and froths up , turn off the stove and set sauce pan aside .
    • Let milk warms down , strain milk with a strainer.
    • Now add ghee and honey , stir well everything.
    • Serve/ sip warm before bed time.

    Video

    Nutrition

    Calories: 166kcal

    Carrot Apple Pineapple Juice

    Published : November 8, 2021 | Last Update on September 24, 2022 By Muktha

    carrot-apple-pineapple-juice

    Carrot Apple Pineapple juice recipe with step by step photo and video. Refreshing and healthy carrot apple pineapple detox juice is energizing, tasty and loaded with nutrients as well.

    This detox juice is sweet , tang and has spice hint from ginger.

    Vitamin C and antioxidants loaded super detox juice helps in cleansing as wells as gives a radiating and flawless skin.

    Though I'm not a juice person , I often add detox juice in my diet for that extra boost and immunity. Few of my healthy boost juices/detox recipes are Beetroot Detox ,Kiwi Cucumber Smoothie ,Papaya Oats Smoothie and Coriander Amla Detox

    Carrot Apple Pineapple detox
    [feast_advanced_jump_to]

    About this recipe

    After long festive season and binge on desserts , it becomes very important to cleanse and maintain a healthy diet. So to shed those extra pounds gained from Diwali , this post Diwali diet comes handy .

    Also it's seasonal transition and it's a common scenario for kids and people on low immunity to fall sick.

    This super juice detox is rich in multivitamins, beta-carotenes and antioxidants that cleans digestive system from toxins as well as helps body fight against diseases.

    This carrot apple pineapple detox recipe uses lemon that balances out the sweet taste of apple making it more palatable and fun to drink. Along with boosting immunity , this wonderful winter cleanse juice helps to get a radiating and flawless skin.

    Why you need to drink this Carrot Apple Pineapple detox?

    • Easy to make
    • Powerful cleanser
    • Improves metabolism
    • Burns fat , reduces weight
    • Boosts Immunity
    carrot-apple-pineapple-juice

    Ingredients

    You need only 5 ingredients to make this cleanse juice

    carrot-apple-pineapple-detox-ingredients

    This fruit and Vegetable based juice uses carrots , pineapple , apples , ginger and lime juice. Along with this add water to juice fruits and vegetables.

    Refer recipe card for actual measurements.

    Watch Video

    Tips and Variations

    Juice 2 stalks of celery along with other ingredients and get additional benefits.

    If you prefer more sweet , you can add a spoonful of honey to make juice little sweeter.

    Consume juice immediately , as time passes, juice will start to loose its nutritional values due to oxidation. Hence, drink it immediately after preparation to get all of its benefits.

    How to make carrot apple pineapple juice

    Wash carrots and apple in running water and dry them.

    Peel skin of apple, carrot and pineapple.

    Carrot Apple Pineapple Juice

    Cut apple into medium pieces and remove the core. Dice carrot and pineapple into medium pieces. If you are using organic carrot, no need to peel skin. Peel ginger skin too.

    Carrot Apple Pineapple Juice

    Now into a mixer grinder jar, add pineapple, carrots, apple and ginger.

    Add water and puree all solid ingredients.

    Carrot Apple Pineapple Juice

    Once its well juiced, squeeze fresh lime juice over the juice.

    carrot-apple-pineapple-juice

    Pour to the glass and consume carrot apple pineapple juice immediately.

    Carrot Apple Pineapple Juice

    FAQ's

    Can I store this juice ? No , I don't recommend as it starts to looses it's nutrition as time passes. Prepare and drink it fresh.

    Is it necessary to peel skins of Carrot and Apple ? No , its not required as far as you are using Organic fruits and vegetables.

    When can I drink this Detox juice? I recommend to drink this detox juice , as first thing in the morning on empty stomach.

    You might also like

    • aliv-makhana-smoothie
      Aliv Makhana Smoothie
    • ragi-cookies
      Ragi Almond Cookies with Jaggery
    • banana stem soup
      Banana Stem Soup - Vazhaithandu Soup
    • Moringa Ladoo
      Moringa Ladoo | How to make Moringa Energy Balls

    Recipe

    carrot-apple-pineapple-juice
    5 from 2 votes

    Carrot Apple Pineapple Juice

    Carrot apple pineapple juice is refreshing and healthy detox juice , it's energizing, tasty and loaded with nutrients
    Prep Time10 minutes mins
    Total Time10 minutes mins
    Course: Beverage, Drinks
    Cuisine: World
    Keyword: Bachelor's Cooking, Diet, Weight Loss
    Servings: 2 people
    Calories: 93kcal
    Author: Muktha H S

    Ingredients

    • ¼ cup Pineapple , diced
    • 1 cup Carrot , chunks
    • 1 Apple medium sized
    • ½ inch ginger
    • ½ lime juice
    • 2 cups water

    Instructions

    • Wash carrots and apple in running water and dry them.
    • Peel skin of apple, carrot and pineapple.
    • Cut apple into medium pieces and remove the core. Dice carrot and pineapple into medium pieces. If you are using organic carrot, no need to peel skin.
    • Peel ginger skin too.
    • Now into a mixer grinder jar, add pineapple, carrots, apple and ginger.
    • Add water and puree all solid ingredients.
    • Once its well juiced, squeeze fresh lime juice over the juice.
    • Pour to the glass and consume immediately.

    Video

    Nutrition

    Calories: 93kcal

    Apple Cinnamon Tea

    Published : November 7, 2021 | Last Update on September 24, 2022 By Muktha

    apple cinnamon tea

    Apple cinnamon tea recipe with step by step images and video. Homemade Apple cinnamon Tea is soothing and comforting warm drink .

    Gala apples are simmered away and enhanced with cinnamon sticks and spicy ginger. Whole home smells heavenly while making this ginger spiced apple cinnamon tea.

    With its sweet and spicy flavor, apple tea will sooth your soul . Quick, easy and delicious, this recipe will become a favorite in no time. Spice your mornings at work with some Apple Cinnamon Tea. 

    Other cozy recipes for winter on blog are Hot Chocolate , Moringa Tea , Anti-bloating Herbal Tea , Turmeric Milk and Masala Chai.

    apple cinnamon tea
    [feast_advanced_jump_to]

    About this recipe

    Apple cinnamon tea recipe is rich in all the classic fall flavors. The sweet apples with the cinnamon and ginger spices gives you precisely what Fall should taste like in a cup.

    To make this Apple cinnamon tea , I haven't used any tea leaves just to avoid caffeine and reap the complete benefits.

    With only five ingredients and 3 minutes of prep time, this tea is simple to make . This tea comes a way better than store-bought. Cozy up with this Apple cinnamon Tea on a cool, crisp day, it's my promise that you'll love this for sure.

    Why you need to make this? Apple cinnamon tea has

    • Tasty and Cozy
    • Easy to make
    • Has loads of Health Benefits
    • Cost Effective

    Health Benefits of Apple Cinnamon Tea

    1. Boosts Immunity: A good immune system is crucial for effective weight loss . Apple tea contains good amounts of vitamin C which helps in boosting immunity.

    2. Fights Cholesterol: The fibre and antioxidant polyphenols present in apples lower the levels of low density lipoprotein (LDL) or bad cholesterol from the blood and, hence, promote fat burn.

    3. Boosts Digestion: Soluble fibre is also known to be great for weight loss. A healthy digestive system helps boost digestion because apples have good amounts of soluble fibre in them.

    4. Regulates Blood Sugar: Apples natural sugars as well as antioxidants improves metabolic balance and also regulate levels of blood sugar.

    5. Low In Calories: Apples are very low in calories. A standard-sized apple contains about 50 calories per 100 gm So, eating or drinking them in form of teas, apples can help you maintain a low-calorie count. Source : NDTV Food

    Ingredients

    You need only 5 ingredients to make this cozy apple cinnamon tea.

    apple cinnamon tea ingredients

    Produce : Gala Apples , Ginger and Lime juice are used here.

    Spices : A good quality cinnamon sticks or Srilankan rolled Cinnamon sticks.

    Condiments : Honey or Maple syrup

    Refer recipe card for exact measurements.

    Recipe Variations:

    You may also add tea leaves or tea bags to make this Apple tea. But trust me even without caffeine , this apple tea tastes delicious. Oh Yes , I'm promoting to have a caffeine free tea here to stay healthy !

    Watch Video

    How to make Apple Cinnamon Tea ?

    In a saucepan add sliced apples , ginger, cinnamon stick and water together.

    Keep on medium low heat for minimum 30 minutes , let it come to nice boil.

    Apple Cinnamon Tea

    After 30 minutes, turn off the stove and set sauce pan aside. Cover with a lid and let it steep for another 5 to 10 minutes.

    Apple Cinnamon Tea

    Next strain the liquid over a mesh strainer. Gently mash apple with help of spoon to extract its juice.

    Apple Cinnamon Tea

    Once tea is warm enough , add lime juice and honey .

    Apple Cinnamon Tea

    Sip warm tea on a cold day.

    apple cinnamon tea

    FAQ's

    Can I add honey to hot tea ? Honey losses its therapeutic values when exposed to high temperature. Hence its always recommended to add honey to warm tea.

    Why was my Tea not flavorful ? If you shorten the simmering time , then flavors might not get infused. Hence its always recommended to simmer on low heat for minimum30 minutes.

    Can I add Tea bags or tea leaves along with cinnamon ? Yes, you can add tea bags or tea leaves to make this apple tea, its just a variation .But , I have tried to keep this caffeine free.

    You might also like

    • kidney-bean-salad-recipe
      Kidney Bean Salad Recipe | how to make rajma salad
    • ragi banana smoothie
      Ragi Banana Smoothie | how to make ragi smoothie
    • mushroom-frittata
      Mushroom Frittata
    • trail-mix-recipe
      Healthy Trail Mix | How to make trail mix

    Recipe

    apple cinnamon tea
    5 from 1 vote

    Apple Cinnamon Tea Recipe

    Apple cinnamon tea recipe is rich in all the classic fall flavors. The sweet apples with cinnamon and ginger will sooth your soul instantly
    Prep Time3 minutes mins
    Cook Time30 minutes mins
    Total Time33 minutes mins
    Course: Beverage, Drinks
    Cuisine: World
    Keyword: Bachelor's Cooking, Diet, Healthy, Weight Loss
    Servings: 2 people
    Calories: 56kcal
    Author: Muktha H S

    Ingredients

    • 1 Gala Apple
    • 1 Cinnamon stick
    • 1 “ inch Ginger
    • Lime Juice to taste
    • 1 cup water
    • Honey to taste

    Instructions

    • In a saucepan add sliced apples , ginger, cinnamon stick and water together.
    • Keep on medium low heat for minimum 30 minutes , let it come to nice boil.
    • After 30 minutes, turn off the stove and set sauce pan aside. Cover with a lid and let it steep for another 5 to 10 minutes.
    • Next strain the liquid over a mesh strainer. Gently mash apple with help of spoon to extract its juice.
    • Once tea is warm enough , add lime juice and honey .
    • Sip warm tea on a cold day.

    Video

    Nutrition

    Calories: 56kcal

    Besan Halwa Recipe

    Published : November 6, 2021 | Last Update on October 17, 2022 By Muktha

    Besan halwa recipe

    Besan Halwa recipe with step by step photos and video . Besan ka Halwa is a most popular Punjabi Dessert . This Besan ka halwa is made with gram flour, clarified butter, sugar , dry fruits -nuts and flavored with cardamom powder.

    Besan Halwa is a easy dish , gets ready within 30 minutes , its tasty and makes a very filling breakfast or dessert.

    Halwa makes for an amazing dessert after your meals or for any festivals or pooja celebrations. So do try some other halwa recipes too Sweet Potato Halwa , Dates Halwa , Carrot halwa , Rajgira halwa , Pumpkin / kaddu halwa , Dumroot / Kashi Halwa

    Besan Halwa Recipe
    [feast_advanced_jump_to]

    About this recipe

    Besan halwa is a delicious ad popular Punjabi sweet dish that is prepared using chickpea flour (besan or gram flour), ghee, sugar, and lots of dry fruits.

    This besan halwa is a thick, and creamy sweet that is usually made for celebrations at home , pujas and also for festivals.

    Besan halwa is also considered as a winter dessert. This is a great dish and is said to give comfort in severest of cold.

    Besan ka halwa comes together in 30 minutes. It is a great sweet dish to prepare when you want to make something super delicious and super quick.

    This Besan Ka Halwa is,

    • Rich & Creamy
    • Easy to make
    • Delicious
    • Perfect for any pujas and celebrations

    Ingredients

    To make Besan ka halwa , all you need is just 5 main and basic ingredients. Other ingredients are optional

    Besan Halwa Recipe

    Most basic ingredients used to make besan halwa are gram flour/ chickpeas flour , ghee , milk , cardamom powder , sugar , dry fruits - nuts .

    I have also used dry rose petals , saffron strands and some silver foil for presenting but it's truly optional .

    Use only ghee (clarified butter) to prepare halwa. Never make Halwa in oil, it doesn't taste good at all.

    Adjust the amount of sugar or jaggery as per your taste. This had perfect sweetness for my taste buds, not too sweet nor less.

    Full fat cream milk gives best results. But you can use skim milk and also half of water to make this halwa. But just make sure to add 1.5 cups of liquid for the used measurements.

    Do not forget to freshly pound and add cardamom powder, as it adds a unique flavor. Fresh cardamom powder adds lot of flavors to ie.

    As said , saffron strands are truly optional, but adding it adds a hint of flavor and color tinge to besan halwa.

    Finish off the Halwa with some dry fruits-nuts , dried rose petals and add silver foil while serving.

    How to make Besan Halwa ?

    In a thick bottom pan , heat ghee.

    Besan Halwa Recipe

    When ghee melts completely, add 1 cup of gram flour and mix well.

    Besan Halwa Recipe

    On a low to medium heat , keep roasting gram flour in ghee until you get nutty aromatic smell. This step is very important , if gram flour is not roasted well, then the entire dish will be spoilt.

    Besan Halwa Recipe

    Once after aromatic smell comes, color of gram flour changes to light golden color. Take care not to  burn ,it should just turn color from yellow to very light golden .

    Now add 1.5 cups of boiled full cream milk ( or 1 cup milk with ½ cup water ) .

    Besan Halwa Recipe

    Once after adding liquid , add some crushed saffron strands ( optional) and  continuously stir until gram flour thickens up.

    Besan Halwa Recipe

    Continue to mix well, at once stage ghee starts to release from edges.

    Besan Halwa Recipe

    Now add in sugar and mix well. Sugar melts completely and melds well.

    Besan Halwa Recipe

    Mix well.

    Besan Halwa Recipe

    Add cardamom powder, raisins and nuts .

    Besan Halwa Recipe

    Continue to cook for another 3-4 minutes until ghee oozes out from edges and halwa thickens and looks glossy.

    Besan Halwa Recipe

    Turn off stove and serve halwa warm .

    besan-halwa-recipe

    Tips

    Make this halwa only in ghee(clarified butter). Oil doesn’t taste as good. Do not reduce the amount of ghee. For every 1 cup of gramflour , ½ cup of ghee ( clarified butter is must )

    Fry the besan on low-medium heat. Frying on high heat will burn the flour.

    Make sure to fry the besan until nutty aroma starts to come. After that color changes from yellow to light golden . You need to stop at this point and proceed with next step of adding milk . If gram flour is not fried properly, the besan will taste raw and dessert doesnt taste good. Also if you fry too much and make it brown , it will taste bitter. So its crucial to fry the flour right.

    You can replace full cream milk with half water and half milk , if you want it lighter.

    Storage Suggestions

    This halwa tastes best when made fresh. But if you have leftovers, you can refrigerate the halwa for 2-3 days in an airtight container.

    Reheat it in a pan or microwave until nice and warm. If you feel it has become a little thick while refrigerating, sprinkle water and adjust the consistency.

    You can also freeze it for up to 1 month. Once ready to eat, just thaw for few hours. Heat in a microwave and serve warm.

    You may also like

    • Makhana-kheer-recipe
      Makhana Kheer Recipe
    • Shahi Tukda
      Shahi Tukda Recipe
    • moongdal-barfi-recipe
      Moongdal Barfi | how to make moongdal burfi
    • sheer-kurma-recipe@palatess-desire
      Sheer Khurma Recipe , How to make sheer khurma

    Recipe

    Besan halwa recipe
    5 from 3 votes

    Besan Halwa Recipe

    Besan Halwa is a most popular Punjabi Dessert made with gram flour , clarified butter, sugar , dry fruits -nuts and flavored with cardamom powder.
    Prep Time5 minutes mins
    Cook Time25 minutes mins
    Total Time30 minutes mins
    Course: Breakfast, Dessert
    Cuisine: India, North Indian, Punjabi
    Keyword: Gluten Free, Sweets
    Servings: 6 people
    Calories: 256kcal
    Author: Muktha H S

    Ingredients

    • 1 cup besan / gram flour
    • ½ cup ghee/clarified butter
    • 1.5 cups full cream milk
    • 1 cup sugar or as required
    • ½ teaspoon cardamom powder freshly pound
    • 5-6 saffron strands optional
    • 1 tablespoon raisins
    • 1 tablespoon almonds slivered
    • 1 tablespoon pistachios slivered
    • 1 tablespoon cashews chopped

    Instructions

    • In a thick bottom pan , heat ghee.
    • When ghee melts completely, add 1 cup of gram flour and mix well.
    • On a low to medium heat , keep roasting gram flour in ghee until you get nutty aromatic smell. This step is very important , if gram flour is not roasted well, then the entire dish will be spoilt.
    • Once after aromatic smell comes, color of gram flour changes to light golden color. Take care not to burn ,it should just turn color from yellow to very light golden .
    • Now add 1.5 cups of boiled full cream milk ( or 1 cup milk with ½ cup water ) .
    • Once after adding liquid , add some crushed saffron strands ( optional) and continuously stir until gram flour thickens up.
    • Continue to mix well, at once stage ghee starts to release from edges.
    • Now add in sugar and mix well. Sugar melts completely and melds well.
    • Add cardamom powder, raisins and nuts . Mix well.
    • Continue to cook for another 3-4 minutes until ghee oozes out from edges and halwa thickens and looks glossy.
    • Turn off and serve warm .

    Video

    Nutrition

    Calories: 256kcal

    Frequently asked questions

    Why did my Halwa turned very dry - You may have overcooked it after adding sugar. Just make sure to turn off the stove when ghee oozes out from edges of halwa.

    Halwa was very sticky - This happens when you undercook ,to avoid this in the last step wait until ghee releases from halwa. Halwa should come out clean without sticking to pan and spatula.

    Halwa was bitter to taste - You may have burnt the flour while frying in ghee. Make sure to fry until it turns nutty and aromatic. Color should change from yellow to light golden , at this point proceed with next step.

    Halwa tasted raw and powdery - if you haven't roasted the flour well, then halwa may taste raw . So make sure to roast well.

    Mushroom Frittata

    Published : October 19, 2021 | Last Update on September 24, 2022 By Muktha

    mushroom-frittata

    Mushroom Frittata recipe with step by step photos and video. Frittata is a classic Italia egg-dish similar to thick omelette prepared along with some additional vegetables, herbs and cheese.

    Mushroom Frittata is perfect for any meal from breakfast to dinner, they're easy to make and delicious.

    Mushroom Frittata
    [feast_advanced_jump_to]

    About this recipe

    Frittata is an savory egg bake dish filled with yummy vegetables, herbs, and a bit of cheese. You can make frittatas with whatever vegetables on hand . I have tried a whole bunch of various combinations over the years and everything taste so good.

    Of all the tried and tested combination mushroom frittata's are one I love the most. It's simple to make and can serve for any quick meal . It takes maximum 30 minutes to put up this dish from scratch.

    Traditionally , Frittatas are baked but you can make it either in an oven or on stove top. This post shares stove top method but alternatively you can bake it.

    Difference between Omelette and Frittata is , Omelette are thin where as frittata are thick and similar to crustless quiche.

    Other similar recipe on this site which I love the most is Spanish Omelette ( Tortilla de Patata) and my low calorie verison of Oats omelette .

    Ingredients

    Find the ingredients used in this recipe.

    • Produce : Mushrooms, onions, garlic, green chillies and herbs
    • Dairy : Milk , Butter , Cheese
    • Refrigerated : Eggs
    • Oil
    • Spices : Italian seasoning , pepper and salt .

    See recipe card for actual measurements.

    Watch Video

    How to make Mushroom Frittata

    Heat butter and oil in a non-stick or an iron skillet.

    Mushroom Frittata

    Add in chopped garlic, green chillies and onions.

    Mushroom Frittata

    Sauté till onions turns translucent.

    Now add in sliced in mushrooms and sauté for 2 minutes.

    Mushroom Frittata

    Add pinch of salt and pepper powder to taste, mix well.

    Into a bowl break open 6 whole eggs, add ¼ cup of milk, pinch of salt and pepper powder to taste. Though milk is optional, adding milk makes frittata fluffy.

    Mushroom Frittata

    Whisk everything well together.

    Mushroom Frittata

    Pour over the prepared mushroom and mix well gently with cooked mushrooms.

    Mushroom Frittata

    Grate 25grams of processed cheese.

    Mushroom Frittata

    Sprinkle Italian seasoning and fresh cilantro.

    Cover lid and cook on medium heat until base turns firms. Cooking time depends on depth of the pan. (Alternatively , If baking ,preheat oven to 400°F and place the iron skillet in preheated oven to bake for 15-20 minutes until eggs are firm at bottom and set at top)

    Mushroom Frittata

    After 8-10 minutes, remove lid and check if the base is firm. Turn off stove.

    Mushroom Frittata

    Loosen the edges, cover the pan with plate and turn upside down.

    Mushroom Frittata

    Now slide the other side of the egg into pan.

    Mushroom Frittata

    Turn on the stove, keep on simmer and cook for 2 minutes.

    Remove frittata from pan, cut into wedges and serve alongside with bread toast.

    mushroom frittata

    Variations

    You can change this recipe to better suit your taste . Check these variations which you may love to do.

    • Milk - adding milk makes a fluffy frittata but if you don't like to add , then feel free to skip.
    • Spicy - adding green chilies are optional instead you can add chili flakes for seasoning.
    • Cheese - add cheedar chesse or mozzarella chesse . Any processed hard cheese works well for this recipe.
    • Vegetables - add some baby spinach along with mushroom to make it more nutritious. Or else you can even add any vegetables in hand to make frittata.

    Tips

    • Before pouring in the eggs , spread veggies evenly throughout the pan - Once you pour the egg mixture in, don’t move the vegetables around much (or you’d end up with scrambled eggs!) . Make sure the veggies are spaced evenly in the pan to get a final frittata with veggies in every bite.
    • Always maintain a ratio of about ¼ cup of any vegetables for every 1 large egg , so that you can get veggies in every bite.
    • If making on a stove top , you can use any non-stick ware or iron skillet . But if you go for baking , iron skillet or casserole can be used.

    Recipe

    mushroom-frittata
    5 from 2 votes

    Mushroom Frittata

    Mushroom Frittata is perfect for any meal from breakfast to dinner, they're easy to make and delicious.
    Prep Time7 minutes mins
    Cook Time30 minutes mins
    Total Time37 minutes mins
    Course: Breakfast
    Cuisine: Italian, World
    Keyword: Bachelor's Cooking, Egg, Gluten Free, Quick & Easy
    Servings: 3 people
    Calories: 282kcal
    Author: Muktha H S

    Ingredients

    • 200 grams button mushrooms sliced
    • 1 medium size onion chopped about ½ cup
    • 3 garlic cloves finely chopped, about 1 tbsp
    • 1 green chili finely chopped, about 1tsp, optional
    • 2 tablespoon cilantro or Italian Parsley chopped
    • 6 no’s whole eggs
    • ¼ cup milk optional
    • 25 grams processed cheese
    • 1.5 tablespoon butter
    • 1 teaspoon of cooking oil
    • 1 teaspoon of Black pepper powder or as required to taste
    • Italian Seasoning to taste
    • Salt to taste

    Instructions

    • Heat butter and oil in a non-stick or an iron skillet.
    • Add in chopped garlic, green chillies and onions.
    • Sauté till onions turns translucent.
    • Now add in sliced in mushrooms and sauté for 2 minutes.
    • Add pinch of salt and pepper powder to taste, mix well.
    • Into a bowl break open 6 whole eggs, add ¼ cup of milk, pinch of salt and pepper powder to taste. Though milk is optional, adding milk makes frittata fluffy.
    • Whisk everything well together.
    • Pour over the prepared mushroom and mix well gently with cooked mushrooms.
    • Grate 25grams of processed cheese.
    • Sprinkle Italian seasoning and fresh cilantro.
    • Cover lid and cook on medium heat until base turns firms. Cooking time depends on depth of the pan. . (Alternatively , If baking ,preheat oven to 400°F and place the iron skillet in preheated oven to bake for 15-20 minutes until eggs are firm at bottom and set at top)
    • After 8-10 minutes, remove lid and check if the base is firm. Turn off stove
    • Loosen the edges, cover the pan with plate and turn upside down.
    • Now slide the other side of the egg into pan.
    • Turn on the stove, keep on simmer and cook for 2 minutes.
    • Remove frittata from pan, cut into wedges and serve alongside with bread toast.

    Video

    Nutrition

    Calories: 282kcal

    More Mushroom Recipes

    • creamy-of-mushroom-soup
      Mushroom Soup
    • butter-garlic-mushroom
      Butter Garlic Mushroom
    • mushroom-masala-recipe
      Mushroom masala recipe
    • mushroom_pulao
      Chettinad Mushroom Pulao

    Banana Stem Soup - Vazhaithandu Soup

    Published : October 6, 2021 | Last Update on September 21, 2022 By Muktha

    banana stem soup

    Banana step soup recipe with step by step photos and videos. Banana stem soup recipe is a healthy and tasty peppery soup from South India .

    Plantain stem is also known as Vazhaithandu in Tamil , hence in regional language it's called as Vazhaithandu soup .

    Banana Stem soup is really quick and easy to make , it's simple and needs just handful ingredients. Believe me it get's ready within 30 minutes.

    Banana Stem Soup - Vazhaithandu Soup
    [feast_advanced_jump_to]

    About this recipe

    This is a popular street style recipe from Tamilnadu . It's popular as Vazhaithandu soup in Tamil ( regional language ) and is very popular in winters.

    Needless to mention soups and winters are best friends but this particular soup also helps to maintain the body temperature in winters.

    Serve this soup topped with cornflakes , crunchiness from corn flakes goes really well with recipe.

    For a light dinner along with banana soup serve some grilled veggies , Tandoori gobi , Panner tikka or Tandoori chicken / grilled chicken .

    Ingredients

    To make Banana stem soup aka vazhaithandu soup , main ingredient is obviously Banana Stem with few basic seasoning and herbs to make this soup tasty.

    • Banana stem , aka Plantain stem
    • Shallots , Ginger , garlic , green chillies and coriander leaves
    • Spices - Pepper powder , Cumin powder , Fennel seeds powder
    • Cornflour as a thickening agent.
    • Water or vegetable stock
    • Salt to taste

    See recipe card for quantities.

    Watch Video

    Step by step instructions

    Preparation - chopping banana stem

    Cut open the outer layers of Banana stem , Remove outer layers until to get soft inner stem

    Banana Stem Soup - Vazhaithandu Soup

    Now cut the inner stem into a circular disc , you get fine thread like strings ( fibers) ,remove it from hands completely.

    Banana Stem Soup - Vazhaithandu Soup

    With every cut of circular disc , you’ll find fibres , just pull it from fingers and remove completely.

    how to clean banana stem

    Once its cleaned completely , finely chop banana stems.  (If you wish to blend it , you can  just chop banana stem roughly , and blend later )

    cutting banana stem

    To make banana stem soup

    Heat 2 tablespoon of butter in a large deep pan.Add chopped green chillies, garlic , ginger and shallots.

    Banana Stem Soup - Vazhaithandu Soup

    Sauté for 2-3 minutes on medium heat until raw smell of shallots vanishes.

    Banana Stem Soup - Vazhaithandu Soup

    Now add finely chopped banana stem , pinch of turmeric powder and saute for a minute.

    Banana Stem Soup - Vazhaithandu Soup

    Add 3 cups of water or stock , salt to taste .

    Banana Stem Soup - Vazhaithandu Soup

    Cover lid and cook for good 12 to 15 minutes on medium high heat. As banana stem is rich in fibres, it takes more time to get cooked. Alternatively, you can pressure cook for 1 to 2 whistles.

    cooking banana stem

    Once banana stem is cooked well, it will be soft .  ( At this stage , if you wish you can strain water, set aside and blend the cooked banana stem in a blender to extract juice.)

    Now make slurry from 1 tablespoon cornflour and 2 tablespoon of water , mix it along with cooked banana stem .

    cornflour slurry for thickening

    Stir well and bring to a gentle boil until it starts to thicken.

    Now add cumin powder, fennel seeds powder, black pepper powder, coriander leaves and stir well.

    Banana Stem Soup - Vazhaithandu Soup

    Turn off the stove , squeeze fresh lime juice to taste.

    banana-stem-soup-recipe

    Top with cornflakes and serve hot.

    banana stem soup

    Variations

    If you don't like to eat banana stem for its more fibers , you can blend cooked banana stem and extract only its juices. Recipe remains same, once everything is cooked just put into a blender , pass through sieve and extract juice discarding banana stem fibres.

    Spicy - add chili flakes while serving for extra heat into the dish.

    Kid friendly - add crushed potato chips along with corn flakes for extra zing.

    Recipe

    banana stem soup
    5 from 1 vote

    Banana Stem Soup Recipe

    Banana stem soup recipe is a healthy and tasty peppery soup from South India . Plantain stem is also known as Vazhaithandu soup in regional language.
    Prep Time10 minutes mins
    Cook Time25 minutes mins
    Total Time35 minutes mins
    Course: Appetizer, Soup
    Cuisine: South India
    Keyword: Diet, Healthy, Soup, South Indian
    Servings: 3 people
    Calories: 104kcal
    Author: Muktha H S

    Ingredients

    • 2 tablespoon Butter
    • 1 green chilli chopped
    • 1 teaspoon garlic chopped
    • ½ teaspoon ginger grated
    • 2 tablespoon shallots chopped
    • 1.5 cups banana stem finely chopped
    • 1 pinch turmeric powder
    • 3 cups water or vegetable stock
    • 1 tablespoon cornflour
    • 2 tablespoon of water to mix with cornflour
    • Salt to taste
    • ½ teaspoon cumin powder
    • ½ teaspoon fennel seeds powder
    • ½ tablespoon blackpepper powder to taste
    • 2 tablespoon coriander leaves
    • 1 tablespoon fresh lime juice

    Instructions

    Preparation -Chopping Banana stem

    • Cut open the outer layers of Banana stem , Remove outer layers until to get soft inner stem
    • Now cut the inner stem into a circular disc , you get fine thread like strings ( fibers) ,remove it from hands completely.
    • With every cut of circular disc , you’ll find fibres , just pull it from fingers and remove completely.
    • Once its cleaned completely , finely chop banana stems. (If you wish to blend it , you can just chop banana stem roughly , and blend later )

    To make soup

    • Heat 2 tablespoon of butter in a large deep pan.
    • Add chopped green chillies, garlic , ginger and shallots. Sauté for 2-3 minutes on medium heat until raw smell of shallots vanishes.
    • Now add finely chopped banana stem , pinch of turmeric powder and saute for a minute.
    • Add 3 cups of water or stock , salt to taste .
    • Cover lid and cook for good 12 to 15 minutes on medium high heat. As banana stem is rich in fibres, it takes more time to get cooked. Alternatively, you can pressure cook for 1 to 2 whistles.
    • Once banana stem is cooked well, it will be soft . ( At this stage , if you wish you can strain water, set aside and blend the cooked banana stem in a blender to extract juice.)
    • Now make slurry from 1 tablespoon cornflour and 2 tablespoon of water , mix it along with cooked banana stem .
    • Stir well and bring to a gentle boil until it starts to thicken.
    • Now add cumin powder, fennel seeds powder, black pepper powder, coriander leaves and stir well.
    • Turn off the stove , squeeze fresh lime juice to taste.
    • Top with cornflakes and serve hot.

    Video

    Nutrition

    Calories: 104kcal

    Similar recipes

    • ragi-soup-with vegetables
      Ragi Soup
    • pumpkin-soup-recipe
      Pumpkin Soup | Healthy Easy Pumpkin Soup Recipe
    • creamy-of-mushroom-soup
      Mushroom Soup
    • Beetroot Soup
      Beetroot Soup , Weight Loss is now more easier

    Kayi Holige Recipe

    Published : September 10, 2021 | Last Update on October 18, 2022 By Muktha

    kayi -hollige-obbattu

    Kayi Holige is Indian sweetened flat bread with coconut and jaggery filling flavored with cardamom powder . Serve hot with clarified butter/ ghee.

    Kayi Holige aka kayi obbattu is traditional sweet is from Karnataka and is prepared during religious rituals and festivals.

    kayi-holige
    [feast_advanced_jump_to]

    About this recipe

    Kayi Holige is popular in Karnataka and is made during many religious rituals and festivals . Also in Maharashtra and Konkan regions , its called as Nariyal Poli . Prepared during Gowri-Ganesha Chaturthi , Ugadi and Varahamahalakashmi festivals in South India.

    A delicious coconut jaggery filling used in this recipe is similar to that of ukadiche modak and fried modak recipe on this blog. You can also check lentil based holige , Bele obattu / Puran Poli recipe on blog with lentil jaggery filling inside.

    Ingredients

    These are the ingredients used to make Kayi Holige recipe

    • For Outer Covering - Wheat flour , Fine Semolina , Turmeric powder , Salt and Ghee.
    • For Inside Filling - Coconut , Jaggery , Poppy seeds , Cardamom powder .
    • Ghee / Clarified Butter for roasting Holige

    See recipe card for quantities.

    Step by step directions to make Kayi Holige

    For outer covering

    Mix whole wheat flour, semolina , clarified butter  and salt together.

    Kayi Holige Recipe

    Add water part by part and knead dough to make smooth but firm dough.

    Kayi Holige Recipe

    Grease dough with 1 tablespoon of ghee , cover with damp cloth and set aside for 30 minutes.

    Kayi Holige Recipe

    For filling

    Into a blender add coconut , cardamom pods, dry ginger and blend.  Alternatively you can use finely grated coconut and add cardamom powder.

    Kayi Holige Recipe

    In a thick botton pan , heat 1 tablespoon of ghee/ clarified butter.

    Add 1 tablespoon of poppy seeds and fry until it start to splutter.

    Kayi Holige Recipe

    Now add in coconut and roast on medium heat until moisture of coconut goes off, it takes about 4 to 5 minutes.

    Kayi Holige Recipe

    Add powdered jaggery and mix well.

    Kayi Holige Recipe

    Cook on low heat ,jaggery melts completely and starts to bubble.

    Kayi Holige Recipe

    Now when bubbles reduces completely , mix well everything. It will be sticky and slightly hard with still moisture within it.

    Kayi Holige Recipe

    Now turn off the heat , add pinch of salt and rice flour.

    Mix well everything, rice flour absorbs the moisture but keeps the mixture soft without turning it hard.

    Kayi Holige Recipe

    Allow to cool completely.

    When its completely cool , make small balls . The mixture should be dry but should be able to hold the shape.

    Kayi Holige Recipe

    For rolling kayi holige

    Now after 30 minutes, pinch dough and make  19-20 balls.

    Roll dough ball into thin 2.5 to 3 inch disc.

    Kayi Holige Recipe

    Place the coconut jaggery filling at centre and bring the corners together to centre.  

    Kayi Holige Recipe

     Gently press  and flatten the dough.

    Kayi Holige Recipe

    Dust some flour and roll dough into medium sized paratha of 5 to 6 inch diameter

    Kayi Holige Recipe

    For roasting

    Heat iron tawa /  griddle. Regulate heat to medium high temperature.

    Place rolled poli / holige on to tava and drizzle some ghee .

    Kayi Holige Recipe

    When upper surface looks dry , flip and cook on other side.

    Kayi Holige Recipe

    Drizzle some ghee  and gently press and cook. If there are no cracks while rolling holige/ poli , it will start to puff up .

    Remove from heat .

    Kayi Holige Recipe

    Drizzle some ghee and serve hot.

    kayi holige

    Substitutions

    To make outer covering , I have used whole wheat flour. But you can make it with All purpose flour. Or combination of both whole wheat flour and APF in 1: 1 ratio along with fine semolina .

    Though jaggery powder is used traditionally as an alternative sugar can also be used to prepare the sweet filling. But I recommend to use Organic Jaggery .

    Storage

    You can store the coconut -jaggery filling and wheat flour dough separately in refrigerator and prepare when wanted. Stays good for 2-3 days.

    If done right, the frozen Kayi Holige stay good for at least one month. For holige to stay fresh for longer, cool completely before packing and freeze them. You can take out the required number of frozen holige and thaw them whenever you want.

    Recipe Tips

    For the outer covering: Use all-purpose flour, wheat flour, or a combination of both , half and half along with fine semolina to make modak covering.

    For smooth outer cover: Add hot or warm ghee to the flour while mixing, it makes the covering nice and smooth.

    Coconut Filling : Try to use fresh coconut for better results though frozen coconut or dessicated coconut can be used.

    Stuffing color: Depending on the color of jaggery, the color of the filling will vary. Dark jaggery will result in a darker saran.

    Rice flour in filling : Adding rice flour to coconut jaggery mixture , helps to absorb any left over moisture in jaggery. This helps to keep the filling mixture dry. So that when holige are roasted , it helps jaggery to melt slightly inside the filling and makes it perfect without making it dry or too sticky .

    Salt in filling : Pinch of salt in filling helps to bring out flavors , so do add salt to the filling.

    FAQ's

    Can I scale down or scale up the measurements ?

    Yes you can either reduce the measurements to half or double or triple the recipe , to suit your needs. As filling is same , I divided the coconut jaggery filling to make both fried modak and Kayi holige. So you can plan accordingly while cooking on festivals.

    Can I make Kayi Holige using dry coconut?

    Yes, desiccated coconut can be used to make holige. Just soak dessicated coconut in 4 tablespoon of warm milk or water to bring in some moisture.

    How to store Kayi Holige?

    Fried modak stays good for 4-5 days in room temperature. Store in an airtight container.

    Why did the filling turn hard?

    Overcooking the filling will make it hard. Cook it just till the mixture is dry but sticky , this prevents it from turning hard.

    Why did my covering was chewy ?

    For covering, knead the dough smooth just like chapathi and roast on both sides as you do for any paratha by drizzling ghee on both sides. Flip and cook on both sides on medium to high heat.

    Recipe

    kayi -hollige-obbattu
    5 from 1 vote

    Kayi Holige Recipe

    Kayi Holige is Indian sweetened flat bread with coconut and jaggery filling flavored with cardamom powder , served with clarified butter.
    Prep Time30 minutes mins
    Cook Time30 minutes mins
    Total Time1 hour hr
    Course: Main Course
    Cuisine: Andhra, Karnataka, Maharstarian, South India
    Keyword: Festivals, Ganesha Chaturthi, Sweets
    Servings: 20 makes
    Calories: 189kcal
    Author: Muktha H S

    Ingredients

    For Filling

    • 4 cups fresh coconut
    • 5 cardamom pods
    • 1 small piece dry ginger
    • 2- 2.5 cups Organic jaggery powder
    • 1 tablespoon Ghee/ Clarified butter
    • 1 tablespoon Poppy seeds
    • Pinch of salt
    • 1 tablespoon Rice flour

    For Cover

    • 3 Cup Wholewheat flour
    • ½ Cup Fine semolina / Sooji Rava
    • ¼ teaspoon salt
    • ½ teaspoon turmeric powder
    • Water to knead dough

    Other ingredients

    • Extra ghee as required to roast puran poli

    Instructions

    For outer covering

    • Mix whole wheat flour, semolina , clarified butter and salt together.
    • Add water part by part and knead dough to make smooth but firm dough.
    • Grease dough with 1 tablespoon of ghee , cover with damp cloth and set aside for 30 minutes.

    For filling

    • Into a blender add coconut , cardamom pods, dry ginger and blend. Alternatively you can use finely grated coconut and add cardamom powder.
    • In a thick botton pan , heat 1 tablespoon of ghee/ clarified butter.
    • Add 1 tablespoon of poppy seeds and fry until it start to splutter.
    • Now add in coconut and roast on medium heat until moisture of coconut goes off, it takes about 4 to 5 minutes.
    • Add powdered jaggery and mix well.
    • Cook on low heat ,jaggery melts completely and starts to bubble.
    • Now when bubbles reduces completely , mix well everything. It will be sticky and slightly hard with still moisture within it.
    • Now turn off the heat , add pinch of salt and rice flour.
    • Mix well everything, rice flour absorbs the moisture but keeps the mixture soft without turning it hard.
    • Allow to cool completely.
    • When its completely cool , make small balls . The mixture should be dry but should be able to hold the shape.

    For rolling

    • Now after 30 minutes, pinch dough and make 19-20 balls.
    • Roll dough ball into thin 2.5 to 3 inch disc.
    • Place the coconut jaggery filling at centre and bring the corners together to centre.
    • Gently press and flatten the dough.
    • Dust some flour and roll dough into medium sized paratha of 5 to 6 inch diameter

    For roasting

    • Heat iron tawa / griddle. Regulate heat to medium high temperature.
    • Place rolled poli on to tava and drizzle some ghee .
    • When upper surface looks dry , flip and cook on other side.
    • Drizzle some ghee and gently press and cook.
    • If there are no cracks while rolling holige/ poli , it will start to puff up .
    • Remove from heat , drizzle some ghee and serve hot.

    Video

    Nutrition

    Calories: 189kcal

    Similar Recipes

    • Ukadiche Modak
      Ukadiche Modak | Modak Recipe
    • fried modak
      Fried Modak Recipe
    • kara-kadbu-recipe
      Kara Kadubu Recipe | Kara Kozhukattai Recipe
    • Ugadi-recipes@palatesdesire
      Obbattu | Bele Holige | Puran Poli

    Fried Modak Recipe

    Published : September 10, 2021 | Last Update on September 24, 2022 By Muktha

    fried modak

    Fried modak recipe with step by step photos and video. Fried Modak is a delicious sweet with crispy outer of wheat flour and a tasty coconut -jaggery filling , flavored with cardamom.

    Modak is Lord Ganesh's favorite sweet and many varieties are offered to him during 10 days of festival. Other popular recipes which are often prepare during Ganesh chaturthi are Ukadiche Modak , Instant mawa Dryfruits Modak , Kara Kadbu , Kayi holige (Nariyal Poli ) and Puran Poli ( bele obbattu )

    Fried-modak
    [feast_advanced_jump_to]

    About this recipe

    Fried Modak is a variation of the much popular steamed modak ( ukadiche modak) . Though inside filling of both types of modak are same , the outer coverings are different. Fried modak coating is made with combination of wheat flour or all purpose flour and fine semolina where as traditional modak as rice flour covering.

    It is easier to make Fried modak when compared with traditional modak. Infact to make modak , one need to know how to shape it. Though modak moulds are easily available mastering the shaping techniques yields beautiful shaped modak.

    In this post I have shared tips and methods to shape large modak without any moulds.

    Fried Modak's are :

    • extremely delicious
    • easier to make
    • crunchy on the outside
    • can be deep-fried (traditional way), air-fried, or even baked.
    • has more shelf life compared to the steamed ones

    Ingredients

    For outer covering : Wheat flour or All Purpose flour , Fine Semolina / Sooji / Rava , salt and ghee are used.

    For filling : Fresh Coconut , Organic powdered Jaggery, poppy seeds , dry nuts , pinch of salt , Rice flour and cardamom powder to flavor.

    Oil for deep frying

    Refer recipe card for exact measurements.

    Watch Video

    Steps by step directions to make Fried Modak

    For outer covering

    Mix whole wheat flour, semolina , clarified butter  and salt together.

    Fried Modak Recipe

    Add water part by part and knead dough to make smooth but firm dough.

    Fried Modak Recipe

    Grease dough with 1 tablespoon of oil ,

    Fried Modak Recipe

    cover with damp cloth and set aside for 30 minutes.

    Fried Modak Recipe

    For filling

    Into a blender add coconut , cardamom pods, dry ginger and blend.  Alternatively you can use finely grated coconut and add cardamom powder.

    Fried Modak Recipe

    In a thick botton pan , heat 1 tablespoon of ghee/ clarified butter. Add 1 tablespoon of poppy seeds and fry until it start to splutter.

    Fried Modak Recipe

    Now add in coconut and roast on medium heat until moisture of coconut goes off, it takes about 4 to 5 minutes.

    Fried Modak Recipe

    Add powdered jaggery and mix well.

    Fried Modak Recipe

    Cook on low heat ,jaggery melts completely and starts to bubble.

    Fried Modak Recipe

    Now when bubbles reduces completely , mix well everything. It will be sticky and slightly heavy to mix with still moisture within it.

    Fried Modak Recipe

    Now turn off the heat , add pinch of salt and rice flour.

    Fried Modak Recipe

    Mix well everything, rice flour absorbs the moisture but keeps the mixture soft without turning it hard.

    Allow to cool completely.

    When its completely cool , add chopped nuts mix well and make small balls . The mixture should be dry but should hold the shape.

    Fried Modak Recipe

    For shaping modak

    Now after 30 minutes, pinch dough and  make  22 balls. 21 for modak and 1 for karanji.

    Roll dough ball into thin 3.5 to 4inch disc. With finger pinch the circumference of the dough to make it even thinner.

    Fried Modak Recipe

    Place the coconut jaggery filling at centre , and seal the edges . Alternatively , you can use a small bowl , place rolled dough inside small bowl.

    Fried Modak Recipe

    Place the coconut-jaggery filling at the centre and

    Fried Modak Recipe

    make pleats and bring dough to the centre.

    Fried Modak Recipe

    Gently press , seal the dough and taper the dough to resemble tip of modak.

    Fried Modak Recipe

    Now with a spoon edge, make deeper impressions on pleats. Watch video to know how to shape ,modak .

    Fried Modak Recipe

    Repeat same and shape modak with remaining dough and filling.

    For frying

    Heat oil in a deep pan ,

    When oil is hot enough , gently drop modak in hot oil .

    Fried Modak Recipe

    Fry on medium heat by turning modak on all sides.

    Fried Modak Recipe

    When modak turns golden in color , reove from oil and place on absorbent paper.

    Fried Modak Recipe

    Once modak comes to room temperature , you can store in air tight containers.

    Substitutions

    To make outer covering , I have used whole wheat flour. But you can make it with All purpose flour. Or combination of both whole wheat flour and APF in 1: 1 ratio along with fine semolina .

    Though jaggery powder is used traditionally ,as an alternative sugar can also be used to prepare the sweet filling.

    Recipe Tips

    For the outer covering: Use all-purpose flour, wheat flour, or a combination of both along with fine semolina to make modak covering.

    For crispy outer crust: Add hot or warm ghee to the flour while mixing, it makes the covering nice and crispy.

    Knead a smooth and firm dough: firm dough prevents the modaks from absorbing too much oil while frying.

    Roll dough thin: Roll dough thin and thinner at outside circumference , so that when pleats are brought together at center , it will not be denser at the center.

    Coconut Filling : Try to use fresh coconut for better results though frozen coconut flakes can be used.

    Stuffing color: Depending on the color of jaggery, the color of the filling will vary. Dark jaggery will result in a darker saran.

    Rice flour in filling : Adding rice flour to coconut jaggery mixture , helps to absorb any left over moisture in jaggery. This helps to keep the filling mixture dry. So that when Modak's are fried in hot oil , it helps jaggery to melt slightly inside the filling and makes it perfect without making it dry or too sticky .

    Salt in filling : Pinch of salt in filling helps to bring out flavors , so do add salt to the filling.

    Nuts are optional: though adding nuts to the filling is optional , I love to add as it gives a nice crunch.

    Seal the modaks well: Even a small opening in the modak can drain the filling while frying and making the oil messy.

    Cooking methods: Alternative to frying , you can also bake or air fry this modak .

    fried modak

    FAQ's

    Can I make fried modak using dry coconut?

    Yes, desiccated coconut can be used to make modak. Just add 2-3 tablespoon of milk or water to bring in some moisture.

    How to store fried modak?

    Fried modak stays good for 4-5 days in room temperature. Store in an airtight container.

    Why did the filling turn hard?

    Overcooking the filling will make it hard. Cook it just till the mixture is dry but sticky , this prevents it from turning hard.

    Why did my fried modak was oily ?

    A soft dough will result in absorbing more oil while frying. So knead smooth but firm dough.

    Why did my covering was not crispy ?

    For crispy covering, knead the dough tight or stiff and add hot ghee to the dough while kneading.

    Recipe

    fried modak
    5 from 2 votes

    Fried Modak

    Fried Modak is a delicious sweet with crispy outer of wheat flour and a tasty coconut -jaggery filling , flavored with cardamom.
    Prep Time30 minutes mins
    Cook Time30 minutes mins
    Total Time1 hour hr
    Course: Sweets
    Cuisine: Indian
    Keyword: Festivals, Ganesha Chaturthi, Sweets
    Servings: 21 Modak
    Calories: 198kcal
    Author: Muktha H S

    Ingredients

    For outer covering

    • 3.5 cups wheat flour
    • ½ cup fine semolina
    • 3 tablespoon warm ghee 2 tablespoon + 1 Tbsp
    • ½ teaspoon salt
    • water as required to knead dough

    For filling

    • 4 cups fresh coconut
    • 7 cardamom pods
    • ½ inch dry ginger
    • 2.5 cups powdered jaggery
    • 1 tablespoon of poppy seeds
    • 1 tablespoon ghee
    • 2 tablespoon of nuts chopped
    • 1 tablespoon of rice flour
    • 1 /4 teaspoon of salt

    Other ingredients

    • Oil for deep frying

    Instructions

    For outer covering

    • Mix whole wheat flour, semolina , clarified butter and salt together.
    • Add water part by part and knead dough to make smooth but firm dough.
    • Grease dough with ½ tablespoon of oil , cover with damp cloth and set aside for 30 minutes.

    For filling

    • Into a blender add coconut , cardamom pods, dry ginger and blend. Alternatively you can use finely grated coconut and add cardamom powder.
    • In a thick botton pan , heat 1 tablespoon of ghee/ clarified butter.
    • Add 1 tablespoon of poppy seeds and fry until it start to splutter.
    • Now add in coconut and roast on medium heat until moisture of coconut goes off, it takes about 4 to 5 minutes.
    • Add powdered jaggery and mix well.
    • Cook on low heat ,jaggery melts completely and starts to bubble.
    • Now when bubbles reduces completely , mix well everything. It will be sticky and slightly hard with still moisture within it.
    • Now turn off the heat , add pinch of salt and rice flour.
    • Mix well everything, rice flour absorbs the moisture but keeps the mixture soft without turning it hard.
    • Allow to cool completely.
    • When its completely cool , add chopped nuts mix well and make small balls . The mixture should be dry but should hold the shape.

    For shaping modak

    • Now after 30 minutes, pinch dough and make 22 balls. 21 for modak and 1 for karanji.
    • Roll dough ball into thin 2.5 to 3 inch disc. With finger pinch the circumference of the dough to make it even thinner.
    • Place the coconut jaggery filling at centre , and seal the edges . Alternatively , you can use a small bowl , place rolled dough inside small bowl. Place the coconut-jaggery filling at the centre and make pleats and bring dough to the centre.
    • Gently press , seal the dough and taper the dough to resemble tip of modak.
    • Now with a spoon edge, make deeper impressions on pleats,
    • Repeat same and shape modak with remaining dough and filling.

    For frying

    • Heat oil in a deep pan ,
    • When oil is hot enough , gently drop modak in hot oil .
    • Fry on medium heat by turning modak on all sides.
    • When modak turns golden in color , reove from oil and place on absorbent paper.
    • Once modak comes to room temperature , you can store in air tight containers.

    Video

    Nutrition

    Calories: 198kcal

    Makhana Kheer Recipe

    Published : August 30, 2021 | Last Update on October 18, 2022 By Muktha

    Makhana-kheer-recipe

    Makhana Kheer recipe with step by step photos and video. Makhana kheer is a rich , creamy and delicious dessert made under 30 minutes. Along with being tasty ,this foxnuts milk based dessert is very dense in nutrition and a healthy treat to indulge.

    Makhana-kheer-recipe

    This Makhane Ki Kheer is popular during Navratri fasting , Makhana ( Foxnuts) are consumed during Ekadashi or on any ritual fasting day as it's nutrient dense and keeps full for longer hours. Hence Makhana Kheer is also known as vrat kheer.

    I had made this kheer , a day before Janmashtami , as we perform fasting prior to Janmashtami celebrations.

    This is very similar to any other kheer recipe , one of my favorite kheer is Sheer Khurma on this site, and Sabudana Kheer which is also made on ritual fasting events.

    [feast_advanced_jump_to]

    Ingredients

    • Makhana / Fox nuts
    • Full fat whole milk
    • Ghee/ Clarified Butter
    • Cardamom Powder , Saffron strands for flavoring
    • Assorted dry fruits and nuts of your choice

    See recipe card for quantities.

    Watch Video

    Instructions

    Heat 2 tablespoon of ghee in a pan and roast foxnut / makhana on medium until makhana turns crisp. You can crush a foxnut nut between fingers and test whether makhana are roasted well and are crunchy. Or just pop into your mouth ….

    You can buy Organic Makhana on amazon : Buy Foxnuts

    roast makhana kheer

    Reserve ⅓ cup of makhana and Transfer remaining roasted foxnuts into a blender .

    blend roasted makhana

    Pulse 1-2 times to get coarse foxnuts powder.

    Makhana Kheer Recipe

    Heat 3 cups milk in same pan and bring it to boil.

    boil milk to make makhana kheer

    Now add in roasted makhana powder , mix well everything.

    how-to-make-makhana-kheer

    Let it come to boil . Now add in sugar to taste , mix well .

    Makhana Kheer Recipe

    Add fried raisins and cashews , few saffron strands and cardamom powder.

    Makhana kheer recipe

    Turn off the stove. Add reserved makhana into kheer, mix well everything.

    Serve Makhana kheer hot or cold. Kheer tends to thicken slightly once after it cools down.

    Makhana-kheer

    Substitutions

    If you are looking to know how to make the recipe fit a Vegan Diet ,

    • Milk - instead of Cow's Milk , you can use Almond milk or Cashew milk for richer and super delicious dessert.

    Variations

    Giving the visitor ideas on how they can change this recipe to better suit their dinner guests, or their cultural cuisine, is a great way to increase the chances they make the recipe

    • Sweetener -you can add either sugar free or honey or maple syrup to suit your need.
    • Flavors - add dried rose petals ,kewra water or rose water.
    • Kid friendly - crush roasted foxnuts into finer powder is serving for babies.

    Equipment

    Equipment can have a big impact on how a recipe turns out. I have made this recipe on a induction stove top and a non stick pan . You can make this makhana kheer on a gas stove also. Just make sure to use a deep pan or kadai to make this dessert.

    Here is a amazon link to buy induction stove and non-stick pan .

    Storage

    Store in refrigerator for 1 to 2 days only , As it is a milk based dessert this dessert don't stand up well to freezing.

    Top tip

    Roasting and keeping foxnuts in a air tight jar , helps to put up this dish under15 minutes.

    Recipe

    Makhana-kheer-recipe
    5 from 3 votes

    Makhana Kheer Recipe

    Makhana kheer is a rich , creamy and delicious dessert made under 30 minutes.
    Prep Time5 minutes mins
    Cook Time20 minutes mins
    Total Time25 minutes mins
    Course: Dessert
    Cuisine: Indian
    Keyword: Bachelor's Cooking, Desserts, Fasting, Gluten Free, Navratri, Sweets
    Servings: 5 people
    Calories: 248kcal
    Author: Muktha H S

    Ingredients

    • 2 cups Makhana / Fox nuts
    • 2 tablespoon ghee /Clarified Butter
    • 3 cups full cream milk
    • 5.5 tablespoon sugar or as required
    • ½ teaspoon Cardamom Powder
    • 2 tablespoon golden fried raisins and cashews
    • Saffron few strands optional

    Instructions

    • Heat 2 tablespoon of ghee in a pan and roast foxnut / makhana on medium until makhana turns crisp.
    • Reserve ⅓ cup of roasted foxnuts and transfer remaining makhana into blender.
    • Pulse 1-2 times to get coarse foxnuts powder.
    • Heat 3 cups milk in same pan and bring it to boil.
    • Now add in roasted makhana powder , mix well everything.
    • Let it come to boil . Now add in sugar to taste , mix well .
    • Add fried raisins and cashews , few saffron strands and cardamom powder.
    • Turn off the stove. Add reserved makhana into kheer, mix well everything.
    • Serve Makhana kheer hot or cold. Kheer tends to thicken slightly once after it cools down.

    Video

    Nutrition

    Calories: 248kcal

    Sorekai Majjige Huli

    Published : August 25, 2021 | Last Update on September 24, 2022 By Muktha

    majjige-huli

    Sorekai Majjige Huli is South India's popular , mildly spiced buttermilk , coconut based curry made with bottlegourd . Served with steamed rice or even with Raggi Mudde.

    Sorekai in Kannada language means " Bottle gourd " and Majjige means buttermilk , so the direct translation means Bottlegourd Buttermilk curry.

    This South Indian style Bottlegourd / lauki diah is a very low calorie curry and also keeps body cool. You can serve this curry with hot steamed rice or ragi mudde for a light lunch .

    sorekai-majjige-hulli
    [feast_advanced_jump_to]

    About this recipe

    Sorekayi Majjige Huli is a coconut and buttermilk based curry . This version is a No Onion , No Garlic recipe. But depending on the spices there is slight variations in taste and flavor of final dish. As every home as their own variations to this recipe.

    This buttermilk curry is easy to make, tastes delicious and is very low on calorie . This is commonly given to people who prefers to have a very light lunch or for those who are recovering from fever or have complaints of stomach inflammation or bloating.

    Along with one dry vegetable curry , this curry served with steamed rice , on its own make a simple balanced lunch.

    Ingredients , Tips and Variations

    Bottle Gourd - Also known as calabash, opo squash , Lauki is the main vegetable . Its recommended to use tender bottle gourd.

    Lentils - Combinaton of Toor dal and Chana dal is used in the recipe. Adding soaked lentils adds thickness to the curry along with some protein portion.

    Fresh Coconut - A small amount of fresh coconut is used along with soaked lentils and spices are blend together

    Spices and Herbs -Cumin seeds , Green Chilies, Coriander leaves , Ginger , Asafoetida and turmeric powder are blend together with coconut.

    Yogurt - Very mildly soured curds works well for this recipe.

    Tempering Ingredients - Oil , mustard seeds, cumin seeds , fenugreek seeds , dry red chilies , hing , curry leaves are used . Tempering is important in this recipe.

    Tips - Adding gramflour / besan into whisked curd , and then cooking buttermilk curry on low heat prevents curds from splitting .

    For Variation- Any of the these vegetables like Ash Gourd , cucumber or raddish can be used in place of bottle gourd to make this curry.

    Many uses 1or 2 cloves of garlic instead of ginger in this recipe .But I personally don't like garlic in this buttermilk curry.

    sorekai-majjige-huli

    Health Benefits of Bottle gourd

    1. Bottle gourd is rich in dietary fibre, both, soluble and insoluble. Hence, it helps in curing constipation .
    2. Lauki has approximately 96% of water, it keeps the body cool and refreshes during summers.
    3. High in sodium and potassium, bottle gourd is also an excellent vegetable for people with hypertension. Also it's rich in vitamin B and C, and helps in anti-oxidative actions.
    4. The vitamins, minerals and dietary fibre in lauki keep the body well-nourished and curb unnecessary appetite, hence promotes in weight loss.
    5. Lauki is a suitable vegetable for light, low-calorie diets as well as for children, people with digestive problems, diabetics and those recovering from an illness or injury. It is also easy to digest.
    6. Bottle gourd is recommended by Ayurveda physicians for balancing the liver function, when the liver is inflamed and unable to process food efficiently for nutrition and assimilation. Source : Healthfeed

    Watch Video

    Step by Step directions to make Sorekai Majjige Huli

    Preparations:

    Soak Chana dal and Toor dal for  20 to 30 minutes and set aside. Before using in the recipe , rinse well , drain water completely and use.

    sorekai-majjige-huli-recipe

    Meanwhile  , trim edges of bottle gourd. Peel skin, cut open and remove any matured seeds if any. If seeds are tender , you can use it. Dice into cubes and set aside.

    To a mixer /blender , add soaked lentils, fresh coconut , cumin seeds,  green chilies , ginger, asafoetida, coriander leaves , turmeric powder

    sorekai-majjige-huli-recipe

    and blend into a smooth paste by adding 2-3 tablespoon of water.

    sorekai-majjige-huli-recipe

    To make sorekai majjige huli

    In pan add water , chopped bottle gourd , turmeric powder , salt , sprig of curry leaves .

    sorekai-majjige-huli-recipe

    Cover lid and cook for 10 minutes. Alternatively, you can also pressure cook everything.

    Sorekai Majjige Huli

    Once bottlegourd is cooked well, add coconut masala paste  .

    sorekai-majjige-huli-recipe

    Stir well everything, add salt to taste and bring it to boil.

    sorekai-majjige-huli-recipe

    Now whisk 1 cup curds along with 1 tablespoon gram flour / besan . Adding besan will prevent from splitting of curds while heating , so its recommended to add gram flour .

    sorekai-majjige-huli-recipe

    Regulate to low heat and add curds .

    sorekai-majjige-huli-recipe

    Stir well and cook on low heat until it starts to bubble.

    Bottle gourd yogurt curry

    Tempering

    In a seasoning pan / tadka pan , Heat  1 tablespoon of ghee/ oil  , add mustard seeds, fenugreek seeds,and cumin seeds, when it starts to splutter. Add dry red chilies, curry leaves and asafoetida.

    sorekai-majjige-huli-recipe

    Pour tempering over prepared curry ,

    sorekai-majjige-huli-recipe

    mix well and serve hot with steamed rice.

    sorekai-majjige-huli-recipe

    Recipe

    sorekayi-majjige-hulli-oggrane
    5 from 3 votes

    Sorekai Majjige Huli

    Sorekai Majjige Huli is South India's popular , mildly spiced buttermilk , coconut based curry made with bottlegourd
    Prep Time10 minutes mins
    Cook Time20 minutes mins
    Total Time30 minutes mins
    Course: Main Course
    Cuisine: Karnataka, South India
    Keyword: Diet, Healthy, low-calorie
    Servings: 4 people
    Calories: 89kcal
    Author: Muktha H S

    Ingredients

    To cook bottle gourd / lauki / sorekai

    • 2 cups Bottlegourd diced into small cubes
    • 1.5 cups water
    • ¼ teaspoon salt
    • ¼ teaspoon turmeric powder
    • 1 sprig curry leaves

    To blend into masala paste

    • 1 tablespoon of chana dal
    • ½ tablespoon toor dal
    • ¼ cup fresh coconut grated
    • 1 teaspoon cumin seeds
    • 2 no’s green chilies or as required
    • ½ inch ginger piece
    • 1 tablespoon coriander leaves
    • 1 pinch hing /asafoetida

    Other ingredients

    • 1 cup curds homemade
    • 1 tablespoon gram flour/ besan

    Tempering

    • 1 tablespoon clarified butter or cooking oil
    • ½ teaspoon mustard seeds
    • ½ teaspoon cumin seeds
    • 1 pinch hing /asafoetida
    • 2 no’s dry red chilli broken
    • 1 sprig curry leaves

    Instructions

    Preparations

    • Soak Chana dal and Toor dal for 20 to 30 minutes and set aside. Before using in the recipe , rinse well , drain water completely and use.
    • Meanwhile , trim edges of bottle gourd. Peel skin, cut open and remove any matured seeds if any. If seeds are tender , you can use it. Dice into cubes and set aside.
    • To a mixer , add soaked lentils, fresh coconut , cumin seeds, green chillies , ginger, asafoetida, coriander leaves , turmeric powder and blend into a smooth paste by adding 2-3 tablespoon of water.

    To make sorekai majjige huli

    • In pan add water , chopped bottle gourd , turmeric powder , salt , sprig of curry leaves . Cover lid and cook for 10 minutes. Alternatively, you can also pressure cook everything.
    • Once bottlegourd is cooked well, add coconut masala paste .
    • Stir well everything, add salt to taste and bring it to boil.
    • Now whisk 1 cup curds along with 1 tablespoon gram flour / besan . Adding besan will prevent from splitting of curds while heating , so its recommended to add gram flour .
    • Regulate to low heat and add curds . Stir well and cook on low heat until it starts to bubble.

    Tempering

    • In a seasoning pan / tadka pan , Heat 1 tablespoon of ghee/ oil , add mustard seeds, fenugreek seeds,and cumin seeds, when it starts to splutter. Add dry red chillies, curry leaves and asafoetida.
    • Pour tempering over prepared curry , mix well and serve hot with steamed rice.

    Video

    Nutrition

    Calories: 89kcal

    Oats Pancake recipe

    Published : August 17, 2021 | Last Update on September 24, 2022 By Muktha

    Oats Pancakes

    Oats Pancake or oats GreenPeas chilla recipe with step by step photos and video. Oats savory pancakes are quick , easy and tasty protein packed breakfast recipe made with rolled oats , green peas, herbs and spices.

    Other Oats recipes which I often make at home for breakfast are Oats Omelette , PeanutButter Oats Smoothie , Protein Rich Masala Oats ( 3 flavors) , Oats Kichadi and Instant Oats Idli

    High Protein Oats Pancakes
    [feast_advanced_jump_to]

    About this recipe

    Basically Chilla means pancakes in India . It can be either savoury or sweet. And this Green peas ,matar oats chilla is a gluten free and vegan free Pancakes. Spices and herbs used in this recipe not only enhances the taste but also helps for proper digestion. So I recommend not to skip Asafoetida, Carom seeds , Cumin seeds and ginger in this recipe.

    Ingredients,Tips and Variations

    Oats : Rolled Oats works best for this recipe . You can also use steel cut oats but it needs long soaking hours. Though instant oats can be used it needs additional rice flour or semolina to combine to make chilla/ pancakes.

    Spices and Herbs : Carom seeds, Asafoetida, Cumin seeds and Ginger aids in good digestion as well as assimilation of nutrients.

    Green Peas : You can use either fresh or frozen green peas. But just make sure to cook green peas before blending with oats.

    Other ingredients : Red Chilies , Onion , Salt and coriander leaves adds taste to the dish.

    Variations : Can add more leafy vegetables like spinach , moringa or fenugreek leaves can be added . Also grated carrots and cabbage can be added to make it more nutrient rich.

    Watch Video

    Health Benefits of Oats Green peas Pancakes

    • Oats are rich in protein and fibers . It has a low GI which makes a healthy choice for people with diabetes. Foods with lower GI scores are ideal and helps to keep blood sugar stable.
    • Oats contains beta-glucan , a soluble fiber . Beta-glucan partially dissolves in water and forms a thick, gel-like solution in the gut . There by improves good gut bacteria
    • Oats may lower the risk of heart disease by reducing both total and LDL cholesterol and protecting LDL cholesterol from oxidation.
    • Oatmeal may help you lose weight by making you feel more full. Eating filling foods may help you eat fewer calories and lose weight.
    • The fiber-rich outer layer of the grain, may help relieve constipation

    How to make Oats Pancakes

    Soak 1 cup rolled oats in water for 10 to15 minutes. I always use Organic Rolled Oats from a particular brand from amazon , you can find it on my amazon stores

    Oats-pancakes-oats-chilla

    Boil 1 cup fresh or frozen green peas  with ½ teaspoon salt . Make sure to cook green peas completely.

    Oats-pancakes-oats-chilla

    Add soaked oats, green peas , ginger, dry red chili, cumin seeds, carom seeds , asafoetida and hing  into a mixer.

    Oats-pancakes-oats-chilla

    Blend to a smooth batter by adding ¼ to ½ cup water.

    Oats-pancakes-oats-chilla

    Transfer to a bowl , add chopped onions and coriander leaves, Mix well together.

    Oats-pancakes-oats-chilla

    Heat tawa/ pan/ griddle , spread  ladle full of batter on tawa .

    Oats-pancakes-oats-chilla

    Drizzle oil ( for vegans) or ghee .

    oats-chilla

    Cover lid and cook for 2 minutes. Flip and cook on both sides.

    Oats-pancakes-oats-chilla

    Serve with any chutney or curry.

    I usually pair Oats chilla with spicy Tomato chutney or Pumpkin Chutney.  In frame its spicy tomato chutney.

    oats-pancakes

    Recipe

    Oats Pancakes
    5 from 1 vote

    Oats Greenpeas Chilla | Oats Pancakes

    Oats savory pancakes are quick , easy and tasty protein packed breakfast recipe made with rolled oats , fresh or frozen green peas, herbs and spices.
    Prep Time15 minutes mins
    Cook Time15 minutes mins
    Total Time30 minutes mins
    Course: Breakfast
    Cuisine: Indian
    Keyword: Bachelor's Cooking, Gluten Free, Healthy, Vegan, Vegetarian
    Servings: 7 makes 6-7 pancakes
    Calories: 58kcal
    Author: Muktha H S

    Ingredients

    • 1 cup rolled Oats soaked for 10 minutes
    • 1 Cup Green Peas fresh or frozen , cooked completely
    • 1 pinch Hing
    • 1 pinch Ajwain/ Carom Seeds
    • 1-2 Red Chilles to taste
    • 1 ” inch Ginger
    • 1 teaspoon Cumin seeds
    • ½ Cup Onions chopped
    • 2 tablespoon of coriander leaves
    • Salt to taste

    Instructions

    • Soak 1 cup rolled oats in water for 10 to minutes.
    • Boil 1 cup fresh or frozen green peas with ½ teaspoon salt . Make sure to cook green peas completely.
    • Add soaked oats, green peas , ginger, dry red chili, cumin seeds, carom seeds , asafoetida and hing into a mixer. Blend to a smooth batter by adding ¼ to ½ cup water.
    • Transfer to a bowl , add chopped onions and coriander leaves, Mix well together.
    • Heat tawa/ pan/ griddle , spread ladle full of batter on tawa .
    • Drizzle oil ( for vegans) or ghee .
    • Cover lid and cook for 2 minutes.Flip and cook on both sides.
    • Serve with any chutney or curry. I usually pair Oats chilla with Tomato chutney or Pumpkin Chutney.

    Video

    Nutrition

    Calories: 58kcal

    Goli Baje | Mangalore Bajji Recipe

    Published : August 16, 2021 | Last Update on September 24, 2022 By Muktha

    Goli Baji Recipe

    GoliBaje recipe with step by step photos and video. Goli Baje is a mildly spiced crispy and soft batter fried fritters.It is crispy outside and soft inside with a hint of sweetness is served hot with coconut chutney.

    Its a monsoon special recipe in India and is loved by many .Goli baje are served with coconut chutney also accompanied with filter coffee or Masala Chai. Other Monsoon special , quick and easy fritters recipes most loved by Indian's are Onion Pakora, Aloo Bajji, Moongdal Vada and Masala Vada

    goli-baje-recipe
    [feast_advanced_jump_to]

    About this recipe

    Goli Baje is a native of Mangalore , coastal region, Karnataka , India. Goli means " Round " and Baje means " Fritters" in regional language of Mangalore. These are also known as Mangalore Bajji or Maida bonda

    Goli Baje are made with All purpose flours, curds and spices .Flour is mixed with sour curds, sugar , salt and cooking soda .Left for 2-3 hours to leaven and then spices are , batter is well beat to incorporate air and fried into fitters and served with coconut chutney.

    Ingredients and Variations

    All Purpose Flour - Refined flour/ Maida is the main ingredient to make this specialty fritters. Don't use wheat flour as it gives dense fritters. Instead as an alternative you can use less beached APF. You can even add 1 tablespoon of rice flour to APF but its optional.

    Sour curds / Yogurt - works best for this recipe. Slightly sour curds works fine here. Alternatively you can also use buttermilk . Vegan's can use soya curd or cashew curds or peanut curds to make this fritters.

    Spices and Herbs - Grated ginger, coriander leaves, curry leaves, cumin seeds , green chilies and coconut pieces are used.

    Sugar, Salt and Cooking Soda : All these ingredients are added to flour along with curds . This helps has leavening agents and yields a fluffy and porous Goli Baje.

    Tips

    • If baking soda is not fresh, the goli baje won't be soft, so use fresh cooking soda , To test freshness of soda, mix soda with lemon/ vinegar  water , if it frizz’s then it’s a fresh soda.
    • Keep batter for 3 + hours helps to leaven the batter, which helps in soft and porous goli baje
    • Beating batter with hands is a very important step , it helps to incorporate air which helps to turn goli baje , fluffy.
    • To fry, drop batter from little height such that it takes round shape. Use either hands or spoon to drop batter .
    • Fry on medium heat until golden on both sides.

    Watch Video

    Step by step directions to make Goli Baje

    Add 1 cup All purpose flour,  sugar , salt  and cooking soda .

    how-to-make-goli-baje

    Mix well.

    how-to-make-goli-baje

    Now add in ⅓ cup sour curds and mix well with flour.

    Goli Baje | Mangalore Bajji Recipe

    Take ¼ cup water and add water part by part to flour and mix well. Batter needs to be thick .

    how-to-make-goli-baje

    Now sprinkle 1 -2 tablespoon of water on top of batter , cover lid and let batter sit for 2 to 3 hours.

    Goli Baje | Mangalore Bajji Recipe

    After 3 hours , add ginger, green chilies, curry leaves, coriander leaves and cumin seeds to batter.

    how-to-make-goli-baje

    Mix well everything and get your hands into batter.

    how-to-make-goli-baje

    Stretch thick batter with hands and throw it back into bowl. This is a method to beat batter and incorporate air. Constantly do this for 4-5 minutes. This beating process is really important to get a crispy and spongy fritters.

    goli-baji-tips

    Heat oil  for frying , drop batter  from little height so that it turns round ,automatically.

    how-to-make-goli-baje

    Turn and fry goli baje until it turns golden color on all sides.

    how-to-make-goli-baje

    Remove fritters from oil , place on absorbent paper and serve hot/ warm with coconut chutney.

    Goli-baje-recipe

    Recipe

    Goli Baji Recipe
    5 from 1 vote

    Goli Baje | Mangalore Bajji Recipe

    Goli Baje are street food from Mangalore. It's mildly spiced, crispy outside and spongy, soft fritters with a hint of sweetness.
    Prep Time15 minutes mins
    Cook Time20 minutes mins
    Resting Time3 hours hrs
    Course: Appetizer, Snack
    Cuisine: South India
    Keyword: snacks
    Servings: 3 people
    Calories: 278kcal
    Author: Muktha H S

    Ingredients

    • 1 Cup APF / Refined flour / Maida
    • ¼ teaspoon Cooking Soda
    • ¼ teaspoon Sugar
    • ½ teaspoon Salt
    • ⅓ Cup Sour Curds homemade preferred
    • ¼ cup water or less as required
    • ½ teaspoon Ginger grated
    • 1 teaspoon Cumin Seeds
    • 1 tablespoon Curry leaves Chopped
    • 1 tablespoon Coriander leaves. Chopped
    • 1 Green chili chopped
    • Oil for frying

    Instructions

    • Add 1 cup All purpose flour, sugar , salt and cooking soda , mix well.
    • Now add in ⅓ cup sour curds and mix well with flour.
    • Take ¼ cup water and add water part by part to flour and mix well. Batter needs to be thick .
    • Now sprinkle 1 -2 tablespoon of water on top of batter , cover lid and let batter sit for 2 to 3 hours.
    • After 3 hours , add ginger, green chillies, curry leaves, coriander leaves and cumin seeds to batter.
    • Mix well everything with wired whisk.
    • Now get your hands into batter. Stretch thick batter with hands and throw it back into bowl. This is a method used to beat the batter. Constantly do this for 4-5 minutes. This beating process is really important to get a crispy and spongy fritters.
    • Heat oil for frying , drop batter from little height so that it turns round ,automatically.
    • Turn and fry goli baje until it turns golden color on all sides.
    • Remove fritters from oil , place on absorbent paper and serve hot/ warm with coconut chutney.

    Video

    Nutrition

    Calories: 278kcal

    Chettinad Mushroom Pulao

    Published : July 18, 2021 | Last Update on September 21, 2022 By Muktha

    mushroom_pulao

    Chettinad Mushroom Pulao is a flavorful, spicy , one pot recipe made with mushrooms, jeera rice ( seeraga samba rice) and spices.

    I love Mushroom's a lot and I often make many recipes out of mushrooms. Few of my favorites are Butter Garlic Mushroom , Burnt Garlic Mushroom Fried Rice , Creamy Mushroom Soup , Mushroom Pepper Masala and Mushroom Scrambled Egg

    mushroom_pulao
    [feast_advanced_jump_to]

    About this recipe

    Chettinad is a place in Tamilnadu , South India . It is famous for it's wide variety of spicy food. I was living in Tamilnadu for couple of years and got familiar with their food culture . It was around 2 decades before I learnt this quick and easy recipe from my cook in Chennai who was from Chettinad. They call this as Kalan Biryani . As I'm very skeptical about using word Biryani to any kind of one pot recipe , I prefer to call it has Mushroom Pulao rather than Mushroom biryani as it is cooked in a pressure cooker.

    You can make this biryani / pulao either on open pan , pressure cooker or instant one pot . It's one and the same all it varies in only cooking time.

    Watch Video

    Ingredients , Tips and Variations

    Mushrooms : Select fresh button mushrooms to make this recipe. Always wipe and rinse mushrooms just before making . If rinsed mushrooms sits for long, it absorb all water like a sponge. You can use shiitake mushrooms along with button mushrooms in this recipe to make chettinad style mushroom pulao

    Rice : Generally Seeraga Samba aka Jeera rice variant is used to make this cheetinad style pulao. Seeraga Samba is a flavorful small grain rice. If it's not available you can use Ambemohar , Zeera rice ( west bengal) or Basmati rice can also be used.

    Coconut Milk : Chettinad or any South Indian recipes are incomplete without fresh coconut or coconut milk. Adding coconut milk to this recipe gives lots of flavor to this pulao. You can either extract fresh coconut milk or use coconut milk from tetra pack . But freshly extracted coconut milk adds lots of flavor.

    Spices : A special blend of freshly roasted spices gives aroma and flavor to this recipe. So don't skip to roast and add spice powder here. Other spices includes red chili , coriander ,turmeric powder and salt to taste is added.

    Fat : I have used vegetable oil and clarified butter in this recipe. As ghee / clarified butter add lots of taste in any rice preparation. For vegans, replace ghee with any vegetable oil.

    Other ingredients : Onion , Garlic and tomatoes are also used in this recipe.

    Herbs : Coriander leaves, mint leaves , ginger , green chilies and lime juice.

    How to make Chettinad Mushroom Pulao

    Preparations

    Rinse seeraga rice ( jeera rice -small grain rice) couple of times and soak for 30 minutes.

    Wash  200- 250 grams of  button mushooms , slice them ans set aside. Thinly slice 2 medium size onions ,chop 1 medium to large size tomatoes and set aside. Clean greens , chop and set aside.

    In a pan, dry roast mace, cardamom, peppercorns, cinnamon sticks, cloves, black stone flower, fennel seeds and shahi jeera till aromatic.

    Chettinad Mushroom Pulao

    Don’t brown spices, immediately transfer the spices into a blender or a plate, let it cool down. If you keep the spices in the same pan after roasting, the heat in the pan may further brown the spices, so it’s important to transfer the dry roasted spices into another plate.

    When spices cool down blend roasted spices into a semi fine powder.

    Chettinad Mushroom Pulao

    Transfer the spice powder into a bowl and set aside.

    chettinad mushroom biryani

    In the same blender, add 2 quartered onions, 10 medium size garlic cloves, 1-1.5” inch ginger, 3-4 green chillies.

    Chettinad Mushroom Pulao

    Blend to a smooth paste.

    how to make mushroom pulao
    To make Chettinad Mushroom Pulao in a Pressure cooker

    Take a pressure cooker, heat oil and ghee together. For vegan, you can skip ghee/ clarified butter and use only vegetable oil.

    Chettinad Mushroom Pulao

    Add Bay leaf and 10 -12 cashews, fry till cashews turn golden brown.

    Chettinad Mushroom Pulao

    Now add in onion garlic ginger paste and sliced onions and fry till raw smell goes off completely. It takes approximately 3-4 minutes on medium heat.

    Chettinad Mushroom Pulao

    Add chopped mint and coriander leaves, mix well everything.

    Chettinad Mushroom Pulao

    Now add turmeric powder, red chili powder, coriander powder and blend spice powder, mix well everything. Spices mix well with oil and moisture from onions and greens , this prevents burning of spices.

    Chettinad Mushroom Pulao

    Tip in chopped tomatoes and mushrooms, give a quick saute for 1-2 minutes.

    kalan biryani

    Let rawness of mushroom and tomato goes off, no need to soften mushroom here.

    how to make mushroom biryani

    Now add in 1 cup coconut milk (medium thick , not thick nor thin ) . Mix well everything.

    Chettinad Mushroom Pulao

    Add 1.5 cups of hot water.

    mushroom biryani in pressure cooker

    Now add soaked rice, stir once everything.

    Chettinad Mushroom Pulao

    Add salt to taste. When it starts to bubble and boil, cover pressure cooker lid and cook on medium  heat for 1 whistle.

    mushroom pulao recipe

    Allow pressure to settle down on its own. Remove whistle weight from pressure cooker lid and then remove the pressure cooker lid.

    mushroom biryani in pressure cooker

    Add 2 tablespoon of chopped coriander leaves and freshly squeeze lime juice.

    Chettinad Mushroom Pulao

    Mix well everything .

    mushroom biryani

    Serve Mushroom Pulao with carrot or potato raita.

    Recipe

    mushroom-pulao
    5 from 4 votes

    Chettinad Mushroom Pulao | Mushroom Pulao Recipe

    Chettinad Mushroom Pulao is a flavorful, spicy , one pot recipe made with mushrooms, jeera rice ( seeraga samba rice)and spices.
    Prep Time15 minutes mins
    Cook Time30 minutes mins
    Total Time45 minutes mins
    Course: Main Course
    Cuisine: India, South India
    Keyword: Biryani, Mushroom recipes, Rice Varities
    Servings: 5 people
    Calories: 329kcal
    Author: Muktha H S

    Ingredients

    For Spice powder

    • 1 small strand Mace javitri
    • 1 teaspoon Black peppercorns
    • 3 no’s Green cardamom
    • 3-4 2 " inch Cinnamon sticks
    • 3 Cloves
    • 1 pinch stone flower / dagad phool
    • 1 teaspoon Fennel Seeds
    • ½ teaspoon Shahi Jeera

    For Masala Paste

    • 2 Onions medium size
    • 10 cloves garlic
    • 1 inch piece ginger
    • 3 Green chillies

    Other ingredients to make Pulao

    • 1.5 tablespoon vegetable oil
    • 1.5 tablespoon Ghee clarified butter
    • 1 Bay leaf
    • 2 onions finely chopped
    • 10 cashew nuts broken
    • ¼ cup coriander leaves chopped
    • ¼ cup mint leaves chopped
    • 1 Tomato medium size chopped
    • ½ teaspoon turmeric
    • 1 teaspoon red chilli powder
    • 2 teaspoon coriander powder
    • Salt to taste
    • 200 grams button mushrooms sliced
    • 1 cup Coconut milk
    • 1.5 cups Jeera Rice seeraga samba, soaked for 30 minutes
    • 1.5 cups Hot water

    Garnishing

    • 2 tablespoon chopped coriander leaves
    • 1 tablespoon Lime Juice

    Instructions

    Preparations

    • Rinse seeraga rice ( jeera rice -small grain rice) couple of times and soak for 30 minutes.
    • Wash 200- 250 grams of button mushooms , slice them ans set aside. Thinly slice 2 medium size onions ,chop 1 medium to large size tomatoes and set aside. Clean greens , chop and set aside.
    • In a pan, dry roast mace, cardamom, peppercorns, cinnamon sticks, cloves, black stone flower, fennel seeds and shahi jeera till aromatic.
    • Don’t brown spices, immediately transfer the spices into a blender or a plate, let it cool down. If you keep the spices in the same pan after roasting, the heat in the pan may further brown the spices, so it’s important to transfer the dry roasted spices into another plate.
    • When spices cool down blend roasted spices into a semi fine powder.
    • Transfer the spice powder into a bowl and set aside.
    • In the same blender, add 2 quartered onions, 10 medium size garlic cloves, 1-1.5” inch ginger, 3-4 green chillies and blend to a smooth paste.

    To make Mushroom Pulao in a Pressure cooker

    • Take a pressure cooker, heat oil and ghee together. For vegan, you can skip ghee/ clarified butter and use only vegetable oil.
    • Add Bay leaf and 10 -12 cashews, fry till cashews turn golden brown.
    • Now add in onion garlic ginger paste and sliced onions and fry till raw smell goes off completely. It takes approximately 3-4 minutes on medium heat.
    • Add chopped mint and coriander leaves, mix well everything.
    • Now add turmeric powder, red chili powder, coriander powder and blend spice powder , mix well everything. Spices mix well with oil and moisture from onions and greens , this prevents burning of spices.
    • Tip in chopped tomatoes and mushrooms, give a quick saute for 1-2 minutes. Let rawness of mushroom and tomato goes off, no need to soften mushroom here.
    • Now add in 1 cup coconut milk (medium thick , not thick nor thin ) . Mix well everything.
    • Add 1.5 cups of hot water.
    • Now add soaked rice, stir once everything.
    • Add salt to taste. When it starts to bubble and boil, cover pressure cooker lid and cook on medium heat for 1 whistle.
    • Allow pressure to settle down on its own. Remove whistle weight from pressure cooker lid and then remove the pressure cooker lid.
    • Add 2 tablespoon of chopped coriander leaves and freshly squeeze lime juice.
    • Mix well everything and serve Mushroom Pulao with carrot or potato raita.

    Video

    Nutrition

    Calories: 329kcal

    More similar rice recipes

    • chana-pulao-recipe
      Chana Pulao | Chickpea Pilaf
    • baingan-biryani-burani-raita
      Baingan Biryani
    • vegetbale-bath-with-raita
      Vegetable Bath
    • capsicum-vangi-bath
      Capsicum Bath Recipe

    Murungai Keerai Muttai Poriyal | Moringa Egg Stir Fry

    Published : July 9, 2021 | Last Update on September 21, 2022 By Muktha

    moringa egg bhurji

    Murungai Keerai Muttai Poriyal aka Moringa Egg Bhurji recipe with step by step photos and video. Murungai Muttai Poriyal is a South Indian quick , tasty and nutritious egg stir fry made with fresh moringa leaves and spices.

    If you are interested then don't forget to check my Moringa Tea recipe and Moringa Energy Balls , an amazing recipe on my space.

    Moringa-egg-stir-fry
    [feast_advanced_jump_to]

    About this recipe

    Scramble eggs with Moringa leaves is one of the most popular dish in South India. Moringa leaves are abundantly found in South India in every house backyard. So we add in fresh moringa leaves in many of our recipes.

    Murungai Keerai mutta poriyal - murungai refers to moringa and keerai to leaves ; muttai means eggs and poriyal means stir fry in Tamil.

    I personally love eggs ; scrambled eggs or Indian Egg Bhurji is my favorite . Let me be honest , its my favorite because its simple to cook and tastes so so delicious. Can pair it with any thing , Rice , roti , bread .....,its tastes yum.

    For me a great way to eat egg bhurji is with vegetables . My all time favorite egg bhurji includes Beetroot Egg Bhurji , French Beans dil egg Bhurji , Onion Egg Bhurji, Mumbai style Masala Egg Bhurji and this Moringa egg bhurji.

    Come lets quickly see on how I make scramble eggs with moringa leaves.

    Ingredients , Tips and Variations

    Moringa Leaves : Always try to use freshly harvested moringa leaves . Keeping moringa leaves for a day may make it turn bitter. Moringa leaves are slightly bitter in taste , so don't add too much in your recipe.

    Onions : For any Egg bhurji , adding onions enhances the taste . For every 1 cup of fresh morings leaves make sure to add at least ½ cup of chopped onions.

    Green chilies : Its optional to add but I like the hint of heat from green chillies. So , I prefer to add.

    Spices : I highly recommend adding Saunf/ Fennel seeds powder here because sweet flavor of fennels seeds meld well with this egg bhurji . Also along with flavorful taste , it aids in balancing thermogenic effects of moringa leaves. Red chili powder is used for heat instead of black pepper powder ( black pepper powder is also produces heat in body , hence it not added in combination with moringa leaves) . Salt to taste is added.

    Other Ingredients : Mustard seeds and chana dal is used , you can skip if you want. I personally add chan dal because I like to get that crunch bite here and there in Egg Bhurji. Any flavorless cooking oil works well here. Salt as per taste is required.

    Nutrition and Health Benefits of Moringa Oleifera

    • Rich in Vitamins and Minerals : Moringa leaves are rich in vitamins A, C, B1 (thiamin), B2 (riboflavin), B3 (niacin), B6 and Folate. Moringa is a iron rich food, as it also rich in Vit C and Vit B , it helps in absorption of Iron.
    • Rich in Amino Acids : Moringa leaves are rich in amino acids, the building blocks of proteins.
    • Fights Inflammation : Moringa leaves are anti-inflammatory in nature due to the presence of isothiocyanates.
    • Rich in Antioxidants : Anti-oxidative properties of moringa protect sagainst the damaging effects of free radicals. Vitamin C and beta-carotene act against free radicals.
    • Good for the Stomach : Moringa leaves are beneficial against digestive disorders. Those who suffer from constipation, bloating, gas, gastritis and ulcerative colitis should add Moringa leaves to their diet.
    • Improves Bone health : Moringa leaves are rich sources of calcium and phosphorus. Both of these elements are needed for good bone health and also fights against osteoporosis and arthritis.
    • Improve Lactation : As it is very rich in calcium and all other nutrients , in Ayurveda , moringa leaves are used to improve lactation in nursing mothers.
    • Helps in Weight Management : Moringa leaves increase fat burning in the body. They reduce cravings for food and boost metabolism. They also lower cholesterol.
    • Good for Skin and Hair : Due to an abundance of antioxidants and nutrients, moringa leaves improve the health and appearance of skin and hair. They add suppleness to the skin and shine to the hair. The antioxidants present in moringa leaves reduce the appearance of fine line and wrinkles on the skin.
    • Good for Detoxification : Moringa leaves are natural cleansers and help to detoxify the system. This helps to keep the body and increases immunity against various infections. They also increase the energy levels in the body. Source : Pharmeasy

    Watch Video

    How to make Murungai Keerai Muttai Poriyal

    Initially check moringa leaves thoroughly, as it’s leaves are from tree it may have dust and insects.

    Pull leaves from stem , small tiny stems attached to the leaves are perfectly fine as it is tender. Just make sure not add to hard and mature stems.

    moringa leaves

    Once you collect all fresh greens, thoroughly wash green leaves to remove sand dust on leaves and set aside.

    In a pan , heat cooking oil. Add mustard seeds , when it splutters add chana dal., let chana dal slightly changes it colour to golden brown.

    scramble eggs with moringa

    Now add in chopped onions and green chillies, sauté till onions turns translucent

    Egg bhurji

    Add rinsed moringa leaves and cook on medium heat for 4 to 5 minutes.

    Moringa Leaves Stir fry

    When moringa leaves are well cooked , add in turmeric powder, red chilli powder and fennel seeds powder.

    Moringa egg bhurji

    Mix well everything.

    Murungai Keerai Muttai Poriyal | Moringa Egg Stir Fry

    Finally, Crack in 2 Eggs , scramble well .

    Moringa egg bhurji

    When egg cooks completely, scramble well .

    scramble eggs with moringa

    Remove from heat and serve as a side dish with rasam rice or roti or top on bread toast.

    Recipe

    moringa-egg-stir-fry
    5 from 1 vote

    Murungai Keerai Muttai Poriyal | Scramble Eggs with Moringa

    Murungai Muttai Poriyal is a South Indian quick , tasty and nutritious egg stir fry made with fresh moringa leaves and spices.
    Prep Time8 minutes mins
    Cook Time12 minutes mins
    Total Time20 minutes mins
    Course: Side Dish
    Cuisine: India
    Keyword: Bachelor's Cooking, Diet, Egg
    Servings: 2
    Calories: 214kcal
    Author: Muktha H S

    Ingredients

    • 1 Cup Moringa leaves cleaned and washed
    • 2 Onions medium size, chopped (about ½ to ⅔ cup)
    • 1 Green chili slit, optional ( if you like it spicier)
    • 2 no’s Eggs
    • ¼ teaspoon Turmeric Powder
    • ½ teaspoon Red Chilli Powder
    • ½ teaspoon Saunf/ Fennel seeds powder
    • ½ teaspoon – ¾ teaspoon Salt or as required
    • 1 tablespoon of cooking oil

    Instructions

    • Initially check moringa leaves thoroughly, as it’s leaves are from tree it may have dust and insects.
    • Pull leaves from stem , small tiny stems attached to the leaves are perfectly fine as it is tender. Just make sure not add to hard and mature stems.
    • Once you collect all fresh greens, thoroughly wash green leaves to remove sand dust on leaves and set aside.
    • In a pan , heat cooking oil. Add mustard seeds , when it splutters add chana dal., let chana dal slightly changes it colour to golden brown.
    • Now add in chopped onions and green chillies, sauté till onions turns translucent
    • Add rinsed moringa leaves and cook on medium heat for 4 to 5 minutes.
    • When moringa leaves are well cooked , add in turmeric powder, red chilli powder and fennel seeds powder. Mix well everything.
    • Crack in 2 Eggs , scramble well . When egg cooks completely, scramble well , remove from heat and serve as a side dish with rasam rice or roti or top on bread toast.

    Video

    Notes

    • Moringa leaves are slightly bitter to taste. So always add freshly harvested leaves in the recipe.
    • Ratio of moringa leaves to onion should be always 2:1 , for 1 cup moringa leaves you need to add ½ cup or slightly more onions. If moringa leaves are more then it may taste bitter.
    • Fennel Seeds / Saunf powder is the must spice here as it imparts a flavour and also balances thermogenic effect of moringa leaves.

    Nutrition

    Calories: 214kcal

    You may also like

    • pumpkin bread
      Pumpkin Bread
    • sicilian-salad
      Sicilian Cabbage Orange Salad
    • strawberry chia pudding
      Strawberry Chia Pudding
    • sprout-salad-recipe
      Sprouts Salad to raise hemoglobin levels

    Aliv Makhana Smoothie

    Published : July 8, 2021 | Last Update on October 10, 2024 By Muktha

    aliv-makhana-smoothie

    Aliv Makhana Smoothie recipe with step by step images and video . Smoothies are great way to start the day in a healthy way. Aliv Makhana Smoothie is a nutritious superfood bowl with creamy , earthen taste with a hint of cardamom and coconut flavors.

    Other healthy breakfast smoothies recipe which I often do at home are Ragi Banana Smoothie , Oats Peanut butter smoothie , Papaya Oats Milk shake.

    Aliv Makhana Smoothie
    [feast_advanced_jump_to]

    About this recipe

    Aliv/ Halim or Garden cress seeds are tiny red seeds with dense nutrients. Aliv seeds are traditionally used during post natal care in different parts of India. A delicious laddo ,sweet is made with this aliv seeds and are given to new mothers . De-constructing the same recipe , I came with this healthy smoothie bowl.

    Being a nutrition advisor , I often get requests for weight loss recipes , immunity boosting , vegetarian protein and liquid diet recipes. As this aliv seeds belongs to functional food , it easily fits into all these categories , so I developed this aliv makhana smoothie .

    This recipe can be eaten by all age groups as breakfast or snack . People looking for weight loss can eat this alone for breakfast , its very filling and keeps you satiates for long . Because this smoothie contains good quality essential proteins ( amino acids) from halim seeds and makhana ( fox nuts) . Good fat from fresh coconut , ghee and cow's milk in fact helps for proper assimilation of nutrients from the body.

    So I would recommend to add all the ingredients without any guilt of calories and enjoy your smoothie bowl.

    Watch Video

    What are Aliv Seeds / Halim or Garden cress seeds?

    Halim seeds or Aliv are garden cress seeds a tiny little red seeds , loaded with many health benefits and nutritional qualities. Aliv seeds fall under the category of ‘functional foods’, that promotes overall health.

    Garden Cress seeds are heaped with nutrients including iron, folate, Vitamin C, A, E, fibre and protein . Include these tiny seeds 3 times a week to enjoy a broad spectrum of health benefits.

    The seeds are most commonly roasted and added to soups, stews , salads and also traditional Indian recipes includes aliv ladoo and kheer .

    Aliv-seeds

    Health Benefits of Aliv Seeds

    Prevents Asthma - The symptoms of asthma can be remarkably lowered also it helps in improving the lung functions. Chewing Garden Cress seeds serves as a good expectorant that helps in treating cough and sore throat.

    Improves Hemoglobin - Rich iron in halim seeds promotes the production of red blood cells there by helps to treat anemia in long run.

    Good For Gut Health - The abundance fiber in these seeds helps in relieving the symptoms of constipation and indigestion.

    Regulates Menstruation - The phytochemicals in aliv seeds are very similar to the estrogen hormone that helps in regularizing the cycle. Hence , Garden Cress seeds is a natural way to normalize the irregular menstrual cycle.

    Boosts Memory - Essential fats linolenic acids and arachidonic fatty acids and this good fats functions as an excellent memory-booster.

    Good For Skin And Hair Health- Both intake of this seeds as well as topical application as great results on skin and hair. It's essential minerals such as iron and magnesium , prevents hair loss and premature greying of hair.

    Promotes Production Of Breast-Milk - Enriched with high amounts of protein and iron, it boosts the secretion of milk. Hence, breast-feeding mothers are encouraged to include food containing garden cress seeds to enhance milk production.

    Regulates Diabetes -These seeds excellent anti-glycemic nature . It helps to reduce the breakdown of starch into glucose thus leads to low blood glucose levels.

    Facilitates Weight Loss - Owing to the presence of fiber and essential nutrients, these seeds satiates hunger pangs and prevents overeating.

    Boosts Immunity -Loaded with a quarry of antioxidants and Vitamin A and C, garden cress seeds offer an absolute remedy for improving the immune system.

    Ingredients , Tips and Variations

    Aliv Seeds / Garden cress seeds : Adding 2 tablespoon of this seeds are enough to make this recipe. Don't add more as it has rustic earthy flavors , which may impart more raw taste. Soaking this seeds is important before using as soaking helps for its nutrients assimilation. You can find Garden Cress seeds on Amazon.

    Makhana / Fox Nuts : These are known for its protein and low calories. Adding makhana in this recipe helps to give a right consistency . So I insist on using ghee roasted Makhana , flavorless fox nuts here.

    Fresh Coconuts : Good fat in fresh coconut along with its nutrients and flavors , is a great add on with this recipe in terms of taste as well as nutrition.

    Fresh Fruit : Banana helps to make more creamier and goes well with choice of ingredients. Hence robusta banana works great here. Another great choice is Mango , in season you can use mango also in this recipe.

    Sweetener : I have uses Dates and Dates syrup along with powdered jaggery on toppings for this recipe. You can add either honey or maple syrup or powdered jaggery as per your taste in this recipe.

    Flavors : I have used freshly pound cardamom powder , to enhance flavors of this smoothie bowl. You can use nut meg and cardamom powder here , it goes well.

    Toppings : Choose sweeter fruits and nuts like raisins , almonds and cashews. Avoid using walnut and other seeds as this combination may not go well with aliv makhana smoothie bowl.

    Aliv makhana smoothie

    Step by step directions to make Aliv Makhana Smoothie

    Preparation

    Soak 2 tablespoon Aliv seeds seeds in ¼ cup water for 2+ hours or overnight.

    Aliv Makhana Smoothie

    After soaking for 2+ hours , aliv seeds absorbs all water and turns gelatinous.

    Aliv Makhana Smoothie

    In a pan , heat 1 or 2 teaspoon of Ghee/ clarified butter and roast makhana on low heat until crisp and crunch.

    Aliv Makhana Smoothie

    When fox nuts/ makhana are perfectly roasted , you can press makhana between fingers and it breaks down easily.

    Aliv Makhana Smoothie

    Now remove from the flame and let it cool down completely. Once it’s cools down you can store in a  air tight snack jar and use it as required in any recipe.

    Aliv Makhana Smoothie

    To make Aliv makhana smoothie

    In a Mixer jar ,  and 1 cup of ghee roasted makhana , shredded fresh coconut ½ cup , soaked aliv seeds, 1 ½ banana , 4 dates , 2 tablespoon of sweetener ( Honey / Dates Syrup or Jaggery Powder ) , Cow’s Milk and cardamom powder.

    Aliv Makhana Smoothie

    Blend everything to smoothie.

    Aliv Makhana Smoothie

    Adjust sweetener and consistency of smoothie, if required by adding extra milk if you need to thin out.

    Aliv Makhana Smoothie

    Transfer to a bowl, top it with fresh coconut, nuts, raisins, pomegranate arils , makhana, dash of jaggery powder and serve immediately.  

    Recipe

    aliv-makhana-smoothie
    5 from 1 vote

    Aliv Makhana Smoothie

    Aliv Makhana Smoothie is a nutritious superfood bowl with creamy , earthen taste with a hint of cardamom and coconut flavors.
    Prep Time2 hours hrs 3 minutes mins
    Cook Time5 minutes mins
    Course: Breakfast, Snack
    Cuisine: India
    Keyword: Breakfast_Ideas, Diet, home remedies, Weight Loss
    Servings: 3
    Calories: 294kcal
    Author: Muktha H S

    Ingredients

    To Blend

    • 2 tablespoon Aliv Seeds / Garden Cress Seeds : 2 Tbsp
    • 1 Cup Makhana / Fox Nuts roasted in ghee
    • ½ Cup Fresh Coconut shredded
    • 1 ½ Robusta Banana
    • 4 Dates
    • 2 tablespoon Sweetener Honey / Dates Syrup /Jaggery powder as required
    • ½ teaspoon Cardamom Powder freshly pound
    • 300 ml Regular Milk / Coconut Milk for Vegans

    Toppings

    • 1 teaspoon Soaked Alive Seeds
    • 2 teaspoon Chopped Nuts Almonds , cashews, pista
    • 1 teaspoon Golden Raisins
    • 1 teaspoon Fresh Coconut
    • ½ Banana
    • Few arils of pomegranate
    • 2 dash of powdered jaggery

    Instructions

    Preparations

    • Soak 2 tablespoon Aliv seeds seeds in ¼ cup water for 2+ hours or overnight.
    • After soaking for 2+ hours , aliv seeds absorbs all water and turns gelatinous.
    • In a pan , heat 1 or 2 teaspoon of Ghee/ clarified butter and roast makhana on low heat until crisp and crunch.
    • When fox nuts/ makhana are perfectly roasted , you can press makhana between fingers and it breaks down easily.
    • Now remove from the flame and let it cool down completely. Once it’s cools down you can store in a air tight snack jar and use it as required in any recipe.

    To make Aliv makhana smoothie

    • In a Mixer jar , and 1 cup of ghee roasted makhana , shredded fresh coconut ½ cup , soaked aliv seeds, 1 ½ banana , 4 dates , 2 tablespoon of sweetener ( Honey / Dates Syrup or Jaggery Powder ) , Cow’s Milk and cardamom powder.
    • Blend everything to smoothie.
    • Adjust sweetener and consistency of smoothie, if required by adding extra milk if you need to thin out.
    • Transfer to a bowl, top it with fresh coconut, nuts, raisins, pomegranate arils , makhana , dash of jaggery powder and serve immediately.

    Video

    Notes

    • You can also add ½ teaspoon of ghee to the smoothie , if you wish as it helps in proper assimilation of nutrients.
    • Recommended dose of aliv seeds are 1 Tbsp  , 2-3 days / week . 

    Nutrition

    Calories: 294kcal

    Mango Mastani Recipe

    Published : July 1, 2021 | Last Update on September 24, 2022 By Muktha

    mango-mastani-recipe

    Mango Mastani Recipe with step by step photos and video. Mango Mastani is a delicious mango ice cream milkshake topped with some glasses cherries ,nuts and mangoes.

    Serve this immediately , It needs both spoon and straw to complete this drink.

    Before season ends , do try this yummy Mango Mastani, so that you don't need to wait till next season.

    Few more , must try Mango recipes are Mango Phirni , Mango Lassi , Mango Mousse , Mango Shrikhand and Mango cheese cake .

    Mango Mastani Recipe
    [feast_advanced_jump_to]

    About this recipe

    Mango Mastani is recipe originated from Pune. A thick Mango Milkshake with ice cream , nuts and glazed cherries make this a delicious summer drink.

    I had couple of requests from readers for this Pune originated , Mango Mastani recipe. As I live in Pune , thought to share this recipe as made in place of origin.

    There is a place in Pune , known as Sujata in Sadashiv Peth which is famous for all flavors of Mastani . I did ask the shop keeper why it's called Mastani and he too said that it may be named after Peshwa Bajirao’s beautiful wife Mastani . But its only in tales and there is no connection of Mango mastani with Bajirao's wife Mastani. Its just a metaphor here.

    mango-mastani

    Ingredients , Tips and Variations

    Mango Pulp - Alphonso mango or Kesar mango are basically very sweet naturally. So , I always prefer to add Alphonso and Kesar mango to make Mango Mastani. I have used Kesar mango pulp to make this drink.

    Full Cream Milk - Thick and full cream milk , chilled for few hours works best here.

    Ice Cream - Vanilla or Mango Ice cream goes well with this Mastani . You can use 1 scoop of vanilla and 1 scoop of Mango also while serving.

    Sugar - 1 or 2 tablespoon sweetener as required , depends on sweetness of mangoes too.

    Dry Fruits and Nuts : Add chopped nuts of your choices and glazed cheeries. You can also top with tutti fruity . I personally don't like tutti fruity hence , I haven't added.

    Watch Video

    How to make Mango Mastani Recipe

    In a blender add 2 cups mango pulp and chilled milk .

    mango  mastani recipe

    Also add 2 scoops of vanilla ice cream.

    how to make mango mastani

    And blend everything together.

    Taste and adjust sweetener , as it depends on the sweetness of mangoes and also ice cream. I used around 1Tbsp of sugar.

    mango mastani

    Blend again.

    Mango Mastani Recipe

    Pour to a tall glass, top with 1 or 2 scoops of ice cream, glazed cherries and chopped nuts and mangoes.

    Recipe

    mango-mastani-recipe
    No ratings yet

    Mango Mastani

    Mango Mastani is a delicious mango ice cream milkshake topped with some glasses cherries ,nuts and mangoes.
    Prep Time8 minutes mins
    Course: Dessert
    Cuisine: India
    Keyword: Bachelor's Cooking, Basic, Drinks, Juices, Kids Recipes
    Servings: 2 people
    Calories: 482kcal
    Author: Muktha H S

    Ingredients

    For Mango Milkshake

    • 2 cups Mango Pulp
    • 1 Cup Full cream milk chilled
    • 2 Scoops Vanilla Ice cream
    • 1-2 Tbsp of Sugar as required

    For Toppings

    • 2 tablespoon Pistachios sliced
    • 2 tablespoon Almonds sliced
    • 2 tablespoon of chopped Mangoes
    • Few Glazed cherries
    • 1-2 scoops of vanilla ice cream
    • 1 tablespoon Tutti fruity optional

    Instructions

    • In a blender add 2 cups mango pulp and chilled milk .
    • Also add 2 scoops of vanilla ice cream.
    • And blend everything together.
    • Taste and adjust sweetener , as it depends on the sweetness of mangoes and also ice cream. I used around 1Tbsp of sugar.
    • Blend again
    • Pour to a tall glass, top with 1 or 2 scoops of ice cream, glazed cherries and chopped nuts and mangoes.

    Video

    Nutrition

    Calories: 482kcal

    Chana Pulao | Chickpea Pilaf

    Published : June 16, 2021 | Last Update on September 29, 2022 By Muktha

    chana-pulao-recipe

    Chana Pulao is a fragrant and mildly spiced main course recipe made with chickpeas, basmati rice , spices and herbs.

    To make this tasty chickpea pilaf safed chana ( white chickpea) aka Kabuli chana is used. This is an easy to make one pot rice that's tasty , simple and nutritious too with a good plant protein .

    Other family favorites from chickpea recipes are Chole masala , Pindi chole , Hummus , Falafal , Chole chat , Chickpea Salad and Usal

    chana-pulao-recipe
    [feast_advanced_jump_to]

    About this recipe

    Chickpeas and rice is a very well known classical combination . In India Chole (Chickpea curry ) with steamed rice is favorite among many including me. The creamy texture of boiled chickpeas along with spices , clarified butter, herbs and basmati rice all together in one pot makes this dish.

    Serve chana pulao with simple salad and raita to make this a complete meal.

    Ingredients , Tips and Variations

    Chickpeas or garbanzo beans - are the main ingredient to make this Pilaf recipe. If using dry chickpeas, make sure to soak it overnight or for 8 to 10 hours . Drain off all the water completely give a quick rinse with cold water and pressure cook for 3-4 whistles . Alternatively you can also use canned chickpeas. If using canned chickpeas , rinse and drain water and skip initial pressure cooking of chickpeas.

    Basmati Rice - Any long grain basmati rice works well in this recipe , It adds lots and loads of flavor. Though you can use any other variety of rice for sure you'll be compromising with taste .

    Whole Spices - Use premium quality of spices for more aromatic pulao. Shahi Jeera with cardamom adds more flavor to this recipe .

    Vegetables - I use Onions , Tomatoes and Potatoes to make chana pulao . Use of Tomatoes and Potatoes are optional but tang from tomatoes and potatoes with chickpeas are most inviting. So I recommend to use for more taste.

    Herbs and Spices - Other ingredients like ginger , garlic, mint , coriander leaves , chili powder , coriander powder and garam masala are used .

    Yogurt / Curds - I prefer to add homemade thick curds to make pulao. You can skip if you want it to be Vegan or Dairy free.

    Fat - Use Ghee/ clarified butter with any flavorless cooking oil to make pulao. You can skip ghee and use oil to make it Vegan

    Facts and Health Benefits of Chickpeas

    Apart from taste , Did you know why this legume and cereal combination , Chole - Chawal exists?

    Chickpeas contains almost all the 8 amino acids except Histidine and Rice / Roti ( cereals) have Histidine amino acid in it . So when both are combined together , it makes up for a complete protein. Hence its a general practice to eat legumes and cereals in combination for delivery of complete protein.

    Chickpeas are high in vitamins, minerals, fiber and protein. These characteristics are responsible for most of their health benefits like maintaining good bone health and maintaining blood sugar levels.

    Adding chickpeas in regular diet will not only support health and weight management. But also reduces the risk of developing chronic diseases like heart diseases and cancer.

    How to make Chana Pulao

    Rinse 1 cup of chickpeas and soak overnight or for 8 to 10 hours. Next day drain water completely, rinse in cold water .

    In a pressure cooker add soaked chickpeas ,  ½ teaspoon Salt , 2 cups of water and pressure cook for 2-3 whistles.

    Chana Pulao | Chickpea Pilaf

    Wash Basmati rice couple of times, until water turns clear . Soak for 10 -15 minutes .

    Whilst, in pan or cooker add clarified butter and cooking oil.

    Chana Pulao | Chickpea Pilaf

    When its hot enough add all listed whole spices .

    Chana Pulao | Chickpea Pilaf

    Allow spices to release oil and turn fragrant.

    Chana Pulao | Chickpea Pilaf

    Now add in sliced onions, ginger,garlic , green chillies , mint leaves , coriander leaves

    Chana Pulao | Chickpea Pilaf

    and saute until onion turns translucent.

    chana pulao

    Add turmeric powder , red chili powder, coriander powder and garam masala . Mix well and saute for a minute.

    Chana Pulao | Chickpea Pilaf

    Now add in tomatoes and saute until tomatoes turns mushy. Add potatoes,  mix along with tomatoes and continue to cook.

    chana pulao

    By now chickpeas would have cooked completely. Remove from cooker , drain cooked water completely  and set aside.

    chana pulao

    Now add in boiled chickpeas into pressure cooker along with tomatoes and spices . Also add ½ teaspoon of salt and mix well everything.

    Chana Pulao | Chickpea Pilaf

    Add ½ cup of whisked curds and mix well.

    Chana Pulao | Chickpea Pilaf

    Now add soaked rice and give a quick stir . Rice grains gets coated with oil and spices . This steps ensures that rice grains doesn’t turns mushy after cooking.

    chana pulao

    Now add in 2 cups of boiled chickpeas water ( stock ) into rice.

    Chana Pulao | Chickpea Pilaf

    Add salt to taste , mix well everything , cover pressure cooker lid .

    Chana Pulao | Chickpea Pilaf

    Pressure cook for just 1 whistle. When pressure settles down on its own , remove nozzle and open lid.

    Chana Pulao | Chickpea Pilaf

    Add coriander leaves, fresh lime juice and ghee.

    chana pulao

    Mix well everything and serve with cucumber carrot raita and some fresh green salad.

    Recipe

    chana-pulao-recipe
    5 from 3 votes

    Chana Pulao | Chickpea Pilaf

    Chana Pulao is a nutritious , tasty, fragrant and mildly spiced main course recipe made with chickpeas, basmati rice , spices and herbs.
    Prep Time8 hours hrs
    Cook Time40 minutes mins
    Total Time8 hours hrs 40 minutes mins
    Course: Main Course
    Cuisine: Asian
    Keyword: Bachelor's Cooking, Rice Varities
    Servings: 5
    Calories: 354kcal
    Author: Muktha H S

    Ingredients

    To Pressure Cook Chickpeas

    • 1 Cup dry chickpeas soaked overnight will be 2 cups soaked
    • 2 Cups water to pressure cook chickpeas
    • ½ teaspoon Salt

    To make Pulao

    • 1.5 tablespoon Clarified Butter / Ghee
    • 1.5 tablespoon Cooking Oil any flavourless oil
    • 1 Bay leaf
    • 3 strand of Mace
    • 1 teaspoon Shahi Jeera
    • 2 Green Cardamom Pods
    • 1 Black Cardamom
    • 1.5" inch Cinnamon Stick
    • 3-4 Cloves
    • 1 large onion thinly sliced
    • ½ tablespoon ginger paste or grated
    • ½ tablespoon garlic paste or minced
    • 2-3 green chillies slit into half optional
    • ¼ cup Coriander leaves
    • 4 tablespoon of fresh Mint Leaves
    • 1 medium potato skin peeled and cut into cubes
    • ½ Cup Curds
    • 1 small Tomato chopped
    • ¼ teaspoon Turmeric Powder
    • 1 teaspoon Red Chili Powder mild spice variant
    • 1.5 teaspoon Coriander Powder
    • ½ teaspoon Garam Masala Powder
    • 1.5 teaspoon Salt or as required
    • 1 cup Long grain Basmati rice about 250 grams

    To garnish

    • 3 -4 tablespoon of coriander leaves
    • ½ tablespoon of fresh lime juice
    • 1 tablespoon of Ghee/ clarified butter

    Instructions

    • Rinse 1 cup of chickpeas and soak overnight or for 8 to 10 hours. Next day drain water completely, rinse in cold water .
    • In a pressure cooker add soaked chickpeas , ½ teaspoon Salt , 2 cups of water and pressure cook for 2-3 whistles.
    • Wash Basmati rice couple of times, until water turns clear . Soak for 10 -15 minutes .
    • Whilst, in pan or cooker add clarified butter and cooking oil. When its hot enough add all listed whole spices . Allow spices to release oil and turn fragrant.
    • Now add in sliced onions, ginger,garlic , green chillies , mint leaves , coriander leave and saute intil onion turns translucent.
    • Add turmeric powder , red chili powder, coriander powder and garam masala . Mix well and saute for a minute.
    • Now add in tomatoes and saute until tomatoes turns mushy.
    • Add potatoes, mix along with tomatoes and continue to cook.
    • By now chickpeas would have cooked completely. Remove from cooker , drain cooked water completely and set aside.
    • Add boiled chickpeas into pressure cooker along with tomatoes and spices . Add ½ teaspoon of salt and mix well everything.
    • Add ½ cup of whisked curds and mix well.
    • Now add soaked rice and give a quick stir . Rice grains gets coated with oil and spices . This steps ensures that rice grains doesn’t turns mushy after cooking.
    • Now add in 2 cups of boiled chickpeas water ( stock ) into rice.
    • Add salt to taste , mix well everything , cover pressure cooker lid .
    • Pressure cook for just 1 whistle. When pressure settles down on its own , remove nozzle and open lid.
    • Add coriander leaves, fresh lime juice and ghee.
    • Mix well everything and serve with cucumber carrot raita and some fresh green salad.

    Video

    Nutrition

    Calories: 354kcal

    You may also like

    • chicken-fried-rice-recipe
      Chicken Fried Rice
    • baingan-biryani-burani-raita
      Baingan Biryani
    • mushroom_pulao
      Chettinad Mushroom Pulao
    • Easy Lemon Rice
      Easy Lemon Rice | No Onion No Garlic Recipe

    Chicken Nuggets Recipe

    Published : June 8, 2021 | Last Update on September 24, 2022 By Muktha

    crispy chicken nuggets

    Chicken nuggets are crispy, juicy tender bites made with deboned chicken that is batter coated , breaded and then fried or baked.

    Few more similar chicken recipes which may interest you are Southern Crispy Fried Chicken , Chicken Lollipop , Sweet Spicy Chicken Wings

    homemade chicken nuggets
    [feast_advanced_jump_to]

    About this recipe

    Crispy chicken nuggets are origin of United States of America and a popular dish on menu in any fast food restaurant. These homemade chicken nuggets are a way far better than what you get in any KFC or Mc Donald’s . The chicken nuggets are super crispy outside and juicy inside are really very easy to make at home.

    This post shares one of the easiest homemade chicken nuggets recipe . In fact ,it always scores better than the one you pick it from any fast food joints. These nuggets turns crisp outside with moist and delicious center without turning rubbery or chewy.

    With this recipe , excluding marinating time all you need is just 30 minutes to make a big batch of chicken nuggets. Also you can freeze it for later use.

    Come let's see on how to make this chicken nuggets recipe.

    Ingredients, Tips and Variations:

    Chicken : Chicken breast is cut into strips, which is then cut into small bite size pieces. Though chicken breast works best to make nuggets , you can also use small bites of deboned chicken .

    Buttermilk : Marinating chicken in buttermilk for few hours or overnight makes chicken pieces to stay moist and juicy. After marination is done, drain off buttermilk and remove chicken pieces. Let excess buttermilk drip off completely.

    Season flour : Add good amount of spices to the flour mixture . Adding spices to the flour will give extra oomph to the chicken nuggets , without which nuggets may taste bland. Hence add all the spices to the flour.

    Coating chicken pieces with seasoned flour is the best way to coat chicken nugget pieces because we get flavorful and amazing chicken nuggets both inside and outside.

    Egg Wash : Dipping flour coated chicken bites in Egg ensures that coating sticks to chicken nugget pieces. If you are allergic to egg , alternative to egg wash you can dip chicken pieces in corn flour slurry for proper coating .

    Panko Bread crumbs : Panko bread crumbs works best for outer coating. If you want extra crisp then mix some crushed cornflakes along with bread crumbs to get super crispy outer on homemade chicken nuggets.

    Bake/ Deep Fry / Air Fry : You can achieve the same crispy outer texture and juicy inside by baking or deep frying chicken nuggets in oil or with air fryer. It's up to your choice, but if you are deep frying make sure to use any flavorless oil.

    Watch Video

    Step by step directions to make Chicken Nuggets

    Whisk butter milk well with salt and pepper powder .

    Chicken Nuggets Recipe

    In a bowl add chicken and pour buttermilk, mix well.

    Chicken Nuggets Recipe

    Cover and marinate it in fridge for 2+ hours or overnight(8 -10 hours)

    Chicken Nuggets Recipe

    Then remove from fridge and drain off excess buttermilk.

    Chicken Nuggets Recipe

    Place all purpose flour on a bowl or plate. Add all spice powders to the flour.

    Chicken Nuggets Recipe

    Mix well everything. Set aside.

    Chicken Nuggets Recipe

    Crack open a egg into a separate bowl , add salt and pepper, whisk well and set aside.

    Chicken Nuggets Recipe

     In a wide bowl mix panko bread crumbs, oregano or thyme , paprika, pepper powder, and mix well. Salt is not added here as panko bread crumbs already contains salt in it.

    Chicken Nuggets Recipe

    Preheat Oven to 200 deg Celsius. Alternatively if you deep frying , In a wide pan heat oil for deep frying.

    Add chicken bites into spice flour and coat it with flour,

    Chicken Nuggets Recipe

    then dip it in egg and

    Chicken Nuggets Recipe

    then coat with panko bread crumb mix. Repeat this to all the chicken pieces.

    Chicken Nuggets Recipe

    Line a baking tray and brush with oil. Arrange chicken pieces on a baking tray , spray oil or drizzle some oil on top of the arranged chicken pieces .

    Chicken Nuggets Recipe

    Put inside a oven and bake for around 18 minutes.

    Chicken Nuggets Recipe

    Around half the way after 10 minutes of baking , open tray from the oven. Turn the chicken pieces to other side, drizzle some oil on top.

    Chicken Nuggets Recipe

    Put it back in oven and continue to bake for 6 to 8 minutes.

    Chicken Nuggets Recipe

    Once done , garnish with some fresh herbs, sprinkle some kosher salt and serve hot with favorite sauce or dips of your choice.

    Chicken Nuggets Recipe

    Recipe

    crispy chicken nuggets
    5 from 2 votes

    Chicken Nuggets Recipe

    Chicken nuggets are crispy, juicy tender bites made with deboned chicken that is batter coated , breaded and then fried or baked.
    Prep Time10 minutes mins
    Cook Time20 minutes mins
    Marination2 hours hrs
    Total Time2 hours hrs 30 minutes mins
    Course: Appetizer, Snack, Starters, Street Food
    Cuisine: American
    Keyword: Chicken, Kids Snacks
    Servings: 4 people
    Calories: 284kcal
    Author: Muktha H S

    Ingredients

    • 250 grams Chicken breast bite size

    For Marination

    • 500 ml Buttermilk
    • 1 tablespoon Salt
    • 1 tablespoon Black Pepper Powder

    For Flour Mixture

    • ⅓ Cup All Purpose Flour
    • 1 teaspoon Black Pepper Powder
    • ½ teaspoon Onion Powder
    • ½ teaspoon Garlic Powder
    • ½ teaspoon Red Chili powder
    • ½ teaspoon Smoked Paprika
    • ½ teaspoon Salt
    • ¼ teaspoon Baking Powder

    For Egg Wash

    • 1 Egg
    • 2 tablespoon Milk optional
    • ½ teaspoon Salt and Pepper

    For Bread Crumbs

    • 1-¾ Cup Bread Crumbs
    • ¼ teaspoon Chili Powder
    • ¼ teaspoon Black pepper powder
    • ¼ teaspoon of Basil or Oregano or thyme your choice
    • Note * Bread Crumbs already has salt in it so don’t add salt
    • Few Drops of Oil to drizzle

    Instructions

    • Whisk butter milk well with salt and pepper powder . In a bowl add chicken and pour buttermilk, mix well. Cover and marinate it in fridge for 2+ hours or overnight(8 -10 hours) Then remove from fridge and drain off excess buttermilk.
    • Place all purpose flour on a bowl or plate. Add all spice powders to the flour and mix well everything. Set aside.
    • Crack open a egg into a separate bowl , add salt and pepper, whisk well and set aside.
    • In a wide bowl mix panko bread crumbs, oregano, paprika, pepper powder, and mix well. Salt is not added here as panko bread crumbs already contains salt in it.
    • Preheat Oven to 200 deg Celsius. Alternatively if you deep frying , In a wide pan heat oil for deep frying.
    • Add chicken bites into spice flour and coat it with flour, then dip it in egg and then coat with panko bread crumb mix. Repeat this to all the chicken pieces.
    • Line a baking tray and brush with oil. Arrange chicken pieces on a baking tray , spray oil or drizzle some oil on top of the arranged chicken pieces .
    • Put inside a oven and bake for around 18 minutes. Around half the way after 10 minutes of baking , open tray from the oven. Turn the chicken pieces to other side, drizzle some oil on top. Put it back in oven and continue to bake for 6 to 8 minutes.
    • Once done , garnish with some fresh herbs, sprinkle some kosher salt and serve hot with favourite sauce or dips of your choice.

    Video

    Nutrition

    Calories: 284kcal

    Hara Bhara Kabab

    Published : June 5, 2021 | Last Update on September 21, 2022 By Muktha

    hara bhara recipe

    Hara Bhara Kabab recipe with step by step photos and video. Hara Bhara Kabab is a healthy pan fried snack made with fresh spinach leaves , peas and potatoes.

    These healthy kebabs can be pan fried / air fired or even baked. This post shares pan fried version of spinach peas kebab.

    Spinach is very versatile and its known for its health benefits. Few of my all time spinach recipes includes Palak Paneer , Dal Palak , Palak Kichidi and Palak Paneer Salad

    Spinach-patties
    [feast_advanced_jump_to]

    About this recipe

    Hara Bhara Kabab is a one of the most popular North Indian snack. Hara means green in Hindi and Bhara refers to full which means patties full of greens. You can find this recipe on menu cards of many Indian Restaurants.

    This tasty green kebabs gets its color from lots of spinach leaves and green peas. These kebabs are not only tasty but are healthy and nutritious too . Serve spinach kebabs with Mint chutney or Tomato ketch up.

    Kids may be fussy to eat greens but this Hara Bara kabab are exceptional and they will definitely love it. You can even add this as snack for kids lunch box or can be served as after school hour snacks.

    Why you should make Hara Bhara Kabab?

    • Basic Ingredients
    • Easy to make
    • Tasty and Healthy
    • Loaded with Nutrients
    • Energy giving
    • Gluten Free and Vegan

    Ingredients , Tips and Variations

    Spinach leaves : Though both tender and matured leaves works fine with this recipe , I prefer tender leaves. Baby spinach is not much suited to make hara bara kebab . Blanching of spinach is recommended to reduce antinutrient oxalates from spinach.

    Green Peas : Both fresh and frozen green peas works well here. I used frozen green peas hence cooking time was less. If using fresh green peas, make sure it is well cooked before adding into the recipe.

    Potatoes : Potatoes needs to be cooked perfectly . It should be tender enough for fork to hold. If potatoes are over cooked and turns mushy then it becomes difficult to shape it . Also it takes up much oil while frying and kebabs may turn greasy.

    Flours : Roasted gram flour is used as a binding agent. Along with gram flour corn flour or APF or bread crumbs can be added. But I generally use Poha ( Flattened Rice ) powder . I add Poha to make it more healthy . Also poha absorbs extra water content and makes kebabs more crisp.

    Spices and Herbs : Herbs like ginger, green chilies and spices like red chili powder, chaat masala , salt and dry mango powder are added to enhance the taste. Though dry mango is important if its unavailable then don't forget to add lime juice.

    Cooking Oil : Any flavorless oil works best , you can use vegetable oil to pan fry. Alternatively you can either bake or air fry these patties.

    Watch Video

    Step by Step directions to make Hara Bhara Kabab

    Preparations

    Blanching Spinach

    Boil water and then switch off the flame. Keep rinsed spinach in hot water for 2 to 3 minutes. Remove with a help of tongs and keep aside for water to drain completely. Squeeze leaves gently if there is extra water.

    Hara Bhara Kabab

    Finely chop the spinach and coriander leaves , keep aside.

    chopping spinach for hara bhara kabab

    Chop green chillies , grate ginger and set aside.

    Other Preparations

    Roast besan (gram flour) in a small pan till it becomes aromatic and changes its color. Don’t over roast or darken the gram flour.

    If using Poha ( flattened rice) , then powder it in a mixer and set aside.

    Steam peas and boil potatoes and set aside.

    Hara Bhara Kabab

    Cook potatoes until tender

    boil potatoed for hara bhara kabab

    To make Hara Bhara Kabab

    Into a mixing bowl grate the boiled potatoes ,

    Hara Bhara Kabab

    to the same bowl add boiled green peas

    Hara Bhara Kabab

    And chopped spinach .

    Hara Bhara Kabab

    Add roasted gram , poha powder , all spices and herbs in the bowl.

    Hara Bhara Kabab

    Mix well everything and mash the kabab mixture with a potato masher.

    Hara Bhara Kabab

    Shape into round patties. Press a cashew halve on each patty.

    Hara Bhara Kabab

    Heat oil in a pan or skillet. Pan fry the kabab till crisp and golden on both sides.

    Hara Bhara Kabab

    Flip and cook on both sides evenly.

    how to make hara bhara kabab

    Once done then place them on kitchen paper towels.

    hara bhara kabab

    Serve hara bhara kabab hot with mint chutney or tomato ketchup.

    Hara Bhara Kabab

    Recipe

    hara bhara recipe
    5 from 1 vote

    Hara Bhara Kabab Recipe

    Hara Bhara Kabab is a popular Indian healthy pan fried snack made with fresh spinach leaves ,peas and potatoes.
    Prep Time25 minutes mins
    Cook Time20 minutes mins
    Total Time45 minutes mins
    Course: Appetizer, Snack
    Cuisine: North Indian
    Keyword: Bachelor's Cooking, Kids Snacks
    Servings: 12 pieces
    Calories: 91kcal
    Author: Muktha H S

    Ingredients

    For Blanching Spinach

    • 2 cups Fresh spinach leaves or 100 grams
    • 1.5 to 2 cups water for blanching

    For Cooking Potatoes and Green Peas

    • 3 small to medium potatoes or 200 grams
    • 1 cup green peas fresh or frozen
    • 2 cups water for cooking

    Other Ingredients

    • 2 tablespoon Besan gram flour or add as required
    • 3 tablespoon Poha powdered or corn flour or bread crumbs
    • 2 no's Green chili chopped
    • 1 teaspoon Ginger grated
    • 2 tablespoon Coriander leaves
    • ¼ teaspoon Chaat masala powder
    • ½ teaspoon Garam Masala powder
    • ¼ teaspoon Jeera / cumin powder
    • ½ teaspoon Amchur powder dry mango powder
    • Salt to taste
    • 8 Cashew halves – optional
    • 2 to 3 tablespoon oil for pan frying the kabab add as required

    Instructions

    Preparations

      Blanching Spinach

      • Boil water and then switch off the flame. Keep rinsed spinach in hot water for 2 to 3 minutes. Remove with a help of tongs and keep aside for water to drain completely. Squeeze leaves gently if there is extra water.
      • Finely chop the spinach and coriander leaves , keep aside.
      • Chop green chillies , grate ginger and set aside.

      Other Preparations

      • Roast besan (gram flour) in a small pan till it becomes aromatic and changes its color. Don’t over roast or darken the gram flour.
      • If using Poha ( flattened rice) , then powder it in a mixer and set aside.
      • Steam peas and boil potatoes and set aside.

      To make Hara Bhara Kabab

      • Into a mixing bowl grate the boiled potatoes , to the same bowl add boiled green peas and chopped spinach . Add roasted gram , poha powder , all spices and herbs in the bowl.
      • Mix well everything and mash the kabab mixture with a potato masher.
      • Shape into round patties. Press a cashew halve on each patty.
      • Heat oil in a pan or skillet. Pan fry the kabab till crisp and golden on both sides. Flip and cook on both sides evenly.
      • Once done then place them on kitchen paper towels.
      • Serve hara bhara kabab hot mint chutney or tomato ketchup.

      Video

      Notes

      • Calories referred here is for 1 single piece of Hara bhara kabab. Its just a approximate value as it may vary depending on the quality of ingredients

      Nutrition

      Calories: 91kcal

      You may also like

      • crispy-coconut-cookies
        Coconut Cookies
      • makhana namkeen recipe
        Makhana Namkeen
      • Goli Baji Recipe
        Goli Baje | Mangalore Bajji Recipe
      • crispy chicken nuggets
        Chicken Nuggets Recipe

      Palak Khichdi Recipe

      Published : June 1, 2021 | Last Update on September 25, 2022 By Muktha

      palak khichdi recipe

      Palak Khichdi recipe with step by step photos and video. Khichdi or khichri is classical and wholesome Indian dish. Palak Khichdi is a version of regular dal khichdi with goodness of spinach leaves , yellow lentils , rice and spices.

      If you are a spinach lover ,then don't forget to try Palak Paneer , Palak Paneer Salad , Palak Pulao , Dal Palak and Hara Bhara Kebab

      palak-khichdi
      [feast_advanced_jump_to]

      About this recipe

      Khichdi is a healthy and comfort balanced meal made with yellow lentils , rice and spices. A twist to traditional khichdi with goodness of spinach makes palak khichdi a super tasty and a nutritious recipe.

      Traditional dal khichdi is a one pot meal. Also in India , its a first solid food for babies because its very light on stomach and is easy to digest.

      With increasing popularity of khichdi , many variations to basic Dal Khichdi is done. Combination of varieties of lentils and vegetables makes khichari a balanced as well as complete protein meal .

      Why you need to try this recipe?

      • Easily available ingredients
      • Simple to make
      • Healthy and nutritious
      • Light on stomach
      • Easily digestible
      • Low on calories
      • Aids in weight loss
      spinach rice recipe

      Ingredients , Tips and Variations

      Spinach : Always use tender and small spinach leaves for greater taste and nutrition. Make sure to blanch and use spinach as blanching helps to reduce anti nutrients oxalic acid. You can also use baby spinach leaves for this recipe . If using baby spinach then there is no need of blanching.

      Split Yellow lentils (Moong dal) : Traditionally to make khichdi , yellow moong dal is used. But you can also split green moong dal with skin. Or for a variation, combination of lentils like toor dal ( arhar dal) and moong dal can also be used.

      Rice : Any short grain rice or regular rice works fine with this recipe. I have used Indrayani rice ( its sticky and aromatic ) as it is easily available here. You can also use ambemohar , jeera rice , kolam , sona mossuri or any short grain. If none is availble, you can use basmati rice too.

      Rice to lentil ratio should be generally 3 : 1 for most of rice -lentil recipes . But here I have used 2 rice : 1 lentil ratio. Taking equal rice and lentil may not be suitable for all as it may cause gasses.

      Whole Spices : Whole spices used in this recipe brings out the flavors. Don't skip adding green cardamoms.

      Ghee : Fat used here is Ghee/ Clarified butter . This not only tastes good but helps for proper digestion of lentils . For vegan option use any vegetable oil.

      Other Ingredients: Onion, tomatoes, ginger, garlic, chilies are also used . Spices like turmeric powder, Asafoetida , chili powder , coriander powder and garam masala are used to make this tasty palak khichdi recipe.

      Watch Video

      How to make palak khichdi

      Once you plan to make khichdi , please soak your lentils and rice  grains( soak for 30 minutes) separately . You can make khichdi without soaking lentils and rice but for health benefits , I recommend to soak. Soaking lentils for 3 + hours helps to reduce antinutrients phytates , there by it helps to absorb vitamins and minerals.

      Drain water completely from soaked lentils and rice , rinse with cold water  and set aside.  

      To pressure cook rice and lentils

      Firstly , heat 1 teaspoon of ghee / clarified butter in a pressure cooker .

      spinach-khichdi-making

      Add cumin seeds, ginger, soaked moong dal, rice ,turmeric powder , hing/ asafoetida ,½ teaspoon of salt and give a quick stir.

      spinach-khichdi-making

      Add 3 cups of water and pressure cook for 2 – 3 whistles.

      spinach-khichdi-making

      To blanch spinach

      Whilst , Blanch spinach : Add spinach and green chillies to hot water. Let it sit for 5 minutes. Later remove from hot water and dip in cold water for 1-2 minutes.

      Palak Khichdi Recipe

      Remove spinach leaves, green chillies from cold water and blend to smooth puree without adding water.  

      spinach-khichdi-making

      To  make Palak Khichdi

      In a pan , heat 1 tablespoon of ghee, add bay leaf , red chili , cumin seeds, cloves, cinnamon stick and cardamom pods. Allow it release its oil and turns aromatic.

      spinach-khichdi-making

      Now tip in garlic , ginger , chopped onions

      spinach-khichdi-making

      and saute till onions turns translucent.

      how to make khichdi recipe

      Add chopped tomatoes and saute until tomatoes turns mushy. Add red chili powder , coriander powder and mix well everything.

      Palak Khichdi Recipe

      Now add in spinach/ palak puree , about 1 cup puree ( 1- 1.5 cups puree can be used) and cook for about 2-3 minutes.

      Palak Khichdi Recipe

      Add 2 cups of water (I have used blender rinsed water)

      Palak Khichdi Recipe

      Add salt to taste and cook on medium flame until it comes to gentle boil.

      Palak Khichdi Recipe

      By now , rice and moong dal will be cooked completely. Once pressure release on it's own remove lid and give a quick stir.

      Palak Khichdi Recipe

      Now add in cooked rice and moong dal ,

      Palak Khichdi Recipe

      mix until everything is well combined.

      Palak Khichdi Recipe

      Cover pan with a lid and keep on simmer for 5 minutes.

      Palak Khichdi Recipe

      After 5 minutes, open the lid. Adjust water if you find palak khichdi to be too thick. If it is thin, you can continue to cook on simmer for few more minutes, until it thickens and reaches desired consistency.

      Finally add another 1.5 tablespoon of ghee , ½ teaspoon of garam masala powder

      how to make spinach khichdi

      Turn off the stove ,add lime juice .

      Palak Khichdi Recipe

      Mix well everything and serve with ghee,  pickle and papad

      palak khichdi recipe

      Recipe

      palak khichdi recipe
      5 from 3 votes

      Palak Khichdi Recipe

      Khichdi or khichri is classical and wholesome Indian dish. Palak Khichdi is a version of regular dal khichdi with goodness of spinach leaves , yellow lentils , rice and spices.
      Prep Time8 minutes mins
      Cook Time25 minutes mins
      Soaking3 hours hrs
      Total Time3 hours hrs 33 minutes mins
      Course: Main Course
      Cuisine: India
      Keyword: Bachelor's Cooking, Diet, Healthy, Weight Loss
      Servings: 4
      Calories: 166kcal
      Author: Muktha H S

      Ingredients

      To Pressure Cook Rice

      • 1 teaspoon Ghee /Clarified Butter
      • 1 teaspoon Jeera Cumin Seeds
      • ½ teaspoon Ginger Grated
      • ⅓ Cup Moong Dal soaked for 2-3 hrs
      • ⅔ Cup Rice short grain , any variety
      • ¼ teaspoon Turmeric Powder
      • ¼ teaspoon Hing /Asafoetida
      • ½ teaspoon Salt
      • 3 cups of water
      • To make Spinach Kichadi
      • 150 grams Palak / spinach need about 1 cup of puree
      • 3 Green Chili less spice variant
      • 1 tablespoon Ghee /Clarified Butter
      • 1 Bay leaf
      • 2 inch cinnamon stick
      • 2 Cloves
      • 1 Dry red Chilli
      • 1-2 Green Cardamom Pods
      • 1 large size Onion finely chopped (1 cup chopped)
      • 1 small size Tomato finely chopped (½ cup)
      • 1 teaspoon Garlic minced or paste
      • 1 teaspoon Ginger minced or paste
      • 1 teaspoon Coriander Powder
      • ½ teaspoon Red chili powder
      • ½ teaspoon Garam Masala
      • 1.5 tablespoon Ghee /clarified Butter
      • 1 teaspoon Lemon Juice
      • 2 Cups water
      • Salt to Taste

      Instructions

      • Once you plan to make khichdi , please soak your lentils and rice grains( soak for 30 minutes) separately . You can make khichdi without soaking lentils and rice but for health benefits , I recommend to soak. Soaking lentils for 3 + hours helps to reduce antinutrients phytates , there by it helps to absorb vitamins and minerals.
      • Drain water completely from soaked lentils and rice , rinse with cold water and set aside.

      To pressure cook rice and lentils

      • Firstly , heat 1 teaspoon of ghee / clarified butter in a pressure cooker . Add cumin seeds, ginger, soaked moong dal, rice ,turmeric powder , hing/ asafoetida and give a quick stir.
      • Add 3 cups of water , ½ teaspoon of salt and pressure cook for 2 – 3 whistles.

      To blanch spinach

      • Whilst , Blanch spinach : Add spinach and green chillies to hot water. Let it sit for 5 minutes. Later remove from hot water and dip in cold water for 1-2 minutes.
      • Remove spinach leaves, green chillies from cold water and blend to smooth puree without adding water.

      To make Palak Khichdi

      • In a pan , heat 1 tablespoon of ghee, add bay leaf , red chili , cumin seeds, cloves, cinnamon stick and cardamom pods. Allow it release its oil and turns aromatic.
      • Now tip in garlic , ginger , chopped onions and saute till onions turns translucent.
      • Add chopped tomatoes and saute until tomatoes turns mushy.
      • Add red chili powder , coriander powder and mix well everything.
      • Now add in spinach/ palak puree , about 1 cup puree ( 1- 1.5 cups puree can be used) and cook for about 2-3 minutes.
      • Add 2 cups of water (I have used blender rinsed water) , salt to taste and cook on medium flame until it comes to gentle boil.
      • Now add in cooked rice and moong dal , mix until everything is well combined.
      • Cover pan with a lid and keep on simmer for 5 minutes.
      • After 5 minutes, open the lid. Adjust water if you find palak khichdi to be too thick. If it is thin, you can continue to cook on simmer for few more minutes, until it thickens and reaches desired consistency.
      • Finally add another 1.5 tablespoon of ghee , ½ teaspoon of garam masala powder and Turn off the stove.
      • Add lime juice , Mix well everything and serve with ghee, pickle and papad

      Video

      Nutrition

      Calories: 166kcal

      Similar recipes

      • pumpkin-khichdi-with-pickle-ghee
        Pumpkin Khichdi , Best ever Weight Loss Recipe
      • bisi-bele-bath-with-khara-boondi
        Bisi Bele Bath Recipe
      • huggi anna recipe
        Huggi Anna | how to make Huggi
      • khara pongal recipe
        Khara Pongal

      Butter Garlic Mushroom

      Published : May 29, 2021 | Last Update on October 28, 2024 By Muktha

      butter-garlic-mushroom

      Butter Garlic Mushroom will soon be your new addiction . Its quick and tasty with a garlicky flavor is too good to resist along with soya glaze. Serve this yummy buttery mushrooms with almost everything !

      Other Mushroom recipes which may interest you from my blog are Mushroom soup , Mushroom Masala , Scrambled egg with Mushrooms and Mushroom Spinach Cutlets

      Garlic Mushroom
      [feast_advanced_jump_to]

      About this recipe

      Garlic mushrooms are cooked in butter and garlic, hence the name of the recipe. However, the extra ingredients added just boosts extra punch of flavours to make you fall in love with this recipe.

      To make this delicious mushroom recipe , you need some basic ingredients mushrooms, butter , garlic , soya sauce ,herbs and seasoning that's it . All it takes is just 15 minutes to put up this dish. It tastes so good that you can serve with almost anything . You can top in on bread toast or can make chop and add to make simple mushroom sandwiches. Serve with some roasted chicken , fish or steaks , it tastes awesome. If not anything, just serve it as a appetizer too .

      garlic-mushroom-recipe

      Ingredients , Tips and Variations

      Mushrooms : Choose some fresh , good button mushrooms. Clean mushroom with a brush or pat with a kitchen towel to remove the dirt . Just right before adding into a pan to cook, rinse mushrooms. If you rinse and keep it , mushrooms absorbs more water and turns slimy while cooking.

      Unsalted Butter is recommended here.

      Garlic : Peel fresh garlic , chop fine or mince and use it in recipe to get bursting flavours. Garlic is added in half the way of cooking mushrooms. As adding it initially may burn garlic and gives a burnt garlic flavour, which is not right for the recipe.

      Onions adds nothing but more and more taste to this recipe , caramelized onions and mushrooms tastes real good. Try it , if you haven't yet. This is an optional ingredient and can skip , if you wish.

      Soya Sauce and White vinegar : Tang and acidity from this enhances the taste of garlic mushroom . The original recipe calls for some white wine , you can try it too. Or you can totally skip these ingredients.

      Herbs : Fresh parsley , cilantro, celery or thyme are my choices , you can add anything as per your likings and availability.

      Seasoning : Salt and generous amount of pepper powder is added to bring out taste from buttery garlic mushrooms.

      Watch Video

      How to make Butter Garlic Mushroom

      Heat the butter and oil in a large pan or skillet over medium-high heat.

      hoe to make garlic mushroom

      Add the mushrooms, mix gently such that butter coats mushrooms.

      hoe to make garlic mushroom

      Now cook for about 4-5 minutes , when mushrooms starts to release water , move mushrooms to one corner and make some space.

      hoe to make garlic mushroom

      Now add some butter, chopped onion and minced garlic.

      hoe to make garlic mushroom

      Sauté the onion until softened.

      Butter Garlic Mushroom

      Mix well everything and saute until mushrooms turns golden and crispy on the edges. Take care not to burn garlic .

      Butter Garlic Mushroom

      Mushroom changes color

      butter garlic mushroom

      Add soya sauce and white vinegar , saute for a minute.

      Butter Garlic Mushroom

      Season with salt and pepper as per your taste.

      garlic mushroom

      Stir through 2 tablespoon of cilantro.

      butter garlic mushroom recipe

      Sprinkle any herbs( thyme , basil , parsley ) of your choice for final punch of flavour and serve warm.

      Recipe

      butter-garlic-mushroom
      5 from 2 votes

      Butter Garlic Mushroom

      A soya glazed buttery garlic mushrooms are simple and easy to cook delicious butter sauted mushroom with burst of garlic flavours.
      Prep Time5 minutes mins
      Cook Time10 minutes mins
      Total Time15 minutes mins
      Course: Appetizer
      Cuisine: World
      Keyword: Bachelor's Cooking, Basic, Gluten Free
      Servings: 4 people
      Calories: 182kcal
      Author: Muktha H S

      Ingredients

      • 500 grams Button Mushrooms
      • 3+1 tablespoon Unsalted Butter
      • 1 tablespoon Olive oil
      • 500 grams Button Mushrooms
      • ¼ Cup Onion chopped optional
      • 1 tablespoon Garlic minced
      • 2 tablespoon chopped fresh cilantro / parsley
      • 1 tablespoon Dark Soy sauce
      • ½ teaspoon White Vinegar
      • Pepper to taste
      • Salt to taste

      Instructions

      • Heat the butter and oil in a large pan or skillet over medium-high heat.
      • Add the mushrooms, mix gently such that butter coats mushrooms.
      • Now cook for about 4-5 minutes , when mushrooms starts to release water , move mushrooms to one corner and make some space.
      • Now add some butter, chopped onion and minced garlic. Sauté the onion until softened.
      • Mix well everything and saute until mushrooms turns golden and crispy on the edges.Take care not to burn garlic .
      • Add soya sauce and white vinegar , saute for a minute.
      • Season with salt and pepper as per your taste.
      • Stir through 2 tablespoon of cilantro.
      • Sprinkle any herbs( thyme , basil , parsley ) of your choice for extra kick of final flavour and serve warm.

      Video

      Nutrition

      Calories: 182kcal

      Mango Phirni Recipe

      Published : May 23, 2021 | Last Update on September 25, 2022 By Muktha

      mango-phirni-topped-with-pistachios-rose-petals

      Mango phirni recipe with step by step directions and videos. Mango phirni is a classic Indian dessert made with mango pulp , rice ,milk and flavored with saffron, cardamom and rose.

      This recipe is a twist to a popular phirni / firni recipe with mango flavors.

      Mango-phirni-recipe
      [feast_advanced_jump_to]

      About this recipe

      Phirni is a popular Indian sweet pudding made with rice, milk and dry fruits. With mild scent of rose , kesar and flavorful cardamom, makes phirni a super delicious and light dessert after meals.

      There are many variations to classic phirni with flavours. And this mango phirni is one such variation. Phirni is a very popular in most North Indian festive occasions or special celebrations . Its easy to make and tastes delicious.

      Traditionally phirni is not too sweet in taste, its mildly a sweet dessert . So you need to adjust sweetness as per your likings. Also phirni needs to be served chilled . In fact ,you can enjoy this delectable dessert when served chilled.

      Difference between Phirni and Kheer

      Ingredients used to make phirni and kheer are almost same . And also method remains similar but the all differences lies with the texture . Phirni is creamy and thick whereas rice kheer is little runny.

      Along with it to make phirni , rice is blend to coarse powder where as for kheer , rice grains can be used directly.

      Phirni is always served chilled whereas kheer can be served hot , warm or cold.

      Watch Video

      I love mangoes and its delectable dishes. From mango rice to Mango lassi and Mango smoothies, juice , curries , pickles , desserts , list never ends. Its so versatile that you can make anything to everything from mangoes and it tastes so so good.

      If you are looking for more Mango recipes then do check Mango lassi, Mango Mousse Recipe , Mango cheese cake, Mango shrikhand and Aam ka panna recipe.

      Tips , Variations and Serving

      Rice : Preferably Basmati rice is used to make phirni , as it adds aroma to the dessert. But you can use any other rice variety too ( don't use parboiled rice) .

      Soaking rice is important , it not only helps in easier cooking but also helps with texture and nutrition assimilation.

      Ground Rice : Either you can soak and dry rice ; later grind to coarse powder . Or else you can ground wet rice to make paste.

      Traditionally to make phirni , rice is soaked, dried and then powdered. Adding dried powder ensures that rice grains doesn't turn clumpy while cooking. No much hand work is needed if you are using dried rice coarse powder.

      Incase if you are using rice paste ( ground wet rice) , make sure you keep stirring continuously while making phirni .

      For variations you can play with different flavors. Add different fruit pulp to make different flavors of phirni like apple phirni , strawberry phirni . Also can add some vanilla essence and make some chocolate phirni also .

      Phirni is always set in earthen /clay pots. Because clay pots absorb water content in the phirni and makes it more thick and creamier in texture. If you don't have clay pot , you can serve in glass or porcelain bowls too

      Always serve phirni chilled. Can serve as a dessert after lunch or dinner .

      Mango Phirni recipe

      How to make Mango Phirni

      Wash and soak rice for 20 to 30 minutes.

      phirni-recipe

      Drain water completely and spread rice on a kitchen towel to dry.  You can also pat rice grains with kitchen towel to wipe it dry.

      phirni-recipe

      Take dry rice in a blender ,

      Mango Phirni Recipe

      Grind to make a coarse powder.

      Mango Phirni Recipe

      In a heavy bottom pan, add 1 litre full fat cream milk.

      Mango Phirni Recipe

      Let the milk come to a boil ,

      Mango Phirni Recipe

      add ghee and saffron strands.

      Mango Phirni Recipe

      Now keep on simmer, let milk reduces to ¾ litre. This step is optional but it adds more creaminess and taste to the final dish.

      Mango Phirni Recipe

      Now add the rice powder

      Mango Phirni Recipe

      and sugar.

      Mango Phirni Recipe

      Simmer the heat and cook till rice is well cooked.

      Mango Phirni Recipe

      Keep stirring milk at regular intervals. Cook until phirni thickens slightly and reaches the desired consistency.

      Mango Phirni Recipe

      Keep in mind that it will further thicken on cooling.

      Switch off the heat, add cardamom powder, nuts and rose petals.  

      Mango Phirni Recipe

      Let the phirni cool down.

      Mango Phirni Recipe

      Now Add mango puree and mix well.

      Mango Phirni Recipe

      Transfer the phirni in earthen bowls.(or regular if not available). Cover top with aluminium or cling wrap.

      Mango Phirni Recipe

      Chill for a 3- 4 hours before serving.

      Mango Phirni Recipe

      Garnish with slivered almonds, pistachios , rose petals , tiny mango bits and serve.

      Mango Phirni

      Recipe

      Mango Phirni
      5 from 2 votes

      Mango Phirni

      Mango phirni is a classic Indian dessert made with mango pulp , rice ,milk and flavored with saffron, cardamom and rose.
      Prep Time30 minutes mins
      Cook Time30 minutes mins
      Total Time1 hour hr
      Course: Dessert
      Cuisine: Indian
      Keyword: Desserts, Diwali, Festivals, Sweets
      Servings: 6 people
      Calories: 76kcal
      Author: Muktha H S

      Ingredients

      • ¼ Cup Basmati Rice or any rice
      • 1 litre Full Fat Milk
      • 1 teaspoon Ghee / Clarified Butter
      • 1 Pinch Saffron strand
      • 1 Cup Mango Puree
      • ¼ Cup Sugar or 1- 2 teaspoon to adjust sweetness if required
      • ½ teaspoon Cardamom Powder
      • 1 tablespoon slivered Pistachios
      • 1 tablespoon slivered Almonds
      • 1 teaspoon Dry Rose Petals

      Instructions

      • Wash and soak rice for 20 to 30 minutes.
      • Drain water completely and spread rice on a kitchen towel to dry. You can also pat rice grains with kitchen towel to wipe it dry.
      • Add rice in a blender to make a coarse powder.
      • In a heavy bottom pan, add 1 litre full fat cream milk.
      • Let the milk come to a boil , add ghee and saffron strands.
      • Now keep on simmer, let milk reduces to ¾ litre. This step is optional but it adds more creaminess and taste to the final dish.
      • Now add the rice powder and sugar.
      • Simmer the heat and cook till rice is well cooked.
      • Keep stirring milk at regular intervals. Cook until phirni thickens slightly and reaches the desired consistency.
      • Keep in mind that it will further thicken on cooling.
      • Switch off the heat, add cardamom powder, nuts and rose petals.
      • Let the phirni cool down. Now Add mango puree and mix well.
      • Transfer the phirni in earthen bowls.(or regular if not available). Cover top with aluminium or cling wrap.
      • Chill for a 3- 4 hours before serving.
      • Garnish with slivered almonds, pistachios , rose petals , tiny mango bits and serve.

      Video

      Nutrition

      Calories: 76kcal

      Similar Recipes

      • mango mousse recipe
        Mango Mousse Recipe
      • mango-lassi
        Mango Lassi Recipe
      • Mango Shrikhand
        Mango Shrikhand | Amrakhand Recipe
      • Mango Cheese Cake | No Bake-Mango Cheese Cake
        Mango Cheese Cake | No Bake-Mango Cheese Cake

      Fried Chicken Recipe | Crispy Fired Chicken

      Published : May 20, 2021 | Last Update on September 25, 2022 By Muktha

      crispy fried chicken

      Best ever super crispy, golden fried chicken with loaded flavors. This recipe is adapted from Jamie Oliver's Ultimate Southern Fried Chicken.

      With fried chicken , If you're in for a disappointment with dry , rubbery and bland chicken inside? Then you should definitely follow this particular recipe , you'll never be disappointed , and it’s a promise!

      fried-chicken-recipe@palates-desire
      [feast_advanced_jump_to]

      About this recipe

      You would have definitely tried fried chicken in your kitchen, but trust me this is unlike the other fried chicken recipe. This tender and juicy chicken will definitely blow your minds off.

      What’s great about this Southern fried chicken recipe ?

      Let me tell you , this has perfect outer crumb which is super crisp , at the same time its juicy and flavorful inside. In contrast with the regular rubbery , bland fried chicken.

      To be honest , this fried chicken recipe is lengthy and time consuming. But trust me , its all worth it. All you need is to plan it ahead , its a great treat for weekend indulgence.

      You may also try Spicy Chicken Wings , Chicken Lollipop , Chilli Capsicum Chicken and Chicken Fried Rice recipe for weekend indulgence.

      Watch Video

      Tips and Variations to this recipe

      There are 5 steps to make this Ultimate Southern Fried Chicken . Brining , Butter milking, flour coating, Frying and Baking.

      Brine is a concentrated salt solution. Spices , salt and sugar are added into hot water , and chicken is soaked for 6 to 8 hours in this brine . Brining chicken is the most important step in making flavorful and juicy fried chicken. So don't skip this step . If celery stalk is not available , you can skip or replace with some fresh thyme leaves .

      Butter milking is important as acidity in buttermilk ,helps to tenderize the chicken.

      Batter / Flour coating , add some spice along with flour. But make sure you just don't use only plain flour for coating chicken. I have used onion powder , garlic powder , pepper powder , paprika , baking powder and salt. You can add or replace any spice of your choice here.

      Make your hands dirty , don't hesitate to put your fingers in and coat the slit areas around.

      Frying : Place chicken in hot oil without overcrowding , fry chicken in batches . Toss and cook chicken until golden brown on all sides just for 3 to 4 minutes. Place fried chicken on a parchment lined baking tray . Sprinkle some fresh thyme or parsley .

      Baking : Now bake chicken in 175 degree Celsius preheated oven for 18 to 20 minutes. Don't over bake , it may dry out chicken from inside.

      Garnish with fresh thyme or parsley and lemon wedges .

      Fred chicken recipe

      Step by step directions to make fried chicken

      Brining

      Firstly , into a large stainless-steel pan, add 2 cups of boiling hot water.

      brine solution

      Add torn bay leaves , celery stalks,  crushed garlic, black pepper corns, Onion peels, brown sugar, salt.

      brine solution

      Add 2 cups of more water at room temperature and whisk well until salt and sugar is dissolved completely.

      brine solution

      Score chicken pieces until the bones. Place chicken pieces in brine.

      brining chicken

      Cover the top and place it in fridge for 6-8 hours.

      brining chicken

      Butter Milking

      After brining chicken for 8 long hours or overnight, chicken looks well hydrated and plump. 

      Remove chicken from the brine, shake off liquids and put it into zip lock bag.

      how to make fried chicken

      Pour 3 cups of buttermilk into zip lock bags. Coat all chicken pieces well in buttermilk. Push air out off the bag and seal the chicken inside zip lock bag. Acidity in buttermilk helps to tenderize chicken.

      fried chicken

      Place the butter milked chicken back in fridge for another 8 hours.

      Fried Chicken Recipe | Crispy Fired Chicken

      Coating in Flour

      In a bowl add plain flour, baking powder , salt , pepper , onion powder , garlic powder , smoked paprika , cayenne pepper and pepper powder  . You can add or replace with any spices of your choice and flavors.  

      spice flour mix

      Mix well everything and prepare spice flour mixture to coat chicken.

      spice flour mix

      Remove chicken from buttermilk. Shake off excess liquids and dip in directly in spice flour mix.

      Fried Chicken Recipe | Crispy Fired Chicken

      Get your fingers in and coat the slit areas around.

      coat chicken with spice flour mix

      Frying Chicken

      Heat oil in a thick deep bottom pan .

      Place chicken in hot oil without overcrowding.

      Fried Chicken Recipe | Crispy Fired Chicken

      Toss and cook until golden brown on all sides just for few minutes. It make take around 3 to 4 minutes only. Make sure you just get a golden colour evenly on all sides of chicken.

      fried chicken

      Remove it on to a lined baking tray. Arrange all fried chicken on baking tray in one layer. Add some fresh parsley or thyme for some aromatic flavors.

      Fried Chicken Recipe | Crispy Fired Chicken

      Baking Chicken

      Place the tray in pre heated oven at 175 degree C.  Bake for 18 to 20 minutes.

      Fried Chicken Recipe | Crispy Fired Chicken

      Remove chicken from baking tray onto a wire mesh.

      Finally , garnish with some fresh herbs and lemon wedges.  

      Fried Chicken Recipe | Crispy Fired Chicken

      Serve immediately with ketch up , mayonnaise and some cabbage slaw.

      It's best served as soon as it's fried. It will turn soggy and loose it's crispiness , if its sits longer.

      crispy fried chicken

      Recipe

      crispy fried chicken
      5 from 3 votes

      Fried Chicken Recipe | Crispy Fried Chicken

      Best ever super crispy, golden fried chicken with loaded flavors
      Prep Time16 hours hrs
      Cook Time25 minutes mins
      Total Time16 hours hrs 25 minutes mins
      Course: Snack, Starters
      Cuisine: American
      Keyword: Baking, Chicken
      Servings: 8 people
      Calories: 252kcal
      Author: Muktha H S

      Ingredients

      • 6-8 Chicken Drumsticks preferably with skin on
      • 3 cups Buttermilk
      • Vegetable oil for deep frying

      For Brine

      • 400 ml Hot water boiling
      • 5 Bay leaves torn into pieces
      • 1 Celery stalk and few fresh leaves
      • 6 cloves Garlic crushed
      • 3 peels of Onion
      • 3 tablespoon pepper corns roughly crushed
      • 5 tablespoon Salt
      • 2 tablespoon Brown Sugar
      • 400 ml Water room temperature

      For Flour Mix

      • 1 cup Plain Flour
      • 1 teaspoon Baking Powder
      • ½ teaspoon Salt
      • 1 teaspoon Onion powder
      • 1 teaspoon Garlic powder
      • 1 ½ teaspoon Pepper powder
      • 1 teaspoon Smoked Paprika
      • 1 teaspoon Cayenne Pepper

      For Garnish

      • Fresh Thyme or parsley
      • Lemon wedges

      Instructions

      Brining

      • Into a large stainless-steel pan, add 2 cups of boiling hot water.
      • Add torn bay leaves , celery stalks, crushed garlic, black pepper corns, Onion peels, brown sugar, salt.
      • Add 2 cups of more water at room temperature and whisk well until salt and sugar is dissolved completely.
      • Score chicken pieces until the bones. Place chicken pieces in brine.
      • Cover the top and place it in fridge for 6-8 hours.

      Butter Milking

      • After brining chicken for 8 long hours or overnight, chicken looks well hydrated and plump.
      • Remove chicken from the brine, shake off liquids and put it into zip lock bag.
      • Pour 3 cups of buttermilk into zip lock bags. Coat all chicken pieces well in buttermilk. Push air out off the bag and seal the chicken inside zip lock bag. Acidity in buttermilk helps to tenderize chicken.
      • Place the butter milked chicken back in fridge for another 8 hours.

      Coating in Flour / Batter

      • In a bowl add plain flour, baking powder , salt , pepper , onion powder , garlic powder , smoked paprika , cayenne pepper and pepper powder . You can add or replace with any spices of your choice and flavours.
      • Mix well everything and prepare spice flour mixture to coat chicken.
      • Remove chicken from buttermilk. Shake off excess liquids and dip in directly in spice flour mix.
      • Get your fingers in and coat the slit areas around.

      Frying Chicken

      • Heat oil in a thick deep bottom pan .
      • Place chicken in hot oil without overcrowding
      • Toss and cook until golden brown on all sides just for few minutes. It make take around 3 to 4 minutes only. Make sure you just get a golden colour evenly on all sides of chicken.
      • Remove it on to a lined baking tray. Arrange all fried chicken on baking tray in one layer. Add some fresh parsley or thyme for some aromatic flavours.

      Baking Chicken

      • Place the tray in pre heated oven at 175 degree C. Bake for 18 to 20 minutes.
      • Remove chicken from baking tray onto a wire mesh.
      • Garnish with some fresh herbs and lemon wedges.
      • Serve immediately with ketch up , mayonnaise and some cabbage slaw.

      Video

      Notes

      • Don't skip any of these steps as each steps helps in adding flavors.
      • It's best served as soon as it's fried. It will turn soggy and loose it's crispiness, if its sits longer.

      Nutrition

      Calories: 252kcal

      Similar Recipes

      • Homemade chicken Stock
        Homemade Chicken Stock Recipe
      • Chicken_lollipop
        Chicken Lollipop Recipe
      • chicken-fried-rice-recipe
        Chicken Fried Rice
      • Chilli Capsicum Chicken
        Chilli Capsicum Chicken

      Shahi Tukda Recipe

      Published : May 11, 2021 | Last Update on October 18, 2022 By Muktha

      Shahi Tukda

      Shahi Tukda recipe with step by step photos and video. Shahi Tukda is a royal dessert; golden fried sugar coated bread slices are dipped in rich , creamy sweetened milk garnished with nuts.

      Similar milk based desserts on blog are rabri , rasmalai , basundi and kesar badam milk

      shahi-tukda-recipe
      [feast_advanced_jump_to]

      About this recipe

      Shahi Tukda is a rich royal Mughlai dessert . Shahi means royal and tukda means piece. It gets directly translated has royal piece. Though few refer Shahi Tukda to double ka meetha , there is slight difference between the two.

      To make shahi tukda in traditional way , deep frying of bread in ghee is must . Also rabri or creamy sweet condensed milk will be comparatively thinner when compared to laccha rabri ( thick layered rabri) .

      Crispy fried bread are dipped in sugar syrup , arranged on a serving plate with chilled rabri , garnished with nuts.

      Watch Video

      Variations

      Bread : To get that traditional taste , I have used white bread here. But you can use any kind of bread like whole wheat , multigrain or millet breads. Needless to mentions tastes best with plain white bread.

      Frying : Deep frying bread is ghee is authentic way to do but here I have pan fried it with ghee. Fry bread evenly till its crisp and golden in color.

      Almonds and cashew paste can be added to milk while making rabri. It not only helps to thicken milk but also gives intense richness to the dessert. But traditionally, cashes and almond paste is not added.

      If in hurry and have no time to make rabri. As a short cut method , you can use store brought condensed milk , mix it with full cream milk . And then garnish, flavor with cardamom and nuts.

      Tips to make traditional Shahi Tukda

      I recommend using generous pinch of saffron to rabri. Along with color it adds depth of flavors to the dessert.

      Also using rose water in this recipe adds a hint of refreshing fragrance and flavor. I insist on using rose water. If premium quality rose water is not available, use JUST ONLY 1 DROP of rose essence or 1 drop kewra essence for flavors. Incase if you add more , definitely it will overpower and ruin the dessert.

      Sugar Syrup : For every 1 cup sugar take ½ cup water , this is the ratio to make sugar syrup. Though 1 string sugar syrup is the consistency required for this recipe. Its not very crucial here. Once sugar dissolves completely and starts to boil , turn off the stove. Sugar syrup would be just fine.

      I always prefer to make sugar syrup in wider pan for this recipe . So that sugar syrup is spread widely and fried bread can be arranged over the syrup rather than dipping it completely in the sugar solution.

      This way , you can ensure that bread is just coated with syrup and not drenched completely. If it is soaked more , fried bread may turn out more soggy.

      shahi tukda recipe

      Step by step directions to make Shahi Tukda

      To make Rabri

      Take a saucepan or  thick bottom kadai, add 1 teaspoon of ghee and swirl so that ghee /clarified butter coats saucepan. This is done to avoid scorching of milk from bottom.

      how to make rabri for shahi tukda

      Add 1 litre of full fat whole milk boil the milk, when milk starts to froth and rises on stop. Regulate the flame to low.

      how to make rabri for shahi tukda

      In half way , add 12-15 strands of saffron , 1 clove in it and continue to boil , stirring milk for every 6-8 minutes from bottom.

      how to make rabri for shahi tukda

      Milk froths often and forms a layer of cream on top.

      how to make rabri for shahi tukda

      Scrape the edges of saucepan/ kadai and add cream back to boiling milk.

      Around 1hour, milk reduces to ½ quantity.

      how to make rabri for shahi tukda

      Add sugar, nuts, rose water and cardamom powder.

      Cook for another 3-4 minutes. Until sugar dissolves completely . Refrigerate and chill until serving

      how to make rabri for shahi tukda

      Chill in refrigerator for a few hours before serving with sugar coated fried bread.

      how to make rabri for shahi tukda

      To Fry Bread

      Trim all 4 edges of bread and remove the brown part of bread. Cut bread diagonally or into rectangles.

      how to make shahi tukda

      Trim all 4 edges of bread and remove the brown part of bread. Cut bread diagonally or into rectangles.

      how to make shahi tukda

      Heat required amount of ghee either to deep fry or shallow fry or pan fry, its up to your choice.  Add bread pieces and fry on both sides on medium heat until crisp and golden.

      how to make shahi tukda

      Remove fried bread on paper lined plate and set aside till use.

      To make Sugar Syrup

      Preferably take a wide pan and add ⅓ cup of sugar , 5-6 tablespoon of water , ¼ teaspoon cardamom powder and bring it boil.

      Shahi Tukda Recipe

      When sugar reaches 1 string consistency, turn off the stove.

      Shahi Tukda Recipe

      Arrange fried bread over sugar syrup, let it sit for just 15 to 20 seconds. Now turn bread to the other side and allow other side also to coat with sugar syrup for 15 seconds.

      Shahi Tukda Recipe

      If you soak for more seconds, it may absorb more sugar syrup and may turn out soggy. So be sure to remove after 15 to 20 seconds. Remove immediately with help of tongs and place on a plate gently.

      how to make shahi tukda

      To assemble

      Arrange sugar coated bread on a serving plate , pour chilled rabri over it , top with chopped nuts and serve.

      Recipe

      Shahi Tukda
      5 from 1 vote

      Shahi Tukda Recipe

      Shahi Tukda is a royal dessert; golden fried sugar coated bread slices are dipped in rich , creamy sweetened milk garnished with nuts
      Prep Time15 minutes mins
      Cook Time1 hour hr 30 minutes mins
      Total Time1 hour hr 45 minutes mins
      Course: Dessert
      Cuisine: Mughlai
      Keyword: Festivals, Sweets
      Servings: 6 people
      Calories: 135kcal
      Author: Muktha H S

      Ingredients

      For Rabri

      • 1 teaspoon ghee / clarified butter
      • 1 litre full fat whole milk
      • 2 tablespoon sugar or add as required
      • 12 to 15 saffron strands
      • ½ teaspoon cardamom powder
      • 1 clove optional ( discard clove before serving)
      • Pinch of nutmeg grated
      • 1 teaspoon rose water or kewra water or 1-2 drops of rose essence
      • 2 tablespoon almonds slivered
      • 2 tablespoon pistachios slivered

      To Fry Bread

      • 6 bread slices white, wheat or multigrain
      • Ghee / Clarified Butter as required to fry

      For Sugar Syrup

      • ⅓ cup Sugar
      • 5 tablespoon water
      • ¼ teaspoon Cardamom powder

      Instructions

      To make Rabri

      • Take a saucepan or thick bottom kadai, add 1 teaspoon of ghee and swirl so that ghee /clarified butter coats saucepan. This is done to avoid scorching of milk from bottom.
      • Add 1 litre of full fat whole milk boil the milk, when milk starts to froth and rises on stop. Regulate the flame to low.
      • In half way , add 12-15 strands of saffron , 1 clove in it and continue to boil , stirring milk for every 6-8 minutes from bottom.
      • Milk froths often and forms a layer of cream on top.
      • Scrape the edges of saucepan/ kadai and add cream back to boiling milk.
      • Around 1hour, milk reduces to ½ quantity.
      • Add sugar, saffron soaked in milk, rose water and cardamom powder.
      • Cook for another 3-4 minutes.
      • Garnish with almond and pistachio slivers.
      • Chill in refrigerator for a few hours before serving with sugar coated fried bread.

      To Fry Bread

      • Trim all 4 edges of bread and remove the brown part of bread. Cut bread diagonally or into rectangles.
      • Heat required amount of ghee either to deep fry or shallow fry or pan fry, its upto your choice. Add bread pices and fry on both sides on medium heat until crisp and golden.
      • Remove fried bread on paper lined plate and set aside till use.

      To make Sugar Syrup

      • Preferably take a wide pan and add ⅓ cup of sugar , 5-6 tablespoon of water , ¼ teaspoon cardamom powder and bring it boil.
      • When sugar reaches 1 string consistency, turn off the stove.
      • Arrange fried bread over sugar syrup, let it sit for just 15 to 20 seconds. Now turn bread to the other side and allow other side also to coat with sugar syrup for 15 seconds.
      • If you soak for mor seconds, it may absorb more sugar syrup and may turn out soggy. So be sure to remove after 15 to 20 seconds.
      • Remove immediately with help of tongs and place on a plate gently.

      To assemble

      • Arrange sugar coated bread on a serving plate , pour chilled rabri over it , top with chopped nuts and serve.

      Video

      Nutrition

      Calories: 135kcal

      Kosambari Recipe | Hesaru bele kosambari

      Published : May 8, 2021 | Last Update on September 25, 2022 By Muktha

      kosambari

      Kosambari recipe with step by step photos and video. Hesaru bele Kosambari is a typical South Indian salad made with lentils , cucumber and a simple tempering with mustard seeds.

      This moongdal kosambari is not only tasty but its very filling too . Its also keeps body very cool hence its made during summers .

      Other easy summer salad recipes , I usually make are watermelon feta salad, Cabbage orange salad , sweetcorn salad and spinach cottage cheese salad

      kosambari recipe
      [feast_advanced_jump_to]

      About this recipe

      Hesarubele in Kannada means Moong dal and Kosambari is a Indian Salad made with cucumber. This version of Kosambari is a typical Karnataka style. Lentils are soaked for 4+ hours or overnight and mixed with pieces of cucumber and spices.

      Kosambari with panaka are must during Ramanavami day which falls on 9th day of Chitra Navami in hot month of April . It's a common practice in Karnataka that on Ramanavami day, Buttermillk , Panaka (wood apple juice) and kosambari are distributed among devotees.

      Science behind this custom is to just beat the scorching heat and keep oneself hydrated. Ramanavami celebrations includes Rama Lila, a theatrical enactment of Ramayana and also chariot procession of Rama, Sita and Laxman idols. As procession will be long for hours , to keep oneself cool and hydrated Kosambari , Wood apple Juice / Bellada panaka and buttermilk are distributed .

      Watch Video

      Ingredients

      • Lentils : Yellow split moong is used to make kosambari. You can not use green split moong in this recipe.
      • Cucumber : Use Tender white cucumbers to make kosambari. But incase if you are using matured cucumbers be sure to remove seeds.
      • Fresh Coconut : Adding fresh grated coconut adds lots of taste to cucumber, so don't skip.
      • Herbs : Add fresh coriander leaves to bring out all flavors. You can also use few torn mint leaves . Green chilies can be added or skipped. Lime juice is must to bring out the flavors.
      • Salt and Black pepper powder can be added as per taste.
      • Tempering ingredients : Basic tempering with oil , mustard seeds , cumin seeds , curry leaves and asafoetida is done. You can also add 1 dry red chili for tempering.
      kosambari-ingredients

      Tips and variations to Kosambari

      Soak lentils overnight or 6+ hours is what I prefer. As it helps to leach out antinutrients. Rinse couple of times in cold water before using .

      Along with cucumbers you can also add grated carrot.

      For spiciness , you can use only black pepper powder or green chilies. But as I like heat from both pepper powder and green chilies , I have added both.

      Asafoetida is important as it helps in proper digestion .

      Always serve kosambari immediately because cucumber releases water when it comes in contact with salt. If planning to serve later, don't add salt . Keep ready salad in refrigerator and add salt just before serving.

      It has very short shelf life , so finish immediately or within 2 hours.

      How to make Kosambari

      To make Kosambari Salad

      Firstly rinse ½ cup moong lentils a couple of times in water.

      Kosambari Recipe | Hesaru bele kosambari

      Then soak the lentils overnight or 4+hours. This is purely for leaching out antinutrients. But you can also soak moong lentils in hot water for 1- 2 hours , if you have no enough time.

      Kosambari Recipe | Hesaru bele kosambari

      Secondly drain all the water from soaked moong dal. Rinse soaked moong lentils in cold water couple of times . Drain water very well  and add the soaked moong lentils in a mixing bowl.

      Kosambari Recipe | Hesaru bele kosambari

      Next add finely chopped cucumber, fresh grated coconut, coriander leaves and chopped green chili. Instead of green chilies, you can only use black pepper powder.

      Kosambari Recipe | Hesaru bele kosambari

      Add salt , pepper powder and squeeze some fresh lemon juice per your requirements.

      Kosambari Recipe | Hesaru bele kosambari

      Mix everything very well.

      moong cucumber salad

      For Tempering Kosambari Salad

      Heat 1 tablespoon oil in a small pan. Then add ½ teaspoon mustard seeds. Allow mustard seeds crackle. Keep the flame to a low. You can also add red chili in the tempering, if you wish.

      Once the mustard seeds crackle, add ½ teaspoon cumin seeds , let it splutter. Add ¼ teaspoon of asafoetida.

      Add 2 sprigs of curry leaves, stir and then switch off the flame.

      Kosambari Recipe | Hesaru bele kosambari

      Pour the tempering mixture on the salad.

      Kosambari Recipe | Hesaru bele kosambari

      Mix very well.

      Kosambari Recipe | Hesaru bele kosambari

      Serve kosambari salad immediately.

      Recipe

      kosambari salad recipe
      4 from 1 vote

      Kosambari Salad | Hesarubele Kosambari Recipe

      Hesaru bele Kosambari is a typical South Indian salad made with lentils , cucumber and a simple tempering with mustard seeds.
      Prep Time10 minutes mins
      Cook Time3 minutes mins
      Soaking4 hours hrs
      Total Time4 hours hrs 13 minutes mins
      Course: Salad
      Cuisine: Indian, Karnataka, South India
      Keyword: Bachelor's Cooking, Basic, Quick & Easy, Summer
      Servings: 4 people
      Calories: 151kcal
      Author: Muktha H S

      Ingredients

      Main Ingredients to make Kosambari Salad

      • ½ Cup Moong dal
      • Enough Water for soaking Moong Dal
      • 3.5 -4 cups Cucumber finely chopped
      • ⅓ cup Fresh Coconut grated
      • 1 Green chili chopped
      • 2 tablespoon Coriander leaves chopped
      • 1 tablespoon Lemon juice or add as required
      • ½ teaspoon Black pepper powder
      • salt as required

      Tempering Ingredients

      • 1 tablespoon Cooking Oil
      • ½ teaspoon Mustard Seeds
      • ½ teaspoon Jeera seeds / Cumin Seeds
      • ¼ teaspoon Asafoetida / Hing
      • 2 sprigs Curry leaves

      Instructions

      To make Kosambari Salad

      • Firstly rinse ½ cup moong lentils a couple of times in water. Then soak the lentils overnight or 6+hours. This is purely for leaching out antinutrients. But you can also soak moong lentils in hot water for 1- 2 hours , if you have no enough time.
      • Secondly drain all the water from soaked moong dal. Rinse soaked moong lentils in cold water couple of times . Drain water very well and add the soaked moong lentils in a mixing bowl.
      • Next add finely chopped cucumber, fresh grated coconut, coriander leaves and chopped green chili. Instead of green chilies, you can only use black pepper powder.
      • Add salt , pepper powder and squeeze some fresh lemon juice per your requirements.
      • Mix everything very well.

      For Tempering Kosambari Salad

      • Heat 1 tablespoon oil in a small pan. Then add ½ teaspoon mustard seeds. Allow mustard seeds crackle. Keep the flame to a low. You can also add red chili in the tempering, if you wish.
      • Once the mustard seeds crackle, add ½ teaspoon cumin seeds , let it splutter. Add ¼ teaspoon of asafoetida.
      • Add 2 sprigs of curry leaves, stir and then switch off the flame.
      • Pour the tempering mixture on the salad. Mix very well.
      • Serve kosambari salad immediately.

      Video

      Notes

      Always serve kosambari immediately because cucumber tends to release water when it comes in contact with salt. If planning to serve later, don't add salt . Keep ready salad in refrigerator and add salt just before serving.
      Kosambari has very short shelf life , so finish immediately or within 2-3 hours.

      Nutrition

      Calories: 151kcal

      Watermelon Feta Salad

      Published : May 6, 2021 | Last Update on September 25, 2022 By Muktha

      cooling-watermelon-salad

      Watermelon Feta Salad recipe with step by step photos and video. This refreshing watermelon salad with feta cheese , fresh mint and olive oil and lime juice dressing is perfect for summer. Watermelon feta salad is sweet , salty with hint of tang makes you feel Ohhh-la la la in every bite.

      This watermelon salad is very easy to make just under 15 minutes with only 5 main ingredients. Its so refreshing that even those who don’t like fruity salads may love this one – the flavor is truly unique.

      Checkout few more tasty and refreshing salad for this summer Palak Paneer Salad (Spinach Cottage cheese Salad ), Sicilian Cabbage Salad , Rajma Salad , Peanut salad , Moong Cucumber salad

      watermelon feta salad
      [feast_advanced_jump_to]

      About this recipe

      Watermelon feta salad is a simple to make , yet very refreshing. Sweet , salt and tang are taste you get in every bite of this salad. Salt and tang in feta along with fresh mint leaves brings out the flavors in this salad.

      Fresh mint along with the salty citrus dressing really brings out the flavor of the watermelon and feta cheese adds a perfect touch of creaminess to this recipe.

      This combination of red , white and green not only looks just beautiful on the table but its the best for a potluck, backyard cook party or even a weekend brunch!

      Watch video

      Ingredients

      To make this refreshing salad all you need is watermelon , feta cheese and fresh mint leaves and lime juice dressing

      watermelon-feta-salad-ingredients

      Watermelon : Choose water melon that is well ripe and sweet. Use seedless watermelons or you can also remove the seeds . Cut watermelon into cubes and refrigerate , chilled watermelon works best in this recipe. Alternatively you can also scoop watermelon using melon baller and use watermelon balls instead of cubes.

      Feta Chesse : Try to find a good goat or sheep’s milk feta . Feta is soft cheese with salt and tang flavor. It is crumbly and has a slightly grainy texture. As white cheese is aged in brine , it gets that salty tang flavor.

      Fresh Mint Leaves : Adding fresh mint leaves makes this salad very refreshing.

      Dressing : Lime juice and extra virgin olive dressing is simple and helps to bring out flavors from watermelon.

      Tips and Variations to this recipe

      • Always chilled watermelon works best for this recipe , hence make sure to chill watermelon before making salad
      • Along with fresh mint leaves you can also add fresh basil leaves .
      • As Feta Cheese has salty and tang flavor , adjust salt as per your taste. Just adding pinch of salt is also sufficient at times depending on the saltiness of feta.
      • For a crunchy taste , tossed pecan or walnuts can also be added
      • You may also add a little balsamic vinegar to dressing to get a flavorful tang taste in your salad.
      • Always serve watermelon feta salad immediately . As it is not a good option for storing . Incase if you want store , then refrigerate watermelon and dressing separately . Mix mint leaves and top with feta only at the time of serving.
      watermelon feta salad

      Step by step directions to make watermelon feta salad

      Cut watermelon into cubes, remove seeds and chill in refrigerator prior to making this salad.

      Transfer chilled watermelon cubes into a mixing bowl

      watermelon

      For dressing , mix lemon juice , extra virgin olive oil and mint leaves . Add pinch of sea salt and black pepper powder to taste.

      dressing-watermelon-salad

      Pour dressing over chilled watermelon.

      Watermelon Feta Salad

      Mix everything

      Watermelon Feta Salad

      Now add in crumbled feta cheese.

      watermelon feta salad

      Gently mix and serve immediately. Also sprinkle some feta on top of salad and serve.

      Recipe

      cooling-watermelon-salad
      5 from 1 vote

      Watermelon Feta Salad

      Watermelon feta salad with fresh mint leaves and simple olive oil and lime juice dressing is a refreshing summer salad .
      Prep Time10 minutes mins
      Cook Time0 minutes mins
      Total Time10 minutes mins
      Course: Salad
      Cuisine: World
      Keyword: Bachelor's Cooking, Basic, brunch, Diet, Healthy, Summer
      Servings: 4 people
      Calories: 226kcal
      Author: Muktha H S

      Ingredients

      • 6 cups Watermelon cubes deseeded
      • 100 grams feta cheese crumbled
      • 3 tablespoon Extra virgin olive oil
      • 1.5 tablespoon Lemon juice
      • ¼ cup fresh mint leaves chopped
      • ½ teaspoon of black pepper powder
      • Pinch of salt to taste

      Instructions

      • Cut watermelon into cubes, remove seeds and chill in refrigerator prior to making this salad.
      • Transfer chilled watermelon cubes into a mixing bowl
      • For dressing , mix lemon juice , extra virgin olive oil and mint leaves . Add pinch of sea salt and black pepper powder to taste.
      • Pour dressing over chilled watermelon.
      • Mix well.
      • Now add in crumbled feta cheese.
      • Gently mix and serve immediately. Also sprinkle some feta on top of salad and serve.

      Video

      Nutrition

      Calories: 226kcal

      More salad recipes

      • kidney-bean-salad-recipe
        Kidney Bean Salad Recipe | how to make rajma salad
      • Peanut Salad
        Peanut Salad
      • sicilian-salad
        Sicilian Cabbage Orange Salad
      • Spinach Salad
        Palak Paneer Salad | Spinach Salad

      Saunf Sharbat recipe ,how to make variyali sharbat

      Published : April 24, 2021 | Last Update on September 25, 2022 By Muktha

      variyalli-sharbat-recipe

      Saunf Sharbat recipe with step by step photos and video. Variyali sharbat aka Saunf sharbat is a refreshing summer cool drink with aromatic flavors of fennel seeds.

      Apart from being a super summer cooler drink , saunf drink has host of health benefits. Saunf seeds are best known for its cooling properties and also relieves bloating / gas issues.

      Few more summer cooler recipe includes Bael sharbat , Virgin Mojito with flavors , Breakfast Pomegranate Juice , Aam Panna and Sattu Sharbat.

      Lets quickly see on how to make this tasty and nutritious drink .

      Variyali sharbat
      [feast_advanced_jump_to]

      About this recipe

      Variyali Sharbat is a traditional summer cooling drink from Gujarat for hot sunny days. Saunf sharbat requires minimal

      Saunf sharbat requires minimum ingredients and procedure. Making saunf sherbat is quite easy , all you need is to soak fennel seeds or its powder overnight in a clay pot along with black dry grapes and rock sugar / candy sugar . Next day ,mash black dry grapes well and extract juice. Mix well everything . Add lime juice , roasted cumin powder and black powder to taste , if required .

      Alternatively , fennel seeds can also be soaked for 6+ hours or overnight and then juiced up together with soaked dry black grapes and served.

      This saunf sharbat recipe post shares a readymade saunf and sugar powder mixture recipe that is used to prepare variyali sharbat.

      How to make Saunf Sharbat Syrup

      Also large batch of variyali sharbat syrup can be made and stored for further use. To make saunf sharbat syrup , soak fennel seeds and cardamom pods for 6+ hours. Grind well with little water and extract juice. Boil fennel seeds juice along with sugar until it reaches 1 thread consistency . Allow it cool completely before storing in a clean glass jar

      Watch recipe video

      Health benefits of saunf

      Saunf seeds are very rich in cooling properties. The best way to get all the benefits of fennel seeds is by steeping them for few hours or overnight. Also its a regular practice in India , munching a teaspoon of saunf after every meal is advisable for better digestion.

      • Fennel seeds are highly nutritious and provides important nutrients, such as vitamin C, calcium, magnesium, potassium, and manganese.
      • These seeds are very effective in weight loss as it helps to reduce appetite.
      • Fennel and its seeds contain fiber, potassium, magnesium, and calcium — all of which are essential for good heart health.
      • Increase milk secretion in breastfeeding mothers.
      • Powerful antioxidants in fennel, such as vitamin C and quercetin, can help reduce inflammation and has also has good antibacterial properties.
      • Fennels relieve hot flashes, vaginal itching, dryness , sleep disturbances and improves sexual function. Helps to reduces menstrual pain , cramps and mood swings during menstruation.
      • Improves digestion, reduces bloating , gases and relieves constipation.

      Ingredients

      saunf sharbat ingredients

      Fennel Seeds : is the main ingredient in this recipe. Badishep or bigger variety saunf is used to make this tasty drink . Either saunf seeds can be soaked directly in water or its powder can be used.

      Sugar : Mishri or candy sugar / rock sugar is used here . Incase if its not available , regular sugar can be used. Alternatively , you can use jaggery or honey as a sweetener.

      Dry Black Grapes : its added to increase the cooling properties of the drink. As sweetness increases with addition of black grapes , keep a check on amount of sugar added in the drink.

      Cardamom : 5 -6 cardamom pods are used in this recipe. A very light hint of cardamom flavor can be sensed as aromatic essence of saunf is overpowering. But adding cardamom also increases its cooling properties.

      Lemon Juice : This adds tang to the drink making it extra refreshing to beat the summer heat.

      Other Ingredients : Cumin powder and black salt are truly optional . Its my choice to add pinch of cumin powder and black salt as it enhances the taste.

      Variyali Doodh : As a variation to this recipe you can mix this powder with milk and serve it warm or chilled.

      Other Variations : Can also add some basil seeds/ falooda seeds and enjoy this drink for extra cooling effect.

      Step by step directions to make saunf sharbat

      Firstly, take equal quantity of fennel seeds and candy sugar, add cardamom pods n a mixer

      Saunf sharbat powder

      and blend everything to a fine powder. Saunf sugar powder stays good for months, you can store in air tight glass jar and set aside.

      Saunf sharbat powder

      Secondly, soak this saunf powder in 3.5 cups of water for 6 + hours or overnight in a clay pot.

      Saunf Sharbat recipe ,how to make variyali sharbat

      Now soak 8 dry black grapes in the same clay pot. Alternatively, you can soak separately.

      Saunf Sharbat recipe ,how to make variyali sharbat

      Add about 3.5 cups of water and soak for about 6 + hours

      Saunf Sharbat recipe ,how to make variyali sharbat

      Add water , let it soak for about 6 or more hours

      Saunf sharbat

      After 6 hours or following day, stir well everything. Now strain juice with help of a strainer or a muslin cloth.

      Saunf Sharbat recipe ,how to make variyali sharbat

      Squeeze collected fennel powder residue and dry black grapes to extract all juices completely. Add ½ cup water, mash or blend everything together to extract all juices.

      Saunf Sharbat recipe ,how to make variyali sharbat

      Add 1.5 tablespoon of lime juice, ¼ teaspoon black salt and ¼ teaspoon roasted cumin powder.

      Saunf Sharbat recipe ,how to make variyali sharbat

      Mix well everything, add some mint leaves, ice cubes and serve chilled.

      Recipe

      variyalli-sharbat-recipe
      4.50 from 2 votes

      Saunf sharbat recipe | Variyali sharbat

      Saunf sharbat is a refreshing summer cool drink with aromatic flavors of fennel seeds ; it helps to reduce heat keeps body cool
      Prep Time6 hours hrs 5 minutes mins
      Total Time6 hours hrs 5 minutes mins
      Course: Drinks
      Cuisine: Indian
      Keyword: Drinks, Juices
      Servings: 3
      Calories: 68kcal
      Author: Muktha H S

      Ingredients

      For Saunf Sugar Powder

      • ¼ Cup Saunf/ Fennel Seeds
      • ¼ Cup Mishri / Rock Sugar
      • 5-6 Green Cardamom pods

      To make Juice

      • 4 tablespoon Saunf- Sugar powder
      • 8 Dry Black grapes
      • 4 Cup Water
      • 1.5 tablespoon Lime juice optional
      • Black salt to taste optional
      • Roasted cumin powder to taste optional

      Instructions

      • Firstly, take equal quantity of fennel seeds and candy sugar, add cardamom pods and blend everything to a fine powder. Saunf sugar powder stays good for months, you can store in air tight glass jar and set aside.
      • Secondly, soak this saunf powder in 3.5 cups of water for 6 + hours or overnight in a clay pot.
      • Now soak 8 dry black grapes in the same clay pot. Alternatively, you can soak separately.
      • After 6 hours or following day, stir well everything.
      • Now strain juice with help of a strainer or a muslin cloth. Squeeze collected fennel powder residue and dry black grapes to extract all juices completely. Add ½ cup water, mash or blend everything together to extract all juices.
      • Finally , add 1.5 tablespoon of lime juice, ¼ teaspoon black salt and ¼ teaspoon roasted cumin powder.
      • Mix well everything, add some mint leaves, ice cubes and serve chilled.

      Video

      Nutrition

      Calories: 68kcal

      Similar recipes

      • aam-panna-summer-drink
        Aam Panna Recipe
      • mango-lassi
        Mango Lassi Recipe
      • sattu-juice
        Sattu Drink Recipe | How to make Sattu Drink
      • Ragi_ambli_recipe
        Salted Ragi Ambli

      Bisi bele bath powder recipe - how to make

      Published : April 20, 2021 | Last Update on September 29, 2022 By Muktha

      bisi bele bath powder

      Bisi bele bath powder recipe with step by step directions and short video. Bisi bele bath powder - is a unique blend of spices roasted and pounded together. It is used to make a traditional rice dish bisi bele bath.

      Bisi bele bath is a traditional Karnataka dish made with lentils ( toor dal ) , vegetables , rice and special spice mix . This post shares on how to make authentic bisi bele bath powder.

      Bisi bele bath powder recipe - how to make
      [feast_advanced_jump_to]

      About this recipe

      Bisibele bath powder is a unique blend of spices . Premium quality spices are roasted till aromatic and pound together. This powder is then used to make a tasty rice dish called as Bisi Bele Bath . This rice recipe is not only delicious but its very nutritious and healthy too.

      For those who doesn't know , how it looks and taste ; its looks like kichadi . But tastes entirely different because of this spice powder . This is authentic bisi bele bath powder recipe from Karnataka .

      I don't prefer making it this powder in large batches and storing. Because nothing tastes as good as freshly roasted and powdered spices. But you can definitely make this powder and store . You can easily double or triple this recipe , if making in larger batches.

      Watch Video

      Ingredients to make bisi bele bath powder

      bisi-bele-bath-powder-ingredients

      Coriander seeds : Coriander seeds is one of the most important spice to make any spice blend. If coriander seeds are not available then substitute with 2 tablespoon of coriander powder . But don't dry roast instead directly add while blending other ingredients.

      Dry Red Chilies : Usually 2 variants of red chilies are used to make bisibele bath powder. Spicy variant called Guntur red chilies and Byadgi red chilies are used . Byadgi Red chilies are mainly used for its colour and guntur for spiciness. You can use 4 guntur red chilies and 2-3 byadgi red chillies . Using byadgi red chillies , gives deep reddish orange colour . If its not available substitute with 5 kashmiri dry red chilies . Incase if you wish to add red chili powder instead of dry red chilies then use about 1 to 1.5 tablespoon kashmiri red chilli powder.

      Lentils : Equal quantities of Chana dal and Urad dal are used .

      Poppy seeds / Khus Khus : It's one of the important ingredient in bisi bele bath powder. ALso it helps in even thickening of bis bele bath.

      Cumin seeds and Fenugreek Seeds : Though in small quantities , its recommended to add these seeds as it gives good aroma and flavors to the dish.

      Cinnamon sticks and cloves are must in this spice blend.

      Marathi Moggu / Kapok Buds : is one of the most important and main ingredient , it looks similar to clove but bit longer than clove. This spice has a musky aroma and adds lot aroma and flavor to bisibele bath powder.

      Dry Coconut : Dry coconut is must here . Though some substitute it with desiccated coconut , dry coconut is recommended. In case if you want to increase the shelf life of bisi bele bath powder , you can skip this while making bisi bele bath powder . But more importantly without fail add powder and add dry coconut directly while making bisi bele bath.

      How to make bisi bele bath powder

      Heat ½ teaspoon of oil in a pan

      Bisi bele bath powder recipe - how to make

      Add coriander seeds , red chilies, lentils, cinnamon stick , cloves and Marathi moggu

      bisi bele bath powder

      Dry roast on a medium heat until aromatic. It takes around 5-6 minutes , approximately.

      bisi bele bath powder

      Once spices turns light gloden in colour , add dry coconut , cumin seeds and poppy seeds.

      bisi bele bath powder

      Gently roast everything on a low flame , within 1-2 minutes cumin seeds starts to splutter. Take care not to brown or burn any spices. Incase , if spices turns brown , it imparts bitter flavor to the whole dish.

      bisi bele bath powder

      Now , turn off the flame . And immediately transfer roasted spices into a mixer jar or blender.  Never keep roasted spices in the same pan as heat in the pan may burn the spices. Alternatively , transfer roasted spices on to a clean dry plate , keep in sun light for 30 minutes and then blend.

      bisi bele bath powder

      When spices cool down a bit, add turmeric powder and ground to semi fine powder.

      bisi bele bath powder

      Store in a glass jar and use as and when required. Stays good and fresh up to a month. Using this bisi bele bath powder , I made a delicious bisi bele bath.

      bisi-bele-bath-recipe

      Recipe

      bisi bele bath powder
      5 from 3 votes

      Bisi bele bath powder

      Bisi bele bath powder - is a unique blend of spices roasted and pounded together. It is used to make a traditional rice dish bisi bele bath.
      Prep Time7 minutes mins
      Cook Time10 minutes mins
      Total Time17 minutes mins
      Course: Condiments, DIY
      Cuisine: Karnataka, South India
      Keyword: Basic, Spice Blends
      Servings: 42 grams
      Calories: 201kcal
      Author: Muktha H S

      Ingredients

      • ½ teaspoon Cooking Oil
      • 1 tablespoon Channa Dal
      • 1 tablespoon Urad Dal
      • 1 teaspoon Khuskhus / Poppy seeds
      • ¼ teaspoon Methi/Fenugreek Seeds
      • ½ teaspoon Jeera seeds /Cumin Seeds
      • 2 Cloves
      • 1" inch Cinnamon Stick
      • 2 Marathi Moggu
      • 6-7 Dry Red chilies
      • 1.5 tablespoon Coriander seeds
      • ½ teaspoon Turmeric Powder
      • ½ cup Dry Coconut

      Instructions

      • Heat ½ teaspoon of oil in a pan
      • Add coriander seeds , red chilies, lentils, cinnamon stick , cloves and Marathi moggu
      • Dry roast on a medium heat until aromatic. It takes around 5-6 minutes.
      • Once spices turns light gloden in colour , add dry coconut , cumin seeds and poppy seeds.
      • Gently roast everything on a low flame , within 1-2 minutes cumin seeds starts to splutter. Take care not to brown or burn any spices.
      • Now , turn off the flame . And immediately transfer roasted spices into a mixer jar or blender. Never keep roasted spices in the same pan, as heat in the pan can burn the spices.
      • When spices cool down a bit, add turmeric powder and ground to semi fine powder.
      • Store in a glass jar and use it when required. Stays good and fresh up to a month.

      Video

      Nutrition

      Serving: 42grams | Calories: 201kcal

      Similar Recipes

      • Puliyogare Gojju
        Puliyogare Gojju | Pulihora Masala Paste
      • Vangibath Powder
        Vangibath Powder
      • Sambar Powder
        Sambar Powder
      • mixed chutney powder
        Mixed Chutney Powder | Dry Chutney Powder Recipe

      Sweet Potato Halwa | Shakarkandi Halwa

      Published : April 5, 2021 | Last Update on October 18, 2022 By Muktha

      Sweet potato Halwa

      Sweet Potato Halwa | Shakarkandi Halwa recipe with step by step photos and video. Shakarkandi Halwa is a delicious sweet made with boiled sweet potatoes , milk and flavoured with cardamom , saffron and nutmeg.

      Sweet potatoes are known as Shakarkand in Hindi hence It is called shakarkandi ka halwa. 

      Ssweet potato halwa recipe
      [feast_advanced_jump_to]

      About this recipe

      Shakarkandi halwa is a quick and easy dessert , that is usually prepared during fasting. Because it is full of energy and keeps you satiated for long. Needless to mention , its not only limited to fasting but you can also prepare it for any festive occasion or anytime when ever you crave to eat any sweet which is healthy too.

      Also like any other sheera , you can also serve this shakarkandi halwa for breakfast .As mornings are right time to enjoy any sweet delicacy with out worrying on calories intake.

      What makes this halwa healthy compared to other sweet halwa ? Sweet potatoes are naturally sweet in taste hence the amount of sugar added here is very less. Also this halwa recipe is a great way to include this nutritious and fibrous rich veggie in diet.

      The procedure to make sweet potato halwa recipe is very easy. The only monitoring part is stirring halwa continuously from start to finish.

      Health Benefits of Sweet Potatoes

      • Sweet potatoes are sweet, starchy root vegetables . They come in a variety of colours and sizes like orange, white, and purple. All varities are rich in vitamins, minerals, antioxidants, and fiber but vary in their sweetness levels. 1 cup of boiled sweet potatoes provides 180 calories.
      • Sweet potatoes are incredibly rich in beta-carotene, which is converted into Vitamin A in our body . These antioxidants prevent vision loss and improve eye health. Also its always advisible to cook sweet potatoes in little fat , so that its nutrients are well absorbed in the body.
      • Promotes Gut health - sweet potatoes contain both soluble and insoluble fibers and antioxidants that promote the growth of good gut.

      How to add sweet potatoes in diet ?

      Sweet potatoes are very easy to add in diet. They can be enjoyed with or without the skin and can be baked, boiled, roasted, fried, steamed, or pan-cooked. Natural sweetness of Sweet potatoes pairs well with both savory and sweet dishes. Also it goeas well with many different seasonings, hence you can go creative and add in your diet.

      Some popular ways to enjoy sweet potatoes include: Sweet potato chaat , paratha , Sweet potato puran poli , salad , chips , kheer and sabji .

      Pro tips and Variations to make Sweet Potato Halwa

      • Sweet Potato : Indian Sweet potato with white flesh works best in this recipe . But you can also use Orange Sweet Potatoes , but you may need to increasse the sweetness as orange sweet potatoes are less sweet.
      • You can either use grated sweet potatoes or boiled sweet potatoes in this recipe. I prefer boiled sweet potatoes over grated ones in this recipe.
      • Dairy : Milk is used in this recipe , as it gives a more smooth and finer texture to halwa. You may skip dairy or for vegan option you can use any nut milk in this recipe. But I recommend using milk for a smooth texture and melt in mouth feel.
      • Flavouring : Saffron , cardamom and Nutmeg are used in this recipe. Saffron adds hint of flavour and nice tinge to sweet potato halwa with milk . Though you can skip nutmeg if not available, freshly powdered cardamom adds lots of flavor to halwa.
      • Fat : Ghee / Clarified butter goes very well in this recipe, If looking for vegan option you can use any flavourless vegetable oil . Also fat medium is very important to absorb nutrients from sweet potato.
      • Sweetner : I have added 2 tablespoon of sugar to this , if you want you can replace sugar with powdered jaggery. I personally like taste of sugar with sweet potatoes than jaggery . You can use either of two. Also adjust sweetner depending on taste of sweet potatoes.
      • Dry Fruits and Nuts : I prefer to add only chopped nuts like almonds, cashews and pistachios in this recipe but you can also add raisins , if you wish.

      Watch recipe video

      Step by step directions

      Crush 3-4 strands of saffron and soak in ¼ cup milk, set aside till use.

      Boil sweet potato in a pressure cooker (2-3 whistles) or Instant pot (manual 12 minutes).

      sweet-potato-halwa-recipe

      When pressure settles down, remove sweet potato, peel skin.

      weet-potato-halwa-recipe

      Mash flesh of boiled sweet potatoes till smooth.

      weet-potato-halwa-recipe

      Heat 2-3Tbsp of ghee in a pan on medium heat.

      weet-potato-halwa-recipe

      Once hot add mashed sweet potatoes.

      weet-potato-halwa-recipe

      Mix and cook with stirring constantly until moistures evaporates completely and becomes slightly thick.

       Once hot add mashed sweet potatoes.

      Now add saffron soaked milk.

      Sweet Potato Halwa | Shakarkandi Halwa

      Mix and cook with stirring continuously.

      Sweet Potato Halwa | Shakarkandi Halwa

      Cook on a medium heat until all the moisture evaporates.

      It starts to thicken and leaves the sides of the pan.

      weet-potato-halwa-recipe

      Then add sugar, cardamom powder, pinch of nutmeg and chopped nuts.

      weet-potato-halwa-recipe

      Mix well until sugar melts completely. Turn off the stove.

      weet-potato-halwa-recipe

      Garnish with sliced nuts, dry rose petals and serve warm.

      Shakarkandi-halwa-recipe

      Recipe

      Sweet potato Halwa
      5 from 1 vote

      Sweet Potato Halwa

      Sweet Potato Halwa is a delicious Indian sweet made with boiled sweet potatoes , saffron milk and flavoured with cardamom and nutmeg
      Prep Time5 minutes mins
      Cook Time35 minutes mins
      Total Time40 minutes mins
      Course: Dessert, Sweets
      Cuisine: Indian
      Keyword: Fasting, Festivals, Sweets
      Servings: 3 People
      Calories: 298kcal
      Author: Muktha H S

      Ingredients

      • 500 grams Sweet potatoes or 2 cups sweet potatoes boiled peeled and mashed
      • 4 strands Saffron crushed
      • ¼ cup milk
      • 2.5 tablespoon Ghee/ Clarified Butter
      • 2 tablespoon Sugar or as required
      • ½ teaspoon Cardamom Powder
      • 2 tablespoon of Nuts chopped
      • Pinch of freshly grated nutmeg

      Instructions

      • Crush 3-4 strands of saffron and soak in ¼ cup milk, set aside till use.
      • Boil sweet potato in a pressure cooker (2-3 whistles) or Instant pot (manual 12 minutes).
      • When pressure settles down, remove sweet potato, peel skin.
      • Mash flesh of boiled sweet potatoes till smooth.
      • Heat 2-3Tbsp of ghee in a pan on medium heat. Once hot add mashed sweet potatoes.
      • Mix and cook with stirring constantly until moistures evaporates completely and becomes slightly thick.
      • Now add saffron soaked milk.
      • Mix and cook with stirring continuously.
      • Cook on a medium heat until all the moisture evaporates.
      • It starts to thicken and leaves the sides of the pan.
      • Then add sugar, cardamom powder, pinch of nutmeg and chopped nuts.
      • Mix well until sugar melts completely.Turn off the stove.
      • Garnish with sliced nuts, dry rose petals and serve warm.

      Video

      Nutrition

      Calories: 298kcal

      Similar Recipes

      • pumpkin halwa recipe
        Kaddu Halwa Recipe | Easy Pumpkin Halwa
      • rajgira halwa
        Rajgira Halwa Recipe
      • dumroot recipe
        Dumroot|kashi halwa|ash gourd halwa recipe
      • carrot-halwa-recipe
        Carrot Halwa Recipe | Gajar Ka Halwa Recipe

      One Oats Many Tastes | Oats Recipes

      Published : April 1, 2021 | Last Update on April 1, 2021 By Muktha

      Oats Recipe

      One oats many taste recipes with step by step directions and video. A healthy and nutritious oats breakfast recipes with extra 2x protein.

      Quaker India has launched new oats with flavour mix with a punch line one oats many taste . This post shares 3 oats recipes from a single pack. This oats recipes is a twist to the orginal masala oats recipe in order to increase the protein portion of vegetarians.

      3 in 1 oats recipe
      [feast_advanced_jump_to]

      About this recipe

      One Oats many tastes is a punch line given from quaker india for their new product flavour mix oats . This flavour mix oats recipe has 4 sachets with 2 flavours . 1 sachet with Tang Tomato flavour and another 3 Sachets with Homemade masala flavour exclusively launched for Indian Taste.

      With this flavour mix oats , I tried 3 different recipes to make it more nutritious and also flavourful. Tang Tomato ,has sweet and sour taste from Tomatoes . I tried to add Mexican flavours with additional spices and also increased its vegetarian protein portion by adding cooked rajma/kidney beans.

      One more flavour is Homemade Masala style , this taste very Desi with full packed Indian flavours. It goes well with everything and all vegetables . My twist was with bursting flavours of Mint , Pepper and lemon with extra added paneer for vegetarian protein .The flavours idea to this recipe was from my all time favourite Indian Chicken Macaroni Soup

      And the last and final recipe was normal porridge . But here in this recipe rather than looking for protein portion , my concern was to avoid dairy. So that it becomes a easier diet option for those suffering from PCOS , PCOD , Lacto intolerance. Hence replaced milk with coconut milk and flavoured with cinnamon , vanilla ; topped with nut, seeds and fresh fruits.

      Watch video recipe

      Ingredients

      • Quaker Oats Flavour Mix : Oats , Tomato Tang Masala and Homs style Masala
      • For Tomato Tang - Mexican Twist : Tomatoes , Garlic , Onion , Capsicum , Kidney Beans , Cumin Powder and Pepper Powder
      • For Homestyle Masala - Mint Panner Pepper Twist : Fresh Mint leaves , Paneer , Ginger , Garlic , Green chillies, Onion , Pepper Powder and Lime juice.
      • Porridge : Coconut Milk , Honey or Maple Syrup , Fresh Fruits , Nuts and seeds , Flavouring vanila and cinnamon.

      Variations to Oats recipe

      • If you want prepare , tang tomato oats recipe without any flavour mix then you can add ¾ teaspoon of red chilli powder , ¼ teaspoon coriander powder , ½ teaspoon Cumin powder , ½ teaspoon of sugar , salt to taste and follow the other ingredients as in recipe.
      • For Homestyle masala oats recipe without any flavour mix , add ¼ teaspoon of turmeric powder , ½ teaspoon of garam masala , ½ teaspoon of coriander powder, ¼ teaspoon of chilli powder, ¼ teaspoon of Cumin powder, ¼ teaspoon of Black Pepper powder , salt to taste and follow the other ingredients as in recipe.
      • Can add assorted vegetables , leafy vegetables , peas and/or corns into any of the two flavours to make it more nutritious .
      • Normal Porridge : Though dairy / milk can be used to make oats , for vegan you can use almond milk or soya milk in the recipe. Also replace honey with maple syrup for vegan option.

      Step by step directions

      For Tang Tomato with Mexican Twist:

      In a Pan, heat 1 teaspoon of any flavourless cooking oil.

      Add chopped garlic, onion and sauté till onion turns translucent.

      Masala oats recipe

      Now add in tomatoes and sauté till it turns pulpy.

      One Oats Many Tastes | Oats Recipes

      Add chopped bell peppers and cooked  kidney beans , saute for a minute.

      Masala oats recipe

      Now add 1 full sachet of tang tomato flavour mix , add cumin powder ,pinch of salt and sugar to taste.

      oats recipe flavour mix

      Mix well everything. Add cooked kidney bean water 1 cup and ½ cup of water.

      One Oats Many Tastes | Oats Recipes

      When it comes to boil ,

      One Oats Many Tastes | Oats Recipes

      Add ½ cup of oats. Regulate the flame to medium low .

      how to make masala oats

      Cover lid and cook for 3 -4 minutes.

      One Oats Many Tastes | Oats Recipes

      Stir well, add blackpepper powder, garnish with coriander leaves and turn of the flame.

      masala oats

      Serve hot.

      Tang Tomato Oats

      For Homemade Masala Style with Mint Paneer Pepper Twist:

      Firstly in a Pan , heat 1 teaspoon of any flavourless cooking oil.

      Firstly , add chopped garlic, ginger, green chillies and onion; sauté till onion turns translucent.

      masala oats

      Add in ½ cup of mint leaves and sauté till mint twilts.

      One Oats Many Tastes | Oats Recipes

      Now add in chopped tomatoes and saute till it turns pulpy.

      Add 50 grams of paneer, cut into small cubes.

      One Oats Many Tastes | Oats Recipes

      Gently saute for a minute so that any water content of paneer dries off.

      Now add 1 full sachet of Homemade masala flavour mix, add pinch of salt to taste and gently mix everything. Taking care not to crumble or break panner cubes. If doing oats without any flavour mix, then read the tips and variations for substitutes.

      One Oats Many Tastes | Oats Recipes

      Now add 1.5 cups of water and bring to boil.

      One Oats Many Tastes | Oats Recipes

      When it comes to boil, add ½ cup of oats. Regulate the flame to medium low.

      masala oats recipe

      Cover lid and cook for 3 -4 minutes.

      masala oats

      Lastly stir well, add Blackpepper powder, garnish with coriander and mint leaves.

      masala mint paneer oats

      Turn of the flame, squeeze in fresh lime juice and serve hot.

      Homestyle masala Oats

      For Vanilla Coconut Milk Oats Porridge

      Firstly in a bowl add coconut milk, water, vanilla essence and cinnamon powder .

      oats in coconut milk

      Stir well and add ½ cup of oats , soak for 10-15 minutes. Set aside.

      oats porridge

      Heat a pan , add soaked oats

      oats porridge

      and cook on medium heat until it reaches desired consistency.

      One Oats Many Tastes | Oats Recipes

      Now add coconut sugar or unrefined sugar to taste.

      non dairy oats porridge

      At last , mix well everything and turn off the heat.

      One Oats Many Tastes | Oats Recipes

      Finally , transfer to a bowl, top with fresh fruits, seeds and nut. Now , drizzle some honey or maple syrup and serve.

      Oats Porridge

      Serve different flavours of tasty and nutritious oats breakfast to everyone in the family ; one oats many tastes.

      Recipe

      3 in 1 oats recipe
      5 from 2 votes

      One Oats Many Tastes | Oats Recipes

      A healthy and nutritious oats breakfast recipes with extra 2x protein.
      Prep Time4 minutes mins
      Cook Time6 minutes mins
      Total Time10 minutes mins
      Course: Breakfast
      Cuisine: Fusion, Indian, World
      Keyword: Bachelor's Cooking, Breakfast_Ideas, Diet, Healthy, Weight Loss
      Servings: 3 People
      Calories: 290kcal
      Author: Muktha H S

      Ingredients

      For Tangy Tomato with Mexican Twist

      • ½ Cup Quaker Quick Oats
      • 1 sachet Tangy Tomato Flavour Mix
      • ¼ Cup Cooked Kidney Beans Rajma
      • 1 Cup Cooked bean water Bean stock
      • ½ Cup Water
      • 1 teaspoon of any Cooking Oil flavourless
      • 1 teaspoon Garlic finely chopped
      • 2 tablespoon Onion Chopped
      • ¼ tablespoon Tomatoes Chopped
      • 2 tablespoon Capsicum any coloured Bell Peppers
      • ½ teaspoon Cumin powder
      • ¼ teaspoon Black pepper powder
      • ¼ teaspoon Salt if required only
      • 1 Pinch of sugar
      • Fresh Coriander leaves to garnish

      For Homestyle Masala with Mint Paneer Twist

      • ½ Cup Quaker Quick Oats
      • 1 sachet Homestyle Flavour Mix
      • 50 grams Paneer / Indian Cottage Cheese
      • ½ Cup Fresh Mint Leaves
      • 1.5 Cups Water
      • 1 teaspoon of any Cooking Oil flavourless
      • 1 teaspoon Garlic finely chopped
      • 1 teaspoon Ginger finely chopped
      • ½ Green chilli finely chopped
      • 3 tablespoon Onion Chopped
      • 2 tablespoon Tomatoes Chopped
      • ½ teaspoon Black pepper powder
      • ¼ teaspoon Salt if required only
      • ½ tablespoon lime juice
      • 2 tablespoon coriander and mint leaves for garnishing
      • fresh Coriander leaves to garnish

      For Vanilla Coconut Oats Porridge

      • ½ cup Oats
      • ½ cup Coconut Milk thick
      • 1.5 cup Water
      • ½ teaspoon Cinnamon Powder
      • ¼ teaspoon Vanilla Essence
      • 1 teaspoon Coconut sugar optional
      • Honey or Maple syrup to taste
      • Fresh fruits Nuts and seeds of your choice.

      Instructions

      For Tang Tomato with Mexican Twist:

      • In a Pan, heat 1 teaspoon of any flavourless cooking oil.
      • Add chopped garlic, onion and sauté till onion turns translucent.
      • Now add in tomatoes and sauté till it turns pulpy.
      • Add chopped bell peppers and cooked kidney beans , saute for a minute.
      • Now add 1 full sachet of tang tomato flavour mix , add cumin powder ,pinch of salt and sugar to taste.
      • Mix well everything.
      • Add cooked kidney bean water 1 cup and ½ cup of water.
      • When it comes to boil , add ½ cup of oats. Regulate the flame to medium low .
      • Cover lid and cook for 3 -4 minutes.
      • Stir well, add blackpepper powder, garnish with coriander leaves and turn of the flame.
      • Serve hot.

      For Homemade Masala Style with Mint Paneer Pepper Twist:

      • In a Pan, heat 1 teaspoon of any flavourless cooking oil.
      • Add chopped garlic, ginger, green chillies and onion; sauté till onion turns translucent.
      • Now add in ½ cup of mint leaves and tomatoes, sauté till tomatoes turns pulpy.
      • Add 50 grams of paneer, cut into small cubes.
      • Gently saute for a minute.
      • Now add 1 full sachet of Homemade masala flavour mix, add pinch of salt to taste. If doing with regular oats without any flavour mix, then read the tips and variations for substitutes.
      • Add 1.5 cups of water and bring to boil.
      • When it comes to boil, add ½ cup of oats. Regulate the flame to medium low.
      • Cover lid and cook for 3 -4 minutes.
      • Stir well, add Blackpepper powder, garnish with coriander and mint leaves.
      • Turn of the flame, squeeze in fresh lime juice and serve hot.

      For Vanilla Coconut Milk Oats Porridge

      • In a bowl add coconut milk, water, vanilla essence and cinnamon powder .
      • Stir well and add ½ cup of oats , soak for 10-15 minutes. Set aside.
      • Heat a pan , add soaked oats and cook on medium heat until it reaches desired consistency.
      • Add coconut sugar or unrefined sugar to taste.
      • Mix well and turn off the heat.
      • Transfer to a bowl, top with fresh fruits, seeds and nut. Drizzle some honey or maple syrup and serve.

      Video

      Nutrition

      Calories: 290kcal

      Similar recipes

      • Oats-omelette-breakfast
        Spicy Masala Oats Omelette Recipe
      • Instant Oats Idli
        Instant Oats Idli Recipe | how to make Oats Idli
      • instant oats dosa
        Instant Oats Dosa

      Dal Palak | how to make palak dal recipe

      Published : March 29, 2021 | Last Update on September 25, 2022 By Muktha

      palak-dal-recipe

      Dal Palak recipe with step by step photos and video . Dal Palak is a delicious lentil-based Indian side dish made with spinch , lentils and spices . Its a soothing and humble accompaniment with phulka/roti or rice. Here is how to make this simple and quick recipe for everday meals.

      Similar Dal Recipes which can be prepared for everyday meals are Dal Fry , Makhani Dal , Methi Dal

      Dal_palak_recipe
      [feast_advanced_jump_to]

      About this recipe

      There are many ways of doing Dal Palak recipe but this one is my style because its quick , easy and simple. This bachelor version of making Dal Palak needs no monitor nor much time. You can pressure cook everything together and then temper with spices. It's all set to serve.

      Dal Palak is a simple everyday Dal which is nutritious recipe made of spinach and pigeon pea lentils. Its one of the most loved combination in Indian homes for is taste and nutrious values . Also its very light on stomach and tastes delicious.

      To make Dal Palak , I have used only pigeon peas ( turvar dal ) but you can always use combination lentils like masoor dal and moong dal also. Moong dal and Toor dal combined together with spinach makes it very delcious.

      You can also cook dal seperately and then saute along with chopped spinach leaves. But here for a quicker and simple version I have pressure cooked everything and then tempered.

      You can make palak dal recipe either in pressure cooker or instant pot , a healthy pot of nutritious, and protein-rich spinach dal will be ready in no time.

      This Dal Palak is nutritious being rich in protein and iron , also its a very quick and easy bachelor recipe perfect for weekday meals

      Checkout Video Recipe

      Ingredients

      Dal – For this Dal Palak recipe, I have used Yellow Lentil Dal or Dhuli Moong Dal, but you can also use any other Dal instead of yellow dal. You can also use a combination of two dal in this recipe.

      Spinach – This Dal is filled with the goodness of Iron-rich leafy vegetable Palak or Spinach. Finely chop the spinach to use in the Dal. You can also puree the spinach and add in the dal, but I like the texture chopped spinach adds.

      Ghee – A ghee tadka in this Spinach Dal adds a really nice flavor and aroma. But you can even use vegetable oil, coconut oil, or olive oil.

      Spices – Turmeric powder and salt are the only spices needed.

      For the tadka – I have added a ghee tadka in the palak dal to enhance the taste even more. This tadka will have ingredients such as ginger, garlic, dry red chili, green chilies, cumin seeds, thing, and red chili powder.

      Others – Some more basic ingredients needed are lemon juice and fresh coriander, which adds a little tanginess in the Dal and coriander leaves adds a nice color along with freshness.

      If you like to make it tangy, you can even add a little bit of tamarind paste and tamarind water in the dal.

      Variations and Tips

      Lentils / Dal – You can change or use mixed lentils to make this Dal Palak. I have used toor dal ( pigeon pea lentils ) in this recipe, but you can replace it with split Moong Dal, split Masoor Dal, Chana Dal, or combination of lentils in this recipe. But always make sure to soak lentils for minimum 3 to 4 hours , if possible 7-8 hours for leaching out antinutrients like phytates and for proper absorption of nutrients.

      Vegetables – You can also add some vegetables like Pumpkin or carrot in the Dal to make it more nutritious and can feed small kids of age group 9 months and above.

      Tempering – You can either give a very simple tempering of Hing and Jeera to this Dal. Or for more enhanced taste adding kasuri methi and garlic will bring out the flavours in spinach dal. And needless to mention , tempering should be done with ghee/ clarified butter.

      No Onion - No Garlic - To make a Jain version , avoid adding onion and garlic in the recipe. All the other ingredients and the process will remain the same.

      Step by Step Dal Palak Recipe

      Wash dal and soak for 3 to 4 hours. Soaking lentils for more hours helps to remove antinutrients from lentils. Drain water completely , rinse with cold water and set aside.

      In a pressure cooker, add 1 tablespoon of Oil , mustard seeds, cumin seeds , ginger, garlic , green chillies and onions. Saute till onions turns translucent. Add turmeric powder and pinch of hing, mix well everything.

      Dal Palak

      Now add in chopped tomatoes , saute till tomatoes turn mushy . Add chopped spinach ,mix well everything.

      how to make dal palak recipe

      Add soaked dal ( lentils) , 2 cups of water

      make dal palak recipe in onepot

      And pressure cook for 2-3 whistles on high heat.

      Dal Palak | how to make palak dal recipe

      When pressure settles on its own , open lid , add salt and keep on simmer for 5 -8 minutes .

      Dal Palak | how to make palak dal recipe

      Whilst , Heat ghee in a small pan. When the ghee is hot, add mustard seeds, cumin seeds, chopped garlic, curry leaves , dry red chilies and asafoetida. Fry till garlic is slightly browned. Add Kasuri methi / dried fenugreek leaves and red chilli . Switch off the heat.

      tempering dal palak

      Immediately pour tempering/ tadak over the cooked dal.

      Dal Palak | how to make palak dal recipe

      Mix well , simmer for 5 minutes and serve with roti or steamed rice.

      Dal Palak | how to make palak dal recipe

      Recipe

      palak-dal-recipe
      5 from 2 votes

      Dal Palak Recipe

      Dal Palak is a delicious lentil-based Indian side dish made with spinch , lentils and spices
      Prep Time5 minutes mins
      Cook Time25 minutes mins
      Soaking Time3 hours hrs
      Total Time3 hours hrs 30 minutes mins
      Course: Side Dish
      Cuisine: Indian
      Keyword: Bachelor's Cooking, Diet, Healthy, Lentils
      Servings: 4 People
      Calories: 119kcal
      Author: Muktha H S

      Ingredients

      • ½ Cup Toor Dal soaked for 3- 4 hours
      • 1 tablespoon Cooking oil
      • ½ teaspoon Mustard seeds
      • ½ teaspoon Cumin Seeds
      • ½ inch Ginger grated
      • 3 no’s Garlic cloves chopped
      • 2 no’s Green chillies slit
      • 1 Onion medium size , chopped
      • 1 Tomato medium size chopped
      • 2 Cups Spinach chopped
      • 2-2.5 cups Water
      • ¼ teaspoon Turmeric Powder
      • ¼ teaspoon Hing/ Asafoetida
      • Salt to taste

      For Tempering

      • 1 tablespoon Ghee/ clarified butter
      • ¼ teaspoon Mustard seeds
      • ½ teaspoon Jeera seeds
      • 2 Sprigs curry leaves
      • 2 Dry red chillies broken
      • ¼ teaspoon Hing/ Asafoetida
      • 1 tablespoon Garlic chopped
      • 1 teaspoon Kasuri methi / Dry fenugreel leaves
      • ½ teaspoon Red chilli powder

      Instructions

      • Wash dal and soak for 3 to 4 hours. Soaking lentils for more hours helps to remove antinutrients from lentils. Drain water completely , rinse with cold water and set aside.
      • In a pressure pan. Add 1 tablespoon of Oil , mustard seeds, cumin seeds , ginger, garlic , green chillies and onions. Saute till onions turns translucent.
      • Now add in chopped tomatoes , saute till tomatoes turn mushy . Add chopped spinach , turmeric powder ,mix well everything.
      • Add soaked dal and 2 cups of water and pressure cook for 1-2 whistles on high heat. When pressure settles on its own , open lid , add salt and keep on simmer for 5 -8 minutes .
      • Whilst , Heat ghee in a small pan. When the ghee is hot, add mustard seeds, cumin seeds, chopped garlic, curry leaves , dry red chilies and asafoetida. Fry till garlic is slightly browned. Add Kasuri methi / dried fenugreek leaves and red chilli . Switch off the heat.
      • Immediately pour tempering/ tadak over the cooked dal.
      • Mix well , simmer for 5 minutes and serve with roti or steamed rice.

      Video

      Nutrition

      Serving: 4g | Calories: 119kcal

      More Palak Recipes

      • Palak Paneer Pulao Recipe
        Palak Paneer Pulao Recipe
      • Spinach Salad
        Palak Paneer Salad | Spinach Salad
      • Palak Chicken
        Palak Chicken| Spinach Chicken

      Rabdi Recipe, how to make best rabri at home

      Published : February 20, 2021 | Last Update on October 17, 2022 By Muktha

      Rabdi-dessert

      Rabdi recipe| Rabri recipe at home with step by step photos and video. Rabri | Rabdi is a traditional Indian dessert made with full fat whole milk flavoured with rose water and cardamom powder and garnished with nuts.

      Rabdi recipe
      [feast_advanced_jump_to]

      About this recipe

      Basically rabri is dense creamy layered sweetened milk . Made by boiling milk on low heat for a long time when milk reduces and thickens , its finally flavored with powdered cardamoms saffron, rose water and slivered almonds and pistachios.

      The preparation of rabdi is easy but its time consuming. Milk is continuously boiled and simmered until it becomes dense and changes its colour to off-white or pale yellow with lots of cream. Later sugar, spices, and nuts are added to give its flavor , chilled and served as dessert.

      Checkout Rabri video !

      There are 2 version of rabri , one is Lachha rabri and other one is plain rabri. In Lachha rabri , there will be layers of cream in the dessert and in plain rabri , you can seed chunks of cream in it .

      Both version tastes amazingly good.

      In lachha rabri , layers of cream is collected and finally added back to condensed milk. Whereas in plain rabri , all cream is scraped from the edges and dropped back into boiling milk , it desired consistency is reached.

      Rabri is usually prepared in broad shape kadai or shallow pan , which makes evaporation of the milk faster. As I didn't had broad shaped kadai , I used my sauce pan to make rabri.

      The pan or kadai has to be thick bottomed or else the milk gets scorched or burnt from the base. To avoid milk getting scorched from the base, I add ½ teaspoon of ghe/clarified butter prior to boiling milk.

      As ghee greased pan prevents milk from scorching from base. Take care to stir milk from bottom for every 8-10 minutes to prevent scorching of milk from base.

      Difference between Rabdi and Basundi?

      Both rabri and basundi are made by reducing the milk. The only difference is in the consistency of these desserts.

      Basundi is slightly thinner whereas rabdi has thicker consistency with chunks of cream / malai in it.

      Serving Suggestions

      You can eat rabdi as such but it pairs fabulously with Gulab Jamun, Shahi Tukda, Jalebi or Malpua.

      rabdi recipe

      Tips and Variations :

      • Making Rabri is a time consuming process. Hence it’s advisable to make it while you are already in the kitchen doing something else. Just once in every 8-10 minutes , stir milk and allow to thicken.
      • You can easily double or reduce the measurements in recipe as per your requirements.
      • Rabdi freezes well, You can make a big batch and freeze. Use whenever you want to pair it with something or eat on its own.
      • You can make variations of rabdi like Sitafal Rabdi, Mango Rabdi , Anjeer Rabdi etc by adding fruits purees to the finished rabdi.

      Step by step directions

      Take a saucepan or kadai, add ½ teaspoon of ghee and swirl so that ghee /clarified butter coats saucepan. This avoids scorching of milk from bottom.

      rabdi_recipe

      Add 1litre of full fat whole milk boil the milk, when milk starts to froth and rises on stop. Regulate the flame to low.

      Rabdi Recipe, how to make best rabri at home

      Take 2 tablespoon of boiled milk and soak 12-15 strands of saffron in it, set aside.

      Rabdi Recipe, how to make best rabri at home

      Now continue to boil milk on low flame, stirring milk for every 6-8 minutes from bottom.

      Milk froths often and forms a layer of cream on top.

      Rabdi Recipe, how to make best rabri at home

      Scrape the edges of saucepan/ kadai and add cream back to boiling milk.

      Rabdi Recipe, how to make best rabri at home

      Around 1 to 1.5 hours, milk reduces to ⅓ quantity.

      Rabdi Recipe, how to make best rabri at home

      Add sugar, saffron soaked in milk, rose water and cardamom powder.

      Rabdi Recipe, how to make best rabri at home

      Cook for another 2-3 minutes.

      Rabdi Recipe, how to make best rabri at home

      Garnish with almond , pistachio slivers and dry rose petals.

      garnish rabdi

      Pour the rabri in earthen pots for more flavours.

      rabri in earthen pot

      Chill in refrigerator for a few hours before serving.

      rabri recipe

      Recipe

      rabri recipe
      5 from 2 votes

      Rabri Recipe | Best Homemade Rabdi Recipe

      Rabri or rabdi is a traditional Indian sweet of creamy , sweetened , thick milk flavoured with rose water, saffron , cardamom and garnished with slivered nuts.
      Prep Time5 minutes mins
      Cook Time1 hour hr 35 minutes mins
      Total Time1 hour hr 50 minutes mins
      Course: Dessert
      Cuisine: Indian, North Indian
      Keyword: Desserts, Diwali, Holi, Sweets, Vegetarian
      Servings: 4 people
      Calories: 204kcal
      Author: Muktha H S

      Ingredients

      • ½ teaspoon ghee / clarified butter
      • 1 litre full fat whole milk
      • 2.5 to 3 tablespoon sugar or add as required
      • 12 to 15 saffron strands
      • ½ teaspoon cardamom powder
      • 1 teaspoon rose water or kewra water or 1-2 drops of rose essence
      • 2 tablespoon almonds slivered
      • 2 tablespoon pistachios slivered
      • 1 tablespoon dry rose petals

      Instructions

      • Take a saucepan or kadai, add ½ teaspoon of ghee and swirl so that ghee /clarified butter coats saucepan. This is done to avoid scorching of milk from bottom.
      • Add 1litre of full fat whole milk boil the milk, when milk starts to froth and rises on stop. Regulate the flame to low.
      • Take 2 tablespoon of boiled milk and soak 12-15 strands of saffron in it, set aside.
      • Now continue to boil milk on low flame, stirring milk for every 6-8 minutes from bottom.
      • Milk froths often and forms a layer of cream on top.
      • Scrape the edges of saucepan/ kadai and add cream back to boiling milk.
      • Around 1 to 1.5 hours, milk reduces to ⅓ quantity.
      • Add sugar, saffron soaked in milk, rose water and cardamom powder.
      • Cook for another 3-4 minutes.
      • Garnish with almond and pistachio slivers.
      • Pour the rabri in earthen pots for more flavours.
      • Chill in refrigerator for a few hours before serving.

      Video

      Nutrition

      Calories: 204kcal

      You might also like

      • Khoya Recipe
        Khoya| Homemade Mawa Recipe
      • matar-kheer-recipe
        Matar Kheer | Green Peas Kheer
      • basundi-sweetened-condensed-milk
        Basundi | Creamy Sweetened Milk
      • rasmalai
        Rasmalai Recipe | Easy Rasmalai Recipe
      • Kesar-badam-milk
        Kesar Badam Milk
      • Thandai
        Thandai

      Kidney Bean Salad Recipe | how to make rajma salad

      Published : February 17, 2021 | Last Update on September 25, 2022 By Muktha

      kidney-bean-salad-recipe

      Kidney bean salad recipe with step by step photos and video. Rajma is a hindi name for red kidney beans . Rajma salad is a healthy protein packed salad made with boiled kidney beans , steamed corn , onions, tomatoes , bell peppers , spices and lime juice. Its easy to make , tastes delicious and is packed with nutrition.

      Some of my other favourite salads are palak paneer salad , sicilian salad , peanut salad and pineapple salsa

      Kidney bean salad
      [feast_advanced_jump_to]

      About this recipe

      Kidney bean salad is an easy, vegan and gluten-free old fashioned salad made with boiled rajma , steamed sweet corns and assorted vegetables. This is my go to salad in all my diet recipes , its protein rich and has good amount of fibre to start your day with but can also be a part of meal or snacking.

      Checkout the video !

      Here, Kidney beans are boiled and mixed with vegetables such as tomato, onion and bekll peppers. I have used green bell peppers but any coloured bell peppers can be used. To give a mexican touch , I have added more tomatoes about 1 cup . Dressing is simple here , it can be made by simply mixing olive oil , lime juice , chopped garlic, spices and salt . But I have added directly to the salad and given 15 minutes of rest time for flavours to meld together to make a super delicious rajma salad.

      Though this is a simple salad that gets ready in minutes , the only time taking part is boiling the kidney beans. But make sure not to over boil the beans otherwise they can become mushy. If you are running short of time , boiling of beans can be done even a day before. Just add in all the ingredients in a bowl, give it a mix and tasty salad will get ready in minutes.

      Also its very important to soak the dry beans for long hours around 8 -12 hours . Its always recommened to pre-soak any kind of legumes and beans . Soaking beans is very important as it leaches out all antinutrients (phytates) and helps in proper digestion and absorption of nutrients from beans.

      This Rajma salad recipe is perfect to add in weightloss diet , as kidney beans are high in protein along with sweet corns and vegetables can keep you filled for longer . Can have this for breakfast or for lunch but never add these salads to replace your dinner as dinner should always be light and easy on stomach to digest.

      Rajma Salad

      Health benefits of Kidney Beans

      Kidney beans are an excellent plant-based source of protein. They’re also rich in various minerals, vitamins, fibers, antioxidants, and other unique plant compounds. Hence these beans helps in weight loss, promote colon health, and moderate blood sugar levels.

      Kidney beans should always be eaten well cooked. Raw or improperly cooked kidney beans are toxic and it may cause bloating, flatulence, and diarrhea in some people.

      Step by Step directions to make kidney bean salad recipe

      Wash the kidney beans and soak in enough water for 8-10 hours.

      Kidney Bean Salad Recipe | how to make rajma salad

      Drain the water and add the beans in a pressure cooker.

      Kidney Bean Salad Recipe | how to make rajma salad

      Add 2.5 cups of water and pressure cook for 2-3 whistles on high, till beans are softened.

      Kidney Bean Salad Recipe | how to make rajma salad

      Drain the water and reserve it to use later use, it’s very nutritious and can be added to make rasam, curries or kneading dough.

      Kidney Bean Salad Recipe | how to make rajma salad

      Steam sweet corns and set aside.

      Kidney Bean Salad Recipe | how to make rajma salad

      Add boiled kidney beans in a bowl.

      Kidney Bean Salad Recipe | how to make rajma salad

      Also add steamed sweet corns.

      Kidney Bean Salad Recipe | how to make rajma salad

      Add all the remaining ingredients and mix well.

      Kidney Bean Salad Recipe | how to make rajma salad

      Rest for 15 minutes before serving as all juices meld together.

      Kidney Bean Salad Recipe | how to make rajma salad

      Recipe

      rajma_salad
      5 from 2 votes

      Kidney bean salad recipe | Rajma Salad

      Kidney bean salad is ahealthy protein packed salad made with boiled kidney beans , steamed corn ,onions, tomatoes , bell peppers , spices and lime juice.
      Prep Time10 minutes mins
      Cook Time20 minutes mins
      Soaking Time10 hours hrs
      Total Time10 hours hrs 30 minutes mins
      Course: Salads
      Cuisine: Fusion, Indian, Mexican
      Keyword: Bachelor's Cooking, Diet, Gluten Free, Healthy
      Servings: 4 People
      Calories: 116kcal
      Author: Muktha H S

      Ingredients

      • ½ cup Rajma/ Kidney beans
      • ½ cup Sweet Corn
      • ½ cup Onion chopped
      • 1 cup Tomato chopped
      • ⅓ cup Bell peppers chopped
      • 2 no Green chilli chopped
      • ½ cup Fresh coriander leaves Chopped
      • 2 garlic cloves chopped
      • ½ teaspoon Blackpepper powder
      • ½-1 teaspoon Cumin powder
      • 1 tablespoon Lemon juice
      • 1 tablespoon Olive oil extra virgin
      • Salt to taste

      Instructions

      • Wash the kidney beans and soak in enough water for 8-10 hours.
      • Drain the water and add the beans in a pressure cooker.
      • Add 2.5 cups of water and pressure cook for 2-3 whistles on high, till beans are softened.
      • Drain the water and reserve it to use later use, it’s very nutritious and can be added to make rasam, curries or kneading dough.
      • Steam sweet corns and set aside.
      • Add boiled kidney beans in a bowl.
      • Add steamed sweet corns
      • Add all the remaining ingredients and mix well.
      • Rest for 15 minutes before serving as all juices meld together.

      Video

      Notes

      Canned beans and corns can be used to make this salad. Drain and rinse them well before using in this recipe.

      Nutrition

      Calories: 116kcal

      FAQ's

      Can we use canned beans and corns in this recipe?

      Yes, Canned beans and corns can be used to make this salad. Drain and rinse them well before using in this recipe.

      How does this Salad helps for weight loss?

      This salad is high in protein and low on glycemic index , which means it takes more time to get digested thus keeping you full for longer . It also satiate you and cuts down cravings , which helps in weight loss.

      Can we substitute any other beans for Kidney Beans?

      Yes, can use black beans, lobia , white beans, or even garbanzo beans or mix of many beans to make this salad . But just make sure to pre soak all beans and well cook them before mixing with salad.

      Can we change dressing and add mayonnaise?

      Yes , you can change dressing but I don;t recommend you to add mayonnaise as this is already protein rich and is mainly used as a part of healthy diet for weightloss ,aiming to consume low calories . Adding mayonnaise increasses the calorie intake.

      Curry leaves chutney powder | karivepaku podi

      Published : February 11, 2021 | Last Update on September 29, 2022 By Muktha

      curry leaves powder recipe

      Curry leaves powder recipe with detailed step by step photos and video. Curry leaves powder or karivepaku podi is a aromatic and flavourful dry chutney powder made with fresh curry leaves and spices.  It is ideal to be served with rice , idlis , dosa or akki roti.

      curryleaves powder
      [feast_advanced_jump_to]

      About this recipe

      Curry leaves chutney powder or Karivepaku Podi also known as Karuvepellai Podi  is a dry chutney powder , very popular in South India. This dry chutney is made from fresh curry leaves, chana dal, urad dal, dry red chilies, tamarind, dry coconut, and salt. Though there are many varitions to this recipe like adding peanuts , coriander seeds and sesame seeds , I am sharing my home style recipe , which we are making it from years.

      As curry leaves chutney powder is generally mixed with sesame oil and served , I have not used sesame seeds while making this curry leaf powder. Also few adds coriander seeds to this chutney powder , personally I don't prefer to add in this chutney powder as it tastes more like a curry leaf sambar powder to me. Hence I avoid using corinder seeds while making this karivepaku podi. Its just my personal preference , if you are okay in adding coriander seeds , you can add it in this this recipe.

      Watch Video Recipe

      Health Benefits of Curry leaves

      Curry leaves have a distinct flavour. From weight loss to treating iron and calcium deficiency , Curry leaves are used to treat several other conditions. Checkout these amazing health benefits of Curry leaves and try adding in your regular diet.

      Improves digestion and helps in in treating constipation and diarrhea.Raw and tender curry leaves eaten on an empty stomach are said to support bowel movement and stimulate digestive enzymes.

      Weight loss : Carbazole alkaloids present in curry leaves help in regulating cholesterol levels in the body and work against weight gain . Hence adding curry leaves in everyday meals aids weight loss.

      Curry leaves helps in increasing digestive secretions and relieve nausea, morning sickness and vomiting in pregenent women.

      Curry leaves are full of carbazole alkaloids which are compounds with antibacterial, anti-cancer and anti-inflammatory properties. 

      Good for diabetics : Curry leaves have been found to reduce blood glucose levels effectively. They offer protection to insulin-producing cells of pancreas and prevent damage caused by free radicals.

      Improves eye sight : Curry leaves are rich in Vitamin A and also prevent early onset of cataract. Source : NDTV

      curry leaves powder

      More DIY spice powder recipes

      • Mixed Chutney Powder
      • Tea Masala Powder
      • Biryani Masala Powder
      • Tandoori Masala
      • Kolhapuri Masala Powder

      How to make curry leaves powder recipe

      Firstly ,wash curry leaves well in salt water, drain water completely and wipe it dry with a kitchen napkin.

      Once its completely dry , then dry roast curry leaves on a medium flame until it turns crisp and crushes with hands easily.

      Curry leaves chutney powder | karivepaku podi

      It takes almost 6-8 minutes to become completely crisp.

      Curry leaves chutney powder | karivepaku podi

      Now , transfer roasted curry leaves into a blender/ dry mixer jar.

      Secondly , in the same pan, heat 1 teaspoon of oil, regulate flame to low and roast chana dal (Bengal gram) and urad dal (de skinned split black gram), until lentils turn light golden in colour.

      Curry leaves chutney powder | karivepaku podi

      Now add in dry red chilies and roast for about 2-3 minutes.

      Curry leaves chutney powder | karivepaku podi

      Add in dry coconut, cumin seeds, garlic cloves, tamarind, roast for a minute and turn off the stove.

      Curry leaves chutney powder | karivepaku podi

      Thirdly ,transfer all the roasted ingredients to the same blender/ mixer jar. Let it cool down completely in a blender / jar itself. As keeping roasted spices in the pan, itself radiates heats and burn the spices when kept for cooling.

      Curry leaves chutney powder | karivepaku podi

      Add hing, turmeric powder , salt and jaggery .

      Curry leaves chutney powder | karivepaku podi

      Finally ,blend everything to a fine powder . Store in air tight dry glass jar, stays fresh upto 1 month.

      Curry leaves chutney powder | karivepaku podi

      Serve it with rasam rice, sambar rice, make podi idli , season and mix with rice or poha . I have tried everything and it tastes equally good with all the mentioned combinations.

      curry leaves powder

      Recipe

      curry leaves powder recipe
      5 from 3 votes

      Curry leaves powder | Karivepaku Podi

      Curry leaves powder or karivepaku podi is a aromatic and flavourful dry chutney powder made with fresh curry leaves and spices.
      Prep Time5 minutes mins
      Cook Time10 minutes mins
      Total Time15 minutes mins
      Course: DIY
      Cuisine: Andhra, Karnataka, South India, Tamil
      Keyword: Basic, Masala Powder
      Servings: 15 Tbsp , makes
      Calories: 15kcal
      Author: Muktha H S

      Ingredients

      • 1 cup curry leaves firmly pressed
      • 1 teaspoon oil
      • 2 tablespoon chana dal
      • 1 tablespoon urad dal
      • 2 tablespoon dry coconut
      • 1 teaspoon jeera /cumin seed
      • 4-5 no's dry red chilies
      • 4 no's garlic cloves
      • 1 teaspoon tamarind pulp firmly pressed (small gooseberry size)
      • ¼ teaspoon hing/asafoetida
      • ½ teaspoon turmeric powder
      • ½ teaspoon jaggery powder optional
      • 1-1.5 teaspoon salt or as required

      Instructions

      • Wash curry leaves well with salt water, drain water completely and wipe it dry with a kitchen napkin.
      • Dry roast curry leaves on a medium flame until it turns crisp and crushes with hands easily. It takes almost 6-8 minutes to become completely crisp.
      • Transfer roasted curry leaves into a blender/ dry mixer jar.
      • In the same pan, heat 1 teaspoon of oil, regulate flame to low and roast chana dal (Bengal gram) and urad dal (de skinned split black gram), until lentils turn light golden in colour.
      • Now add in dry red chilies and roast for about 2-3 minutes.
      • Add in dry coconut, cumin seeds, garlic cloves, tamarind, roast for a minute and turn off the stove.
      • Transfer all the roasted ingredients to the same blender/ mixer jar. Let it cool down completely in a blender / jar itself. As keeping roasted spices in the pan, itself radiates heats and burn the spices when kept for cooling.
      • Add hing, turmeric powder , salt and jaggery .
      • Blend everything to a fine powder . Store in air tight dry glass jar, stays fresh upto 1 month.
      • Serve it with rasam rice, sambar rice, make podi idli , season and mix with rice or poha . I have tried everything and it tastes equally good with all the mentioned combinations.

      Video

      Nutrition

      Calories: 15kcal

      Cornflakes upma | how to make cornflakes upma

      Published : February 7, 2021 | Last Update on September 21, 2022 By Muktha

      cornflakes-upma-with lemon

      Cornflakes upma recipe with step by step images and video. Cornflakes upma is savoury recipe where various seasonings and/or vegetables are added and cornflakes are cooked by sprinkling water and garnished with herbs .

      Upma is a classic Indian breakfast made with semolina . It is basically a simple tempering done with mustard seeds, lentils , curry leaves , onion and chillies. Different version of upma includes Murmura upma , Quinoa upma , Poha , Bread upma and Vermicelli Upma.

      cornflakes_upma
      [feast_advanced_jump_to]

      About this recipe

      Cornflakes upma is a savoury version of well known breakfast cereals cornflakes. Basically upma is a most popular Indian breakfast made with semolina / rava / cream of wheat . Various seasonings and/or vegetables are often added during cooking upma, depending on individual preferences .

      This recipe is a savoury version of a most popular cornflakes. As many gets bored with eating cornflakes in traditional way , pairing with milk and fruits , this recipe is a twist with Indian flavours. Quick and easy recipe that can be made under 15 minutes.

      Me being a health nut and foodie , I often experiment with taste and my little picky eater liked this upma for a change . So this recipe can be a quick breakfast recipe or can even be served to kids as after school snacking . Also an healthy evening snack option for weight loss and weight management.

      For a dry version of this cornflakes upma is Cornflakes Chivda , which I often serve with Masala Chai

      Why cornflakes for breakfast ?

      Corn flakes are very rich in thiamine. Thiamine is good for carbohydrate metabolism, energy production and cognitive functions.  It is also rich in iron content, which maintains healthy blood levels and keeps the brain alert. As cornflakes are nutritious and also low in fat , adding in breakfast is a smart choice. Also you can serve to kids and elderly people for evening snacks , as it can be a healthy snacking option.

      Cornflakes actualy becomes a easier option for morning breakfasts for kids, working women and bachelor's. Though I'm not okay with any kind of ready to eat breakfasts , conflakes do comes handy and easier for me at times when i'm lazy or not well. So for all those who are like me , this cornflakes upma can become saviour.

      Watch Video

      Pro tips and Variations

      • Vegetables : Here in this recipe I have just used basic seasionig along with onions and tomatoes for vegetables. You can add more vegtables to suit your preferances . Carrot , green peas , french beans , cabbage and even some sprouts can be added in this recipe .
      • Water : Adding water is most crucial and important in this recipe. For every 1 cup cornflakes you may need to sprinkle about 3 to 4 tablespoon of water. Adding more water may make cornflakes soggy and adding too little will make it chewy. So you may need to just add it right. Alternatively you can also rinse cornflakes for 30 seconds and use in this recipe.
      cornflakes upma

      Step by step directions to make Cornflakes Upma

      Heat 1.5 tablespoon of oil in a pan . Add seasoning ingredients mustard seeds and cumin seeds. When mustard seeds starts to splutter , add chana dal, urad dal and chopped curry leaves. Fry on a medium flame until lentils changes colour to lightly golden .

      cornflakes_upma

      Now add in chopped green chillies , grated ginger , chopped onions , turmeric powder and asfoetida.

      cornflakes_upma_recipe

      Mix well everything and saute until onion turns translucent.

      cornflakes_upma

      Add in chopped tomatoes ,

      cornflakes_upma

      Mix well and continue to cook until it turns pulpy.

      cornflakes_upma

      Add 3 cups of cornflakes and mix well.

      cornflakes upma

      Sprinkle salt and spices to taste , mix well together.

      cornflakes_upma

      Now add ¼ cup to ⅓ cup of water and gently mix everything.

      Cornflakes upma | how to make cornflakes upma

      Cover lid and cook on low flame for about 3 to 5 minutes . By now water would have absorbed by Cornflakes and with enough moisture it will be soft not being soggy or chewy . If you find cornflakes as chewy , then sprinkle 1or 2 tablespoon of extra 2 water and gently stir and cook for a minute.

      Cornflakes upma | how to make cornflakes upma

      Turn off the stove. Tip in chopped coriander leaves and squeeze fresh lime juice.

      Cornflakes upma | how to make cornflakes upma

      Mix well everything and serve hot immediately .

      cornflakes upma

      Recipe

      cornflakes-upma-with lemon
      5 from 3 votes

      Cornflakes Upma

      Cornflakes upma is savoury recipe where various seasonings and/or vegetables are added and cornflakes are cooked by sprinkling water and garnished with herbs .
      Prep Time5 minutes mins
      Cook Time12 minutes mins
      Total Time17 minutes mins
      Course: Breakfast, Tiffin
      Cuisine: Fusion, Indian
      Keyword: Bachelor's Cooking, Basic
      Servings: 3 People
      Calories: 176kcal
      Author: Muktha H S

      Ingredients

      • 3 cups cornflakes
      • 1.5 tablespoon oil
      • ½ teaspoon mustard seeds
      • ½ teaspoon jeera / cumin seeds
      • 1 teaspoon chana dal
      • 1 teaspoon urad dal
      • 1 sprig curry leaves chopped
      • 1 teaspoon green chilli chopped
      • 1 teaspoon ginger grated
      • ¼ teaspoon turmeric powder
      • ⅛ teaspoon hing /asafoetida
      • ½ cup onion chopped
      • ½ cup tomato chopped
      • ½ teaspoon red chilli powder
      • ½ teaspoon jeera powder
      • ½ teaspoon sugar
      • Salt to taste
      • ⅓ cup water
      • 2 tablespoon chopped coriander leaves
      • 1-2 teaspoon lime juice

      Instructions

      • Heat 1.5 tablespoon of oil in a pan . Add seasoning ingredients mustard seeds and cumin seeds. When mustard seeds starts to splutter , add chana dal, urad dal and chopped curry leaves.
      • Fry on a medium flame until lentils changes colour to lightly golden .
      • Now add in chopped green chillies , grated ginger , chopped onions , turmeric powder and asfoetida.
      • Mix well everything and saute until onion turns translucent.
      • Add in chopped tomatoes , mix well and continue to cook until it turns pulpy.
      • Add 3 cups of cornflakes and mix well.
      • Sprinkle salt and spices to taste , mix well together.
      • Now add ¼ cup to ⅓ cup of water and gently mix everything.
      • Cover lid and cook on low flame for about 3 to 5 minutes . By now water would have absorbed by Cornflakes and with enough moisture it will be soft not being soggy or chewy . If you find cornflakes as chewy , then sprinkle 1or 2 tablespoon of extra 2 water and gently stir and cook for a minute.
      • Turn off the stove. Tip in chopped coriander leaves and squeeze fresh lime juice.
      • Mix well everything and serve hot immediately .

      Video

      Nutrition

      Calories: 176kcal

      Similar Recipes

      • cornflakes_chivda
        Cornflakes Chivda Recipe - Easy, Healthy Diet Snacks
      • Murmura Upma | Puri Uppittu
        Murmura Upma | Puri Uppittu
      • Bread Upma
        Bread Upma Recipe
      • Easy Lemon Rice
        Easy Lemon Rice | No Onion No Garlic Recipe

      Sattu Drink Recipe | How to make Sattu Drink

      Published : January 29, 2021 | Last Update on September 29, 2022 By Muktha

      sattu-juice

      Sattu Drink is a delicious summer coolant made with roasted black chickpea flour flavoured with lime juice, spices and herbs.

      Sattu is famous in Eastern India and is very popular in Kolkata and Bihar and thi if popularly called as chane ke sattu.

      Sattu Namkeen Sharbat
      [feast_advanced_jump_to]

      What is Sattu?

      Sattu is a black chickpea flour , it is made by dry roasting black chickpea and then pounding this roasted gram to a powder. It contains a very high quality vegan protein that can easily absorbed by human body . Hence many refer Sattu has equivalent to Whey Protein

      Sattu has amazing health benefits . It is rich in several nutrients including fiber , iron, calcium and magnesium . Sattu has cooling properties and is great in providing relief from the scorching heat .

      Health Benefits of Sattu

      • Excellent for bone health and prevention of osteoporosis because of high quality protein, calcium and magnesium
      • Very rich in Iron , super healthy for growing kids and adults .
      • Fiber : Cleanses out colon and ease problems like constipation, bloating, acidity and provides relief to irritation and burning in stomach.
      • Aids fat and weight loss also improves sexual health .
      • Keeps body cool : With great quantities of fiber, carbs and various vitamins and minerals, it helps to beat scorching heat with full of energy.

      Watch Video

      How to include sattu in your Diet

      Sattu can be consumed in many ways like sherbet , Sattu paratha, chilla , laddoos and litti . Also you can just munch on some handful of roasted chana for snacking.

      Variations to Sattu Drink : However, sattu sherbet is the easiest ways to consume it. In North East India , its common practice to consume sattu drink to get relief from scorching heat . This post shares namkeen sattu sherbet. If you wish to make meeth sherbat then mix sattu with lime juice , jaggery and water.

      Since sattu drink does not contain any harmful calories, no artificial sweeteners and is enriched with protein , fibers and many essential minerals and vitamins , it can do wonders to the overall health and well-being. Sattu sherbet can be consumed at any time of the day.

      How to make Sattu Drink

      Firstly , in a juicer , add sattu , cumin powder , chaat masala, dry mango powder , coriander leaves , mint leaves ,jaggery , water, lime juice, salt and ice cubes

      Sattu Drink Recipe | How to make Sattu Drink

      Secondly , blend everything until it combines well.

      Sattu Drink Recipe | How to make Sattu Drink

      Finally , pour to a glass jar and serve immediately.

      Sattu drink recipe

      Recipe

      sattu-juice
      4.67 from 6 votes

      Sattu Drink | Sattu Namkeen Sherbet

      Sattu drink is a delicious summer coolant made with roasted black chickpea flour flavoured with lime juice, spices and herbs.
      Prep Time2 minutes mins
      Cook Time0 minutes mins
      Total Time2 minutes mins
      Course: Drinks
      Cuisine: Bihar, Indian, North Indian
      Keyword: Diet, Drinks, Gluten Free, Healthy, Vegan, Weight Loss
      Servings: 2 People
      Calories: 87kcal
      Author: Muktha H S

      Ingredients

      • 3 tablespoon Sattu Powder / Sattu flour
      • ½ teaspoon Jeera / Cumin Powder
      • ½ teaspoon Dry Mango / Amachur Powder
      • ¼ teaspoon Jaggery powder or coconut sugar optional
      • ¼ teaspoon Green chillies chopped
      • ¼ teaspoon Chaat Masala optional
      • 1 tablespoon Lime Juice
      • 1 tablespoon coriander leaves chopped
      • 3-4 Mint leaves torn
      • Salt as required
      • 2 Cups water
      • Ice cubes as required

      Instructions

      • In a juicer , add sattu , cumin powder , chaat masala, dry mango powder , coriander leaves , mint leaves ,jaggery , water, lime juice, salt and ice cubes
      • Blend everything until it combines well.
      • Pour to a glass jar and serve immediately.

      Video

      Notes

      Sattu flour tends to settle down at the bottom of the glass , hence its advisable to blend in a juicer , so that constant stirring is not needed.

      Nutrition

      Calories: 87kcal

      Similar Recipes

      • aam-panna-summer-drink
        Aam Panna Recipe
      • mango-lassi
        Mango Lassi Recipe
      • virgin Mary
        Virgin Mary
      • Thandai
        Thandai

      Amla Thokku | how to make dry amla pickle

      Published : January 18, 2021 | Last Update on September 29, 2022 By Muktha

      amla thokku recipe

      Amla Thokku recipe with step by step images and video. Amla Thokku is a spicy sour cooked gooseberries dry pickle that can lasts for month. Thokku in South India basically refers to grated and cooked instant pickles.

      This version of dry amla thokku is moisture free and has a great shelf life when compared with other variants of Amla Thokku.

      Amla Thokku
      [feast_advanced_jump_to]

      About this recipe

      Amla Thokku is a popular recipe from South India . Amla aka Indian Gosseberries are either cut into small pieces or grated are cooked , mixed with spices and tempered . Though fewer versions of Amla Thokku recipe calls for cooking gosseberries in little water in a pan or pressure cooker. I prefer making it with sauting as it is moisture free and has more shelf life.

      Difference between Thokku and Pickle

      Pickle and thokku both are used as condiments, but prepared in a different way.

      Pickles are generally prepared with tangy vegetables like mango, lemon or even with ginger, garlic, green chillies and even with mixed vegetables. Basically, the vegetables are cut and mixed with lots of salt, chilli powder, and other spices like fenugreek powder, mustard powder, turmeric, which the pickle calls for. And left for several days, except for shaking one a day or so. As days go by, the vegetables tend to leave out water, shrink, at the same time absorb salt and all the spices added and be ready to be consumed. Longer the vegetables are soaked , the tender and tastier they become. Finally heated oil is drizzled on top of the pickle (with or without tempering). It doesn't involve much cooking other than heating the oil.

      Whereas, Thokku calls for some detailed sautéing work to be done. Oil is added, and the required ingredient is sauteed till it shrinks and is almost completely devoid of moisture . And it is ground into a fine or coarse paste with very less water if possible. The lesser the water added, the more the shelf life is. Also the shelf life is more if oil is used more. Thokku is a instant form of pickle which doesnt need any fermentation process or any soaking in brine solution as in case of pickles.

      These are the major differences between the two. But in this recipe of Amla THokku , I have not used water to make it completely dry and increasse the shelf life.

      Why Amla should be added into diet?

      • Amla juice can be taken as a powerful home remedy to treat cough and flu as well as mouth ulcers. Also helps in managing respiratory ailments like asthma. Also boosts immunity
      • Regular consumption of amla juice helps in reducing cholesterol levels. Amino acids and antioxidants aid in the overall functioning of heart.
      •  It is also helpful in managing diabetes better .
      • Alkaline nature of amla helps in clearing the system and strengthening the digestive system.
      • Supports liver function and flushes out toxins from the body. hence its used in detoxification .
      • Amla is very rich in Vitamin C , Iron and Calcium, it is truly a health treasure and hence can be taken as a complete nutritional drink.
      • Amino acids and protein present in amla help in hair growth, tackling hair fall and fortifying the root .
      • Amla juice helps in oxidizing melanin and closes skin pores ,fight marks, pigmentation and blemishes.

      More Amla recipes on blog are :

      • Amla Pickle
      • Beetroot Amla Detox
      • Amla Aloevera Detox
      • Coriander Amla Detox

      Watch Video

      How to make Amla Thokku | Dry Amla Pickle

      Dry roast mustard seeds, fenugreek seeds, fennel seeds , cumin seeds and Dry red chillies .

      Amla Thokku | how to make dry amla pickle

      When cumin and mustard seeds starts to pop , turn of the heat and transfer the roasted ingredients into a mixer jar.

      Amla Thokku | how to make dry amla pickle

      Blend/ Ground spices into a coarse powder.

      Amla Thokku | how to make dry amla pickle

      In a pan heat 1 teaspoon of sesame oil and add chopped amla / gooseberries pieces.

      Amla Thokku | how to make dry amla pickle

      Sauté and cook until moisture from gooseberries evaporates, changes its colour and turns soft. You can check the doneness by gently cutting gooseberries with spatula.

      Amla Thokku | how to make dry amla pickle

      Turn off the stove , let cool completely.

      Now transfer the cooked amla pieces into same mixer jar/ blender ,

      Amla Thokku | how to make dry amla pickle

      ground amla along with spice powder to get a coarse paste.

      Amla Thokku | how to make dry amla pickle

      For Seasoning

      In a pan , heat 2 tablespoon of sesame oil .

      Add mustard seeds, curry leaves , turmeric powder and hing/ asafoetida.

      Amla Thokku | how to make dry amla pickle

      Now tip in ground coarse amla paste and mix along with seasoning and allow to cook in a low heat.

      Amla Thokku | how to make dry amla pickle

      Add salt and jaggery powder ,mix well everything.

      Amla Thokku | how to make dry amla pickle

      When it changes colour, turn off the flame.

      Pour 2 tablespoon of Hot sesame oil on it.

      Amla Thokku | how to make dry amla pickle

      When it cools down completely, store in an glass jar and use as required. Shelf life upto 6 months when refrigerated.

      nellikai thokku

      Recipe

      amla thokku recipe
      No ratings yet

      Amla Thokku | Dry Amla Pickle

      Amla Thokku is a spicy sour cooked gooseberriries dry pickle served as an accompaniment with any South Indian Meal
      Prep Time10 minutes mins
      Cook Time12 minutes mins
      Total Time22 minutes mins
      Course: Accompaniment
      Cuisine: Andhra, Karnataka, South India, Tamil Nadu
      Keyword: DIY, Pickles, Vegan, Vegetarian
      Servings: 200 grams
      Calories: 37kcal
      Author: Muktha H S

      Ingredients

      • 1 Cup Amla / Indian Gooseberries chopped
      • 1 teaspoon Mustard Seeds
      • ¼ teaspoon Fenugreek Seeds
      • ½ teaspoon Fennel Seeds optional
      • ¾ teaspoon Jeera / Cumin Seeds
      • 8 Dry Red Chillies
      • 1 teaspoon Sesame Oil
      • For Seasoning
      • 4 tablespoon sesame oil divided into 2 tablespoon each
      • ½ teaspoon Mustard Seeds
      • 2 springs Curry leaves
      • ¼ teaspoon Turmeric Powder
      • ¼ teaspoon Hing
      • Salt to taste
      • ½ teaspoon Jaggeru powder, optional

      Instructions

      • Dry roast mustard seeds, fenugreek seeds, fennel seeds , cumin seeds and Dry red chillies .
      • When cumin and mustard seeds starts to pop , turn of the heat and transfer the roasted ingredients into a mixer jar.
      • Blend/ Ground spices into a coarse powder.
      • In a pan heat 1 teaspoon of sesame oil and add chopped amla / gooseberries pieces. Sauté and cook until moisture from gooseberries evaporates, changes its colour and turns soft. You can check the doneness by gently cutting gooseberries with spatula.
      • Turn off the stove , let cool completely.
      • Now transfer the cooked amla pieces into same mixer jar/ blender , ground amla along with spice powder to get a coarse paste.

      For Seasoning

      • In a pan , heat 2 tablespoon of sesame oil .
      • Add mustard seeds, curry leaves , turmeric powder and hing/ asafoetida.
      • Now tip in ground coarse amla paste and mix along with seasoning and allow to cook in a low heat.
      • Add salt and jaggery powder ,mix well everything.
      • When it changes colour, turnof the flame. Pour 2 tablespoon of Hot sesame oil on it.
      • Mix well everything.
      • When it cools down completely, store in an glass jar and use as required. Shelf life upto 6 months when refrigerated.

      Video

      Nutrition

      Serving: 20grams | Calories: 37kcal

      Huggi Anna | how to make Huggi

      Published : January 13, 2021 | Last Update on October 7, 2022 By Muktha

      huggi anna recipe

      Huggi Anna Recipe with step by step photos and video. A spicy and savoury dish prepared with moongdal , rice and spices served along with coconut chutney and tamarind gojju.

      Huggi Anna
      [feast_advanced_jump_to]

      About this recipe

      Huggi anna is a native of Karnataka basically prepared with moongdal and rice. There are both sweet and savoury versions of huggi anna.

      Savoury version of huggi anna is similar to Khara Pongal / Ven Pongal , a porridge consistency moongdal and rice dish with spices , similar to Khichdi .

      But this style of Huggi anna recipe is unique, it's made only in few remote villages of Karnataka during Makar Sankranti festival. Unlike regular Huggi Anna this recipe has texture similar to overcooked mushy rice usually served with coconut chutney and tamarind gojju.

      Also for variation , fresh hyacinth bean / avarekalu is also added to this huggi anna along with Moong dal.

      Watch Video

      Similar recipes on blog

      • Sweet Pongal | Sihi Pongal
      • Khara Pongal
      • Moongdal Rice
      • Pumpkin Khichdi
      • Moongdal Payasa | Hesarubelle Payasa
      • Moongdal Barfi
      Huggi Anna

      Step by step directions to make huggi

      Rinse well rice and moongdal 3-4 times .

      Huggi Anna | how to make Huggi

      Soak moongdal and rice together for 15-20 minutes , drain water completely and set aside.

      Huggi Anna | how to make Huggi

      In a mixer jar /blender , add fresh coconut , cumin seeds, black peppercorns, green chillies, ginger and turmeric powder.

      Huggi Anna | how to make Huggi

      Blend to a semi fine paste without adding water.

      Huggi Anna | how to make Huggi

      In a pressure cooker , heat 2 tablespoon of oil and 1 tablespoon of ghee

      Add mustard seeds when it starts to splutter , add curry leaves , dry red chillies and pinch of hing.

      Huggi Anna | how to make Huggi

      Now tip in ground masala paste and saute for 1-2 minutes.

      Huggi Anna | how to make Huggi

      Add soaked and drained , rice and moongdal , mix well everything along with masala paste.

      Huggi Anna | how to make Huggi

      Now add 2.5 Cup of hot water , ½ Cup of Tamarind juice extract and stir well.

      Huggi Anna | how to make Huggi

      Add salt to taste.

      Huggi Anna | how to make Huggi

      Close pressure cooker lid and pressure cook for 1-2 whistles on medium heat.

      Huggi Anna | how to make Huggi

      Allow pressure to settle down on its own , completely.

      Remove lid , mix well everything

      Huggi Anna | how to make Huggi

      And serve with coconut chutney or Tamarind gojju.

      Huggi Anna

      Recipe

      huggi anna recipe
      5 from 1 vote

      Huggi Anna | Karnataka Style Savoury Moongdal Rice

      A spicy and savoury dish prepared with moongdal , rice and spices served along with coconut chutney and tamarind gojju.
      Prep Time5 minutes mins
      Cook Time20 minutes mins
      Soaking Time20 minutes mins
      Total Time45 minutes mins
      Course: Breakfast
      Cuisine: Karnataka, South India
      Keyword: Bachelor's Cooking, Festivals, Lentils, Sankranti
      Servings: 4 People
      Calories: 398kcal
      Author: Muktha H S

      Ingredients

      • 1 Cup Rice
      • ½ Cup Moong dal / split green gram
      • ½ Cup Fresh Coconut grated
      • ½ tablespoon Jeera / Cumin Seeds Cumin Seeds
      • 1 teaspoon Black Peppercorns
      • 3-4 Green chillies medium spice variant
      • ½ inch Ginger
      • 2 tablespoon Coriander leaves
      • ¼ teaspoon Turmeric Powder
      • ⅛ teaspoon Hing / Asafoetida
      • 2 tablespoon Cooking Oil
      • 1 tablespoon Ghee / Clarified Butter
      • ¼ teaspoon Mustard Seeds
      • 1 Sprig Curry Leaves
      • 2 Dry Red Chillies Broken
      • 2.5 Cups of water
      • ½ Cup Tamarind Juice extract from 1 lemon size tamarind pulp.
      • Salt to taste

      Instructions

      • Rinse well rice and moongdal 3-4 times .
      • Soak moongdal and rice together for 15-20 minutes , drain water completely and set aside.
      • In a mixer jar /blender , add fresh coconut , cumin seeds, black peppercorns , green chillies, ginger and turmeric powder.
      • Blend to a semi fine paste without adding water.
      • In a pressure cooker , heat 2 tablespoon of oil and 1 tablespoon of ghee
      • Add mustard seeds when it starts to splutter , add curry leaves , dry red chillies and pinch of hing.
      • Now tip in ground masala paste and saute for 1-2 minutes.
      • Add soaked and drained , rice and moongdal , mix well everything along with masala paste.
      • Now add 2.5 Cup of hot water , ½ Cup of Tamarind juice extract and stir well.
      • Add salt to taste.
      • Close pressure cooker lid and pressure cook for 1-2 whistles on medium heat.
      • Allow pressure to settle down on its own , completely.
      • Remove lid , mix well everything and serve with coconut chutney or Tamarind gojju.

      Video

      Nutrition

      Calories: 398kcal

      Ragi Almond Cookies with Jaggery

      Published : January 5, 2021 | Last Update on September 25, 2022 By Muktha

      ragi-cookies

      Ragi Almond Butter cookies are easy to make gluten free crunchy cookies made with finger millet flour , almond meal , butter and organic jaggery .

      If you are a cookie lover then don't forget to try out my whole wheat biscuits , peanut butter cookies and crinkle cookies recipes, I'm sure you'll love it as much as I do.

      Ragi-almond-cookies
      [feast_advanced_jump_to]

      About this recipe

      Ragi Almond Butter cookies are easy to make gluten free crunchy cookies made with finger millet flour , almond meal , butter and organic jaggery . Ragi cookies are not only healthy but are full of nutrition and is one of the healthiest choice for snacking among all age groups.

      Winters are perfect for baking also with holiday season and Christmas vibes around , I always get tempted to bake goodies in this season. The Nutritionist in me always awakens me to eat healthy and right but the foodie in me craves for all kind of tasty food .

      Without killing myself , I make sure to enjoy all kind of food in my diet without any repent . So for this season , its finger millet cookies . Millets are used at the most during winters , as it helps to keep you warm from within .

      Also good amount of fat in cookies from almonds and butter along with natural organic jaggery not only keeps you warm but also delivers you with essential nutrients.

      Ragi Almond Cookies with Jaggery

      Be a foodie or a health freak ,without even a single thought you can adapt this recipe into your diet. You'll definitely love this .

      This Ragi Almond Cookies are just mildly sweet because I curated this recipe mainly for healthy snacking options in diabetics diet . If you wish it to be little more sweetner , you can add upto ½ cup of powdered jaggery instead of ⅓ cup . Also mild sweetness from almonds adds on to this cookies. So, be careful while adding powdered jaggery . You may also need to check the sweetness of powdered jaggery you are using to make this cookies.

      As I'm from Mysore, Karnataka , India , I have grown up eating Ragi / finger millet since childhood . Ragi Roti, Ragi Mudde and Ragi ambli are like everday recipes at home. It's our staple food because it is one of the main crop in Karnataka .

      If you are interested, then check my favourite recipes like Ragi coconut milk pudding , Ragi banana cake and Ragi Smoothie.

      Health Benefits of Ragi

      Ragi aka Finger Millets are very rich in calcium and it supplies complex carbohydrates and high dietary fiber when compared to other grains like wheat, rice, maize or barley.

      Ragi is powerhouse of nutrients and these tiny little cereals have lot to deliver when it comes to calcium and iron.

      Finger millets / Nachni / Ragi is one of the most nutritious cereal. Ragi is very rich in calcium, in fact, no other cereal is even near to ragi with respect to calcium content. Regular consumption of finger millet is good for bone health. And keeps diseases such as osteoporosis at bay and could reduce risk of fracture.

      Ragi is rich in polyphenols , these nutrients help control blood sugar levels and hyperglycemic tendency found in diabetics. Hence Ragi is considered has a wonder grain for diabetics.

      It is also rich in fiber and has lower glycemic response , hence helps in controlling blood sugar levels. It also battles anaemia, reduces the risk of stroke, boosts lactation, increases bone strength, helps in digestion, reduces cholesterol and makes excellent food for baby . Ragi is also gluten free and hence good for people who are allergic to gluten.

      This super grain has umpteen benefits when comes to health , so start adding to your diet. Also if you are suffering from sleep disorders and mood swings , this super grain helps you to overcome this. Ragi contains essential amino acid known as Tryptophan , which goes into making serotonin .

      What is Serotonin ? This a chemical in the brain that can affect mood and sleep. Eating foods that contain the essential amino acid tryptophan can help the body to produce more serotonin. Tryptophan, which goes into making serotonin, is commonly found in foods that contains protein and humble ragi falls into this category. Hence its called a super food as this tiny grains is no less than a wonder grain.

      Ingredients , Tips and Variations

      Flour : I have used only Ragi flour in this recipe ,if you wish you can also add oats meal and wheat flour combination along with Ragi Flour.

      Dry Nuts : You can add cashew / walnut along with almond meal.

      Sweetner : Organic Jaggery is used in this recipe , You can add either sugar or coconut sugar for variation. These cookie are mildly sweetned , can add more sweetner if required.

      Milk : Depending on quality of flour , incase dough is dry and becomes difficult to bind , then you may need to add 2-3 tablespoon of milk to make dough and roll into cookie . As I always use homemade Ragi flour , fats from almond flour and butter was enough to bind dough and shape into cookies.

      Toppings : Can top with choc chips and desired dry fruits and nuts on cookies while baking.

      Ragi Almond Cookies with Jaggery

      Watch Video

      How to make Ragi Almond Cookies

      In a pan , dry roast ragi flour on medium heat for 4 to 5 minutes. Allow it to cool down completely.

      Ragi Almond Cookies with Jaggery

      Add ⅓ cup of almonds in a blender and ground to fine powder to get about ¾ cup of almond meal. Set aside till use.

      Ragi Almond Cookies with Jaggery

      In a mixing bowl , add ½ cup softened butter and ⅓ cup ( can add upto ½Cup) of powdered jaggery and beat well till smooth and creamy.

      Ragi Almond Cookies with Jaggery

      Now add roasted ragi flour , almond meal , baking powder , salt and cardamom powder .

      Rub with hands to get bread crumbs texture and then mix well well everything to form cookie dough. In case if its too dry and can’t bind into dough , then you can add 2-3 tablespoon of milk.

      Ragi Almond Cookies with Jaggery

      Mix well everything, cover with a cling wrap and refrigerate for 20 minutes or more.

      Ragi Almond Cookies with Jaggery

      Whilist preheat oven to 180 deg Celsius , prepare cookie tray and set aside.

      After 30 minutes, scoop  around 1.5 tablespoon of cookie dough , shape into cookies and arrange on a tray.

      Ragi Almond Cookies with Jaggery

      Bake for about 15-18 minutes at 180 deg Celsius in oven.

      Ragi Almond Cookies with Jaggery

      Transfer cookies on to wire rack , allow it to cool completely.

      Ragi Almond Cookies with Jaggery

      When cookies cools down completely , store in an air tight jars and use a required.

      Recipe

      ragi-cookies
      5 from 2 votes

      Ragi Almond Cookies

      Ragi Almond Butter cookies are easy to make gluten free crunchy cookies made with finger millet flour , almond meal , butter and organic jaggery .
      Prep Time10 minutes mins
      Cook Time18 minutes mins
      Resting Time20 minutes mins
      Total Time48 minutes mins
      Course: Snack
      Cuisine: Fusion, Indian
      Keyword: Baking, Cookies, Diabetic friendly, Diet, Eggless, Gluten Free, Healthy, Kids Snacks
      Servings: 15 Makes
      Calories: 132kcal
      Author: Muktha H S

      Ingredients

      • ¾ Cup Ragi Flour
      • ⅓ Cup Almonds powdered
      • ½ Cup Butter softened
      • ⅓ Cup Jaggery powdered
      • ½ teaspoon Baking Powder
      • ⅛ teaspoon Salt
      • ½ teaspoon Cardamom Powder
      • 2-3 tablespoon Milk if required

      Instructions

      • In a pan , dry roast ragi flour on medium heat for 4 to 5 minutes. Allow it to cool down completely.
      • Add ⅓ cup of almonds in a blender and ground to fine powder to get about ¾ cup of almond meal. Set aside till use.
      • In a mixing bowl , add ½ cup softened butter and ⅓ cup ( can add upto ½Cup) of powdered jaggery and beat well till smooth and creamy.
      • Now add roasted ragi flour , almond meal , baking powder , salt and cardamom powder .
      • Rub with hands to get bread crumbs texture and then mix well well everything to form cookie dough. In case if its too dry and can’t bind into dough , then you can add 2-3 tablespoon of milk.
      • Mix well everything, cover with a cling wrap and refrigerate for 20 minutes or more.
      • Whilist preheat oven to 180 deg Celsius , prepare cookie tray and set aside.
      • After 30 minutes, scoop around 1.5 tablespoon of cookie dough , shape into cookies and arrange on a tray.
      • Bake for about 15-18 minutes at 180 deg Celsius in oven.
      • Transfer cookies on to wire rack , allow it to cool completely.
      • When cookies cools down completely , store in an air tight jars and use a required.

      Video

      Nutrition

      Calories: 132kcal

      More Ragi Recipes

      Few more regular Ragi recipes which I usually prepare at home are Ragi Mudde / Ragi Balls , Ragi Roti , Ragi Dose , Ragi Milk , Ragi Malt , Ragi Ambli , Ragi Idli , Ragi Soup and Ragi Banana Smoothie

      • Ragi_ambli_recipe
        Salted Ragi Ambli
      • ragi-soup-with vegetables
        Ragi Soup
      • ragi banana smoothie
        Ragi Banana Smoothie | how to make ragi smoothie
      • Instant Ragi Idli
        Instant Ragi Idli Recipe
      • « Previous Page
      • 1
      • 2
      • 3
      • 4
      • …
      • 10
      • Next Page »

      Hey ! Nice To Meet You

      Muktha-about-me

      Hi ! I'm Muktha , Blogger , Nutrition Advisor & Recipe Creator behind Palate's Desire . I share tried & tested everyday meal recipes for healthy living and occasional indulgence. Palate's Desire helps even a novice to cook like a pro. Happy Cooking...! Read More about me →

      Stay Connected

      • Instagram

      Baking Recipes

      • coconut-cookie-sandwich
        Cookie Sandwich
      • peanut butter cookies
        Peanut Butter Cookies
      • crinkle-cookies
        Chocolate Crinkle Cookies
      • crispy fried chicken
        Fried Chicken Recipe | Crispy Fired Chicken
      • Karela-chips-with-coffee
        Karela Chips Recipe | Bittergourd Chips
      • cup cake recipe
        Eggless Cup Cake Recipe

      Baking Recipes→

      Popular Recipes

      • bisi bele bath powder
        Bisi bele bath powder recipe - how to make
      • pineapple-salsa
        Pineapple Salsa - How to make spicy salsa
      • dry gobi manchurian recipe
        Gobi Manchurian Dry | Cauliflower Manchurian
      • okra-peanut-stir-fry
        Moongphali Bhindi | Peanut Okra Stir fry
      • Mangalore Fish Curry
        Fish Curry | Meen Gassi - Mangalore Style
      • moringa-tea-to-burn-fat
        Moringa Tea Recipe | Sip everday to Burn Fat easily

      Rice Recipes

      • bellada-anna-recipe
        Bellada Anna - Gudanna
      • Rice Varities
        Masala Lemon Rice | Nimbehuli Chitranna Recipe
      • mavinakayi-chitranna
        Mavinakayi Chitranna | Raw Mango Rice
      • Donne-Biryani-Recipe
        Donne Biryani Recipe
      • chicken-pulao
        Chicken Pulao Recipe
      • vegetable fried rice
        Vegetable Fried Rice | Indo-Chinese Fried Rice Recipe
      • vegetable dum biryani
        Vegetable Dum Biryani Recipe
      • Jeera Rice
        Jeera Rice

      Egg Recipes

      • scrambled mushroom eggs
        Scrambled Egg with Mushroom
      • spanish-potato-omelette-cut-into-wedges
        Spanish Potato Omelette
      • scrambled Egg Curry
        Scrambled Egg Curry
      • kerala egg curry
        Kerala Egg Curry | Easy Egg Recipes
      • shakshuka recipe
        Shakshuka | How to make Shakshuka recipe
      • Kolhapuri Egg Masala
        Kolhapuri Egg Masala
      • Mumbai Style Egg Burji
        Mumbai Style Egg Bhurji
      • onion egg bhurji
        Onion Egg Bhurji

      Sweets & Desserts

      • bhapa-doi-recipe
        Bhapa Doi
      • Ragi-coconut-milk-pudding-recipe
        Ragi Coconut Milk Pudding
      • easy-shrikhand-recipe-photo
        Shrikhand
      • Thandai-kulfi
        Thandai Kulfi Recipe
      • eggless chocolate mousse
        Eggless Chocolate Mousse
      • Besan halwa recipe
        Besan Halwa Recipe
      • kayi -hollige-obbattu
        Kayi Holige Recipe
      • mango-phirni-topped-with-pistachios-rose-petals
        Mango Phirni Recipe

      Footer

      ↑ back to top

      ABOUT

      • ABOUT MUKTHA
      • MEDIA KIT

      STAY CONNECTED

      • SIGN UP ! FOR E MAILS
      • CONTACT ME

      POLICIES

      • PRIVACY POLICY
      • TERMS & CONDITIONS

      COPYRIGHT © 2025 PALATE'S DESIRE

      Rate This Recipe

      Your vote:


      A rating is required
      A name is required
      An email is required