Palate's Desire

  • Home
  • Recipe Index
  • Diet Recipes
  • Videos
  • Work with me
  • Subscribe
menu icon
go to homepage
  • Home
  • Recipe Index
  • Diet Recipes
  • Videos
  • Contact
    • Facebook
    • Instagram
    • Pinterest
    • Twitter
    • YouTube
  • subscribe
    search icon
    Homepage link
    • Home
    • Recipe Index
    • Diet Recipes
    • Videos
    • Contact
    • Facebook
    • Instagram
    • Pinterest
    • Twitter
    • YouTube
  • ×

    Baingan Biryani

    Published : April 8, 2020 | Last Update on September 15, 2022 By Muktha

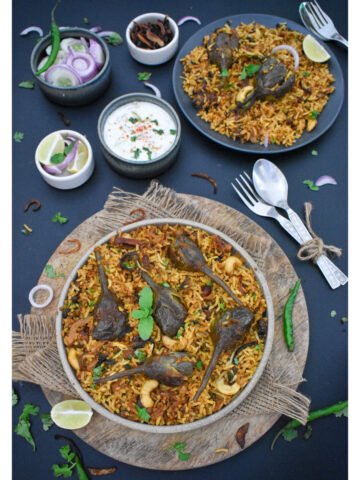
    baingan-biryani-burani-raita

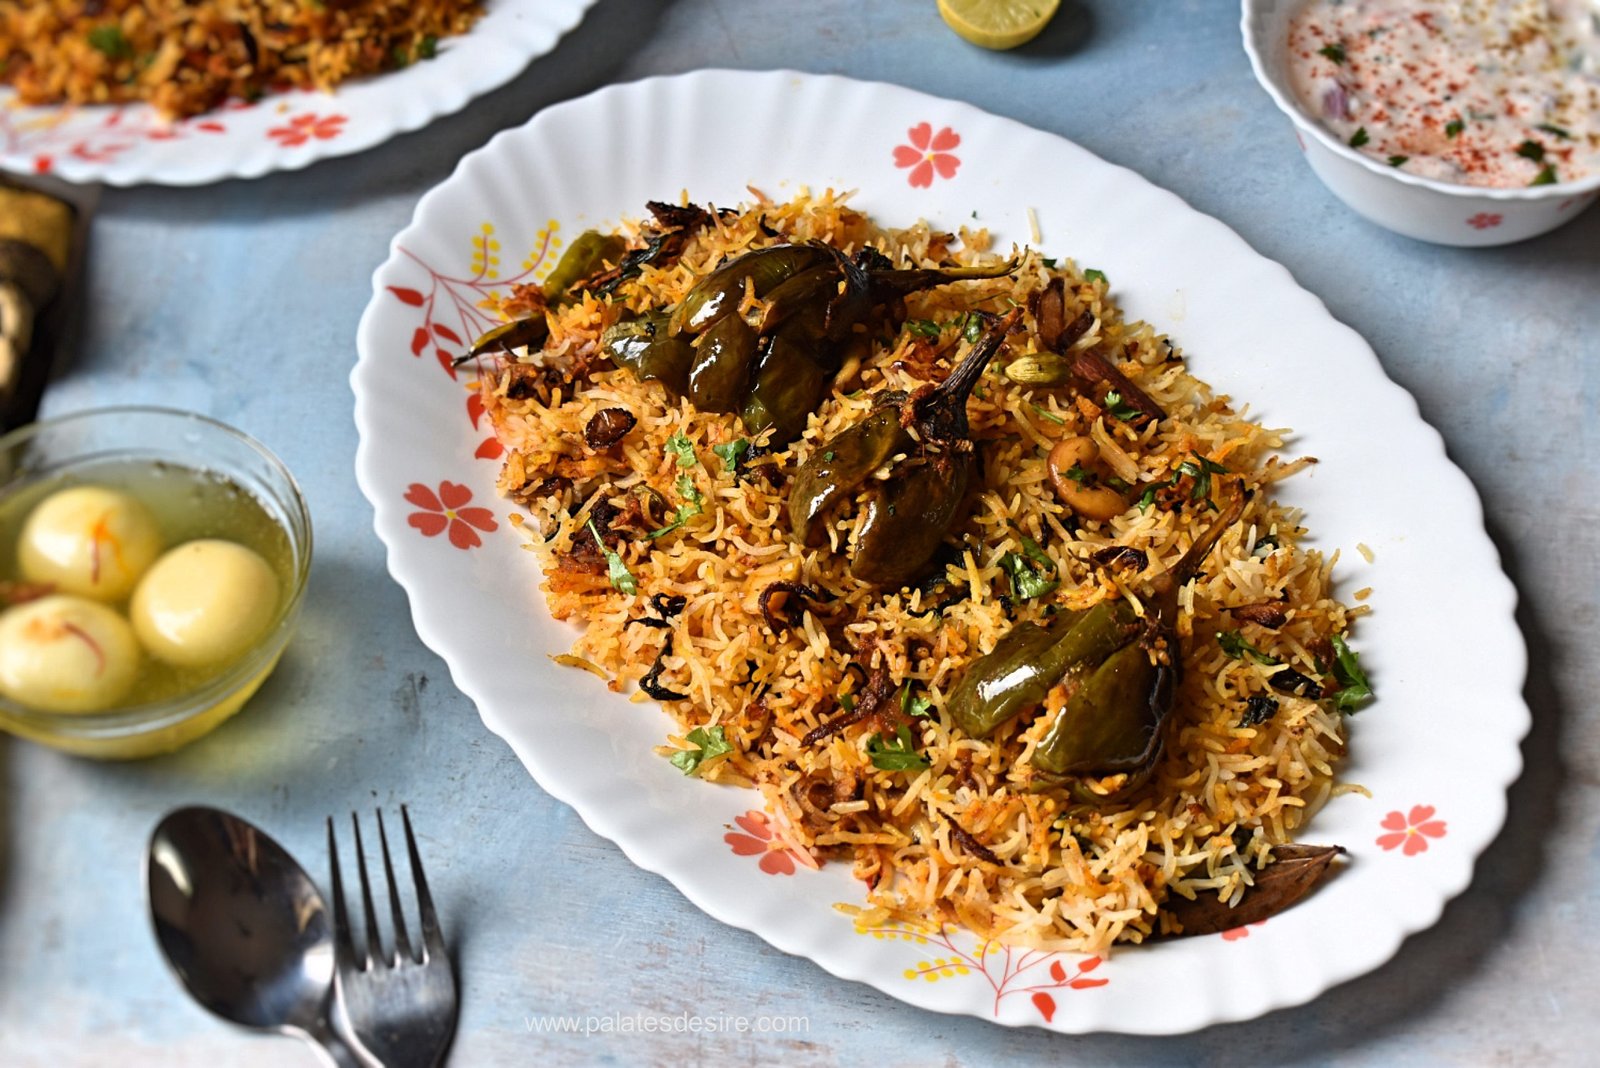
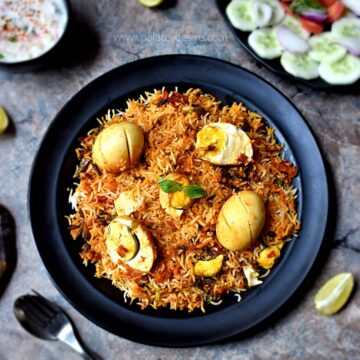
    Baingan Biryani or Brinjal Biryani is also known as guthi vankaya biryani in Telugu is speciality biryani from Andra Cuisine.

    This biryani rice is similar to any other biryani but the stuffed eggplant in this biryani is something that asks you to eat more and more.

    If you are a biryani lover, then this recipe is a must try recipe for you. Trust me , you will definitely love this even if you are a brinjal / egg plant hater. Give it a try , you'll never be disappointed.

    If you are Pulao / Biryani lover just like me then you must definitely try out few of my top favourite recipes like Chettinad Mushroom Pulao , Ambur Star Biryani , Chickpea Pilaf , Chicken Pulao and Donne BIryani

    baingan-biryani-with-lemon-raita
    [feast_advanced_jump_to]

    About this recipe

    Baingan Biryani or Brinjal Biryani is also known as guthi vankaya biryani in Telugu language is speciality biryani from Andra Cuisine.

    Freshly blend spices are stuffed inside Egg plants , cooked along with spices , layered with rice and cooked on dum .

    Just like any other biryani , it takes good 1 hour to make this tasty biryani but trust me, its all worth for the tasty biryani.

    With lot many ingredients list and many steps , it may look daunting but worry not , it's pretty easy to make like anyother biryani .

    You must try this baingan biryani because it is

    • Delicious
    • Feast to taste buds
    • Vegetarian version of Yummy Biryani
    • Unique and Tasty

    Ingredients

    List of Ingredients in the recipe card mya daunt you , worry not . Like most of the Biryani , It's the whole spices that makes the list long . Check the list of ingredients and make this awesome biryani over the weekend.

    For stuffing the eggplant

    Egg Plants / Baingan - Always choose fresh eggplant , which are oval in shape, green in colour with purple lines throughout . Always use small or medium size brinjals with less or no seeds inside.

    Barista / fried onions - I always keep fried onions ( barista) handy while making Biryani. This recipe includes blending barista with spices and are stuffed inside Egg plants . This imparts lot of flavor , if Barista is not available then freshly fry some onions until golden brown and use in the recipe.

    Groundnuts/ Peanuts - I use dry roasted and de skinned peanuts to stuff inside eggplants. It gives nutty flavour .

    Garlic - raw garlic inside stuff adds lots of flavour in this biryani just like Baingan Bharta.

    Spices - Need some spice powders like Turmeric Powder , Red Chilli powder , Coriander Powder ,Garam masala powder , Dry Mango Powder and Salt to taste.

    For cooking the rice

    Rice – Use the premium quality basmati rice to make this biryani as it tastes great . If not available , you can make this with any less starch variety of rice too. But just be sure to use the correct liquid ratio to cook rice.

    Spices – You will need regular whole spices like bay leaf , cloves, cinnamon, black cardamom, green cardamom , black peppercorn , star anise and fennel seeds. If any of the mentioned ingredient is not available then feel free to skip .

    Others- Mint leaves , few drops of oil and salt to taste along with water to cook rice.

    To make Baingan Biryani gravy

    Ghee and Oil – I have cooked this biryani in both vegetable oil and ghee. You can also cook it in any flavourless oil or clarified butter completely.

    Fresh Produce – You will need fresh ingredients like onion, tomatoes, green chilli, ginger paste, garlic paste, lime juice, mint, and coriander leaves.

    Curds / Yogurt - Use fresh and thick yogurt to make this biryani . Alternatively you can also use store bought set curd or plain flavorless greek yogurt in this recipe.

    Spice Powders - You need to add basic spice powders like red chilli powder and coriander powder . Depending on your taste you can either increasse or decressse the amount used in the recipe.

    Nothing can taste without Salt , add it as per your taste.

    Optional add on's

    Cashews , Raisins and Biryani Masala Powder to temper on Biryani . Though it's optional , I recommend to make it as it elevates the taste of guthi vankaya biryani.

    Top Tip

    Always use medium sized brinjals to make this biryani as it tastes good. If small brinjals are used , they cook very fast and get torn easily while cooking. If large brinjals are used , it has seeds and doesn't give good taste.

    Watch Video

    How to make Brinjal Biryani Recipe

    To cook biryani rice

    Rinse rice for 3-4 times , till water runs clear and soak rice in water for minimum 30 minutes.

    Baingan Biryani

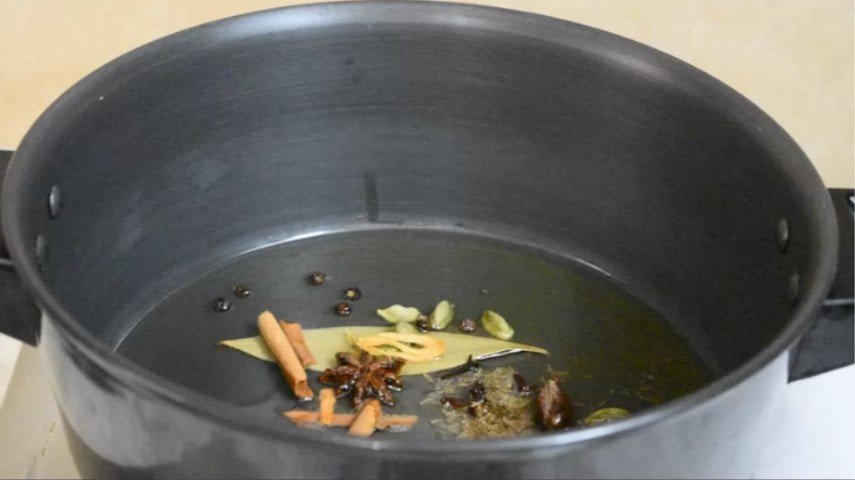
    Add ½ teaspoon of oil , add whole spices , bay leaf , cinnamon stick , cloves , cardamom and  mint leaves , saute till fragrant .

    Baingan Biryani

    Add 8-10 cups of water and bring it to boil .

    Baingan Biryani

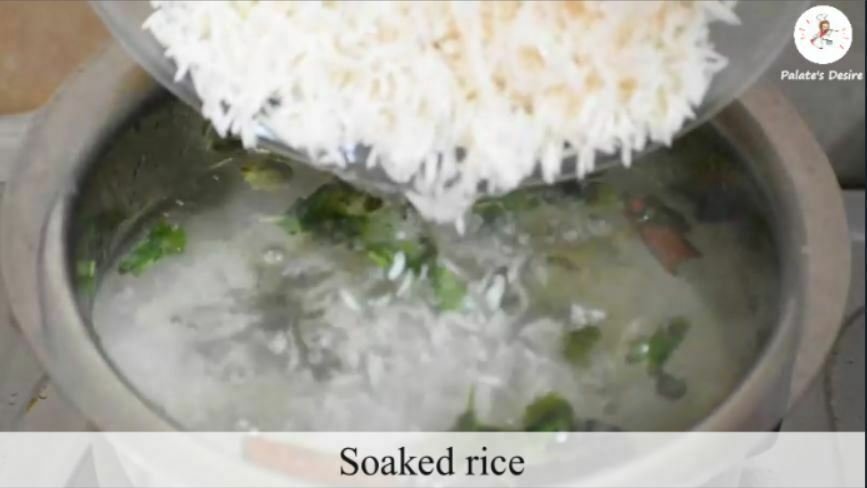
    Drain water from soaked rice and add rice to boiling water.

    Baingan Biryani

    Cook rice for about 7-8 minutes , till its 90 % cooked.

    Baingan Biryani

    Drain water completely.

    Baingan Biryani

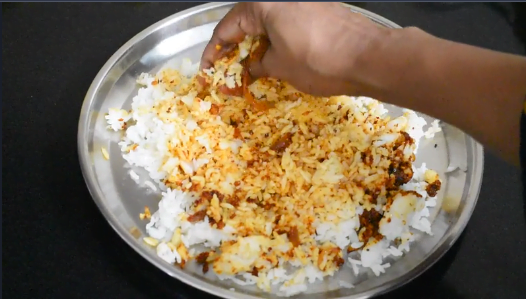
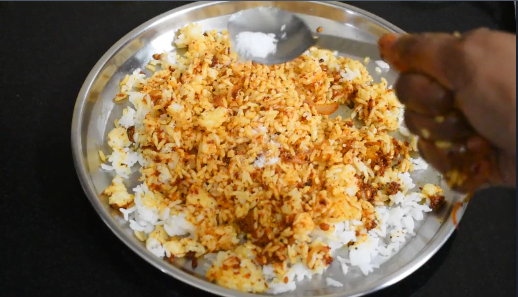
    Spread rice on a wide plate , sprinkle some salt and set aside.

    Baingan Biryani

    To stuff Baingan ( Egg plants)

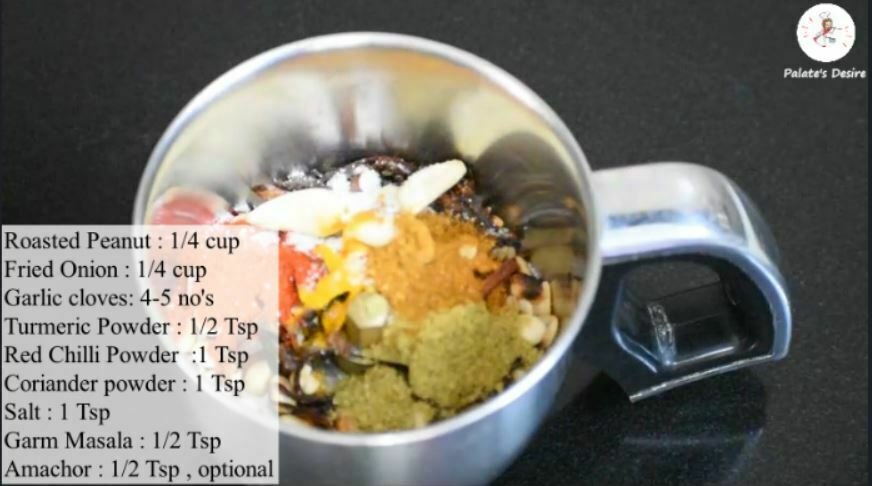
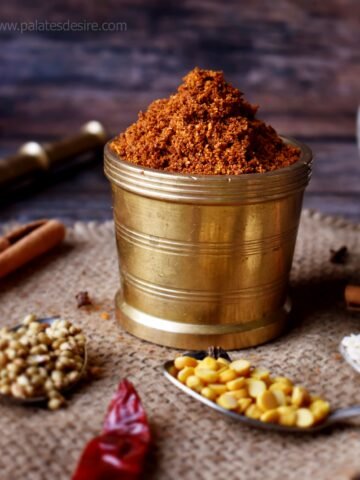
    In a mixer / blender add roasted peanuts , garlic , red chilli powder , coriander powder , garam masala , amachur powder , turmeric powder and salt.

    Baingan Biryani

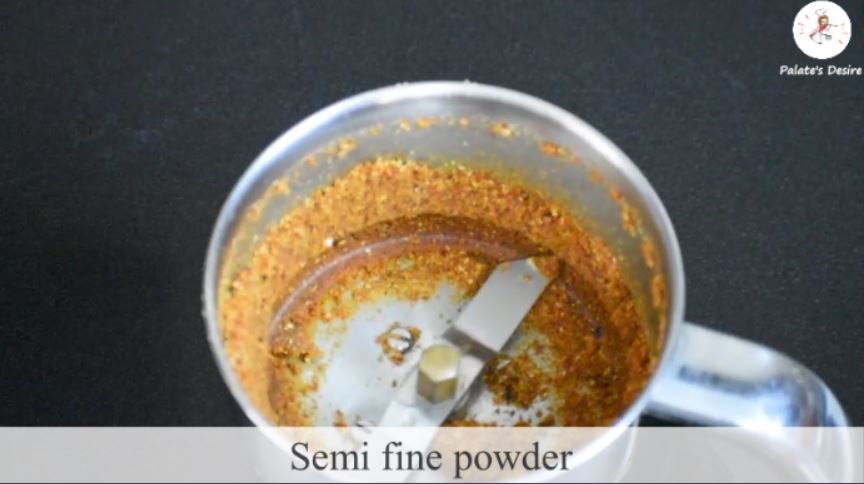
    Blend to semi fine powder, set aside.

    Baingan Biryani

    Wash and wipe small brinjal / eggplant . Remove thorns if any and can trim stalks , if needed.

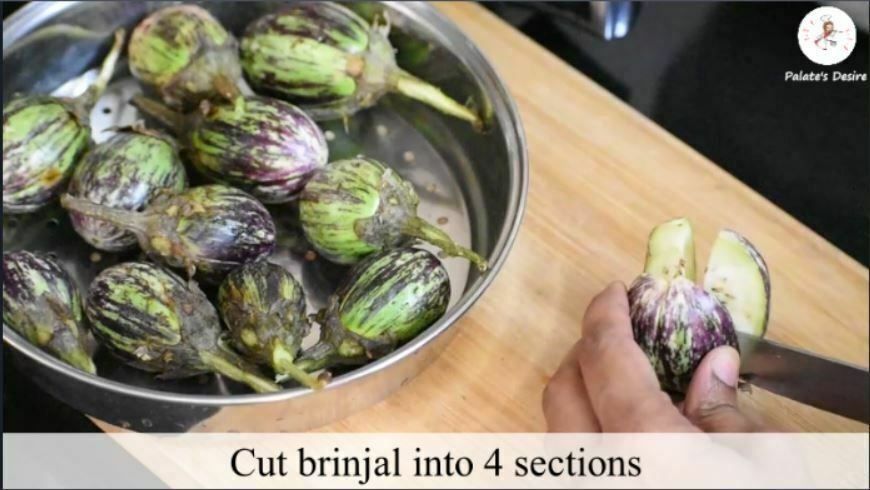
    Take each brinjal and slit it in four sides without cutting it entirely. Make sure that stalks from top hold brinjals / egg plant . Pull the cut sides outwards and check for worms if any.

    Baingan Biryani

    Now stuff each brinjal / egg plant with this masala powder and set aside.

    Baingan Biryani

    To make Baingan Biryani

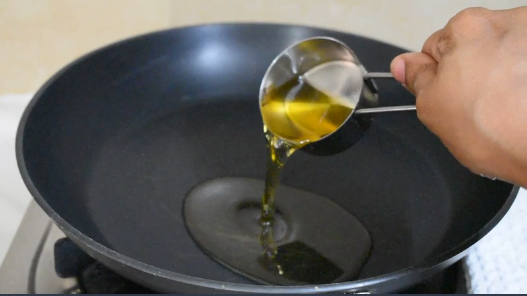
    In a thick bottom pan , heat oil and ghee.

    Baingan Biryani

    Add whole spices and saute till fragrant.

    Baingan Biryani

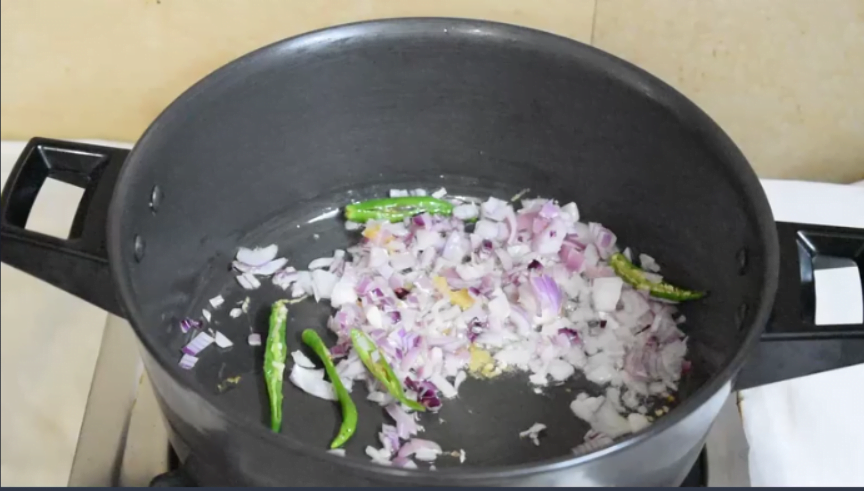
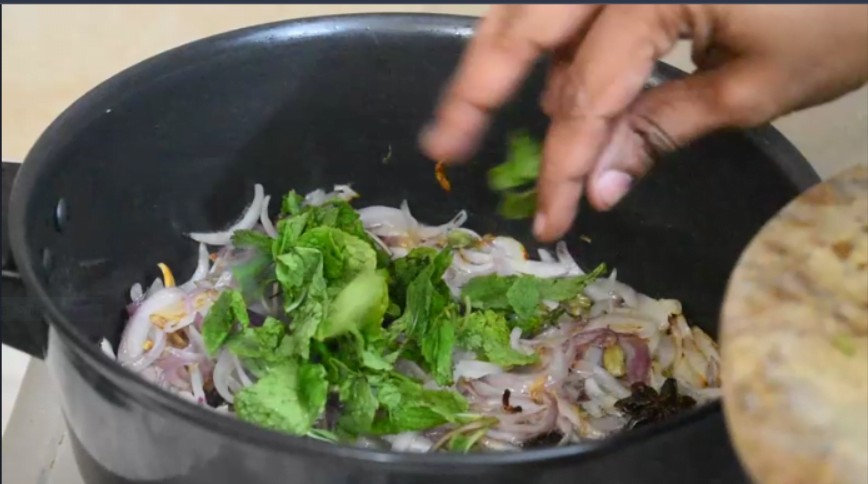
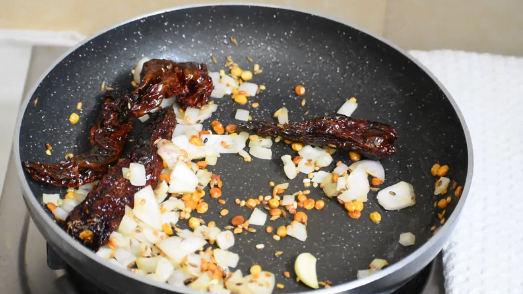
    Now add slit green chilies and onions .

    Baingan Biryani

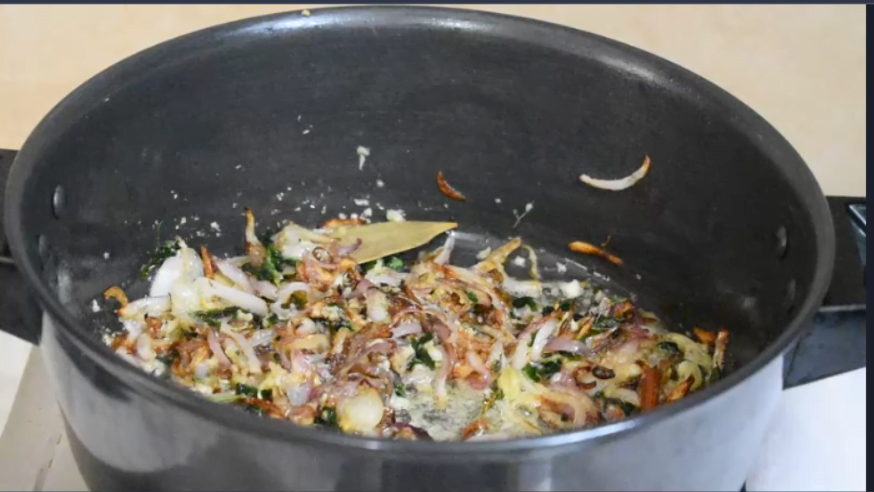
    Add freshly ground ginger garlic paste and saute till raw smell goes off completely.

    Baingan Biryani

    Add mint leaves and fry well , till onion changes color and mint leaves are well fried.

    Baingan Biryani

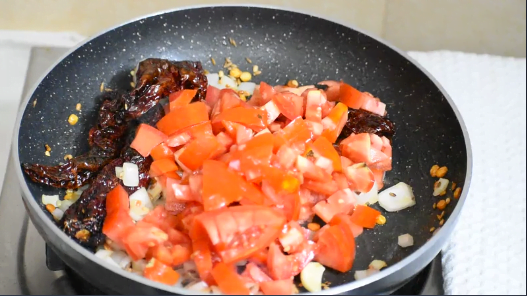
    Now add tomatoes , saute well and cook till tomatoes turns pulpy.

    Baingan Biryani

    Add turmeric powder , chili powder , coriander powder and biryani masala powder, mix well.

    Baingan Biryani

    Keeping flame on low heat , Add ½ cup of thick curds and mix well completely till specks of oil is seen.

    Baingan Biryani

    Add salt and mix well .

    Baingan Biryani

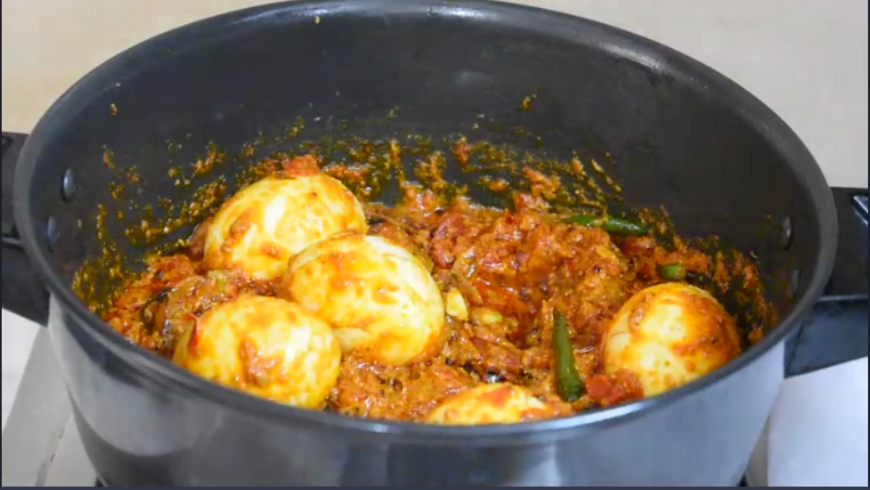
    When oil starts to release from corners add stuffed brinjal into gravy.

    Baingan Biryani

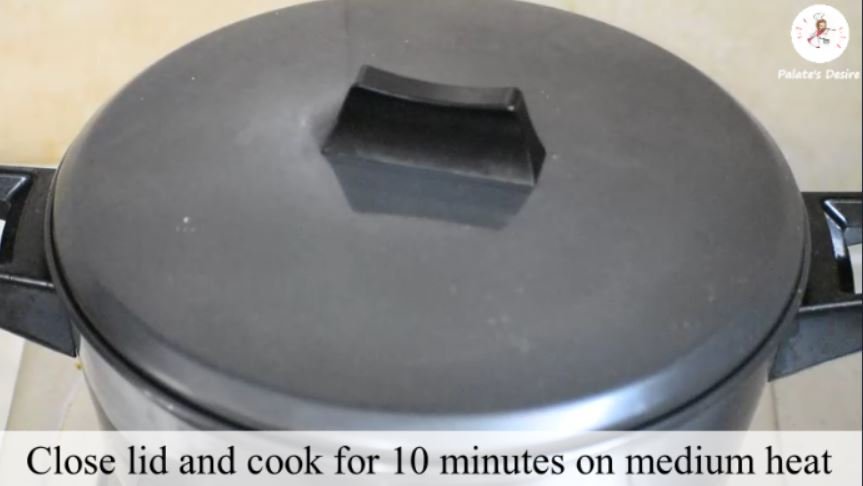
    Gently saute ,such that masala coats brinjal . Close lid and cook on medium heat for about 8-10 minutes.

    Baingan Biryani

    Open lid, you can see oil floating in corners.

    Now gently flip each brinjal to other side and keep the flame on simmer.

    Baingan Biryani

    Dum Cook Brinjal Biryani

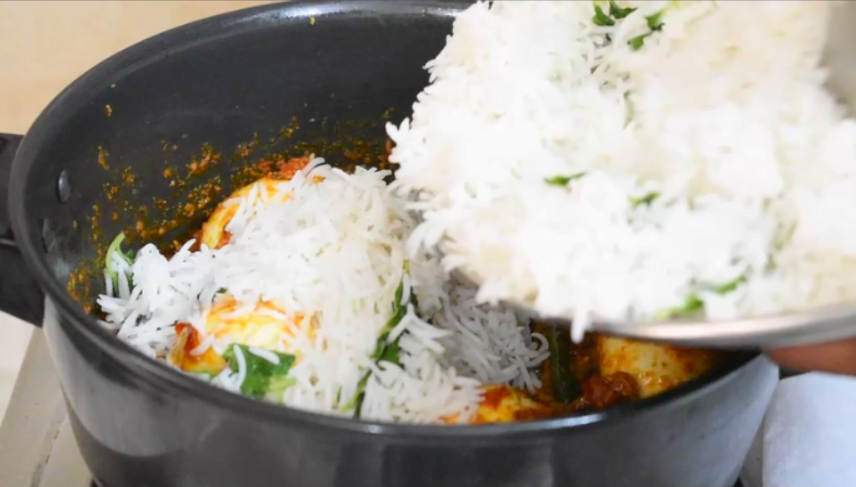
    Add cooked rice on top of brinjal and spread evenly.

    Biyani rice cooked to 90%

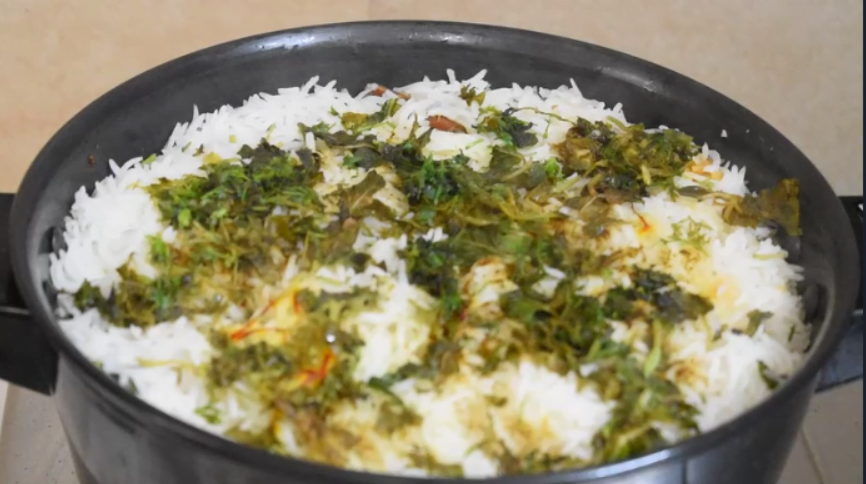
    Add fried onions and torn mint leaves on top. Now pour saffron soaked milk .

    Baingan Biryani

    In a seasoning pan , heat ghee , add cashews and raisins . When raisins puffs up , add ½ teaspoon of biryani masala powder . Turn off the stove.

    Tempering biryani with cashews and biryani masala

    Pour the temper on biryani rice .

    Add tempering on assembled brinjal biryani

    Add 2 tablespoon of chopped coriander leaves and squeeze some fresh lime juice.

    assemble biryani before dum cook

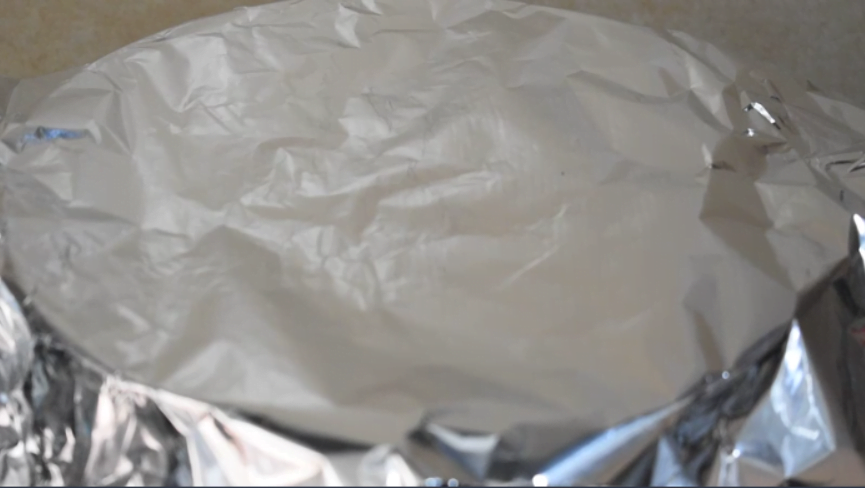
    Cover the pot with aluminium foil and tightly close the lid. Alternatively you can even close the lid and seal it with atta dough.

    Cook on dum

    Keep the flame on sim and leave for minimum 20 minutes for all flavors to combine well and enhance. After 20 minutes , turn off the flame and remove lid and foil.

    Baingan Biryani

    Finally , mix well everything gently from bottom and serve hot along with aloo raita.

    Baingan Biryani

    Recipe is recently updated from archieves , hence you can see two different images .

    Recipe

    baingan-biryani-recipe
    5 from 6 votes

    Baingan Biryani | Brinjal Biryani Recipe

    Baingan Biryani is a fluffy, flavourful rice cooked with aromatic spices and stuffed brinjals .
    Prep Time25 minutes mins
    Cook Time50 minutes mins
    Total Time1 hour hr 15 minutes mins
    Course: Main Course
    Cuisine: Andhra, Indian
    Keyword: Biryani, Hyderabadi, Rice Varities
    Servings: 5 people
    Calories: 527kcal
    Author: Muktha H S

    Ingredients

    For Biryani Rice

    • 8-10 cups Water
    • 2 cups Basmati rice , age old
    • 1 tablespoon Oil
    • 1 Bay Leaf
    • 4 Green Cardamom , pods
    • 1 ½ inch Cinnamon Sticks
    • 2 Cloves
    • Mint leaves handful , torn

    For Stuffing Brinjal / Egg plant /Baingan

    • 350 grams Brinjals , 10-12 medium sized brinjals , approximately
    • ¼ cup Barista / fried onions
    • ¼ cup Groundnuts ,dry roasted, de skinned
    • 5-6 Garlic Cloves,medium size
    • ½ teaspoon Turmeric Powder
    • 1 teaspoon Red Chilli powder
    • 1 teaspoon Coriander Powder
    • ½ teaspoon Garam masala powder
    • ½ teaspoon Dry Mango Powder / Amachor Powder ,optional
    • 1 teaspoon Salt

    For Biryani Masala / Gravy

    • ¼ cup Oil
    • 3 tablespoon Ghee / Clarified Butter
    • 2 no's Onions , large , sliced
    • 2 tablespoon Garlic Paste
    • 2 tablespoon Ginger Paste
    • 4 no's Green Chillies , slit long
    • 2 no's Tomatoes , chopped
    • ½ cup Mint leaves chopped
    • ½ cup Curds , thick
    • ½ teaspoon Turmeric powder
    • 1 tablespoon Red chilli powder
    • 1 tablespoon Coriander powder
    • 1 teaspoon Biryani Masala Powder , refer notes
    • 1 no Bay leaf
    • 3 no's Green Cardamom
    • 2 no's Black Cardamom
    • 1 ½ " inch Cinnamon Sticks
    • 4 no's Cloves
    • 1 no's Star Anise
    • ½ teaspoon Black peppercorns
    • 3-4 Mace Strands /Javitri
    • ½ teaspoon Shahi Jeera
    • ½ teaspoon Stone flower
    • 2 teaspoon Salt or as needed

    Other Ingredients

    • ¼ Cup Warm Milk
    • 10-12 no's Saffron Strands
    • 2 tablespoon Mint leaves , optional, refer notes
    • 2 tablespoon Coriander leaves
    • 2 tablespoon Barista / fried onions , optional
    • 2 tablespoon Lime juice
    • 2 tablespoon Clarified Butter/Ghee
    • 1 tablespoon Cashews
    • 1 tablespoon Raisins
    • ½ teaspoon Biryani Masala Powder

    Instructions

    For Cooking Rice

    • Rinse 2 cups rice for 3-4 times , till water runs clear and soak rice in water for minimum 30 minutes.
    • Add ½ teaspoon of oil , add whole spices , bay leaf , cinnamon stick , cloves , cardamom and mint leaves , saute till fragrant .
    • Add 8-10 cups of water and bring it to boil .
    • Add rice to boiling water.
    • Cook rice for about 7-8 minutes , till its 90 % cooked.
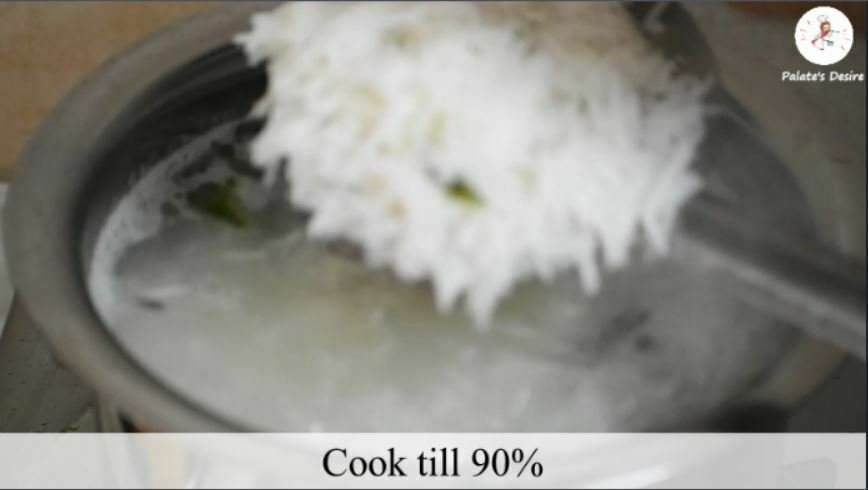
    • Drain water completely from rice.
    • Spread rice on a wide plate , sprinkle ½ teaspoon salt and set aside.

    For Stuffing Baingan / Brinjal

    • In a mixer / blender add roasted peanuts , garlic , red chilli powder , coriander powder , garam masala , amachur powder , turmeric powder and salt.
    • Blend to semi fine powder, set aside.
    • Wash and wipe small brinjal / eggplant . Remove thorns if any and can trim stalks , if needed.
    • Take each brinjal and slit it in four sides without cutting it entirely. Make sure that stalks from top hold brinjals / egg plant . Pull the cut sides outwards and check for worms if any.
    • Now stuff each brinjal / egg plant with this masala powder and set aside.

    For Baingan Biryani Gravy

    • In a thick bottom pan , heat oil and ghee.
    • Add whole spices and saute till fragrant.
    • Now add slit green chilies and onions .
    • Add freshly ground ginger garlic paste and saute till raw smell goes off completely.
    • Add mint leaves and fry well , till onion changes color and mint leaves are well fried.
    • Now add tomatoes , saute well and cook till tomatoes turns pulpy.
    • Add turmeric powder , chili powder , coriander powder and biryani masala powder, mix well.
    • Keeping flame on low heat , Add ½ cup of thick curds and mix well completely till specks of oil is seen.
    • Add salt and mix well .
    • When oil starts to release from corners add stuffed brinjal into gravy.
    • Gently saute ,such that masala coats brinjal .
    • Close lid and cook on medium heat for about 8-10 minutes.
    • Open lid, you can see oil floating in corners.
    • Now gently flip each brinjal to other side and keep the flame on simmer.

    Dum Cooking

    • Add cooked rice on top of brinjal and spread evenly.
    • Add fried onions and torn mint leaves on top.
    • Now pour saffron soaked milk .
    • On the other side , In a seasoning pan , heat ghee , add cashews and raisins . When raisins puffs up , add ½ teaspoon of biryani masala powder and mix well .
    • Pour the temper on biryani rice .
    • Add 2 tablespoon of chopped coriander leaves and squeeze some fresh lime juice.
    • Cover the pot with aluminium foil and tightly close the lid. Alternatively you can even close the lid and seal it with atta dough.
    • Keep the flame on sim and leave for minimum 20 minutes for all flavors to combine well and enhance.
    • After 20 minutes , turn off the flame and remove lid , foil.
    • Gently mix well everything from bottom and serve hot along with aloo raita.

    Video

    Nutrition

    Calories: 527kcal

    You may also like

    • Stuffed Baingan
      Badanekayi Ennegayi | Stuffed Baingan
    • Vangibath Powder
      Vangibath Powder
    • baingan bharta
      Baingan Bharta
    • brinjal_rava_fry
      Brinjal Fry | Eggplant Fry

    Cauliflower Potato Kurma | aloo gobi kurma

    Published : April 2, 2020 | Last Update on September 27, 2022 By Muktha

    cauliflower potato kurma

    Cauliflower potato kurma recipe with step by step photos and short video. Kurma is a South Indian style spicy fragrant masala made with fresh coconut and spices.

    Aloo gobi is one of the most popular combination worldwide and making it in our preferred cuisine will add more taste on its own.

    This cauliflower potato kurma is our family favorite to pair with hot puri /poori or set dosa. Similar recipes like Bombay Saagu and Mixed Vegetable Saagu are already shared on my blog.

    Cauliflower Potato Kurma | aloo gobi kurma

    There are many variations to make this cauliflower potato kurma . Few add potatoes and then saute in oil but I prefer to add boiled potatoes to make this more tastier . But it just about one's preferences.

    Since my childhood I loved this curry and I really don't know what had stopped me posting this recipe. Recently I saw few searches on my blog looking for Mysore style Cauliflower potato kurma , hence thought I would make justice to one of my favorite dish by posting on my blog....!

    If intrested , do check one of the most popular fool proof cauliflower recipe from my blog Tandoori Gobi.

    Watch Video

    How to make Cauliflower Potato Kurma

    Preparations

    Boil potatoes, peel skin , cut and set side.

    Cut cauliflower into medium size florets .

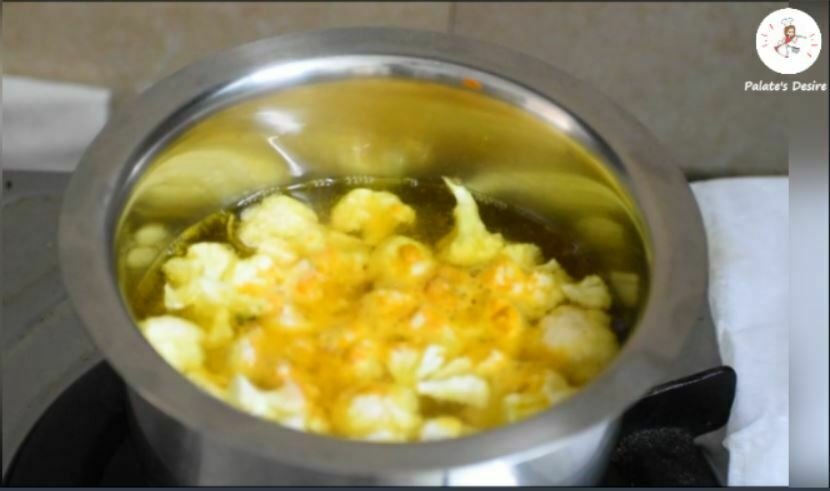
    Bring 2 -3 cups of water to boil . Add cauliflower florets , ½ teaspoon of turmeric powder and ½ teaspoon of salt . Turn off the stove . Cover and keep it aside for 10 minutes. Before use , drain water completely from cauliflower , rinse with cold water and use.

    Cauliflower Potato Kurma | aloo gobi kurma

    Blanch green peas and set aside, optional. You can use either frozen or fresh green peas. If using fresh green peas , blanching is must. If frozen peas are used then , you can skip this step .

    To blend masala

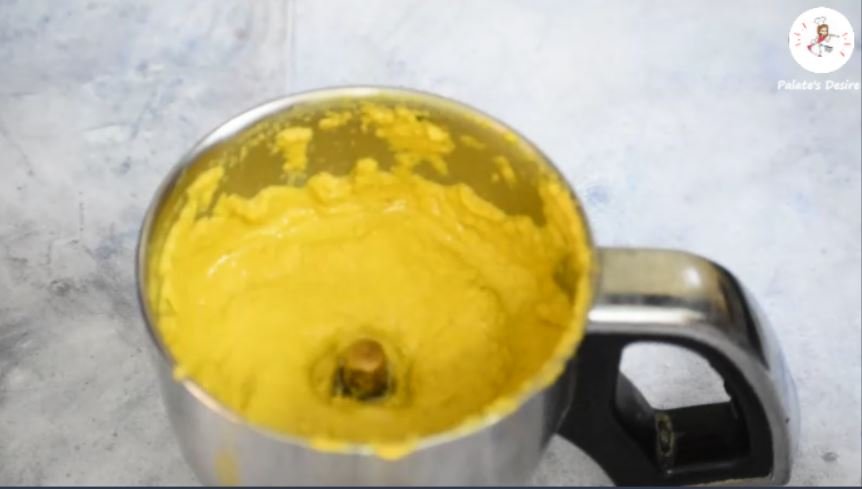
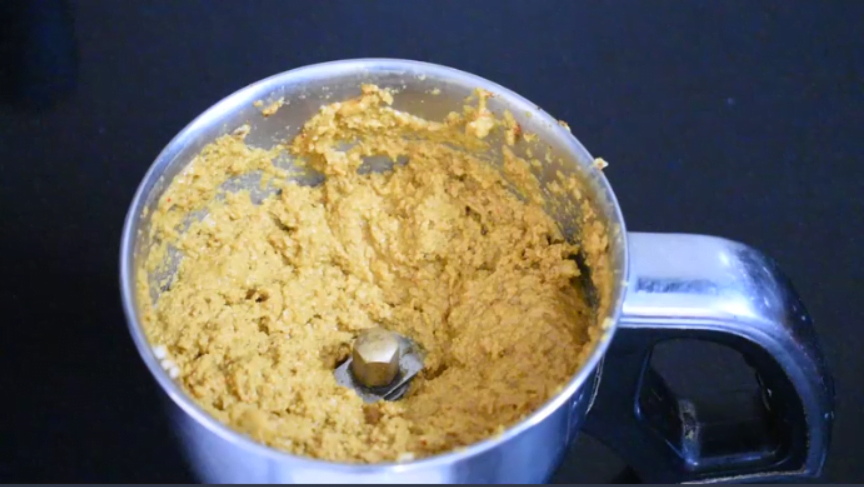
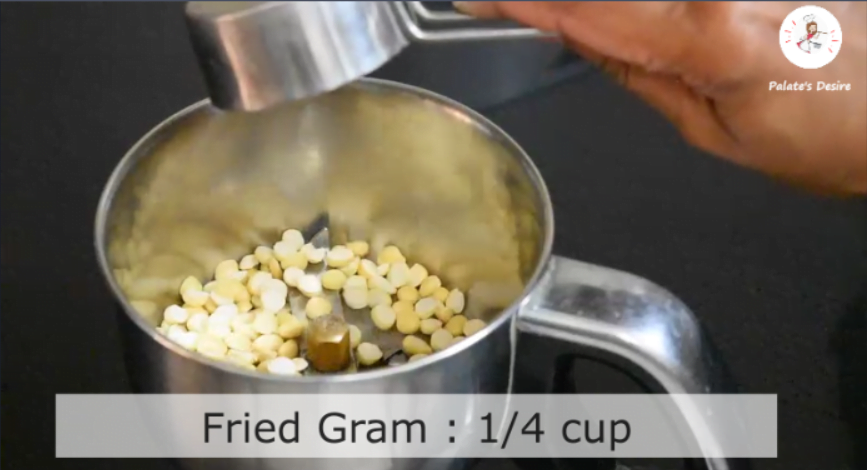
    Whilst grind masala ,take a mixer jar and fresh cococnut , ginger , garlic , green chillies , cardamom , fennel seeds , cinnamon , clove , turmeric powder , red chilli powder , coriander powder , poppy seeds ,fried gram and coriander leaves .

    Cauliflower Potato Kurma | aloo gobi kurma

    Initially without adding water , blend spices to as smooth as possible.

    Cauliflower Potato Kurma | aloo gobi kurma

    Then add ¼ cup of water and ground to a very fine paste. Poppy seeds doesn't get blended well enough if water is added before grinding. Hence its necessary to blend masala paste twice , without water and later with water.

    Cauliflower Potato Kurma | aloo gobi kurma

    To make cauliflower Potato Kurma

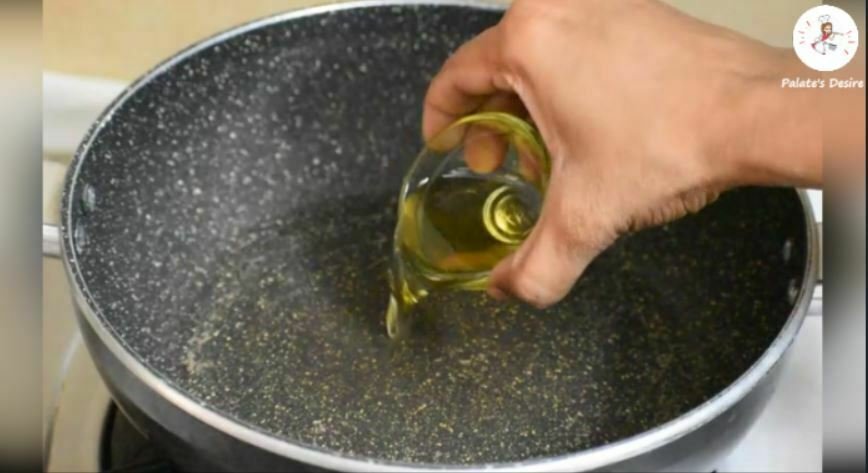
    Take a pan / kadai , heat 2 tablespoon of oil .

    Cauliflower Potato Kurma | aloo gobi kurma

    Add chopped mint leaves and chopped onions.

    Cauliflower Potato Kurma | aloo gobi kurma

    Saute onions till translucent .

    Cauliflower Potato Kurma | aloo gobi kurma

    Add chopped tomatoes .

    Cauliflower Potato Kurma | aloo gobi kurma

    Saute for about 3-4 minutes on medium heat or till tomatoes turns mushy.

    Cauliflower Potato Kurma | aloo gobi kurma

    Add blanched green peas . As I have used frozen green peas , I have not blanched the peas here. Saute for 2-3 minutes.

    Cauliflower Potato Kurma | aloo gobi kurma

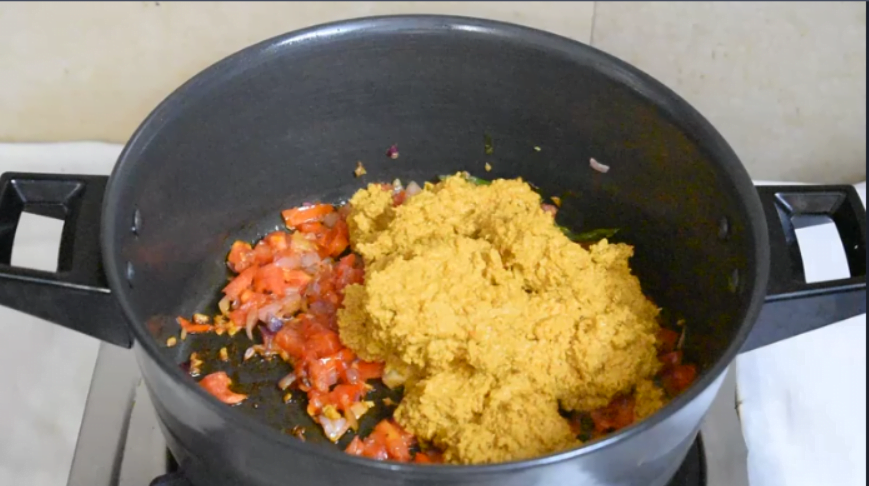
    Now add ground masala paste

    Cauliflower Potato Kurma | aloo gobi kurma

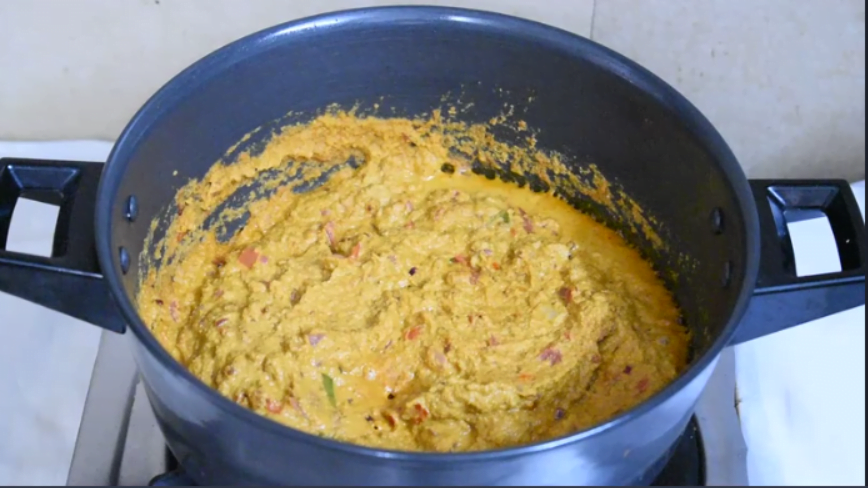
    Saute and cook for about 4-5 minutes on low heat.

    Cauliflower Potato Kurma | aloo gobi kurma

    Add mixer / blender rinsed water about 1 cup and stir into the masala.

    Cauliflower Potato Kurma | aloo gobi kurma

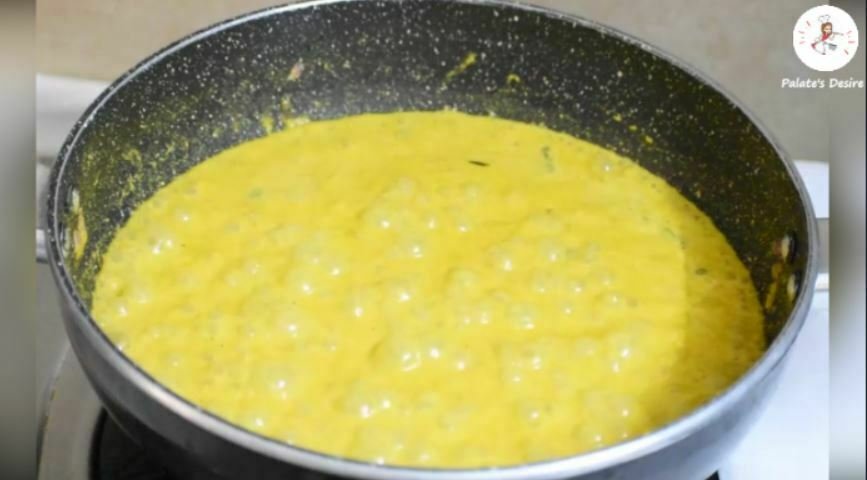
    Cook untill masala starts to bubble and boil.

    Cauliflower Potato Kurma | aloo gobi kurma

    Now add in blanched cauliflower and continue to cook for 3-4 minutes on medium heat .

    Cauliflower Potato Kurma | aloo gobi kurma

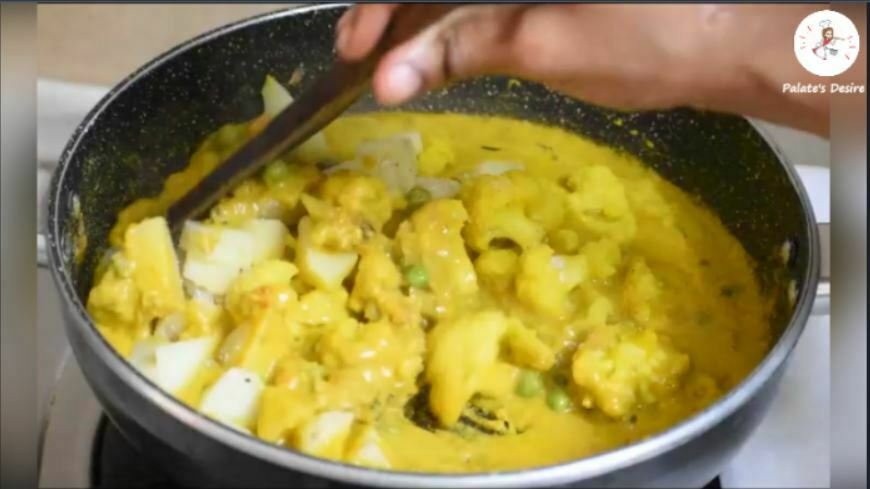
    Add boiled potatoes .

    Cauliflower Potato Kurma | aloo gobi kurma

    Add salt

    Cauliflower Potato Kurma | aloo gobi kurma

    Mix well everything gently.

    Cauliflower Potato Kurma | aloo gobi kurma

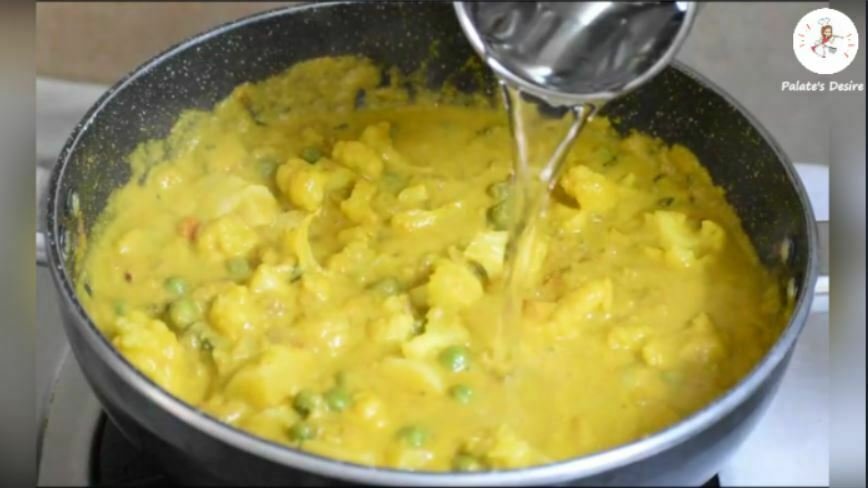
    Add about 1 cup of water .

    Cauliflower Potato Kurma | aloo gobi kurma

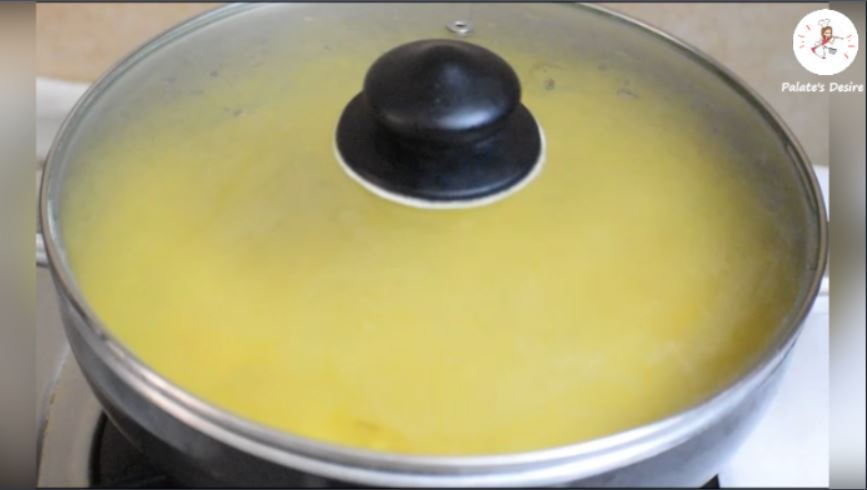
    Close lid and cook on medium heat for about 5 minutes or untill it comes to boil.

    Cauliflower Potato Kurma | aloo gobi kurma

    Open lid , mix well everything , simmer and cook for 2 minutes.

    Cauliflower Potato Kurma | aloo gobi kurma

    Turn off the stove and garnish with fresh coriander leaves.

    Cauliflower Potato Kurma | aloo gobi kurma

    Mix well everything and serve with hot poori's or with set dosa.

    Cauliflower potato kurma

    Recipe

    cauliflower potato kurma
    5 from 3 votes

    Cauliflower Potato Kurma | Aloo Gobi Kurma

    A South Indian style medium spiced cauliflower potato gravy made with fresh coconut and spices.
    Prep Time20 minutes mins
    Cook Time20 minutes mins
    Total Time40 minutes mins
    Course: Side Dish
    Cuisine: Karnataka, South India
    Keyword: Gluten Free, South Indian, Vegetarian
    Servings: 5 people
    Calories: 142kcal
    Author: Muktha H S

    Ingredients

    • 1 ½ cup Cauliflower florets
    • 2 no's Potato , boiled , medium size
    • ½ cup Green peas, fresh / frozen
    • ½ cup Onion , chopped
    • 1 no Tomato , chopped
    • 1 tablespoon Mint leaves
    • 2 tablespoon Oil
    • 1 ½ teaspoon Salt or as required
    • 2 cups Water or as required
    • 1 tablespoon Coriander leaves , garnishing

    For grinding masala paste

    • ⅓ cup Fresh coconut , grated
    • ½ teaspoon Turmeric powder
    • 1 ½ " inch Cinnamon Stick
    • 1 no Clove
    • 6 no's Garlic cloves
    • 1 inch Ginger
    • 1 no Green Cardamom
    • 2 no's Green Chilies
    • ½ teaspoon Saunf /Fennel Seeds
    • 1 teaspoon Poppy Seeds / Khus khus
    • 1 tablespoon Coriander leaves
    • ½ teaspoon Red Chilli powder
    • 1 teaspoon Coriander powder
    • 1 tablespoon Fried Gram / Roasted gram

    Instructions

    Preparations

    • Boil potatoes, peel skin , cut and set side.
    • Cut cauliflower into medium size florets .
    • Bring 2 -3 cups of water to boil . Add cauliflower florets , ½ teaspoon of turmeric powder and ½ teaspoon of salt . Turn off the stove . Cover and keep it aside for 10 minutes. Before use , drain water completely from cauliflower , rinse with cold water and use.
    • Blanch green peas and set aside, optional. You can use either frozen or fresh green peas. If using fresh green peas , blanching is must. If frozen peas are used then , you can skip this step .

    To blend masala

    • Whilst grind masala ,take a mixer jar and fresh cococnut , ginger , garlic , green chillies , cardamom , fennel seeds , cinnamon , clove , turmeric powder , red chilli powder , coriander powder , poppy seeds ,fried gram and coriander leaves .
    • Initially without adding water , blend spices to as smooth as possible. Then add ¼ cup of water and ground to a very fine paste. Poppy seeds doesn't get blended well enough if water is added before grinding. Hence its necessary to blend masala paste twice , without water and later with water.

    To make cauliflower Potato Kurma

    • Take a pan / kadai , heat 2 tablespoon of oil .
    • Add chopped mint leaves and chopped onions.
    • Saute onions till translucent .
    • Add chopped tomatoes and saute for about 3-4 minutes on medium heat or till tomatoes turns mushy.
    • Add blanched green peas . As I have used frozen green peas , I have not blanched the peas here.
    • Saute for 2-3 minutes.
    • Now add ground masala paste , saute and cook for about 4-5 minutes.
    • Add mixer / blender rinsed water about ½ cup and stir into the masala and cook untill masala starts to bubble and boil.
    • Now add in blanched cauliflower and continue to cook for 3-4 minutes.
    • Add boiled potatoes.
    • Add salt and mix well everything gently.
    • Add about 1 cup of water .
    • Close lid and cook for about 5 minutes or untill it comes to boil.
    • Open lid , mix well everything , simmer and cook for 2 minutes.
    • Turn off the stove. Garnish with fresh coriander leaves.
    • Mix well everything and serve with hot poori's

    Video

    Notes

    • Blanching cauliflower in hot water , turmeric and salt is optional , but  I recommend as  cauliflower  has worms in it and has high amount of pesticides. If you are going for organic cauliflower than you can skip blanching ,cauliflower.
    • If poppy seeds are not available , alternatively you can use 3-4 whole cashews . In such case either increase red chili powder by ½ teaspoon or add 1 more green chili , less spice variant.

    Nutrition

    Calories: 142kcal

    You may also like

    • majjige-huli
      Sorekai Majjige Huli
    • ragi-soup-with vegetables
      Ragi Soup
    • aloo-methi-recipe
      Aloo Methi Recipe
    • baingan bharta
      Baingan Bharta

    Kulfi | Pista Badam Kulfi Recipe

    Published : March 29, 2020 | Last Update on September 27, 2022 By Muktha

    Pista badam kulfi on plate

    Kulfi | Pista Badam Kulfi recipe with step by step photos and short video. Kulfi is frozen Indian dessert made from thickening milk or condensed milk. This is a simple and easy recipe made with khoya , pista and badam , flavored with saffron and cardamom.

    Khoya also called as mawa is evaporated milk solids. Adding this to kulfi imparts lot of flavor and taste.

    Kulfi
    [feast_advanced_jump_to]

    About this recipe

    Kulfi is a simple and delicious Indian frozen dessert made with milk , khoya , pistachios, almonds and saffron. To make this delicious frozen dessert , basic ingredients include miIk, mawa and pista , almond powder.

    There are many flavors of kulfi , keeping this as a basic recipe , you can make variations in flavors . Also you can try Thandai Kulfi , which I often make during Holi festival. Add Thandai Masala Powder in place of Pista Badam powder , and you are set. Just go creative and add more flavors to Kulfi and enjoy your favorite summer dessert.

    Watch Video

    As we are locked inside the house due to Covid -19 lock down . My son is bored to death and asks for snacks throughout the day . Getting basic groceries and vegetables has become difficult here , forget about packed snacks / cookies / desserts or chocolates . Also there is no supply of fresh fruits to make juices . Hence for his sake, I made this delicious dessert .

    This is very easy recipe provided you have khoya at home. I have used homemade khoya in this recipe. You can also use store brought or instant khoya to make this delicious kulfi.

    I made this frozen dessert to beat the heat. Its scorching sun here outside, with mercury rising to 38 deg Celsius. Enjoying the dessert and writing this blog 🙂

    Looking for recipes to beat the heat , try

    • Kesar Badam Milk
    • Thandai Kulfi
    • Thandai
    • Mango Shrikhand

    If interested , you can try these simple and easy, kids friendly sweet recipes with available resources at home

    • Pista Almond Paneer Rolls
    • Rasgulla
    • Rasmalai
    • Sabudana Kheer

    And also kids all time favorite savory recipes like potato wedges, potato smiley , cutlets , pasta in tomato sauce and french fries can also be made at home to bring back a smile from a frown face.

    Step by Step directions to make Kulfi

    Boil 4 cups of milk in a wide, thick bottom pan.

    Kulfi | Pista Badam Kulfi Recipe

    Once milk comes to boil , lower the flame and keep milk on simmer for 15-20 minutes.

    Kulfi | Pista Badam Kulfi Recipe

    Measure and take 4 tablespoon of milk , from boiled milk and set aside to cool.

    Kulfi | Pista Badam Kulfi Recipe

    Dissolve rice flour or corn flour in 4 tablespoon of warm milk and set aside.

    Kulfi | Pista Badam Kulfi Recipe

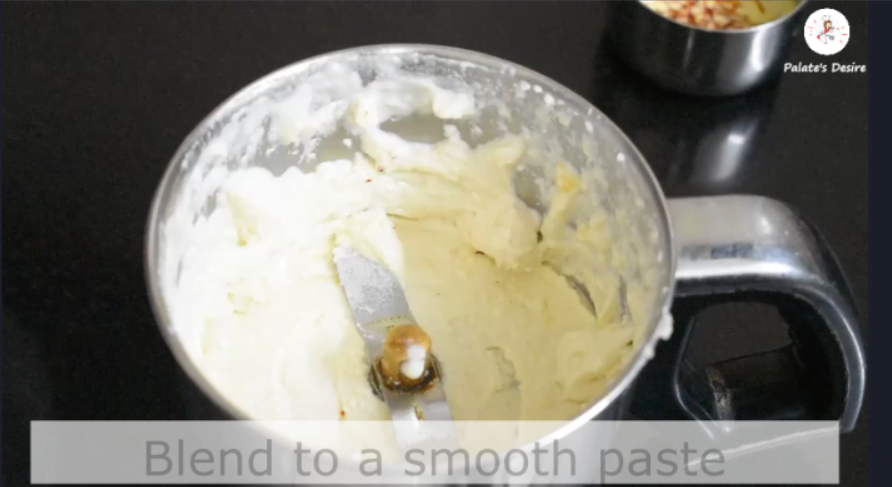
    Whilst in a mixer jar , ground pistachios and almond to a semi fine powder. Grate / crumble khoya and keep aside.

    Kulfi | Pista Badam Kulfi Recipe

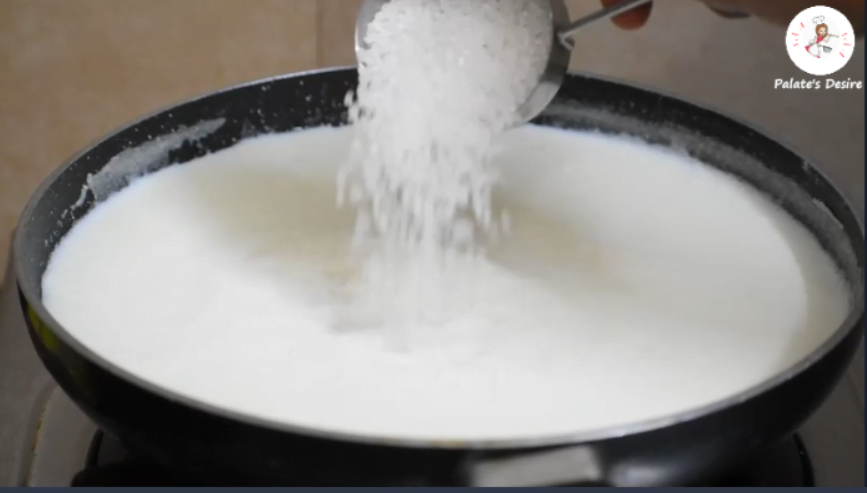
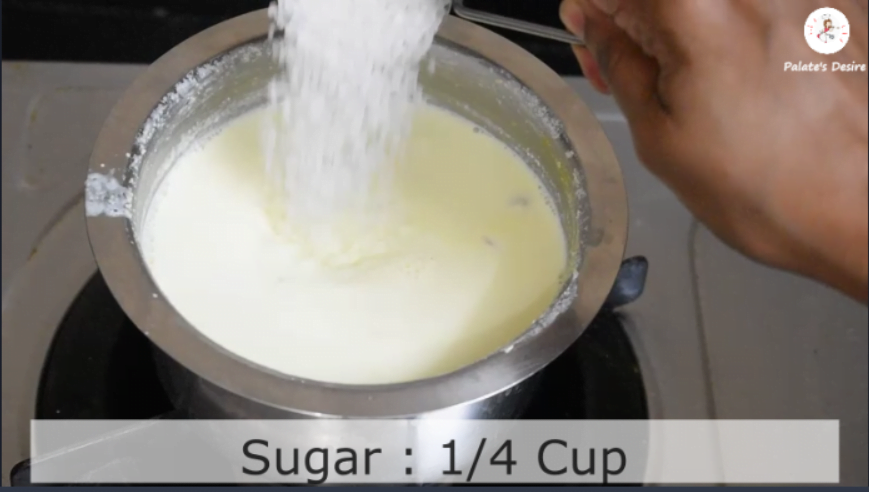
    After 15 minutes of simmering milk , scrape milk solids from edges and add sugar to milk , stir well , till it dissolves .

    Kulfi | Pista Badam Kulfi Recipe

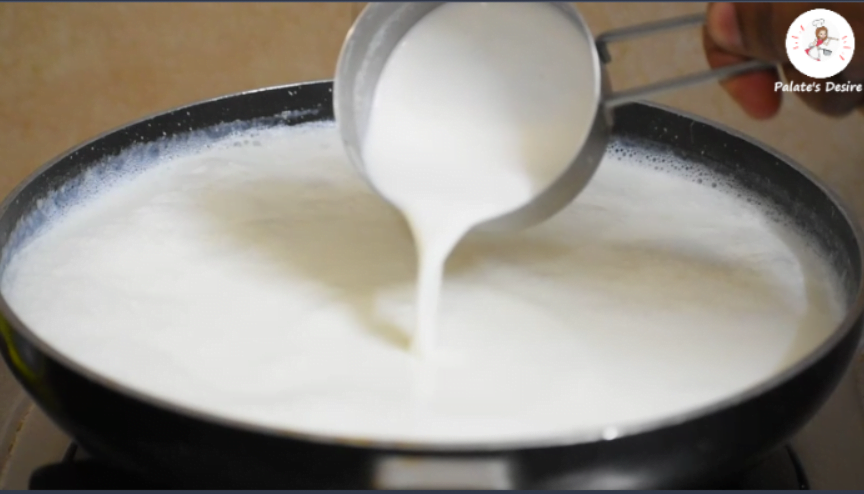
    Now add rice flour paste or corn starch paste.

    Kulfi | Pista Badam Kulfi Recipe

    Keep stirring milk for some minutes till the milk thickens. If small lumps are seen then break them with the spatula or spoon.

    Kulfi | Pista Badam Kulfi Recipe

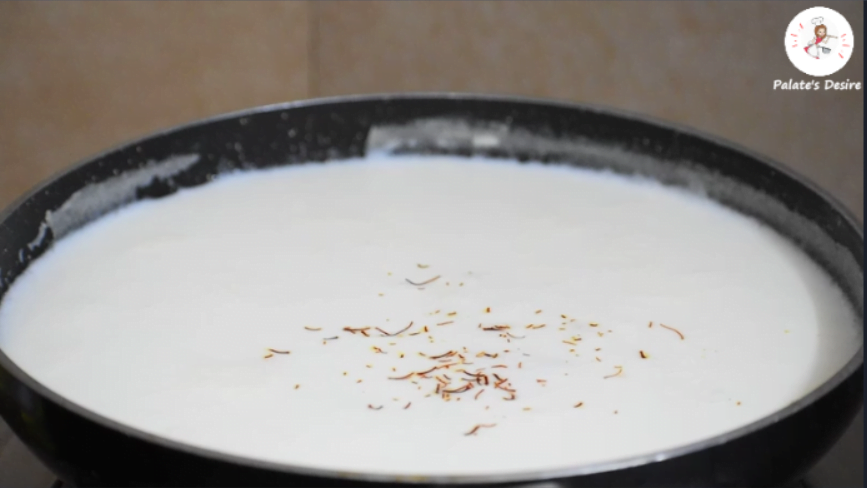
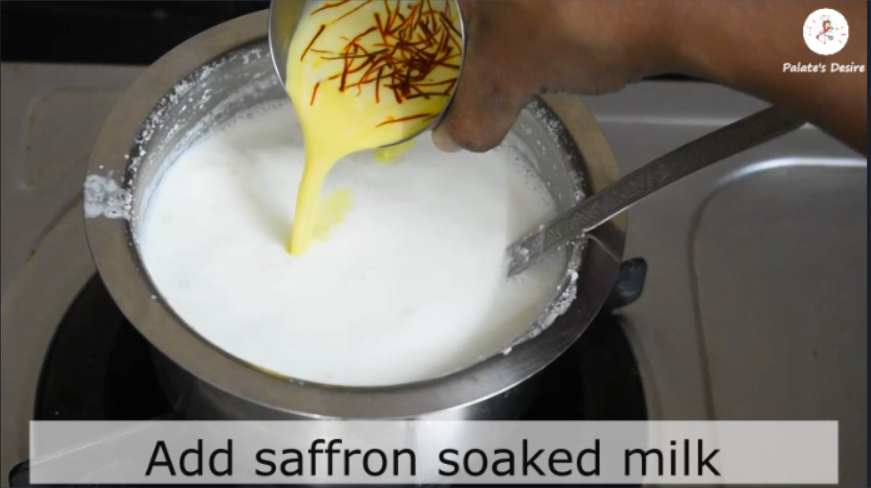
    Add crushed saffron into milk , stir well and let it milk be on simmer for further 15 minutes. This imparts good color and flavor to kulfi . Alternatively , you can even add saffron along with ground nuts.

    Kulfi | Pista Badam Kulfi Recipe

    Add crumbled / grated khoya into milk , stir well and continue to cook for 2-3 minutes on simmer.

    Kulfi | Pista Badam Kulfi Recipe

    Add ground almond and pistachios powder , stir well and continue to cook further for 5-6 minutes . Keep stirring in between.

    Kulfi | Pista Badam Kulfi Recipe

    Switch off the flame. Add cardamom powder and 1-2 drops of kewra water or rose water , stir well.

    Kulfi | Pista Badam Kulfi Recipe

    Allow it to come to room temperature. Once cooled , pour milk in kulfi moulds / glass .

    Kulfi | Pista Badam Kulfi Recipe

    Cover with lid/ aluminium foil and keep in freezer ,till it sets.

    Kulfi | Pista Badam Kulfi Recipe

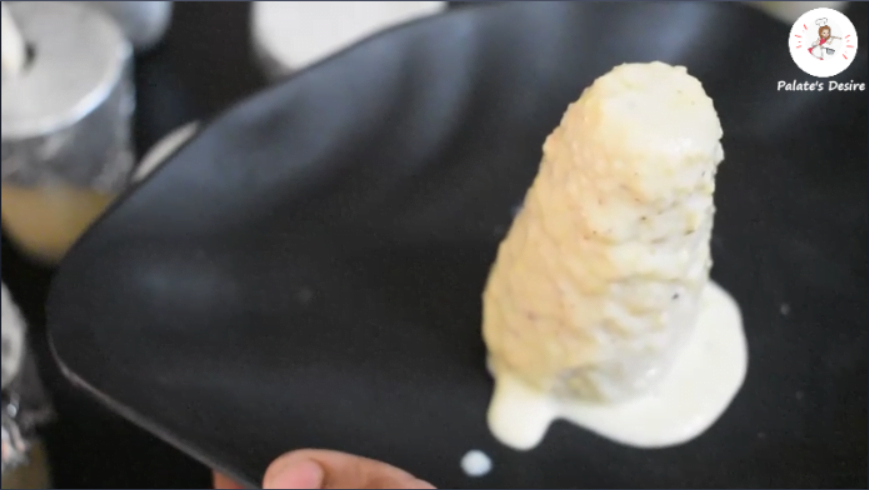
    Once the kulfi is well set, unmould the kulfi. Dip moulds in some water .

    Kulfi | Pista Badam Kulfi Recipe

    Quickly remove them by sliding a butter knife at the edges. Remove on a plate.

    Kulfi | Pista Badam Kulfi Recipe

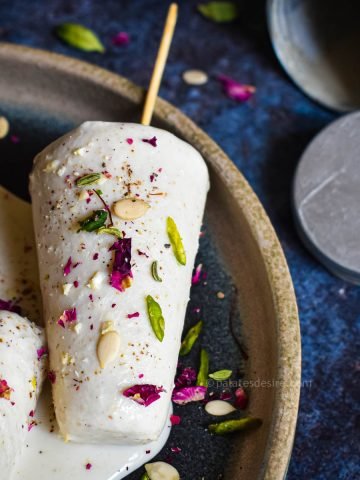
    Garnish with chopped pistachios , almonds , saffron strands and dry rose petals and serve immediately.

    Kulfi | Pista Badam Kulfi Recipe

    Recipe

    pista-badam-kulfi
    5 from 4 votes

    Kulfi | Pista Badam Kulfi Recipe

    A simple and delicious Indian frozen dessert made with milk , khoya , pistachios ,almonds and saffron.
    Prep Time5 minutes mins
    Cook Time40 minutes mins
    Total Time45 minutes mins
    Course: Dessert
    Cuisine: Indian
    Keyword: Desserts, frozen dessert, Summer
    Servings: 6
    Calories: 154kcal
    Author: Muktha H S

    Ingredients

    • 4 cups Whole milk , full fat
    • ⅓ cup Khoya / Mawa
    • 5 tablespoon Sugar or as required
    • 10 no's Pistachios , Unsalted
    • 10 no's Almonds
    • ½ teaspoon Cardamom powder
    • 2 tablespoon Rice Flour or 1.5 tablespoon cornflour
    • 4 tablespoon Warm milk
    • 3 pinches Saffron Strands , crushed
    • Kewra or rose water , few drops

    Instructions

    • Boil 4 cups of milk in a wide, thick bottom pan.
    • Once milk comes to boil , lower the flame and keep milk on simmer for 15-20 minutes.
    • Measure and take 4 tablespoon of milk , from boiled milk and set aside to cool.
    • Dissolve rice flour or corn flour in 4 tablespoon of warm milk and set aside.
    • Whilst in a mixer jar , ground pistachios and almond to a semi fine powder . Grate / crumble khoya and keep aside.
    • After 15 minutes of simmering milk , scrape milk solids from edges and add sugar to milk , stir well , till it dissolves .
    • Now add rice flour paste or corn starch paste. Keep stirring milk for some minutes till the milk thickens. If small lumps are seen then break them with the spatula or spoon.
    • Add crushed saffron into milk , stir well and let it milk be on simmer for further 15 minutes. This imparts good color and flavor to kulfi . Alternatively , you can even add saffron along with ground nuts.
    • Add crumbled / grated khoya into milk , stir well and continue to cook for 2-3 minutes on simmer.
    • Add ground almond and pistachios powder , stir well and continue to cook further for 5-6 minutes . Keep stirring in between.
    • Switch off the flame. Add cardamom powder and 1-2 drops of kewra water or rose water , stir well.
    • Allow it to come to room temperature.
    • Pour milk in kulfi moulds / glass , cover with lid/ aluminium foil and keep in freezer ,till it sets.
    • Once the kulfi is well set, unmould the kulfi. Dip moulds in some water and quickly remove them by sliding a butter knife at the edges. Remove on a plate.
    • Garnish with chopped pistachios , almonds , saffron strands and rose dry rose petals and serve immediately.

    Video

    Nutrition

    Calories: 154kcal

    Similar recipes

    • Kesar-badam-milk
      Kesar Badam Milk
    • Khoya Recipe
      Khoya| Homemade Mawa Recipe
    • rasgulla-recipe
      Rasgulla Recipe | how to make Rasgulla in pressure cooker
    • rasmalai
      Rasmalai Recipe | Easy Rasmalai Recipe

    Mushroom masala recipe

    Published : March 28, 2020 | Last Update on September 27, 2022 By Muktha

    mushroom-masala-recipe

    Mushroom Masala recipe with step by step photos and short video. Mushroom masala is a simple , easy and spicy gravy recipe made with button mushrooms , onions, tomatoes and spices.

    This pairs well with roti / chapathi / phulka. As it takes only 30 minutes from start to finish , this recipe can be easily prepared by bachelors too.

    This also can be packed for lunch box as it tastes good even after its cooled down .

    Mushroom masala recipe
    [feast_advanced_jump_to]

    About this recipe

    This version of flavorful Mushroom Masala gets all its taste from caramelized onions , black pepper powder and Yogurt.

    There are many styles of making Mushroom but this is my own style . I always noticed Mushroom tastes very well , when onions are sautéed till golden brown.

    And also pepper powder goes very well with mushroom . Hence I have added onions and my secret ingredient curds, which actually adds tastes to this recipe. Also to give that restaurant style finish , I temper mushroom masala with curry leaves , cashews and black pepper powder , this step alone will take dish to the next level.

    This recipe of mushroom masala is very similar to the chicken ghee roast masala which I often make at home. All I can say about this recipe is , The state is somewhere between Mushroom masala and mushroom pepper dry. Call it with whichever name but all I can say is it tastes simply good.

    Watch Video

    Some Balanced Meal Combos

    With limited resources at home due to COVID-19 lockdown , I'm trying to cook something really delicious with available produce. So that people at home wouldn't get bored about eating healthy . A simple sauteed vegetable / vegetable gravy with simple dal fry , phulka / roti and a small cup of homemade curds or buttermilk is what I am cooking for lunch these days. No exotic curries in picture , its only humble desi food happening in kitchen. Trying to keep it simple and balanced as much as possible.

    Here are the list of simple balanced meals that you can cook during lockdown with limited available resources / produces . My salad is always simple, its just combination of cucumber, carrot , tomato and onion with dash of salt and pepper , lime juice and coriander leaves.

    1. Methi Dal , Rice / Roti , Beetroot Egg Bhurji , salad, Homemade curds
    2. Palak Dal , Rice / Roti , Peanut Okra Stir Fry , Salad, Curds
    3. Dal Fry , Rice / Roti , Spring Onion Stir Fry ,Salad, Curds
    4. Matar Paneer , Jeera Rice ,Salad, Buttermilk
    5. Dal tadka , Roti /Phulka , Mushroom Masala , Salad Curds
    6. Egg Curry with steamed rice/ jeera rice, salad
    7. Mixed vegetables dal kichadi , papad , amla / turmeric pickle , curds
    8. Rajma Masala with steamed rice, Palak Paneer bhurji , butter milk
    9. Dal Makhani with roti/ rice, Peanut salad , butermilk

    Step by step directions to make Mushroom Masala

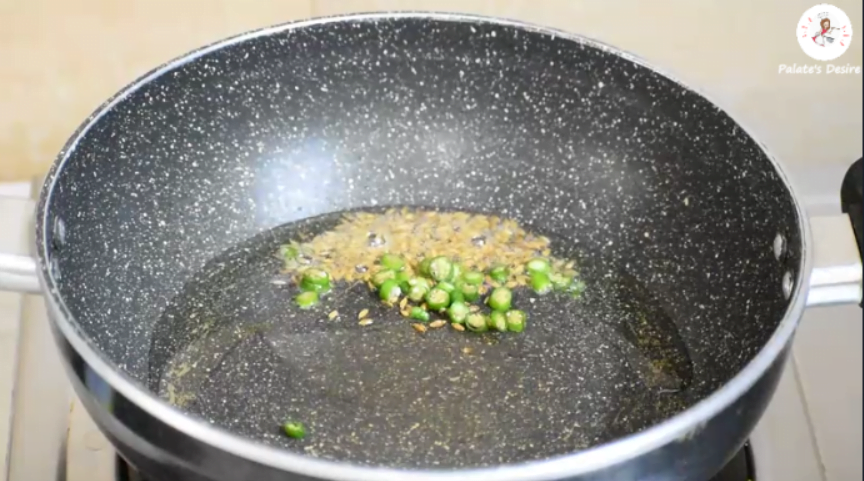
    Heat oil in a pan / kadai , add cumin seeds when it splutters add chopped green chilies.

    Mushroom masala recipe

    Now add ginger and garlic paste and saute till , raw smell goes off.

    Mushroom masala recipe

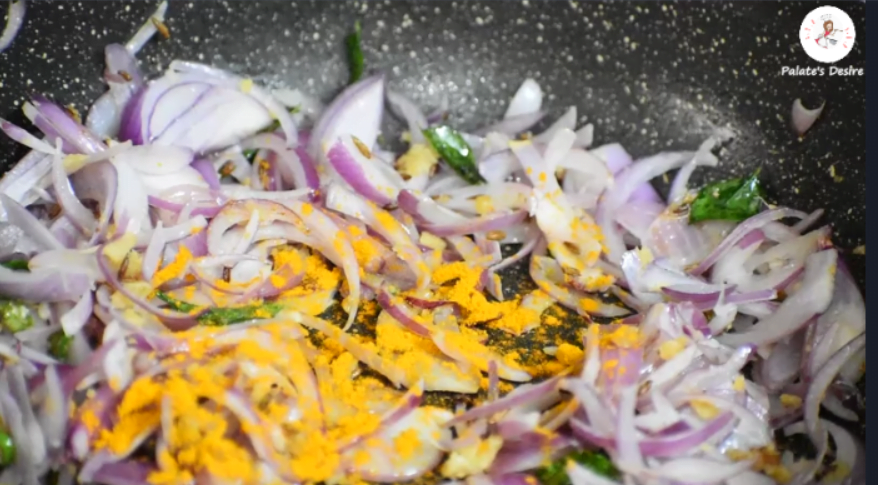
    Add 1 sprig curry leaves and sliced onions, turmeric powder .

    Mushroom masala recipe

    Saute till onions turns light golden color.

    Mushroom masala recipe

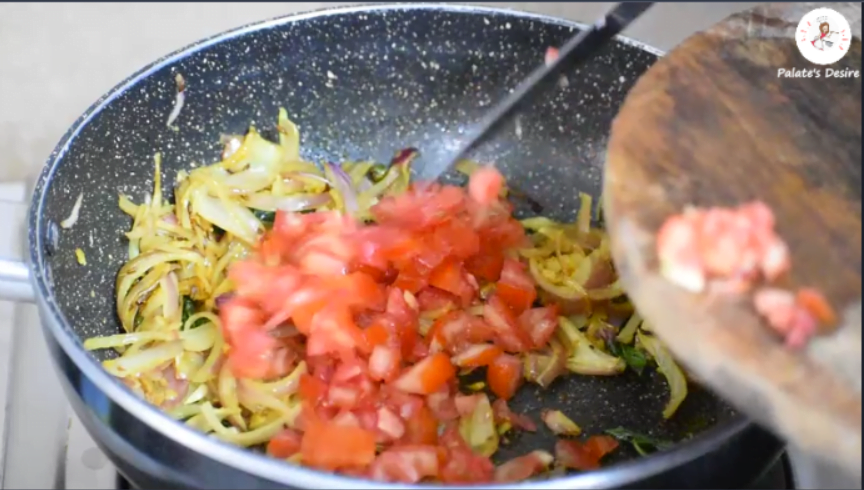
    Add in chopped tomatoes and saute for 3-4 minutes , till tomatoes turns soft.

    Mushroom masala recipe

    Add red chilli powder , coriander powder , garam masala and jeera powder, mix well everything.

    Mushroom masala recipe

    Whilst wash mushroom , slice and add to the above mixture.

    Mushroom masala recipe

    Gently saute for 2-3 minutes , add salt and sugar .

    Mushroom masala recipe

    Mix well everything , cover with a lid and cook on medium heat for 5-6 minutes.

    Mushroom masala recipe

    Open the lid and mix well .

    Mushroom masala recipe

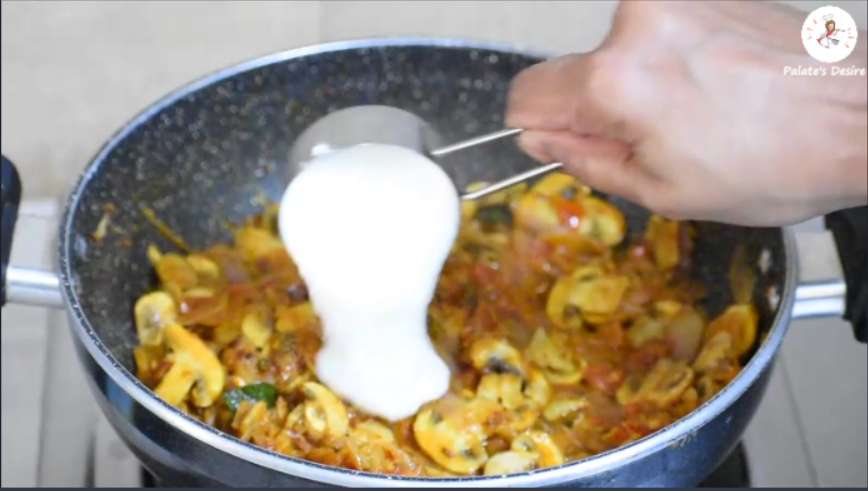
    Keep on low heat , add curds and mix well everything.

    Mushroom masala recipe

    Allow it to blend well with spices and cook on low heat for 2-3 minutes.

    Mushroom masala recipe

    Add ¼ cup of water , mix well .

    Mushroom masala recipe

    Continue to cook further till specks of oil is seen on top.

    Mushroom masala recipe

    Whilst , heat 1 tablespoon ghee / clarified butter in a seasoning pan. Add cashews and curry leaves, allow cashews to turn light golden and curry leaves turn crisp. Turn off the heat and add black pepper powder and mix well.

    Mushroom masala recipe

    Pour temper over mushroom masala. Add chopped coriander leaves , mix well everything and turn off the stove.

    Mushroom masala recipe

    Serve mushroom masala with onion rings, lemon wedges alongside roti / phulka.

    Mushroom Masala

    Recipe

    mushroom-masala-recipe
    4.50 from 2 votes

    Mushroom Masala

    A simple and tasty mushroom side dish made with onions, curry leaves and black pepper powder.
    Prep Time16 hours hrs 5 minutes mins
    Cook Time25 minutes mins
    Total Time16 hours hrs 30 minutes mins
    Course: Side Dish
    Cuisine: Indian
    Keyword: Bachelor's Cooking, Gluten Free, Mushroom recipes
    Servings: 3 People
    Calories: 144kcal
    Author: Muktha H S

    Ingredients

    • 200 grams Button Mushroom
    • 2 no's Onion , Medium Size , sliced
    • 1 no Tomato , chopped
    • 1 teaspoon Green Chili , Finely Chopped
    • 6 Garlic cloves , big , minced or ¾ tablespoon garlic paste
    • 1 inch Ginger crushed to paste or ¾ tablespoon ginger paste
    • 1 Curry leaves , sprig
    • 1.5 tablespoon Oil
    • ½ teaspoon Jeera / cumin seeds
    • ¼ teaspoon Turmeric powder
    • ½ teaspoon Red chilli powder
    • 1 teaspoon Coriander powder
    • ½ teaspoon Garam masala powder
    • ½ teaspoon Jeera powder
    • 1 teaspoon Salt or as required
    • ¼ teaspoon Sugar
    • ⅓ cup Curds
    • ¼ cup Water
    • 2 tablespoon Coriander leaves , chopped

    To Temper

    • 1 tablespoon Clarified Butter/Ghee
    • 2 Sprigs of Curry leaves
    • 1 tablespoon Cashews
    • ½ tablespoon Black Pepper powder

    Instructions

    • Heat oil in a pan / kadai , add cumin seeds when it splutters add chopped green chilies.
    • Now add ginger and garlic paste and saute till , raw smell goes off.
    • Add 1 sprig curry leaves and sliced onions, turmeric powder and saute till onions turns light golden color.
    • Add in chopped tomatoes and saute for 3-4 minutes , till tomatoes turns soft.
    • Add red chilli powder , coriander powder , garam masala and jeera powder , mix well everything.
    • Whilst wash mushroom , slice and add to the above mixture.
    • Gently saute for 2-3 minutes , add salt and sugar .
    • Mix well everything , cover with a lid and cook on medium heat for 5-6 minutes.
    • Open the lid , keep on low heat , add curds and mix well everything.
    • Allow it to blend well with spices and cook on low heat for 2-3 minutes.
    • Add ¼ cup of water , mix well and continue to cook further till specks of oil is seen on top.
    • Whilst , heat 1 tablespoon ghee / clarified butter in a seasoning pan.
    • Add cashews and curry leaves, allow cashews to turn light golden and curry leaves turn crisp.
    • Turn off the heat and add black pepper powder and mix well.
    • Pour temper over mushroom masala.
    • Add chopped coriander leaves , mix well everything and turn off the stove.
    • Serve mushroom masala with onion rings, lemon wedges alongside roti / phulka.

    Video

    Nutrition

    Calories: 144kcal

    More mushroom recipes

    • creamy-of-mushroom-soup
      Mushroom Soup
    • Spinach Mushroom Soya Cutlet
      Spinach Mushroom Soya Cutlets
    • scrambled mushroom eggs
      Scrambled Egg with Mushroom
    • Mushroom Shots

    Khoya| Homemade Mawa Recipe

    Published : March 23, 2020 | Last Update on October 17, 2022 By Muktha

    Khoya Recipe

    Khoya | Homemade mawa recipe with step by step photos and short video. Khoya also called as mawa or khoa is milk solids obtained after thickening of milk. It is widely used in Indian cuisine to make many desserts and dishes. Adding khoa to any desserts will enhance the taste by giving richness .

    If any recipes , calls for khoya , you can prepare this a day in advance and use it next day in the recipe. Because making khoya / mawa is a time consuming process but the best part is , it needs no preparations or no constant monitoring required. Only occasional stirring of milk is needed while making this homemade mawa .

    Khoya| Homemade Mawa Recipe
    [feast_advanced_jump_to]

    About this recipe

    To make Khoya , boil milk in a thick bottom preferably wide pan. When it comes to boil , keep on simmer and stir milk in intervals . scrape edges for milk solids and boil till milk thickens and dries up completely . Homemade khoya will get ready . But you need to be bit alert at the end stage and should be quick enough to briskly stir up thickened milk to get milk solids. Or else there are chances of milk solids getting burnt.

    In this khoya recipe , the step by step pictures helps you to get clarity on different stages of milk thickening and where actually you need to be quick and alert to get the desired result. With this homemade mawa , I made Gujiya , Pista Badam Kulfi and Doodh peda. Hence I thought to post this home made mawa recipe , as I'll be using Khoya / Khoa in my upcoming recipes. Stay tuned 🙂

    Watch Video

    Social isolation due to covid-19 , kids being at home , work from home option and no helps has put me in kitchen for longer hours. Most of my time goes in kitchen for making extra snacks , coffee and tea , apart from cooking main meals. Hence making sweets and snacks these days just because everyone are at home and my kiddo asks for snack all time.

    Keeping my 5 year old engage for whole day inside the house has become a real task for me. I am involving him in my cooking activity and educate him about COVID , importance of isolation and sanitization measures . Also most importantly explaining him the importance of eating right to build immunity has become my routine. In fact I'm enforcing him to eat right but with a different approach , luckily its working 🙂 Well , do share your thoughts on how you are keeping your kids engaged at home during covid-19 lock down ?

    Step by step directions to make Khoya | mawa recipe

    Pour milk in a large thick bottom, deep pan and bring it to boil on a medium heat.

    Khoya| Homemade Mawa Recipe

    When milk rises up and about to spill , stir and lower the flame.

    Khoya| Homemade Mawa Recipe

    Keep milk on simmer and allow it to boil.

    Khoya| Homemade Mawa Recipe

    Meanwhile once in between , stir milk at intervals. There is no need to monitor but be alert and stir milk in intervals.

    Khoya| Homemade Mawa Recipe

    Milk will froth and rise up many times , keep stirring with a spatula and scrape milk solids from the sides .

    Khoya| Homemade Mawa Recipe

    After lapse of 75- 80 minutes , it reaches a consistency of lachcha rabri ( a thick creamy milk ).

    Khoya| Homemade Mawa Recipe

    Now continue to sim and stir at regular intervals. Once milk reaches this stage , be attentive and stir often .

    Khoya| Homemade Mawa Recipe

    Around 20 minutes after reaching rabri consistency , milk further reduces and thickens completely. This stage is almost at the end.

    Khoya| Homemade Mawa Recipe

    At this point stir continuously and you will see bubbles bursting in the milk.

    Once you see milk bubbles bursting, it may further take 6-10 minutes . Be alert at this stage and continuously stir milk or else there are chances of milk getting burnt.

    Khoya| Homemade Mawa Recipe

    When there are no more bubbles, that is when moisture in the milk is completely evaporated , stir well.

    Khoya| Homemade Mawa Recipe

    Turn off the stove .

    Khoya| Homemade Mawa Recipe

    Once khova cools down completely , use it as required. Also store in a airtight box and refrigerate. Stays good up to 1 week in fridge and 15 days in freezer.

    Recipe

    Khoya Recipe
    5 from 1 vote

    Khoya | Homemade mawa recipe

    Khoya | Homemade Mawa : A traditional method used to thicken milk to get milk solids.
    Cook Time2 hours hrs 20 minutes mins
    Total Time2 hours hrs 20 minutes mins
    Course: Dessert, DIY
    Cuisine: Indian
    Keyword: DIY, Sweets
    Servings: 250 grams
    Calories: 608kcal
    Author: Muktha H S

    Ingredients

    • 1500 ml Full fat whole milk

    Instructions

    • Pour milk in a large thick bottom, deep pan and bring it to boil on a medium heat.
    • When milk rises up and about to spill , stir and lower the flame.
    • Keep milk on simmer and allow it to boil.
    • Meanwhile once in between , stir milk at intervals. There is no need to monitor but be alert and stir milk in intervals.
    • Milk will froth and may rise up many times , keep stirring with a spatula and scrape milk solids from the sides .
    • After lapse of 75- 80 minutes , it reaches a consistency of lachcha rabri ( a thick creamy milk).
    • Now continue to sim and stir at regular intervals. Once milk reaches this stage , be attentive and stir often .
    • Around 20 minutes after reaching rabri consistency , milk further reduces and thickens completely. This stage is almost at the end.
    • At this point stir continuously and you will see bubbles bursting in the milk.
    • Once you see milk bubbles bursting, it may further take 6-10 minutes . Be alert at this stage and continuously stir milk or else there are chances of milk getting burnt.
    • When there are no more bubbles, that is when moisture in the milk is completely evaporated. Turn off the stove .
    • Once khova cools down completely , use it as required. Also store in a airtight box and refrigerate. Stays good up to 1 week in fridge and 15 days in freezer.

    Video

    Notes

    • 608 calories /250 grams

    Nutrition

    Calories: 608kcal

    Moongphali Bhindi | Peanut Okra Stir fry

    Published : March 18, 2020 | Last Update on September 27, 2022 By Muktha

    okra-peanut-stir-fry

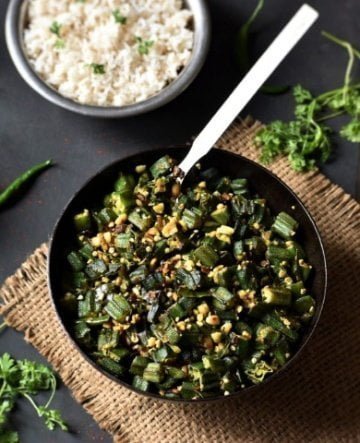
    Moongphali Bhindi | Peanut Okra Stir fry recipe with step by step photos and short video. This simple okra stir fry is simple and tasty recipe with a crunch of roasted peanuts .

    Moongphali Bhindi is a adapted recipe from Maharashtra cuisine . Every home has their own recipe to suite their taste . I don't claim this recipe to be authentic or owe it to Maharashtra cuisine, it only my way of making peanut okra stir fry .

    Moongphali Bhindi

    I cook this peanut okra stir fry mainly for 3 reasons : simple to make with minimal ingredients , tasty and mainly its nutritious with good amount of fiber , protein and essential nutrients. As I'm a huge fan of Bhindi , I like it in any style provided it is properly cooked without being slime . But at home , its not the scenario men majority needs only tasty food. So I always tweak recipes to suit their taste. And this Peanut Okra stir fry recipe is a super hit at home and also among my clients with weight loss journey. Hence made this recipe post for all health freaks who are trying to eat healthy and simple food.

    Okra boasts an impressive nutrient profile. Okra are among the very low calorie vegetables it provides just 30 calories per 100 g. Nonetheless, they are rich sources of dietary fiber, minerals, and vitamins . I often recommend okra in diet for cholesterol control and also in weight reduction programs. As okra are rich sources of mucilage substance that help in smooth peristalsis of digested food through the gut and ease constipation. Hence it is always recommended in colon cleanse diet . If interested, you can read more about nutritional and health benefits of okra here.

    Most popular Okra recipes from Indian Cuisine are Bhindi Stir Fry , Stuffed Bhindi , Kurkure Bhindi , Achari Bhindi , Bhindi do pyaaz , Bhindi Masala , Vendakkai mor kuzhambu and Bhindi Fry .

    RECIPE CARD FOR MOONGPHALI BHINDI | PEANUT OKRA STIR FRY

    Recipe

    Moongphali Bhindi | Peanut Okra Stir fry
    5 from 2 votes

    Moongphali Bhindi | Peanut Okra Stir fry Recipe

    A simple, easy and tasty okra stir fry with a crunchy peanuts .
    Prep Time10 minutes mins
    Cook Time20 minutes mins
    Total Time30 minutes mins
    Course: Side Dish
    Cuisine: Indian, Maharstarian
    Keyword: Bachelor's Cooking, Gluten Free, stir fry, Vegan, Vegetarian
    Servings: 3 People
    Calories: 207kcal
    Author: Muktha H S

    Ingredients

    • 500 grams okra
    • ¼ cup peanuts
    • 1 tablespoon Garlic , finely chopped
    • 5 no's green chili , less spice variant , roughly chopped
    • 2 no's sprigs Curry leaves
    • 2 tablespoon Oil
    • ½ teaspoon mustard seeds
    • ½ teaspoon jeera seeds / cumin Seeds
    • ¼ teaspoon turmeric powder
    • 11/2 teaspoon salt or as required
    • 2 tablespoon coriander leaves , chopped
    • 1 teaspoon lime juice

    Instructions

    • Wash okra and wipe it dry with a kitchen towel. Make sure bhindi / okra is completely dry before cutting.
    • Chop bhindi / okra into 1 or 2 inch pieces and set aside.
    • In a pan dry roast peanuts till its crunchy. Remove and set aside.
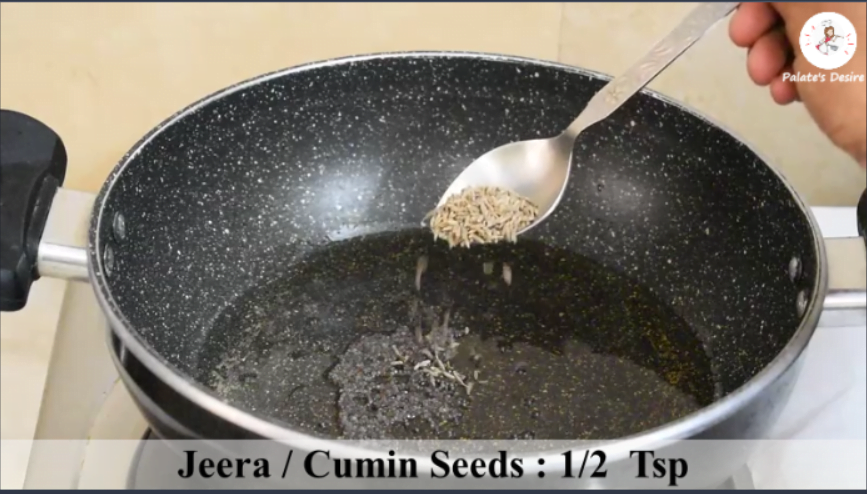
    • Heat 2 tablespoon of oil in the same pan , add mustard seeds, jeera seeds and allow it to crackle.
    • Add curry leaves , chopped green chilies and garlic .
    • Saute for 2 minutes , till garlic raw smell goes off.
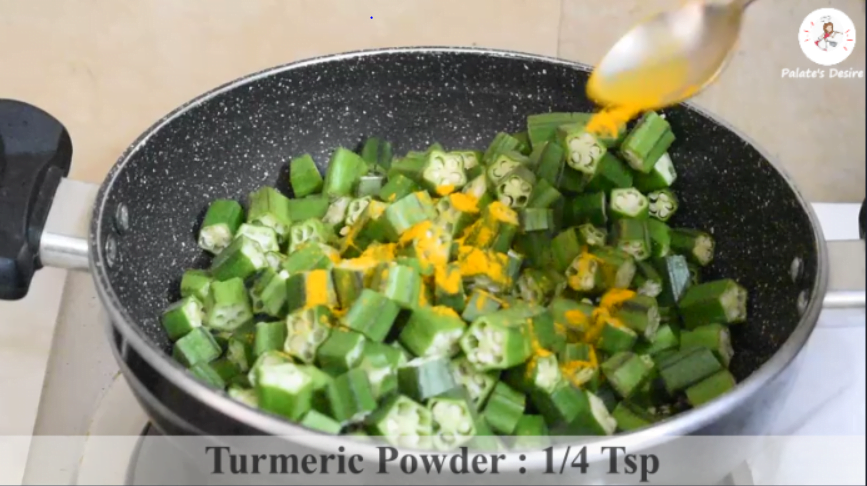
    • Add chopped bhindi , turmeric powder ,mix well and saute for 5 minutes.
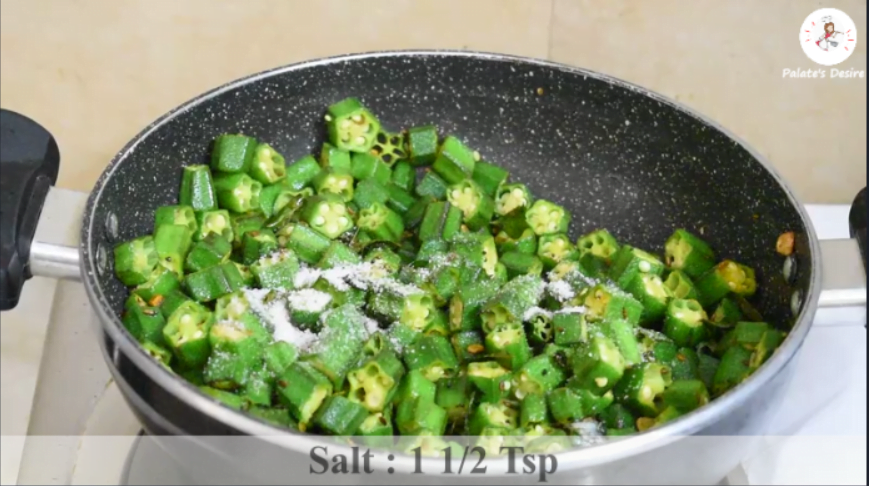
    • Now add in salt as required and mix well .
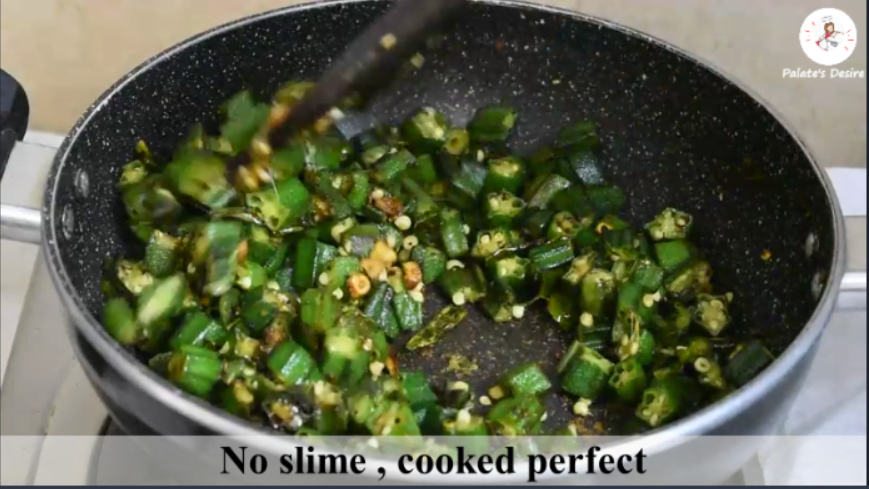
    • Saute bhindi /okra and cook till sliminess and stickiness is minimized completely.
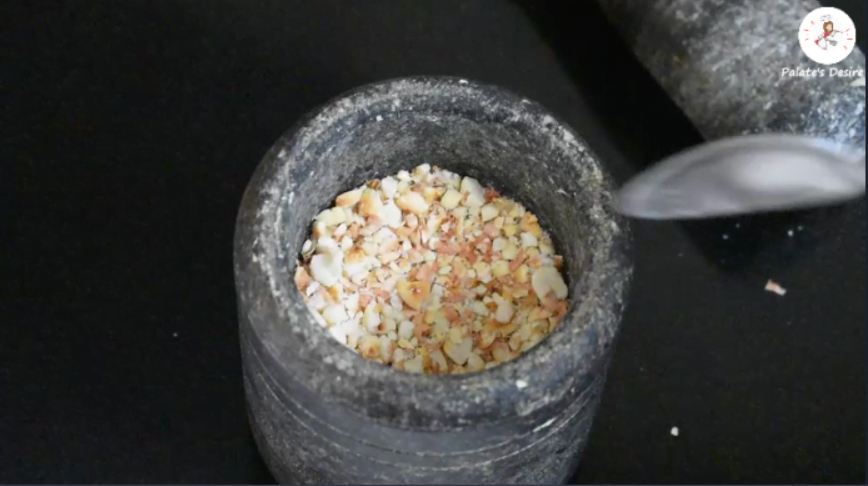
    • Whilst crush roasted peanuts in a mortar and pestle .
    • Add coarsely crushed peanuts into cooked bhindi/ okra.
    • Mix well , saute for 1-2 minutes and turn off the stove.
    • Garnish with coriander leaves , add lime juice , mix and serve as a side dish .

    Video

    Nutrition

    Calories: 207kcal

    Step by Step Directions to make Moongphali Bhindi

    Wash okra and wipe it dry with a kitchen towel. Make sure bhindi / okra is completely dry before cutting.

    Chop bhindi / okra into 1 or 2 inch pieces and set aside.

    In a pan dry roast peanuts till its crunchy. Remove and set aside.

    Moongphali Bhindi | Peanut Okra Stir fry

    Heat 2 tablespoon of oil in the same pan , add mustard seeds, jeera seeds and allow it to crackle.

    Moongphali Bhindi | Peanut Okra Stir fry

    Add curry leaves , chopped green chilies and chopped garlic .

    Moongphali Bhindi | Peanut Okra Stir fry

    Saute for 2 minutes , till garlic raw smell goes off.

    Moongphali Bhindi | Peanut Okra Stir fry

    Add chopped bhindi , turmeric powder .

    Moongphali Bhindi | Peanut Okra Stir fry

    Mix well and saute for 5 minutes.

    Moongphali Bhindi | Peanut Okra Stir fry

    Now add in salt as required and mix well .

    Moongphali Bhindi | Peanut Okra Stir fry

    Saute bhindi /okra and cook till sliminess and stickiness is minimized completely.

    Moongphali Bhindi | Peanut Okra Stir fry

    Whilst crush roasted peanuts in a mortar and pestle .

    Moongphali Bhindi | Peanut Okra Stir fry

    Add coarsely crushed peanuts into cooked bhindi/ okra.

    Moongphali Bhindi | Peanut Okra Stir fry

    Mix well , saute for 1-2 minutes and turn off the stove.

    Moongphali Bhindi | Peanut Okra Stir fry

    Add coriander leaves add lime juice .

    Moongphali Bhindi | Peanut Okra Stir fry

    Mix well and serve as a side dish . In the frame is my balanced meal, rice , ridgegourd sambar , cucumber for salad and homemade curds .

    Peanut Okra stir fry

    Salted Ragi Ambli

    Published : March 15, 2020 | Last Update on February 24, 2023 By Muktha

    Ragi_ambli_recipe

    Ragi Ambli or ragi ganji is a tasty and nutritious light drink. It is easy to digest and gets ready within 10 minutes. . This is a nutritious, healthy drink made using Ragi , you can have it in your breakfast or can serve to kids as a after school snack.

    Salted Ragi Ambli
    [feast_advanced_jump_to]

    Ragi ambli is popular recipe in Karnataka , Ragi means finger millet and ganji refers to porridge.

    There are 2 variants of Ragi Ambli or ragi ganji , sweet and salt version. For salted version buttermilk is used where as for sweet version , milk and jaggery are used to make ragi ambli .

    As it keeps the body cool , it is one of the simplest and easiest breakfast that can be consumed during summer season. With the onset of summer , here comes nutritious and healthy recipe for the season.

    Also when it comes to weight loss , adding this super grain in your diet can be very beneficial .

    Health benefits of Ragi

    Finger millets / Nachni / Ragi is one of the most nutritious cereal. Ragi is very rich in calcium, in fact, no other cereal is even near to ragi with respect to calcium content.

    Regular consumption of finger millet is good for bone health and keeps diseases such as osteoporosis at bay and could reduce risk of fracture.

    It is also rich in fiber and has lower glycemic response , hence helps in controlling blood sugar levels.

    It also battles anaemia, reduces the risk of stroke, boosts lactation, increases bone strength, helps in digestion, reduces cholesterol and makes excellent food for baby .

    Ragi is also gluten free and hence good for people who are allergic to gluten. This super grain has umpteen benefits when comes to health , so if you are new to this cereal , start adding to your diet.

    Also if you are suffering from sleep disorders and mood swings , this super grain helps you to overcome this. Ragi contains essential amino acid known as Tryptophan , which goes into making serotonin .

    What is Serotonin ? This a chemical in the brain that can affect mood and sleep. Eating foods that contain the essential amino acid tryptophan can help the body to produce more serotonin. Tryptophan, which goes into making serotonin, is commonly found in foods that contains protein and humble ragi falls into this category. Hence its called a super food as this tiny grains is no less than a wonder grain.

    If you wonder on how to include ragi in your diet , here are few of my favourite ragi recipes like Ragi Banana Smoothie , Ragi Almond Cookies , Raggi Mudde ( Ragi Balls ) , Ragi Roti , Ragi Idli , Ragi Dosa and Ragi Soup

    Watch Video

    How to make Salted Ragi Ambli

    In a pan , dry roast ragi flour on medium heat for about 6-8 minutes or till steam starts to escape from flour. Turn off stove and set aside.

    Salted Ragi Ambli

    Add 3 cups of water to a pan, let it comes to just luke warm, refer notes .

    Salted Ragi Ambli

    Keeping on low heat , add rosted ragi flour gently to luke warm water , stirring continuously such that no lumps are formed.

    Salted Ragi Ambli

    Now turn flame to medium heat , stir once in between and bring it to boil.

    Salted Ragi Ambli

    When ragi ambli starts to boil , stir with a spatula .

    Salted Ragi Ambli

    Once after it comes to boil , on medium heat , it takes around 4 -5 minutes further to thicken.

    Salted Ragi Ambli

    Add salt to taste and mix well .

    Salted Ragi Ambli

    Continue to cook for 1-2 minutes , it thickens further.

    Salted Ragi Ambli

    Turn off the stove, remove the pan from the stove and allow it to cool.

    Salted Ragi Ambli

    Transfer prepared Ragi Ambli to a deep pot / vessel , add 1 cup of homemade curds . Slightly sour curd , tastes good in this recipe. If using store brought curds (set curd) then add ½ cup curds and ½ cup water to dilute curds. Alternatively , you can also add buttermilk , refer notes.

    Salted Ragi Ambli

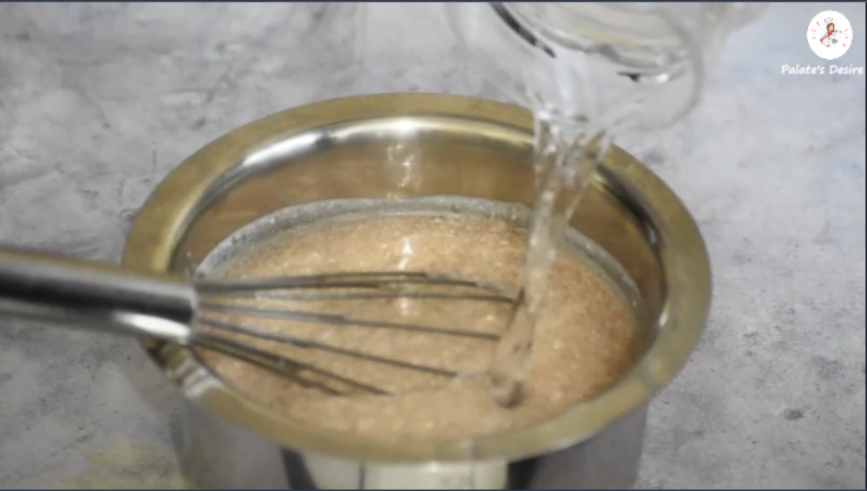
    Whisk well .

    Salted Ragi Ambli

    If it is thick you can add either water or buttermilk . I added ½ cup water and whisked well again.

    Salted Ragi Ambli

    In a tempering pan , heat oil , add mustard seeds, jeera seeds , green chillies and curry leaves.

    Salted Ragi Ambli

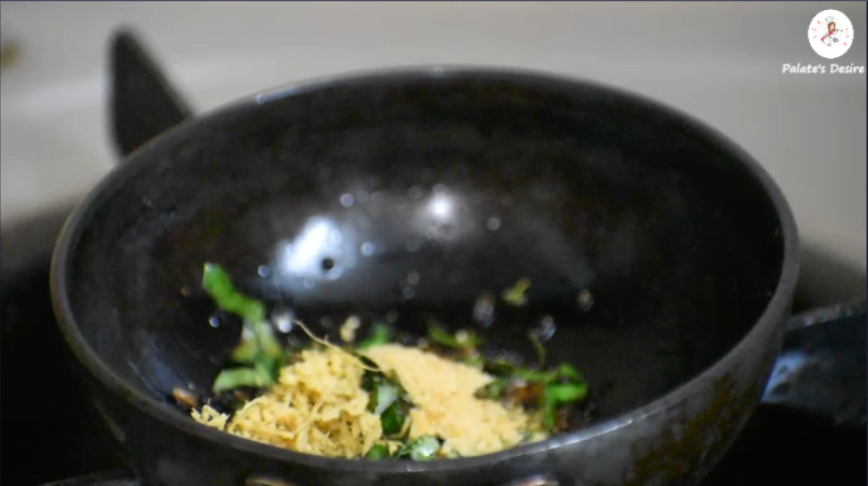
    Turn off the stove, add grated ginger and hing . I add this after turning off the stove because , I didnt wanted asafoetida/hing to get burn.

    Salted Ragi Ambli

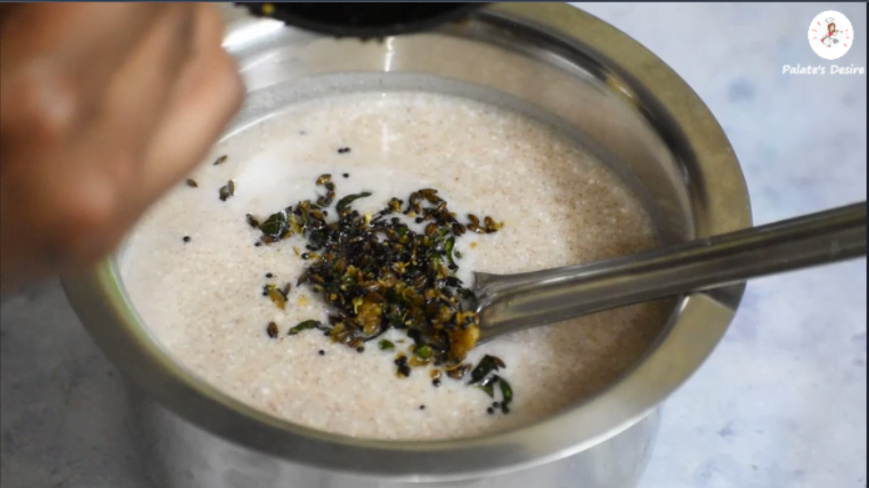
    Pour tempering on prepared ragi ambli .

    Salted Ragi Ambli

    Add ½ teaspoon of methi seeds powder and 1 teaspoon of chopped coriander leaves.

    Salted Ragi Ambli

    Stir well and serve immediately.

    Salted ragi ambli

    Recipe

    Ragi_ambli_recipe
    4.72 from 7 votes

    Salted Ragi Ambli | Ragi Ganji Recipe

    Salted Ragi Ambli is a nutritious healthy breakfast drink made with Finger millet flour , water and buttermilk ,further taste is enhanced by tempering.
    Prep Time5 minutes mins
    Cook Time15 minutes mins
    Total Time20 minutes mins
    Course: Beverage, Breakfast, Drinks
    Cuisine: Indian, Karnataka, South India
    Keyword: Beverages, Breakfast_Ideas, Diet, gulten free, Healthy, Instant Breakfast, South Indian
    Servings: 3
    Calories: 110kcal
    Author: Muktha H S

    Ingredients

    • ⅓ cup Ragi flour / finger millet flour ,sieved
    • 3 ½ cups water
    • 1 cup Curds , homemade , whisked
    • ½ teaspoon Salt or as required
    • ½ teaspoon Methi Seeds powder , optional
    • 1 teaspoon Coriander leaves , chopped

    For Tempering

    • 1 ½ teaspoon Coconut Oil or any cooking oil
    • ½ teaspoon Mustard Seeds
    • ½ teaspoon Jeera seeds / Cumin Seeds
    • 1 sprig Curry leaves , chopped
    • 1 teaspoon Green chillies finely chopped , optional
    • ½ teaspoon Ginger , grated
    • ¼ teaspoon Asafoetida / Hing

    Instructions

    • In a pan , dry roast ragi flour on medium heat for about 6-8 minutes or till steam starts to escape from flour. Turn off stove and set aside
    • Add 3 cups of water to a pan, let it comes to just luke warm, refer notes
    • Keeping on low heat , add rosted ragi flour gently to luke warm water , stirring continuously such that no lumps are formed.
    • Now turn flame to medium heat , stir once in between and bring it to boil.
    • When ragi ambli starts to boil , stir with a spatula .
    • Once after it comes to boil , on medium heat , it takes around 5-6 minutes further to thicken.
    • Add salt to taste , mix well and continue to cook for 1-2 minutes , it thickens further.
    • Turn off the stove, remove the pan from the stove and allow it to cool.
    • Transfer prepared Ragi Ambli to a deep pot / vessel , add 1 cup of homemade curds .Slightly sour curd , tastes good in this recipe. If using store brought curds (set curd) then add ½ cup curds and ½ cup water to dilute curds. Alternatively , you can also add buttermilk , refer notes.
    • Whisk well , if it is thick you can add either water or curds . I added ½ cup water and whisked well again.
    • In a tempering pan , heat oil , add mustard seeds, jeera seeds , green chillies and curry leaves.
    • Turn off the stove, add grated ginger and hing . I add this after turning off the stove because , I didnt wanted asafoetida/hing to get burn.
    • Pour tempering on prepared ragi ambli .
    • Add ½ teaspoon of methi seeds powder and 1 teaspoon of chopped coriander leaves.
    • Stir well and serve immediately.

    Video

    Notes

    • Mixing roasted flour to luke warm water is very important , if water is hot then it may form lumps. Make sure temperature of roasted flour and water is almost same.
    • Avoid using Stainless steel pan/ vesseles for cooking ragi  as it easily scorch from bottom .You can use either non stick pan , anodized pan , iron , indolium, aluminium or clay.
    • Homemade curds has high amount of water content when compared to store brought set curds. Depending on the thickness of ragi porridge , you can add more water or butter milk .
    • If you keep ragi ambli for long , It will thin out , hence serve immediately.

    Nutrition

    Calories: 110kcal

    You may also like

    • ragi banana smoothie
      Ragi Banana Smoothie | how to make ragi smoothie
    • ragi-cookies
      Ragi Almond Cookies with Jaggery
    • Moringa Ladoo
      Moringa Ladoo | How to make Moringa Energy Balls
    • ragi-soup-with vegetables
      Ragi Soup

    Vegetable Poha | Diet Poha

    Published : March 13, 2020 | Last Update on September 21, 2022 By Muktha

    vegetable-diet-poha

    Vegetable Poha aka diet poha is a healthy low carbs breakfast with lots of vegetables, sprouts and flattened rice .Gets ready under 20 minutes and has loads of fibers , minerals and vitamins. A perfect way to kick start the day.

    Other popular poha recipes on blog are : Gojju Avalakki (Spice & Tang Poha) , Sweet Poha(Sihi Avalakki) and Vegetable Poha Cutlet .

    If you are looking for low calories diet friendly breakfast recipes then do check this out : Ragi Idli ,Rice Kanji , Murmura Upma and also Cornflakes Upma

    Vegetable Poha | Diet Poha
    [feast_advanced_jump_to]

    About this recipe

    Poha / Flattened rice is used to make variety of recipes from breakfasts to snacks in India. Poha is easy to digest and is very light on stomach. Veg poha is a simple recipe with lots of vegetables and sprouts. The ratio of vegetables to poha is 2: 1 . This makes an ideal breakfast for all.

    I generally include this recipe in my diet chart for all weight watchers . This diet poha is easy to make and is a balanced meal on its own. This recipe has vegetables like carrots , beans , cabbage ,capsicum and potato , along with sprouted moong beans and green peas. A plate of this vegetable poha has carbs , protein , vitamin , minerals and fat , everything packed together. Hence this can be added either to your morning breakfast or evening tiffin .

    Watch Video :

    These days I have got busy working on diet plans for my clients. I generally give them instructions on portion meals and also recipes .

    As I stay in Pune , Maharashtra when I ask them to eat Poha , by default it's understood has Kanda Pohe (Onion Poha) or Batata Poha (potato poha) with lots of oil , onion , potatoes and topped with some fine sev ..... ! Awwww, undoubtedly it tastes delicious .....! But that's not what I mean when I say eat Poha for breakfast .

    My happy clients somehow became unhappy when I said no sev toppings 🙁 so to keep up the taste along with nutrition and maintain calories , I made this Vegetable / Diet Poha .

    Ingredients

    Poha / Flattened Rice : A thick or medium variant Poha can be used in this recipe. Thick variant needs little more time around 5 minutes to rinse in water where as medium variant needs just 30 seconds.

    Vegetables : Onion , Tomatoes ,Carrot , French beans , Capsicum , Cabbabge , Potato etc, any vegetables of your choice can be used here.

    Beans/ Legumes : Sprouted moong bean ( green gram sprouts ), green peas and peanuts are used here to increase the protein portion in this recipe.

    Herbs : Coriander leaves , Curry leaves, green chillies , garlic , ginger and lemon.

    Spices : Mustard seeds , Cumin seeds , Turmeric powder and salt

    Others : Oil , chana dal and urad dal for tempering.

    How to make Vegetable Diet Poha

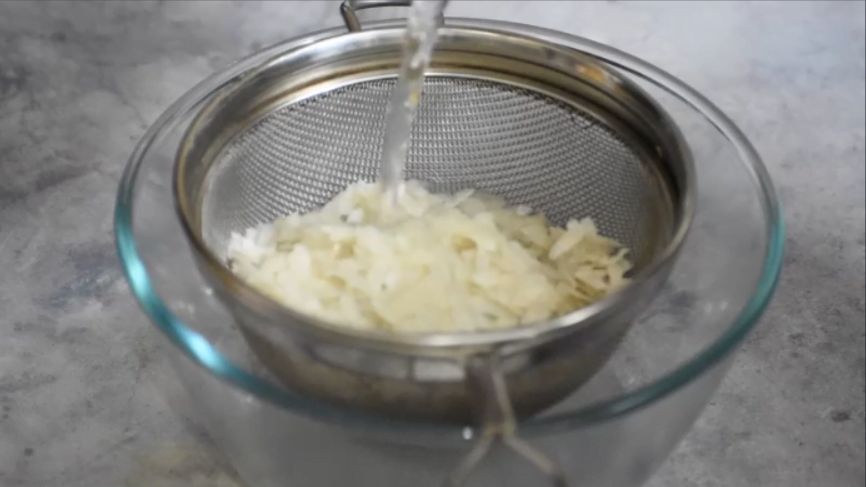
    Rinse medium variant , poha 2-3 times and set aside for 10 minutes. Let water drain completely. If using thick variant , you may need to soak poha in water for 4-5 minutes , drain water completely and set aside.

    Vegetable Poha | Diet Poha

    Whilst clean and wash all vegetables , chop and keep it ready .

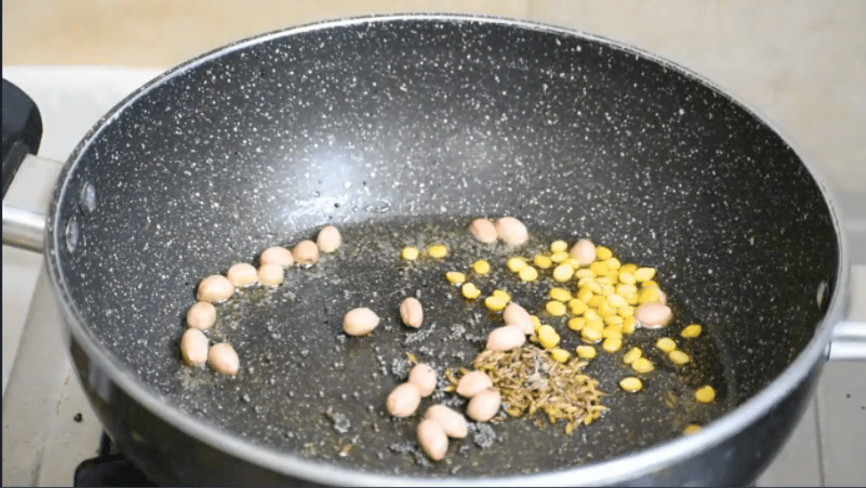
    Heat oil in a kadai / deep pan , add mustard seeds , jeera seeds allow it splutter. Add peanuts , Chana dal , urad dal and fry till it turns brown.

    Vegetable Poha | Diet Poha

    Throw in curry leaves , green chilies and grated ginger , saute for 30 seconds.

    Add chopped onions , turmeric powder , asafoetida.

    Vegetable Poha | Diet Poha

    Saute till onions turns translucent.

    Vegetable Poha | Diet Poha

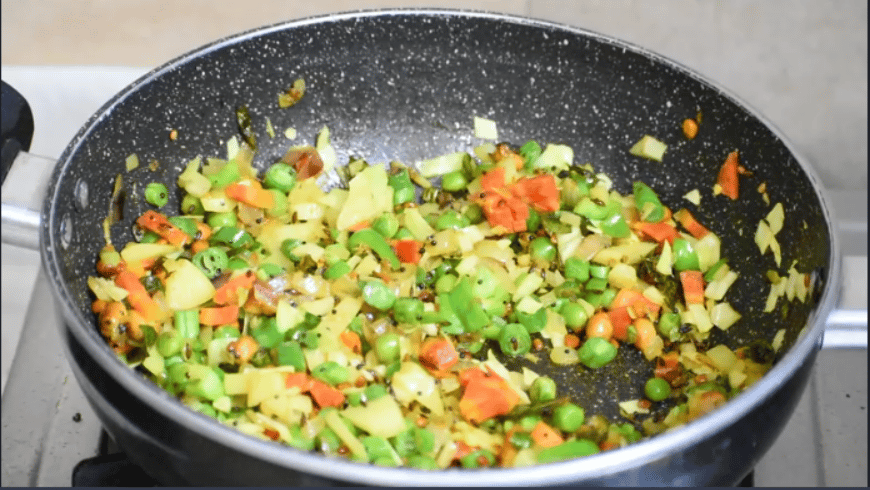
    Now add in green peas and all vegetables , add ½ teaspoon of salt .

    Vegetable Poha | Diet Poha

    Cook on medium heat until vegetables are cooked. Just make sure green peas and potatoes are well cooked , if other vegetables are cooked to 75% its fine.

    vegetables saute

    Now add in ½ cup of moong sprouts and mix well everything.

    sprouts in vegetable poha

    Add poha and salt to taste.

    Vegetable Poha | Diet Poha

    Mix well everything. Cook for 4-5 minutes on medium heat. You can also close lid and cook , if you want. I usually don't do this because steam falls on poha making it mushy. If you are using a thick variant poha , then closing a lid will help in soft and separated poha.

    Vegetable Poha | Diet Poha

    Turn off the stove , squeeze lime juice , add chopped coriander leaves , mix well everything .

    vegetbale poha recipe

    Serve hot . In frame salted ragi ganji and moong sprouts salad.

    diet poha

    Recipe

    vegetable-diet-poha
    5 from 3 votes

    Vegetable Poha -Diet Poha Recipe

    A healthy low carbohydrates breakfast made with lots of vegetables , sprouts and flattened rice.
    Prep Time10 minutes mins
    Cook Time20 minutes mins
    Total Time30 minutes mins
    Course: Breakfast, Tiffin
    Cuisine: Indian
    Keyword: Bachelor's Cooking, Diet, Gluten Free, Healthy
    Servings: 4 People
    Calories: 185kcal
    Author: Muktha H S

    Ingredients

    • 1 cup Poha / Flattened Rice , Thick or Medium variant refer notes
    • 1 Onion , medium size , chopped
    • ¼ cup Green peas , fresh or frozen
    • ⅓ cup Carrot , chopped
    • ¼ cup French beans , chopped
    • ¼ cup Capsicum , chopped
    • ¼ cup Potato , chopped
    • ⅓ cup Cabbage , chopped
    • ½ cup Moong bean sprouts
    • 2 no's Green chillies, chopped
    • 2 Sprig Curry leaves
    • ½ teaspoon Ginger ,grated
    • 1 ½ tablespoon Coconut Oil or any cooking oil , unrefined
    • ½ teaspoon Mustard Seeds
    • ½ teaspoon Jeera seeds /cumin seeds
    • 1 teaspoon Chana Dal
    • 1 teaspoon Urad Dal
    • 1 tablespoon Peanuts
    • ½ teaspoon Turmeric Powder
    • ¼ teaspoon Hing / Asafoetida
    • 1 teaspoon Rock Salt / Sendha Namak or as required
    • 1 tablespoon Coriander leaves , chopped
    • 1 tablespoon Lime juice

    Instructions

    • Rinse poha 2-3 times and set aside for 10 minutes. Let water drain completely.
    • Whilst clean and wash all vegetables , chop and keep it ready .
    • Heat oil in a kadai / deep pan , add mustard seeds , jeera seeds allow it splutter.
    • Add peanuts , Chana dal , urad dal and fry till it turns brown.
    • Throw in curry leaves , green chilies and grated ginger , saute for 30 seconds.
    • Add chopped onions , turmeric powder , asafoetida and saute till onions turns translucent.
    • Now add in green peas and all vegetables , add ½ teaspoon of salt and cook on medium heat until vegetables are cooked. Just make sure green peas and potatoes are well cooked , if other vegetables are cooked to 75% its fine.
    • Now add in ½ cup of moong sprouts and mix well everything.
    • Add poha , salt to taste and mix well everything.
    • Cook for 4-5 minutes on medium heat. You can also close lid and cook , if you want. I have not used closed lid here because steam falls on cooked food and may make poha mushy.
    • Turn off the stove , squeeze lime juice , add chopped coriander leaves , mix well everything and serve hot.

    Video

    Notes

    • Three variants of poha are available in market , thick , medium and thin. Thick variant needs to be soaked for about 4-5 minutes , medium variant can be just washed and used. Don't use thin variant Poha here.
    • You can add as much as vegetables you wish , there is no actual measurement for this. With this measurement of veggies there would be balance in taste with poha to vegetables ratio.
    • As this recipe is specially for diet , I have said unrefined coconut oil for cooking. You can use any cooking oil of your choice. You can also reduce on the amount of oil to ½ - 1 Tbsp 

    Nutrition

    Calories: 185kcal

    Rice Kanji | Homemade Probiotics

    Published : March 10, 2020 | Last Update on September 27, 2022 By Muktha

    rice-kanji-recipe

    Rice Kanji is a natural homemade probiotics made with rice ,water and homemade curds ( dahi ) . This is a good old traditional recipe passed from genertions to keep a healthy gut.

    This homemade rice kanji is very simple to make and works well on digestive system by improving digestive enzymes.

    Rice_Kanji
    [feast_advanced_jump_to]

    About this recipe

    Kanji tastes very similar to curd rice and tastes similar to curd rice. But the main difference with Rice kanji and regular curd rice is the fermentation of cooked rice.

    To make rice kanji , soak cooked rice overnight in a clay pot. After 12 hours of fermentation , you can eat 2-3 tablespoon of rice as first thing in the morning . Further adding homemade curds ,even increases the good bacteria's.

    But I make this rice kanji similar to curd rice. Soak cooked rice over night in little water. Following day either mash in hand or blend fermented rice in a mixer . To this add home made curds and finally add tempering .

    A delicious bowl of homemade , natural probiotics will be ready within 5 minutes. Without shelling out hundreds to thousands of money on store brought probiotics.

    Indian traditional and ancestral knowledge on food science says lot about health . With varieties of spices , herbs and techniques used for cooking , has lot to deliever to maintain a good health.

    As I am from Mysore , South India , my knowledge about food is more inclined towards with South Indian food. At home we traditionally follow few healthy food eating habits and practices from our ancestors to mainatian a healthy lifestyle. One such practice followed from years is eating Rice Kanji .

    This rice kanji recipe was followed by my maternal grand mother. She always used to soak cooked rice in clay pots. And on the following day , she used to mash rice well with hands , add curds , onions and served this for breakfast .

    Even today I prefer to eat only this if I feel discomfort on stomach. Also on any hot day , my lunch will be simple with a bowl of Rice Kanji , pickle and some stir fry veggies.

    Recently , I had put one of my client on a colon cleanse diet . With advise to eat lots of probiotics, fiber rich and gluten free food .

    So made this post on how to make Rice kanji at home , an inexpensive natural homemade probiotics.

    What are Probiotics and why is it important ?

    Probiotics are foods that contain healthy bacteria . These bacteria's are live microorganisms that helps in promoting a healthy digestive tract and a healthy immune system.

    Many problems like indigestion , bloating , leaky guts and poor immune system is because of poor gut health. It occurs when the ratio of bad microorganisms overpowers the good microorganisms in the human body.

    In the digestive tract , bad bacteria's are fed with refined carbohydrates . While the prebiotics, feed the good bacterias and thus help in balancing a good gut microflora.

    This process makes vitamins and minerals much more bioavailable in the body. Hence adding probiotics to diet is very important. If interested, read more about probiotics here.

    Watch video

    Step by Step directions to make Rice Kanji

    Soak ½ cup cooked rice in ½ cup water in a clay pot for about 10-12 hours or overnight.

    soak cooked rice in clay pot overnight

    Next day , transfer fermented rice to a blender , add salt to taste and blend to smooth paste.

    blend fremented rice in a mixer

    Transfer blended rice into a mixing bowl.

    Rice Kanji | Homemade Probiotics

    Whisk ¼ cup of homemade curds and add to rice paste , stir well. Preferably add slightly sour curds as it tastes more good. Stir well and keep aside .

    Rice Kanji | Homemade Probiotics

    To temper

    In a season pan / tadka pan , heat coconut oil . Add mustard seeds , jeera seeds , urad dal , chopped curry leaves , choppeds green chillies and fry well.

    Rice Kanji | Homemade Probiotics

    Add chopped onions and fry till it turns light brown .Turn off the stove

    Rice Kanji | Homemade Probiotics

    Now add in grated ginger , hing and mix well.

    Rice Kanji | Homemade Probiotics

    Pour temper over the prepared rice kanji.

    Rice Kanji | Homemade Probiotics

    Finally garnish with chopped coriander leaves . Tempering is purely optional and it enances the taste .

    Rice Kanji | Homemade Probiotics

    Eat immedieately.

    Rice_kanji_probiotics

    Recipe

    rice-kanji-recipe
    3.90 from 19 votes

    Rice Kanji | Homemade Probiotics

    Rice Kanji is homemade probiotics made by fermenting cooked rice and mixed with curds.
    Prep Time7 minutes mins
    Cook Time3 minutes mins
    Soaking time12 hours hrs
    Total Time10 minutes mins
    Course: Breakfast, Main Course
    Cuisine: South India
    Keyword: Bachelor's Cooking, Basic, Breakfast_Ideas, Diet, Gluten Free, Healthy, home remedies
    Servings: 1 people
    Calories: 110kcal
    Author: Muktha H S

    Ingredients

    • ½ cup cooked Rice
    • 1 cup water
    • ¼ cup curds , homemade
    • ¾ teaspoon salt or as required
    • 1 tablespoon fresh coriander leaves , chopped

    To Temper

    • ½ tablespoon coconut oil
    • ¼ teaspoon mustard seeds
    • ¼ teaspoon jeera / cumin Seeds
    • ½ teaspoon urad dal / split black gram
    • 1 teaspoon curry leaves ,finely chopped
    • ½ teaspoon green chilies , chopped
    • 4 tablespoon onion ,finely chopped
    • 1 teaspoon ginger , grated
    • ½ teaspoon Asafoetida / Hing

    Instructions

    • Soak ½ cup cooked rice in ½ cup water in a clay pot for about 10-12 hours or overnight.
    • Next day , transfer fermented rice to a blender and blend to smooth paste.
    • Transfer blended rice into a mixing bowl.
    • Whisk ¼ cup of homemade curds and add to rice paste and stir well. Preferably add slightly sour curds as it tastes more good.
    • Now add salt to taste and mix well.

    To temper

    • In a season pan / tadka pan , heat coconut oil , add mustard seeds ,jeera seeds , urad dal , chopped curry leaves , choppeds green chillies and fry well.
    • Add chopped onions and fry till it turns light brown .Turn off the stove
    • Now add in grated ginger , hing and mix well.
    • Pour temper over the prepared rice kanji.
    • Garnish with chopped coriander leaves and serve.

    Video

    Notes

    • Clay pot is used for fermentation , as science says it provides micro-oxygenation, including enzymatic reactions for producing unique flavors. If you don't have clay pot , you can use steel or glass vessel but clay pot is recommended.
    • Fermented rice needs to be mashed well , you can either squeeze with clean hands or use fork or blend in a mixer. 
    • Use slightly sour curds , it adds more taste to rice kanji.
    • Tempering  with coconut oil adds lots of flavor and tastes really good. 
    • You can use any type of cooked rice , best way to use left out rice.

    Nutrition

    Calories: 110kcal

    Gujiya Recipe|Karanji | Karjikai Recipe

    Published : March 9, 2020 | Last Update on October 18, 2022 By Muktha

    gujiya

    Gujiya Recipe with step by step photos and short video. Gujiya is a delicious Indian deep fried sweet , crispy, flaky pastry covering filled with dry fruits , nuts and milk solids.

    If you are here looking for holi sweets recipe , then do check Best Holi recipes here .

    Also after playing with colours refresh yourselves with Thandai , Kesar Badam Milk , Basundi , Aam Panna , Sattu Drink , Mango Lassi . Do check this post on how to make Thandai Masala Powder at home to make an Instant Thandai Recipe.

    Gujiya Recipe|Karanji | Karjikai Recipe
    [feast_advanced_jump_to]

    About this recipe

    Gujiya is also known as Karanji or Karjikai in different regions of India.The main difference in Gujiya , Karnaji or Karjikai mainly depends on sweet filling . Gujiya has a sweet filling of khoya and dry fruits mixture wheras Karanji or Karjikai is with desiccated dry coconut , poppy seeds , sesame seeds and sugar.

    These are just regional variations as per liking's , availability of ingredients based on abundance and seasonal need to the body requirements as done by our ancestors.

    Holi is incomplete without Gujiya , its a must sweet for bhog on Holi festival in North India. Hence , I too made this sweet for Holi festival . Here , I have used some homemade mawa , dry fruits , dry coconut and poppy seeds for filling .

    Tips and Variations to make Gujiya

    Also I have used 1 : 1 ratio of whole wheat flour to refined flour / maida but you can either use complete wholewheat flour or Refined flour / maida . Generally maida is used for covering along with 1 tablespoon of fine rava to get a crispy outer covering . But irrespective of flour , all techniques of making good gujiya lies in frying . For enhanced taste you can use 1 : 1 ratio of ghee and oil for deep frying. In fact you can use ghee completely for deep frying karanji , undoubtedly it tastes delicious.

    While making karjikai / karanji , heat oil / ghee in a medium heat and once it attains the required temperature , put on low flame and fry gujiya's. This ensures that you get a crispy gujiya .

    Alternatively you can also bake gujiya but this time as it was for festive celebrations , I was not in a mood to bake gujiya ...., I wanted authentic taste hence deep fried it . Still I cheated by using half amount of whole wheat flour / atta ,just ignore ! Lol 🙂

    If you are more calorie conscious you can bake this in an oven at 180 deg Celsius for about 28-30 minutes by brushing with oil and flipping it to other side in half way.

    Apart from frying , filling inside karanji speaks lot about this dish. Depending on the occasions stuffings also changes as per religious customs. In karnataka style karjikai , its dry coconut , poppy seeds , fried grams and sugar is the main filling. In Gujiya , its mainly mawa and dry fruits.

    Filling is individual's preferences as per their taste and practices. But I personally like mawa with dry fuits , hence I have used the same. You can get creative and add fillings of your choice.

    Step by step directions to make Gujiya

    To make dough

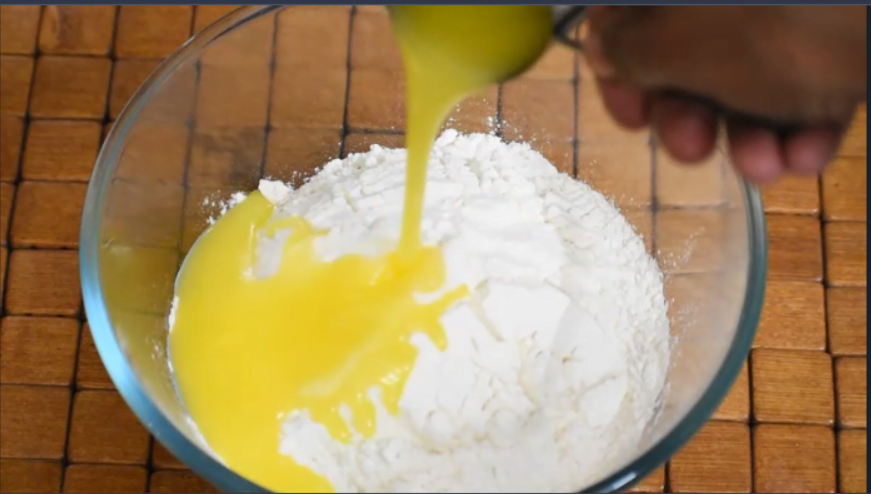
    In a bowl add flour, salt and melted ghee.

    Gujiya Recipe|Karanji | Karjikai Recipe

    Rub ghee with flour in hands till it looks like bread crumbs in texture.

    Gujiya Recipe|Karanji | Karjikai Recipe

    Add water part by part and knead the dough till firm .

    Gujiya Recipe|Karanji | Karjikai Recipe

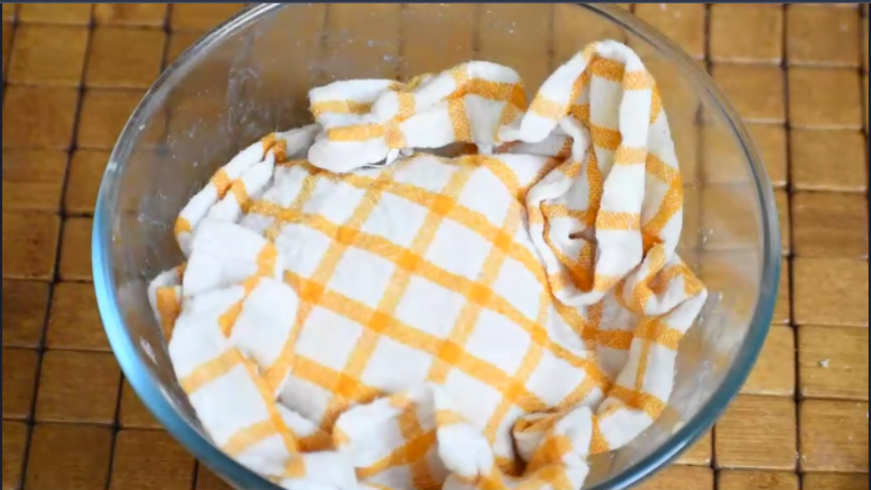
    Cover with a damp cloth and set aside for 30 minutes. Whilst make filling ready.

    Gujiya Recipe|Karanji | Karjikai Recipe

    To make filling

    Heat 1 tablespoon of ghee in a pan .

    Gujiya Recipe|Karanji | Karjikai Recipe

    Add poppy seeds , chopped nuts and raisins , roast on medium heat till it starts to change colour.

    Gujiya Recipe|Karanji | Karjikai Recipe

    Now add in dry coconut.

    Gujiya Recipe|Karanji | Karjikai Recipe

    Roast till aromatic .

    Gujiya Recipe|Karanji | Karjikai Recipe

    Transfer this into a wide plate and set aside.

    Gujiya Recipe|Karanji | Karjikai Recipe

    In the same pan , add grated khoya / mawa and fry for 6-8 minutes till it starts to change color to light brown. Turn off stove and allow it cool.

    Gujiya Recipe|Karanji | Karjikai Recipe

    Transfer mawa to the same plate with dry fruits.

    Gujiya Recipe|Karanji | Karjikai Recipe

    Now add in ½ cup powdered sugar , ½ teaspoon of cardamom powder .

    Gujiya Recipe|Karanji | Karjikai Recipe

    Mix well everything and set aside.

    Gujiya Recipe|Karanji | Karjikai Recipe

    To make sealant

    Add 2 tablespoon of maida flour , 3 tablespoon of water make a paste / slurry and set aside.

    Gujiya Recipe|Karanji | Karjikai Recipe

    To roll and shape

    Divide dough into 2 parts , roll into a log and cut into equal parts.

    Gujiya Recipe|Karanji | Karjikai Recipe

    Roll into small balls and set aside in the same bowl covered with a damp cloth.

    Gujiya Recipe|Karanji | Karjikai Recipe

    Now take a small ball and roll into a 5 inch diameter circle.

    Gujiya Recipe|Karanji | Karjikai Recipe

    Place rolled dough on a gujiya mold , put 1 ½ tablespoon of filling mixture into mold. Apply sealant mixture on the edges , close and open the mold .

    Gujiya Recipe|Karanji | Karjikai Recipe

    Shaped gujiya's will be ready. My new mold did not work well , hence I again shaped using fork.

    Gujiya Recipe|Karanji | Karjikai Recipe

    Alternative method is to shape with hands or by using fork .

    Gujiya Recipe|Karanji | Karjikai Recipe

    Whichever is convenient ,you can use that method to shape.

    Gujiya Recipe|Karanji | Karjikai Recipe

    To fry Gujiya

    Heat oil/ ghee in a deep frying pan / kadai to correct temperature. Test oil temperature by dropping a small piece of dough, if it comes up gradually then temperature is perfect and oil is ready to fry. If dough sits at the bottom , the oil is still warm and need to become hot , If it comes up immediately , then oil is too hot. So test oil before frying .

    Gujiya Recipe|Karanji | Karjikai Recipe

    Gently slide the gujiya into oil . And let it fry on a low heat.

    Gujiya Recipe|Karanji | Karjikai Recipe

    Once its cooked on one side, Turn them over carefully to other side . And fry till it turns golden in colour.

    Gujiya Recipe|Karanji | Karjikai Recipe

    Drain oil and remove gujiya. Place on a kitchen paper towel. Fry remaining gujiya's in few batches , drain and remove. Once they are cooled completely, store them in a air tight box . Stays good at room temperature upto 4-5 days.

    Serve to friends and family.

    Gujiya

    Recipe

    Gujiya Recipe
    5 from 2 votes

    Gujiya | Karanji | Karjikai Recipe

    Gujiya is a delicious Indian deep fried sweet , crispy, flaky pastry covering filled with dry fruits , nuts and milk solids.
    Prep Time30 minutes mins
    Cook Time40 minutes mins
    Total Time1 hour hr 10 minutes mins
    Course: Sweets
    Cuisine: Indian
    Keyword: Diwali, Festivals, Holi, Sankranti
    Servings: 12 makes
    Calories: 282kcal
    Author: Muktha H S

    Ingredients

    For Dough

    • 1 cup Wholewheat Flour
    • 1 cup Refined flour / Maida
    • ¼ teaspoon Salt
    • 3 tablespoon Ghee/Clarified Butter
    • ½ cup Water or as required ,refer notes

    For Filling

    • 1 tablespoon Ghee/Clarified Butter
    • 1 tablespoon Poppy Seeds / Khus khus , optional
    • 1 tablespoon Raisins
    • 10 no's Almonds, chopped
    • 10 no's Pistachios , chopped
    • 10 no's Whole Cashews ,chopped
    • ⅓ cup Dry Coconut , grated
    • 1 cup Mawa / Khoya , grated
    • ½ cup Sugar , powdered
    • ½ teaspoon Green cardamom powder

    For sealant

    • 2 tablespoon Maida / Refined flour
    • 3 tablespoon Water

    Other Ingredients

    • Oil / Ghee , as required for deep frying

    Instructions

    To make Dough

    • In a bowl add flour, salt and melted ghee.
    • Rub ghee with flour in hands till it looks like bread crumbs in texture.
    • Add water part by part and knead the dough till firm .
    • Cover with a damp cloth and set aside for 30 minutes.
    • Whilst make filling ready.

    To make filling

    • Heat 1 tablespoon of ghee in a pan , add poppy seeds.
    • Add all chopped nuts and raisins , roast on medium heat till it starts to change color.
    • Now add in dry coconut, roast till aromatic .
    • Transfer this into a wide plate and set aside.
    • In the same pan , add grated khoya / mawa and fry for 6-8 minutes till it starts to change color to light brown. Turn off stove and allow it cool.
    • Transfer mawa to the same plate with dry fruits.
    • Now add in ½ cup powdered sugar , ½ teaspoon of cardamom powder and mix well everything and set aside.

    To make Sealant

    • Add 2 tablespoon of maida flour , 3 tablespoon of water make a paste / slurry and set aside.

    To roll and shape gujiya

    • Divide dough into 2 parts , roll into a log and cut into equal parts.
    • Roll into small balls and set aside in the same bowl covered with a damp cloth.
    • Now take a small ball and roll into a 5 inch diameter circle.
    • Place rolled dough on a gujiya mold , put 1 ½ tablespoon of filling mixture into mold.
    • Apply sealant mixture on the edges , close and open the mold . Shaped gujiya's will be ready. Alternative method is to shape with hands or by using fork . Whichever is convenient ,you can use that method to shape.

    To fry Gujiya

    • Heat oil/ ghee in a deep frying pan / kadai to correct temperature. Test oil temperature by dropping a small piece of dough, if it comes up gradually then temperature is perfect and oil is ready to fry. If dough sits at the bottom , the oil is still warm and need to become hot , If it comes up immediately , then oil is too hot. So test oil before frying
    • Gently slide the gujiya into oil .And let it fry on a low heat.
    • Once its cooked on one side, Turn them over carefully to other side . And fry till it turns golden in colour.
    • Drain oil and remove gujiya. Place on a kitchen paper towel. Fry remaining gujiya's in few batches , drain and remove. Once they are cooled completely, store them in a air tight box . Stays good at room temperature upto 4-5 days.Serve to friends and family.

    Video

    Notes

    • Water quantity depends on the quality of flour , if using 2 cups of maida / refined flour then you may need less water . If using complete whole wheat flour , you may need more water. So add water part by part and then knead to smooth .
    • 1 deep fried gujiya of about 95 grams approx has about 282 calories.

    Nutrition

    Calories: 282kcal

    You may also like

    • kayi -hollige-obbattu
      Kayi Holige Recipe
    • Shahi Tukda
      Shahi Tukda Recipe
    • rajgira halwa
      Rajgira Halwa Recipe
    • Khoya Recipe
      Khoya| Homemade Mawa Recipe

    Easy Banana Bread | Eggless Bread Recipe

    Published : March 5, 2020 | Last Update on November 2, 2024 By Muktha

    banana-bread-recipe

    Easy Banana Bread recipe with step by step photos and short video . Banana Bread is a sweet bread with robust banana flavor and light texture. Goodness about this banana bread is its a kind of healthier bread made with whole wheat flour , oats , milk , yogurt and oil . This can be a served either for breakfast or along with a tea time snack.

    Banana Bread Recipe

    Unlike other breads its not dense in texture , its light and tastes delicious . In this recipe , I have used home made yogurt as a replacement for eggs. I recommend home made yogurt here because naturally cultured bacteria gives a tang taste and its acidity activates baking soda in bread which yields a soft and light bread. Also it keeps the bread moist without drying out. But if you can eat egg then add 2 eggs in place of yogurt.

    Adding eggs will give a airy light bread. I have made this banana bread by adding egg also. It comes out really well with a nice airy texture and its hard say whether its a bread or a cake , its that good.

    Can use all purpose flour in place of wholewheat flour. I added whole wheat flour in the recipe just to add some fiber in the bread. As this is my breakfast bread, I get a feel of eating healthier. You can also toss in some walnuts , choco chips and some seeds to get a nice crunchy taste. Just keep the basic measurement right , get creative and other add on's as per your liking's.

    This banana bread is good to eat on its own . But you can even spread some butter , peanut butter , almond butter or choco butter. If you are planning to serve with any kind of sweetened butter then make sure to add less sugar in the recipe to suit your taste.

    Other must try baking recipes on blog are : Pumpkin Walnut Pound cake , Tres Leches Cake , Wholewheat Masala Bun , Low fat Orange Cake , Banana Muffins and Flourless Chocolate Cake.

    RECIPE CARD FOR EASY BANANA BREAD

    Recipe

    Easy Banana Bread
    4.50 from 4 votes

    Easy Banana Bread | Eggless Bread Recipe

    Banana Bread is a sweet bread with robust banana flavor and light texture. This is a eggless bread made with goodness of wholewheat flour, oats, sugar , milk and yogurt.
    Prep Time10 minutes mins
    Cook Time50 minutes mins
    Total Time1 hour hr
    Course: Breakfast, Snack, Tiffin
    Cuisine: World
    Keyword: Baking, Bread, Eggless
    Servings: 10 People
    Calories: 201kcal
    Author: Muktha H S

    Ingredients

    • ¾ Cup Whole Wheat Flour
    • ¾ Cup All Purpose Flour
    • ¾ Cup Rolled Oats / Instant Oats
    • ⅔ Cup Sugar , powdered
    • 1 teaspoon Salt
    • 2 teaspoon Baking Powder
    • ¼ teaspoon Cooking Soda
    • 2 teaspoon Cinnamon Powder
    • 3 no's Banana , fully ripen
    • ½ Cup Yogurt , Homemade
    • ⅓ Cup Milk
    • ¼ Cup Cooking Oil
    • ¾ teaspoon Vanilla Essence or Vanilla Extract ( 1 ½ Tsp)

    Instructions

    • Preheat oven to 180 deg Celsius or 350 deg Fahrenheit.
    • Prepare a 9x5 loaf pan with parchment paper.
    • In a wide mixing bowl , combine whole wheat flour , all purpose flour , Oats , sugar , cinnamon powder , salt , baking powder and cooking soda.
    • Mix well everything and set aside.
    • Take another bowl , add banana and mash well with a fork.
    • Add milk , yogurt , oil , vanilla essence and whisk well together.
    • Now slowly add dry ingredients into wet ingredients mixing gently with a spatula. Just combine everything , don't over mix .
    • Pour batter into prepared bread tin , tap gently .
    • Place in oven and bake for about 48 -50 minutes or until a toothpick inserted comes out clean.
    • Cover the pan with aluminium foil and set aside to cool. This is a optional step but steam from cake helps to soften the top crust giving a nice texture on top.
    • When still warm, remove from tin , cut into a thick slice and serve with plain butter.
    • Store at room temperature / refrigerate wrapped in cling wrap for up to 3 days.

    Video

    Notes

    • Wholewheat flour can be replaced with all purpose flour. 
    • Batter may look bit thick , don't worry if you are using wholewheat flour. If its bit loose with more water , then bread may become dense after baking while using wholewheat flour. In case if the batter is too thick not even  thick spoon dropping consistency , then feel free to add little more milk to loosen the batter. Because it depends on quality of the wheat flour used.
    • Yogurt can be replaced with 2 eggs in the recipe. Try using homemade yogurt as it has naturally cultured bacteria , which helps to activate soda in bread. Also it has enough water content in it which is sufficient to bake bread. Avoid using thick yogurt . If using set curd from stores then for ½ cup curd use ½ cup water  to thin it out. Also few drops of lime juice would work better in such case.
    • I added ⅔ cup of sugar , I personally found it to be little sweeter for my taste buds. But friends & family found this perfect . I feel sugar can be reduced to ½ cup . If you are serving with peanut / almond/ hazel nut sugared butter then do reduce the sugar in the recipe.

    Nutrition

    Calories: 201kcal

    Step by Step directions to make Easy Eggless Banana Bread

    Preheat oven to 180 deg Celsius or 350 deg Fahrenheit.

    Prepare a 9x5 inch loaf pan with parchment paper.

    In a wide mixing bowl , combine whole wheat flour , all purpose flour , Oats, sugar , cinnamon powder , salt , baking powder and cooking soda.

    Easy Banana Bread | Eggless Bread Recipe

    Mix well everything and set aside.

    Easy Banana Bread | Eggless Bread Recipe

    Take another bowl , add banana and mash well with a fork.

    Easy Banana Bread | Eggless Bread Recipe

    Add milk , yogurt , oil , vanilla essence and whisk well together.

    Easy Banana Bread | Eggless Bread Recipe

    Now slowly add dry ingredients into wet ingredients mixing gently with a spatula. Just combine everything , don't over mix .

    Easy Banana Bread | Eggless Bread Recipe

    Pour batter into prepared bread tin , tap gently . Batter may look bit thick, its absolutely fine while using whole wheat flour also use only homemade curd which has water in it. Don't use thick yogurt or store brought set curd.

    Easy Banana Bread | Eggless Bread Recipe

    Place in oven and bake for about 48 -50 minutes.

    Easy Banana Bread | Eggless Bread Recipe

    Bake until a toothpick inserted comes out clean.

    Easy Banana Bread | Eggless Bread Recipe

    Cover the pan with aluminium foil and set aside to cool. This is a optional step but steam from cake helps to soften the top crust giving a nice texture on top.

    Easy Banana Bread | Eggless Bread Recipe

    When still warm, remove from tin , cut into a thick slice and serve with plain butter.

    Easy Banana Bread | Eggless Bread Recipe

    Store at room temperature / refrigerate wrapped in cling wrap for up to 3 days.

    Easy Banana Bread | Eggless Bread Recipe

    Lemon Ginger Concoction

    Published : March 1, 2020 | Last Update on May 4, 2021 By Muktha

    Lemon Ginger Concoction

    Lemon Ginger concoction with step by step photos and short video . Lemon Ginger concoction is a mixture of lemon, ginger juice with rock salt and warm water.

    This concoction is mainly used for detoxification of colon to flush out toxins from the body. Lemon ginger juice is used as a natural home remedy for colon cleanse.

    Lemon Ginger Concoction
    [feast_advanced_jump_to]

    About this recipe

    Lemon Ginger concoction is a mixture of lemon, ginger juice with rock salt and warm water. This concoction is used for detoxification of colon . It helps to flush out toxins from the body.

    There is no much of recipe here other than mixing of juices and salt with warm water. Clean Colon can keep illness like common cold , flu , headache, join pains , lack of concentration at bay. Hence a timely scheduled colon cleanse at least once in 60 days is very effective.

    To know more about colon cleanse and get a sample Indian Diet Plan, refer this article.

    How to use this

    While on colon cleanse diet , lemon ginger concoction need to be taken at least 3 times a day. Start your day with 1 glass of warm water followed by an apple. After 30 minutes of eating an apple , sip on 2 glasses ( 400 ml) of lemon ginger concoction and give a minimum 60 minutes of gap for the next meal.

    Also maintain a 30 minutes of gap for lunch as well as dinner after drinking leminger concoction.

    Refer Indian sample diet chart for more details on do's and don'ts during colon cleanse. hour before breakfast and 30 minutes before lunch and dinner.

    Watch Video

    For colon cleanse vegetable smoothies , Kiwi Cucumber Smoothie are preferred over juices but still you can add juices like Alovera Amla Detox , ABC Juice , Beetroot Detox and Coriander Amla Detox.

    Step by Step directions to make Lemon Ginger Concoction:

    Heat water till its warm .

    Grate ginger and place in a mesh strainer on a bowl .

    Lemon Ginger Concoction

    Press grated ginger with a spoon against mesh strainer and collect 2 tablespoon of juice in a bowl.

    Lemon Ginger Concoction

    Add 2 tablespoon of lime juice from fresh cut lime .

    Lemon Ginger Concoction

    Now add in 2 teaspoon of Rock Salt / Sendha Namak to the lemon ginger mixture , mix well.

    Lemon Ginger Concoction

    Take 400 ml of warm water in a glass .Add the entire mixture.

    Lemon Ginger Concoction

    Stir well till salt is completely dissolved.

    Lemon Ginger Concoction

    Sip on and drink immediately.

    Lemon Ginger Concoction

    Recipe

    Lemon Ginger Concoction
    5 from 3 votes

    Lemon Ginger Concoction

    Lemon Ginger Concoction is a mixture of lemon juice, ginger juice and rock salt with warm water , this is an effective natural home remedy for colon cleanse.
    Prep Time5 minutes mins
    Cook Time2 minutes mins
    Total Time7 minutes mins
    Course: Drinks
    Cuisine: Indian
    Keyword: Detox, home remedies
    Servings: 1 People
    Calories: 9kcal
    Author: Muktha H S

    Ingredients

    • 400 ml Water
    • 2 tablespoon Lemon juice
    • 2 Tbsp Ginger Juice
    • 2 teaspoon Rock Salt / Sendha Namak

    Instructions

    • Heat water till its warm .
    • Grate ginger and extract fresh. Press grated ginger with a spoon against mesh strainer and collect 2 tablespoon of juice in a bowl.
    • Add 2 tablespoon of lime juice from fresh cut lime .
    • Now add in 2 teaspoon of Rock Salt / Sendha Namak to the lemon ginger mixture , mix well.
    • Take 400 ml of warm water in a glass , add the entire mixture and stir well till salt is completely dissolved.
    • Sip on and drink immediately.

    Video

    Notes

    • 30 minutes after sipping , you may have to visit bathroom ,its completely natural and don't panic. Its all about colon cleanse. 

    Nutrition

    Calories: 9kcal

    Colon Cleanse - Indian Diet Plan

    Published : February 29, 2020 | Last Update on November 26, 2021 By Muktha

    Colon cleanse is very essential for a good health . The colon plays an important role in eliminating the waste and toxic material from the body and absorbs the water and sodium to maintain the electrolyte balance. The improper functioning of the colon causes accumulation of toxic matter in the body which results in various health problems.

    Most of the illness and diseases are caused by an unhealthy colon. When elimination is impaired, food waste can stay in colon for few days to weeks and putrefy the entire system. Thus causing various health problems like common cold, hemorrhoids, weight problems, constipation, diarrhea, fatigue, headaches, sinusitis, allergies, digestive problems, joint pains and stress.

    A combination of poor-quality food with bad elimination thus causes various health problems. Retained debris in the colon leads to absorption of toxins, resulting in “systemic” intoxication within the body . Hence colon cleansing becomes necessary to remove toxins and waste from the body.

    A scheduled colon cleanse helps to maintain a healthy lifestyle. Methods like Colon irrigation , Water enema , Basti ( Ayurveda medicated enema) , Herbal Colon Cleansing are generally in practice for colon cleansing. But apart from these methods, a natural cleansing method with a systematic diet can help to cleanse colon.

    Colon Cleanse - Indian Diet Plan

    Colon cleanse can help improve overall body's health and wellness. It is one of the most effective process to detoxify the body . Hence following a scheduled colon cleanse often will ensure better digestion of food with proper absorption of nutrients. Colon cleansing can help body rejuvenate itself naturally.

    Also if you are struggling with weight loss and management then consider colon cleanse before starting with your diet plan . Following colon cleanse diet plan for minimum 3 days will prepare body to eliminate toxins regularly with better digestion and absorption capacity. Also increases energy , metabolism and helps to focus on healthy diet.

    3 Day Indian Diet Plan for Colon Cleanse

    colon_cleanse_diet_plan

    The above diet plan is a sample diet plan , if you are looking for a customized diet plan then feel free to write to me. Also you can fill in diet consultation form and mail to mukthagopinath@gmail.com

    While on Colon Clenase , gluten free diet is generally followed along with fermented food . Probiotics plays a very important role in gut health, hence fermented food is emphasized in Indian diet chart. Dosa , Idli , Dhokla , Rice Kanji, beetroot kanji are all fermented food. When paired along with veggies / sambar/ chutney , it aids in proper digestion of food , there by improving gut health and increasing metabolism . This helps for proper absorption of nutrients and intended weight loss without being low on energy levels.

    Recipes used in diet plan are available on blog . While adapting these recipes for colon cleanse , make sure to use unrefined coconut oil / groundnut oil or mustard oil . Also replace table salt with Rock salt / sendha namak or pink salt in the recipe.

    Colon Cleanse Recipes on blog are :

    • Lemon Ginger Concoction
    • Rice Kanji
    • Murmura Bhel | Churmuri | Jhalmuri
    • Murmura Upma
    • Vegetable Poha | Diet Poha
    • Vegtable Pulao
    • Mixed Lentil Dosa | Adai Dosa
    • Pesarattu | Greengram Dosa
    • Healthy Masala Idli
    • Hummus
    • Stir fry Okra
    • Coconut Chutney
    • Drumstick Sambar
    • Tiffin Sambar
    • Lentil Rice | Bisi Bele Bath

    Colon Cleanse lemon ginger drink

    Note:

    • You may have urge to use bathroom frequently during colon cleanse. Hence plan and schedule colon cleanse accordingly.
    • This is sample diet plan only .
    • Increase your water intake up to 3 liters.
    • Use Pink salt or rock salt only.
    • Keep small portion size , don't over eat .
    • Try to use unrefined oil to cook food.

    Disclaimer : Always check with your doctor before starting any diet plan


    Fish Curry | Meen Gassi - Mangalore Style

    Published : February 22, 2020 | Last Update on September 29, 2022 By Muktha

    Mangalore Fish Curry

    Fish Curry | Meen Gassi recipe with step by step photos and short video. Fish Curry | Meen Gassi : A mild spiced , flavorful fish curry from coastal regions of Mangalore is delicious with hint of tang and tone of sweetness from coconut is served with plain rice or boiled rice.

    Fish Curry
    [feast_advanced_jump_to]

    About this recipe

    This fish curry is a popular curry from Mangalore , coastal area in Southern region of Karnataka . Coastal regions are popular for its wide varieties of tasty sea foods .

    Meen in kannada means Fish and Gassi is curry, hence it's called as Meen Gassi in local language . Mangalorean Fish curry is quite popular across the globe and can be seen on menu of many restaurants too.

    This curry is lightly spiced dish with a hint of tang flavor from tamarind and a very mild sweetish tone from coconut . Flavors balances so well with coconut oil that you end up having extra morsels of rice. Fish Curry is normally served with white rice or boiled rice and is popularly known as fish curry rice. If you haven't tried this dish yet , then I recommend you to try once to know why people love this so much.

    Mangalore Fish curry gets its unique flavor from Jaargey / Malbar Tamarind / Kumdampuli . Jaargey is a dried exterior of a fruit which is sour in taste. If its not available , either tamarind or kokum can be used as an alternative , which do justice to the recipe. I have used tamarind here , you can even soak dried kokum and use it as well.

    As its native of Mangalore , its needless to mention about the use of fresh coconut. Recipe here calls for use of coconut oil and fresh coconut . I must say , coconut oil adds lots of flavor to this dish. Hence don't skip on using coconut oil if you are keen about getting authentic Mangalore Fish Curry.

    Watch Video

    Types of fishes

    Most common types of sea fish used for this curry are Pomfret , Kane (Lady fish) , Boothai (Sardines) and Bangude (Mackerel) . But incase if its not available in your region you can also try this recipe with Kingfish , Tilapia and Catfish. If you are used to eat fresh water fish then you can also try with Rohu and Catla. This curry tastes equally good with all kind of fishes and also with shripm and prawns.

    Fish Curry Rice

    Similar Fish recipes

    My DH is very fond of Mangalore style Fish Curry. Also Neer Dosa with Chicken Gassi , Chicken Sukka , Kori Roti and Kane Masala fish fry are few of his favorites to mention . And I Love Fish fry ......, any fish for that matter , I Just Love It. Bangude Fish Fry , Chettinad style fish fry , Simple Fish Fry and Amritsari fish fry are few of the recipes which I often make at home.

    We'll , let me stop here, if you also crave for fish , then try out any recipes from my space and let me know , how it turned out for you.

    Step by Step Directions to make Fish Curry | Meen Gassi

    Heat 2 tablespoon of coconut oil in a heavy bottom pan.

    Fish Curry | Meen Gassi - Mangalore Style

    Add ginger , green chili and finely chopped onion . Fry till raw smell goes off.

    Fish Curry | Meen Gassi - Mangalore Style

    Now add in chopped tomatoes , pinch of salt and cook till tomatoes look pulp.

    Fish Curry | Meen Gassi - Mangalore Style

    Whilst prepare masala paste by blending coconut , chili powder , coriander powder , tamarind, garlic , peppercorns , methi seeds and ajwain into a fine paste.

    Fish Curry | Meen Gassi - Mangalore Style

    Add little water while blending to make fine paste.

    Fish Curry | Meen Gassi - Mangalore Style

    Add this ground masala into above cooked tomatoes.

    Fish Curry | Meen Gassi - Mangalore Style

    Saute and cook masala paste for 5 minutes, till rawness of masala paste goes off. Add ½ cup of mixer rinsed water and cook masala till specks of oil is seen on top.

    Fish Curry | Meen Gassi - Mangalore Style

    Now add 3 cups of water and salt to taste .

    Fish Curry | Meen Gassi - Mangalore Style

    Bring it to boil .

    Fish Curry | Meen Gassi - Mangalore Style

    Keep flame on medium heat and add fish pieces .

    Fish Curry | Meen Gassi - Mangalore Style

    Close lid and let fish cook for 10 minutes on medium heat.

    Fish Curry | Meen Gassi - Mangalore Style

    When it comes to boil , open lid and keep on sim.

    Fish Curry | Meen Gassi - Mangalore Style

    Whilst, heat oil in a Tadka / season pan , add curry leaves and chopped onions fry till onions turns brown.

    Fish Curry | Meen Gassi - Mangalore Style

    Pour seasoning / tadka over fish curry and turn off the stove.

    Fish Curry | Meen Gassi - Mangalore Style

    Serve Fish curry with plain rice or boiled rice.

    Mangalore Fish Curry

    Recipe

    Fish Curry
    4.50 from 4 votes

    Fish Curry | Meen Gassi - Mangalore Style

    Fish Curry | Meen Gassi : A mild spiced , flavourful fish curry from coastal regions of Mangalore is delicious with hint of tang and tone of sweetness from coconut is served with plain rice or boiled rice.
    Prep Time15 minutes mins
    Cook Time30 minutes mins
    Total Time45 minutes mins
    Course: Main Course
    Cuisine: Indian, Mangalore, South India
    Keyword: Coconut, Curries
    Servings: 5 People
    Calories: 257kcal
    Author: Muktha H S

    Ingredients

    • 500 grams Fish
    • 2 tablespoon Coconut Oil
    • 1 Onions medium size
    • 4 no's Green Chilies Slit
    • 1 " inch Ginger grated
    • 2 no's Tomatoes
    • 3- 3.5 cups Water
    • 2 teaspoon Salt or as required

    To Grind into Masala Paste

    • 1 cup Coconut
    • 2 teaspoon Red chili powder
    • 2 teaspoon Coriander powder
    • 1 teaspoon Turmeric
    • ½ teaspoon Jeera / Cumin Seeds
    • ¼ teaspoon Fenugreek Seeds / Methi Seeds
    • ¼ teaspoon Ajwain /Carom seeds
    • ½ teaspoon Black Peppercorns
    • 6 Garlic Cloves,medium size
    • ½ Onion, medium size , roughly sliced
    • Tamarind lemon size

    For Seasoning

    • 2 tablespoon Coconut Oil
    • 1 no Onions finely chopped
    • 1-2 sprigs Curry leaves

    Instructions

    • Heat 2 tablespoon of coconut oil in a heavy bottom pan.
    • Add ginger , green chili and finely chopped onion . Fry till raw smell goes off.
    • Now add in chopped tomatoes , pinch of salt and cook till tomatoes look pulp.
    • Whilst prepare masala paste by blending coconut , chili powder , coriander powder , tamarind, garlic , peppercorns , methi seeds and ajwain into a fine paste. Add little water while blending to make fine paste.
    • Add this ground masala into above cooked tomatoes.
    • Saute and cook masala paste for 5 minutes, till rawness of masala paste goes off.
    • Add ½ cup of mixer rinsed water and cook masala till specks of oil is seen on top.
    • Now add 3 cups of water and salt to taste , bring it to boil .
    • Keep flame on medium heat and now add fish pieces .
    • Close lid and continue to cook for 10 minutes.
    • When it comes to boil , open lid and keep curry on simmer.
    • Meanwhile , heat oil in a Tadka / season pan , add curry leaves and chopped onions fry till onions turns brown.
    • Pour seasoning / tadka over fish curry and turn off the stove.
    • Serve Fish curry with plain rice or boiled rice.

    Video

    Nutrition

    Calories: 257kcal

    Thambittu | Akki Thambittu Recipe

    Published : February 20, 2020 | Last Update on October 17, 2022 By Muktha

    Thambittu Recipe

    Thambittu | Akki Thambittu recipe with step by step photos and short video. Akki Thambittu unde is a traditional Karnataka sweet made during Maha shivratri festival . Its a quick and easy sweet recipe made with rice flour , peanuts , dry coconut , fried gram and jaggery . As festival is around the corner made this traditional sweet . This thambittu can also be refereed as Rice Flour Laddu. As Akki means rice in Kannada and unde is ladoo.

    Thambittu | Akki Thambittu Recipe

    Rather than following a traditional method , I have opted a shortcut method of using Rice flour to make Akki Thambittu Unde. To make authentic thambittu , rice grains are washed and dried in shade . Later dry roasted till aromatic, then milled along with fried gram and other ingredients are added and laddu's are formed . To make such authentic version of this dish one needs to do it in larger quantities as you need to mill it. Another alternative is you can use mixer jar to make fine powder , sieve and use . But to be frank here , I feel its not worth taking all time and efforts to make such authentic version as there is no much difference in taste .

    Traditionally thambittu is made on festive day and shaped has diya (deepa) and is called Thambittu Deepa . By litting all diya's "aarthi " is performed to Lord called as "Tambittu aarti " . This ritual is followed since ages and is one of the most important ritual on Maha shivratri day . Later Thambittu unde is distributed among devotees as Prasada.

    Thambittu | Akki Thambittu Recipe

    Making thambittu is lot more easier , just dry roast all dry ingredients . Make a jaggery syrup and bind everything together. Thambittu is little dry in texture and bit harder when compared to other laddo's. But getting a right consistency of jaggery syrup will help to get those perfect Thambittu Unde. While making Jageery syrup just before you get 1 string consistency turn off the stove and quickly add 1 tablespoon of ghee , this prevents from further solidifying of jaggery syrup. Then immediately mix syrup with dry ingredients and bind together to form ladoo's.

    Few other Laddu recipes on blog are :

    • Rava Ladoo Recipe|Rave Unde
    • Til Gul Ladoo Recipe
    • Besan Ladoo Recipe
    • Puri Unde | Murmura Ladoo

    RECIPE CARD FOR THAMBITTU | AKKI THAMBITTU

    Recipe

    Thambittu Recipe
    5 from 4 votes

    Thambittu | Akki Thambittu Recipe

    Thambittu is a sweet from Karnataka made during Mahashivaratri festiva made with Rice flour , fried gram , peanuts and jaggery.
    Prep Time15 minutes mins
    Cook Time15 minutes mins
    Total Time30 minutes mins
    Course: Dessert, Sweets
    Cuisine: Indian, Karnataka, South India
    Keyword: Festivals, Sweets
    Servings: 10 Makes
    Calories: 224kcal
    Author: Muktha H S

    Equipment

    • Flat Pan
    • Mixer Jar or Blender
    • Spatula

    Ingredients

    • 1 cup Rice flour
    • ⅔ cup Fried gram
    • ½ cup Groundnuts
    • ⅓ cup Dry coconut
    • 2 tablespoon Sesame seeds
    • 1 ⅛ Cup Jaggery powder
    • ⅓ cup Water
    • ½ teaspoon Cardamom powder
    • ¼ teaspoon Ginger powder
    • 3 tablespoon Ghee / Clarified butter

    Instructions

    • In a wide pan , dry roast fried gram for 2 minutes.
    • Transfer roasted fried gram to a blender and blend to a fine powder.
    • Transfer fried gram powder to a wide plate.
    • Now take 1 cup of rice flour in the same pan and dry roast for 5-6 minutes on a medium heat or till steam starts to escape from flour.
    • Add roasted flour into same wide plate along with fried gram powder.
    • Dry roast groundnuts till skin starts to peel off.
    • Remove skin and transfer into a mixer jar. Blitz / pulse for a second to get crushed peanuts .
    • Add this into the same plate along with rice flour and fried gram powder.
    • Dry roast dry coconut and sesame seeds for 2-3 minutes on a medium flame and transfer into the plate with other ingredients.
    • Add cardamom powder , ginger powder and mix well.
    • Add 2 tablespoon of ghee / clarified butter and crumble well with hands.
    • Make a well at the center of the flour and set aside.
    • Warm ⅓ cup of water in a pan and add 1 cup and 2 tablespoon of jaggery powder into it.
    • Keep on medium heat and bring it to boil. When it starts to bubble , just check between fingers for sticky consistency .
    • Just before its about to form 1 string consistency , turn off the stove and add 1 tablespoon of ghee / clarified butter and quickly stir in.
    • Pour jaggery syrup into the center of the dry ingredients and mix well everything.
    • Grease hands with ghee and take a portion of the mixture and bind together to form balls.
    • Thambittu is ready to serve. Store it in a air tight container ,it has a good shelf life and stays good for about 15-20 days without refrigerator.

    Video

    Notes

    • Jaggery Syrup consistency is most important here. Once jaggery melts and starts to bubble , check between fingers to find whether its sticky enough to bind together. Do not wait till 1 string consistency , just before you get a string consistency turn off the stove and add ghee. 
    • If syrup is too thin then you may not be able to bind together , if it reaches a string consistency then ladoo becomes very hard. 
    • Ladoo tends to become harder even after binding , so make sure to add ghee when syrup starts to bubble.

    Nutrition

    Calories: 224kcal

    Step by Step Directions to make Thambittu Recipe :

    In a wide pan , dry roast fried gram for 2 minutes.

    Thambittu | Akki Thambittu Recipe

    Transfer roasted fried gram to a blender and blend to a fine powder.

    Thambittu | Akki Thambittu Recipe

    Transfer fried gram powder to a wide plate.

    Thambittu | Akki Thambittu Recipe

    Now take 1 cup of rice flour in the same pan and dry roast for 5-6 minutes on a medium heat or till steam starts to escape from flour.

    Thambittu | Akki Thambittu Recipe

    Add roasted flour into same wide plate along with fried gram powder.

    Thambittu | Akki Thambittu Recipe

    Dry roast groundnuts till skin starts to peel off.

    Thambittu | Akki Thambittu Recipe

    Remove skin and transfer into a mixer jar. Blitz / pulse for a second to get crushed peanuts .

    Thambittu | Akki Thambittu Recipe

    Add this into the same plate along with rice flour and fried gram powder.

    Thambittu | Akki Thambittu Recipe

    Dry roast dry coconut and sesame seeds for 2-3 minutes on a medium flame and transfer into the plate with other ingredients.

    Thambittu | Akki Thambittu Recipe

    Add cardamom powder , ginger powder and mix well.

    Thambittu | Akki Thambittu Recipe

    Add 2 tablespoon of ghee / clarified butter and crumble well with hands.

    Thambittu | Akki Thambittu Recipe

    Make a well at the center of the flour and set aside.

    Warm ⅓ cup of water in a pan and add 1 cup and 2 tablespoon of jaggery powder into it.

    Thambittu | Akki Thambittu Recipe

    Keep on medium heat and bring it to boil. When it starts to bubble , just check between fingers for sticky consistency .

    Thambittu | Akki Thambittu Recipe

    Just before its about to form 1 string consistency , turn off the stove and add 1 tablespoon of ghee / clarified butter and quickly stir in.

    Thambittu | Akki Thambittu Recipe

    Pour jaggery syrup into the center of the dry ingredients and mix well everything.

    Thambittu | Akki Thambittu Recipe

    Mix well together.

    Thambittu | Akki Thambittu Recipe

    Grease hands with ghee and take a portion of the mixture and bind together to form balls.

    Thambittu | Akki Thambittu Recipe

    Thambittu is ready to serve. Store it in a air tight container ,it has a good shelf life and stays good for about 15-20 days without refrigerator.

    Thambittu

    Bombay Sagu | Potato Sagu Recipe

    Published : February 16, 2020 | Last Update on September 27, 2022 By Muktha

    bombay saagu

    Bombay Sagu recipe with step by step photos and short video. Bombay Sagu is a simply side dish made with basic ingredients like potatoes, fried grams and simple seasoning .

    bombay sagu
    [feast_advanced_jump_to]

    This easy to make bombay sagu goes on well with any kind of Rava Idli . Be it a Ragi Rava idli , Oats rava idli or any millet based Rava Idli. I prefer this sagu over coconut chutney or sambar for Rava Idli . As rava idli enhances in taste along with this side dish. Some even serve this sagu with poori , though it tastes good with poori , I make slightly different version of potatao masala for poori.

    The time taken to make this sagu is same as that of a coconut chutney provided you have boiled potatoes before . For this recipe I usually boil potatoes but you can also finely chopped potatoes. I make this recipe exclusively for rava idli , hence to save some time in the morning I always roast rava previous night and keep . While roasting semolina , I also keep potatoes for boiling , so that I can save some good 15 minutes in the morning rush hours. Its just all about my time management.

    Other than Rava Idli , you can also serve this with poori and also with chapati . But for chapati , the consistency of this sagu need should be thicker whereas for idli it should be thinner. This is a No Onion , No Garlic recipe but a variation to this recipe does include addition of onions. You can add onions if you need but I personally don't prefer in fact its not actually needed as it adds no taste nor some extra nutritional benefits .

    Also I wanted to highlight this , in all my recipes I use bit less oil or only as required.

    In case if you don't mind having 1 more extra spoon of oil in your curries , you can go ahead and add more.

    As I always eat my food with 1 tablespoon of ghee / clarified butter , I actually don't prefer adding more oil than required.

    Adding extra fat definitely adds extra richness and taste to the dish but I always feel , it shouldn't be at the cost of our health. Just 1 tablespoon of oil contains 120 calories and adding more than required just adds on calories.

    As these curries are everyday eating recipes and my prime importance of writing a food blog is to share regular recipes , which are tasty and healthy with occasional indulgence .

    Other similar side dish recipes that goes well with breakfast are Mixed Vegetable sagu , Tiffin Sambar and Tomato Chutney .

    Watch Video

    How to make to make Bombay Sagu

    Preparation

    In a blender add ¼ cup fried gram and blend to a fine powder.

    Bombay Sagu | Potato Sagu Recipe

    Add ¼ cup of water and whisk well to form a lump free paste.

    Bombay Sagu | Potato Sagu Recipe

    Add another ¼ cup water dilute the paste and keep aside till use.

    Bombay Sagu | Potato Sagu Recipe

    Boil 3 medium sized potatoes ,remove skin. Slightly mash with fork and set aside till use.

    Bombay Sagu | Potato Sagu Recipe

    To make Bombay Saagu

    Heat oil in a kadai or pan , add mustard seeds , jeera / cumin seeds and wait till it to crackles.

    Bombay Sagu | Potato Sagu Recipe

    Add Chana dal , urad dal and fry till it starts to change colour.

    Bombay Sagu | Potato Sagu Recipe

    Now add in dry red chilies broken , curry leaves , hing , slit green chilies and grated ginger , saute for a minute.

    Bombay Sagu | Potato Sagu Recipe

    Add ¼ cup of green peas and saute for 2-3 minutes . You can even use fresh green peas , blanch and use.

    Bombay Sagu | Potato Sagu Recipe

    Add ½ teaspoon Turmeric powder and mix well.

    Bombay Sagu | Potato Sagu Recipe

    Add 11/2 cup water , pinch of salt and continue to cook till peas are done.

    Bombay Sagu | Potato Sagu Recipe

    Bring to boil.

    Bombay Sagu | Potato Sagu Recipe

    Keep on medium heat , add in fried gram paste and stir well.

    Bombay Sagu | Potato Sagu Recipe

    Add roughly mashed potatoes and mix well.

    Bombay Sagu | Potato Sagu Recipe

    Add salt to taste

    Bombay Sagu | Potato Sagu Recipe

    Cook till it reaches the desired consistency. If it becomes more thick add ½ cup of more water and mix well. It thickens a bit more even after cooling , so when it comes boil , turn off the stove immediately.

    Bombay Sagu | Potato Sagu Recipe

    Add chopped coriander leaves and squeeze in lime juice.

    Bombay Sagu | Potato Sagu Recipe

    Mix well and serve with any ragi idli.

    Recipe

    bombay saagu
    No ratings yet

    Bombay Sagu | Potato Sagu Recipe

    Bombay Sagu is a very simple side dish prepared potatoes , peas and fried gram.
    Prep Time15 minutes mins
    Cook Time10 minutes mins
    Total Time25 minutes mins
    Course: Side Dish
    Cuisine: Indian, South India
    Keyword: Bachelor's Cooking, No Onion , No Garlic, Quick & Easy
    Servings: 5 People
    Calories: 98kcal
    Author: Muktha H S

    Ingredients

    • 3 Potatoes , Medium Size , Boiled
    • ¼ cup Green Peas , Fresh or frozen , refer notes
    • ¼ cup Fried gram
    • 1 ½ tablespoon Oil
    • ½ Tsp Mustard Seeds
    • ½ teaspoon Jeera / Cumin Seeds
    • ½ tablespoon Chana Dal
    • ½ tablespoon Urad Dal
    • 2 Sprig Curry leaves
    • 1-2 Dry Red chilly , broken
    • ¼ teaspoon Hing / Asafoetida
    • 4 Green Chilies, slit
    • ½ inch Ginger ,grated
    • 1 - 1 ½ teaspoon Salt to taste
    • ½ tablespoon Lime Juice
    • 2 tablespoon Coriander leaves
    • 1 ½ - 2 Cups Water or as required refer notes

    Instructions

    Preparation

    • Boil 3 medium sized potatoes ,remove skin. Slightly mash with fork and set aside till use.
    • In a blender add ¼ cup fried gram and blend to a fine powder.
    • Add ¼ cup of water and whisk well to form a lump free paste. Add another ¼ cup water dilute the paste and keep aside till use.

    To make Bombay Saagu

    • Heat oil in a kadai or pan , add mustard seeds , jeera / cumin seeds and wait till it to crackles.
    • Add Chana dal , urad dal and fry till it starts to change colour. curry leaves , broken red chilies.
    • Now add in dry red chilies broken , curry leaves , hing , slit green chilies and grated ginger , saute for a minute.
    • Add ¼ cup of green peas and saute for 2-3 minutes . You can even use fresh green peas , blanch and use.
    • Add ½ teaspoon Turmeric powder and mix well.
    • Add 11/2 cup water , pinch of salt and continue to cook till peas are done.
    • Keep on medium heat , add in fried gram paste and stir well.
    • Add roughly mashed potatoes and mix well.
    • Add salt to taste
    • Cook till it reaches the desired consistency. If it becomes more thick add ½ cup of more water and mix well. It thickens a bit more even after cooling , so when it comes boil , turn off the stove immediately.
    • Add chopped coriander leaves and squeeze in lime juice.
    • Mix well and serve with any rava idli.

    Video

    Notes

    • Green peas is optional , you can use fresh or frozen . If using fresh then cooking hours will vary . Alternatively you can even blanch and add green peas .
    • If you don't have fried gram then you can even use chick pea flour / gram flour. Use ¼ cup of besan flour and add ½ cup water to make paste.
    • Added about 2 ½ cups of water including ½ cup water to make fried gram paste . If you are serving for chapati , it needs to be thick and if its for Rava idli , it needs to be thin. 

    Nutrition

    Calories: 98kcal

    You may also like

    • Vegetable saagu with poori
      Vegetable Saagu Recipe
    • kaddu-ki-chutney
      Pumpkin Chutney | Kaddu Ki Chutney Recipe
    • cauliflower potato kurma
      Cauliflower Potato Kurma | aloo gobi kurma
    • mushroom-masala-recipe
      Mushroom masala recipe

    Kesar Badam Milk

    Published : February 11, 2020 | Last Update on September 27, 2022 By Muktha

    Kesar-badam-milk

    Kesar Badam Milk is a delicious Indian Beverage made with saffron and almonds. Its a delicious and nutritious drink that you can sip on and get lost with its flavours.

    Badam milk can be served either hot or chilled , but I personally like cold badam milk. This is easy to make and can serve your family and friends during gatherings and festivals.

    If you like the flavours of Kesar Badam then you must never miss to try out Pista Badam Kulfi , Shrikhand , Basundi and Rabri.

    Kesar Badam Milk
    [feast_advanced_jump_to]

    About this recipe

    Kesar Badam Milk is a delciious sweetened drink made with milk, almonds , saffron , cardamom and rose petals .

    Best thing about this badam milk is it's flavours . I can describe this as a lightly sweetened , aromatic and flavorful milk .

    It's so tasty that even milk haters will fall in love with this chilled badam milk . And one will never get to know that they are drinking a glass of milk.

    During winters you can drink a hot cup of badam milk to keep you warm from within . Having almonds when soaked for just 30 minutes or less , will keep you warm from within , it produces heat in the body .

    Where as when you soak almonds for longer periods for 12 hours or more , it has a cooling effect on the body .

    You can chill and serve badam sweetened milk on summer also. So according to season , prepare badam milk and devour .

    You get Kesar Badam milk powder readily available in stores but believe me once you taste this delicious badam milk at home , I bet you will never turn back to those readymade instant Kesar Badam Milk Powder .

    You must try this Kesar Badam Milk recipe as it is

    • Simple to make
    • Better than any store bought
    • Economical
    • Nutritious
    • Tasty and flavourful
    Kesar Badam Milk

    Ingredients

    To make this delicious and tasty Indian sweetened beverage , you need few basic ingredients from kitchen pantry .

    Whole Milk - I always prefer to use full fat whole cow's milk to make this drink as it add lot od richness and creminess to kesar badam milk . Having said so , you can even use skimmed milk , it tastes delcioius even with less fat too. For vegans , I straight away recommend to use Almond milk as a substitue to cow's milk here.

    Almonds - This ingredient is the hero of this recipe . Use premium qulaity almonds to make this beverage.

    Saffron - There is no fun without kesar ( saffron ) in fesar badam doodh. It gives light golden colour to the milk and the flavors it imparts is exceptional. Nothing can bring those fragrance and flavours of saffron strands in this milk.

    Sugar - I use white crystal sugar here . You can use any sweetener as your preference.

    Green Cardamom - Nothing can replace the aroma of freshly pound green cardamom.

    Optional Add On's

    Rose petals - You can either use 1 tbsp Dry Rose Petals or few drops of rose water to make Kesar badam milk.

    Nuts - Add some finely crushed or sliced nuts of your choice. I prefer to add pistachios and cashews . Fell free to use whichever is available and according to your likings.

    Watch Video

    How to make Kesar Badam Milk

    Soak almonds in 1 cup of hot water for about 20 minutes.

    Kesar Badam Milk

    Soak 20 saffron strands in ¼ cup of warm milk and set aside for 20 minutes.

    Kesar Badam Milk

    Peel almond skin and transfer it into a mixer jar / blender.

    Kesar Badam Milk

    Add ¼ cup of milk to blender , 3-4 saffron strands (optional) .

    Kesar Badam Milk

    Blend to a very fine paste.

    Kesar Badam Milk

    Bring 3.5 cups of milk to boil .

    Kesar Badam Milk

    Add almond paste and stir well.

    Kesar Badam Milk

    Keep on low flame and stir milk till raw smell of almonds completely goes off. This takes for about 15 minutes. Keep stirring milk in between to avoid scorching of milk from bottom.

    Add saffron soaked milk and stir well , boil for 5 minutes on a medium heat.

    Kesar Badam Milk

    Add ¼ cup of sugar and stir well , till it dissolves for about 5 minutes.

    Kesar Badam Milk

    Turn off the stove . Add freshly crushed cardamom powder from mortar and pestle.

    Kesar Badam Milk

    Also add dry rose petal and stir well.

    Kesar Badam Milk

    Garnish with slivered pista and almonds. Kesar Badam Milk can be served either hot or cold.

    Kesar Badam Milk

    Recipe

    Kesar-badam-milk
    5 from 1 vote

    Kesar Badam Milk Recipe

    Kesar Badam Milk is a very tasty sweetened beverage made with almonds , saffron and flavored with cardamom and rose petals . You can serve it either chilled or hot.
    Prep Time10 minutes mins
    Cook Time30 minutes mins
    Soaking Time20 minutes mins
    Total Time1 hour hr
    Course: Beverage
    Cuisine: Indian
    Keyword: Beverages, Celebrations, Festivals, Holi
    Servings: 4 People
    Calories: 90kcal
    Author: Muktha H S

    Ingredients

    • 4 cups Whole Milk , full fat
    • 30 Almonds
    • 20 -25 Saffron strands
    • ¼ cup Sugar
    • 5 pods Green Cardamom ,remove husk and powder
    • 1 tablespoon Dry Rose Petals , optional , refer notes
    • 1 cup Water to soak almonds
    • 1 teaspoon Pistachios , slivered for garnish

    Instructions

    • Soak almonds in 1 cup of hot water for about 20 minutes.
    • Soak 20-25 saffron strands in ¼ cup of warm milk and set aside for 20 minutes.
    • Peel almond skin and transfer it into a mixer jar / blender.
    • Add ¼ cup of milk to blender , 3-4 saffron strands and blend to a very fine paste.
    • Bring milk to boil , add almond paste and stir well.
    • Keep on low flame and stir milk till raw smell of almonds completely goes off. This takes for about 20 - 25 minutes. Keep stirring milk in between to avoid scorching of milk from bottom.
    • Add saffron soaked milk and stir well , boil for 5 minutes on a medium heat.
    • Add ¼ cup of sugar and stir well , till it dissolves.
    • Turn off the stove . Add freshly crushed cardamom powder from mortar and pestle.
    • Also add dry rose petal and stir well.
    • Garnish with slivered pista ,almonds and dry rose petals.`
    • Kesar Badam Milk can be served either hot or cold.

    Video

    Notes

    • 3.5 cups of milk is used to boil , ¼ cup of milk to blend almonds and ¼ cup of milk to soak almonds. All together its 4 cups of full fat whole milk is used in this recipe.
    • You can either use dry rose petals or 1-2 tablespoon of rose water .
    • Garnish with nuts , saffron strands and dry rose petals before serving.

    Nutrition

    Calories: 90kcal

    You may also like

    • Shahi Tukda
      Shahi Tukda Recipe
    • mango-phirni-topped-with-pistachios-rose-petals
      Mango Phirni Recipe
    • rasmalai
      Rasmalai Recipe | Easy Rasmalai Recipe
    • Thandai-kulfi
      Thandai Kulfi Recipe

    Instant Ragi Idli Recipe

    Published : February 10, 2020 | Last Update on September 27, 2022 By Muktha

    Instant Ragi Idli

    Instant Ragi Idli recipe with step by step photos and short video. Ragi Idli is a nutritious , diabetic friendly breakfast made with Ragi , curds and semolina.

    I have used grated carrot here but to make it more nutritious and diabetic friendly , you can add grated lauki / bottle gourd . Be creative and add some nutritious vegetables like grated beetroot ,cucumber and also ash gourd .

    These vegetables gets well with this Ragi Idli without altering much taste .

    Instant Ragi Idli Recipe
    [feast_advanced_jump_to]

    About this recipe

    Finger millet Idli aka Ragi Idli is a nutritious , diabetic friendly breakfast made with Ragi , curds and semolina. Also with goodness of some diabetic friendly vegetables is added to increase ,its nutritious value.

    There are two methods to make ragi idli , one is authentic version where ragi grains are soaked along with urad dal , ground to batter and then idli is made. And other version is this quick and instant Idli made with Ragi Flour.

    Watch video

    For all working ladies for a hassle free morning , make this nutritious breakfast to kick start your day . These ragi idli's are quite filling , its just 2 idli's per serving and keeps you energized for long. It takes just 30 minutes from start to finish without monitoring. Also to save some time you can roast semolina and ragi , previous night to speed up the process of making breakfast the following day.

    Also vegetables like bottle gourd, ash gourd , beetroot have proven its benefits in maintaining blood glucose levels. Hence if you are exclusively making this for diabetic patients then you can add the above mentioned vegetables. Also if you are new to Ragi taste , then I recommend to add any vegetable like carrot or cucumber to make Idli till you get adjusted with the taste of earthy

    Serving Suggestions

    This insant Ragi idli's are soft and has hint of earthen flavor of ragi . I personally recommend to serve this Ragi idli hot with a spoon of ghee and Tiffin Sambar or bombay potato saagu or tomato chutney . Also onion chutney , pumpkin chutney and Gori Kai Kara chutney | Cluster beans chutney goes on well with this.

    I somewhat doesn't like the combination of Ragi Idli with coconut chutney because this particular ragi idli calls for some really strong flavored , spicy chutney or sambar rather than traditional coconut chutney.

    Ragi for Diabetics

    Ragi / Finger Millet is considered to be one of the best cereal for diabetics. It has high dietary fiber , high protein and is rich source of minerals like calcium ,iron and phosphorous. As ragi has complex carbohydrates and is low on GI , it can be the best source of energy to diabetic patients without spike in glucose levels . Also this can work wonder on weight management and weight loss when added to regular diet . But for all who wants to try this , always keep a mono cereal diet per meal to get its benefits.

    Step by step directions to make Instant Ragi Idli

    Heat 1 tablespoon of oil in a flat pan. Add mustard seeds and cumin seeds , once it starts to splutter add cashews.

    Instant Ragi Idli Recipe

    Add Chana Dal and urad dal and saute till cashews and dals turns light golden brown.

    Instant Ragi Idli Recipe

    Now add in chopped green chilly and curry leaves and mix .

    Instant Ragi Idli Recipe

    To this add regular rava / semolina and fry on a medium heat for 2 minutes.

    Instant Ragi Idli Recipe

    Add ragi flour and continue to roast on a medium heat for 3-4 minutes.

    Instant Ragi Idli Recipe

    Turn off the heat / stove. Remove pan from the stove and set aside for the mixture to cool down.

    Instant Ragi Idli Recipe

    After cooling , add in salt , coriander leaves and grated carrot. Mix well everything .

    Instant Ragi Idli Recipe

    Add curds and water , stir and mix well , so that there are no lumps.

    Instant Ragi Idli Recipe

    Keep it covered aside for minimum 10-15 minutes or more to rest .

    Instant Ragi Idli Recipe

    Whilst , keep water for boiling to steam idlis . Also grease idli plates with oil and set aside.

    Instant Ragi Idli Recipe

    After 10-15 minutes, ragi and rava would have absorbed water and batter would be very tight.

    Instant Ragi Idli Recipe

    Add ¼- ⅓ cup of curds and 1 - 2 tablespoon of water if needed and mix well everything to a Idli batter consistency.

    Instant Ragi Idli Recipe

    Add cooking soda and mix well.

    Instant Ragi Idli Recipe

    Place ladle full of idli batter on each section of greased idli plates , tap plates to level the batter.

    Instant Ragi Idli Recipe

    Now place the stacked idli plates into a steamer / pressure cooker and steam for 10 -12 minutes only.

    Instant Ragi Idli Recipe

    Give standing time of minimum 5 minutes before remove idli's from plates. Alternatively you can cook idli in a pressure cooker without closing pressure (weight) .

    Instant Ragi Idli Recipe

    Remove Idli plate from steamer/ pressure cooker.

    Instant Ragi Idli Recipe

    Wet the base of idli plate with cold water and remove idli's. Serve Idli hot with Tomato Chutney or Bombay Saagu.

    Instant Ragi Idli Recipe

    Recipe

    Instant Ragi Idli
    No ratings yet

    Instant Ragi Idli

    Instant Ragi Idli - A nutritious and healthy breakfast made with ragi flour , curds and semolina.
    Prep Time8 minutes mins
    Cook Time12 minutes mins
    Resting Time10 minutes mins
    Total Time30 minutes mins
    Course: Breakfast
    Cuisine: Indian, South India
    Keyword: Bachelor's Cooking, Breakfast_Ideas, Diet, Healthy
    Servings: 4 person
    Calories: 164kcal
    Author: Muktha H S

    Equipment

    • Flat Pan
    • Idli moulds
    • Pressure Cooker Or Steamer

    Ingredients

    • ½ cup Ragi Flour / Finger Millet flour
    • ½ cup Regular Rava / semolina
    • ¾ cup Curds
    • ½ cup Water
    • 1 teaspoon Salt
    • 1 tablespoon Oil
    • ½ teaspoon Mustard seeds
    • ½ teaspoon Jeera/Cumin Seeds
    • 1 tablespoon Chana Dal
    • 1 tablespoon Urad Dal
    • 1 tablespoon Cashew halves , optional
    • 1 teaspoon Green Chili , finely chopped
    • 1 sprig Curry leaves , chopped
    • ¼ teaspoon Coriander leaves
    • ⅓ Cup Carrot , grated
    • ⅛ teaspoon Baking Soda

    Instructions

    • Heat 1 tablespoon of oil in a flat pan.
    • Add mustard seeds and cumin seeds , once it starts to splutter add cashews
    • Add Chana Dal and urad dal and saute till cashews and dals turns light golden brown.
    • Now add in chopped green chilly and curry leaves and mix .
    • To this add regular rava / semolina and fry on a medium heat for 2 minutes.
    • Add ragi flour and continue to roast on a medium heat for 3-4 minutes.
    • Turn off the heat / stove. Remove pan from the stove and set aside for the mixture to cool down.
    • After cooling , add in salt , coriander leaves and grated carrot.
    • Mix well everything .
    • Add curds and water , stir and mix well , so that there are no lumps.
    • Keep it covered aside for minimum 10 minutes or more to rest .
    • Whilst , keep water for boiling to steam idlis . Also grease idli plates with oil and set aside.
    • After 10-15 minutes, ragi and rava would have absorbed water and batter would be very tight.
    • Add ¼- ⅓ cup of curds and 1 - 2 tablespoon of water if needed and mix well everything to a Idli batter consistency.
    • Place ladle full of idli batter on each section of greased idli plates/ molds , tap the molds to level the batter.
    • Now place the stacked idli plates into a steamer and steam for 10 -12 minutes only. Give standing time of minimum 5 minutes before remove idli's from plates. Alternatively you can cook idli in a pressure cooker without closing pressure (weight) .
    • Remove Idli plate from steamer , wet the base of idli plate with cold water and remove idli's. Serve Idli hot with Tomato Chutney or Bombay Saagu.

    Video

    Nutrition

    Calories: 164kcal
    • Instant Rava Paddu | Sooji Appe
      Instant Rava Paddu | Sooji Appe
    • Instant Oats Idli
      Instant Oats Idli Recipe | how to make Oats Idli
    • Onion Rava Dosa
      Onion Rava Dosa| Instant Rava Dosa Recipe

    Rice Appe | Paddu |Guliappa Recipe

    Published : February 4, 2020 | Last Update on May 4, 2021 By Muktha

    Rice Appe

    Rice Appe | Paddu | Guliappa recipe with step by step photos and short video. Appe | Paddu is a tasty South Indian breakfast made with rice and dal batter . To make authentic paddu , all variety of lentils / dal's are used along with rice and grind to smooth batter , later tempered and cooked in appe pan by drizzling little oil. Appe can also be made by using left over idli or dosa batter but authentic paddu with all lentils tastes more delicious. This rice appe is soft and tastes delicious when served hot with thin coconut chutney.

    Rice Appe | Paddu |Guliappa Recipe

    Again to highlight , appe is considered as a healthy breakfast / snack with complete protein with combination of cereals and pulses . Also when served with coconut chutney and ghee , along with enhanced taste it makes it more healthier with therapeutic properties of coconut and ghee. adding ghee to coconut chutney brings down the glycemic index . Eating this kind of healthy breakfasts are always win win situation for health as well as taste .

    Appe , Dosa , Idili are all staple breakfast in South India and is common at every home with their own creative and additional ingredients. Whenever and where ever you eat a good food take some time to explore that food and recipe followed to put that wonderful dish. Always try to discover wide varieties of recipes from your neighbours , families , friends, relatives , food blogs and adapt recipes that tastes good and are healthy . End of the day our mind should be happy and contend with good food and good work to get sound full sleep for a healthy body.

    If you are interested , do check these complete protein , healthy breakfast recipes from South India

    • Set Dosa
    • Masala Dosa
    • Greengram Dosa | Pesarratu
    • Adai
    • Masala Idli
    • Khara Pongal
    • Sweet Pongal
    • Hesarru bele anna
    • Bisi bele bath | Hot lentil rice

    RECIPE CARD FOR RICE APPE | PADDU | GULIAPPA

    Recipe

    Rice Appe
    5 from 4 votes

    Rice Appe | Paddu | Guliappa

    Rice Appe is a popular South Indian Breakfast made with soaked dal and rice batter , fermented overnight , tempered and cooked in appe pan by drizzling oil and then served with thin coconut chutney.
    Prep Time15 minutes mins
    Cook Time10 minutes mins
    Soaking and Fermentation20 hours hrs
    Total Time20 hours hrs 25 minutes mins
    Course: Breakfast
    Cuisine: South India
    Keyword: Breakfast_Ideas, Gluten Free, Protein Rich, Vegan
    Servings: 35 Makes
    Calories: 240kcal
    Author: Muktha H S

    Equipment

    • Appe Pan
    • Wet Mixer Jar or Grinder
    • Seasoning Pan

    Ingredients

    For Batter

    • 2 cups Regular rice or Dosa Rice
    • ⅓ cup Urad Dal
    • 1 tablespoon Chana Dal
    • 3 tablespoon Moong Dal
    • 2 tablespoon Toor Dal
    • ¾ Cup Poha / Flattened rice , refer notes
    • 1 teaspoon Methi Seeds / Fenugreek Seeds
    • Water as required to soak

    To Temper

    • 1 tablespoon Oil
    • ½ teaspoon Mustard Seeds
    • ½ teaspoon Cumin Seeds / Jeera Seeds
    • 2 Green Chilies , chopped
    • ½ cup Onion , chopped
    • 1 sprig Curry Leaves Chopped
    • ⅛ teaspoon Asafoetida / Hing , optional ,refer notes

    Other Ingredients

    • 1 teaspoon Salt
    • ⅓ cup Coriander Leaves
    • Oil as required for roasting

    Instructions

    To make batter

    • In a bowl , add rice grains , urad dal , channa dal , moong dal and toor dal , rinse well.
    • Add enough water and soak for about 7-8 hours.
    • In a separate bowl , add methi / fenugreek seeds and poha / flattened rice.
    • Rinse well and soak in water for about 4 hours or upto 7-8 hours.
    • After 7 hours of soaking , drain water completely from both rice , dal and poha.
    • Transfer soaked dals , rice and poha into a wet mixer jar or grinder.
    • Add very little water around ¼ cup and grind to fine batter.
    • Transfer batter into a deep bowl .
    • Add 1 teaspoon of non iodized salt and mix well with hands.
    • Keep batter in a warm place and allow it to ferment for about 9-10 hours or overnight.
    • After fermentation , gently mix well the batter and transfer required amount of batter into a bowl and set aside.

    To Temper

    • Heat 1 tablespoon of oil in a pan , add mustard seeds . Once it splutters , add cumin seeds.
    • Add chopped curry leaves , green chilies , chopped onions and saute till onions turns translucent.
    • Turn off the stove, add pinch of asafoetida and mix well.
    • Add this tempered mixture into appe batter and set aside.

    Procedure to make appe

    • Add some freshly chopped coriander leaves into appe batter , stir well and keep the batter ready.
    • Heat appe pan , drizzle few drops of oil in each chamber.
    • Keep heat on a medium flame , drop a spoon full of appe batter in each section of pan.
    • Drizzle some oil on top of batter .
    • Cover the pan with lid and cook for about 3-4 minutes till base turns firm.
    • With help of spoon , flip appe and cook on other side for 1-2 minutes.
    • Remove from pan and serve hot with coconut chutney .

    Video

    Notes

    • You can use either Thick or Thin Poha . If using Thick Poha , use ½ cup , if using medium thin , then use ¾ cup.
    • Adding Hing / Asafoetida is optional , I recommend here to use because using it along with dals helps for digestion and avoids flatulence.
    • Serving size , 5 Paddu / person , calories : 240 / serving

    Nutrition

    Calories: 240kcal

    Step by Step directions for Rice Appe | Paddu | Guliappa

    To make batter

    In a bowl , add rice grains , urad dal , channa dal , moong dal and toor dal , rinse well.

    Rice Appe | Paddu |Guliappa Recipe

    Add enough water and soak for about 7-8 hours.

    Rice Appe | Paddu |Guliappa Recipe

    In a separate bowl , add methi / fenugreek seeds and poha / flattened rice.

    Rice Appe | Paddu |Guliappa Recipe

    Rinse well and soak in water for about 4 hours or upto 7-8 hours.

    Rice Appe | Paddu |Guliappa Recipe

    After 7 hours of soaking , drain water completely from both rice , dal and poha.

    Rice Appe | Paddu |Guliappa Recipe

    Transfer soaked dals , rice and poha into a wet mixer jar or grinder.

    Add very little water around ¼ cup .

    Rice Appe | Paddu |Guliappa Recipe

    Grind to fine batter.

    Rice Appe | Paddu |Guliappa Recipe

    Transfer batter into a deep bowl . Add 1 teaspoon of non iodized salt and mix well with hands.

    Rice Appe | Paddu |Guliappa Recipe

    Close batter and keep it in a warm place . Allow it to ferment for about 9-10 hours or overnight.

    Rice Appe | Paddu |Guliappa Recipe

    After fermentation , gently mix well the batter and transfer required amount of batter into a bowl and set aside.

    To Temper

    Heat 1 tablespoon of oil in a pan , add mustard seeds . Once it splutters , add cumin seeds.

    Rice Appe | Paddu |Guliappa Recipe

    Add chopped curry leaves , green chilies , chopped onions and saute till onions turns translucent.Turn off the stove, add pinch of asafoetida and mix well.

    Add this tempered mixture into appe batter and set aside.

    Rice Appe | Paddu |Guliappa Recipe

    Procedure to make appe

    Add some freshly chopped coriander leaves into appe batter , stir well and keep the batter ready.

    Rice Appe | Paddu |Guliappa Recipe

    Heat appe pan , drizzle few drops of oil in each chamber.

    Rice Appe | Paddu |Guliappa Recipe

    Keep heat on a medium flame , drop a spoon full of appe batter in each section of pan.

    Rice Appe | Paddu |Guliappa Recipe

    Drizzle some oil on top of batter .

    Rice Appe | Paddu |Guliappa Recipe

    Cover the pan with lid and cook for about 3-4 minutes till base turns firm.

    Rice Appe | Paddu |Guliappa Recipe

    With help of spoon , flip appe and cook on other side for 1-2 minutes.

    Rice Appe | Paddu |Guliappa Recipe

    Remove from pan and serve hot with coconut chutney .

    Rice Appe

    Egg Biryani Recipe | Anda Biryani

    Published : January 30, 2020 | Last Update on September 21, 2022 By Muktha

    Egg-biryani-recipe@palates-desire

    Egg Biryani recipe with step by step photos and short video .

    Anda Biryani or Egg Biryani is a flavorful and fragrant rice cooked with aromatic biryani spices and boiled egg on a low flame till perfection.

    Egg Biryani
    [feast_advanced_jump_to]

    Authentic egg biryani recipe needs no introduction, its flavourful , fragrant and fluffy . This is quite simple biryani recipe with few aromatic spices , less cooking hours and no marination hours .

    To make egg biryani recipe at home , you need complete 60 minutes from start to end. But before jumping into a recipe go through the detailed tips to cook a perfect restaurant style Biryani at home.

    As this is a basic and simple Egg Biryani recipe , I have just used boiled eggs and no marination is done .

    But for hyderabadi egg dum biryani recipe , I do marinate eggs for minimum 30 minutes. If you wish , to marinate eggs , then prick boiled eggs with fork and marinate with hung curd , ginger garlic paste , red chilli powder , salt , oil and lime juice.

    Marination is done mainly for 2 reasons , one is to tenderize meat and other is to add flavours . But for Vegetables and Eggs, tenderizing is not required . Fat( oil or butter) and Citric acid ( lime or vinegar ) are must ingredients used to tenderize and other ingredients are just used to add flavours.

    Preparation is more while making biryani . But with proper planning , you can save some time.

    To save time , I generally boil water in electric kettle and then use to cook rice , from which I can get 90% cooked rice in 7-8 minutes. Also if eggs are boiled and kept before , then all you need is saute everything together in oil and cook on sim . This makes the process of making Egg biryani recipe , easier.

    Also adding barista ( fried brown onion) adds lots of flavour and enhances taste of biryani. I generally make barista and freeze , but as I didn't had at home I haven't used. But if you have , I recommend you to use or else alternatively you can also deep fry some sliced onions and use in egg biryani recipe.

    Tips to make perfect Egg Biryani Recipe

    Use premium quality spices because it imparts lots of flavours and aroma to Biryani .

    Always use old age rice for Biryani , rinse and wash well for 3-4 times and soak for minimum 30 minutes before cooking.

    Fat is very important to make a perfect biryani . So grease you thick bottom pan always with good amount of fat . Incase if you are trying to make a restaurant style biryani , then do add little more oil and ghee to get a tasty biryani.

    Good hours of marination .

    Slow cooking technique helps flavours to blend well .

    If you are a biryani - pulao lover and planning for a special weekend meal with family & friends at home then you can try any of these following delicious recipes :

    • Chicken Pulao
    • Chicken Donne Biryani
    • Ambur Star Chicken Biryani
    • Chettinad Mushroom Pulao
    • Vegetable Dum Biryani
    • Palak Paneer Pulao
    • Jeera Rice

    Watch Video

    How to make Best Egg Biryani Recipe

    Preparations

    Boil 5-6 eggs for 10 minutes , remove shell and set aside.

    Wash rice for 3-4 times , till water runs clear and soak rice in water for minimum 30 minutes.

    Make fresh ginger garlic paste and set aside.

    Clean all greens , slice onions , chop tomatoes , slit green chilies and set aside.

    For cooking rice

    Boil 8-10 cups of water . Add bay leaf , green cardamom , cinnamon , cloves and soaked rice.

    Egg Biryani Recipe | Anda Biryani

    Drain rice and add soaked rice to boiling water.

    Egg Biryani Recipe | Anda Biryani

    Add 1 teaspoon of oil ,tsp of salt and few torn mint leaves.

    Egg Biryani Recipe | Anda Biryani

    Cook rice for about 7-8 minutes , till its 90 % cooked. Turn off the stove.

    Egg Biryani Recipe | Anda Biryani

    Drain water completely from rice , pour cold water and drain water completely.

    Egg Biryani Recipe | Anda Biryani

    Spread rice on a wide plate , sprinkle some salt and set aside.
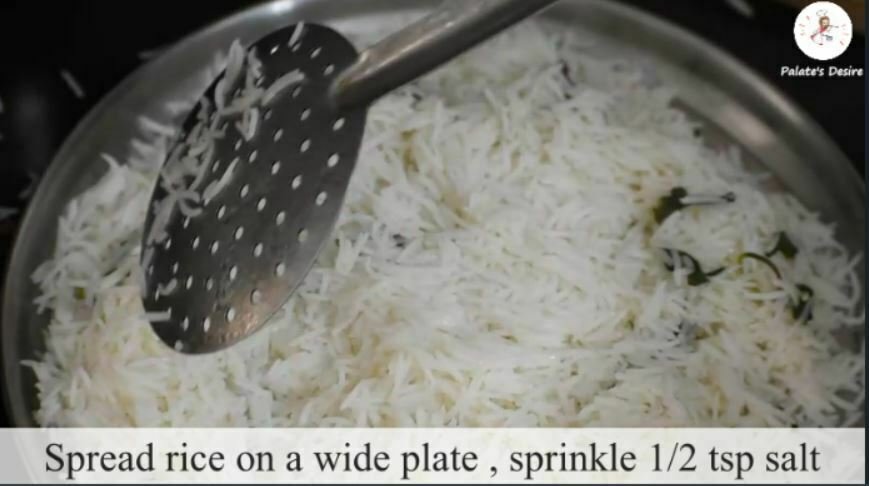
    Egg Biryani Recipe | Anda Biryani

    For Egg gravy

    In a thick bottom pan , heat oil and ghee.

    Egg Biryani Recipe | Anda Biryani

    Add whole spices and saute till fragrant.

    Egg Biryani Recipe | Anda Biryani

    Now add in sliced onions and fry .

    Egg Biryani Recipe | Anda Biryani

    Add mint leaves .

    Egg Biryani Recipe | Anda Biryani

    Fry well , till onion changes color and mint leaves are well fried.

    Egg Biryani Recipe | Anda Biryani

    Add freshly ground ginger garlic paste.

    Egg Biryani Recipe | Anda Biryani

    Saute till raw smell goes off completely.
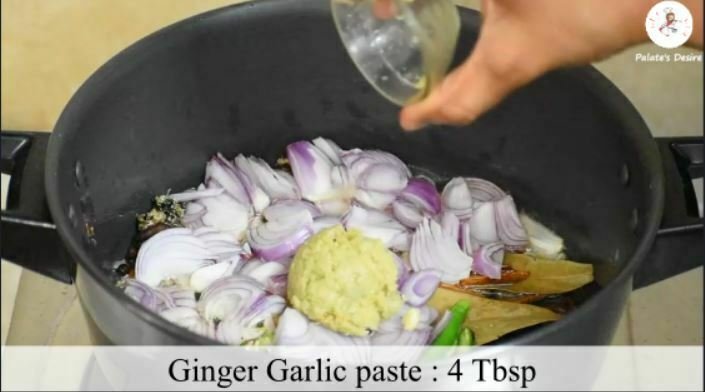
    Egg Biryani Recipe | Anda Biryani

    Now add in slit green chilies and tomatoes , saute well and cook till tomatoes turns pulpy.

    Egg Biryani Recipe | Anda Biryani

    Add turmeric powder , chili powder and coriander powder mix well .

    Egg Biryani Recipe | Anda Biryani

    Keeping flame on low heat , Add ½ cup of thick curds and mix well completely till specks of oil is seen.

    Egg Biryani Recipe | Anda Biryani

    Add salt and biryani masala powder, mix well.

    Egg Biryani Recipe | Anda Biryani

    When oil starts to release from corners. Make incisions from knife on boiled eggs and add into gravy.

    Egg Biryani

    Gently saute egg ,such that masala / gravy coats well on egg .

    Egg Biryani

    Dum Cooking

    Add cooked rice on top of egg gravy.

    Egg Biryani

    And spread evenly using a spatula.

    Egg biryani

    Now pour saffron soaked milk , sprinkle salt and biryani masala powder.

    Egg Biryani

    Drizzle 1 -2 tablespoon of ghee / clarified butter on top.

    Egg _biryani

    Add chopped coriander leaves and mint leaves .

    Egg_biryani

    Add 2-3 tablespoon of kewra or rose water. If using essence ,don't add more than 1 - 2 drops .

    egg_biryani

    Add Lime juice

    Egg Biryani Recipe | Anda Biryani

    Cover the pot with aluminium foil .

    Egg Biryani Recipe | Anda Biryani

    And tightly close the lid alternatively you can even close the lid and seal it with atta dough.

    Egg Biryani Recipe | Anda Biryani

    Keep the flame on sim and leave for minimum 20 minutes for all flavors to combine well and enhance taste.

    After 20 minutes , turn off the flame and remove lid and foil.

    Egg Biryani

    Gently mix well everything from bottom.

    Egg Biryani Recipe | Anda Biryani

    Serve hot along with fresh cucumber salad.

    Egg Biryani Recipe | Anda Biryani

    Recipe

    Egg-biryani-recipe@palates-desire
    5 from 8 votes

    Egg Biryani Recipe

    Egg Biryani is a fluffy, flavourful rice cooked with aromatic spices and boiled egg.
    Prep Time20 minutes mins
    Cook Time50 minutes mins
    Total Time1 hour hr 10 minutes mins
    Course: Main Course
    Cuisine: Indian
    Keyword: Biryani, Rice Varities
    Servings: 5 people
    Calories: 613kcal
    Author: Muktha H S

    Ingredients

    For Biryani Rice

    • 8-10 cups Water
    • 2 cups Basmati rice
    • 1 teaspoon Salt
    • 1 teaspoon Oil
    • 1 Bay Leaf
    • 4 Green Cardamom , pods
    • 1 ½ inch Cinnamon Sticks
    • 2 Cloves
    • Mint leaves handful , torn

    For Biryani Masala / Gravy

    • 5-6 Boiled ,eggs
    • ⅓ cup Oil
    • 2 tablespoon Ghee / Clarified Butter
    • 2 no's Onions , large , sliced
    • 2 tablespoon Garlic Paste
    • 1 ½ tablespoon Ginger Paste
    • 4 no's Green Chillies , slit long
    • 2 no's Tomatoes , chopped
    • ½ cup Mint leaves chopped
    • ½ cup Curds , thick
    • ½ teaspoon Turmeric powder
    • 11/2 tablespoon Red chilli powder
    • 2 tablespoon Coriander powder
    • 1 teaspoon Biryani Masala Powder , refer notes
    • 1 no Bay leaf
    • 3 no's Green Cardamom
    • 1 no's Black Cardamom
    • 1 ½ " inch Cinnamon Sticks
    • 4 no's Cloves
    • 1 no's Star Anise
    • ½ teaspoon Black peppercorns
    • ½ teaspoon Shahi Jeera
    • 2 teaspoon Salt or as needed

    Other Ingredients

    • ¼ Cup Warm Milk
    • 10-12 no's Saffron Strands
    • 2 tablespoon Mint leaves fried , optional, refer notes
    • 2 tablespoon Coriander leaves
    • 2 tablespoon Barista / fried onions , optional
    • 1 tablespoon Clarified Butter/Ghee
    • ½ teaspoon Biryani Masala Powder
    • ½ teaspoon Salt
    • 2 drops Kewra water ,essence
    • 1 tablespoon Lime juice

    Instructions

    Preparations

    • Boil 5-6 eggs for 10 minutes , remove shell and set aside.
    • Wash rice for 3-4 times , till water runs clear and soak rice in water for minimum 30 minutes.
    • Make fresh ginger garlic paste and set aside.
    • Clean all greens , slice onions , chop tomatoes , slit green chilies and set aside.

    For cooking rice

    • Boil 8-10 cups of water . Add bay leaf , green cardamom , cinnamon , cloves and soaked rice.
    • Drain rice and add soaked rice to boiling water.
    • Add 1 teaspoon of oil ,tsp of salt and few torn mint leaves.
    • Cook rice for about 7-8 minutes , till its 90 % cooked.
    • Drain water completely and pour cold water and drain water completely.
    • Spread rice on a wide plate , sprinkle some salt and set aside.

    For Egg gravy

    • In a thick bottom pan , heat oil and ghee.
    • Add whole spices and saute till fragrant.
    • Now add in sliced onions and fry .
    • Add mint leaves and fry well , till onion changes color and mint leaves are well fried.
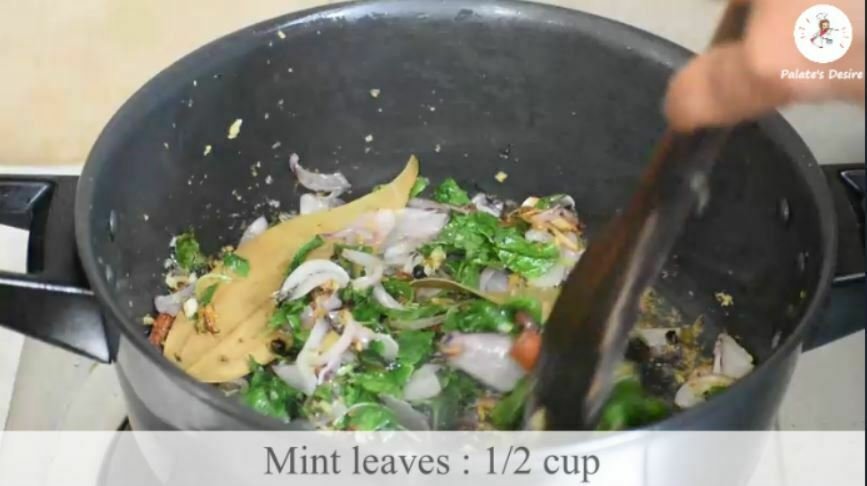
    • Add freshly ground ginger garlic paste and saute till raw smell goes off completely.
    • Now add in slit green chilies and tomatoes , saute well and cook till tomatoes turns pulpy.
    • Add turmeric powder , chili powder and coriander powder mix well .
    • Keeping flame on low heat , Add ½ cup of thick curds and mix well completely till specks of oil is seen.
    • Add salt and biryani masala powder mix well .
    • When oil starts to release from corners make incisions on boiled eggs with knife and add into gravy.
    • Gently saute egg ,such that masala coats well on egg .

    Dum Cooking

    • Add cooked rice on top of egg and spread evenly.
    • Now pour saffron soaked milk , sprinkle salt and biryani masala powder
    • Drizzle 1 -2 tablespoon of ghee / clarified butter on top.
    • Add chopped coriander leaves and mint leaves , lime juice and 2-3 tablespoon of kewra or rose water. If using essence ,don't add more than 1 - 2 drops .
    • Cover the pot with aluminium foil and tightly close the lid alternatively you can even close the lid and seal it with atta dough.
    • Keep the flame on sim and leave for minimum 20 minutes for all flavors to combine well and enhance.
    • After 20 minutes , turn off the flame and remove lid and foil.
    • Gently mix well everything from bottom and serve hot along with fresh cucumber salad.

    Video

    Nutrition

    Calories: 613kcal

    You may also like

    • scrambled Egg Curry
      Scrambled Egg Curry
    • Beans-egg-bhurji-recipe
      French Beans Egg Bhurji
    • scrambled mushroom eggs
      Scrambled Egg with Mushroom
    • kerala egg curry
      Kerala Egg Curry | Easy Egg Recipes

    Capsicum Bath Recipe

    Published : January 20, 2020 | Last Update on September 27, 2022 By Muktha

    capsicum-vangi-bath

    Capsicum bath is a kind of masala bath , variety rice made with vangi bath masala powder . This is a popular recipe from Karnataka . Capsicum bath is easy to make and it is a popular lunch box recipe too.

    Before jumping into the recipe , do take some time to read the complete post for tips and details to make a perfect capsicum bath or vangi bath with capsicum ( this is how we call this recipe at home) .

    Capsicum Bath Recipe
    [feast_advanced_jump_to]

    About this recipe

    Vangi bath is a variety rice made with tender green brinjals , popular in Karnataka. It is spicy to taste and has a mild sweetness and tang taste too. The main flavours in vangi bath comes from special spice blend used to make this rice.
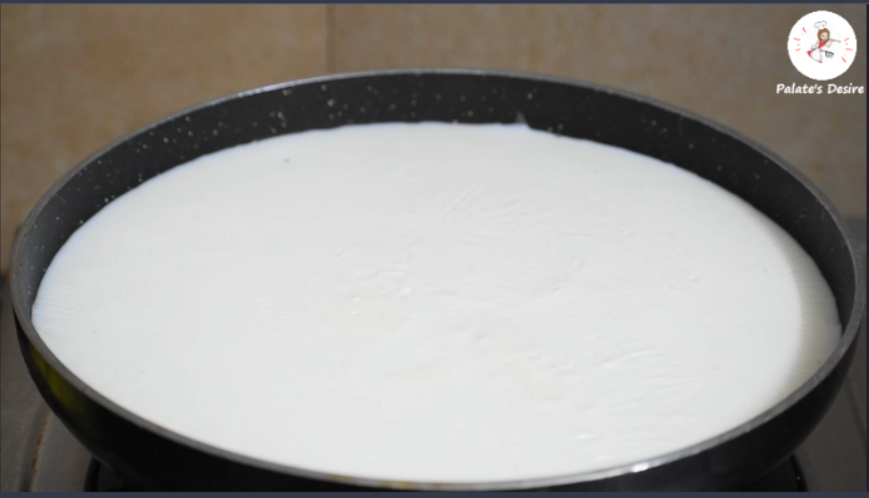
    Traditionally , Vangi bath is made with tender and fresh green brijals . But as it is not easily available throughout the year , at home we often make it with different vegetables. And this post shares Vangi bath recipe made using capsicum and potatoes.

    As vangi bath powder ( spice blend) is used to make this rice , this recipe is often refered as Capsicum Vangi Bath .

    This Capsicum vangi bath is

    • easy to make
    • tastes delicious
    • fresh and aromatic
    • Lunch box recipe

    Ingredients

    To make this recipe , most importantly you need Vangi Bath Masala Powder , Cooked rice , Brinjal / Capsicum ( or any mixed vegetables) , tamarind and basic seasoning ingredients.

    Also mixed vegetables like carrot , french beans , green peas and potato are also used to make this vangi bath . One more favourite combination that goes well with this vangi bath is green peas and fresh methi leaves.

    Tips to make best Variety Rice

    To make variety rice , always make sure to use either warm rice or cool rice. Has it helps to mix well with masala without breaking the rice grains.

    You can use either Basmati , sona masoori , kolam , Jeera or any kind of rice to make this recipe . But just make sure to cook , fluffy rice with each rice grain separated.

    You can also use 1 teaspoon of oil and ½ teaspoon of salt to make rice , for vangibath.

    To make vangi bath masala , use sesame oil because it enhances the taste. If you don't have sesame oil, you can use any other cooking oil of your choice. But I always recommend sesame oil for recipes like puliyogare , heralekai chitranna and also our street favourite churmuri .

    How to make Vangi Bath Gojju ?

    Firstly, to make vangi bath you need to prepare masala paste also known as Vangi bath gojju.

    Use sesame oil to make a basic tempering , then add all seasoning ingredients followed by vegetables of your choice.

    Once after , vegetables are fried well in oil , add vangibath powder and mix well.

    Add tamarind juice , pinch of jaggery and salt to taste and cook on low flame until oil floats or specks of oil is seen.

    This is Vangi bath Gojju and you can store this masala paste in refrigerator upto 7 days.

    How to make Capsicum Bath using Vangi Masala :

    For capsicum masala paste /gojju

    Heat 5 tablespoon of sesame oil in a pan. When oil is hot enough , add mustard seeds, once it crackles add curry leaves and broken red chillies.

    Capsicum Bath Recipe

    Add chana dal , urad dal and cashews and saute till it turns golden brown.

    Capsicum Bath Recipe

    Now add sliced onions .

    Capsicum Bath Recipe

    Fry well till onion turns translucent.

    Capsicum Bath Recipe

    Add thinly sliced capsicum of 1 ½ " inch and fry well.

    Capsicum Bath Recipe

    Add chopped , tomatoes and potatoes( if using) .

    Capsicum Bath Recipe

    Mix well and saute for a minute.

    Capsicum Bath Recipe

    Add ½ teaspoon of turmeric powder and 1 teaspoon of salt.

    Capsicum Bath Recipe

    Mix everything and continue to cook till potatoes and tomatoes are well cooked.

    Capsicum Bath Recipe

    Add 3 tablespoon of Vangi bath masala powder

    Capsicum Bath Recipe

    Mix well everything.

    Capsicum Bath Recipe

    Now add in ½ cup of tamarind juice extracted from ½ tablespoon of tamarind pulp and mix well.

    Capsicum Bath Recipe

    Add ½ teaspoon of jaggery powder , 1 ½ teaspoon of salt and mix well.

    Capsicum Bath Recipe

    Keep the flame on low heat , mix well everything and cook till oil releases from the edges.

    Capsicum Bath Recipe

    Mix well everything. Turn off the flame and set aside till use.

    Once cool , you can even store it in a clean dry glass jar upto 1 week in refrigerator.

    To mix with Rice :

    Take cooked and warm rice in a large plate .

    Add above prepared capsicum masala paste and mix well with rice using hands. For every 1 cup of cooked rice add about 11/2- 2 tablespoon heap of capsicum masala paste/ gojju.

    Capsicum Bath Recipe

    Sprinkle Vangi bath masala powder , ½ teaspoon of salt and mix well with hands. For every 1 cup cooked rice , add 1 tablespoon vangi bath masala powder.

    Capsicum Bath Recipe

    Add chopped coriander leaves and few drops of lime juice , mix well everything . Adding lime juice is optional , but I recommend , as it enhances the taste.

    Capsicum Bath Recipe

    Taste and adjust salt or masala or spiciness accordingly by adding salt , capasicum masala paste or vangi bath masala powder to suit your taste.

    Serve immediately.

    capsicum_bath_recipe

    Recipe

    capsicum-vangi-bath
    5 from 3 votes

    Capsicum bath recipe

    Capsicum bath is spicy rice variety made with capsicum and vangi bath powder , a variation to the most popular rice recipe vangi bath from Karnataka.
    Prep Time10 minutes mins
    Cook Time20 minutes mins
    Total Time30 minutes mins
    Course: Breakfast, Main Course
    Cuisine: Karnataka, South India
    Keyword: Gluten Free, Rice Varities, Sankranti
    Servings: 5 people
    Calories: 363kcal
    Author: Muktha H S

    Ingredients

    For Masala Paste | Gojju

    • 5 tablespoon Sesame Oil
    • 2 no's Onion, medium size , sliced
    • 3 no's Green capsicum , large , cut into 11/2 "inch thin sticks
    • 1 Potato , small , optional
    • 1 Tomato , chopped , optional
    • ½ teaspoon Mustard Seeds
    • ½ tablespoon Chana dal
    • 1 tablespoon Urad Dal
    • 2 Sprigs of Curry leaves
    • 2 Dry Red chillies , broken
    • 2 tablespoon Cashews
    • ½ teaspoon Jaggery powder
    • 3 tablespoon Vangi bath powder
    • ½ tablespoon Tamarind, soaked in ½ cup water
    • ½ teaspoon Turmeric Powder
    • 1 ½ teaspoon Salt or as required

    To mix with rice

    • 4 ½ -5 cups Cooked Rice , refer notes
    • Capsicum Masala Paste , gojju , refer notes
    • 4 - 5 tablespoon Vangi bath powder
    • 2 teaspoon Salt or as required
    • 1 teaspoon Lime Juice , optional
    • 3 tablespoon Coriander leaves , chopped

    Instructions

    To make capsicum masala paste /gojju

    • Heat 5 tablespoon of sesame oil in a pan. When oil is hot enough , add mustard seeds , curry leaves and broken red chillies.
    • Add chana dal , urad dal and cashews and saute till it turns golden brown.
    • Now add sliced onions and fry well till onion turns translucent.
    • Add thinly sliced capsicum of 1 ½ " inch and fry well.
    • Add chopped tomatoes and potatoes .Mix well and saute for a minute.
    • Add ½ teaspoon of turmeric powder , 1 teaspoon of salt and continue to cook till potatoes and tomatoes are well cooked.
    • Add 3 tablespoon of Vangi bath masala powder and mix well .
    • Now add in ½ cup of tamarind juice extracted from ½ tablespoon of tamarind pulp and mix well.
    • Add ½ teaspoon of jaggery powder , 1 teaspoon of salt and mix well.
    • Keep the flame on low , mix well everything and cook till oil releases from the edges.
    • Mix well everything. Turn off the flame and set aside till use.
    • Once cool , you can even store it in a clean dry glass jar upto 1 week in refrigerator.

    To mix with Rice

    • Take cooked and warm rice in a large plate .
    • Add above prepared capsicum masala paste and mix well with rice using hands. For every 1 cup of cooked rice add about 11/2- 2 tablespoon heap of capsicum masala paste/ gojju.
    • Sprinkle Vangi bath masala powder , salt to taste , few drops of lime juice , chopped coriander leaves and mix well. Adding lime juice is optional , but I recommend , as it enhances the taste.
    • Taste and adjust it accordingly by adding capasicum masala paste or vangi bath masala powder or salt , to suit your taste.
    • Serve immediately.

    Video

    Notes

    • This recipe yields approximately about 1 ¼ cup of masala paste /gojju , which can make about ½ kilo capsicum bath.
    • I have used only 2 cups of cooked rice for ⅓ cup of masala paste/gojju. But with the above capsicum masala / gojju , 4-5 cups of cooked rice can be mixed easily .
    • The Masala Paste | Gojju  can be stored in refrigerator upto 1 week.
    • For every 1 Cup of cooked rice , 1 tablespoon of dry vangi bath masala powder needs to be mixed while mixing with rice.

    Nutrition

    Calories: 363kcal

    You may also like

    • huggi anna recipe
      Huggi Anna | how to make Huggi
    • Heralekai Chitranna
      Heralekai Chitranna | Citron Lime Rice
    • palak khichdi recipe
      Palak Khichdi Recipe
    • mavinakayi-chitranna
      Mavinakayi Chitranna | Raw Mango Rice

    Vangibath Powder

    Published : January 16, 2020 | Last Update on May 4, 2021 By Muktha

    Vangibath Powder with step by step photos and short video. Vangibath is one of the most popular rice varieties made with vangi (brinjal) or capsicum or any mixed vegetables. Though addition of vegetable is one's choice , traditionally vangibath was made with young and tender green brinjals. As this masala powder is used to make a masala bath with Vangi , it is called vangi bath masala powder . But this blend of spice powder can be used to make any variety of Masala Bath with additional vegetables.

    Vangi bath powder

    Until I shifted to Pune , I believed that Vangi Bath is a Maharashtrian recipe . Later I realised that there is no connection with popular Maharashtrian Masala Bath with this Vangi Bath other than the marathi names Vangi and bath which means brinjal and rice , respectively.

    This recipe is from my doddamma ( Mom's elder sister ) who does a delicious Vangibath . A good quality masala powder very important to make tasty masala bath. Vangi Bath Masala Powder gets its strong flavors from spices like marathi moggu/ kapok buds , cloves ( lavang) and cinnamons ( dalchini). If you are looking for vangibath powder recipe , similar to MTR style , then I would recommend you to try this recipe .

    It's a fool proof and easy to make recipe . I often make all kinds of masala powders at home in small batches . Though this masala can be stored in a glass jar for 3 - 4 months. I often finish it with in a month because I feel that the aroma of spices will be lost if stored for longer period.

    Other Spice Blends , most popular DIY recipes on blog are : Bisi bele Bath Powder , Puliyogare Masala , Biryani Masala , Tandoori Masala, Tea Masala Powder , Thandai Masala and Mixed Chutney Powder .

    RECIPE CARD FOR VANGIBATH POWDER:

    Recipe

    Vangi bath powder
    5 from 3 votes

    Vangibath Powder

    Vangibath Powder : A special spice blend used to make a kind of variety rice called vangibath, a popular recipe from Karnataka.
    Prep Time10 minutes mins
    Cook Time10 minutes mins
    Total Time20 minutes mins
    Course: DIY
    Cuisine: Andhra, Karnataka, Maharstarian
    Keyword: Lunchbox Recipe, Rice Varities
    Servings: 1 Small Jar
    Calories: 42kcal
    Author: Muktha H S

    Ingredients

    • 10 Dry Red Chillies ,guntur or any spicy version
    • 4 Byadgi Red Chilli or kashmiri red chillies
    • ¼ cup Coriander seeds , heap
    • ½ cup Dry coconut , grated , loosely packed
    • 2 tablespoon Chana dal
    • 2 tablespoon Urad dal
    • 1 Marathi moggu / Kapok seeds
    • 2 no Cloves / Lavang
    • 1 ½ " inch Cinnamon stick
    • ½ teaspoon Turmeric powder

    Instructions

    • Dry roast red chillies and coriander seeds till it releases pungent smell.
    • Add cinnamon sticks , cloves and marathi moggu / kapok buds and dry roast till aroma wafts .
    • Now add chana dal , urad dal and dry roast till it turns light golden brown.
    • Add in ½ cup of loosely packed grated dry coconut and roast well .
    • When dry coconut wilts .Turn off the stove , allow spices to cool down.
    • Transfer spices into dry mixer grinder jar / blender. Add ½ teaspoon turmeric powder.
    • Ground to a semi fine powder.
    • Store in a glass jar and use as required.

    Video

    Nutrition

    Calories: 42kcal

    Step By Step directions for Vangibath Powder recipe:

    Dry roast red chillies and coriander seeds till it releases pungent smell.

    Vangibath Powder

    Add cinnamon sticks , cloves and marathi moggu / kapok buds and dry roast till aroma wafts .

    Vangibath Powder

    Now add chana dal , urad dal and dry roast till it turns light golden brown.

    Vangibath Powder

    Add in ½ cup of loosely packed grated dry coconut and roast well .

    Vangibath Powder

    When dry coconut wilts .Turn off the stove , allow spices to cool down.

    Vangibath Powder

    Transfer spices into dry mixer grinder jar / blender. Add ½ teaspoon turmeric powder.

    Vangibath Powder

    Ground to semi fine powder.

    Vangibath Powder

    Store in a glass jar and use as required.

    Vangibath Powder

    Homemade Chicken Stock Recipe

    Published : January 6, 2020 | Last Update on March 20, 2021 By Muktha

    Homemade chicken Stock

    Homemade Chicken Stock Recipe with Step by Step photos and short video. Chicken Stock is a easy recipe made by simmering chicken bones . This stock can be used as base for soups and sauces , also it adds more flavour and richness to few rice dishes and pastas. Other than as a base for soup it can also be used in recipes which calls for chicken broth .

    Chicken Stock

    This recipe is somewhere between chicken stock and chicken broth . Basically Chicken stock is made from simmering the bones for a long period of time , which results in more depth of flavour . Where as chicken broth is made with meaty parts . Hence you can use this recipe interchangeably with broth as well as stock .

    Chicken stock usually has 4 important components : chicken bones , water , aromatic vegetables and herbs & spices . Most commonly used aromatic vegetables includes onions, garlic , leeks , celery stalks and carrots . For herbs you can add bay leaves , rosemary, parsley ,thyme and spices like peppercorns , cloves , star anise and cinnamons are also used . So you can tweak the ingredients and add more or less of any ingredients depending on the flavours you need in an chicken stock .

    This recipe is a basic chicken stock recipe with gentle flavours of all the four components without overpowering any particular flavour . This recipe goes on well as a base for any kind of soups and sauces . I have used chicken neck , bones , back pieces and few carcass ( unwanted chicken pieces) . In aromatic vegetables , I have used quartered onion , carrot tops, leeks and celery stalks . Bay leaf , cloves and peppercorns are spices i have added to make this soup , you can tweak the recipe you suit your needs. But just make sure at least 1-2 ingredients are present from each component.

    Can store this chicken stock in refrigerator for 3 days and also can freeze well upto 6 months. You can also fill in the fill the chicken stock in ice tray and then freeze chicken stock cubes . It's easy to store and comes handy while making some soups.

    Most popular Chicken Soup recipes on blog are : Lemon Coriander Chicken Soup and Indian Style Macaroni chicken Soup .

    RECIPE CARD FOR HOMEMADE CHICKEN STOCK :

    Recipe

    Homemade chicken Stock
    No ratings yet

    Homemade Chicken Stock Recipe

    Homemade Chicken Stock - A flavourful stock made by simmering chicken bones , aromatic vegetables and herbs
    Prep Time10 minutes mins
    Cook Time50 minutes mins
    Total Time1 hour hr
    Course: DIY
    Cuisine: World
    Keyword: Basic, Soup
    Servings: 4 Cups
    Calories: 82kcal
    Author: Muktha H S

    Ingredients

    • 250 grams chicken bones ,neck and back pieces
    • 2 + 5 cups water
    • 1 Bay Leaf
    • 4 Cloves
    • 6 Peppercorns
    • 1 leek , roughly chopped
    • ¼ onion , quaterd
    • ½ carrot tops , roughly cut
    • 1 celery stalk
    • 1 Tsp Salt

    Instructions

    • Firstly , add 2 cups of water in a pan and add chicken pieces.
    • Add salt and bring it to boil .
    • Turn chicken pieces to other side and cook for 1-2 minutes.
    • When fat starts to float , turn of the stove .
    • Discard water and set aside chicken pieces .

    For Chicken Stock

    • In a deep pot , add 5 cups of water .
    • Add Bay leaf , cloves and peppercorns.
    • Now add in all aromatic vegetables onion , leeks , carrot tops and celery stalk .
    • Add chicken pieces . Let it come to boil
    • Now close the pot with a lid and simmer for 30-45 minutes.
    • Remove lid , turn off the stove .
    • Allow it to cool. Once cooled , strain the stock and store in a glass jar.
    • Can store upto 3 days when refrigerated and freeze upto 6 months.

    Video

    Nutrition

    Calories: 82kcal
    Step by Step Directions to make Homemade Chicken Stock :

    Firstly , add 1 cup water in a pan .

    Homemade Chicken Stock Recipe

    Add chicken pieces. Add salt and bring it to boil .

    Homemade Chicken Stock Recipe

    Turn chicken pieces to other side and cook for 1-2 minutes.

    Homemade Chicken Stock Recipe

    When fat starts to float , turn of the stove . Discard water and set aside chicken pieces .

    Homemade Chicken Stock Recipe

    For Chicken Stock :

    In a deep pot , add 5 cups of water .

    Homemade Chicken Stock Recipe

    Add Bay leaf , cloves and peppercorns.

    Homemade Chicken Stock Recipe

    Now add in all aromatic vegetables onion , leeks , carrot tops and celery stalk .

    Homemade Chicken Stock Recipe

    Add chicken pieces .

    Homemade Chicken Stock Recipe

    Let it come to boil.

    Homemade Chicken Stock Recipe

    Now close the pot with a lid and simmer for 30-45 minutes.

    Homemade Chicken Stock Recipe

    Remove lid , turn off the stove . Allow it to cool.

    Homemade Chicken Stock Recipe

    Once cooled , strain the stock .

    Homemade Chicken Stock Recipe

    When completely cooled , transfer to glass jar/ bottle and store.

    Homemade Chicken Stock Recipe

    Can store upto 3 days when refrigerated and freeze upto 6 months.

    Homemade chicken Stock

    Pumpkin Walnut Cake

    Published : December 24, 2019 | Last Update on November 2, 2024 By Muktha

    pumpkin-walnut-cake-recipe

    Pumpkin Walnut Cake with step by step directions and short video .

    Pumpkin Walnut Cake is a delicate, moist and very flavorful, pumpkin spice pound cake - a perfect holiday treat.

    This is a easy recipe with a simple mix of wet and and dry ingredients together. Serve a slice of pumpkin walnut cake for breakfast or with evening tea or as dessert with a scoop of ice cream , it tastes delicious .

    Pumpkin Walnut Cake

    Texture of this cake lies between that of bread and a cake , hence its a pound cake. Addition of spices and pumpkin puree to a regular cake helps to bake a moist cake with fragrance of warm spices. Frankly speaking , don't expect your cake to be full of pumpkin flavour in fact you can hardly make it out but can expect a delicious light and moist cake with added nutrients .

    If you have pumpkin puree ready then within no time you can bake this cake. This cake tastes better after sitting for a day . I made pumpkin puree a day ahead and made this cake , following day . Though making pumpkin puree is no big deal , I made it just a day before to save some time. That's the #lifeoffoodblogger .

    If you want you can either use readymade pumpkin puree or just cut into small pieces, remove its skin and seeds and then steam it . After 15-20 minutes , blend into smooth puree . You are done with a pumpkin puree. Just make sure to remove the skin from pumpkin and then steam it . Alternatively you can bake the whole pumpkin in oven and then scoop the pulp and mash well to get a smooth and silken puree. You can find the video on how to make fresh homemade pumpkin puree here

    pumpkin Puree

    Actually I was intended to bake this cake in a loaf pan in oven but unfortunately when I put my cake tin into oven , suddenly power switched off and there was no back up too . Hence straight away transferred cake batter into a 8 " inch tin and made it on a pressure cooker .

    In spite of all fuss while baking this cake turned out to be a real moist and delicious cake . Hence I'm sharing this recipe on how to bake a cake in a pressure cooker . Alternatively you can always bake a cake in an oven.

    Though this is a fall dessert you can extend it till winter, holiday season and serve your clan at dinning to get accolades of appreciation.

    Other similar holiday recipe from my blog are :

    • Plum Cake
    • Melting Moments
    • Flourless Chocolate Cake
    • Tres Leches
    • Whole wheat Butter Biscuits
    • Banana Muffins
    • Low Fat Orange Yogurt Cake
    • Cheese Cake

    RECIPE CARD TO MAKE PUMPKIN WALNUT CAKE

    Recipe

    Pumpkin Walnut Cake
    5 from 2 votes

    Pumpkin Walnut Cake in a Pressure Cooker

    Pumpkin Walnut Cake is a Delicate, Moist and Flavorful Spiced Pound Cake.
    Prep Time15 minutes mins
    Cook Time45 minutes mins
    Total Time1 hour hr
    Course: Dessert
    Cuisine: World
    Keyword: Baking, Desserts, Kids Recipes
    Servings: 12 People
    Calories: 237kcal
    Author: Muktha H S

    Ingredients

    • 11/2 Cup All purpose flour
    • 1 ½ tablespoon Cornflour
    • 1 teaspoon Cinnamon Powder
    • ½ teaspoon Cloves Powder
    • ¼ teaspoon Ginger Powder
    • ¼ Tsp Nutmeg Powder
    • ½ teaspoon Salt
    • 1 teaspoon Baking Soda
    • 2 no's Eggs
    • ¼ cup Milk
    • ½ cup Brown Sugar
    • ¾ cup Granulated White Sugar
    • 1 ¾ cup Pumpkin Puree
    • ½ teaspoon Vanilla Essence
    • ½ cup Oil
    • ½ Cup Walnuts

    Instructions

    • Sieve all purpose flour , cornflour , spice powders , salt and baking soda together ,twice and set aside.
    • In a mixing bowl , add 2 eggs , brown sugar , granulated sugar and whisk well.
    • Add milk , pumpkin puree , vanilla essence , oil and whisk well all together so that everything mixes well.
    • Now take sieved dry ingredients in a bowl and slowly add wet ingredients part by part to the flour mixture.
    • With a spatula gently mix everything carefully such that no lumps are formed.
    • Finally , add ½ cup of walnut and stir into the cake batter gently.
    • Grease the cake tin / loaf pan and pour the batter.
    • Take a wide pressure cooker , add sea salt (crystal salt) into cooker and evenly spread salt. Keep a heat proof stand on sea salt and place cooker on a high flame on a stove top. This is similar to preheating in oven. Alternatively , you can bake cake in a preheat oven at 180 deg celsius and bake for 25 to 30 minutes.
    • After 6-8 minutes, salt to becomes sufficiently hot then immediately reduce the flame to low heat /sim and place cake tin inside the pressure cooker.
    • Remove gasket (rubber ring) from pressure cooker lid and securely close it.
    • Don't put vent weight( whistle) on the pressure cooker.
    • Cook on a low heat for about 35-45 minutes , till toothpick inserted comes out clean.
    • Remove the cake tin from pressure cooker and allow it to cool completely.
    • Invert the cake tin on a plate , tap it gently and remove the cake .
    • Wrap the cake with clingfilm and let it sit overnight before serving. The flavors meld well and tastes delicious when served on following day .
    • Serve cake at room temperature either for breakfast or with tea. Also you can serve slice of cake with scoop of ice cream.

    Video

    Nutrition

    Calories: 237kcal

    How to make Pumpkin Walnut Cake

    Sieve all purpose flour , cornflour , spice powders , salt and baking soda together ,twice and set aside.

    Pumpkin Walnut Cake

    In a mixing bowl , add 2 eggs , brown sugar .

    Pumpkin Walnut Cake

    Add granulated sugar and whisk well.

    Pumpkin Walnut Cake

    Well combined.

    Pumpkin Walnut Cake

    Add milk ,

    Pumpkin Walnut Cake

    pumpkin puree ,

    Pumpkin Walnut Cake

    vanilla essence ,

    Pumpkin Walnut Cake

    oil

    Pumpkin Walnut Cake

    and whisk well all together so that everything mixes well.

    Pumpkin Walnut Cake

    Now take sieved dry ingredients in a bowl and slowly add wet ingredients part by part to the flour mixture.

    Pumpkin Walnut Cake

    With a spatula gently mix everything carefully .

    Pumpkin Walnut Cake

    Mix gently and carefully such that no lumps are formed.

    pumpkin walnut cake

    Finally , add ½ cup of walnut

    Pumpkin Walnut Cake

    and stir into the cake batter gently.

    Pumpkin Walnut Cake

    Grease the cake tin / loaf pan and pour the batter.

    Pumpkin Walnut Cake

    To Make Cake in Pressure Cooker:

    Take a wide pressure cooker , add sea salt (crystal salt) into cooker and evenly spread salt. Keep a heat proof stand on sea salt and place cooker on a high flame on a stove top. This is similar to preheating in oven. Alternatively , you can bake cake in a preheat oven at 180 deg celsius and bake for 25 to 30 minutes.

    pumpkin walnut cake

    After 6-8 minutes, salt becomes sufficiently hot then immediately reduce the flame to low heat /sim and place cake tin inside the pressure cooker.

    Pumpkin Walnut Cake

    Remove gasket (rubber ring) from pressure cooker lid

    Pumpkin Walnut Cake

    and securely close it.

    Pumpkin Walnut Cake

    Don't put vent weight( whistle) on the pressure cooker.

    Cook on a low heat for about 35-45 minutes , till toothpick inserted comes out clean.

    Pumpkin Walnut Cake

    Remove the cake tin from pressure cooker and allow it to cool completely.

    Invert the cake tin on a plate , tap it gently and remove the cake .

    Pumpkin Walnut Cake

    Wrap the cake with clingfilm and let it sit overnight before serving. The flavors meld well and tastes delicious when served on following day .

    Pumpkin Walnut Cake

    Serve cake at room temperature either for breakfast or with tea. Also you can serve slice of cake with scoop of ice cream.

    Pumpkin Walnut Cake

    Banana Appe | Banana Paniyaram

    Published : December 16, 2019 | Last Update on September 29, 2022 By Muktha

    banana appe

    Banana Appe from left over rice recipe with step by step pictures and short video . Banana appe is a tasty snack made with rice flour , ripen banana , jaggery and flavored with spices .

    This Banana Appe can be served as a afterschool evening snack , tastes delicious and quite filling on it own.

    Other appe recipes , I often make at home are Instant Sooji Appe and Authentic Rice Appe .

    Banana Appe | Banana Paniyaram
    [feast_advanced_jump_to]

    About this recipe

    Here in this recipe instead of rice flour , I have made use of left over rice to create this tasty snack . It's one of the best way to make use of left over rice and serve as a evening snack for kids or can be a great short break snack for tiffin box during school and working hours.

    Any cooked and cool rice works good on this recipe . Alternatively you can even use rice flour instead of cooked rice to make this recipe . Actually original recipe calls for rice flour but to make use of left over rice , I often make this recipe .

    This Banana appe is not very sweet . It has a balance of sweetness from banana , fresh coconut and jaggery . Also there is a hint of flavours from spices like cardamom , dry ginger , cumin and nutmeg.

    It's undoubtedly an healthy and tasty snack for kids. You can serve this banana appe either for breakfast or after school hours snack . This instant sweet appam is tasty and filling too .

    This banana appe is

    • Easy to make
    • Simple
    • Scalable
    • Great for snacks

    My lil boy is a fussy eater and is very choosy about food. I really find it very hard to make him eat anything new or make him eat any sweet . His taste buds works only for savoury dishes and says BIG NO for all kind of sweet dishes.

    So my only way to make him eat sweets is , I distribute among his friends and once they say it is delicious , then he slowly comes to me asking for it. Hence he has so many memories with friends for almost every sweet dish .

    At times he recalls those memories with his friends , narrates me the whole story and asks me for that particular dish. This banana appe is one among such category ....., he recalled a old memory and asked me for this mild sweetened banana appam.

    Watch Video

    If interested do check , Raw Banana Tikki , Banana Muffins and Banana Rasayana recipes , which I often do at home.

    How to make Banana Appe

    Add 2 cups of cooked rice to a mixer jar and add ½ cup of water

    Banana Appe | Banana Paniyaram

    Blend to a smooth but thick batter.

    Banana Appe | Banana Paniyaram

    Transfer to a mixing bowl and set aside.

    banana_appe

    In the same mixer jar , add ripen banana .

    banana_appe

    Make banana puree.

    banana_appe

    Add banana puree to the mixing bowl along with rice batter.

    banana_appe

    Now add in fresh pieces of coconut, jaggery powder and rice flour .

    banana_appe

    Add spice powders cardamom powder , ginger powder , nutmeg powder , cumin powder , salt and baking soda. ( I has missed to add sesame seeds at this step , hence added in the next step ) .

    banana_appe

    Add sesame seeds and whisk well to get a thick batter.

    banana_appe

    Taste batter and adjust sweetness , if required. Whisk well and set aside.

    Banana Appe | Banana Paniyaram

    Heat appe pan , add ½ teaspoon of Ghee / clarified butter into every chamber.

    banana appe

    Add a spoonful of batter .

    Banana Appe | Banana Paniyaram

    Cover the pan with a lid and cook on medium heat for 3-4 minutes.

    Banana_appe

    Open the lid , drizzle another ½ teaspoon of ghee on top of the appe in each chamber.

    Banana Appe | Banana Paniyaram

    Gently slide in the spoon on each appe chamber , flip appe and cook on other side for about 3 more minutes .

    banana appe

    Remove appe and serve it hot or warm .

    banana appe

    As it is made using leftover rice , don't store it. If you wish to store then , use rice flour to make this tasty snack snack.

    Banana Appe

    Recipe

    banana appe
    5 from 1 vote

    Banana Appe

    Banana Appe is a delicious and tasty snack made with rice , jaggery and fresh coconut .
    Prep Time10 minutes mins
    Cook Time20 minutes mins
    Total Time30 minutes mins
    Course: Breakfast, Snack
    Cuisine: South India
    Keyword: Gluten Free, Kids Recipes, Vegan
    Servings: 4 servings
    Calories: 412kcal
    Author: Muktha H S

    Ingredients

    • 2 cups Cooked Rice
    • ½ cup Water
    • 3 no's Banana , fully ripen
    • 2 tablespoon Rice flour
    • 4 - 5 tablespoon Jaggery powder or as required
    • ¼ cup Fresh coconut , small pieces
    • ½ teaspoon Cardamom powder
    • ¼ teaspoon Ginger Powder
    • ¼ teaspoon Cumin / jeera powder
    • ⅛ teaspoon Nutmeg/ Jaiphal powder
    • 2 tablespoon Black/ White Sesame Seeds
    • ¼ teaspoon Salt
    • ⅛ teaspoon Baking Soda
    • ½ -1 teaspoon Ghee / Clarified butter for each appe

    Instructions

    • Add 2 cups of cooked rice to a mixer jar and add ½ cup of water and blend to smooth but thick batter.
    • Transfer to a mixing bowl and set aside.
    • In the same mixer jar , add ripen banana and make puree.
    • Add banana puree to the mixing bowl along with rice batter.
    • Now add in fresh pieces of coconut, jaggery powder , rice flour , cardamom powder , ginger powder , nutmeg powder , cumin powder , salt and baking soda.
    • Add sesame seeds and whisk well to get a thick batter.
    • Taste batter and adjust sweetness , if required. Whisk well and set aside.
    • Heat appe pan , add ½ teaspoon of Ghee / clarified butter into every chamber.
    • Add a spoonful of batter , cover the pan with a lid and cook on medium heat for 3-4 minutes.
    • Open the lid , drizzle another ½ teaspoon of ghee on top of the appe in each chamber.
    • Gently slide in the spoon on each appe chamber , flip appe and cook on other side for about 3 more minutes .
    • Remove appe and serve it hot or warm .

    Video

    Notes

    • Instead of cooked rice , you can add 1.5 cups of rice flour.
    • To blend cooked rice add ⅓ -½ cup of water , don't add more.
    • If batter becomes thin , then increase the amount of rice flour.
    • Depending on the sweetness of banana , increase or decrease the amount of jaggery.
    • Drizzle ghee/ clarified butter and cook on both side on medium heat.
    • Makes around 21-24 appe and serving size is 5-6 appe / person.

    Nutrition

    Calories: 412kcal

    Amla Pickle Recipe

    Published : December 12, 2019 | Last Update on September 27, 2022 By Muktha

    Amla Pickle Recipe

    Amla Pickle Recipe with step by step photos and short video . Amla Pickle is a spicy, tasty Andhra Style Pickle with pungent, sour ,bitter and sweet taste of Indian Amla with rustic flavours of mustard and sesame seeds.

    Amla Pickle Recipe
    [feast_advanced_jump_to]

    About this recipe

    Usiri Avakaya as called in Telugu , is a Andhra style spicy and tasty pickle with pungent , sweet and sour taste of Amla . It has heat from red chilli powder , rustic flavour from mustard seeds and sesame oil . This amla avakaya is easy to make and has a shelf life of about 8-12 months. It's one of the best way to include amla/ Indian Gooseberries in our daily diet throughout the year. You can serve this pickle along with paratha and rasam rice , curd rice and sambar rice too.

    This Amla Pickle recipe is from my friend's mom , she is from Andhra. Without making any changes , I just followed her recipe. Pickle tasted awesome. To make Amla pickle , either addition of lemon juice or boiled tamarind paste is very important . Adding lemon / tamarind paste enhances taste , increase shelf life and also removes the strong pungent and bitterness of gooseberries. And Sesame Oil / Gingelly oil is recommended to make this pickle. But sunflower oil or mustard oil can also be used. Crushed garlic is also used in the pickle but its optional and enhances the taste.

    Traditional procedure of making any pickle included grinding of dry red chillies along with mustard and methi seeds. But you can also add red chilli powder too , which makes the procedure lot more simpler. So do try making pickles at home as and when required and relish .

    As Amla is a mid seasonal crop and is seen in abundance during winter , adding this wonder fruit to our daily diet is very beneficial. Being rich in Vitamin C , Iron and Calcium, it is truly a health treasure . Its commonly seen that during seasonal transition in month of november - december , many complaints of having cold and cough . Adding this seasonal fruit in regular diet boosts immunity and also helps to fight cold , flu and cough during the season.

    Amla can be eaten in any form , either raw , dried or powder form. In spite of knowing its healthy benefits , I somehow skip to include in my regular diet. Hence I made this Spicy Andhra Style Amla Pickle , so that I can eat in my meals regularly . Did You know , eating pickles improves Gut Health??? Yes , It does , hence don't hesitate to add pickles in your meals. One more delicious and tasty pickle with tons of health benefits is Fresh Turmeric Pickle , if interested do find the recipe here.

    Also this year I planned to store amla for longer duration for my own hair health , hence making a large batch of Sukka Amla ( Dry Amla) . To store Amla, I have cut Amla into small pieces , mixed with salt and keeping it under Sun . Still its about to get dry completely , if it comes out well then I will share tips on how to make and store it for year long use.

    Amla being rich in Antioxidants , Iron and Vitamin C , I frequently add Amla Aloevera Juice , Beet Amla Detox and Coriander Amla Detox in my clients diet for weight loss . Because it helps in proper assimilation of nutrients , which in turn will help to get rid of stubborn fat. If you are struggling for weight loss then try adding amla in your diet.

    Watch Video

    Step by Step Directions to make Amla Pickle:

    Wash and rinse amla well with water and wipe it dry with a kitchen napkin. Dry it completely.

    Amla Pickle Recipe

    Cut amla and remove seeds . If you using small amla , then pierce gooseberries with fork and set aside.

    Amla Pickle Recipe

    In a pan , warm mustard seeds and methi seeds for 1-2 minutes.

    Amla Pickle Recipe

    Take a blender / mixer jar , add mustard and methi seeds.

    Amla Pickle Recipe

    Grind to a semi fine powder and set aside.

    Amla Pickle Recipe

    In a same pan , heat ⅓ cup of sesame oil .

    Amla Pickle Recipe

    When it comes to smoking point , add cut amla pieces and cook on a medium heat .

    Amla Pickle Recipe

    Cook amla till it slightly turns golden in colour by now it will be soft . Slide a knife through amla pieces to check whether its soft or not.

    Amla Pickle Recipe

    Once amla pieces are cooked , switch off the heat . Add crushed garlic and mix well. Wait till it turns warm.

    Amla Pickle Recipe

    Now to this, add red chilli powder , turmeric powder , sea salt and mustard methi seeds powder .

    Amla Pickle Recipe

    Mix well everything with a clean dry spatula.

    Amla Pickle Recipe

    Wait till it cools down completely , now add in lemon juice and stir everything.

    Amla Pickle Recipe

    In a tadka pan , heat ¼ cup of oil , add ½ teaspoon of Mustard seeds ,once it crackles turn off the heat .

    Amla Pickle Recipe

    Add Hing / asafoetida.

    Amla Pickle Recipe

    Pour over the prepared pickle.

    Amla Pickle Recipe

    Mix well.

    Amla Pickle Recipe

    Store it in a clean glass jar . Allow it to mature for 3-4 days and then store pickle in a refrigerator.

    Amla Pickle Recipe

    Use it as required , you can serve with any Paratha , Thepla , Rasam Rice , Sambar Rice and curd rice too.

    Recipe

    Amla Pickle
    5 from 2 votes

    Amla Pickle Recipe

    Amla Pickle is a spicy, tasty Andhra Style Pickle with pungent, sour ,bitter and sweet taste of Indian Amla with rustic flavours of mustard and sesame seeds.
    Prep Time30 minutes mins
    Cook Time10 minutes mins
    Total Time40 minutes mins
    Course: Condiments
    Cuisine: Andhra
    Keyword: DIY, Side
    Servings: 1 Small Jar
    Author: Muktha H S

    Ingredients

    • 250 grams Amla / Indian Gooseberries
    • ⅓ Cup Sesame Oil
    • 3-4 no Garlic Cloves , crushed lightly
    • 2 tablespoon Mustard Seeds
    • ¼ teaspoon Methi Seeds
    • 3 tablespoon Red Chilli powder
    • 1 teaspoon Turmeric Powder
    • 1.5 tablespoon Sea Salt / Crystal Salt , as required
    • 1-1.5 tablespoon Lemon juice

    To Temper

    • ¼ cup Sesame Oil
    • 1 tablespoon Black Mustard Seeds
    • ½ teaspoon Asafoetida / Hing

    Instructions

    • Wash and rinse amla well with water and wipe it dry with a kitchen napkin . Dry it completely.
    • Cut amla and remove seeds . If you using small amla , then pierce gooseberries with fork and set aside.
    • In a pan , warm mustard seeds and methi seeds for 1-2 minutes.
    • Take a blender / mixer jar , grind mustard and methi seeds to a semi fine powder and set aside.
    • In a same pan , heat ⅓ cup of sesame oil .
    • When it comes to smoking point , add cut amla pieces and cook on a medium heat .
    • Cook amla till it slightly turns golden in colour by now it will be soft . Slide a knife through amla pieces to check whether its soft or not.
    • Once amla pieces are cooked , switch off the heat . Add crushed garlic and mix well. Wait till it turns warm.
    • Now to this, add red chilli powder , turmeric powder , sea salt and mustard methi seeds powder . Mix well everything with a clean dry spatula.
    • Wait till it cools down completely , now add in lemon juice and stir everything.
    • In a tadka pan , heat ¼ cup of oil , add ½ teaspoon of Mustard seeds ,once it crackles turn off the heat . Add Hing / asafoetida and pour over the prepared pickle.
    • Mix well and store it in a clean glass jar .
    • Allow it to mature for 3-4 days and then store pickle in a refrigerator.
    • Serve with any Paratha , Thepla , Rasam Rice , Sambar Rice and curd rice too.

    Video

    Notes

    • For mustard powder , if yellow mustard seeds are not available then you can use black mustard seeds also.
    • If you feel pickle has less oil , then you can heat some oil and pour it over the pickle.
    • Always use clean and dry spoon .
    • As amla has lot of moisture , cooking in oil prior to pickle is the only way to increase its shelf life.

    Chicken Gassi Recipe | Mangalore Style

    Published : December 3, 2019 | Last Update on April 26, 2021 By Muktha

    chicken gassi

    Chicken Gassi Recipe with step by step photos and short video .

    Chicken Gassi is a delicious chicken curry from Mangalore region . Fresh grated coconut with garlic and cumin seeds paste along with freshly ground spices make this a very tasty chicken curry.

    Chicken gassi is not a spicy chicken , the heat in the curry is well balanced with mild sweetness from coconut. Also additional ghee temper with onions and curry leaves yields a flavourful and rich curry .

    Similar recipes from Mangalore cuisine in blog are Meen Gassi and Chicken sukka

    chicken gassi

    About this recipe

    If you are looking for any authentic mangalorean kori gassi then this recipe is just for you . There are 2 ways of making chicken gassi or kori gassi , one version includes adding coconut milk and second version is with fresh coconut and garlic paste . I am following the second version with fresh coconut and garlic paste.

    Actual recipe of this kori gassi uses gavran chicken / nati chicken / country chicken . But I have used farm chicken in this recipe. Undoubtedly gavran chicken tastes more delicious . Instead of coconut you can also use coconut milk in this recipe.

    Watch Video

    I got this recipe from Vijayalakshmi Reddy's Cookery School. She is one of the famous food enthusiast and recipe developer from Bangalore since 40 years . Also she was associated with KMF and MTR for recipe developing . Since the day I started developing interest on food and cooking , I am following her recipes and till date it's never a failure. And this Chicken Gassi is my all time favorite from her recipe book.

    Step by step directions to make Chicken Gassi:

    In a pan , heat ½ tablespoon of oil , cinnamon stick , cloves, add black peppercorns , red chillies , coriander seeds , fenugreek seeds and jeera seeds , roast them well.

    Chicken Gassi Recipe | Mangalore Style

    Add chopped onion and fry till raw smell of goes off and onion starts to change colour. Turn off the heat and let all the roasted items cool down.

    Chicken Gassi Recipe | Mangalore Style

    Transfer the roasted spices and onion into a mixer jar / blender and blend to a fine paste.

    Chicken Gassi Recipe | Mangalore Style

    Add little water and blend to smooth and fine paste and set aside.

    Chicken Gassi Recipe | Mangalore Style

    In a pressure cooker or deep pan , heat 2 tablespoon of oil . Add 1 chopped onion and fry till raw smell goes off.

    Chicken Gassi Recipe | Mangalore Style

    Wash and clean chicken , drain water completely . Add cleaned chicken pieces.

    Chicken Gassi Recipe | Mangalore Style

    Add turmeric powder and salt ½ tsp.

    Chicken Gassi Recipe | Mangalore Style

    Mix well and cook chicken on high heat , till it changes colour from pink to white.

    Chicken Gassi Recipe | Mangalore Style

    Now add chopped Tomatoes and cook for 5 minutes , till tomatoes starts to leave water.

    Chicken Gassi Recipe | Mangalore Style

    Add above blend paste .

    Chicken Gassi Recipe | Mangalore Style

    Mix well and cook on medium heat till masala coats chicken.

    Chicken Gassi Recipe | Mangalore Style

    Add 1 cup of water and 1 teaspoon of salt .

    Chicken Gassi Recipe | Mangalore Style

    Allow chicken to cook . By end of this step chicken should be , almost 80 % cooked.

    Chicken Gassi Recipe | Mangalore Style

    Whilst , take a blender / mixer jar add grated fresh coconut , garlic cloves and ¼ teaspoon jeera seeds .

    Chicken Gassi Recipe | Mangalore Style

    Add little water a blend to a very fine paste.

    Chicken Gassi Recipe | Mangalore Style

    Now add this coconut masala into chicken .

    Chicken Gassi Recipe | Mangalore Style

    Mix well and cook till gravy becomes medium thick.

    Chicken Gassi Recipe | Mangalore Style

    To Temper :

    Take a pan or tadka pan , heat 1 tablespoon of ghee/ clarified butter , add one finely chopped onion and fry till its golden brown , add curry leaves and fry till crisp.

    Chicken Gassi Recipe | Mangalore Style

    Now pour this temper over prepared chicken curry , give a stir and serve.

    Chicken Gassi Recipe | Mangalore Style

    Serve hot with Neer dosa , idli or appam. I served with Neer Dosa for sunday morning breakfast . You can try this for weekend breakfast /brunch too.

    Chicken Gassi Recipe | Mangalore Style

    Recipe

    chicken gassi
    5 from 1 vote

    Chicken Gassi Recipe | Mangalore Style

    Chicken Gassi is delicious chicken curry made with fresh coconut and freshly ground spices . Its native of Mangalore and usually served with neer dosa , appam or Idli.
    Prep Time20 minutes mins
    Cook Time30 minutes mins
    Total Time50 minutes mins
    Course: Side Dish
    Cuisine: Karnataka, Mangalore
    Keyword: Chicken, Curries, Non-Vegetarian
    Servings: 4
    Calories: 386kcal
    Author: Muktha H S

    Ingredients

    To Roast and Grind

    • 8-10 no's Guntur Red chillies or any spicy variant
    • 1 tablespoon Coriander seeds
    • ½ teaspoon Jeera seeds
    • ½ teaspoon Fenugreek Seeds / Methi Seeds
    • ½ teaspoon Black peppercorns
    • 1 ½ " inch Cinnamon Sticks
    • 2 no Cloves
    • ¼ cup Onion , chopped
    • ½ tablespoon Cooking Oil

    Coconut Masala Paste

    • ½ cup Fresh Coconut Grated
    • 5-6 no Garlic Cloves
    • ¼ teaspoon Jeera / Cumins Seeds

    Other Ingredients

    • 500 grams Chicken , medium size pieces with bones
    • 1 no Onion , chopped
    • 1 no Tomatoes , chopped
    • 1 ½ tablespoon Coconut Oil
    • ¼ teaspoon Turmeric Powder
    • 1 ¼ cup Water
    • 11/2 teaspoon Salt or as required

    To temper

    • 1 tablespoon Ghee/Clarified Butter
    • 1 no Onion , chopped
    • 2-3 sprig Curry leaves

    Instructions

    • In a pan , heat ½ tablespoon of oil , add black peppercorns , cinnamon stick , cloves, jeera seeds , fenugreek seeds , red chillies , coriander seeds and roast them till you get pungent smell.
    • Add chopped onion and fry till raw smell of goes off and onion starts to change colour. Turn off the heat and let all the roasted items cool down.
    • Transfer the roasted spices and onion into a mixer jar / blender , add little water and blend to smooth and fine paste and set aside.
    • In a pressure cooker or deep pan , heat 2 tablespoon of oil . Add 1 chopped onion and fry till raw smell goes off.
    • Wash and clean chicken , drain water completely . Add cleaned chicken pieces.
    • Add turmeric powder and salt ½ tsp.
    • Mix well and cook chicken on high heat , till it changes colour from pink to white.
    • Now add chopped Tomatoes and cook for 5 minutes , till tomatoes starts to leave water.
    • Add above blend paste . Mix well and cook on medium heat till masala coats chicken.
    • Add 1 cup of water , 1 teaspoon salt and allow chicken to cook . By end of this step chicken should be almost 80 % cooked.
    • Whilst , take a blender / mixer jar add grated fresh coconut ,garlic cloves and ¼ teaspoon jeera seeds ,add little water a blend to a very fine paste.
    • Now add this coconut masala into chicken , ½ cup water and cook till gravy becomes medium thick.

    To Temper

    • Take a Tadka pan , heat 1 tablespoon of ghee/ clarified butter , add one finely chopped onion and fry till its golden brown , add curry leaves and fry.
    • Pour this temper over prepared chicken curry and serve hot with neer dosa , idli or appam.

    Video

    Notes

    • You can replace dry red chilies with 1 teaspoon byadgi chilli powder and 1 teaspoon guntur (spicy variant) chilli powder.
    • 1 tablespoon coriander seeds with 2 teaspoon Coriander powder.
    • You can double or half this recipe, scale the measurements as per your need.

    Nutrition

    Calories: 386kcal

    Similar recipes

    • chicken-bhuna-masala
      Chicken Bhuna Masala|How to make Bhuna Chicken
    • koli saaru
      Koli Saaru | Chicken Curry - Karnataka Style
    • Chilli Capsicum Chicken
      Chilli Capsicum Chicken
    • Palak Chicken
      Palak Chicken| Spinach Chicken

    Beetroot Chapati | Beetroot Roti Recipe

    Published : November 27, 2019 | Last Update on May 8, 2021 By Muktha

    roti-paratha-flatbreads

    Beetroot Chapathi recipe with step by step photos and short video . Beetroot Chapati is simple and easy to make Indian Flat bread with beetroot puree and whole wheat flour. It's one of the easiest way to incorporate beet in our daily diet.

    Beetroot Chapati | Beetroot Roti Recipe

    Chapati / roti / Phulka is a staple food in any Indian house and adding this deep pink vegetable to roti yields a nutrient rich roti in every bite. Adding beetroot puree doesn't  give any predominant taste to regular chapathi other than a hint of mild sweet tone. But believe me kids would love this soft pink roti's in their tiffin box , mission accomplished. As few ads quote " Taste bhi , health bhi " 

    Though there is no much of recipe in this delicious beetroot chapathi , still I blog this because its Nutrient Rich and is one of the easiest way to include in kids diet.  You can make either chapati or phulka by adding beetroot puree. I prefer chapati as I pack this for my lil boy's tiffin box as pink rolls with ghee and some chutney powder sprinkled all over or smear spicy upsaaru khara on it. As he likes and withstand heat and little spice in the food , I add small chilli and ½ inch ginger whiling pureeing beetroot. As eating raw beetroot ( low GI) is more beneficial then cooked beetroot , hence don't steam or cook beetroot prior to pureeing.

    Beetroot is seasonal produce and in winter it's easily available here in India. Did you know , Beetroot is very rich in Nitrates. One of the most important nutrient that helps in vasodilation. It improves blood flow and helps to lower blood pressure. Also beetroot juice can be used as a pre-workout drink as it helps to improve the stamina during intense exercise. Along with nitrates Beets are also good sources of folate, potassium, vitamin C, fiber, and antioxidants. Hence try to add in your diet  in any form at least 3 times in a week .

    Other beetroot recipes which I often do at home are Beet Amla Detox Drink , ABC Juice , Beetroot Egg Bhurji , Beetroot Soup , Beet Khanji , Beet Pachadi and Beet Hummus . And the most regular are in my salad or juice or my easy beetroot roti for an healthy diet.

    RECIPE CARD FOR BEETROOT CHAPATI | BEETROOT ROTI

    Recipe

    beetroot_chapati
    4.75 from 4 votes

    Beetroot Chapati | Beetroot Roti Recipe

    Beetroot Chapathi | Roti is a nutrient rich flat Indian bread made with beetroot puree, green chilli , ginger and whole wheat flour.
    Prep Time15 minutes mins
    Cook Time10 minutes mins
    Resting Time20 minutes mins
    Total Time45 minutes mins
    Course: Breakfast, Main Course
    Cuisine: Indian
    Keyword: Breakfast_Ideas, Diet, Healthy, Indian Breads, Kids Recipes, Lunchbox Recipe
    Servings: 11 Roti
    Calories: 131kcal
    Author: Muktha H S

    Ingredients

    • 2 cups Whole wheat flour
    • 1 cup Beetroot , grated
    • 1 no Green chilli , optional
    • ½ inch Ginger , optional
    • ¼ teaspoon Ajwain , carom seeds
    • ¾ teaspoon Salt
    • 1 tablespoon Oil
    • ½-2/3 cup Water or as required
    • 2 -3 tablespoon Oil or as required, for rolling roti , optional
    • Extra Whole wheat flour for dusting
    • Extra Oil / Ghee for roasting

    Instructions

    • In a mixer jar / blender , add 1 cup grated beetroot (tightly pressed) , 1 green chilli and ½ inch ginger , blend everything together to get beetroot puree. Adding green chilli and ginger is truly optional .
    • In a mixing bowl , add 2 cups whole wheat flour , ¼ teaspoon carom seeds and salt.
    • Add beetroot puree and mix well.
    • Now add in ½ - ⅔ cup water in batches and bring flour together to form a smooth dough . Add water part by part as it depends on the quality of wheat flour. I added around ½ cup plus a tablespoon to get a smooth dough.
    • Add 1 tablespoon of oil , spread on dough and cover dough with a damp cloth and set it aside for 20 minutes.
    • After 20 minutes , knead dough once. Pinch some dough, make lemon size balls and set aside. I got around 11 balls of medium size. Close it damp cloth and keep aside.
    • Dust some flour on worktop surface , take lemon size dough ball , flatten it and roll into a round circle of around 6-7 " inch diameter. Grease some oil on top of rolled dough.
    • Tightly roll dough like a log . Starting from one end , wind dough circularly to form a spiral shape .
    • Lightly press the spiral dough and roll it into a circle of 6-7 ' diameter.
    • Alternatively , you can just roll it into a circular disk of 5-6 " inch and make phulka without adding any oil . Or else as a traditional chapathi , you can even apply oil , fold and roll roti . However you roll , beetroot roti comes out well.
    • Heat griddle /tawa . Keep the flame on high heat , place rolled roti on hot griddle , drizzle some oil / ghee at corners and on top . Flip and cook on other side.
    • Apply ghee/ oil on other side too. Gently press roti ,flip and cook on other side too . Keep flipping roti , alternatively on both sides for every 3-4 seconds. It doesn't take more than 40-45 seconds to make a single roti. Once you see brown spots , its done. Remove it and place on a roti basket lined with cotton napkin.
    • Serve Roti accompanied with dal and any sabji of your choice.

    Video

    Notes

    • Adding green chilli and ginger is optional . You can just add beetroot puree only.
    • I recommend to add Ajwain / Carom seeds , as it gives flavour as well as improves gut health and immunity.
    • If you are on a low fat diet , you can skip oil and make phulka. 

    Nutrition

    Calories: 131kcal

    Step by Step directions to make Beetroot Chapati | Roti :

    In a mixer jar / blender , add 1 cup grated beetroot (tightly pressed) , 1 green chilli and ½ inch ginger. Adding green chilli and ginger is truly optional .

    Beetroot Chapati | Beetroot Roti Recipe

    Blend everything together to get beetroot puree.

    Beetroot Chapati | Beetroot Roti Recipe

    In a mixing bowl , add 2 cups whole wheat flour , ¼ teaspoon carom seeds and salt. Add beetroot puree and mix well.

    Beetroot Chapati | Beetroot Roti Recipe

    Now add in ½ - ⅔ cup water in batches and bring flour together to form a smooth dough . Add water part by part as it depends on the quality of wheat flour. I added around ½ cup plus a tablespoon to get a smooth dough. I have added mixer rinsed water , hence water has colour from beetroot.

    Beetroot Chapati | Beetroot Roti Recipe

    Add 1 tablespoon of oil , spread on dough .

    Beetroot Chapati | Beetroot Roti Recipe

    Cover dough with a damp cloth and set it aside for 20 minutes.

    Beetroot Chapati | Beetroot Roti Recipe

    After 20 minutes , knead dough once.

    Beetroot Chapati | Beetroot Roti Recipe

    Pinch some dough, make lemon size balls and set aside. I got around 11 balls of medium size. Close it damp cloth and keep aside.

    Beetroot Chapati | Beetroot Roti Recipe

    Dust some flour on worktop surface , take lemon size dough ball , flatten it .

    Beetroot Chapati | Beetroot Roti Recipe

    Roll into a round circle of around 6-7 " inch diameter.

    Beetroot Chapati | Beetroot Roti Recipe

    Grease some oil on top of rolled dough.

    Beetroot Chapati | Beetroot Roti Recipe

    Tightly roll dough like a log .

    Beetroot Chapati | Beetroot Roti Recipe

    Starting from one end , wind dough circularly to form a spiral shape .

    Beetroot Chapati | Beetroot Roti Recipe

    Lightly press the spiral dough and roll it into a circle of 6-7 ' diameter.

    Beetroot Chapati | Beetroot Roti Recipe

    Alternatively , you can just roll it into a circular disk of 5-6 " inch and make phulka without adding any oil . Or else as a traditional chapathi , you can even apply oil , fold and roll roti . However you roll , beetroot roti comes out well.

    Beetroot Chapati | Beetroot Roti Recipe

    Heat griddle /tawa . Keep the flame on high heat , place rolled roti on hot griddle .

    Beetroot Chapati | Beetroot Roti Recipe

    Drizzle some oil / ghee at corners and on top. Flip and cook on other side.

    Beetroot Chapati | Beetroot Roti Recipe

    Apply ghee/ oil on other side too. Gently press roti ,flip and cook on other side too. Keep flipping roti , alternatively on both sides for every 3-4 seconds. It doesn't take more than 40-45 seconds to make a single roti.

    Beetroot Chapati | Beetroot Roti Recipe

    Once you see brown spots , its done. Remove beetroot roti and place on a roti basket lined with cotton napkin.

    Beetroot Chapati | Beetroot Roti Recipe

    Serve beetroot chapati accompanied with dal and any sabji of your choice. I served with Stir fry tang Okra | Bendekai Palya

    beetroot_chapati

    Onion Rava Dosa| Instant Rava Dosa Recipe

    Published : November 23, 2019 | Last Update on July 22, 2022 By Muktha

    Onion Rava Dosa

    Onion Rava Dosa recipe with step by step pictures . Onion Rava Dosa is a thin ,crispy and lace Dosa which is made instantly with easily available ingredients from kitchen . Semolina/ Rava, Rice flour , Onion and few spices are the main ingredients used to make this recipe. As I will be looking for more instant options to make breakfast / light tiffin for evening during weekends, this becomes easy without any pre-preparation and fermentation.

    Onion Rava Dosa| Instant Rava Dosa Recipe

    To make Onion Rava Dosa , batter consistency is the only key factor to consider . Batter should be watery and runny to nail a perfect South Indian Onion Rava Dosa . Though it's called as Instant Rava Dosa , a good 30 minutes of resting time for batter is very important . For instant version of Dosa / Idli , if semolina / rava is used in the recipe then just make sure to soak and keep for minimum 20- 30 minutes to get desired results . Or else the final dish may not turn out as good as it needs to be.

    If you are a reader of my blog , by now you would have already noticed that for all my semolina based recipes I use curds / yogurt . Because it adds a hint of tang flavour to the final dish to make it more delicious. Either buttermilk or curds with water can be used in this recipe. Always use medium size rava / bombay rava or regular upma rava to make rava dosa. Using fine rava or coarse rava (bansi rava) doesn't yield good crispy lacy dosa.

    Also in order to save time , initially mix rava , rice flour and refined flour with curds and water , rest for good 20 minutes. Whilst chop onions , green chillies and leaves and then add into the batter along with other spices. Also while batter is resting ,you can prepare Coconut Chutney and Tomato Chutney to serve with Onion Rava Dosa.

    Other similar recipes on blog are Instant Rava Idli , Instant Rava Paddu / Instant Appe and Instant Khaman Dhokla .

    Rava Idli
    Instant Rava Idly
    instant_rava_paddu
    Instant Paddu
    Khaman Dhokla
    Khaman Dhokla

    If you are looking for more Dosa recipes ,do check these following Dosa Recipe Collections :

    • Mysore Masala Dosa
    • Gobi Masala Dosa
    • Set Dosa  | Sponge Dosa
    • Menthe Dosa | Fenugreek dosa
    • Pesarattu | Greengram Dosa
    • Adai | Mixed Grain Dosa
    • Instant Oats Dosa

    RECIPE CARD FOR ONION RAVA DOSA

    Recipe

    Onion Rava Dosa
    5 from 2 votes

    Onion Rava Dosa Recipe

    Crispy ,lacy and delicious dosa made with semolina , rice flour and yogurt instantly.
    Prep Time8 minutes mins
    Cook Time5 minutes mins
    Resting time20 minutes mins
    Total Time30 minutes mins
    Course: Breakfast
    Cuisine: Indian, Karnataka, South India, Tamil Nadu
    Keyword: Bachelor's Cooking, Breakfast_Ideas, Quick & Easy
    Servings: 3 people
    Calories: 183kcal
    Author: Muktha H S

    Ingredients

    • ½ cup Rava / semolina
    • ½ cup Rice flour
    • ¼ cup Refined flour /All purpose flour /Maida
    • 1 no Onion ,medium size, finely chopped
    • 1 no Green Chilli , finely chopped
    • 1 tablespoon Ginger ,grated
    • 1 teaspoon Cumin Seeds
    • ½ tablespoon Black peppercorns
    • 1 teaspoon Salt
    • ¼ teaspoon Sugar , optional
    • 1 sprig Curry leaves , finely chopped
    • 1 tablespoon Coriander leaves ,chopped
    • Oil / Ghee for roasting
    • 2-3 tablespoon Curds
    • 3.5-4 cups Water or as required

    Instructions

    • In a mixing bowl , add rava , rice flour and refined flour.
    • Add in green chillies , ginger , cumin seeds , crushed black peppercorns , curry leaves , coriander leaves ,salt and pinch of sugar.
    • Mix well everything .
    • Add 2-3 tablespoon of curds and 2 cups of water or else you can also add butter milk.
    • Add finely chopped onions, whisk well . Let batter rest for minimum 20 minutes.
    • After resting time , add remaining 1.5 cups of water ,mix well everything from bottom . As rava tends to settle down at bottom , adjust remaining water while pouring dosa in next batches.
    • On a hot non stick tawa/ cast iron griddle and pour a ladle full of batter from outside to inner side, fill in the large holes.
    • Drizzle some oil / ghee on top of dosa and cook on a low- medium heat ,slowly .
    • Once the base looks firm and turns golden brown , remove dosa from corners , fold and serve it straight , accompanied with tomato chutney and coconut chutney.

    Notes

    • Adding curds or buttermilk is optional , but adding it really enhances the taste.
    • You can even replace 2 tablespoon of Refined Flour with Whole Wheat flour if required.
    • Batter consistency should be watery to get lace structure in Dosa. Rava tends to settle down at bottom so stir batter from bottom in ladle every time before pouring batter on griddle to make dosa.
    •  Be generous in adding Ghee / oil for roasting Dosa , as it makes dosa crispy .
    • Tastes good when served hot.

    Nutrition

    Calories: 183kcal

    Step by Step directions to make Onion Rava Dosa Recipe:

    In a mixing bowl , add rava , rice flour and refined flour.

    Add in green chillies , ginger , cumin seeds , crushed black peppercorns , curry leaves , coriander leaves ,salt and pinch of sugar.

    Onion Rava Dosa| Instant Rava Dosa Recipe

    Mix well everything . 

    Onion Rava Dosa| Instant Rava Dosa Recipe

    Add 2-3 tablespoon of curds.

    Onion Rava Dosa| Instant Rava Dosa Recipe

    And 2 cups of water or else you can also add butter milk. Or just water can also be added.

    Onion Rava Dosa| Instant Rava Dosa Recipe

    Whisk well together.

    Onion Rava Dosa| Instant Rava Dosa Recipe

    Now add finely chopped onions . 

    Onion Rava Dosa| Instant Rava Dosa Recipe

    Let batter rest for minimum 20 minutes.

    Onion Rava Dosa| Instant Rava Dosa Recipe

    After resting time, rava tends to settle downOnion Rava Dosa| Instant Rava Dosa Recipe

    Add remaining 1.5 cups of water ,mix well everything from bottom . The batter should be thin free flowing consistency . Onion Rava Dosa| Instant Rava Dosa Recipe

    On a hot non stick tawa/ cast iron griddle and pour a ladle full of batter from outside to inner side, fill in the large holes. Only if batter is thin , lacy and crispy dosa's are formed. Every time while making next dosa , please ensure to stir batter from the bottom . As batter tends to settle down at the bottom , if batter looks thick , then feel free to adjust with little water and pinch of salt to taste.

    Onion Rava Dosa| Instant Rava Dosa Recipe

    Drizzle some oil / ghee on top of dosa and roast dosa on a medium-low heat , slowly .

    Onion Rava Dosa| Instant Rava Dosa Recipe

    Once the base looks firm and turns golden brown , remove dosa from corners.

    Onion Rava Dosa| Instant Rava Dosa Recipe

    Fold and serve it straight . 

    Onion Rava Dosa| Instant Rava Dosa Recipe

    Serve crispy Onion Rava Dosa hot accompanied with tomato chutney and coconut chutney.

    Crispy Onion Rava Dosa

    Tomato Chutney Recipe

    Published : November 20, 2019 | Last Update on October 16, 2022 By Muktha

    Tomato Chutney recipe with step by step pictures and short video. Tomato Chutney is a spicy and tangy accompaniment that goes well with Idli and Dosa . Tomato chutney is simple to make with basic ingredients. I often make this chutney along with Onion Rava Dosa, as it doubles the taste of crispy rava dosa.

    Tomato Chutney
    [feast_advanced_jump_to]

    To make Tomato chutney , always choose ripen tomatoes . Also you can add 1 medium size onion to it , though it is optional , I love my tomato chutney with onion.

    Every South Indian home as their own family recipes for this Tomato Chutney but my recipe is the most basic recipe with regular ingredients. Few also add peanuts to make Tomato chutney but it has totally different taste from this regular chutney. If you like peanuts in your chutney with tomato then try this Spicy Peanut Chutney , which you may like .

    Dosa and Idli being staple breakfast at home wide varieties of chutneys i are also made . I always choose accompaniments such that along with enhancing taste , it's nutrition absorption should also be taken care.

    Did you know , how important it is to temper chutney , especially coconut based chutney ???? If you want to have a low GI food , then without thinking about the amount of fat that gets into temper chutney , please pour a desi ghee tadka on your chutney and have it wholeheartedly. Eating right and thoughtfully is the only way to achieve a healthy body with slimmer waistline .

    Few chutney recipes which I have shared are : Regular Coconut Chutney , Masala Dosa Coconut Chutney , Masala Dosa Red Chutney, Pumpkin Chutney , Peanut Chutney , Mooli Chutney , Gorikai Kara |Cluster Bean Chutney and Spicy Peanut Chutney.

    How to make Tomato Chutney:

    In a pan , heat 1 teaspoon of oil , add dry red chilli and saute till you get pungent smell.

    Tomato Chutney Recipe

    Add Chana dal , urad dal and continue to fry until it turns golden in colour.Also add in jeera seeds and continue to saute.

    Tomato Chutney Recipe

    Now add in 2 garlic cloves , chopped onion and saute for 5 minutes on medium heat till raw smell of garlic and onion goes off.

    Tomato Chutney Recipe

    Add chopped tomatoes , saute for few minutes .

    Tomato Chutney Recipe

    To speed up the process of cooking tomatoes , add in salt and sugar . This makes tomatoes to release its juice and cooks sooner.

    Tomato Chutney Recipe

    When tomatoes are well cooked , turn off the stove and allow to cool.

    Tomato Chutney Recipe

    Once the mixture is cool , transfer it into a blender /mixer jar.

    Tomato Chutney Recipe

    Blend to smooth. Can add little water while blending chutney. You can adjust water as per required consistency , but I like tomato chutney to be on little thicker side.

    Tomato Chutney Recipe

    To Temper Tomato Chutney :

    In a Temper/ Tadka pan ,heat oil , add mustard seeds when it splutters add cumin/ jeera seeds .

    Tomato Chutney Recipe

    Add 1 sprig curry leaves , once it turns crisp , add hing and turn off the heat.

    Tomato Chutney Recipe

    Pour this temper on above prepared tomato chutney .

    Tomato Chutney Recipe

    Serve with Idli / Dosa.

    Recipe

    Tomato Chutney Recipe
    5 from 2 votes

    Tomato Chutney Recipe

    Tomato Chutney is most popular recipe from South India , it's a spicy and tangy accompaniment that goes well with Idli and Dosa ,
    Prep Time10 minutes mins
    Cook Time18 minutes mins
    Total Time28 minutes mins
    Course: Accompaniment
    Cuisine: Andhra, Karnataka, Tamil Nadu
    Keyword: Basic, Chutney, Gluten Free, Quick & Easy, South Indian, Vegan
    Servings: 5 people
    Calories: 78kcal
    Author: Muktha H S

    Equipment

    • Frying Pan , Temper Pan
    • Mixer Jar or Blender

    Ingredients

    • 3 no Large Tomatoes , fully ripe , Chopped
    • 1 no Onion , optional
    • 2 no's Garlic cloves
    • 4 no's Dry Kashmiri Red Chillies ( Guntur or any spicy version)
    • 1 tablespoon Chana Dal
    • ½ tablespoon Urad Dal
    • 1 tablespoon Cooking oil
    • 1 teaspoon Salt
    • ¼ teaspoon sugar

    For Temper

    • 1 tablespoon Oil
    • ½ teaspoon Mustard Seeds
    • ½ teaspoon Jeera/Cumin Seeds
    • 1 sprig Curry leaf
    • ¼ teaspoon Hing / Asafoetida

    Instructions

    • In a pan ,heat 1 teaspoon of oil , add dry red chilli and saute till you get pungent smell.
    • Add Chana dal , urad dal and continue to fry until it turns golden in colour.
    • Now add in 2 garlic cloves , chopped onion and saute for 5 minutes on medium heat till raw smell of garlic and onion goes off.
    • Add chopped tomatoes , saute for few minutes until cooked.
    • To speed up the process of cooking tomatoes , add in salt and sugar . This makes tomatoes to release its juice and cooks sooner.
    • When tomatoes are well cooked , turn off the stove and allow to cool.
    • Once the mixture is cool , transfer it into a blender /mixer jar and blend to smooth. Can add little water while blending chutney.

    To Temper

    • In a Temper/ Tadka pan ,heat oil , add mustard seeds when it splutters add cumin/ jeera seeds .
    • Add 1 sprig curry leaves , once it turns crisp , add hing and turn off the heat.
    • Pour this temper on prepared tomato chutney and serve with Idli / Dosa.

    Video

    Nutrition

    Calories: 78kcal

    Heralekai Chitranna | Citron Lime Rice

    Published : November 14, 2019 | Last Update on September 27, 2022 By Muktha

    Heralekai Chitranna

    Heralekai Chitranna | Citron Lime Rice with step by step pictures and short video . Citron Lime referred as Heralekai in Kannada, Narthangai in Tamil is used to make this delicious and tasty rice preparation .

    Basically , lime rice is a temper rice with additional lime juice into it . But in this recipe Heralekai Gojju / Citron Lime Masala Paste is used , to make Heralekai Chitranna .

    Heralekai Chitranna

    Heralekai Gojju / Masala Paste has a shelf life of 15 -20 days , when refrigerated. So whenever I will be out of home for a week or more , I prepare this Gojju and refrigerate . So that men at home can make their own Heralekai Chitranna , just by adding rice and hot oil . Also according to season , I do Mavinakayi Chitranna Gojju | Raw Mango Rice , Nimbehuli Chitranna Gojju | Masala Lemon Rice and Puliyogare Gojju | Tamarind Rice to make it easier for men at home to cook their own food when I am out of town. Just sneak - peek into the above recipes and help your husband to cook their own food when needed.

    Heralekai Chitranna | Citron Lime Rice

    Heralekai chitranna is a delicious rice with spice, tang and hint of bitterness from Citron. Though procedure to make Heralekai Chitranna is same as any other Chitranna gojju / masala paste , ingredients list significantly varies and so is the taste. Citron Lime is used as one of the best home remedy for " Pitta Dosha ". Hence , addition of groundnuts are not used in this Citron lime rice , has it may not be effective for health benefits.

    Health Benefits of Citron

    Citron lime juice is a wonderful natural remedy to balance the acid secretions in the gut. Problems like flatulence, bloating, nausea and constipation can be overcome with citron juice. Also the strong anti-inflammatory and analgesic properties of citron work well to lower any acute or chronic pain in the body. As Citron belongs to Citrus family its undoubtedly rich in Vitamin C and boosts immune system. And also its rich potassium levels adds on to stabilize blood pressure and improves heart health . What more you need from a seasonal fruit than this , to add it in your diet?????

    As its season of this wonderful citrus fruit , I try to incorporate into my diet. Whenever Citron Lime is available I make sure , I make this chitranna , Sweet & Salt Citron Lime Juice and Citron Lime Pickle. I am literally drooling now as I mentioned , Citron Lime Pickle. Because it's one of the tastiest pickle with tang , spice and bitterness. I totally love it , going to share the recipe soon , stay tuned on my Facebook and Instagram for updates on this.

    Other Karnataka Style Tempered Rice Recipes on blog are :

    • Masala Chitranna
    • No Onion No Garlic , Easy Chitranna
    • Mavinakayi Chitranna
    • Puliyogare

    RECIPE CARD FOR HERALEKAI CHITRANNA | CITRON LIME JUICE

    Recipe

    Heralekai Chitranna
    5 from 1 vote

    Heralekai Chitranna | Citron Lime Rice Recipe

    Heralekai Chitranna | Citron Lime Rice : It is a tasty rice preparation from Karnataka Cuisine made with juice of Citron Lime .It's a delicious rice with spice, tang and hint of bitterness from Citron.
    Prep Time10 minutes mins
    Cook Time20 minutes mins
    Total Time30 minutes mins
    Course: Breakfast, Main Course
    Cuisine: Andhra, Karnataka
    Keyword: Gluten Free, Rice Varities
    Servings: 8 people
    Calories: 273kcal
    Author: Muktha H S

    Ingredients

    • 2 -3 No's Citron Lime or ½ cup Citron Lime Juice
    • 1 no Onion sliced ,large
    • 1 ½ teaspoon Salt or as required

    To Dry Roast

    • 8 no's Kashmiri Red Chilli
    • 1 tablespoon Coriander Seeds
    • 1 ½ tablespoon Cumin / Jeera Seeds

    To Blend

    • ½ cup Fresh Coconut grated
    • 10-12 no Garlic cloves or 1 Garlic pod
    • ½ teaspoon Turmeric powder
    • ½ inch Cinnamon stick
    • 1 no Clove ,small
    • Above dry roasted spices

    To Temper

    • 4 tablespoon Sesame Oil or any cooking oil
    • ½ teaspoon Mustard Seeds
    • 1 tablespoon Chana Dal
    • 2 tablespoon Urad Dal
    • 1 spring Curry Leaves
    • ½ teaspoon Asafoetida

    To mix with rice

    • 1 cup Cooked Rice
    • ½ tablespoon Hot oil
    • ½ teaspoon Salt

    Instructions

    • In a pan , add 8-10 red chillies , 1 tablespoon Coriander seeds and dry roast until there is a pungent smell.
    • Add Cumin seeds and roast on low heat , till it starts to splutter.
    • Turn off the heat , allow it to cool.
    • In a small mixer jar /blender , add fresh grated coconut ,garlic , above roasted spices , turmeric powder , cinnamon and cloves.
    • Blend to a coarse paste without adding water.
    • Whilst , cut open citron lime , squeeze to release juice. Pass juice through mesh filter and discard seeds and set juice aside.

    To prepare Masala Paste / Gojju

    • Heat 4 tablespoon of sesame oil in a pan.
    • Add ½ teaspoon mustard seeds , allow it to crackle.
    • Add 1 tablespoon of Chana dal , 2 tablespoon of urad dal and 1 sprig curry leaves.
    • Saute till it dal turns golden in colour , add asafoetida
    • Now add in sliced onions and saute till it turns translucent.
    • Add the above blend masala , mix well.
    • Cook for 6-8 minutes till masala blends well with onions and starts to release oil at corners.
    • Add 1 ½ teaspoon of salt and mix well.
    • Add citron lime juice and cook for 4-5 minutes on low heat.
    • Turn off the heat , Heralekai Gojju / Citron Lime Masala paste is ready . Once it is cool , store it in a dry glass jar.

    To prepare Hereralekai alekai Chitranna

    • Take 1 cup cooked rice on a plate.
    • Add 2-3 tablespoon of Heralekai Gojju / Heralekai Masala Paste to cooked rice.
    • Add ½ tablespoon of hot oil
    • Mix rice well with gojju using hands.
    • Add ½ teaspoon of salt mix well ,taste and adjust it by adding more gojju or salt , if required.
    • Heralekai Chitranna is ready to serve.

    Video

    Notes

    • Here I have use only 1 cup of rice for serving . With this gojju / masala paste you can make Chitranna upto 7-8 plates of cooked rice.

    Nutrition

    Calories: 273kcal

    Step by Step Directions to make Heralekai Chitranna | Citron Lime Rice

    In a pan , add 8-10 red chillies , 1 tablespoon Coriander seeds and dry roast until there is a pungent smell.

    Heralekai Chitranna | Citron Lime Rice

    Add Cumin seeds and roast on low heat , till it starts to splutter.

    Heralekai Chitranna | Citron Lime Rice

    Turn off the heat , allow it to cool.

    Heralekai Chitranna | Citron Lime Rice

    In a small mixer jar /blender , add fresh grated coconut ,garlic , above roasted spices , turmeric powder , cinnamon and cloves.

    Heralekai Chitranna | Citron Lime Rice

    Blend to a coarse paste without adding water.

    Heralekai Chitranna | Citron Lime Rice

    Whilst , cut open citron lime , squeeze to release juice. Pass juice through mesh filter and discard seeds and set juice aside.

    Heralekai Chitranna | Citron Lime Rice

    To prepare Masala Paste / Gojju

    Heat 4 tablespoon of sesame oil in a pan.

    Heralekai Chitranna | Citron Lime Rice

    Add ½ teaspoon mustard seeds , allow it to crackle. Add 1 tablespoon of Chana dal , 2 tablespoon of urad dal and 1 sprig curry leaves.

    Heralekai Chitranna | Citron Lime Rice

    Saute till it dal turns golden in colour , add asafoetida

    Heralekai Chitranna | Citron Lime Rice

    Now add in sliced onions and saute till it turns translucent. Add the above blend masala , mix well.

    Heralekai Chitranna | Citron Lime Rice

    Cook for 6-8 minutes till masala blends well with onions and starts to release oil at corners.

    Heralekai Chitranna | Citron Lime Rice

    Add 1 ½ teaspoon of salt and mix well.

    Heralekai Chitranna | Citron Lime Rice

    Add citron lime juice, mix well and cook for 4-5 minutes on low heat.

    Heralekai Chitranna | Citron Lime Rice

    Turn off the heat , Heralekai Gojju / Citron Lime Masala paste is ready . Once it is cool , store it in a dry glass jar.

    Heralekai Chitranna | Citron Lime Rice

    To prepare Hereralekai alekai Chitranna

    Take 1 cup cooked rice on a plate. Add 2-3 tablespoon of Heralekai Gojju / Heralekai Masala Paste to cooked rice. Add ½ tablespoon of hot oil .

    Heralekai Chitranna | Citron Lime Rice

    Mix rice well with gojju using hands.

    Heralekai Chitranna | Citron Lime Rice

    Add ½ teaspoon of salt mix well ,taste and adjust it by adding more gojju or salt , if required.

    Heralekai Chitranna | Citron Lime Rice

    Heralekai Chitranna is ready to serve.

    Heralekai Chitranna | Citron Lime Rice

    Alu Vadi Recipe

    Published : November 4, 2019 | Last Update on November 11, 2019 By Muktha Gopinath

    Alu Vadi

    Alu Vadi Recipe with step by step pictures and short video(coming up soon) . Colocasia Leaves / Arbi ke Patte / Taro leaves are used to make this delectable snack recipe . Cleaned Arbi leaves are generously coated with a mixture of gram flour masala paste , rolled and then steamed. Later steamed leaves are cut and then either temper or shallow / deep fry before serving. Alu vadi is also referred as patra and is one of the most popular snack recipe Maharashtra and Gujarat . In Karnataka, it is popularly known as pathrode and instead of gram flour masala batter , rice batter is used to make this snack.

    Alu Vadi Recipe

    To make Alu Vadi Recipe , use tender , fresh and medium size colocasia leaves . Taro leaves / colocasia leaves are itchy in nature because of presence of calcium oxalate crystals . Choose tender and farm fresh Arbi leaves to minimize the effect of tingle in throat . I was lucky enough to get these tender Colocasia leaves from my help's farm . It was so fresh and tender that there were no traces of itching . Also steaming arbi leaves will remove the itchiness from the leaves . Hence a mixture of spice , sweet and tang is added into gram flour batter to make this delicious snack .

    Colocasia Leaves/  Arbi ke Patte / Taro Leaves are easily available during monsoon season. Its rich in nutrients also iron and Vitamin A. Never miss to make alu vadi during monsoon with a cup of masala chai , it tastes delicious .

    Alu Vadi Recipe

    Also I would like to highlight these evening snack recipes , do check , it may interest you.

    • Sabudana Vada
    • Veg Poha Cutlet
    • Khaman Dhokla
    • Spinach Mushroom Soya Cutlets
    • Masala Vada

    RECIPE CARD FOR ALU VADI

    Recipe

    Alu Vadi
    5 from 1 vote

    Alu Vadi

    Alu vadi is a tasty snack made with colocasia leaves where gram flour and spices are mixed together , smeared on leaves , stacked , rolled, steamed and fried or temper ,later.
    Prep Time20 minutes mins
    Cook Time25 minutes mins
    Total Time45 minutes mins
    Course: Snack
    Cuisine: Gujarati, Maharstarian
    Keyword: Gluten Free, snacks
    Servings: 3 People
    Calories: 263kcal
    Author: Muktha H S

    Ingredients

    • 15 No's Colocasia Leaves / Arbi ke patte Small size leaves
    • 1 cup Gram Flour / besan
    • ½ teaspoon Turmeric powder
    • 1 /2 teaspoon Asafoetida / Hing
    • ½ teaspoon Jaggery powder
    • 1 teaspoon Red Chilli powder
    • 1 teaspoon Coriander Powder
    • 1 Tbsp Tamarind seedless , soaked in ¼ cup water water , refer notes
    • ¾ - 1 teaspoon Salt or as required
    • ⅛-1/4 cup Water , as required to adjust the consistency

    For Masala

    • 2 tablespoon Fresh Coconut
    • ½ teaspoon Cumin / Jeera seeds
    • 4-5 no's Garlic cloves
    • ½" inch Ginger
    • 4-5 no Green Chilli
    • ½ inch Cinnamon Stick , optional
    • 1 no Clove , small, optional

    Other Ingredients

    • 3 tablespoon Cooking Oil , for shallow fry
    • Water for steaming

    Instructions

    • In a blender or a mixer chutney jar , add coconut , garlic , ginger , green chillies , cumin seeds, cinnamon , cloves and blend to a coarse paste .
    • Take mixing bowl , add gram flour , masala paste , red chilli powder , coriander powder , turmeric powder , jaggery , salt and hing.
    • Mix all spices with gram flour and add tamarind juice .
    • Whisk and add water part by part to make a thick batter .
    • Wash , clean and wipe dry colocasia leaves . Reverse the leaf , cut steam and remove veins gently with knife , if any.
    • Now take a leaf , reverse it , drop spoonful of gram flour batter on leaf and spread evenly.
    • Take one more leaf and place it on the batter spread leaf in opposite direction and apply besan mix on it evenly.
    • Now take one more leaf , place in opposite direction , apply gram flour batter and repeat the process for another 2-3 leaves .
    • Fold the leaves on both sides , vertically and start rolling the stacked taro leaves tightly from down moving upwards, horizontally .
    • Secure the rolled leaves by tieing with a thread . This step is optional.
    • In a similar way , take 5 to 6 leaves , apply batter , stack one above the other , and roll . Repeat for all leaves . You can even spread extra batter on rolled leaves too .
    • Whilst , boil water in a steamer .
    • Place rolled leaves on a greased steamer pan and steam for 18-20 minutes.
    • Once steamed , remove the secured thread and slice the steamed rolls.
    • Heat 3 tablespoon of oil in a pan and shallow fry these steamed rolls on both sides. Alternatively you can even deep fry it instead of shallow fry or just temper sliced alu vadi with mustard , sesame seeds and garnish with fresh coconut .
    • Serve hot with a cup a masala chai /tea.

    Video

    Notes

    • Soak seedless tamarind in warm water for about 30 minutes . Squeeze the tamarind pulp and extract juice .
    • If there are thick veins in leaves , remove it with knife gently and roll the leaf using rolling pin .
    • If you temper and serve Alu vadi garnished with fresh coconut then adding coconut in masala is optional. 
    •  

    Nutrition

    Calories: 263kcal

    Step By Step Directions to make Alu vadi

    In a blender or a mixer chutney jar , add coconut , garlic , ginger , green chillies , cumin seeds, cinnamon and cloves

    Alu Vadi Recipe

    Blend to a coarse paste .

    Alu Vadi Recipe

    Take mixing bowl , add gram flour , masala paste , red chilli powder , coriander powder , turmeric powder , jaggery , salt and hing.

    Alu Vadi Recipe

    Mix all spices with gram flour and add tamarind juice .

    Alu Vadi Recipe

    Whisk and add water part by part to make a thick batter .

    Alu Vadi Recipe

    Wash , clean and wipe dry colocasia leaves . Reverse the leaf , cut steam and remove veins gently with knife , if any.

    Alu Vadi Recipe

    Now take a leaf , reverse it , drop 1-2 spoonful of gram flour batter on leaf and spread evenly.

    Alu Vadi Recipe

    Take one more leaf and place it on the batter spread leaf in opposite direction and apply besan mix on it evenly.

    Alu Vadi Recipe

    Now take one more leaf , place in opposite direction , apply gram flour batter and repeat the process for another 2-3 leaves .

    Alu Vadi Recipe

    Fold the leaves on both sides , vertically and start rolling the stacked taro leaves tightly from down moving upwards, horizontally .

    Alu Vadi Recipe

    Secure the rolled leaves by tieing with a thread . This step is optional.

    Alu Vadi Recipe

    In a similar way , take 5 to 6 leaves , apply batter , stack one above the other , and roll . Repeat for all leaves . You can even spread extra batter on rolled leaves too .

    Whilst , boil water in a steamer .

    Place rolled leaves on a greased steamer pan.

    Alu Vadi Recipe

    Place rolled leaves on a greased steamer pan .

    Alu Vadi Recipe

    Steam for 18-20 minutes.

    Alu Vadi Recipe

    After steam.

    Alu Vadi Recipe

    When it is warm , remove it from pan . Cut open and remove the thread. Slice the steamed rolls

    Alu Vadi Recipe

    Sliced alu vadi . (If you wish you can temper with mustard seeds , sesame seeds and garnish with fresh grated coconut and serve , or proceed to next step)

    Alu Vadi Recipe

    Heat 3 tablespoon of oil in a pan .

    Alu Vadi Recipe

    Add sliced alu vadi and shallow fry .

    Alu Vadi Recipe

    Flip and fry on other sides.

    Alu Vadi Recipe

    Shallow fry till it looks crisp and turns golden brown from outside.

    Alu Vadi Recipe

    Alternatively you can even deep fry it instead of shallow fry or just temper with mustard , sesame seeds and garnish with fresh coconut .

    Serve hot with a cup a masala chai /tea.

    Alu Vadi Recipe

    Chilli Capsicum Chicken

    Published : October 30, 2019 | Last Update on September 27, 2022 By Muktha

    Chilli Capsicum Chicken
    Chilli Capsicum Chicken

    Chilli Capsicum Chicken with step by step photos and short video . Chilli Capsicum Chicken is a quick and easy diet friendly version of Chilli Chicken . Unlike regular chilli chicken this recipe has no marination nor batter fried chicken . It's one of the most basic recipe with minimal ingredients . It's a spicy and dry chicken dish made with boneless chicken. But can also use chicken with bones. As it is not a deep fried chicken , it doesn't make much difference with or without bone. Its a quick and easy chicken that can be put up within 30 minutes.

    I am making this recipe since a decade and every time I love to eat it all alone with some green salad or serve it as a starter for all beer lovers. The heat in the chicken is quite on higher end and is served more like a starter . Or else you can even serve as a side dish to accompany with simple rice sambar / dal chawal / rice rasam . Green Capsicum , green chillies , chicken , soya sauce , white vinegar ,oil and salt are the only ingredients that are used to make this chicken. As it is my own version of diet friendly version of chilli chicken and use only capsicum and chillies , I name it as Chilli Capsicum Chicken.

    Fewer variations can be made to the recipe to get a saucy consistency by using corn starch at the end of the recipe and allow it to thicken for desired consistency . Also you can marinate chicken in soya sauce and vinegar for 30 minutes and continue to make this dish .

    This recipe has No Onion , No Garlic and No Ginger in it. All flavours are mainly from Chillies , Soya Sauce and Bell peppers. Try not to use Chicken breast pieces , as it may dry out quickly . If you don't like chilli capsicum chicken to be completely dry then try saucy version of this chicken .

    For Chilli Capsicum Chicken to be saucy : dissolve 1 ½ tablespoon of corn flour in ½ cup of water and add it to the chicken at the end of the recipe ,once it starts to thicken ,turn off the heat . Garnish with spring onions and serve.

    Chilli Capsicum Chicken

    If interested do check other similar Chicken Recipes on blog :

    • Chicken Ghee Roast
    • Pepper Chicken with Curry Leaves
    • Chicken Sukka | Mangalore Style
    • Chicken Lollipop
    • Chicken Tikka
    • Sheek Kebab
    • Tandoori Chicken

    RECIPE CARD FOR CHILLI CAPSICUM CHICKEN

    Recipe

    Chilli Capsicum Chicken
    5 from 2 votes

    Chilli Capsicum Chicken

    Chilli Capsicum Chicken - A spicy dry sauteed chicken made with lots of green chillies, peppers and soy sauce to mock IndoChinese Chilli Chicken for a healthy diet .
    Prep Time10 minutes mins
    Cook Time20 minutes mins
    Total Time30 minutes mins
    Course: Appetizer, Starters
    Cuisine: Fusion, Indo-Chinese
    Keyword: Bachelor's Cooking, Chicken, Diet, Gluten Free, Protein Rich, Quick & Easy
    Servings: 4 People
    Calories: 223kcal
    Author: Muktha H S

    Ingredients

    • 500 grams Chicken Cut pieces ,with or without bone
    • 200 grams Green Capsicum
    • 10-12 no's Green Chillies ,slit Medium Spice Variant
    • 3 tablespoon Cooking Oil
    • ¼ teaspoon Turmeric Powder
    • 2 tablespoon Soya Sauce
    • 1 ½ tablespoon White Vinegar
    • ½ -¾ teaspoon Salt or as required
    • ½ teaspoon Black Pepper powder , freshly ground

    Instructions

    • In a deep pan , heat 1 ½ tablespoon of oil , add washed and cleaned chicken pieces.
    • Add ½ teaspoon salt, turmeric powder and cook on medium heat till chicken releases water.
    • Meanwhile, slit green chillies and cut casicum into ½ inch cubes and set aside. Add more green chillies if you can withstand more heat.
    • When water is about to dry , add 1 teaspoon of Soya Sauce and 1 teaspoon of Vinegar
    • Mix well everything and continue to cook further for 5 more minutes till chicken is well cooked. Don't overcook chicken , it may dry out the chicken.
    • Whilst , in a wok heat 1 ½ tablespoon of oil , add slit green chillies and capsicum.
    • Saute well and add remaining soya sauce and vinegar to this , mix well.
    • Now transfer the cooked chicken pieces into the wok , stir well .
    • Add ½ teaspoon of crushed black pepper powder. Check taste and then add salt ,if needed as soya sauce has lot of salt in it.
    • Serve hot .

    Video

    Notes

    • Chicken should be cooked on medium heat ,it should be tender and juicy , if you over cook it dries out and spoils the entire dish. 
    • If you want it to be saucey , then add dissolve 2 tablespoon of Corn flour in ½ cup of water and add it at last . When it bubbles ,thickens  and reaches required consistency . Turn off the heat.
    • Be careful while adding salt as soya sauce contains lots of salt in it.

    Nutrition

    Calories: 223kcal

    Step by Step directions to make Chilli Capsicum Chicken:

    In a deep pan , heat 1 ½ tablespoon of oil , add washed and cleaned chicken pieces.

    Chilli Capsicum Chicken

    Add ½ teaspoon salt and ¼ teaspoon turmeric powder .

    Chilli Capsicum Chicken

    Mix well and cook on medium heat till chicken releases water.

    Chilli Capsicum Chicken

    Meanwhile, slit green chillies and cut capsicum into ½ inch cubes and set aside. Add more green chillies if you can withstand more heat.

    When water from chicken is about to dry , add 1 teaspoon of Soya Sauce and 1Tsp of Vinegar.

    Chilli Capsicum Chicken

    Mix well everything and continue to cook further for 5 more minutes till chicken is well cooked. Don't overcook chicken , it may dry out the chicken.

    Chilli Capsicum Chicken

    Whilst , in a wok heat 1 ½ tablespoon of oil , add slit green chillies and capsicum.

    Chilli Capsicum Chicken

    Saute well and add remaining soya sauce and vinegar to this , mix well.

    Chilli Capsicum Chicken

    Now transfer the cooked chicken pieces into the wok .

    Chilli Capsicum Chicken

    Mix well , Turn off the flame .

    Chilli Capsicum Chicken

    Add ½ teaspoon of crushed black pepper powder. Check taste and then add salt , if needed as soya sauce has lot of salt in it.

    Chilli Capsicum Chicken

    Allow it to sit for 5-10 minutes together for flavours to blend well and then serve.

    Chilli Capsicum Chicken

    Serve hot

    Chilli Capsicum Chicken

    Atta Chiroti Recipe

    Published : October 28, 2019 | Last Update on October 17, 2022 By Muktha

    chiroti

    Atta Chiroti Recipe with step by step photos and short video . Chiroti is a Karnataka special deep fried, crispy , flaky , layered sweet made with fine rava and ghee. It is served with powdered sugar and sweetened milk / Basundi . Chiroti is a traditional sweet served during marriages and religious functions.

    atta chiroti

    In this Atta Chiroti Recipe instead of fine rava , I have made with Whole Wheat flour , ghee and fine rava. Try to make this delicious , healthy and rich , atta chiroti this Diwali. Happy Diwali for all my readers.

    Variations to Recipe : As I said instead of Atta / Whole wheat , fine rava can be used . Also combination of refined flour / maida and fine rava / fine semolina can also be used in combination . But with every change in ingredients , the texture of chiroti changes.

    Once after deep fried , Atta Chiroti and fine rava chiroti both comes out crispy and flaky. But while serving when you dip in sweetened milk , the structure of the desert differs. With Atta Chiroti once milk is poured over chiroti , it absorbs milk and holds to the structure whereas with fine rava chiroti disintegrates . But frankly speaking , I felt structure and tasty of Atta Chiroti much better than with regular chiroti . With regular chiroti , I always feel it is more soggy with milk but with Atta Chiroti , it is perfect and tastes delicious .

    Pro Tips to make Atta Chiroti :

    Kneading atta to a smooth dough plays a trick for this recipe. Initially prepare a hard dough and later knead with knuckles, heels of palm till dough elasticity improves and turns soft and smooth. Next add generous amount of Saati / Spread while stacking the rotis.

    Also fry chiroti on a medium heat. While frying chiroti , hold a long wooden stick or rear end of a long spatula at the centre of chiroti and start pouring hot oil over the chiroti using a ladle. This makes chiroti to turn crispy and flaky evenly inside all layers . While serving , slightly crush chiroti , top with powdered sugar and pour warm sweetened milk / Basundi over it and enjoy.

    Also I would like to highlight traditional Karnataka Sweets like MysorePark, Rave Undae / Rava Ladoo , Bele Obbattu , Dum root / Ash Gourd Halwa , Hesarubele Gasagase Payasa /Moongdal Kaskas Payasam, Kobbari Mithai /Coconut Barfi , and Halbai / Wheat Coconut Milk Pudding . Do check these wonderful Karnataka Recipes if interested.

    chiroti

    Step by Step directions to make Atta Chiroti :

    In a bowl , take 1 cup atta , ½ cup fine rava , ¼ teaspoon salt , ¼ teaspoon baking powder , 3 tablespoon ghee, mix well to crumble.

    Atta Chiroti Recipe

    Add ⅓ Cup milk mix well , add water ( ¼ cup) part by part .

    Atta Chiroti Recipe

    Mix everything together to form a really hard dough .

    Atta Chiroti Recipe

    Transfer dough onto a worktop , start kneading the dough well with heels of the palm till dough becomes soft and smooth.

    Atta Chiroti Recipe

    Smooth and soft dough.

    Atta Chiroti Recipe

    Transfer back to a bowl , cover it with a damp muslin cloth , let it rest for 15- 20 minutes.

    Atta Chiroti Recipe

    Whilst prepare saati , in bowl add 3 tablespoon rice flour and 4 tablespoon ghee .

    Atta Chiroti Recipe

    Whisk well and set aside.

    Atta Chiroti Recipe

    Remove muslin cloth , take dough and make 6 medium size balls.

    Atta Chiroti Recipe

    Take a ball, dust some flour ,flatten it and start to roll.

    Atta Chiroti Recipe

    Roll dough into large circle .

    Atta Chiroti Recipe

    Roll as thin as possible . Roll all 6 balls separately and set aside.

    Atta Chiroti Recipe

    Spread ½ tablespoon of saati on rolled dough .

    Atta Chiroti Recipe

    Spread saati generously with hands evenly on rolled dough.

    Atta Chiroti Recipe

    Place another rolled dough on top of the saati spread. 

    Atta Chiroti Recipe

    Repeat the process and stack all remaining rolled dough one above the other.

    Atta Chiroti Recipe

    Tightly roll the dough like a log .

    Atta Chiroti Recipe

    Cover it with damp muslin cloth and allow it to sit for 15 minutes in refrigerator.

    Atta Chiroti Recipe

    Later cut into 1 inch pieces. Gently press in hand and make small circular disc and roll gently.

    Atta Chiroti Recipe

    Drop in Chiroti in hot oil .

    Atta Chiroti Recipe

    Once you drop in chiroti in hot oil , gently press the centre with a long wooden stick or rear end of a spatula and pour ladle full of hot oil at the centre , so that oil gets into every layer inside and it turns crispy .

    Atta Chiroti Recipe

    On medium heat , deep fry the chiroti , till crispy and flaky , once it turns golden brown , strain oil and remove.

    Atta Chiroti Recipe

    For sweetened milk, boil 1 ½ litres milk, let it reduce to 1 litre. Add ⅓ cup condensed milk, chopped nuts, milk masala powder, saffron and dried rose petals . Stir well and set aside.  

    Sprinkle powdered sugar on top of chiroti.

    Atta Chiroti Recipe

    Pour sweetened milk on top of chiroti and serve hot or warm .

    Atta Chiroti Recipe

    Recipe

    Atta Chiroti Recipe
    4.50 from 2 votes

    Atta Chiroti Recipe

    Atta Chiroti is a crispy, flaky ,layered deep fried dish served with powdered sugar and sweetened milk.
    Prep Time30 minutes mins
    Cook Time15 minutes mins
    Resting Time30 minutes mins
    Total Time1 hour hr 15 minutes mins
    Course: Sweets
    Cuisine: Karnataka
    Keyword: Diwali, Sweets
    Servings: 12 Makes
    Calories: 297kcal
    Author: Muktha H S

    Ingredients

    For Chiroti Dough

    • 1 Cup Whole Wheat Atta Flour
    • ½ Cup Barik Sooji / Fine semolina
    • ⅓ Cup Milk
    • ¼ Cup Water , or as needed
    • 3 tablespoon Clarified Butter / Ghee
    • ¼ teaspoon Baking Powder
    • ¼ teaspoon Salt

    For Saati

    • 3 tablespoon Rice Flour
    • 4-5 tablespoon Ghee/ Clarified Butter

    Other Ingredients

    • ¼ cup Powdered Sugar
    • Oil for deep frying

    Instructions

    To make Atta Chiroti Dough

    • In a bowl , take 1 cup atta , ½ cup fine rava , ¼ teaspoon salt , ¼ teaspoon baking powder , 3 tablespoon ghee, mix well to crumble.
    • Add ⅓ Cup milk mix well , add water ( ¼ cup) part by part . Mix everything together to form a really hard dough .
    • Transfer dough onto a worktop , start kneading the dough well with heels of the palm till dough becomes soft and smooth.
    • Transfer back to a bowl , cover it with a damp muslin cloth , let it rest for 15- 20 minutes.

    To make Saati

    • Whilst prepare saati , in bowl add 3 tablespoon rice flour and 4 tablespoon ghee .
    • Whisk well and set aside.

    To roll Chiroti

    • After 15 minutes ,remove muslin cloth , take dough and make 6 medium size balls.
    • Take a ball, dust some flour ,flatten it and start to roll.
    • Roll dough into large circle as thin as possible . Roll all 6 balls separately and set aside.
    • Spread ½ tablespoon of saati on rolled dough , spread saati generously with hands evenly over the rolled dough.
    • Place another rolled dough on top of the saati spread. 
    • Repeat the process and stack all remaining rolled dough one above the other.
    • Tightly roll the dough like a log .
    • Cover it with damp muslin cloth and allow it to sit for 15 minutes in refrigerator.
    • Later cut into 1 inch pieces. Gently press in hand and make small circular disc and roll gently.

    To deep fry Chiroti

    • Heat oil ,drop in rolled chiroti in hot oil .
    • Once you drop in chiroti in hot oil , gently press the centre with a long wooden stick or rear end of a spatula and pour ladle full of hot oil at the centre , so that oil gets into every layer inside and it turns crispy .
    • On medium heat , deep fry the chiroti , till crispy and flaky , once it turns golden brown , strain oil and remove.
    • Sprinkle powdered sugar on top of chiroti.
    • Pour sweetened milk on top of chiroti and serve hot or warm . Refer notes for making creamy sweetened milk / Basundi .

    Video

    Notes

    For sweetened milk, boil 1 ½ litres milk, let it reduce to 1 litre. Add ⅓ cup condensed milk, add chopped nuts 2 tbsp, ¾ teaspoon milk masala powder, few strands of saffron and dried rose petals . Stir well and set aside.  

    Nutrition

    Calories: 297kcal

    Easy Tres Leches Cake Recipe

    Published : October 18, 2019 | Last Update on September 27, 2022 By Muktha

    tres-leches-cake

    Easy Tres Leches cake is Mexican Dessert (Pastel de Tres Leches) . It is a very light sponge cake soaked with evaporated milk , condensed milk and whole milk .

    If you are a dessert lover then you may also love these recipes - Mango Cheese Cake , Rasmalai and Shahi Tukuda

    tres-leches-cake
    [feast_advanced_jump_to]

    About this recipe

    Easy Tres Leches cake is Mexican Dessert (Pastel de Tres Leches) . It is a very light sponge cake soaked with a mixture of three kinds of milk : condensed milk , evaporated milk and whole milk. Hence , the name " Tres Leches " meaning 3 milk . This decadent dessert is a true sweet creamy bliss.

    The most important part of the recipe is the structure of the cake . Sponge cake should be as light as air and full of air bubbles.

    So that when it's soaked in 3 types of milk , sponge cake should hold up while absorbing the milk without weighed down or soggy.

    Hence care should be taken to bake a perfect sponge cake. The cross sectional image below shows the spongy and airy light structure of tres leches cake without weighing down.

    Easy Tres Leches Cake Recipe

    Easy Tres Leches Cake recipe is adapted from Bigger Bolder Baking - Gemma Stafford. According to Gemma ,to create a airy light super sponge cake Egg whites and Egg Yolk should be whipped separately.

    Yes , indeed it worked so well that my cake was super light .

    The actual recipe called for a 9*13 inch baking pan but as I didnt had that size baking pan , I baked in a 8*8 inch glass dish . As a result the width of the cake was less and cake was taller.

    So I did reduce the amount of milk syrup for soaking cake with the fear of cake being weigh down /soggy . I guess, reducing milk syrup did work for me and the dessert was decadent.

    Evaporated milk , condensed milk and whole milk are the 3 combinations used for milk syrup . In fact few recipes even calls for whipped cream in place of whole milk . But here I have used whole milk to make this recipe .

    Also , most importantly always use full fat cream milk to get rich taste in tres leches.

    Difference between Evaporated Milk and Condensed Milk :

    Both are reduced milk with and without sugar in it, respectively.

    If full fat milk is reduced to half of its original quantity then you can call it as Evaporated Milk . If sweetener is added to the evaporated milk then it becomes condensed milk .

    To make evaporated milk , I followed this recipe from bigger bolder baker.

    A friend of mine shared me the recipe of Easy Tres Leches Cake and insisted me to give a try . Since then , it was in my to do list and finally made it for a special occasion .

    For the love of baking and for all the love I have , I put up this dessert , loved every bite of it.

    Tips and variations to make Tres Leches

    To create a airy light super sponge cake , whip Egg whites and Egg Yolk separately.

    Use full fat cream milk to get rich taste .

    To add variations , you can soak cake in rose milk , mocha or carmael flavored milk everything tastes good.

    You may also like

    • eggless chocolate mousse
      Eggless Chocolate Mousse
    • mango-phirni-topped-with-pistachios-rose-petals
      Mango Phirni Recipe
    • dates kheer
      Dates Kheer | Khajoor Ki Kheer
    • rasmalai
      Rasmalai Recipe | Easy Rasmalai Recipe

    How to make Easy Tres Leches Cake:

    Preheat the oven to 180 deg c / 350 F . Grease the baking dish and set aside.

    Easy Tres Leches Cake Recipe

    Separate egg white and egg yolk in two seperate bowls and set aside.

    Easy Tres Leches Cake Recipe

    In a bowl , add 1 cup all purpose flour , baking powder and salt , mix well together and keep aside.

    Easy Tres Leches Cake Recipe

    With help of electric hand blender or a stand blender ,beat Egg Yolk on high speed.

    Easy Tres Leches Cake Recipe

    Stream in ¾ cup of powdered sugar to egg yolk and continue to beat on high speed in a one way direction only .

    Easy Tres Leches Cake Recipe

    Beat ,till it turns pale yellow colour.

    Easy Tres Leches Cake Recipe

    Now slowly add in vanilla .

    Easy Tres Leches Cake Recipe

    Add milk and continue to beat on medium speed, in the same direction.

    Easy Tres Leches Cake Recipe

    Add in dry ingredients slowly and continue to beat on low speed till dry ingredients just incorporates with egg yolk. DON'T BEAT MORE , AS IT MAY DRY OUT and TOUGHEN THE CAKE.

    Easy Tres Leches Cake Recipe

    Mixed batter looks like this.

    Easy Tres Leches Cake Recipe

    Transfer the mixture into a bowl and set aside.

    Easy Tres Leches Cake Recipe

    Now using electric hand blender , whip egg whites.

    Easy Tres Leches Cake Recipe

    Till it turns light and foamy.

    Easy Tres Leches Cake Recipe

    Gradually, add ¼ cup sugar and continue to whip till stiff peaks are formed.

    Easy Tres Leches Cake Recipe

    Stiff peaks are formed.

    Easy Tres Leches Cake Recipe

    Now add in the whipped egg whites to egg yolk mixture.

    Easy Tres Leches Cake Recipe

    Using a wide spatula , from bottom mix in a circular motion just to fold in and combine egg yolk mixture with egg whites.

    Pour the batter to greased baking dish .

    Easy Tres Leches Cake Recipe

    Level it using a spatula.

    Easy Tres Leches Cake Recipe

    Bake in a preheated oven for 35 to 40 minutes.

    Easy Tres Leches Cake Recipe

    Whilst prepare milk syrup by combining evaporated milk , condensed milk and whole milk together , set aside for later use.

    Easy Tres Leches Cake Recipe

    Once cake is baked , take it out from oven.

    Easy Tres Leches Cake Recipe

    Allow it to cool .

    Easy Tres Leches Cake Recipe

    Take a wide plate , place the baked cake tin inverted , gently tap and transfer the cake on a plate . Allow it to cool completely and then remove from bake pan. As I had no patience ,tried to remove it soon and cake did stick to the pan making it look bad 🙁 🙁

    Easy Tres Leches Cake Recipe

    With a toothpick , prick cake evenly to form more holes on top of the cake.

    Easy Tres Leches Cake Recipe

    Pour in half the quantity of milk syrup and just wait for 1- 2 minutes for cake to absorb the milk on top . Pour remaining milk evenly on top of the cake.

    Easy Tres Leches Cake Recipe

    Refrigerate for minimum 1 hour or overnight for milk syrup to absorb completely .

    Easy Tres Leches Cake Recipe

    Remove cake from refrigerator , add 1 ½ cup heavy whipped cream on top of the cake level it.

    Easy Tres Leches Cake Recipe

    Dust 1 teaspoon of cinnamon powder on top of the cake.

    Easy Tres Leches Cake Recipe

    While serving , top it with some fresh berries and serve.

    Easy Tres Leches Cake Recipe

    Can make this delicious and easy tres leches cake recipe for any occasion . Fresh fruits toppings are recommended , serve it chilled.

    Recipe

    Easy_Tres_Leches_Cake
    5 from 6 votes

    Easy Tres Leches Cake Recipe

    Easy Tres Leches cake is Mexican Dessert (Pastel de Tres Leches) . It is a very light sponge cake soaked with evaporated milk , condensed milk and whole milk .
    Prep Time30 minutes mins
    Cook Time35 minutes mins
    Total Time1 hour hr 5 minutes mins
    Course: Dessert
    Cuisine: Mexican
    Keyword: Baking, Celebrations, Desserts
    Servings: 15
    Calories: 249kcal
    Author: Muktha H S

    Ingredients

    For Sponge Cake

    • 1 cup Refined Flour
    • 1 ½ teaspoon Baking Powder
    • 5 no Large Eggs , White and Yolk separated
    • 1 cup Sugar
    • ⅓ cup Whole Milk
    • ¼ teaspoon Salt
    • 1 teaspoon Vanilla Essence

    For Milk Syrup

    • 1 Cup Evaporated Milk
    • 1 ¼ Cup Condensed Milk
    • ¼ Cup Whole Milk

    For whipped Toppings

    • 1 ½ Cup Heavy whipped Cream
    • 1 teaspoon Cinnamon Powder
    • Few fresh fruits ,optional

    Instructions

    For Sponge Cake

    • Preheat the oven to 180 deg c / 350 F .
    • Grease the baking dish and set aside.
    • Separate egg white and egg yolk in two seperate bowls and set aside.
    • In a bowl , add 1 cup all purpose flour , baking powder and salt , mix well together and keep aside.
    • With help of electric hand blender or a stand blender ,beat Egg Yolk on high speed.
    • Stream in ¾ cup of sugar to egg yolk and continue to beat on high speed in a one way direction only till it turns pale yellow colour.
    • Now slowly add in milk and vanilla , continue to beat on medium speed, in the same direction.
    • Add in dry ingredients slowly and continue to beat on low speed till dry ingredients just incorporates with egg yolk. DON'T BEAT MORE , AS IT MAY DRY OUT THE CAKE.
    • Transfer the mixture into a bowl and set aside.
    • Now using electric hand blender , whip egg whites till light and foamy.
    • Gradually, add ¼ cup sugar and continue to whip till stiff peaks are formed.
    • Now add in the whipped egg whites to egg yolk mixture.
    • Using a wide spatula , from bottom mix in a circular motion just to fold in and combine egg yolk mixture with egg whites.
    • Pour the batter to greased baking dish , level it.
    • Bake in a preheated oven for 35 to 40 minutes.
    • Whilst prepare milk syrup by combining evaporated milk , condensed milk and whole milk together , set aside for later use.
    • Once cake is baked , allow it to cool . Take a wide plate , place the baked cake tin upside down , gently tap and transfer the cake on a plate .
    • With a toothpick , prick cake evenly to form more holes on top of the cake.
    • Pour in half the quantity of milk syrup and just wait for 1- 2 minutes for cake to absorb the milk on top . Pour remaining milk evenly on top of the cake.
    • Refrigerate for minimum 1 hour or overnight for milk syrup to absorb completely .
    • Remove cake from refrigerator , add 1 ½ cup heavy whipped cream on top of the cake level it.
    • Dust 1 teaspoon of cinnamon powder on top of the cake.
    • While serving , top it with some fresh berries and serve.

    Video

    Nutrition

    Calories: 249kcal

    Gatte Ki Sabji | Besan Gatte Sabji Recipe

    Published : October 11, 2019 | Last Update on May 8, 2021 By Muktha

    Gatte Ki Sabji | Besan Gatte Sabji Recipe

    Gatte ki Sabji recipe with short video and step by step pictures. Gatte ki sabji is a simple and delicious mild spiced yogurt based curry with gram flour dumplings . It's a Rajasthani cuisine , tastes delicious when served along with hot steamed rice or roti . There are many variations for making this popular besan gatte sabji but after many trials and tastes finally I hooked up to this recipe with slight modifications.

    Gatte ki sabji is one of the most popular recipes with many variants. This can also be prepared with onion and tomato based gravy as in Punjab Cuisines. But in Rajasthani Cuisine they have two variants one is without onion and garlic and other version is with onion and garlic. As it is a curd based gravy , if onion and garlic are not added then it tastes very similar to gatte ki kadhi. I love this recipe with Onion and Garlic in it . Also try use homemade full fat thick curd to make this recipe if curd is not thick then there are chances of splitting when added to the curry.

    In this recipe , I have used Onion and Garlic with some whole spices which imparts a aromatic fragrance to the curry. While making gatte ki sabji recipe , the most important element is to cook gatte perfectly .Cooked Gatte should be soft and not dense.Do follow this recipe for right measurements and cooking directions to get perfectly cooked gatte. With perfectly cooked gatte making curry is lot more easier. If you try this recipe do Comment , tag me on Facebook or Instagram , I would love to hear from you guys 🙂 🙂 🙂

    Other besan/gram flour based recipes on blog are : Besan Chilla , Besan Bread Toast , Methi Thepla and Sauteed Spring Onions.

    RECIPE CARD FOR GATTE KI SABJI | BESAN GATTE SABJI

    Recipe

    gatte ki sabji
    4 from 1 vote

    Gatte ki Sabji

    Gatte ki sabji from Rajasthani Cuisine is a simple and delicious mild spiced yogurt based curry with gram flour dumplings , tastes delicious when served with hot steamed rice or roti .
    Prep Time20 minutes mins
    Cook Time30 minutes mins
    Total Time50 minutes mins
    Course: Main Course
    Cuisine: Rajasthan
    Keyword: Gluten Free, Gravy
    Servings: 5 People
    Calories: 328kcal
    Author: Muktha H S

    Ingredients

    For Gatte

    • 2 cups Besan / gram flour
    • 1 pinch Asafoetida /hing
    • ½ teaspoon Carom seeds /ajwain
    • ½ teaspoon Red chilli powder
    • 1 teaspoon Coriander powder
    • 1 teaspoon Salt
    • 3 tablespoon Oil
    • 2 tablespoon Curd
    • 3-4 tablespoon Water
    • 4 cups Water for cooking gatte

    for blending paste

    • 1 no Onion, medium sized
    • 4 no Garlic cloves , medium size
    • ½ inch Ginger

    For making gravy

    • 2 tablespoon Oil
    • 1 teaspoon Cumin seeds
    • 3 no Cloves
    • 1 inch Cinnamon Stick
    • 2 green Cardamoms
    • 1 no Bay leaf / tej patta
    • 1-2 no Red Chilli ,dry
    • 1 cup Curd
    • 1 pinch Hing /asafoetida
    • ½ teaspoon turmeric powder
    • 2 teaspoon red chilli powder
    • 1 tablespoon coriander powder
    • 1 cup cooked gatte water
    • ¾ -1 teaspoon Salt or as required
    • 2 tablespoon Coriander leaves for garnishing

    Instructions

    Making Gatte

    • In a deep bowl add besan /gram flour , red chilli powder , coriander powder , turmeric powder ,hing , ajwain , salt , curds oil and mix well .
    • Sprinkle water part by part and bring everything together to form a soft and smooth crack free dough.
    • Divide dough into small lemon size balls .
    • On a rolling pin , take dough and roll into cylindrical shape sticks ( similar to soup sticks) .
    • Cut dough sticks into required length so that it can be place in the kadai easily.

    Cooking Gatte

    • Bring 4 cups water to boil in a large kadai , gently add rolled gatte sticks into the boiling water.
    • On a medium heat , cook gatte. till it starts to float.
    • Once cooked , gatte starts floating and bubbles will be seen on them .
    • Gently remove cooked gatte with mesh strainer or slotted spoon and keep aside.
    • Reserve the water from the cooked gatte and set aside. It will be used while making curry.
    • Once the gatte are cooled , cut it into small roundels and set aside.

    Making Curry

    • In a mixer jar / blender add 1 onion , garlic , ginger and blend to a smooth paste.
    • Heat 2 tablespoon of oil / ghee in a pan , add cumin seeds , bay leaf , cloves , cinnamon sticks , cardamom and red chilly . Saute till fragrant.
    • Add onion paste and saute till raw smell of onion and garlic goes off.
    • Now add in red chilli powder , turmeric powder and coriander powder,hing , mix well everything.
    • Keep the flame on low heat , beat curds well and add into to the above onion and spice mixture.
    • Mix well everything on cook on a very low heat , add salt.
    • Now add in reserved water .
    • When oil starts to float to top of the curry , add cut gatte pieces .
    • Keep on simmer , close lid and cook for 5 minutes for flavours to get absorbed.
    • Turn off the heat , add chopped coriander leaves , stir well and serve .
    • Serve Gatte ki sabji with steamed rice or roti.

    Video

    Nutrition

    Calories: 328kcal

    How to make Gatte Ki Sabji Recipe , Step by Step details :

    Making Gatte

    In a deep bowl add besan /gram flour , red chilli powder , coriander powder, turmeric powder ,hing , ajwain , salt , curds oil and mix well .

    Gatte Ki Sabji | Besan Gatte Sabji Recipe

    Sprinkle water part by part and bring everything together to form a soft and smooth crack free dough.

    Gatte Ki Sabji | Besan Gatte Sabji Recipe

    Divide dough into small lemon size balls .

    Gatte Ki Sabji | Besan Gatte Sabji Recipe

    On a rolling pin , take dough and roll into cylindrical shape sticks ( similar to soup sticks) .

    Gatte Ki Sabji | Besan Gatte Sabji Recipe

    Cut dough sticks into required length so that it can be place in the kadai easily.

    Gatte Ki Sabji | Besan Gatte Sabji Recipe

    Cooking Gatte

    Bring 4 cups water to boil in a large kadai .

    Gatte Ki Sabji | Besan Gatte Sabji Recipe

    Gently add rolled gatte sticks into the boiling water.

    Gatte Ki Sabji | Besan Gatte Sabji Recipe

    On a medium heat , cook gatte. till it starts to float. Once cooked , gatte starts floating and bubbles will be seen on them .

    Gatte Ki Sabji | Besan Gatte Sabji Recipe

    Gently remove cooked gatte with mesh strainer or slotted spoon and keep aside. Reserve the water from the cooked gatte and set aside. It will be used while making curry.

    Gatte Ki Sabji | Besan Gatte Sabji Recipe

    Once the gatte are cooled , cut it into small roundels and set aside.

    Gatte Ki Sabji | Besan Gatte Sabji Recipe

    Making Curry

    In a mixer jar / blender add 1 onion , garlic and ginger .

    Gatte Ki Sabji | Besan Gatte Sabji Recipe

    Blend to a smooth paste and set aside.

    Gatte Ki Sabji | Besan Gatte Sabji Recipe

    Heat 2 tablespoon of oil / ghee in a pan , add cumin seeds , bay leaf , cloves , cinnamon sticks , cardamom and red chilly . Saute till fragrant.

    Gatte Ki Sabji | Besan Gatte Sabji Recipe

    Add onion paste and saute till raw smell of onion and garlic goes off.

    Gatte Ki Sabji | Besan Gatte Sabji Recipe

    Now add in red chilli powder , turmeric powder and coriander powder,hing , mix well everything.

    Gatte Ki Sabji | Besan Gatte Sabji Recipe

    Keep the flame on low heat , beat curds well and add into to the above onion and spice mixture.

    Gatte Ki Sabji | Besan Gatte Sabji Recipe

    Mix well everything on cook on a very low heat , add salt.

    Gatte Ki Sabji | Besan Gatte Sabji Recipe

    Now add in reserved water .

    Gatte Ki Sabji | Besan Gatte Sabji Recipe

    When oil starts to float to top of the curry , add cut gatte pieces .

    Gatte Ki Sabji | Besan Gatte Sabji Recipe

    Keep on simmer , close lid and cook for 5 minutes for flavours to get absorbed.

    Gatte Ki Sabji | Besan Gatte Sabji Recipe

    Turn off the heat , add chopped coriander leaves .

    Gatte Ki Sabji | Besan Gatte Sabji Recipe

    Stir well and serve .

    Gatte Ki Sabji | Besan Gatte Sabji Recipe

    Serve Gatte ki sabji with steamed rice or roti.

    gatte ki sabji

    Sabudana Kheer Recipe

    Published : October 6, 2019 | Last Update on October 18, 2022 By Muktha

    sabudana-kheer-recipe

    Sabudana Kheer detail recipe with step by step pictures and a short video. Sabudana Kheer is is one of the easiest dessert that can be made within minutes for any occasion . Put together soaked Sabudana , milk , few nuts, sugar and cardamom , you'll come up a finger licking good Sabudana Kheer.

    This easy to make recipe is delicious and can be enjoyed by all age groups . As sabudana is full of carbohydrates and releases instant energy , it is widely used during fasting. And for this Navratri , my main source of carbs are from Sabudana and enjoying it in every form .

    sabudana-kheer

    Sabudana has high starch and is full of carbohydrates only. There are no other much nutrients present in this tapioca pearls . Hence to make it nutrient rich , it is always paired with milk, ghee, peanuts and dry fruits and nuts while making desserts . Also its for the same reason , peanuts are added to a savoury dishes to bring out a balance between carbs and protein.

    How to make Sabudana Kheer

    Wash and soak sabudana for 30 - 60 minutes.

    Sabudana Kheer Recipe

    In a heavy bottom pan, add soaked sabudana, water and cook .

    Sabudana Kheer Recipe

    Add 1 teaspoon of ghee , stir well and cook for few minutes till sabudana turns 70% transparent.

    Sabudana Kheer Recipe

    Now add in boiled milk, stir in an continue to cook.

    Sabudana Kheer Recipe

    Add sugar and stir.

    Sabudana Kheer Recipe

    Now add in saffron strands.

    Sabudana Kheer Recipe

    Continue to cook until sabudana is becomes transparent and completely cooked , turn off the flame. You can even cook till you get the desired consistency , Kheer even thickens once it cools.

    Sabudana Kheer Recipe

    Add cardamom powder ,raisins and chopped nuts.

    Sabudana Kheer Recipe

    Stir everything and serve.

    Sabudana Kheer Recipe

    Serve Sabudana Kheer hot or warm .

    Recipe

    Sabudana-kheer
    5 from 1 vote

    Sabudana Kheer

    Sabudana Kheer is a tasty and delicious dessert made with tapioca pearl , milk , sugar , nuts and flavoured with cardamom and saffron strands.
    Prep Time5 minutes mins
    Cook Time30 minutes mins
    Soaking Time1 hour hr
    Total Time1 hour hr 35 minutes mins
    Course: Dessert
    Cuisine: Indian
    Keyword: Bachelor's Cooking, Festivals, Sweets
    Servings: 4 People
    Calories: 139kcal
    Author: Muktha H S

    Ingredients

    • ¼ cup Sabudana / Tapioca Pearl
    • 1 cup Water
    • 2 Cups Milk , boiled
    • 3 tablespoon Sugar
    • 1 teaspoon Ghee
    • ½ teaspoon Cardamom Powder
    • 1 tablespoon Raisins
    • 2 tablespoon Chopped nuts (cashew , almonds , pista)
    • Saffron strands , few

    Instructions

    • Wash and soak sabudana for 30 - 60 minutes.
    • In a heavy bottom pan, add soaked sabudana, water and cook .
    • Add 1 teaspoon of ghee , stir well and cook for few minutes till sabudana turns 70% transparent.
    • Now add in boiled milk, stir in an continue to cook.
    • Add sugar , saffron strands , stir and continue to cook until sabudana is becomes transparent and completely cooked , turn off the flame.
    • You can even cook till you get the desired consistency , Kheer even thickens once it cools.
    • Add cardamom powder , raisins, chopped nuts and few saffron strands, mix everything.
    • Serve Sabudana Kheer hot or warm .

    Video

    Nutrition

    Calories: 139kcal

    Sabudana Upvas Chivda Recipe

    Published : October 2, 2019 | Last Update on October 17, 2022 By Muktha

    Sabudana Upvas Chivda

    Sabudana Upvas Chivda Recipe with step by step photos and video. Sabudana Upvas Chivda is a crunchy and tasty snack to munch during fasting , as it is full of carbohydrates and gives instant energy.

    Other Sabudan recipes which I often make at home during fasting are : Sabudana Khichdi , Sabudana Thalipeeth , Sabudana Vada and Sabudana Kheer ,

    Sabudana Upvas Chivda Recipe
    [feast_advanced_jump_to]

    About this recipe

    Sabudana is one of the most fond food during fasting as it is full of carbohydrates and gives energy instantly. As Navratri is on ,this easy and tasty fasting snack comes handy to munch during the day .

    If you are planning to make Sabudana chivda for a fasting day then you need to add only chilli powder , rock salt , oil or ghee for deep frying and some dry fruits and nuts of your choices.

    But if its for any regular day as a namkeen to munch for a evening coffee/ tea then you can include other ingredients like turmeric powder , hing , curry leaves , dry red chilli and garlic .

    Checkout the Video !

    Ingredients:

    To make Sabudana Chivda minimal ingredients are used :

    • Nylon Sabudana ( Small Varient )
    • Spices : Chilli powder and Rock Salt
    • Dry Fruits and Nuts of your choice
    • Oil for deep frying

    Pro Tips and Variations

    • There are 2 variants of Nylon Sabudana , small and large variant . I have used smaller variant to make this chivda. But you can use larger variant also.
    • Cooking time of smaller variant is very less when compared with larger ones . If you are choosing larger variant then make sure to cook for 4 -5 minutes more as it takes more time to cook. Also check the doneness of the cooked sabudana by tasting it. If not cooked properly then centre of the sabudana will be hard.
    • Frying : Make sure to fry on medium heat and stir it in between using a spoon or spatula . Use a strainer to deep fry sabudana. Also depending on the size of the strainer add small amount of sabudana pearls for frying because it crowds after frying.
    • For Non Fasting Day : If not on fasting , you can also add cumin seeds , curry leaves , garlic , turmeric powder and more to suit your taste.

    Recipe

    Sabudana Upvas Chivda
    No ratings yet

    Sabudana Upvas Chivda

    Sabudana Upvas Chivda is a crunchy and tasty snack to munch during fasting , as it is full of carbohydrates and gives instant energy.
    Prep Time5 minutes mins
    Cook Time10 minutes mins
    Total Time15 minutes mins
    Course: Snack
    Cuisine: Indian, Maharstarian
    Keyword: Fasting, Festivals, Gluten Free, Vegan
    Servings: 5
    Calories: 163kcal
    Author: Muktha H S

    Equipment

    • Deep Pan / Kadai for frying
    • Strainer

    Ingredients

    • ⅓ cup Nylon Sabudana small
    • 10-12 no's Raisins
    • 10-15 no's Cashews halved
    • 10 no's Badam , halved
    • 2 tablespoon Dry Coconut slices
    • ½ teaspoon Rock Salt / Sendha Namak
    • ½ - ¾ teaspoon Red chilli powder
    • ½ teaspoon Sugar
    • Oil for deep frying

    Instructions

    • Heat oil in a deep kadai for frying.
    • Add ⅓ cup of nylon sabudana into a strainer and dip inside the oil.
    • Cook for 3-4 minutes , stir pearls using spoon or a spatula to make sure even cooking.
    • Transfer the fried sabudana on a kitchen towel.
    • In the same oil , using strainer deep fry raisins , cashews and almonds one after other and set aside.
    • Add coconut slices and fry till golden brown and set aside.
    • Place everything in a deep bowl.
    • Add salt , red chilli powder and sugar .
    • Mix well everything and serve. Once cooled , store it in a airtight container and use it as required.

    Video

    Nutrition

    Calories: 163kcal

    Step by Steps for making Sabudana Upvas Chivda :

    Heat oil in a deep kadai for frying.

    Sabudana Upvas Chivda Recipe

    Add ⅓ cup of nylon sabudana into a strainer and dip inside the oil.

    Sabudana Upvas Chivda Recipe

    Cook for 3-4 minutes , stir pearls using spoon or a spatula to make sure even cooking.

    Sabudana Upvas Chivda Recipe

    Transfer the fried sabudana on a kitchen towel.

    Sabudana Upvas Chivda Recipe

    In the same oil , using strainer deep fry raisins , cashews and almonds one after other and set aside.

    Sabudana Upvas Chivda Recipe

    Add coconut slices and fry till golden brown and set aside.

    Sabudana Upvas Chivda Recipe

    Place everything in a deep bowl.

    Sabudana Upvas Chivda Recipe

    Add salt , red chilli powder and sugar .

    Sabudana Upvas Chivda Recipe

    Mix well everything and serve.

    Sabudana Upvas Chivda Recipe

    Once cooled , store it in a airtight container and use it as required.

    Sabudana Upvas Chivda

    Mysore Masala Dosa Recipe

    Published : September 27, 2019 | Last Update on September 29, 2022 By Muktha

    mysore masala dosa

    Mysore Masala Dosa recipe with step by step pictures and video . Mysore Masala Dosa is a crispy dosa with spicy red chutney spread inside and mild spiced potato filling / potato sabji . Its generally served with coconut chutney and sambar .

    The main difference with Mysore Masala Dosa and other Dosa is with its crispness and texture. Masala dosa should always be thin and crispy where as Set Dosa will be very Soft and spongy and Set Masala Dosa will be crisp outside and soft inside. In all these varieties of Dosa , though ingredients are same , proportion and method of making Dosa varies. This post is dedicated to all Dosa Lovers just like me.

    Mysore Masala dosa

    Don't get daunted by the number of steps and images in the post . In this post I have included on how to make Masala Dosa batter, cook Dosa and also steps to make red chutney and potato filling . Hence it is a quite lengthy post but indeed making of Mysore Masala Dosa is quite simple.

    Pro tips for Perfect Dosa :

    To make perfect Dosa making a perfect batter is very essential. Never use Basmati Rice to make Dosa. Use combination of Sona Masoori / Kolam / any regular rice along with Idli / Dosa rice to prepare dosa. Soak rice and urad dal for minimum 6 hours before grinding . If you are grinding in a mixer then make sure to use ice cold water . Make sure mixer doesn't gets hot while grinding . If its get hot , pause for 5 -10 minutes and then grind .

    Fermentation is the most important factor , use batter only after it ferments. If you are storing Dosa batter in fridge , make sure to keep the batter in airtight container. Also next day while using the batter , make sure the batter is at room temperature or else Dosa turns out to be hard and chewy. Heat of Griddle / Tawa is also very important , always pour ladle full of batter on a hot tava with medium high flame. For soft dosa , cover dosa with a lid and cook for a crispy dosa covering with a lid is not required.

    Other Dosa Recipes on blog are :

    • Gobi Masala Dosa
    • Set Dosa
    • Fenugreek Dosa | Methi Dosa
    • Green Gram Dosa | Pesarattu
    • Adai
    • Oats Dosa

    How to make Mysore Masala Dosa :

    For Dosa Batter

    Rinse and wash Rice , Urad Dal , Chana Dal and Methi Seeds .

    Mysore Masala Dosa Recipe

    Soak everything together in water for 6-8 hours.

    Mysore Masala Dosa Recipe

    30 minutes prior to grinding the batter , wash and soak poha / flattened rice along with above soaked rice and dal.

    Mysore Masala Dosa Recipe

    After 30 minutes of soaking Poha , drain water completely , add soaked rice and dal to a mixer /grinder .

    Mysore Masala Dosa Recipe

    Grind to a smooth free flowing batter by adding water( ½ -⅔ cup) , part by part .

    Mysore Masala Dosa Recipe

    Transfer batter into a deep bowl and add salt .

    Mysore Masala Dosa Recipe

    Mix it with hands.

    Mysore Masala Dosa Recipe

    Keep it aside in warm place for about 8-10 hrs or overnight for fermentation.

    Mysore Masala Dosa Recipe

    For Red Chutney

    In a mixer jar , add ¼ cup puffed gram , red chilli powder 2 teaspoon , coconut , tamarind and salt.

    Mysore Masala Dosa Recipe

    Grind to a smooth and thick chutney , add 1 -2 tablespoon of water only if required to grind chutney smooth.

    Mysore Masala Dosa Recipe

    Transfer to a bowl and set side.

    For Potato Filling / Potato Palya / Potato Sabji

    Boil potato , remove skin , mash potato and keep it aside . Cook green peas and set aside.

    Heat 2 tablespoon of oil in a deep pan , add mustard seeds ,chana dal , urad dal and curry leaves.

    Mysore Masala Dosa Recipe

    Once dal turns golden brown , add sliced onions , green chillies , turmeric powder and saute till onion turns translucent.

    Mysore Masala Dosa Recipe

    Add mashed potatoes , green peas , salt , 1 teaspoon of lime juice and mix well.

    Mysore Masala Dosa Recipe

    Garnish with chopped coriander leaves and set aside.

    Mysore Masala Dosa Recipe

    For Coconut Chutney

    Add coconut , green chillies , salt , tamarind , puffed gram , coriander leaves into a chutney jar.

    Mysore Masala Dosa Recipe

    Add little water and grind .

    Mysore Masala Dosa Recipe

    In a seasoning pan , heat oil /ghee , add mustard seeds , jeera ,urad dal and curry leaves ,red chilly and asafoetida fry well.

    Mysore Masala Dosa Recipe

    Pour seasoning over the chutney.

    Mysore Masala Dosa Recipe

    Can serve this coconut chutney with Masala Idli , Appe and Rava Idli . You can also find other version of coconut chutney here.

    Mysore Masala Dosa Recipe

    Preparing Dosa

    Next day or after fermentation , mix the batter well. Its should be free flowing consistency . Incase if it's thick just add little water and make it to flowing consistency.

    Mysore Masala Dosa Recipe

    Heat griddle /tawa , wipe it with cut onion/ paper towel , take a ladle full of batter and spread dosa from centre.

    Mysore Masala Dosa Recipe

    Once base is firm drizzle 1 tablespoon of oil /ghee on top .

    Mysore Masala Dosa Recipe

    Smear red chutney inside the dosa .

    Mysore Masala Dosa Recipe

    Add 2- 3 tablespoon of potato filling .

    Mysore Masala Dosa Recipe

    Fold and serve hot.

    Mysore Masala Dosa Recipe

    Serve hot with coconut chutney and Sambar.

    Mysore Masala dosa

    Recipe

    mysore masala dosa
    5 from 5 votes

    Mysore Masala Dosa Recipe

    Mysore Masala Dosa - South Indian Breakfast : It is a crispy dosa with spicy red chutney and spiced potato filling . It is generally served with coconut chutney and sambar.
    Prep Time15 minutes mins
    Cook Time20 minutes mins
    Soaking & Fermentation15 hours hrs
    Total Time15 hours hrs 35 minutes mins
    Course: Breakfast
    Cuisine: Karnataka, South India
    Keyword: Breakfast_Ideas, Gluten Free, Vegan
    Servings: 12 makes
    Calories: 238kcal
    Author: Muktha H S

    Ingredients

    Masala Dosa Batter

    • 1 ½ cup Sona Masoori Rice
    • ½ cup Parboiled rice / idli rice
    • ¾ cup Split Urad Dal or ½ cup Whole Urad dal white
    • ½ cup Poha
    • 2 tablespoon Chana Dal
    • 1 teaspoon Methi Seeds
    • ½ -⅔ cup Water ,while grinding batter
    • 1 teaspoon Salt

    Potato Filling / Palya

    • 300 grams Potato Boiled , mashed
    • 100 grams Fresh / Frozen Green peas , blanched
    • 2 tablespoon Cooking Oil
    • ½ teaspoon Mustard Seeds
    • 1 teaspoon Urad Dal
    • 1 teaspoon Chana Dal
    • 2 no's Onion
    • 4 no's Green Chillies
    • ½ teaspoon Turmeric Powder
    • 1 Sprig Curry Leaves
    • 1 -11/2 teaspoon Salt or as required
    • 2 tablespoon Coriander Leaves , chopped

    Red Chutney Spread

    • ¼ Cup Puffed gram
    • 1 tablespoon Fresh Coconut
    • 2 teaspoon Red Chilli Powder ( or 3- 4 Red chillies ,soaked)
    • 1 teaspoon Salt
    • 1 teaspoon Tamarind , firmly pressed

    Coconut Chutney

    • ½ cup coconut
    • 2 no Green Chillies
    • 2 tablespoon Coriander Leaves
    • 1 tablespoon Puffed gram
    • ½ teaspoon Tamarind ,firmly pressed
    • ½ teaspoon Salt

    Seasoning

    • ½ tablespoon Oil / Ghee
    • ½ teaspoon Mustard Seeds
    • 1 sprig Curry leaves
    • 1 teaspoon Urad Dal
    • 1 no Dry Red Chilly broken
    • ½ teaspoon Hing / Asafoetida
    • 1 teaspoon Jeera seeds /Cumin Seeds

    Instructions

    Dosa Batter

    • Rinse and wash Rice , Urad Dal , Chana Dal and Methi Seeds . Soak everything together in water for 6-8 hours.
    • 30 minutes prior to grinding the batter , wash and soak poha / flattened rice along with above soaked rice and dal.
    • After 30 minutes of soaking Poha , drain water completely , add soaked rice and dal to a mixer /grinder and grind to a smooth free flowing batter by adding water( ½ -⅔ cup) , part by part .
    • Transfer batter into a deep bowl , add salt ,mix it with hands and keep it aside in warm place for about 8-10 hrs or overnight for fermentation.

    Red Chutney

    • In a mixer jar , add ¼ cup puffed gram , red chilli powder 2 teaspoon , coconut , tamarind and salt.
    • Grind to a smooth and thick chutney , add 1 -2 tablespoon of water only if required to grind chutney smooth.
    • Transfer to a bowl and set side.

    For Potato Filling / Potato Palya / Potato Sabji

    • Boil potato , remove skin , mash potato and keep it aside .
    • Cook green peas and set aside.
    • Heat 2 tablespoon of oil in a deep pan , add mustard seeds ,chana dal , urad dal and curry leaves.
    • Once dal turns golden brown , add sliced onions , green chillies , turmeric powder and saute till onion turns translucent.
    • Add mashed potatoes , green peas , salt , 1 teaspoon of lime juice and mix well.
    • Finally add in chopped coriander leaves , mix well and set aside.

    For Coconut Chutney

    • Add coconut , green chillies , salt , tamarind , puffed gram , coriander leaves into a chutney jar. Add little water and grind .
    • In a seasoning pan , heat oil /ghee , add mustard seeds , jeera ,urad dal and curry leaves ,red chilly and asafoetida fry well.
    • Pour seasoning over the chutney and set aside till use.

    Preparing Dosa

    • Next day or after fermentation , mix the batter well. Its should be free flowing consistency . Incase if it's thick just add little water and make it to flowing consistency.
    • Heat griddle /tawa , wipe it with cut onion/ paper towel , take a ladle full of batter and spread dosa from centre.
    • Once base is firm drizzle 1 tablespoon of oil /ghee on top . Smear red chutney inside the dosa , add 2 tablespoon of Potato filling , fold and serve.
    • Serve hot with coconut chutney and Sambar.

    Video

    Nutrition

    Calories: 238kcal

    Dumroot|kashi halwa|ash gourd halwa recipe

    Published : September 17, 2019 | Last Update on October 17, 2022 By Muktha

    dumroot recipe

    Dumroot | Kashi Halwa | Ash gourd Halwa recipe with short video and step by step pictures. Kashi halwa is one of the classic and traditional dessert of Karnataka. It's one of the most popular dessert in marriages and house warming ceremonies.

    Traditionally it is made with only ash gourd , ghee and sugar with cardamom flavouring. But to enhance the taste and richness of the dessert khoya and milk are also added at times.

    Here in this recipe , I have added very little amount of milk and khoya . But you can skip it ,in case if you want to increase the shelf life of the dessert.

    Dumroot
    [feast_advanced_jump_to]

    About this recipe

    It's easy to make ash gourd halwa ; a friend of mine requested for this particular recipe with a note asking for a rich and tasty dessert . Hence a extra addition of khoya is used in this recipe or else I generally cook with only milk.

    Unlike other halwa , there is slight slight procedural variations while cooking this halwa. Grated ash gourd is cooked in milk and Ghee/clarified butter. Then its mixed with khoya to get that richness to the dessert. Sugar is added at the final step and mixed well to get that glossy finish .

    Did you know , Ash Gourd has tremendous health benefits. Gourd family vegetables are always on top notch for weight loss . Also its juice is used as a home remedy to combat acidity and keep indigestion at bay.

    Health benefits of Ash Gourd

    Every life has its own ups and down , people do suffer from various kind of mental illness. For a healthy body physical , mental and emotional health are equally important. Exercises , Meditation , Eating right and doing what you love are few of the basic ways to maintain good health. On such note , Ash Gourd always comes to me on priority. It acts as a natural sedative and calms nerves and brain.

    Also drinking Ash gourd juice regularly helps to deal with insomnia. With my own experience , I would suggest to include this as much as possible in your diet to bring down your anxiety levels and maintain a healthy mind.

    As I have a sweet tooth , naturally my mind calms down when I eat sweet . but with dumroot it's definitely yes. Though Ash gourd is healthy don't regularly eat in the form of dessert like this with loaded sugar 🙂 🙂 .

    But once in a while , during feast and special occasions , it's absolutely fine to indulge in such a delicious melt in mouth dessert to treat ourselves.

    dumroot| Kashi Halwa |Ash gourd Halwa

    Other halwa recipe which you may like are :

    • Sweet Potatao Halwa
    • Carrot Halwa
    • Kaddu Halwa
    • Dates Halwa

    In case if you are looking for No Sugar or Jaggery based desserts , then do check these delicious recipes :

    • Dates Kheer
    • Carrot Millet Kheer
    • Wheat Coconut Milk Pudding (Halbai)
    • Ragi Coconut Milk Pudding
    • Dates & Fig Roll
    • Moongdal Kaskas Payasam

    Watch Video

    How to make Dumroot | Kashi Halwa | Ash Gourd Halwa Recipe:

    Heat 2 tablespoon of ghee in a heavy bottom pan .

    Dumroot|kashi halwa|ash gourd halwa recipe

    Add grated ash gourd .

    Dumroot|kashi halwa|ash gourd halwa recipe

    Mix well and cook on a medium heat.

    dumroot

    Once water content dries up , add milk and continue to cook .

    Dumroot|kashi halwa|ash gourd halwa recipe

    When ash gourd is completely cooked , add in grated khoya .

    dumroot

    Mix well everything so that khoya blends well with ash gourd. Now add in 2 tablespoon of Ghee at the centre and add cashews .

    dumroot

    Fry cashew pieces in ghee till it turns lightly golden in colour . Alternatively you can roast cashews separately and add it to the halwa at last.

    dumroot

    Mix well everything and add in sugar .

    dumroot

    Stir everything, sugar melts completely and starts to bubble. Once it starts to get halwa consistency , turn off the flame.

    dumroot

    Add cardamom powder , saffron strands and a teaspoon of ghee.

    Dumroot|kashi halwa|ash gourd halwa recipe

    Mix well together and serve. It can be served either warm or cold.

    dumroot | Kashi Halwa

    Recipe

    dumroot recipe
    No ratings yet

    dumroot | kashi halwa | Ash gourd halwa recipe

    Kashi halwa is one of the classic and traditional dessert of Karnataka prepared using ash gourd , ghee and sugar with cardamom flavouring.
    Prep Time10 minutes mins
    Cook Time30 minutes mins
    Total Time40 minutes mins
    Course: Dessert
    Cuisine: Indian, Karnataka, South India
    Keyword: Festivals, Sweets
    Servings: 5 people
    Calories: 263kcal
    Author: Muktha H S

    Ingredients

    • 500 grams Ash gourd grated / 3 cups
    • ¼ cup Milk refer notes
    • ⅓ cup Khoya grated refer notes
    • ¼ cup Ghee / Clarified butter
    • ¾ cup Sugar or as required
    • 10 no Cashews broken /halved
    • 4-5 no Green Cardamom ,remove husk and powder
    • Saffron ,few strands ,optional

    Instructions

    • Heat 2 tablespoon of ghee in a heavy bottom pan .
    • Add grated ash gourd and mix well and cook on a medium heat.
    • Once water content dries up , add milk and continue to cook .
    • When ash gourd is completely cooked , add in grated khoya .
    • Mix well everything so that khoya blends well with ash gourd.
    • Make some place at the centre and add in 2 tablespoon of Ghee.
    • Add cashew pieces at the centre and fry in ghee till it looks golden in colour. Alternatively you can roast cashews separately and add it the halwa at last.
    • Mix everything and add in sugar .
    • Stir everything such that sugar melts completely and starts to bubble.
    • Once it starts to get halwa consistency ,turn off the flame.
    • Add cardamom powder , saffron strands and a teaspoon of ghee.
    • Mix well together and serve. It can be served either warm or cold.

    Video

    Notes

    • Adding Milk and Khoya is truly optional ,adding it enhances the taste and give richness to the dessert.
    • Also you can skip either khoya/milk or any one . 
    • If skipping milk or khoya ,then increase sugar by 1 or 2 tablespoon depending on your taste.

    Nutrition

    Calories: 263kcal

    You may also like

    • pumpkin bread
      Pumpkin Bread
    • vegan mayo
      Vegan Mayonnaise
    • bhapa-doi-recipe
      Bhapa Doi
    • Ragi-coconut-milk-pudding-recipe
      Ragi Coconut Milk Pudding
    • « Previous Page
    • 1
    • 2
    • 3
    • 4
    • 5
    • 6
    • …
    • 10
    • Next Page »

    Hey ! Nice To Meet You

    Muktha-about-me

    Hi ! I'm Muktha , Blogger , Nutrition Advisor & Recipe Creator behind Palate's Desire . I share tried & tested everyday meal recipes for healthy living and occasional indulgence. Palate's Desire helps even a novice to cook like a pro. Happy Cooking...! Read More about me →

    Stay Connected

    • Instagram

    Baking Recipes

    • coconut-cookie-sandwich
      Cookie Sandwich
    • crispy-coconut-cookies
      Coconut Cookies
    • peanut butter cookies
      Peanut Butter Cookies
    • crinkle-cookies
      Chocolate Crinkle Cookies
    • crispy chicken nuggets
      Chicken Nuggets Recipe
    • crispy fried chicken
      Fried Chicken Recipe | Crispy Fired Chicken

    Baking Recipes→

    Popular Recipes

    • bisi bele bath powder
      Bisi bele bath powder recipe - how to make
    • pineapple-salsa
      Pineapple Salsa - How to make spicy salsa
    • dry gobi manchurian recipe
      Gobi Manchurian Dry | Cauliflower Manchurian
    • okra-peanut-stir-fry
      Moongphali Bhindi | Peanut Okra Stir fry
    • Mangalore Fish Curry
      Fish Curry | Meen Gassi - Mangalore Style
    • moringa-tea-to-burn-fat
      Moringa Tea Recipe | Sip everday to Burn Fat easily

    Rice Recipes

    • bellada-anna-recipe
      Bellada Anna - Gudanna
    • Rice Varities
      Masala Lemon Rice | Nimbehuli Chitranna Recipe
    • chicken-fried-rice-recipe
      Chicken Fried Rice
    • Donne-Biryani-Recipe
      Donne Biryani Recipe
    • chicken-pulao
      Chicken Pulao Recipe
    • vegetable fried rice
      Vegetable Fried Rice | Indo-Chinese Fried Rice Recipe
    • chana-pulao-recipe
      Chana Pulao | Chickpea Pilaf
    • vegetable dum biryani
      Vegetable Dum Biryani Recipe

    Egg Recipes

    • spanish-potato-omelette-cut-into-wedges
      Spanish Potato Omelette
    • shakshuka recipe
      Shakshuka | How to make Shakshuka recipe
    • Kolhapuri Egg Masala
      Kolhapuri Egg Masala
    • Mumbai Style Egg Burji
      Mumbai Style Egg Bhurji
    • onion egg bhurji
      Onion Egg Bhurji
    • Oats-omelette-breakfast
      Spicy Masala Oats Omelette Recipe
    • Egg-gravy-recipe
      Egg Gravy
    • mushroom-frittata
      Mushroom Frittata

    Sweets & Desserts

    • easy-shrikhand-recipe-photo
      Shrikhand
    • Besan halwa recipe
      Besan Halwa Recipe
    • Makhana-kheer-recipe
      Makhana Kheer Recipe
    • Sweet potato Halwa
      Sweet Potato Halwa | Shakarkandi Halwa
    • Rabdi-dessert
      Rabdi Recipe, how to make best rabri at home
    • moongdal-barfi-recipe
      Moongdal Barfi | how to make moongdal burfi
    • sheer-kurma-recipe@palatess-desire
      Sheer Khurma Recipe , How to make sheer khurma
    • Instant Modak in 20 minutes, make festivals more special
      Instant Modak in 20 minutes, make festivals more special

    Footer

    ↑ back to top

    ABOUT

    • ABOUT MUKTHA
    • MEDIA KIT

    STAY CONNECTED

    • SIGN UP ! FOR E MAILS
    • CONTACT ME

    POLICIES

    • PRIVACY POLICY
    • TERMS & CONDITIONS

    COPYRIGHT © 2025 PALATE'S DESIRE

    Rate This Recipe

    Your vote:


    A rating is required
    A name is required
    An email is required