Palate's Desire

  • Home
  • Recipe Index
  • Diet Recipes
  • Videos
  • Work with me
  • Subscribe
menu icon
go to homepage
  • Home
  • Recipe Index
  • Diet Recipes
  • Videos
  • Contact
    • Facebook
    • Instagram
    • Pinterest
    • Twitter
    • YouTube
  • subscribe
    search icon
    Homepage link
    • Home
    • Recipe Index
    • Diet Recipes
    • Videos
    • Contact
    • Facebook
    • Instagram
    • Pinterest
    • Twitter
    • YouTube
  • ×

    Healthy Masala Idli

    Published : September 4, 2019 | Last Update on September 22, 2019 By Muktha

    Healthy Masala Idli

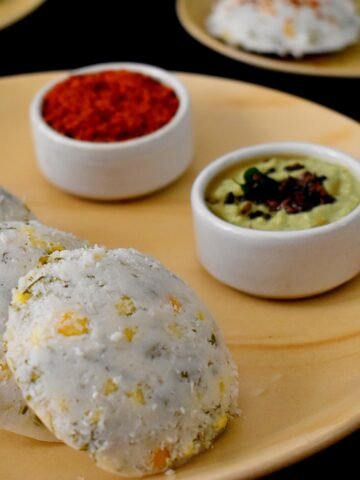
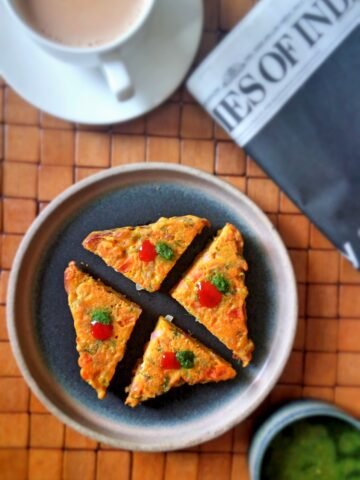
    Healthy Masala Idli recipe with short video and step by step pictures. This idli is one of the most healthiest form with complete protein ,calcium rich and taste enriched . Regular idli batter used to make soft idli is used here but addition of Dill leaves is extra. To make idli more nutritious , my mom used to do this way . Also this is one of the main dish on Ganesha Chaturthi at my home. Onions are not added if it is offered to God but for making it more tasty and delicious and if it is for breakfast , it can be added.

    Healthy Masala Idli

    Why Idli's with Dill leaves? Just making it more nutritious. You can also add grated carrot but I have not added because dill leaves are as it is rich in calcium , iron , fibre and vitamin c. So kept it simple by adding only dill leaves, coriander leaves , chopped onions , soaked lentils and green chilies. This idli gives you a good taste and the pungent smell of dill leaves gets unnoticed. I named it as Healthy Masala Idli because undoubtedly its healthy because of extra addition of Dill leaves and lentils. Also Idli is a Complete Protein because it is a combination of Cereals and Pulses . For more information and better understanding regarding eating right , please read here.

    Nutrition for Women

    Dill leaves are one of the richest source of plant based Calcium . And many doesn't like the pungent smell of Dill leaves. Hence it is not included in many of our regular diet . But Dill leaves are very nutritious and adding in diet is very much important .

    For all women above 30 , I recommend to eat this leafy vegetable in any form at least thrice a week . Bone density starts to deteriorate once you step into 30's . So eating calcium rich food is very important and Dill leaves are one among them. And also its rich in Iron which helps you to stay active with full of energy. So if you ever feel tired , lethargic and dipping energies try adding iron rich food like raisins, dates ,poultry , beans and green leafy vegetables in your diet.

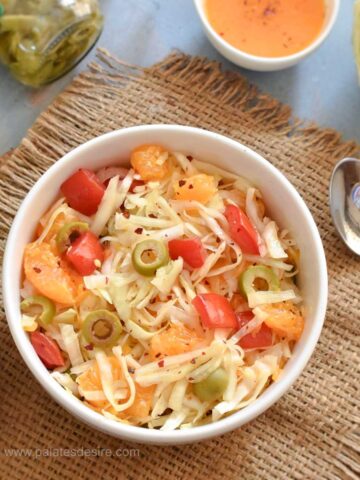
    Breakfast plate should always be nutritious , so eating right is the only key for healthy slimmer body. If you are looking for weight loss ,then consider eating a nutritious breakfast. Nutritious and Healthy Breakfast need not be bland with only sprouts and salads , you can also consider few other Indian healthy breakfast that your palate desire for and also loved by your body .

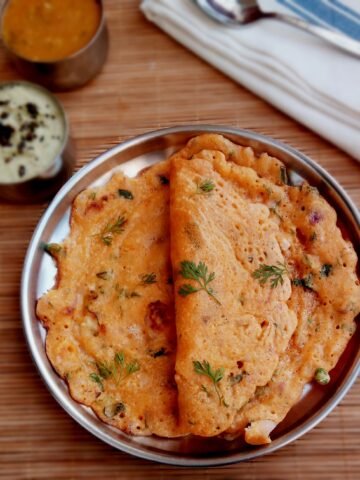
    Other Healthy Breakfast Recipes for Weight Loss are : Methi Dosa , Set Dosa , Green Gram Dosa , Methi Matar Oats Pulao, Methi Pulao , Oats Idli , Oats Omelette and Scrambled Egg with Mushroom. All the breakfast recipes mentioned here are protein and fibre rich recipes ,which aids in Weight Loss.

    RECIPE CARD FOR MAKING HEALTHY MASALA IDLI

    Recipe

    Healthy Masala Idli
    4.67 from 3 votes

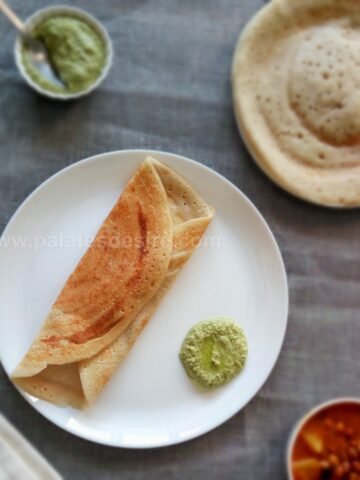
    Healthy Masala Idli | Dill Idli

    Healthy Masala idli is one of the most nutritious and healthiest idli made with dill leaves and extra lentils to make a complete protein and calcium rich food.
    Prep Time14 hours hrs 7 minutes mins
    Cook Time10 minutes mins
    Total Time14 hours hrs 10 minutes mins
    Course: Breakfast
    Cuisine: Indian, Karnataka, South India
    Keyword: Breakfast_Ideas, Healthy, Weight Loss
    Servings: 20 Makes
    Calories: 46kcal
    Author: Muktha H S

    Equipment

    • Mixer
    • Idli moulds
    • Idli cooker or Pressure cooker
    • Mixing bowl

    Ingredients

    For Soft Idli Batter

    • 1 cup Idli Rice
    • ½ cup Whole Urad dal
    • ½ teaspoon Methi Seeds
    • ⅓ cup Ice cold water , for grinding
    • 11/2 teaspoon Rock salt

    For Healthy Masala

    • ½ cup Dill leaves ,chopped
    • ¼ cup Coriander leaves ,chopped
    • 1 teaspoon Green Chilli , finely chopped less spice variant
    • 1 no Onion ,medium size, finely chopped
    • 2 tablespoon Coconut Bits ,Chopped
    • 1-2 tablespoon Chana Dal ,soaked
    • 2-3 tablespoon Moong Dal ,soaked

    Instructions

    Making Soft Idli Batter in mixer

    • Wash idli rice 2-3 times , till water runs clear and soak it for 6 hrs.
    • Wash Whole Urad dal, methi seeds and soak it separately for 4-6 hrs.
    • Drain water completely from both rice and urad dal and set it aside.
    • Transfer urad dal along with methi seeds into a mixer , add 2 tablespoon of cold water .
    • Grind to a smooth batter , sprinkle ice cold water if necessary while grinding. Once batter is smooth enough ,batter will should up small bubbles .
    • Then transfer into a bowl and set aside.
    • Add soaked idli rice into the same mixer and grind to a coarse paste.
    • Meanwhile add little water (less than ¼ cup) and grind again to get free flowing batter . Touch batter between your palms and you should feel the coarse rava texture.
    • Now transfer the rice batter into a mixing bowl .
    • Add in prepared urad dal batter to rice batter , 1 teaspoon of rock salt and mix in with your hands.
    • Close the lid of mixing bowl and keep in a warm place overnight or 8-10 hours for fermentation.

    To make Healthy Masala Idli

    • Soak Chana Dal and moong dal for 1-1.30 hours ( I soak it overnight, as it becomes easy for me prepare idli, early morning) .
    • Next day ,once the batter is fermented , mix gently with a ladle.
    • Drain water from soaked chana dal and moong dal and add to batter.
    • Keep water in Idli Cooker , let it come to boil.
    • Whilst , add in ½ cup of chopped dill leaves , ¼ cup coriander leaves, chopped onion, green chillies and bits of coconut.Mix well
    • Grease Idli Moulds with oil and pour ladle full of batter in each section .
    • Place the arranged idli plates in idli cooker or pressure cooker.
    • Close the lid ( if using pressure cooker , don't use vent ) and cook for 10 minutes only on medium- high heat.
    • Give standing time of 5 minutes, before opening the lid.
    • Remove idli plate , wet the idli mould base with water and carefully remove idlis with a spoon.
    • Serve it hot with coconut chutney, Idli podi and ghee.

    Video

    Nutrition

    Calories: 46kcal

    Have no time to make now , pin and save recipe to make it later .

    Healthy Masala Idli

    Step by Step Directions for making Healthy Masala Idli:

    Making Soft Idli Batter in mixer

    Wash idli rice 2-3 times , till water runs clear and soak it for 6 hrs.

    Healthy Masala Idli

    Wash Whole Urad dal, methi seeds and soak it separately for 4-6 hrs.

    Healthy Masala Idli

    Drain water completely from both rice and urad dal and set it aside.

    Transfer urad dal along with methi seeds into a mixer , add 2 tablespoon of cold water .

    Healthy Masala Idli

    Grind to a smooth batter , sprinkle ice cold water if necessary while grinding. Once batter is smooth enough ,batter will should up small bubbles. Then transfer into a bowl and set aside.

    Healthy Masala Idli

    Add soaked idli rice into the same mixer and grind to a coarse paste.

    Healthy Masala Idli

    Meanwhile add less than ¼ cup of water and grind again to get free flowing batter . Touch batter between your palms and you should feel the coarse rava texture.

    Healthy Masala Idli

    Now transfer the rice batter into a mixing bowl .

    Healthy Masala Idli

    Add in prepared urad dal batter to rice batter .

    Healthy Masala Idli

    Add 11/2 teaspoon of rock salt .

    Healthy Masala Idli

    Mix in with your hands.

    Healthy Masala Idli

    Close the lid of mixing bowl and keep in a warm place overnight or 8-10 hours for fermentation.

    Healthy Masala Idli
    To make Healthy Masala Idli

    Soak Chana Dal and moong dal for 1-1.30 hours ( I soak it overnight, as it becomes easy for me prepare idli, early morning) .

    Healthy Masala Idli

    Next day ,once the batter is fermented .

    Healthy Masala Idli

    Mix gently with a ladle.

    Healthy Masala Idli

    Drain water from soaked chana dal and moong dal and add to batter.

    Healthy Masala Idli

    Keep water in Idli Cooker , let it come to boil.

    Whilst , add in ½ cup of chopped dill leaves , ¼ cup coriander leaves, chopped onion, green chillies and bits of coconut.

    Healthy Masala Idli

    Mix well .

    Healthy Masala Idli

    Grease Idli Moulds with oil .

    Healthy Masala Idli

    Pour ladle full of batter in each section .

    Healthy Masala Idli

    Place the arranged idli plates in idli cooker or pressure cooker.

    Healthy Masala Idli

    Close the lid ( if using pressure cooker , don't use vent ) and cook for 10 minutes only on medium- high heat.

    Healthy Masala Idli

    Give standing time of 5 minutes and then open the lid.

    Healthy Masala Idli

    Remove idli plate , wet the idli mould base with water and carefully remove idlis with a spoon.

    Healthy Masala Idli

    Serve it hot with coconut chutney, Idli podi and ghee.

    Healthy Masala Idli

    Ukadiche Modak | Modak Recipe

    Published : August 30, 2019 | Last Update on September 9, 2021 By Muktha

    Ukadiche Modak
    Top post on IndiBlogger, the biggest community of Indian Bloggers

    Ukadiche Modak detail recipe with short video and stepwise pictures. Modak is a traditional Maharashtrian sweet dumplings offered to Lord Ganesha , as He is referred as "Modaka priya" . Ukadiche in Marathi means steam as modak are steamed its referred as Ukadiche. Its a easy recipe where coconut , jaggery is stuff inside and covered with a rice flour and steamed. Drizzle Ghee / Clarified Butter on Modak , before offering to Lord Ganesha . Its a healthy , gluten free sweet dish that can be easily prepared at home with ease.

    Ukadiche Modak

    Many varieties of modak are seen in the market but this one is the simplest of all . It's easy to make and tastes delicious too . Shaping Modak in hands needs skills but if using moulds then its very easy to make. Basically it's just a coconut , jaggery filling but I have added poppy seeds too and finally flavoured with cardamom and nutmeg powder . To make a soft rice flour covering , proper ratio of water to rice flour and kneading the dough is the only key .

    Pro Tips for Perfect Ukadiche Modak:

    Use fine quality rice flour or else sieve rice flour twice before using. Water to rice flour ratio is generally 1:1 but it always depends on the quality of rice flour used. As water is brought to rolling boiling , water may evaporate in case if you are not quick enough to add rice flour. Hence use 1 ¼ cup of water for boiling . Also keep another ¼ cup of hot water ready to sprinkle and knead the dough in case if dough looks dry. Knead dough when it is still hot, wet your palms with water and knead to get a crack free , smooth rice flour dough.

    As Gowri - Ganesha festival is around the corner , check other festival recipes , if interested. Puran Poli | Obbattu , Masala Chitranna , Mavinakayi Chitranna , Puliyogare , Bisibele bath , Hesarubele Payasa , Dates Kheer , Rava Ladoo , Kobbari Mithai | Coconut Barfi , Nippattu .

    RECIPE CARD FOR UKADICHE MODAK:

    Recipe

    Ukadiche Modak
    4.60 from 5 votes

    Ukadiche Modak | Modak Recipe

    Ukadiche Modak is a traditional Maharashtrian sweet dumplings made with coconut, jaggery , poppy seeds and covered with rice flour and steamed.This is offered to Lord during Ganesha Festival.
    Prep Time40 minutes mins
    Cook Time20 minutes mins
    Total Time1 hour hr
    Course: Dessert, Sweets
    Cuisine: Indian, Maharstarian
    Keyword: Festivals, Gluten Free, Vegan
    Servings: 15 Makes
    Calories: 66kcal
    Author: Muktha H S

    Ingredients

    For Modak Filling

    • ½ teaspoon Ghee / Clarified Butter
    • ½ tablespoon Poppy Seeds / Khus khus
    • 1 ½ Cup Fresh Coconut Grated
    • 1 Cup Organic powdered Jaggery or as required ,refer notes
    • ½ teaspoon Cardamom Powder
    • ¼ teaspoon Nutmeg/ Jaiphal grated to powder
    • ½ teaspoon Rice Flour , optional

    For Outer Covering

    • 1 ¼ Cup Water
    • 1 Cup Fine Rice Flour or rice flour sieved twice.
    • ¼ teaspoon Salt
    • 1 teaspoon Ghee / Clarified Butter
    • 2-3 tablespoon Hot Water for kneading , only if required refer notes

    Instructions

    For Filling

    • Heat ½ teaspoon of Ghee in a pan , add poppy seeds and fry on low heat till it starts to splutter.
    • Add 1 ½ Cup freshly grated coconut .
    • Fry on a medium heat for about 3 minutes .
    • Add ¾ cup to 1 Cup organic jaggery powder ,as per your taste.
    • Saute well on low heat and continue to cook till jaggery melts completely and blends well with coconut.
    • Add ½ teaspoon of cardamom powder and ¼ teaspoon of nutmeg powder.
    • Mix everything together and turn of the heat.
    • Add ½ teaspoon of Rice Flour and mix well , so that any moisture in the coconut jaggery mixture will be absorbed.
    • Allow the mixture to cool down completely.

    For Outer Covering

    • Heat 1 ¼ cup water in a wide utensil and bring water to rolling boiling. Add ¼ teaspoon of Salt and ½ teaspoon of ghee/clarified butter.
    • Add 1 cup of rice flour through sieve.
    • Instantly mix well everything and continue to cook on a low flame for 2 minutes.
    • When rice flour completely incorporates with water and look like a dough . Turn off the stove and close the pan with a lid . Allow it to sit for 5-6 minutes.
    • After 5-6 minutes , open the lid and check whether the dough looks dry or smooth. If it is dry sprinkle ¼ cup of hot water part by part and start kneading the dough when it is still hot.
    • Knead dough well enough with your hands till soft and smooth.

    Shaping and Steaming Modak

    • Whilst , before start shaping the modak , keep water for boiling in a steamer .
    • Pinch dough and make small lemon size balls . Place one ball into a modak mould and with the help of your fingers cover the innerwal of the mould with the rice flour covering.
    • Depending on the size of the moulds , place 1 teaspoon -½ tablespoon of modak filling inside the mould.
    • Cover the base with rice flour cover and evenly press all the corners.
    • Remove the moulds and shaped modaks are ready for steaming.
    • Place the shaped modak on a steamer pan and place on a stove , cover and cook.
    • Steam for about 15 minutes.
    • When done remove Modak from steamer , drizzle ghee , garnish with saffron strands and offer to Lord Ganesha.

    Video

    Notes

    • For Vegan Option , Use Coconut Oil or any other oil instead of Ghee/clarified butter.
    • Organic Jaggery which I used is was less sweet , hence used 1 cup loosely packed jaggery . Anything between ¾ - 1 cup jaggery should be perfect.
    • Use extra water upto ¼ cup only if dough is dry or else not needed.
    • To knead the hot dough , wet your palms with water and start kneading.

    Nutrition

    Calories: 66kcal

    Step By Steps for making Ukadiche Modak :

    For Filling:

    Heat ½ teaspoon of Ghee in a pan , add poppy seeds and fry on low heat till it starts to splutter. For vegan option ,you can use oil instead of ghee.

    Ukadiche Modak | Modak Recipe

    Add 1 ½ Cup freshly grated coconut .

    Ukadiche Modak | Modak Recipe

    Fry on a medium heat for about 3 minutes .

    Ukadiche Modak | Modak Recipe

    Add ¾ cup to 1 Cup organic jaggery powder ,as per your taste.

    Ukadiche Modak | Modak Recipe

    Saute well on low heat .

    Ukadiche Modak | Modak Recipe

    Continue to cook till jaggery melts completely and blends well with coconut.

    Ukadiche Modak | Modak Recipe

    Add ½ teaspoon of cardamom powder and ¼ teaspoon of nutmeg powder. Mix everything together and turn of the heat.

    Ukadiche Modak | Modak Recipe

    Add ½ teaspoon of Rice Flour and mix well , so that any moisture in the coconut jaggery mixture will be absorbed. Though this is a optional step , I prefer doing this as the stuffing will be moisture free.

    Ukadiche Modak | Modak Recipe

    Allow the mixture to cool down completely.

    Ukadiche Modak | Modak Recipe

    For Outer Covering :

    Heat 1 ¼ cup water in a wide utensil and bring water to rolling boiling. Add ¼ teaspoon of Salt and ½ teaspoon of ghee/clarified butter.

    Ukadiche Modak | Modak Recipe

    Add 1 cup of rice flour through sieve.

    Ukadiche Modak | Modak Recipe

    Instantly mix well everything and continue to cook on a low flame for 2 minutes.

    Ukadiche Modak | Modak Recipe

    When rice flour completely incorporates with water and look like a dough . Turn off the stove.

    Ukadiche Modak | Modak Recipe

    Cover the pan with a lid and allow it to sit for 5-6 minutes.

    Ukadiche Modak | Modak Recipe

    After 5-6 minutes , open the lid and check whether the dough looks dry or smooth. If smooth straight away start kneading or else follow the next step.

    If it is dry sprinkle ¼ cup of hot water part by part and start kneading the dough when dough is still hot.

    Ukadiche Modak | Modak Recipe

    Knead dough well enough with your hands till soft and smooth.

    Ukadiche Modak | Modak Recipe

    Soft and smooth dough.

    Ukadiche Modak | Modak Recipe

    Shaping and Steaming Modak :

    Whilst , before start shaping the modak , keep water for boiling in a steamer .

    Pinch dough and make small lemon size balls .

    Ukadiche Modak | Modak Recipe

    Place one ball into a modak mould and with the help of your fingers cover the innerwal of the mould with the rice flour covering.

    Ukadiche Modak | Modak Recipe

    Depending on the size of the moulds , place 1 teaspoon -½ tablespoon of modak filling inside the mould.

    Ukadiche Modak | Modak Recipe

    Cover the base with rice flour .

    Ukadiche Modak | Modak Recipe

    Evenly press all the corners and cover the base.

    Ukadiche Modak | Modak Recipe

    Remove the moulds and shaped modaks are ready for steaming.

    Ukadiche Modak | Modak Recipe

    Place the shaped modak on a steamer pan and place on a stove , cover and cook.

    Ukadiche Modak | Modak Recipe

    Steam for about 15 minutes.

    Ukadiche Modak | Modak Recipe

    When done remove Modak from steamer.

    Ukadiche Modak | Modak Recipe

    Drizzle ghee on Modak , garnish with saffron strands and offer to Lord Ganesha.

    Ukadiche Modak

    Nippattu

    Published : August 26, 2019 | Last Update on October 17, 2022 By Muktha

    Nippattu

    Nippattu Recipe with short video and step by step pictures. It is a crispy deep fried snack made with rice flour , peanuts and few spices. Its spicy and crispy , makes a perfect evening snack with a cup of filter coffee. Nippattu is a recipe from Karnataka and neighbour states Tamil Nadu and Andhra Pradesh , do have similar versions like Thattai and Chekkalu respectively . Though basic ingredients are same , there is slight variations in texture and taste.

    Nippattu

    As Nippattu is one of the traditional snack , each home has their own recipes varying from region to region. Ingredients to make Nippattu are simple and found in any Indian kitchen . Addition of peanuts , sesame seeds , fried gram , dry coconut and curry leaves adds lots of crispness , aroma and taste to this snack.

    Nippattu is made during most of the festivals in Karnataka. But , I had made this savoury rice crackers for Janmashtami. Puri Undae | Murmura Ladoo , Coconut Barfi , Kalakand , Gopalkala , Gojju avalakki and Sweet Poha were different items which I had prepared for Janmashtami Celebrations in our society. And all little boys and girls dressed up like little Krishna and Radha , looked lovely.

    RECIPE CARD FOR NIPPATTU |THATTAI | CHEKKALU

    Recipe

    Nippattu
    No ratings yet

    Nippattu Recipe

    Nippattu is a crispy deep fried snack made with rice flour , peanuts and few spices. Its a traditional snack from Karnataka Cuisine .
    Prep Time10 minutes mins
    Cook Time20 minutes mins
    Total Time30 minutes mins
    Course: Snack
    Cuisine: Karnataka
    Keyword: Festivals, Karnataka, snacks, Vegan
    Servings: 16 Makes
    Calories: 71kcal
    Author: Muktha H S

    Ingredients

    • 1 cup Rice Flour
    • 2 tablespoon Maida / Refined flour ,optional
    • 2 Tbsp Chiroti Rava / Fine Sooji /Semolina
    • ¼ cup Peanuts
    • 3 tablespoon Fried Gram
    • 2 tablespoon Dry Coconut
    • 1 tablespoon Sesame Seeds / Til
    • 2 Sprigs Curry Leaves , chopped finely
    • 1 teaspoon Red chilli powder
    • ¾ teaspoon Salt or as required
    • 2 tablespoon Hot Oil
    • ¼ Cup Water or less, as required
    • Oil for Frying

    Instructions

    • In a pan ,dry roast groundnut till skin starts to peel.
    • Add fried gram and dry coconut , just roast along with groundnut for 20-30 seconds.
    • Turn off the stove and allow it to cool down.
    • Transfer into a mixer.
    • Pulse it into a coarse powder and set aside.
    • In the same pan , add rice flour and dry roast for 2 minutes on a low heat .
    • For this add , maida and rava ,continue to roast for another 1 minutes. Turn off the heat and set aside.
    • For this roasted rice flour , add groundnut coarse powder , red chilli powder , chopped curry leaves , sesame seeds , salt and combine everything.
    • For this , add sizzling hot oil and mix up everything to get a crumble texture.
    • Now add water ,part by part and mix to get a non sticky stiff dough ,don't knead the dough. Just mix everything and form a stiff and smooth dough to hold shape. Sprinkle water ,if needed .
    • On a butter paper , place a big size dough and roll it as thin as possible.
    • Using a round cookie cutter , cut into desired shapes. Also alternatively you can roll into thin discs using rolling pin or just spread on a damp cloth or butter sheet using your hands.
    • On medium high heat , heat oil for frying . When oil is hot enough , test by dropping a pinch of dough into the oil. If it comes up immediately without browning , then the temperature is perfect for frying.
    • Now carefully take the rolled dough and put into hot oil . Keep the flame on medium high once the base becomes firm , flip and cook on other side , till it turns golden in colour.
    • Remove fried nippattu from oil using a mesh basket , place on kitchen napkin.
    • Once it is cooled completely , store in an airtight container.
    • Stays good up to 15 days .Serve it as required.

    Video

    Notes

    • Adding hot oil is very important ,as it helps to keep the Nippattu crispy.
    • Over roasting the groundnuts makes Nippattu more greasy as groundnuts tends to release oil after deep frying. So make sure to roast groundnuts till skin starts to peel. 

    Nutrition

    Calories: 71kcal

    Step by Step directions for making Nippattu :

    Dry roast groundnut till skin starts to peel.

    Nippattu

    Add fried gram and dry coconut , continue to roast along with groundnut for 20-30 seconds.

    Nippattu

    Turn off the stove and allow it to cool down. Transfer into a mixer.

    Nippattu

    Pulse it into a coarse powder and set aside.

    Nippattu

    In the same pan , add rice flour and dry roast for 2 minutes on a low heat .

    Nippattu

    For this add , maida and rava .

    Nippattu

    Now continue to roast for another 1 minutes. Turn off the heat and set aside.

    Nippattu

    For this roasted rice flour , add groundnut coarse powder , red chilli powder , chopped curry leaves , sesame seeds and salt.

    Nippattu

    Combine everything.

    Nippattu

    For this , add sizzling hot oil .

    Nippattu

    Mix up everything to get a crumble texture.

    Nippattu

    Now add water ,part by part and mix to get a non sticky stiff dough ,don't knead the dough.

    Nippattu

    Just mix everything and form a stiff and smooth dough to hold shape. Sprinkle water ,if needed .

    Nippattu

    On a butter paper , place a big size dough and roll it as thin as possible.

    Nippattu

    Using a round cookie cutter , cut into desired shapes. Prick it with fork here and there . Also alternatively you can roll into thin discs using rolling pin or just spread on a damp cloth or butter sheet using your hands.

    Nippattu

    On medium high heat , heat oil for frying . When oil is hot enough , test by dropping a pinch of dough into the oil. If it comes up immediately without browning , then the temperature is perfect for frying.

    Nippattu

    Now carefully take the rolled dough and put into hot oil . Keep the flame on medium high once the base becomes firm , flip and cook on other side , till it turns golden in colour.

    Remove fried nippattu from oil using a mesh basket .

    Nippattu

    Place on kitchen napkin. Once it is cooled completely , store in an airtight container.

    Nippattu

    Stays good up to 15 days . Serve it as required.

    Nippattu

    Gopalkala Recipe

    Published : August 23, 2019 | Last Update on April 7, 2021 By Muktha

    Gopalkala
    Gopalkala

    Gopalkala Recipe with Video and Step by Step pictures.

    Gopalkala is a savoury dish prepared using poha (flattened rice ) , curd , cucumber , coconut and green chillies . It is a no cook recipe ,just mix together all ingredients and temper with ghee. This is mainly distributed as prashad during Dahi Handi . Hence GopalKala is one of the main offering to Lord Krishna on next day following Janmashtami. Gopalkala is also put inside Dahi Handi before breaking the pot.

    Krishna Janmashtami is the celebration to mark the birth of Lord Krishna. Most of them fast on Janmashtami day and celebrations start from midnight . Lots of sweets and savoury dishes like Rava Laddu ( Rave Unde) , Kalakand , Murmura ladoo (Puri Unde) , Coconut Barfi( Kobbari Mithai) , Nippattu , Chakli ( Muruku ) are few of the most popular dishes on this festival .

    Apart from sweet and savoury dishes , poha based recipes are most popular for this day . As flattened rice is considered to be one of the most favourite ingredient to Lord Krishna , many of the offerings are made using flattened rice . Along with Gopalkala , Sweet Poha , Gojju avalakki ( Spicy Tangy Poha) and Rasayana are made to offer Lord Kanniya .

    RECIPE CARD FOR GOPAL KALA | JANMASHTAMI RECIPE

    Recipe

    Gopalkala
    5 from 1 vote

    Gopalkala | Janmashtami Recipe

    Gopalkala is a savoury dish prepared using flattened rice , curd , cucumber , coconut , green chillies and tempered with clarified butter

    Prep Time15 minutes mins
    Cook Time5 minutes mins
    Total Time20 minutes mins
    Course: Breakfast
    Cuisine: Karnataka, Maharstarian
    Keyword: Basic, Festivals
    Servings: 4 People
    Calories: 54kcal
    Author: Muktha H S

    Ingredients

    • 1 cup Flattened Rice / Poha any variety
    • ½ cup Yogurt / Curds / Dahi
    • 1 no Cucumber , finely chopped
    • 3 tablespoon Coconut , freshly grated
    • 1 no Green Chilli , finely chopped
    • 1 teaspoon Ginger ,grated
    • 3 tablespoon Coriander Leaves , chopped
    • 2 tablespoon Pomegranate arils , optional
    • 1 tablespoon Raisins ,optional
    • 1 teaspoon Salt or as required

    Tempering

    • 1 teaspoon Ghee / Clarified Butter
    • ½ teaspoon Mustard Seeds
    • ½ teaspoon Jeera / Cumin Seeds
    • 1 sprig curry leaves
    • 1 no Green Chilli ,chopped
    • ⅛ teaspoon Asafoetida / Hing

    Instructions

    • Wash flattened rice well .Thin variety of poha gets softened while washing , it just takes around 30 seconds of time . For thicker variety , wash and soak for 2 minutes.
    • Drain water completely and set aside.
    • In a bowl , add drained poha , cucumber , coconut , green chillies , grated ginger , pomegranate , raisins , coriander leaves.
    • Add yogurt / curds , salt and mix well .
    • Heat ghee in a tempering pan , add mustard seeds and cumin seeds . Once it starts to change colour , turn off the heat . Add green chillies , curry leaves and hing
    • Pour it over the above prepared poha mixture .
    • Mix well and serve .

    Video

    Notes

    • The amount of Yogurt can be varied , ½ cup is perfect neither its dry nor too soggy. If you want it to be more flowing consistency ,extra  milk or yogurt can be added.
    • I have used medium thick poha , if you are using thick variety then wash and soak it for 2 -5 minutes, drain water completely before use. 

    Nutrition

    Calories: 54kcal

    Step by Step Directions for making of Gopalkala Recipe:

    Wash flattened rice well .Thin variety of poha gets softened while washing , it just takes around 30 seconds of time . For thicker variety , wash and soak for 2 minutes.

    Gopalkala

    Drain water completely and set aside.

    Gopalkala

    In a bowl , add drained poha , cucumber , coconut , green chillies , grated ginger , pomegranate , raisins , coriander leaves.

    Gopalkala Recipe

    Add yogurt / curds and salt .

    Gopalkala Recipe

    Mix well.

    Gopalkala

    Heat ghee in a tempering pan , add mustard seeds and cumin seeds . Once it starts to change colour , turn off the heat . Add green chillies , curry leaves and hing.

    Gopalkala Recipe

    Pour it over the above prepared poha mixture.

    Gopalkala Recipe

    Mix well .

    Gopalkala

    Serve .

    Gopalkala

    Mumbai Style Egg Bhurji

    Published : August 16, 2019 | Last Update on September 29, 2022 By Muktha

    Mumbai Style Egg Burji
    Mumbai Style Egg Bhurji

    Mumbai Style Egg Bhurji Short Video and Recipe with stepwise pictures. Scrambled Egg with different blend of spices varies from region to region. Every part of the country and every home as their own versions of anda bhurji . This Mumbai Style Egg Bhurji is quite popular as a street food along with pav / bread toast across Mumbai.

    The main ingredient in this Egg Bhurji is the use of Pav Bhaji Masala. If you don't like the flavours of pav bhaji spices in your egg bhurji then replace it garam masala . Both the ways , this Mumbai Style Egg Bhurji tastes good.

    I'm very found of Egg Bhurji whether its a dhaba style or south indian masala egg bhurji or simple onion egg bhurji , I love to have it in any form. Egg being one of the most nutrient rich food and it is easily available at home . Hence reaching out for an egg for daily intake of protein is lot easier. Adding vegetables along with Egg will also delivers more nutrition in every bite. So , Beetroot Egg Bhurji and French beans Egg Bhurji are of such kind of recipes on my blog.

    Other Egg Curry Recipes on blog are : Kolhapuri Egg Masala , Scrambled Egg Curry, Egg Masala , Kerala Egg Curry and Poached Egg Curry .

    Few of the kids favourite egg breakfast / tiffin recipes are Savoury Egg Toast, Classic French Toast , Scrambled Egg with Mushroom , Potato Omelette and Oats Omelette .

    RECIPE CARD FOR MUMBAI STYLE EGG BHURJI:

    Recipe

    Mumbai Style Egg Bhurji
    5 from 1 vote

    Mumbai Style Egg Bhurji

    Mumbai Style Egg Bhurji is scrambled egg with different spice blends. It is quite popular and served along with Pav / Bread Toast across streets of Mumbai.
    Prep Time7 minutes mins
    Cook Time15 minutes mins
    Total Time22 minutes mins
    Course: Appetizer, Breakfast
    Cuisine: Indian, Maharstarian
    Keyword: Bachelor's Cooking, Quick & Easy, Street Food
    Servings: 4 People
    Calories: 196.4kcal
    Author: Muktha H S

    Equipment

    • Pan

    Ingredients

    • 4 no's Eggs
    • 1 cup Onions, chopped
    • ¼ cup Capsicum , Chopped
    • ⅓ Cup Tomato ,Chopped
    • 1 teaspoon Ginger ,grated
    • 1 teaspoon Garlic, grated
    • 1 no Green Chilly ,chopped
    • ½ teaspoon Cumin Seeds`
    • ⅛ teaspoon Turmeric Powder
    • ½ teaspoon Red Chilly Powder
    • ½ teaspoon Coriander Powder
    • ¼ teaspoon Garam masala powder , refer notes
    • ½ - 1 Tsp Pav Bhaji Masala , refer notes
    • ½ teaspoon Black Pepper powder
    • 2-3 tablespoon Cooking Oil
    • 1 - 1 ½ teaspoon Salt or as required
    • 1 teaspoon Mint Leaves ,chopped
    • 1 tablespoon Coriander Leaves ,chopped

    Instructions

    • Heat oil in a pan , when it's hot enough ,add cumin seeds.
    • Once cumin seeds is about to change colour , add chopped ginger , garlic and green chillies.
    • Add chopped onions and saute well till it turns translucent.
    • Now add in finely chopped capsicum and saute for 3-4 minutes.
    • Add in chopped tomatoes and cook till it turns soft. To speed up the process of cooking tomatoes, add ½ teaspoon salt.
    • Add turmeric powder ,red chilli powder , coriander powder , garam masala or pav bhaji masala (refer notes) and mix well.
    • Break in 4- 5 eggs into the above cooked vegetables and gently mix .
    • Allow eggs to cook completely. Once its cooked ,scramble the eggs well to mix along with vegetables.
    • Now add ½ teaspoon of black pepper powder , ½ -¾ teaspoon of salt and mix well.
    • Garnish with mint and coriander leaves.
    • Serve it as a side dish along with Toasted Bread, Roti or Rice-Sambar.

    Video

    Notes

    • Using Garam masala is optional , you can totally skip garam masala and use 1 teaspoon of pav bhaji masala. 
    • Or If you don't have pav bhaji masala , then use ½ teaspoon of Garam Masala .

    Nutrition

    Calories: 196.4kcal

    Step by Step Directions for making of Mumbai Style Egg Bhurji:

    Heat oil in a pan , when it's hot enough ,add cumin seeds.

    Mumbai Style Egg Bhurji

    Once cumin seeds is about to change colour , add chopped ginger , garlic and green chillies.

    Mumbai Style Egg Bhurji

    Add chopped onions and saute well till it turns translucent.

    Mumbai Style Egg Bhurji

    Now add in finely chopped capsicum and saute for 3-4 minutes.

    Mumbai Style Egg Bhurji

    Add in chopped tomatoes and cook till it turns soft. To speed up the process of cooking tomatoes, add ½ teaspoon salt.

    Mumbai Style Egg Bhurji

    Add turmeric powder ,red chilli powder , coriander powder , garam masala or pav bhaji masala (refer notes) and mix well.

    Mumbai Style Egg Bhurji

    Break in 4- 5 eggs into the above cooked vegetables and gently mix .

    Mumbai Style Egg Bhurji

    Allow eggs to cook completely. Once its cooked ,scramble the eggs well to mix along with vegetables.

    Mumbai Style Egg Bhurji

    Now add ½ teaspoon of black pepper powder , ½ -¾ teaspoon of salt and mix well.

    Mumbai Style Egg Bhurji

    Garnish with mint and coriander leaves.

    Mumbai Style Egg Bhurji

    Serve it as a side dish along with Toasted Bread, Roti or Rice-Sambar.

    Mumbai Style Egg Bhurji

    Easy Lemon Rice | No Onion No Garlic Recipe

    Published : August 15, 2019 | Last Update on January 6, 2022 By Muktha

    Easy Lemon Rice

    Easy Lemon Rice recipe with Video and Stepwise Directions and pictures. This is one of the simplest rice recipe . Its quick, easy and delicious too. Basically lemon rice is tempered rice with addition of lime juice. This recipe is one of the variant of lemon rice but has no onion or groundnuts added . Also many temples in Karnataka , distribute this as prashad.

    Easy Lemon Rice

    This is one of the quickest rice recipe , tempering ingredients, Green chillies, lime juice , grated coconut and coriander leaves are the main ingredients for this recipe. If rice is cooked and kept ready , hardly it takes 5 minutes to put up the dish. You can also you left over rice for this recipe. I always prepare rice before , spread it on a wide plate to cool and then I add rice . Because using rice that is warm or cold is very important in recipes of this kind.

    Me being from Mysore , Karnataka , a place known for its paddy crop twice a year , Rice is the staple food at home. Hence wide varieties of rice recipes at home from breakfast to dinner do takes place. There are around 5 main varieties of lemon rice we prepare at home and this is one among them . Also recipe of Masala Lemon Rice is already shared on blog .

    Few other most popular Karnataka Style Rice Recipes on blog are : Puliyogare , Raw Mango Rice , Masala Lemon Rice, Heralekai Gojju Chitranna, Khara Pongal , Bisi Bele Bath , Vegetable Bath , Tomato Bath , Masoor Dal Rice and Hesaru Bele Anna are few among them.

    RECIPE CARD FOR EASY LEMON RICE | NO ONION NO GARLIC RECIPE

    Recipe

    Easy Lemon Rice
    5 from 1 vote

    Easy Lemon Rice | No Onion No Garlic Recipe

    Easy Lemon Rice is a tasty and quick tempered rice with heat of green chillies , tang from lime juice and mild sweetness from fresh grated coconut. This is one of the most popular rice recipe from Karnataka.
    Prep Time5 minutes mins
    Cook Time7 minutes mins
    Total Time10 minutes mins
    Course: Breakfast
    Cuisine: Karnataka
    Keyword: Bachelor's Cooking, Lunchbox Recipe, Quick & Easy
    Servings: 5 People
    Calories: 260kcal
    Author: Muktha H S

    Ingredients

    • 4 cups Cooked Rice
    • 3 tablespoon Cooking Oil
    • 1 teaspoon Mustard Seeds
    • 1 tablespoon Chana Dal
    • 2 tablespoon Urad Dal
    • ¼ teaspoon Turmeric powder
    • 1 pinch Hing / Asafoetida
    • 2 sprigs Curry leaves
    • 6 no's Green Chillies , chopped less spice variant
    • 1 ½ -2 tablespoon Lime Juice or as required
    • ⅓ cup Fresh Coconut Grated
    • ¼ cup Coriander leaves , chopped
    • 1 ½ - 2 teaspoon Salt or as required
    • 2 tablespoon Fresh coconut grated , garnishing ,optional

    Instructions

    • Heat oil in a deep pan ,add mustard seeds allow it to splutter.
    • Add chana dal and urad dal ,saute till it turns deep brown in colour.
    • Now add curry leaves , chopped green chillies and fry well.
    • Add turmeric powder , hing and ½ teaspoon salt , mix well everything.
    • Now add ⅓ cup of fresh grated coconut and saute well for a minute.
    • Add 4 cups of cooked rice and mix well.
    • Squeeze in fresh lime juice about 1 ½- 2 tablespoon of juice into rice.
    • Add chopped coriander leaves and 2 tablespoon of grated coconut ,salt and mix well everything.
    • Serve with coconut chutney and onion pakoda.

    Video

    Notes

    • Make sure to brown chana dal and urad dal but don't burn it.
    • Use warm or cool rice before mixing with tempering .

    Nutrition

    Calories: 260kcal

    Step by Step Directions for making Easy Lemon Rice Recipe:

    Heat oil in a deep pan ,add mustard seeds allow it to splutter. Add chana dal and urad dal ,saute till it turns deep brown in colour.

    Easy Lemon Rice | No Onion No Garlic Recipe

    Now add curry leaves , chopped green chillies and fry well. Add turmeric powder , hing and ½ teaspoon salt , mix well everything.

    Easy Lemon Rice | No Onion No Garlic Recipe

    Now add ⅓ cup of fresh grated coconut .

    Easy Lemon Rice | No Onion No Garlic Recipe

    Saute well for a minute.

    Easy Lemon Rice | No Onion No Garlic Recipe

    Add 4 cups of cooked rice and mix well.

    Easy Lemon Rice | No Onion No Garlic Recipe

    Squeeze in fresh lime juice about 1 ½- 2 tablespoon of juice into rice.

    Easy Lemon Rice | No Onion No Garlic Recipe

    Add chopped coriander leaves and 2 tablespoon of grated coconut and salt.

    Easy Lemon Rice | No Onion No Garlic Recipe

    Mix well everything.

    Easy Lemon Rice | No Onion No Garlic Recipe

    Serve with coconut chutney and onion pakoda.

    Easy Lemon Rice

    Rava Ladoo | Rave Unde |Sooji laddu

    Published : August 10, 2019 | Last Update on October 18, 2022 By Muktha

    rava ladoo

    Rava Ladoo | Rave Unde is one of the most easiest sweet recipe to prepare at home. Unde in kannada refers to spherical /round shape. As this sweet dish is made with sooji (rava) , it is Rava Ladoo. No expertise is needed to prepare this sweet , it's a beginner level dessert with minimal ingredients . This sweet is quite common during festivals like Diwali , Janmashtami and Varamahalakshmi .

    Rava Ladoo | Rave Unde |Sooji laddu

    This recipe is very easy and simple. No condensed milk or No sugar syrup, it's a most basic recipe with only sooji , coconut , sugar and ghee as main ingredients. Use only medium or fine Sooji to make this ladoo . To make a delicious rava ladoo , firstly roast sooji with a teaspoon of ghee till fragrant . Use a good quality home made desi ghee to make any Indian Sweets , it gives nice aroma and taste to the dish. Also fresh grated coconut is used here , you can use dessicated coconut too. Ghee / clarified butter is used to bind the ladoo . Also 1-2 tablespoon of warm milk can also be sprinkled to bind ladoo's. Though adding milk is optional , as it is easy to bind , I use it.

    I made this rava ladoo on the occasion of Varamahalakshmi festival . For me this festival is associated with a friend of mine - Sowmya . Her divinity , faith and religious belief for this particular festival made me to follow and pray Goddess Lakshmi on this day . Though she is 1000 miles away from me, I remember her and do all sweets and savouries on this day .

    Rava Ladoo | Rave Unde |Sooji laddu

    Popular recipes on blog for Varamahalakshmi Festival are : Obbattu , Puliyogare , Chitranna , Matar Kheer , Moong dal Payasam , Besan Ladoo and Coconut Barfi. Also few prashad recipes are Banana Rasayana , Gojjavalakki , Sweet Poha and Greengram Usal .

    RECIPE CARD FOR RAVA LADOO | SOOJI LADDU |RAVE UNDE:

    Recipe

    rava ladoo
    4 from 1 vote

    Rava Ladoo | Rave Unde | Sooji Laddu

    Tasty and Delicious Indian Sweet made with Semolina , Sugar ,Coconut , Clarified butter and nuts
    Prep Time15 minutes mins
    Cook Time10 minutes mins
    Total Time25 minutes mins
    Course: Sweets
    Cuisine: Indian
    Keyword: Festivals
    Servings: 20 Makes
    Calories: 78kcal
    Author: Muktha H S

    Ingredients

    • 1 ¼ Cup Medium or Fine Sooji
    • ¼ Cup Clarified Butter / Desi Ghee
    • ⅔ Cup Sugar
    • 5-6 pods Green Cardamom
    • ⅓ cup Fresh Coconut Grated
    • 1 tablespoon Raisins or as required
    • 1 tablespoon Cashews pieces or as required
    • 2 tablespoon Warm Milk , optional

    Instructions

    • Take ⅔ or ¾ cup sugar in a mixer ,add cardamom pods and blend to a fine powder. Set it aside till use.
    • Heat 2 tablespoon of Ghee on a thick bottom pan , add raisins fry well till golden brown and remove .
    • Add in cashew pieces and fry till golden brown , remove and set aside for later use.
    • In the same pan , add 1 1 /4 cup of sooji and fry on a low to medium heat till rava grains looks separated.
    • Now add in fresh grated coconut to roast rava and continue to roast on a low heat , till aroma wafts.
    • Now add in powdered sugar to the rava/ sooji mixture and mix well.
    • Add fried cashews and raisins and mix well.
    • Turn off the heat,
    • Add ghee part by part to the rava mixture and mix it well.
    • Sprinkle milk , mix with sooji mixture .Take handful of sooji mixture and bind together like a ball to form ladoos of desired size.
    • Store in an airtight box and serve as needed.

    Video

    Nutrition

    Calories: 78kcal

    Step by step directions for making Rava Ladoo:

    Take ⅔ or ¾ cup sugar in a mixer ,add cardamom pods.

    Rava Ladoo | Rave Unde |Sooji laddu

    Blend to a fine powder. Set it aside till use.

    Rava Ladoo | Rave Unde |Sooji laddu

    Heat 2 tablespoon of Ghee on a thick bottom pan , add raisins fry well till golden brown and remove .

    Rava Ladoo | Rave Unde |Sooji laddu

    Add in cashew pieces and fry till golden brown , remove and set aside for later use.

    Rava Ladoo | Rave Unde |Sooji laddu

    In the same pan , add 1 1 /4 cup of sooji and fry on a low to medium heat .

    Rava Ladoo | Rave Unde |Sooji laddu

    Rava grains should look separated.

    Rava Ladoo | Rave Unde |Sooji laddu

    Now add in fresh grated coconut to roast rava and continue to roast on a low heat , till aroma wafts.

    Rava Ladoo | Rave Unde |Sooji laddu

    It looks grainy and entire kitchen fills with aroma of fresh coconut with rava.

    Rava Ladoo | Rave Unde |Sooji laddu

    Now turn the flame to very low heat , keep on simmer. Add in powdered sugar to the rava/ sooji mixture and mix well.

    Rava Ladoo | Rave Unde |Sooji laddu

    Add fried cashews and raisins and mix well.

    Rava Ladoo | Rave Unde |Sooji laddu

    Turn off the heat. Add ghee part by part to the rava mixture .

    Rava Ladoo | Rave Unde |Sooji laddu

    Mix well .

    Rava Ladoo | Rave Unde |Sooji laddu

    Sprinkle milk , mix with sooji mixture. Milk is optional , you can even skip this .

    Rava Ladoo | Rave Unde |Sooji laddu

    Take handful of sooji mixture .

    Rava Ladoo | Rave Unde |Sooji laddu

    Bind together like a ball to form ladoos of desired size.

    Rava Ladoo | Rave Unde |Sooji laddu

    Store in an airtight box and serve as needed.

    Rava Ladoo

    Masala Puri Chaat | Karnataka Style Masala Puri

    Published : July 30, 2019 | Last Update on November 8, 2019 By Muktha

    Masala Puri

    Masala Puri Chaat recipe with short video and step by step pictures. Masala Puri is a famous chaat from Mysore Bangalore regions . Here the term Masala refers to the spicy gravy made with dry green peas . This chaat is served with crushed Puri , ladle full of spicy masala gravy and finally topped with titbits of assorted veggies and sev . This is one of the most popular and favourite chaat among young generations in the region.

    Masala Puri Chaat | Karnataka Style Masala Puri

    Many stories are associated with this Chaat . It brings me so many memories of our college days, I feel nostalgic about this. Many small fights , make ups and challenges those days were for this 1 plate of Masala Puri , Pani Puri and Churmuri . LOL ....., it brings so much of funny , caring and lovable memories. I guess many of our generation people have these kind of memories 🙂

    Masala Puri Chaat | Karnataka Style Masala Puri

    Other Chaat and street food recipes that may interest you are : Pav Bhaji , Misal Pav , Puchka and Churumuri

    RECIPE CARD FOR MASALA PURI CHAAT

    Recipe

    Masala Puri
    4.80 from 5 votes

    Masala Puri Chaat

    A spicy gravy made with dry green peas is served with puri , tidbits of assorted vegetables and crunchy sev . It is one of the most popular chaat in Karnataka.
    Prep Time10 minutes mins
    Cook Time30 minutes mins
    Soaking Hours8 hours hrs
    Total Time8 hours hrs 40 minutes mins
    Course: Snack
    Cuisine: Karnataka
    Keyword: Chaat, snacks, Street Food
    Servings: 8 People
    Calories: 311kcal
    Author: Muktha H S

    Ingredients

    To Pressure Cook

    • 1 cup Dry Peas , soaked for 7-8 hours
    • 1 teaspoon Salt
    • 2 no Potatoes, medium size
    • 2 cups Water

    For Masala Paste

    • 2 teaspoon Oil
    • 1 inch Cinnamon Stick
    • 2 no Cloves
    • ½ teaspoon Jeera / Cumin Seeds
    • ¼ teaspoon Black peppercorns
    • 1 no Marathi Moggu
    • ¼ teaspoon Stone Flower
    • ½ cup Onion , chopped
    • 2-3 no Garlic cloves
    • ½ inch Ginger
    • 3 no Green chillies
    • ½ teaspoon Red Chilli Powder
    • ½ teaspoon Coriander Powder
    • ½ tablespoon Mint Leaves
    • 2 tablespoon Coriander Leaves
    • ½ cup Soaked Dry Green peas , cooked

    For Masala Gravy

    • 2 tablespoon Oil
    • ¼ teaspoon Turmeric Powder
    • ½ teaspoon Red Chilli powder
    • ½ teaspoon Dry Mango Powder / Amchur powder
    • ½ teaspoon Chaat Powder
    • 2 ½-3 Cups Water
    • 1 ½ -2 teaspoon Salt or as required

    For Assembling

    • 5-6 no's Puri , crushed
    • ¾ cup Masala Gravy
    • 2 tablespoon Tomatoes , chopped
    • 2 tablespoon Onions , chopped
    • 2 tablespoon Boiled Potatoes , mashed
    • 1 Tbsp Carrot , grated
    • ½ tablespoon Coriander Leaves
    • 2 tablespoon Sev
    • 1 pinch Garam masala powder
    • 1 pinch Chaat masala
    • 1 pinch salt
    • Lime Juice , few drops

    Instructions

    • Pressure cook soaked dry green peas , 2 boiled potatoes , ½ teaspoon of salt with 2 cups of water for 3-4 whistles.
    • Allow pressure to release on its own . Peel potato skin , mash and set it aside.

    For Masala Paste

    • Heat 2 teaspoon oil in a pan , add cinnamon stick , cloves, black peppercorns, cumin seeds , stone flower , Marathi moggu and saute well.
    • Add ½ cup chopped onions, 2- 3 garlic cloves , ½ inch ginger , 3 green chillies and saute till , raw smell goes off.
    • Now add in ½ teaspoon red chilli powder , coriander powder , mint leaves , coriander leaves and mix well.
    • Turn off the stove /heat . Allow it to cool
    • Transfer the sauteed masala into a blender and blend to a coarse paste.
    • Add ½ cup of boiled green peas ,to this blended masala , add little water and blend to a very smooth paste.

    For Masala Gravy

    • Heat 1 tablespoon of Oil , add ⅛ teaspoon of turmeric powder , ½ teaspoon of chilli powder .
    • Instantly add the above ground paste and mix well.
    • Add 1 ½ - 2 cups of water and bring it to boil.
    • Now add in salt , ½ teaspoon of dry mango powder and chaat masala .
    • Add in boiled green peas . Adjust water if needed , once it comes to boil ,keep it on simmer and set aside.

    To Assemble

    • Crush 5-6 puris , add 4 ladle full of hot masala gravy along with green peas.
    • Top it with chopped tomatoes, grated carrots, chopped onions, boiled potatoes and coriander leaves.
    • Sprinkle pinch of salt , chaat masala , garam masala powder.
    • Add few drops of lime juice and top with some crispy sev and serve immediately.

    Video

    Nutrition

    Calories: 311kcal
    Step by Step Directions for making Masala Puri Chaat

    Pressure cook soaked dry green peas , 2 boiled potatoes , ½ teaspoon of salt with 2 cups of water for 3-4 whistles.

    Masala Puri Chaat | Karnataka Style Masala Puri

    Allow pressure to release on its own . Peel potato skin , mash and set it aside.

    Masala Puri Chaat | Karnataka Style Masala Puri

    For Masala Paste

    Heat 2 teaspoon oil in a pan , add cinnamon stick , cloves, black peppercorns, cumin seeds , stone flower , Marathi moggu and saute well.

    Masala Puri Chaat | Karnataka Style Masala Puri

    Add ½ cup chopped onions, 2- 3 garlic cloves , ½ inch ginger , 3 green chillies and saute till , raw smell goes off. Now add in ½ teaspoon red chilli powder , coriander powder , mint leaves , coriander leaves and mix well.

    Masala Puri Chaat | Karnataka Style Masala Puri

    Turn off the stove /heat . Allow it to cool .

    Masala Puri Chaat | Karnataka Style Masala Puri

    Add ½ cup of boiled green peas ,to this blended masala .

    Masala Puri Chaat | Karnataka Style Masala Puri

    Add little water and blend to a very smooth paste.

    Masala Puri Chaat | Karnataka Style Masala Puri

    For Masala Gravy

    Heat 1 tablespoon of Oil , add ⅛ teaspoon of turmeric powder , ½ teaspoon of chilli powder.

    Masala Puri Chaat | Karnataka Style Masala Puri

    Instantly add the above ground paste and mix well.

    Masala Puri Chaat | Karnataka Style Masala Puri

    Add 1 ½ - 2 cups of water and bring it to boil.

    Masala Puri Chaat | Karnataka Style Masala Puri

    Now add in salt , ½ teaspoon of dry mango powder and chaat masala .

    Masala Puri Chaat | Karnataka Style Masala Puri

    Now add cooked green peas .

    Masala Puri Chaat | Karnataka Style Masala Puri

    Adjust water if needed , once it comes to boil , keep it on simmer and set aside.

    Masala Puri Chaat | Karnataka Style Masala Puri

    To Assemble

    Crush 5-6 puris , add 4 ladle full of hot masala gravy.

    Masala Puri Chaat | Karnataka Style Masala Puri

    Top it with chopped tomatoes, grated carrots, chopped onions, boiled potatoes and coriander leaves.Sprinkle pinch of salt , chaat masala , garam masala powder.

    Masala Puri Chaat | Karnataka Style Masala Puri

    Add few drops of lime juice and top with some crispy sev and serve immediately.

    Masala Puri Chaat | Karnataka Style Masala Puri

    Methi Thepla Recipe | Gujarati Thepla Recipe

    Published : July 19, 2019 | Last Update on March 28, 2021 By Muktha

    Methi Thepla

    Methi Thepla Recipe with step by step directions and video. Methi Thepla is most common and popular recipe from Gujarat. Methi Thepla is a Healthy Indian Flat bread made with fresh fenugreek leaves , whole wheat flour , gram flour and spices.

    Other Methi recipes on blog are Methi Dal , Methi Malai Matar , Methi Dry peas Curry and Aloo Methi

    Methi Thepla Recipe | Gujarati Thepla Recipe
    [feast_advanced_jump_to]

    About this recipe

    Thepla is a soft , thin , delicious Indian flatbreads . As fresh fenugreek leaves / methi leaves are used, it is called Methi Thepla. This can be served as a breakfast or as evening snack or into lunch box . Also this is one of the best travel friendly food , which can stay fresh for many days .

    Methi Thepla is made with whole wheat flour , besan , fenugreek leaves , yogurt and other spices . But along with gram flour , bajra flour (pearl flour) and jowar flour (sorghum flour) can also be added . Adding besan gives a kind of lightly crisp thepla. Incase if you need a very soft Thepla then only use whole wheat flour. Also if you are planning to store for many days then instead of yogurt use water to knead the dough.

    Watch Video

    Ingredients

    • Flour : Whole wheat flour , Gram flour , Jowar flour. You can also add Bajra flour ( pearl millet flour) into this.
    • Spices :Red chilli powder , Coriander powder , Jeera / CuminPowder ,Turmeric powder , Asafoetida and Salt
    • Fat : Oil or Ghee for roasting
    • Produce : Methi Leaves ( Fenugreek leaves) , Green chillies , Ginger
    • Dairy : Curds

    Many variations are done with addition of spices and herbs with thepla. Instead of ginger paste few add minced garlic too . Also for every 1 cup of methi leaves they do add ½ cup of coriander leaves too and knead the dough . But I am somehow hooked up with this recipe and I love the taste of this Methi thepla with ginger rather than minced garlic.

    You can try variations to thepla ,depending on the flavours and herbs you like. Other thepla recipes that are quite famous are Doodhi Thepla ( Bottle Gourd Thepla) and simple Acchari Thepla. Planning to do some pickle masala , once its ready , I'll update all related recipes .

    Thepla can be served with any pickle of your choice , curd or raita . Also when served as a late evening snack , few even dip it inside masala chai and enjoy this delicacy. But my personal favourite is with any pickle with a cup of hot masala chai .

    Methi Thepla Recipe | Gujarati Thepla Recipe

    If you are interested do check following flatbread recipes : Pathiri , Onion Paratha , Aloo Paratha , Gobi Paratha , Chinese Paratha , Paneer Paratha , Akki roti , Stuffed Rice Flour Paratha.

    Recipe

    Methi Thepla
    5 from 3 votes

    Methi Thepla | Gujarati Thepla Recipe

    Methi Thepla is a Healthy Indian Flat bread made with fresh fenugreek leaves , whole wheat flour , gram flour and spices.
    Prep Time10 minutes mins
    Cook Time20 minutes mins
    Resting Time20 minutes mins
    Total Time50 minutes mins
    Course: Breakfast, Snack
    Cuisine: Gujarati
    Keyword: Healthy, Indian Breads
    Servings: 12 Makes
    Calories: 108kcal
    Author: Muktha H S

    Ingredients

    • 1 Cup Whole wheat Flour
    • ¼ Cup Jowar / Sorghum Flour
    • ⅓ Cup Besan / Gram Flour
    • 1 Cup Fresh Fenugreek Leaves , chopped
    • ¾ teaspoon Green Chilli Paste , 2 green chillies crushed
    • ¾ teaspoon Ginger Paste , ½ inch ginger grated
    • ⅓ Cup Yogurt
    • ½ teaspoon Red Chilli Powder
    • ½ teaspoon Coriander Powder
    • ½ teaspoon Cumin / Jeera Powder
    • ¼ teaspoon Asafoetida /Hing
    • ¼ teaspoon Turmeric Powder
    • ¾ teaspoon Salt or as required
    • 1 ¼ tablespoon Cooking Oil
    • Water to sprinkle , if needed
    • Oil for roasting Thepla

    Instructions

    • Take whole wheat flour , jowar flour(optional) and besan/gram flour in a bowl.
    • Add in green chilli paste , ginger paste, all other spice powders and salt .
    • Now add in 1 cup of finely chopped fenugreek leaves / methi leaves.
    • Mix well together with hands, add ¼ cup of curds and mix the flour well.
    • Add 2 tablespoon of oil to the above mixture , sprinkle some water (if needed) and prepare smooth and stiff dough.
    • Add ½ teaspoon of oil on top of the dough and cover it with a kitchen napkin. Allow it to rest for 20 -30 minutes.
    • After 30 minutes,remove the kitchen napkin, knead the dough , make small lemon size balls and keep it aside.
    • Dust the working top with some dry whole wheat flour , place the dough ball ,press it in hand ,sprinkle some flour on top of it and roll the dough into a 5-6 inch diameter round circle.
    • Heat the griddle to super hot and place the rolled roti over it .Drizzle oil around the corners and above the roti .
    • As soon as it looks dry on top and small bubbles about to appear ,flip the roti and cook on other side by applying some oil on corners and top .
    • Flip and cook ,couple of times till brown spots appears on each side and its evenly cooked .
    • Serve with pickle , curds/raita or with Masala Chai.

    Video

    Notes

    • Fenugreek leaves tends to release water when it comes in contact with salt , hence make a stiff dough , as it may release some water while resting.
    • To increase shelf life , add only water to knead dough skip yogurt. 
    • Gram Flour , Jowar flour can be omitted ,if you need Soft Thepla

    Nutrition

    Calories: 108kcal

    Steps by Steps directions to make Methi Thepla

    Take whole wheat flour , jowar flour(optional) and besan/gram flour in a bowl.

    Methi Thepla Recipe | Gujarati Thepla Recipe

    Add in green chilli paste , ginger paste, all other spice powders and salt .

    Methi Thepla Recipe | Gujarati Thepla Recipe

    Now add in 1 cup of finely chopped fenugreek leaves / methi leaves.

    Methi Thepla Recipe | Gujarati Thepla Recipe

    Mix well together with hands, add ¼ cup of curds and mix the flour well.

    Methi Thepla Recipe | Gujarati Thepla Recipe

    Add 1 tablespoon of oil to the above mixture , sprinkle some water (if needed) and prepare smooth and stiff dough.

    Methi Thepla Recipe | Gujarati Thepla Recipe

    Add ½ teaspoon of oil on top of the dough and cover it with a kitchen napkin. Allow it to rest for 20 -30 minutes.

    Methi Thepla Recipe | Gujarati Thepla Recipe

    After 30 minutes,remove the kitchen napkin, knead the dough , make small lemon size balls and keep it aside.

    Methi Thepla Recipe | Gujarati Thepla Recipe

    Dust the working top with some dry whole wheat flour , place the dough ball ,press it in hand ,sprinkle some flour on top of it and roll the dough into a 5-6 inch diameter round circle.

    Methi Thepla Recipe | Gujarati Thepla Recipe

    Heat the griddle to super hot and place the rolled roti over it .Drizzle oil around the corners and above the roti .

    Methi Thepla Recipe | Gujarati Thepla Recipe

    As soon as it looks dry on top and small bubbles about to appear ,flip the roti and cook on other side by applying some oil on corners and top .

    Methi Thepla Recipe | Gujarati Thepla Recipe

    Flip and cook ,couple of times till brown spots appears on each side and its evenly cooked .

    Methi Thepla Recipe | Gujarati Thepla Recipe

    Serve with pickle , curds/raita or with Masala Chai . Serve it for breakfast or as a snack.

    Methi Thepla Recipe | Gujarati Thepla Recipe

    Kolhapuri Misal Pav | Kolhapuri Usal Recipe

    Published : July 14, 2019 | Last Update on September 27, 2022 By Muktha

    Kolhapuri Misal Pav

    Kolhapuri Misal Pav is one of the addictive street food from Maharashtrian Cuisine . Misal is a spicy curry made with sprouted moth beans , topped with farsan , onions and served with pav and kat ( a spicy red curry ) . Kolhapuri cuisine is famous for its fiery, super hot meals and this too is not different. In spite of wiping your nostrils and eyes you will enjoy devouring this meal.

    Kolhapuri Misal Pav | Kolhapuri Usal Recipe

    I was introduced to this fiery meal a decade before by a friend in Pune .She took me to a college canteen and ordered 2 plates of Misal Pav . Within minutes we were served with 2 plates of pav, a sprouted lentil curry topped with farsan , onions , lemon wedges and a katori of red curry . I was wondering on how to eat this ....., soon my friend smiled and asked me to pour some red gravy on sprouted lentils.

    Took a small piece of pav dipped it in a gravy and took a spoonful of lentils together with chopped onions and crunchy farsan . I just followed her and after that , I was actually lost for few minutes. OMG , It tasted amazingly good with bursting flavours . Since then , till date my love for Kolhapuri Misal Pav continues.

    After lot many trails and changes , I have settled with this recipe for Kolhapuri Misal Pav . Its a fail proof recipe , you can get authentic Kolhapuri Misal / Usal taste from this . I have altered this recipe to suit my taste but incase if you want fiery super hot kat then you can go ahead adding more chilli powder 🙂

    Though there are many steps and images , it's easy to make, hence go ahead , make it and enjoy.

    You can also serve Kolhapuri Misal Pav without Kat Curry also , but just make sure to make Misal curry bit thinner , in that case.

    Other popular recipes from Maharashtrian Cuisine on blog are Sabudana Khichdi , Sabudana Vada , Pav Bhaji and Kolhapuri Egg Masala.

    How to make Kolhapuri Misal

    For Masala Paste : Heat oil in a pan , add finely chopped onions and fry till it turns golden brown. Add grated dry coconut and fry along with onion , till it starts turning brown.

    Kolhapuri Misal Pav | Kolhapuri Usal Recipe

    Now add in 1 ½ tablespoon Kolhapuri Masala Powder to this and saute well.

    Kolhapuri Misal Pav | Kolhapuri Usal Recipe

    Allow it to cool . Transfer into a blender .

    Kolhapuri Misal Pav | Kolhapuri Usal Recipe

    Blend to a smooth paste by adding little water.

    Kolhapuri Misal Pav | Kolhapuri Usal Recipe

    Cooking Misal: Healt oil in a pan , add mustard seeds to it. Once it pops and splutter, add cumin seeds and curry leaves.

    Kolhapuri Misal Pav | Kolhapuri Usal Recipe

    Add chopped onions, turmeric powder and hing. Saute till onions turns translucent .

    Kolhapuri Misal Pav | Kolhapuri Usal Recipe

    Now add in peanuts, sprouts, chopped potatoes and salt and saute well everything .

    Kolhapuri Misal Pav | Kolhapuri Usal Recipe

    Add in above ground masala paste , mix well and stir couple of minutes until the masala is evenly cooked . Add 1 cup of mixer rinsed water and cook till oil starts to release from the corners.

    Kolhapuri Misal Pav | Kolhapuri Usal Recipe

    Now add 4 cups of water and cook in medium flame and bring to boil.

    Kolhapuri Misal Pav | Kolhapuri Usal Recipe

    Add salt ,tamarind extract, jaggery , cover and cook until the sprouts and potatoes are cooked totally.

    Kolhapuri Misal Pav | Kolhapuri Usal Recipe

    Simmer for 5-8 minutes and set aside till use.

    Kolhapuri Misal Pav | Kolhapuri Usal Recipe

    Misal is ready to serve , top it with crispy farsan ,onions and chopped coriander leaves along with lemon wedges.

    Kolhapuri Misal Pav
    Preparation of Kat :

    Heat Oil in a pan , add onions and fry till it turns translucent . For this add in Kolhapuri Masala powder , mix in well and cook for about 2 minutes on medium heat.

    Kolhapuri Misal Pav | Kolhapuri Usal Recipe

    Add chopped tomatoes and cook well .

    Kolhapuri Misal Pav | Kolhapuri Usal Recipe

    Now add in coconut and fry well till aromatic.

    Kolhapuri Misal Pav | Kolhapuri Usal Recipe

    Allow it to cool.

    Kolhapuri Misal Pav | Kolhapuri Usal Recipe

    Transfer the above cooked masala into a blender , add little water and blend to a very smooth paste.

    Kolhapuri Misal Pav | Kolhapuri Usal Recipe

    Heat 2 tablespoon of oil in a pan , add turmeric powder, hing and chilli powder .

    Kolhapuri Misal Pav | Kolhapuri Usal Recipe

    Instantly add the above ground Kat masala paste , mix well and add about 1 cup of water and blend well.

    Kolhapuri Misal Pav | Kolhapuri Usal Recipe

    Once it comes to boil , add in tamarind extract and salt as per taste.

    Kolhapuri Misal Pav | Kolhapuri Usal Recipe

    Simmer for few minutes , turn off the stove and preserve it till use. 

    Kolhapuri Misal Pav | Kolhapuri Usal Recipe

    Serve along with Misal Pav.

    Kolhapuri Misal Pav

    Serve prepared Misal in a bowl , top it with chopped onions , coriander leaves and crispy farsan along with lemon wedges , pav and a small bowl of spicy kat curry.

    Kolhapuri misal pav

    Recipe

    Kolhapuri Misal Pav
    5 from 3 votes

    Kolhapuri Misal Pav | Kolhapuri Usal

    A spicy gravy prepared with sprouted moth beans and flavoured with Kolhapuri misal masala ,topped with crispy farsan , chopped onions and served alongside of pav.
    Prep Time25 minutes mins
    Cook Time50 minutes mins
    Total Time1 hour hr 15 minutes mins
    Course: Snack
    Cuisine: Kolhapuri, Maharstarian
    Keyword: Street Food
    Servings: 8 People
    Author: Muktha H S

    Ingredients

    For Kolhapuri Masala Paste

    • 1 No Onion , large
    • ½ cup Dry Coconut , grated
    • 1 ½ tablespoon Kolhapuri Masala powder , refer notes

    Other Ingredients

    • 2 tbsp Oil
    • 1 teaspoon Mustard Seeds
    • 1 teaspoon Jeera Seeds
    • 3 sprigs Curry Leaves
    • ¼ teaspoon Hing , Asafoetida
    • 1 no Onion , large , chopped
    • 3 cups Sprouted Moth Beans , Matki
    • ⅓ cup Dry Roasted Ground Nuts
    • ½ Cup Potatoes , cubed ,optional
    • 1 tablespoon Tamarind Extract
    • 1 teaspoon Jaggery Powder
    • 5-6 Cups water
    • Salt as required

    For Kat Masala Paste

    • 1 no Onion , Large
    • 2 no's Tomatoes , Large
    • ½ cup Dry Coconut , grated
    • 1 tablespoon Oil
    • 2 tablespoon Kolhapuri Masala Powder

    For Kat Curry

    • 2 tablespoon Cooking Oil , original recipe calls for 5 Tbsp
    • ½ teaspoon Turmeric Powder
    • ¼ teaspoon Hing / Asafoetida
    • 2 tablespoon Red Chilli Powder , original recipe calls for 5-6 Tbsp
    • 3 tablespoon Tamarind Extract
    • 1 cup Water
    • Salt as required

    Instructions

    Preparation of Masala Paste

    • Heat oil in a pan , add finely chopped onions and fry till it turns golden brown.
    • Add grated dry coconut and fry along with onion , till it starts turning brown.
    • Now add in 1 ½ tablespoon Kolhapuri Masala Powder to this and saute well.
    • Allow it to cool . Transfer into a blender and blend to a smooth paste by adding little water.

    Preparation of Misal

    • Healt oil in a pan , add mustard seeds to it. Once it pops and splutter, add cumin seeds and curry leaves.
    • Add chopped onions, turmeric powder and hing. Saute till onions turns translucent .
    • Now add in peanuts, sprouts, chopped potatoes and salt and saute well everything.
    • Add in above ground masala paste , mix well and stir couple of minutes until the masala is evenly cooked and oil starts to release from the corners.
    • Now add 5-6 cups of water and cook in medium flame. When it begins to boil, simmer and cook until the sprouts and potatoes are cooked totally.
    • Add tamarind extract, jaggery , adjust salt and simmer for few more minutes for all of the flavours to mix effectively.

    For Kat Masala Paste:

    • Heat oil in a pan , add onions and fry till it turns translucent .
    • For this add in Kolhapuri Masala powder , mix in well and cook for about 2 minutes on medium heat.
    • Add chopped tomatoes and cook well .
    • Now ,add in grated coconut , mix well and cook till aromatic. Allow it to cool.
    • Transfer the above cooked masala into a blender , add little water and blend to a very smooth paste.

    Making Kat Curry

    • Heat 2 tablespoon of oil in a pan , add turmeric powder, hing and chilli powder .
    • Instantly add the above ground Kat masala paste , mix well and add about 1 cup of water and blend well. 
    • Once it comes to boil , add in tamarind paste and salt as per taste.Simmer for few minutes and preserve it till use.

    Assemble

    • Serve prepared Misal in a bowl , top it with chopped onions , coriander leaves and crispy farsan along with lemon wedges , pav and a small bowl of spicy kat curry.

    Video

    Notes

    • For Kolhapuri Masala Powder ,refer the recipe link here 
    • You can serve Misal Pav without Kat Curry also,.Kat Curry also known rasa is added to lentil curry (misal) to get that thin consistency 
     

    Mavinakayi Chitranna | Raw Mango Rice

    Published : June 24, 2019 | Last Update on October 6, 2022 By Muktha

    mavinakayi-chitranna

    Mavinakayi Chitranna | Raw Mango Rice is a one of the traditional recipe from Karnataka . This tangy , spicy rice is most common during Mango Season, especially during Ugadi .

    Also to add on , any of the religious ceremony is incomplete with Chitranna or Puliyogare in Southern regions of Karnataka. Rice being our staple food ,one can find wide variety of Rice Recipes in Karnataka Cuisine and hence on my blog 🙂

    mavinakayi-chitranna
    [feast_advanced_jump_to]

    About this recipe

    As Mavinakayi Chitranna is quite famous in our region , each and every family has their own recipe . And this recipe is from my Mom's kitchen . Chitranna basically means a tempered yellow rice , many varieties can be made. Most common are Nimbe Hannu masala Chitranna (Lemon Rice) , Mavinakayi Chitranna (Raw Mango Rice) , Easy Chitranna , Tomato Chitranna and Heralekai Chitranna (Citron Lime Rice) . Though it's all about tempering the cooked rice , main ingredients and methods varies from each recipe.

    Other most popular Rice recipes from Karnataka are : Bisi Bele Bath , Vegetable Bath , Tomato Bath , Khara Pongal and Hesaru Bele Anna .

    To make this traditional raw mango rice ,initially roast spices till fragrant and then ground to a coarse paste. Tempered and cooked with grated raw mango to get Mavinakayi Gojju ( Raw Mango Masala Paste ) . Later cooked rice is mixed with Mavinakayi Gojju | Masala Paste . Depending on one's taste , level of sourness and spice , mango masala paste is mixed with cooked rice and served.

    In this Raw Mango Rice , I have used garlic . Though it adds lots of taste to mango rice , you can skip if you don't use garlic. If you plan to store this Raw Mango Masala Paste | Mavinakayi Gojju , then cook well and store in a dry glass jar . It stays good for about 15 days , when refrigerated.

    Mavinakayi Chitranna | Raw Mango Rice

    How to make Mavinkayi Chitranna

    Dry roast dry red chillies , fenugreek seeds , cloves, cinnamon stick and jeera seeds. Allow it to cool.

    Mavinakayi Chitranna | Raw Mango Rice

    In a blender , add ⅓ cup of fresh grated coconut , green chillies , garlic , roasted spices and ¼ teaspoon turmeric powder.

    Mavinakayi Chitranna | Raw Mango Rice

    Blend to a coarse paste without adding water.

    Mavinakayi Chitranna | Raw Mango Rice

    Heat 3-4 tablespoon of cooking oil in a deep pan/kadai.

    Mavinakayi Chitranna | Raw Mango Rice

    Add ½ teaspoon mustard seeds, allow it to crackle . Then add groundnuts , bengal gram and urad dal . Fry well , till it turns brown.

    Mavinakayi Chitranna | Raw Mango Rice

    Add Curry leaves and dried red chillies , fry well.

    Mavinakayi Chitranna | Raw Mango Rice

    Now add in ground masala paste and fry well.

    Mavinakayi Chitranna | Raw Mango Rice

    Add 1 cup of grated raw mango and saute well . Add 1 teaspoon of salt and mix.

    Mavinakayi Chitranna | Raw Mango Rice

    Continue to cook till oil releases from corners.

    Mavinakayi Chitranna | Raw Mango Rice

    Now add in cooked rice and mix well. Turn off the stove .

    Mavinakayi Chitranna | Raw Mango Rice

    Add in chopped coriander leaves , add salt 1 ½ -2 tsp,adjust accordingly , mix well with rice.

    Mavinakayi Chitranna | Raw Mango Rice

    Ready to Serve

    Mavinakayi Chitranna | Raw Mango Rice

    Recipe

    mavinakayi-chitranna
    4.50 from 2 votes

    Mavinakayi Chitranna | Raw Mango Rice

    Tangy , Spicy and Delicious Rice made with Raw Mango is one of the most popular recipe from Karnataka.
    Prep Time15 minutes mins
    Cook Time15 minutes mins
    Total Time30 minutes mins
    Course: Breakfast, Main Course
    Cuisine: Andhra, Karnataka
    Keyword: Rice Varities
    Servings: 6 People
    Calories: 256kcal
    Author: Muktha H S

    Ingredients

    For Masala Paste

    • 8 no's Dry Red Chilli ,dry roasted
    • 10 no's Methi / Fenugreek seeds , dry roasted
    • ½ teaspoon Jeera Seeds ,dry roasted
    • ⅓ cup Fresh Coconut
    • 4-5 no's Garlic Cloves,medium size
    • 3 no's Green Chilli
    • 2 no's Cloves
    • ½" inch Cinnamon Stick
    • ¼ teaspoon Turmeric Powder

    For Tempering

    • 3 tablespoon Cooking Oil
    • 2 tablespoon Ground nuts
    • ½ Tsp Mustard Seeds
    • 2 Sprigs Curry Leaves
    • 2 no's Dry Red Chillies , Broken
    • ½ tablespoon Chana Dal / Bengal Gram
    • 1 tablespoon Urad Dal

    Other Ingredients

    • 1 Cup Raw Mango , grated
    • 5 Cups Cooked Rice
    • 2 tablespoon Coriander Leaves
    • 21/2 -3 teaspoon Salt or as required

    Instructions

    For Masala Paste

    • Dry roast dry red chillies , fenugreek seeds , cloves, cinnamon stick and jeera seeds. Allow it to cool.
    • In a blender , add ⅓ cup of fresh grated coconut , green chillies , garlic , roasted spices and ¼ teaspoon turmeric powder.
    • Blend to a coarse paste without adding water.
    • Heat 3-4 tablespoon of cooking oil in a deep pan/kadai.
    • Add ½ teaspoon mustard seeds, allow it to crackle . Then add groundnuts , bengal gram and urad dal . Fry well , till it turns brown.
    • Add Curry leaves and dried red chillies , fry well.
    • Now add in ground masala paste and fry well.
    • Add 1 cup of grated raw mango and saute well .Add 1 teaspoon of salt and mix.
    • Continue to cook till oil releases from corners.
    • Now add in cooked rice and mix well. Turn off the stove
    • Add in chopped coriander leaves , salt 1 ½ -2 teaspoon ( refer notes) and mix well with the rice and serve.

    Video

    Notes

    • As sourness of mango varies , keep a check on masala paste before mixing with rice.
    • Before adding the rice , remove ¼ -⅓ cup of prepared masala paste (mavinakayi gojju ) and set aside. After mixing rice with remaining masala , check the taste and add the masala paste accordingly.
    • Note salt is added while cooking Masala paste as well as while mixing with rice at final step.
    • Also if you are serving it later , then do check the salt and tang in rice as it will absorb the flavours and may tend to taste mild. So it's necessary to check before serving and adjust salt and masala paste as  needed.

    Nutrition

    Calories: 256kcal

    You may also like

    • raw mango rasam
      Raw Mango Rasam Recipe
    • sweet corn usli
      Sweet corn sundal | Sweet corn usli recipe
    • Ugadi-recipes@palatesdesire
      Obbattu | Bele Holige | Puran Poli
    • obbattu-saaru-recipe@palates-desire
      Obbattu Saaru Recipe | Holige Saaru

    Onion Egg Bhurji

    Published : June 12, 2019 | Last Update on September 29, 2022 By Muktha

    onion egg bhurji

    Onion Egg Bhurji is a simple, quick and delicious recipe , it's the Indian style scrambled egg with onions , herbs and spices.

    Egg Bhurji or anda bhurji is the name given for Indian style scrambled egg which are more firm whem compared to runny scrambled eggs.

    It takes less than 15 minutes and it's one of the most favourite recipe among Bachelors. Also this goes very well as starter with any drink .

    Onion_Egg_Bhurji
    [feast_advanced_jump_to]

    About this recipe

    To make a perfect onion egg bhurji , the main key is frying onions. Adding lots of finely chopped onions and frying till golden brown results in a tasty and delicious bhurji.

    As I had lots and lots of requests for making a simple egg recipe that goes well as side dish , I opted to post this recipe.

    Three main types of Egg Bhurji widely cooked across India are Vegetable based Bhurji , South Indian style masala Egg Bhurji and Basic onion egg bhurji.

    Vegetable based Egg Bhurji's are tasty and nutritious , few of my favourites include Beans Egg Bhurji , Moringa Egg Bhurji , Mumbai Egg Bhurji and Beetroot Egg Bhurji .

    Other egg based recipes on blog are : Kolhapuri Egg Masala , Kerala Egg Masala , Simple Egg Curry and Scrambled Egg Curry .

    Also If you are looking for Egg Breakfast ,try this Oats Omelette , Spanish Potato Omelette , Scrambled Egg & Mushroom and Shakshuka

    Watch Video

    How to make Onion Egg Bhurji

    Heat 2-3 tablespoon of oil in a skillet / frying pan.

    Onion Egg Bhurji

    Add 2 cups of finely chopped onions and fry till raw smell vanishes.

    Onion Egg Bhurji

    Now add in chopped green chillies and saute well , till onions turns translucent.

    Onion Egg Bhurji

    Break in 3 eggs, mix and saute till eggs are well cooked .

    Onion Egg Bhurji

    Scramble egg well till it becomes small bits .

    Onion Egg Bhurji

    Add salt and freshly black pepper powder ,mix well everything.

    Onion Egg Bhurji

    Now add in freshly chopped coriander leaves ,mix well and serve hot.

    Onion Egg Bhurji

    Serve hot with phulka or serve as a starter/snack along with a drink.

    Onion_Egg_Bhurji

    Recipe

    onion egg bhurji
    5 from 2 votes

    Onion Egg Bhurji

    Easy , quick and delicious Indian style scrambled egg with onions , herbs and spices.,
    Prep Time5 minutes mins
    Cook Time12 minutes mins
    Total Time17 minutes mins
    Course: Side Dish, Starters
    Cuisine: Indian
    Keyword: Bachelor's Cooking, Egg
    Servings: 3 People
    Calories: 244kcal
    Author: Muktha H S

    Ingredients

    • 3 no Whole Eggs
    • 3 no's Onions , Medium size finely chopped
    • 1 teaspoon Green Chillies , finely chopped
    • 2-3 tablespoon Cooking Oil
    • ¾ -1 teaspoon Salt or as required
    • 1 teaspoon Black Pepper powder or as required
    • 4 tablespoon Coriander Leaves , chopped

    Instructions

    • Heat 2-3 tablespoon of oil in a skillet / frying pan.
    • Add 2 cups of finely chopped onions and fry till raw smell vanishes.
    • Now add in chopped green chillies and saute well , till onions turns translucent.
    • Break in 3 eggs, mix and saute till eggs are well cooked .
    • Scramble egg well till it becomes small bits .
    • Add salt and freshly ground black pepper powder ,mix well everything.
    • Now add in freshly chopped coriander leaves ,mix well and serve hot.

    Video

    Nutrition

    Calories: 244kcal

    You may also like

    • spanish-potato-omelette-cut-into-wedges
      Spanish Potato Omelette
    • Beans-egg-bhurji-recipe
      French Beans Egg Bhurji
    • scrambled Egg Curry
      Scrambled Egg Curry
    • shakshuka recipe
      Shakshuka | How to make Shakshuka recipe

    Set Dosa Recipe | Sponge Dosa Recipe

    Published : June 8, 2019 | Last Update on September 27, 2019 By Muktha

    Set Dosa

    Set Dosa is a speciality from Karnataka . This Dosa variety is different from regular Dosa in texture. Set Dosa is more soft , spongy , light and fluffier when compared with regular Dosa. As this Dosa is smaller in size , a set of 2-3 Dosa's are served , hence the name Set Dosa. It is also referred as Khali/Sada Dosa in few food joints as it is not filled with potato stuffing at the centre. Vegetable Saagu is served instead of Sambar along with this Set Dosa.

    Set Dosa

    As I mention everywhere , Dosa is a Complete Protein .Because it is a combination of Lentils and Cereals. For all those who over think about their diet and try to add protein in every meal , then do consider DOSA / IDLI also. Though most of the ingredients used in making Dosa are same , variations in measurements, fermentation yields different taste/ texture dosa.

    Dosa is one of the most common Breakfast in any South Indian house. I'm no where different , one variety of Dosa is must per week at home. Other Varieties of Dosa which are regular at home are Adai , Oats Dosa , Green Gram Dosa , Fenugreek Seeds Dosa and Gobi Masala Dosa .

    RECIPE CARD FOR SET DOSA | SPONGE DOSA RECIPE

    Recipe

    Set Dosa
    5 from 1 vote

    Set Dosa Recipe

    Set Dosa is a soft , spongy , light and fluffier Dosa from Karnataka.

    Prep Time6 hours hrs 15 minutes mins
    Cook Time20 minutes mins
    Fermentation8 hours hrs
    Total Time14 hours hrs 35 minutes mins
    Course: Breakfast
    Cuisine: Karnataka
    Keyword: Breakfast_Ideas, Dosa, Karnataka
    Servings: 7 people
    Calories: 223kcal
    Author: Muktha H S

    Equipment

    • Griddle / Tawa
    • Mixer Jar or Blender

    Ingredients

    • 1 1 /2 cup Raw Rice
    • ½ cup Urad Dal
    • ½ cup Poha
    • ¼ teaspoon Methi Seeds
    • ½-3/4 Cup Water or as required
    • 1 teaspoon Salt or as required
    • Oil or Ghee ,for roasting Dosa

    Instructions

    • Rinse and Wash raw rice , urad dal , methi seeds , 3-4 times and drain water.
    • Add water and soak it for about 6 hours.
    • In a separate bowl , add ½ cup poha , rinse and wash thoroughly.
    • Soak poha for about 30 minutes , prior to grinding batter.
    • After 6 hours of soaking , drain water completely and add rice , urad dal and soaked poha into a wet mixer jar or wet grinder
    • Grind to a smooth batter , by adding very little water part by part.
    • Transfer batter into a deep container and add 1 teaspoon of salt .
    • Stir in the batter with bare hands and mix well.
    • Cover the batter and allow to ferment for 7-8 hours or overnight.
    • Next Day or After fermentation , mix the batter well with a ladle.
    • Heat griddle / tawa , wipe it with a cloth and pour a ladle full of batter and swirl the batter to spread like a dosa. Spread batter bit thick and into a small dosa.
    • Cover the dosa with lid and cook for 1-2 minutes.
    • Remove lid , drizzle some oil or ghee , fold and serve . You can even flip the dosa to other side and cook for less than 30 seconds.
    • Serve Set Dosa Hot with Coconut Chutney and Vegetable Saagu.

    Video

    Nutrition

    Calories: 223kcal

    Step by Step Directions for making Set Dosa

    Rinse and Wash raw rice , urad dal , methi seeds , 3-4 times and drain water.

    Set Dosa Recipe | Sponge Dosa Recipe

    Add water and soak it for about 6 hours.

    Set Dosa Recipe | Sponge Dosa Recipe

    In a separate bowl , add ½ cup poha , rinse and wash thoroughly.

    Set Dosa Recipe | Sponge Dosa Recipe

    Soak poha for about 30 minutes , prior to grinding batter.

    Set Dosa Recipe | Sponge Dosa Recipe

    After 6 hours of soaking , drain water completely and add rice , urad dal and soaked poha into a wet mixer jar or wet grinder.

    Set Dosa Recipe | Sponge Dosa Recipe

    Grind to a smooth batter , by adding very little water part by part.

    Set Dosa Recipe | Sponge Dosa Recipe

    Transfer batter into a deep container and add 1 teaspoon of salt . Stir in the batter with bare hands and mix well.

    Set Dosa Recipe | Sponge Dosa Recipe

    Cover the batter and allow to ferment for 7-8 hours or overnight.

    Set Dosa Recipe | Sponge Dosa Recipe

    Next Day or After fermentation , mix the batter well with a ladle.

    Set Dosa Recipe | Sponge Dosa Recipe

    Heat griddle / tawa , wipe it with a cloth and pour a ladle full of batter and swirl the batter to spread like a dosa. Spread batter bit thick and small.

    Set Dosa Recipe | Sponge Dosa Recipe

    Cover the dosa with lid and cook for 1-2 minutes.

    Set Dosa Recipe | Sponge Dosa Recipe

    Remove lid , drizzle some oil or ghee , fold and serve . You can even flip the dosa to other side and cook for less than 30 seconds.

    Set Dosa Recipe | Sponge Dosa Recipe

    Serve Set Dosa Hot with Coconut Chutney and Vegetable Saagu.

    Set Dosa

    Kolhapuri Masala | Kolhapuri Chutney

    Published : May 29, 2019 | Last Update on September 27, 2022 By Muktha

    Kolhapuri Masala is a special blend of roasted spices , dry coconut , onion and garlic. I prepared this masala, specially to make Kolhapuri Misal . I was at my Home Town with my kiddo for his summer holidays and my Sis & Niece both were behind me for this Misal Pav .

    So I thought to serve them with authentic Kolhapuri Misal Pav with kat. Hence I freshly dry roasted all spices and prepared this masala for further use. If Kolhapuri Masala | Kolhapuri Chutney is ready , then making kat and misal becomes very easy.

    Kolhapuri Masala

    Kolhapuri food is famous for its spice and heat . With Kolhapuri Food ,I can imagine myself with watery eyes and running nose but still enjoy my food. It's only a scene from restaurant but at home ,whenever I prepare Kolhapuri Food , I make sure it's not super hot as others don't dare to eat such a super Hot Spicy curries . With this Homemade Spice Blend , you can always have freedom to adjust heat accordingly. This recipe is from my neighbour ,who is from Kolhapur. So blindly adopted this , as Misal made with this Masala tastes super delicious.

    Kolhapuri Egg Masala and Kolhapuri Biryani are regular at home. But never tried it with this homemade spice blend , I'll try with this masala powder and update you all soon . This is a basic Kolhapuri Masala recipe also known as Kolhapuri Chutney which is used in quite a few recipes to get that Kolhapuri flavours. But to make authentic Kolhapuri Cuisines , I do add few other spices along with this spice blend. With this Spice Blend at home, there are many recipes lining up in the list along with Kolhapuri Chicken Curry and Veg Masala. I'll soon update the blog with all these recipes.

    Other Spice blends on blog are : Sambar Powder , Biryani Masala , Tandoori Masala , Chai Masala and Thandai Masala Powder

    RECIPE CARD FOR KOLHAPURI MASALA | KOLHAPURI CHUTNEY

    Recipe

    Kolhapuri Masala
    No ratings yet

    Kolhapuri Masala | Kolhapuri Chutney

    Kolhapuri Masala is a blend of roasted spices , onion , garlic , dry coconut and coriander leaves. It is widely used in Kolhapuri Cuisines to make super hot dishes .
    Prep Time5 minutes mins
    Cook Time15 minutes mins
    Resting Time30 minutes mins
    Total Time50 minutes mins
    Course: DIY
    Cuisine: Kolhapuri, Maharstarian
    Keyword: Basic, Masala Powder, Spice Blends
    Servings: 80 grams (approx)
    Author: Muktha H S

    Equipment

    • Griddle
    • Mixer Jar or Blender

    Ingredients

    • 50 grams Dry Red Chillies ( Guntur or any spicy version)
    • 10 no's Byadgi Red Chillies
    • ¼ Cup Coriander seeds
    • 3-4 no Cloves
    • ¼ inch Cinnamon Sticks
    • 1 teaspoon Black Peppercorns
    • 1 Tsp Jeera / Cumins Seeds
    • 1 teaspoon Sesame Seeds
    • ½ teaspoon Saunf /Fennel Seeds
    • ½ no Onion , medium Size
    • 4 no Garlic Cloves
    • ¼ Cup Coriander Leaves
    • 15 grams Dry Coconut ,2 tablespoon Shredded approx
    • ½ tablespoon Oil

    Instructions

    • Dry roast red chilli till pungent on a griddle and set aside.
    • On the same griddle , Dry roast ¼ cup coriander seeds ,till fragrant and set aside along with roasted red chillies.
    • Dry roast all other spices ,till its aromatic and set aside along with roasted red chillies and coriander seeds.
    • Add sliced onions and garlic cloves, add ½ tablespoon of Oil and saute.
    • Fry till brown.
    • Now add in dry coconut and fry till golden brown along with fried onions and garlic.
    • Add coriander leaves and saute till crisp.
    • Once it turns crisp , Turn Off the Heat / Stove .
    • Add in all the roasted spices back on to the griddle and spread it evenly.
    • Sun dry for minimum 30 minutes.
    • Place all sun dried spices into a mixer jar / blender .
    • Blend in a fine powder . Store in airtight jar and use it as required.

    Video

    Notes

    • You can double or triple the recipe .
    • In place of  Dry red chilli , you can use red chilli powder directly.If doing so , use ½ red chilli powder
    • Shelf life is about 45 days 

    Step By Step Directions for making Kolhapuri Masala

    Dry roast red chilli till pungent on a griddle and set aside.

    Kolhapuri Masala | Kolhapuri Chutney

    On the same griddle , Dry roast ¼ cup coriander seeds ,till fragrant and set aside along with roasted red chillies.

    Kolhapuri Masala | Kolhapuri Chutney

    Dry roast all other spices ,till its aromatic and set aside along with roasted red chillies and coriander seeds. If you are doing it in larger quantity dry roast spices separately . As I did for small quantity, roasted spices together. Add jeera , saunf and sesame seeds at last , as it pops up immediately.

    Kolhapuri Masala | Kolhapuri Chutney

    Add sliced onions and garlic cloves, add ½ tablespoon of Oil and saute.

    Kolhapuri Masala | Kolhapuri Chutney

    Fry till brown

    Kolhapuri Masala | Kolhapuri Chutney

    Now add in dry coconut and fry till golden brown along with fried onions and garlic.

    Kolhapuri Masala | Kolhapuri Chutney

    For this , Add coriander leaves and saute till crisp.

    Kolhapuri Masala | Kolhapuri Chutney

    Once it turns crisp , Turn Off the Heat / Stove .

    Kolhapuri Masala | Kolhapuri Chutney

    Add in all the roasted spices back on to the griddle and spread it evenly. The heat from the griddle helps to crisp the spices ,though it's optional . And sun dry it for minimum 30 minutes. You can keep it for a day too under sun.

    Kolhapuri Masala | Kolhapuri Chutney

    Place all sun dried spices into a mixer jar / blender .

    Kolhapuri Masala | Kolhapuri Chutney

    Blend to a fine powder .

    Kolhapuri Masala | Kolhapuri Chutney

    Store in airtight jar and use it as required.

    Kolhapuri Masala | Kolhapuri Chutney


    Spicy Drumstick Green Curry

    Published : May 22, 2019 | Last Update on February 27, 2020 By Muktha

    Spicy Drumstick Green Curry

    Spicy Drumstick Green Curry is a most popular curry from Karnataka , around Bangalore Mysore region. This curry is a vegetarian version of a famous non vegetarian curry but with less spices and slight modifications. Like most of South Indian curries , fresh coconut is used to make this curry . If you don't get fresh coconut then you can soak dry coconut either in warm water or warm milk and use accordingly . Though there will be slight change in taste , you can still enjoy the similar taste.

    Spicy Drumstick Green Curry

    Drumstick sambar with pearl onions is one of the most loved sambar among most of us. But believe me ,once after you try this curry undoubtedly it becomes your next favourite Drumstick Curry . Unlike regular sambar , the spices used here are entirely different with less procedure for cooking. Other Drumstick recipes which I usually prepare at home are Drumstick Masala Fry , Drumstick Rasam and Drumstick Sambar .

    Health Benefits : Both Drumsticks and their leaves are very rich in Calcium and Iron. Drumstick Leaves also known as Moringa Leaves are one of the superfood throughout the world. It is rich in B Vitamins , folic acid and also calcium . Hence it is given to pregnant women and also lactating mothers. It strengthens the bone and keeps the digestive system in check. Also adding this superfood in regular diet helps to lower blood sugar levels and promote heart health .

    RECIPE CARD FOR SPICY DRUMSTICK GREEN CURRY:

    Recipe

    Spicy Drumstick Green Curry
    No ratings yet

    Spicy Drumstick Green Curry

    Spicy Drumstick Green Curry is a most popular curry from Karnataka , it is a vegetarian version of a well known non-vegetarian curry but with lesser spices.

    Prep Time10 minutes mins
    Cook Time25 minutes mins
    Total Time35 minutes mins
    Course: Main Course, Side Dish
    Cuisine: Karnataka
    Keyword: Curries, Drumstick, Easy
    Servings: 4 People
    Calories: 162kcal
    Author: Muktha H S

    Ingredients

    • 500 grams Drumsticks
    • 1 no Onion medium size finely chopped
    • 1 tablespoon Mint leaves , chopped
    • 2 tablespoon Cooking Oil or Ghee /Clarified Butter
    • 1-2 no Green Cardamom, optional
    • 2 cups Water
    • Salt as required

    For Masala Paste

    • ⅓ cup Fresh Coconut
    • 1 no Onion
    • 6 no's Garlic Cloves Medium size
    • 1 inch Ginger
    • 4 no's Green Chillies
    • 4 tablespoon Coriander Leaves
    • 1 no Tomato
    • ¼ teaspoon Turmeric Powder
    • 1 tablespoon Coriander Powder
    • ½ teaspoon Jeera Seeds / Cumin Seeds
    • 2-3 no Cloves
    • 1 inch Cinnamon Stick
    • 1 teaspoon Black peppercorns
    • 1 no Green Cardamom pod

    Instructions

    • Add all the ingredients under Masala Paste into a mixer jar and blend into a smooth paste by adding very little water.
    • In a pressure cooker or deep pot , heat ghee/clarified butter ,oil , add cardamom pods , chopped mint leaves and chopped onions fry till onions turns translucent.
    • When Onions turns translucent ,add blended masala paste.
    • Sautee for 6-8 minutes , till raw smell of masala goes off and specks of oil is seen.
    • Now add in cleaned drumsticks and mix well and continue to cook for 5 minutes.
    • Add mixer/blender rinsed water about ½-3/4 cup.
    • Once it comes to bubble , add another 1 ½ cup of water .
    • Add salt to taste as required.
    • Pressure cook for 1 whistle and immediately release the pressure manually. Alternatively you can cook in a deep vessel/pot and cover with a lid till drumsticks are cooked.
    • Open the lid , stir well and serve hot with ragi Mudde or Steamed Rice.

    Video

    Notes

    1. If you don't have Fresh coconut ,soak dry coconut in warm water or warm milk and use it as required.
    2. You can even add ½ tablespoon of poppy seeds and 1 tablespoon of roasted bengal gram while grinding masala paste , it helps to thicken the curry .

    Nutrition

    Calories: 162kcal

    Step by step directions for making Spicy Drumstick Green Curry:

    Add fresh coconut , green chillies, ginger , garlic ,coriander leaves , tomatoes and spices into a mixer jar.

    Spicy Drumstick Green Curry

    Blend into a smooth paste by adding very little water.

    Spicy Drumstick Green Curry

    In a pressure cooker or deep vessel/pot , heat ghee/clarified butter ,oil .( 2 tablespoon Oil or 1 tablespoon Ghee and 1 tablespoon Oil)

    Spicy Drumstick Green Curry

    Add chopped onions, chopped mint leaves and fry onions till it turns translucent.

    Spicy Drumstick Green Curry

    When Onions turns translucent ,add blended masala paste.

    Spicy Drumstick Green Curry

    Sautee for 6-8 minutes , till raw smell of masala goes off and specks of oil is seen.

    Spicy Drumstick Green Curry

    Now add in cleaned drumsticks .

    Spicy Drumstick Green Curry

    Mix well and continue to cook for 5 minutes.

    Spicy Drumstick Green Curry

    Add mixer/blender rinsed water about ½-3/4 cup.

    Spicy Drumstick Green Curry

    Once it comes to bubble , add another 1 ½ cup of water .

    Spicy Drumstick Green Curry

    Add salt to taste about 1- 11/2 teaspoon or as required.

    Spicy Drumstick Green Curry

    Pressure cook for 1 whistle and immediately release the pressure manually. Alternatively you can cook in a deep vessel/pot and cover with a lid till drumsticks are cooked.

    Spicy Drumstick Green Curry

    Open the lid , stir well and serve hot

    Spicy Drumstick Green Curry

    Serve hot with Ragi Mudde or Steamed Rice.

    Spicy Drumstick Green Curry

    Mango Shrikhand | Amrakhand Recipe

    Published : May 3, 2019 | Last Update on September 27, 2022 By Muktha

    Mango Shrikhand

    Mango Shrikhand is a sweet dessert made with yogurt , ripe mango pulp , sugar and flavoured with cardamom powder . Mango Shrikhand tastes delicious with poori but can have it as a chilled dessert too.

    It is a easy to make dessert where recipe calls to hung curd for 4-5 hours to drain water completely then mix with mango puree , sugar and cardamom powder .

    Refrigerate for few hours, chill and amrakhand is ready to serve. Garnish with saffron strands and nuts to treat your tastebuds , eyes with lovely hues.

    Mango Shrikhand

    This is one of my favourite Mango dessert . But I don't like the store bought Mango Shrikhand which is full of artificial colours ,flavours and also it has some powdered kind of texture .

    Homemade Shrikhand has silken smooth texture with real mango flavours. Try making this simple, easy dessert this mango season and fall in love with this. You can either use Homemade Curd or Store bought .

    Though homemade curd tastes best , I made it from Regular Amul Curds. And also amount of sugar in the recipe can be varied depending on the sweetness of mango . I have used Ratnagiri Alphonso Mango to make this delicious dessert. Though any sweet variety mango can be used.

    Mango Shrikhand

    One more similar Mango Based Dessert , which tastes Super Yum is Mango Cheese Cake , where I had poured all my Love to make this Delicious Eggless No Bake Cheesecake.

    Mango Nutrition

    Mangoes - "King of Fruits" is a delightful and refreshing summer fruit. Mango is a great high fibre and high antioxidant food. It is also rich in beta carotene and Vitamin C. As it is rich in fibre , it is good for digestion also antioxidants are directly related with anti ageing properties. Beta carotene and Vitamin C associated with eye health and immunity boosters.

    Mangoes are rich in carbohydrates and fructose , so eating this fruit in moderation is recommended . Mangoes are not fattening but when had after meals those extra carbs leads to more calorie intake which in turn makes to put on weight. So consider the facts and thoughtfully change your diet and enjoy this summer fruit.

    RECIPE CARD FOR MANGO SHRIKHAND

    Recipe

    Mango Shrikhand
    5 from 3 votes

    Mango Shrikhand | Amrakhand

    Smooth,  silken, delicious Dessert made with Ripen Mangoes , Yogurt ,Sugar, flavoured with cardamom powder and garnished with nuts and saffron strands.
    Prep Time4 hours hrs 15 minutes mins
    Resting Time4 hours hrs
    Total Time4 hours hrs 15 minutes mins
    Course: Dessert
    Cuisine: Indian, Maharstarian
    Keyword: Easy, Kids Recipes, Sweets
    Servings: 500 grams approx
    Calories: 1234kcal
    Author: Muktha H S

    Ingredients

    • 4 Cups Curds to Hung
    • 1 Cup Mango Pulp
    • 7-8 tablespoon Sugar
    • 6-7 No's Green Cardamom ,remove husk and powder
    • 4-5 Saffron Strands
    • 1 teaspoon Pistachios , Chopped
    • 1 teaspoon Almonds , Slivered

    Instructions

    • Place a sieve on a vessel and line sieve with a double layer muslin cloth. This is done to collect the dripping water from hung curd.
    • Now pour in 4 cups of curds into the muslin cloth.
    • Bring the edges of the cloth together , tie it and hang the curd for minimum 4 hours.
    • After 4 hours , remove the knot and collect the hung curd.
    • Scoop mango pulp from 2 big ripen mangoes to get 1 full cup mango pulp.
    • Add in mango pulp into a mixer jar.
    • Also add 7-8 tablespoon of sugar into the same jar . 
    • Blend to get a smooth puree.
    • Now add in Hung Curd , Cardamom Powder also can add 2-3 strands of saffron.
    • Blend to a smooth mixture.
    • Chill in refrigerator , garnish with chopped nuts and saffron strands, 
    • Serve as a dessert or with Poori

    Video

    Notes

    • Addition of sugar can be reduced or increased depending on the sweetness of mangoes.
    • If you are serving with Poori's then no need to chill in refrigerator.
    • If served alone , then chill and serve.
    • Makes approximately 480-500 grams with 1274 K calories . 

    Nutrition

    Calories: 1234kcal

    How to make Mango Shrikhand


    Place a sieve on a vessel and line sieve with a double layer muslin cloth. This is done to collect the dripping water from hung curd.

    Mango Shrikhand | Amrakhand Recipe

    Now pour in 4 cups of curds into the muslin cloth.

    Mango Shrikhand | Amrakhand Recipe

    Bring the edges of the cloth together , tie it and hang the curd for minimum 4 hours.

    Mango Shrikhand | Amrakhand Recipe

    After 4 hours , remove the knot and collect the hung curd.

    Mango Shrikhand | Amrakhand Recipe

    Scoop mango pulp from 2-3 ripen mangoes to get 1 full cup mango pulp.Add in mango pulp into a mixer jar.

    Mango Shrikhand | Amrakhand Recipe

    Also add 7-8 tablespoon of sugar into the same jar . 

    Mango Shrikhand | Amrakhand Recipe

    Blend to get a smooth puree.

    Mango Shrikhand | Amrakhand Recipe

    Now add in Hung Curd , Cardamom Powder also can add 2-3 strands of saffron.

    Mango Shrikhand | Amrakhand Recipe

    Blend to a smooth mixture.

    Mango Shrikhand | Amrakhand Recipe

    Chill in refrigerator , garnish with chopped nuts and saffron strands

    Mango Shrikhand | Amrakhand Recipe

    Serve as a dessert or with Poori

    Mango Shrikhand

    Savoury Bread Toast

    Published : May 2, 2019 | Last Update on September 27, 2022 By Muktha

    Savoury Bread Toast is a delicious bread toast similar to Savoury French Toast. Bread slices are dipped in spiced , milk- egg batter with vegetables of your choice and cooked on a griddle to get a perfect fluffy Toast.

    This is a version of Omelette Egg Toast with addition of milk . Adding milk helps to get a more fluffier Toast. Also vegetables of your choice can be added to make it more nutritious. Capsicum , Mushroom , Spinach , Carrot and Cabbage can be added.

    Savoury Bread Toast

    I was working on a article on How to make kids , eat right? Kids always get attracted to colourful and bright food. Also they are very much influenced by environment and also ads on media. Adding more colours on plate and plating the dish as seen in ads also helps to make kids eat right.

    Few more Kids after school snacks recipes which may interest you are : Vegetable Poha Cutlets , Besan Chilla , Green Peas Kheer , Whole Wheat Butter Biscuits , Masala Buns, Potato Wedges and Potato Smiley.

    Well coming back to the recipe , with the article there came many recipes and one such recipe that I had forgotten to post here was this Savoury Bread Toast. Though it is a breakfast recipe , it can even be served as a after school snacks . If you are looking for a kids friendly recipe that is tasty , nutritious and energy giving, you can consider this. Its has all the 5 essential nutrients Carbohydrates , Protein , Fat , Vitamins and Minerals.

    Other bread recipes on blog are Classic French Toast , Veg Sandwiches , Cheesy Bell Pepper Toast , Besan Bread Toast , Basic Avocado Toast , and Bread Upma

    RECIPE CARD FOR SAVOURY BREAD TOAST

    Recipe

    Savoury Bread Toast
    5 from 2 votes

    Savoury Bread Toast

    A Simple , Quick  and  Easy to make delicious Indian Style Savoury Egg Toast .
    Prep Time5 minutes mins
    Cook Time7 minutes mins
    Total Time12 minutes mins
    Course: Breakfast
    Cuisine: French, Fusion
    Keyword: Bachelor's Cooking, Basic, Breakfast_Ideas, Kids Recipes, Quick & Easy, Tiffin
    Servings: 2 Makes
    Calories: 247kcal
    Author: Muktha H S

    Ingredients

    • 2 No's Eggs
    • 2 No's Whole Wheat Bread Slices
    • ¼ Cup Milk
    • 2 tablespoon Onions , finely chopped
    • 2 tablespoon Tomatoes , finely chopped
    • 2 tablespoon Coriander leaves , finely chopped
    • 1 No Green Chilli ,finely chopped
    • ½ teaspoon Pepper Powder
    • ¼ teaspoon Red Chilli Powder
    • 1 Pinch Turmeric Powder
    • ½ teaspoon Salt or as required
    • 1 teaspoon Butter or Oil , for roasting

    Instructions

    • In a wide flat dish , add milk and eggs
    • Now in add in chopped vegetables and herbs of your choice.
    • Add salt , red chilli powder , turmeric powder and black pepper powder
    • Whisk well together
    • Dip in one bread slice , coat the batter evenly on top of bread , with the help of spoon
    • Heat a griddle/tava , add ½ teaspoon of butter. Place soaked bread gently on tava/griddle.
    • Add butter/ oil on sides of the bread .
    • Once the base becomes firm , flip and cook on other sides.
    • Once evenly cooked on both sides, Serve Hot.

    Video

    Notes

    • Can add other vegetables like grated cabbage,carrot,mushroom , greens and capsicum .
    • Quantity of spices can be altered .For more Indian flavours can add garam masala and cumin powder too.
    • Don't soak bread for more than a minute , as it may become soggy.
    • Be gently while lifting the soaked bread and placing on the griddle.
    • Calorie Information is for per serving.

    Nutrition

    Calories: 247kcal

    Step by Step directions for making Savoury French Toast

    In a wide flat dish , add milk and eggs.

    Savoury Bread Toast

    Now in add in chopped vegetables and herbs of your choice.

    Savoury Bread Toast

    Add salt , red chilli powder , turmeric powder and black pepper powder.

    Savoury Bread Toast

    Whisk well together.

    Savoury Bread Toast

    Dip in one bread slice .

    Savoury Bread Toast

    Coat the batter evenly on top of bread , with the help of spoon.

    Savoury Bread Toast

    Heat a griddle/tava , add ½ teaspoon of butter. Place soaked bread gently on tava/griddle.

    Savoury Bread Toast

    Once the base becomes firm , flip and cook on other sides.

    Savoury Bread Toast

    Once evenly cooked on both sides, Serve Hot.

    Savoury Bread Toast

    Serve hot ,You can even serve with some Ketchup 🙂

    Savoury Bread Toast

    Bread Upma Recipe

    Published : April 26, 2019 | Last Update on September 27, 2022 By Muktha

    Bread Upma


    Bread Upma is a easy and tasty snack than can be prepared within 30 minutes. Pre cut ,Bread slices into bite size cubes and saute in oil with vegetables and spices

    Either fresh bread or day old bread works well for this bread Upma. If kids are bored with regular bread recipes then try this desi version of bread preparation, which will surely be a hit.

    Bread Upma Recipe

    I often squeeze in time to bake fresh loaf of whole wheat bread at home . But these days , I have gone extremely busy with too many work assignments and running short of time. Hence brought freshly baked whole wheat bread from stores . I'm not at all a bread lover but my lil boy is different , so at least once in a week , either I bake bread or get it from stores. Every time , it happens so that 1 loaf of bread lasts for 2-3 days. First day it's going to be either Bread Egg Toast or Cheese Sandwiches, followed by Bread Upma or Masala Bread Toast for next day evening snack.

    Try using Whole Wheat Bread for any of your bread based recipes . Please cutdown refined flours from your diet as much as possible. Also cultivate clean eating habits , bread is full of carbohydrates , just add in more veggies, eggs ,paneer , cheese and prepare a balanced food.

    Few bread recipes on blog are : Classic French Toast , Veg Sandwiches , Avocado Toast ,Cheese Bell Pepper Toast , Savoury Bread Toast and Besan Bread Toast

    RECIPE CARD FOR BREAD UPMA | EASY TIFFIN RECIPE

    Recipe

    bread upma
    5 from 2 votes

    Bread Upma Recipe

    Easy and Tasty Tiffin made with Bread .
    Prep Time7 minutes mins
    Cook Time15 minutes mins
    Total Time22 minutes mins
    Course: Breakfast, Snack
    Cuisine: Indian
    Keyword: Bachelor's Cooking, Kids Recipes, Tiffin
    Servings: 3 People
    Calories: 252kcal
    Author: Muktha H S

    Ingredients

    • 6 no Wholewheat Bread Slices
    • 1 no Onion Medium Size , roughly chopped
    • 1" inch Ginger , grated
    • 2 no Tomatoes Medium Size , roughly chopped
    • 1 no Green Chilli, chopped
    • 1-2 Sprigs Curry Leaves
    • 1 tablespoon Coriander Leaves
    • 1-1.5 teaspoon Lime Juice , freshly squeezed
    • 2 tablespoon Cooking Oil
    • ½ teaspoon Mustard Seeds
    • ¼ teaspoon Jeera Seeds
    • 1 pinch Asafoetida
    • ½ teaspoon Red Chilli Powdre
    • ½-3/4 teaspoon Salt or as required

    Instructions

    Preparations

    • Take 6 bread slices and cut into cubes . If bread is soft , then no need to trim the edges of bread , only if it is hard then remove the edges.
    • Roughly chop 1 medium size onion and 2 Tomatoes . Finely chop green chillies and coriander leaves .Grate ginger and set it aside.

    Method:

    • Take a pan , add 2 tablespoon of oil and heat.
    • Once oil is hot , add mustard seeds , let it splutter.
    • Now add jeera /cumin seeds , once it starts to change colour add curry leaves, green chillies.
    • Add roughly chopped onions, turmeric powder and saute well , till it turns translucent.
    • Add in grated ginger and saute for a minute.
    • Now add in chopped tomatoes and saute for 1-2 minutes.
    • Add chilli powder , salt and asafoetida , mix well everything.
    • Continue to cook till tomatoes turns soft.
    • Now add bread cubes and mix well everything. Cook for 5 minutes. If bread is very dry then sprinkle 1 teaspoon of water .
    • Finally add chopped coriander leaves and squeeze in fresh lime juice.
    • Serve hot with Masala Chai.

    Video

    Nutrition

    Calories: 252kcal

    Step by step directions on making of Bread Upma :

    Preparations:

    Take 6 bread slices and cut into cubes . If bread is soft , then no need to trim the edges of bread , only if it is hard then remove the edges.

    Roughly chop 1 medium size onion and 2 Tomatoes . Finely chop green chillies and coriander leaves .Grate ginger and set it aside.

    Method:

    Take a pan , add 2 tablespoon of oil and heat.

    Bread Upma Recipe

    Once oil is hot , add mustard seeds , let it splutter.

    Bread Upma Recipe

    Now add jeera /cumin seeds , once it starts to change colour add curry leaves, green chillies.

    Bread Upma Recipe

    Add roughly chopped onions, turmeric powder and saute well , till it turns translucent.

    Bread Upma Recipe

    Add in grated ginger and saute for a minute.

    Bread Upma Recipe

    Now add in chopped tomatoes and saute for 1-2 minutes.

    Bread Upma Recipe

    Add chilli powder , salt and asafoetida , mix well everything.

    Bread Upma Recipe

    Continue to cook till tomatoes turns soft.

    Bread Upma Recipe

    Now add bread cubes .

    Bread Upma Recipe

    Mix well everything. Cook for 5 minutes. If bread is very dry then sprinkle 1 teaspoon of water .

    Bread Upma Recipe

    Finally add chopped coriander leaves and squeeze in fresh lime juice.

    Bread Upma Recipe

    Serve hot with Masala Chai , as I did 🙂

    Bread Upma Recipe

    Menthe Dose | Methi Dosa| Vendhaya Dosa

    Published : April 24, 2019 | Last Update on September 27, 2022 By Muktha

    Menthe Dosa

    Menthe Dosa is a soft Dosa made with Fenugreek seeds and Rice . Like regular dosa, Urad Dal isn't used in making this Dosa . It's only Fenugreek Seeds , Raw Rice and either poha or cooked rice is used to make this Methi Dosa.

    Methi seeds are powerhouse of nutrients and also it keeps the body cool . During summer , I always try to keep the food simple and this one is a must every week during summers.

    Methi Dosa

    Dosa needs no introduction , there are lot many varieties of Dosa . Few varieties are thin crepes, few are like pancakes and other few are crispy and flaky ,however you eat it tastes delicious. Though procedure remains almost same for all dosa varieties , ingredients and ratios varies slightly. Masala Dosa batter is different from Set Dosa , Soft regular Dosa and vegetable Dosa . If you are not from / in South India then you may not be aware of all these differences. As it's only Masala Dosa , with different stuffings is seen in most of street food stalls and restaurants .

    Menthe Dosa is a soft dosa , you can either make it small and thick like set dosa or spread like Masala Dosa. It tastes delicious either the way . I generally make a lentils based curry along with chutney to serve with this Dosa , just to balance the protein quotient in my meal . I do this because this Dosa has no lentil /pulses added to make the batter . Likewise , I balance the nutrition in my everyday eating. Other Dosa recipes which are regular at home are : Masala Dosa , Set Dosa , Adai , Neer Dosa and Pesarattu| green gram Dosa.

    RECIPE CARD FOR MENTHE DOSE |METHI DOSA | VENDHAYA DOSA

    Recipe

    menthe dose
    5 from 1 vote

    Menthe Dosa | Methi Dosa | Vendhaya Dosa

    Menthe Dosa is a pancake made with fenugreek seeds and raw rice . Its very nutritious and keeps the body cool
    Prep Time10 minutes mins
    Cook Time20 minutes mins
    Soaking & Resting14 hours hrs
    Total Time30 minutes mins
    Course: Breakfast
    Cuisine: South India
    Keyword: Dosa, Gluten Free, Summer, Vegan
    Servings: 12 Makes
    Calories: 133kcal
    Author: Muktha H S

    Ingredients

    • 2 cups Raw Rice
    • 3 tablespoon Fenugreek Seeds
    • 2 tablespoon Cooked rice / Poha , optional
    • 2 teaspoon Salt or as required
    • Ghee/ Oil for roasting

    Instructions

    • Rinse and wash raw rice with water , 2-3 times till water runs clear.Soak rice for 4-5 hours.
    • Wash fenugreek seeds and soak in enough water ,separately for 4-5 hours.
    • Soak cooked rice or poha ,separately . You can even skip this ,its optional.
    • After 4 hours , drain water ( refer notes) completely from fenugreek seeds and raw rice , keep it aside.
    • In a wet grinder or wet mixer jar , add fenugreek seeds and grind well to a smooth paste, adding little water part by part.
    • Now , add soaked raw rice and cooked rice and grind to a fine paste.
    • Transfer it into a bowl , add salt.
    • Mix in well with your hands, close it with a lid and allow to ferment in warm place for 10-12 hours or overnight.
    • After 10 - 12 hours, check the batter you can find small bubbles . Stir and mix well with ladle.
    • Heat a dosa tava / griddle , pour ladle full of batter and swirl to desired size and thickness. Cook dosa on a medium heat
    • Close the lid for 30-40 seconds , remove lid and drizzle ghee/oil.
    • Once it looks crisp from the bottom , fold, remove and serve hot.

    Notes

    • Don't waste, drained Fenugreekseeds water , its rich in nutrients. Either drink the water or use the same water to grind the batter..
    • Fenugreek seeds keeps the body cool , best for diabetics and also reduces all kinds of PMS.

    Nutrition

    Calories: 133kcal

    Step by Step directions for making Menthe Dose | Methi Dosa

    Rinse and wash raw rice with water , 2-3 times till water runs clear.Soak rice for 4-5 hours.

    Menthe Dose | Methi Dosa| Vendhaya Dosa

    Wash fenugreek seeds and soak in enough water ,separately for 4-5 hours.

    Menthe Dose | Methi Dosa| Vendhaya Dosa

    Soak cooked rice or poha ,separately . You can even skip this ,its optional.

    Menthe Dose | Methi Dosa| Vendhaya Dosa

    After 4 hours , drain water ( refer notes) completely from fenugreek seeds and raw rice , keep it aside.

    Menthe Dose | Methi Dosa| Vendhaya Dosa

    In a wet grinder or wet mixer jar , add fenugreek seeds and grind well to a smooth paste, adding little water part by part.

    Menthe Dose | Methi Dosa| Vendhaya Dosa

    Now , add soaked raw rice and cooked rice and grind to a fine paste.

    Menthe Dose | Methi Dosa| Vendhaya Dosa

    Transfer it into a bowl , add salt.

    Menthe Dose | Methi Dosa| Vendhaya Dosa

    Mix in well with your hands, close it with a lid and allow to ferment in warm place for 10-12 hours or overnight.

    Menthe Dose | Methi Dosa| Vendhaya Dosa

    After 10 - 12 hours, check the batter you can find small bubbles . Stir and mix well with ladle

    Menthe Dose | Methi Dosa| Vendhaya Dosa

    Heat a dosa tava / griddle , pour ladle full of batter and swirl to desired size and thickness.

    Menthe Dose | Methi Dosa| Vendhaya Dosa

    Close the lid for 30-40 seconds , remove lid and drizzle ghee/oil.

    Menthe Dose | Methi Dosa| Vendhaya Dosa

    Once it looks crisp from the bottom , fold, remove and serve hot.

    Menthe Dose | Methi Dosa| Vendhaya Dosa

    Serve Hot with coconut chutney and sambar .

    menthe dose

    Pathiri | Ari Pathiri | Malabar Rice Pathiri

    Published : April 19, 2019 | Last Update on September 27, 2022 By Muktha

    Pathiri

    Pathiri | Ari Pathiri is a gluten free, healthy ,pancakes made out of rice flour. It's a most popular recipe from Malabar region. Pathri is very similar to Akki Roti from Karnataka but the only difference lies in dry roasting the rice flour before making roti dough . A fine dry roasted rice flour is mixed with piping hot water , kneaded to a smooth dough and rolled to a super thin roti. It's a must served dish with a spicy meat curry during Iftar/ religious celebrations in Malabar region.

    Pathiri

    Rice is a staple food at home and can have this in many form. Rice is gluten free and is very easy to digest too. Varieties of Rice dishes , Dosa Varieties , Idli Varieties , Akki Roti , Appe , Idiyappam/ Ottu Shavige/ Nool puttu , Appam and Puttu are few of the most common rice based dishes prepared in Southern regions of India. Will update the blog with all these recipes , shortly 🙂

    Many are under the misconception that eating rice at night , makes them to put on weight. It's such a Myth . Truth is , it's actually so light and one tends to eat more , because of which one may gain weight. Also most of people from young and mid generations have totally changed their diet by replacing rice with wheat flour roti at night . Just to get that Diet feeling and also they are under a impression that they will not put on weight if rice is replaced by Wheat flour roti 🙂 🙂 🙂 , which is absolutely FALSE . Nothing is as good as simple rice and dal for dinners for Indians. Also it's easy to digest, light on stomach and never makes you bloated , all you need is portion control while eating rice.

    Pathiri | Ari Pathiri | Malabar Rice Pathiri
    Ari Pathiri

    Pathiri goes on well with any kind of veg - non vegetarian spicy curry . I served it with Kerala Egg Curry . It tastes delicious with Keema Masala and also with Ennegayi for vegetarian option.

    RECIPE CARD FOR PATHRI | ARI PATHIRI

    Recipe

    Pathiri
    No ratings yet

    Pathiri | Ari Pathiri

    Pathiri | Ari Pathiri is a gluten free, healthy ,pancakes made out of rice flour is a popular recipe from Malabar region.
    Prep Time15 minutes mins
    Cook Time20 minutes mins
    Total Time35 minutes mins
    Course: Breakfast
    Cuisine: Kerala, South India
    Keyword: Gluten Free, Indian Breads
    Servings: 12 Makes
    Calories: 117kcal
    Author: Muktha H S

    Ingredients

    • 2 cups Rice Flour
    • 2 Cups Water
    • 2 tablespoon Coconut Oil / any cooking oil
    • 1 teaspoon Salt
    • Extra Rice Flour for dusting

    Instructions

    • Dry roast rice flour on a iron skillet in low heat for 5 minutes.Sieve the flour and set it aside.
    • In a large vessel / Kadai, heat 2 cups of water and bring it to rolling boiling.
    • Add 2 tablespoon of coconut oil and 1 teaspoon of salt to the water.
    • Now keep the flame on low and add in the sieved rice flour to the boiling water.
    • Immediately mix well everything briskly with a spatula.Keep it on simmer for 10-15 seconds.
    • Turn off the heat,close it with a lid and allow it for 3-7 minutes. Wait till you can handle the heat from the dough to work with.
    • Now apply some coconut oil on palm, transfer the dough on to a workspace and knead it evenly to get a uniform smooth and less sticky dough.
    • Make small lemon sized dough,set aside. Cover it with damp muslin cloth.
    • Dust some rice flour on worktop, using a rolling pin roll one small ball into a circle just like chapati,roll as thin as possible.
    • Using a 5"-6"inch diameter round cutter, cut the rolled roti's to give a even circle shape.
    • Heat a tawa, place the rolled pathiri on it.Cook for 10-15 seconds,flip and cook on other side by pressing gently with a spatula, wait till it puffs up.
    • Remove from the tawa and stack up cooked Pathiris. Don't overcook Pathiris,as it should be white in colour.

    Nutrition

    Calories: 117kcal

    Step by Step Directions for making Pathri | Ari Pathri :

    Dry roast rice flour on a iron skillet in low heat for 5 minutes.Sieve the flour and set it aside.

    Pathiri | Ari Pathiri | Malabar Rice Pathiri

    In a large vessel / Kadai, heat 2 cups of water and bring it to rolling boiling.

    Pathiri | Ari Pathiri | Malabar Rice Pathiri

    Add 2 tablespoon of coconut oil and 1 teaspoon of salt to the water.

    Pathiri | Ari Pathiri | Malabar Rice Pathiri

    Now keep the flame on low and add in the sieved rice flour to the boiling water.

    Pathiri | Ari Pathiri | Malabar Rice Pathiri

    Immediately mix well everything briskly with a spatula.Keep it on simmer for 10-15 seconds.

    Pathiri | Ari Pathiri | Malabar Rice Pathiri

    Turn off the heat,close it with a lid and allow it for 3-7 minutes. Wait till you can handle the heat from the dough to work with.

    Pathiri | Ari Pathiri | Malabar Rice Pathiri

    Now apply some coconut oil on palm, transfer the dough on to a workspace and knead it evenly to get a uniform smooth and less sticky dough.

    Pathiri | Ari Pathiri | Malabar Rice Pathiri

    Make small lemon sized dough,set aside. Cover it with damp muslin cloth.

    Pathiri | Ari Pathiri | Malabar Rice Pathiri

    Dust some rice flour on worktop, using a rolling pin roll one small ball into a circle just like chapati,roll as thin as possible.

    Pathiri | Ari Pathiri | Malabar Rice Pathiri

    Using a 5"-6"inch diameter round cutter, cut the rolled roti's to give a even circle shape.

    Pathiri | Ari Pathiri | Malabar Rice Pathiri

    Heat a tawa, place the rolled pathiri on it.Cook for 10-15 seconds,flip and cook on other side.

    Pathiri | Ari Pathiri | Malabar Rice Pathiri

    Gently press with a spatula, wait till it puffs up. Remove from the tawa and stack up cooked Pathiris. Don't overcook Pathiris,as it should be white in colour.

    Pathiri | Ari Pathiri | Malabar Rice Pathiri

    I served it with Kerala Egg Curry .

    Pathiri | Ari Pathiri | Malabar Rice Pathiri

    Besan Bread Toast | Besan Toast Recipe

    Published : April 9, 2019 | Last Update on July 23, 2022 By Muktha

    besan breaad toast

    Besan Bread Toast is a easy to make, delicious Toast that can be made for either morning or evening Tiffin . Bread slices are dipped in gram flour batter and cooked on tawa till crisp. Finely chopped onions, tomatoes , green chillies and herbs are only veggies , I add to make this toast. But other vegetables like capsicum , cabbage , carrot can also be added to the gram flour batter to make it more nutritious and tasty . Depending on your taste you can add or delete any veggies of your choice.

    Besan Bread Toast

    I like besan bread pakora with Green Chutney but as it drinks lots of oil , I don't make it or eat it . Its very rare , may be once in a year occasionally , I indulge with bread pakora. So my alternative for those deep fried bread pakora is this besan toast. Deliveries almost similar taste with less oil . Hence , I'm ok with it having for my evening snack or for my lazy mornings.

    Other bread recipes on blog are : Cheese Chilli Toast , Classic French Toast , Whole wheat Masala Bun , Veg Sandwiches and Basic Avocado Toast .

    Few more easy kids friendly tiffin recipes on blog are : Besan Chilla , Oats Omelette , Spanish Potato Omelette , Instant Rava Paddu and Khaman Dhokla .

    RECIPE CARD FOR BESAN BREAD TOAST

    Recipe

    Besan Bread Toast
    No ratings yet

    Besan Bread Toast | Besan Toast Recipe

    Besan Bread Toast is tasty, easy to make tiffin recipe made with chickpea flour , spices , assorted vegetables and herbs.
    Prep Time7 minutes mins
    Cook Time10 minutes mins
    Total Time17 minutes mins
    Course: Breakfast, Snack, Tiffin
    Cuisine: Indian
    Keyword: Bachelor's Cooking, Kids Recipes, Quick & Easy
    Servings: 4 makes
    Calories: 151kcal
    Author: Muktha H S

    Ingredients

    • 1 Cup Besan / Gram Flour / Chickpea Flour
    • 1 no Onion , medium size ,finely chopped
    • 1 no Tomato , medium size , finely chopped
    • 2 no Green Chillies, finely chopped
    • 1 tablespoon Coriander Leaves, chopped
    • ¼ teaspoon Turmeric Powder
    • ½ teaspoon Red Chilli Powder
    • ¼ teaspoon Ajwain /Carom Seeds
    • 1 pinch Asafoetida
    • ½-3/4 teaspoon Salt or as required
    • ⅓-1/2 Cup Water , as required
    • Oil for roasting , as required

    Instructions

    • In a wide bowl /small pan ,add 1 cup gram flour.
    • To this add ½ teaspoon turmeric powder , chilli powder , carom seeds, salt  and pinch of asafoetida .
    • Add in chopped onions, chopped tomatoes, green chillies and coriander leaves.
    • Add ⅓-1/2 cup of water ,part by part .
    • Whisk well everything such that no lumps are formed.
    • Adjust water if needed , the batter should be thick spoon dropping consistency but not free flowing.
    • Heat 1 teaspoon of oil in a tava/griddle /frying pan.
    • Dip in the bread slice in a batter, with help of spoon place coat the batter evenly with the batter. Don't keep bread slice inside the batter for long as it may turn soggy.
    • Place it on the hot tava , drizzle some oil on corners and top. 
    • When the base becomes firm , flip and cook on other side.
    • Cook even on both sides till it looks golden brown, serve it along with coriander chutney and Tomato Ketchup.

    Notes

    • Adding Asafoetida and carom seeds/ajwain is recommended as it helps in digestion .
    • Chickpeas releases phytic acid and few may feel gassy when used . To combat its effect , ajwain and asafoetida are used with Besan/ gram flour/Chickpea flour.

    Nutrition

    Calories: 151kcal

    Step by Step directions for making Besan Bread Toast :

    In a wide bowl /small pan ,add 1 cup gram flour.

    Besan Bread Toast | Besan Toast Recipe

    To this add ½ teaspoon turmeric powder , chilli powder , carom seeds, salt  and pinch of asafoetida . Add in chopped onions, chopped tomatoes, green chillies and coriander leaves.

    Besan Bread Toast | Besan Toast Recipe

    Add ⅓-1/2 cup of water ,part by part .

    Besan Bread Toast | Besan Toast Recipe

    Whisk well everything such that no lumps are formed.

    Besan Bread Toast | Besan Toast Recipe

    Adjust water if needed , the batter should be thick spoon dropping consistency but not free flowing.

    Besan Bread Toast | Besan Toast Recipe

    Heat 1 teaspoon of oil in a tava/griddle /frying pan.

    Besan Bread Toast | Besan Toast Recipe

    Dip in the bread slice in a batter, with help of spoon place coat the batter evenly with the batter.Don't keep bread slice inside the batter for long as it may turn soggy.

    Besan Bread Toast | Besan Toast Recipe

    Place it on the hot tava , drizzle some oil on corners and top

    Besan Bread Toast | Besan Toast Recipe

    When the base becomes firm , flip and cook on other side.

    Besan Bread Toast | Besan Toast Recipe

    Cook even on both sides till it looks golden brown, serve it along with coriander chutney and Tomato Ketchup.

    Besan Toast

    Obbattu | Bele Holige | Puran Poli

    Published : April 5, 2019 | Last Update on October 17, 2022 By Muktha

    Ugadi-recipes@palatesdesire

    Obbattu | Bele Holige | Puran Poli with step by step photos and video. Bele Obbattu is a Indian Sweet flatbread filled with a Sweet- lentils mixture made from either Chana Dal or Toor Dal and organic jaggery.

    Obbattu is traditional sweet that is mainly prepared during festivals like Ugadi, Gowri-Ganesha festival and also Holi . Puran is the sweet filling and Poli means roti in Marathi. Bele is lentils and Holige/Obbattu means a kind sweet flatbread/roti in Kannada.

    Obbattu | Bele Holige | Puran Poli
    [feast_advanced_jump_to]

    About this recipe

    In Karnataka style Obbattu / bele holige , filling is made with Toor dal , little coconut ,organic jaggery and cardamom . Also the outer covering (roti) is made with Maida/refined flour and fine rava/sooji . But in this recipe , I have replaced maida / refined flour with whole wheat flour.

    Final outcome was a healthy and delicious Obbattu. Whereas for Puran Poli , only Chana Dal,jaggery and cardamom is used . Fresh coconut is not used and outer covering is only with whole wheat flour. It's just a regional wise small changes that has been followed in the recipes. But Nutritional values are almost same whether its chana dal or toor dal and do you know its a complete protein?

    Bele Holige / puran poli is a complete protein as it is a cereal and lentil combination. I highlight this point in most of my post , just to bring awareness on how to eat food, right. Indian Diet is so well balanced with full of nutrition when cooked and eat in the right manner.

    For making Holige/puran poli , Dal /lentils are soaked for 4-6 hours ,this helps in releasing phytic acid from them , hence it becomes easier for digestion . In general , phytic acid is referred as anti nutrient as it impairs the mineral absorption .Hence soak lentils / pulses before cooking , it is one of the right method. Also complains of acidity , bloating and flatulence can be reduced when lentils/pulses are soaked and well cooked.

    Step by Step directions to make obbattu

    To make Filling/ Puran / Hoorna

    Wash ,rinse and soak toor dal in water for 3-4 hours.

    Obbattu | Bele Holige | Puran Poli

    Rinse the soaked dal, add water  and pressure cook on high for 1 whistle or  when whistle is about to come ,turn off the flame. Orelse you can even cook in open vessel till , lentils cracks and cooked well . 

    Obbattu | Bele Holige | Puran Poli

    Drain the water completely and reserve it to make Obbattu Saaru (amti ) for later. Set aside cooked dal to drain off the water completely.

    Obbattu | Bele Holige | Puran Poli

    Take cooked dal in the same pressure cooker  or pan , add powdered jaggery and  keep on a low flame.

    Obbattu | Bele Holige | Puran Poli

    Allow jaggery to melt completely and once it starts to bubble , add coconut , and mix well, continue to cook.

    Obbattu | Bele Holige | Puran Poli

    Once it thickens and becomes completely dry , add dry ginger powder , cardamom powder and pinch of nutmeg powder.

    Obbattu | Bele Holige | Puran Poli

    Mix well everything and turn off the flame. Make big lime size balls and set aside.

    Obbattu | Bele Holige | Puran Poli

    For Dough :

    Take  1 ¾ cup whole wheat flour , ¼ cup fine sooji/rava ,2 tablespoon of ghee, pinch of salt and ¼ teaspoon Turmeric powder in a bowl. Mix well  everything.

    Obbattu | Bele Holige | Puran Poli

    Now add water as required part by part and knead the dough to smooth.

    Obbattu | Bele Holige | Puran Poli

    Once dough is well kneaded , smear 1 teaspoon of ghee over the prepared dough and cover the bowl with a damp muslin cloth and set aside for 1-2 hrs , minimum 30 minutes.

    Obbattu | Bele Holige | Puran Poli

    After 30 minutes , divide the dough into equal size balls and set aside.

    Obbattu | Bele Holige | Puran Poli

    Preparing the Roti / Poli 

    Dust some flour on worktop .Take the medium sized ball from the dough and roll dough into a circle , of 3 inch circumference.

    Obbattu | Bele Holige | Puran Poli

    Place the prepared  portion of sweet filling /puran / hoorna ball at the centre of the rolled dough. Bring the dough edges to the centre, join them together and pinch off extra dough.

    Obbattu | Bele Holige | Puran Poli

    Gently press the dough and flatten it. Dust some flour and with a rolling pin , roll into a circle of desired size .

    Obbattu | Bele Holige | Puran Poli

    Apply a teaspoon of ghee/clarified butter  on  griddle/tava and heat it. Once it.s hot enough ,place the rolled roti on the griddle .Drizzle some ghee on top and corners , cook till the base looks firm and browned.

    Obbattu | Bele Holige | Puran Poli

    Flip and cook on other side. Apply some ghee  , turn over and cook uniformly on both sides.

    Obbattu | Bele Holige | Puran Poli

    Serve Obbattu / Holige / Puran Poli with ghee and milk

    Obbattu

    Recipe recently update from archieves.

    Recipe

    Ugadi-recipes@palatesdesire
    5 from 3 votes

    Obbattu | Bele Holige | Puran Poli

    Obbattu | Bele Holige | Puran Poli is a Indian Sweet flatbreads filled with lentils made from either Chana Dal or Toor Dal and organic jaggery.
    Prep Time5 hours hrs
    Cook Time40 minutes mins
    Resting Time4 hours hrs
    Total Time5 hours hrs 40 minutes mins
    Course: Sweets
    Cuisine: Andhra, Indian, Karnataka, Maharstarian
    Keyword: Diwali, Festivals, Ganesha Chaturthi, Holi, Ugadi
    Servings: 8 Makes
    Calories: 308kcal
    Author: Muktha H S

    Ingredients

    For Sweet Filling / Puran /Hoorna

    • 1 Cup Toor Dal or Chana Dal
    • 2 ½ Cup Water for pressure cooking
    • 1 Cup Organic Jaggery Powder
    • ¼ cup Fresh Coconut , optional
    • ¾ teaspoon Dry Ginger powder
    • ½ teaspoon Cardamom Powder
    • ½ teaspoon Fennel Seeds Powder
    • 1 pinch Nutmeg

    For Dough

    • 1 ¾ Cup Wholewheat flour
    • ¼ Cup Fine Sooji / Rava
    • ¼ teaspoon Turmeric Powder
    • ½ teaspoon salt
    • Water as required
    • 2 tablespoon Ghee/clarified butter ,for dough

    Other Ingredients

    • Wheatflour for dusting
    • Ghee/oil for Roasting Obbattu/Puran Poli

    Instructions

    To make Filling/ Puran / Hoorna

    • Wash ,rinse and soak toor dal in water for 3-4 hours.
    • Rinse the soaked dal, add water and pressure cook ,when whistle is about to come ,turn off the flame. Orelse you can even cook in open vessel till , lentils cracks and can be pressed between the fingers.
    • Drain the water completely and save it to make Obbattu Saaru (amti ) later.
    • Take cooked dal in the same pressure cooker or pan , add powdered jaggery and keep on a low flame.
    • Allow jaggery to melt completely and once it starts to bubble , add coconut , and mix well, continue to cook. 
    • Once it thickens and becomes completely dry , add dry ginger powder , cardamom powder and pinch of nutmeg powder.
    • Mix well everything and turn off the flame.
    • Make big lime size balls and set aside.

    For Dough :

    • Take  1 ¾ cup whole wheat flour , ¼ cup fine sooji/rava ,2 tablespoon of ghee, pinch of salt and ¼ teaspoon Turmeric powder in a bowl. Mix well  everything.
    • Now add water as required part by part and knead the dough to smooth.
    • Once dough is well kneaded , smear 1 teaspoon of ghee over the prepared dough and cover the bowl with a damp muslin cloth and set aside for 1-2 hrs , minimum 30 minutes.

    Preparing the Roti / Poli 

    • Dust some flour on worktop .Take the medium sized ball from the dough and roll dough into a circle , of 3 inch circumference.
    • Place the prepared portion of sweet filling /puran / hoorna ball at the centre of the rolled dough. 
    • Bring the dough edges to the centre, join them together and pinch off extra dough.
    • Gently press the dough and flatten it. Dust some flour and with a rolling pin , roll into a circle of desired size .
    • Apply a teaspoon of ghee/clarified butter on griddle/tava and heat it. 
    • Once it's hot enough ,place the rolled roti on the griddle .
    • Drizzle some ghee on top and corners , cook till the base looks firm and browned.
    • Flip and cook on other side. Apply some ghee , turn over and cook uniformly on both sides.

    Video

    Nutrition

    Calories: 308kcal

    Palak Paneer Salad | Spinach Salad

    Published : March 31, 2019 | Last Update on September 27, 2022 By Muktha

    Spinach Salad

    Palak Paneer Salad | Spinach Salad recipe with step by step photos and video . Spinach Salad aka palak paneer salad is a Indian Style refreshing summer salad . Indian Style Palak salad is a mix of assorted veggies like tomatoes, cucumber and onions with some roasted peanuts.

    spinach salad
    [feast_advanced_jump_to]

    About this recipe

    Every home from North to South have their own style of palak paneer salad recipe. But in this recipe I have replaced onion with some fresh crumbled , home made Indian cottage cheese aka paneer . As it includes the protein portion in the meal needless to mention , its full of nutrition with loaded protein from cottage cheese , peanuts along with additional good fat and calcium from sesame seeds.

    As I often make this , I have clicked image during 2 different occasion.Once I blanched spinach and one more time I directly used spinach without blanching has it was tender. But as a Nutritionist , I recommend to blanch and eat Spinach !

    Watch recipe video

    As temperature is soaring outside , I'm keeping all my food simple and satisfying. With this scorching sun , I really have no patience to be in kitchen for long with elaborated cooking. Salads being summers BFF , thought of sharing this refreshing , tasty summer salad recipe to satiate your taste buds.

    I believe that the food we eat should be delicious enough to awaken our senses and at the same time it should be Nutritious , too. If interested do check refreshing salads like Sicilian Salad and Peanut Salad for this season.

    This post goes for all my friends , family and clients , who always complain to eat Salads by giving the excuse and tag " Salads as Bland" . There is no miracle about the endless health benefits of Spinach. Add more green leafy vegetable into your diet and flaunt with a healthy body .

    This nutrient packed superfood is full of iron , calcium, potassium and fibre . From maintaining blood glucose levels to lowering Blood Pressure and from strong bones to healthy eyes , hair and skin . It does all good to your body , so start adding it in your daily diet and get all its benefits.

    Palak Paneer Salad

    Other spinach / palak based recipes on blog are : Palak Paneer , Palak Paneer Bhurji , Palak Paneer Pulao , Spinach Mushroom Cutlets, Aloo Palak ,Saag , Palak Chicken and Masida Soppu Saaru.

    Step by step directions to make Palak Paneer Salad

    Clean and wash Spinach leaves in a running water, drain water completely .

    Palak

    Dip palak leaves in hot water and set aside for 3 to 5 minutes , remove and wash in cold water  (Blanching )  . Blanching helps to reduce  the anti nutrient oxalates  in spinach.

    Spinach is high in calcium and oxalate, which prevents a lot of the calcium from being absorbed into the body. Hence reducing the concentration of oxalates by blanching is important.

    Alternatively baby spinach can be used directly in salads.

    Palak Paneer Salad

    Add chopped leaves into a mixing bowl.

    Palak Paneer Salad

    Chop 1 large tomato and 2 baby cucumbers ,add into the mixing bowl.

    Palak Paneer Salad

    Add ½ cup of fresh , crumbled cottage cheese to the mixing bowl.

    Palak Paneer Salad

    Now add in 2 tablespoon of roasted and roughly crushed peanuts.

    Palak Paneer Salad

    Add 1-2 tablespoon of raisins.

    Palak Paneer Salad

    Sprinkle some salt and squeeze in some fresh lime juice.

    Palak Paneer Salad | Spinach Salad

    Heat ½ tablespoon of oil in a tempering pan , add ¼ teaspoon of mustard seeds,allow it to crackle.Add ½ teaspoon of Jeera/cumin seeds , once it starts to change colour. Turn off the heat.

    Palak Paneer Salad

    Now just add in ½ teaspoon of red chilli powder to the seasoning .Don't burn the spices.

    Palak Paneer Salad

    Pour the seasoning over the prepared salad.

    Palak Paneer Salad | Spinach Salad

    Mix well everything and serve .

    Palak Paneer Salad

    Recipe

    palak paneer salad
    4.80 from 5 votes

    Palak Paneer Salad | Indian Style Spinach Salad

    A refreshing low calorie summer salad with goodness of Spinach , Cucumber and Tomatoes tossed with some crumbled paneer and crunchy peanuts. 
    Prep Time10 minutes mins
    Cook Time3 minutes mins
    Total Time13 minutes mins
    Course: Salad
    Cuisine: Indian
    Keyword: Bachelor's Cooking, Basic, Diet, Summer, Weight Loss
    Servings: 4 People
    Calories: 87kcal
    Author: Muktha H S

    Ingredients

    • 100 grams Chopped Spinach leaves
    • 1 no Tomato large ,roughly chopped
    • 2 no Baby Cucumbers, roughly chopped
    • ½ cup Fresh Cottage Cheese , crumbled
    • 2 tablespoon Peanuts , roasted and crushed
    • 1-2 tablespoon Raisins
    • 1 teaspoon Lime Juice squeezed
    • ½ teaspoon Salt or as required
    • ½ tablespoon Cooking Oil
    • ¼ teaspoon Mustard seeds
    • ½ teaspoon Cumin Seeds / Jeera Seeds
    • 1 teaspoon Sesame Seeds
    • ½ teaspoon Red Chilli Powder

    Instructions

    • Clean and Wash Spinach leaves in a running water, blanch and squeeze excess water. If using baby spinach , you can use directly without blanching.
    • Chop spinach leaves .
    • Add chopped leaves into a mixing bowl.
    • Chop 1 large tomato and 2 baby cucumbers ,add into the mixing bowl.
    • Add ½ cup of fresh  crumbled cottage cheese to the mixing bowl.
    • Now add in 2 tablespoon of roasted and roughly crushed peanuts.
    • Add 1-2 tablespoon of raisins.
    • Sprinkle some salt and squeeze in some fresh lime juice.
    • Heat 1 tablespoon of oil in a tempering pan , add ¼ teaspoon of mustard seeds,allow it to crackle.
    • Add ½ teaspoon of Jeera/cumin seeds , once it starts to change colour. 
    • Turn off the heat.Now add sesame seeds and ½ teaspoon of red chilli powder to the seasoning.
    • Pour the seasoning over the prepared salad.Mix well everything and serve .

    Video

    Nutrition

    Calories: 87kcal

    Kerala Egg Curry | Easy Egg Recipes

    Published : March 29, 2019 | Last Update on October 6, 2022 By Muktha

    kerala egg curry

    Kerala Egg Curry is a delicious egg curry from Malabar region . Most of the Kerala cuisine are incomplete without the use of Coconut.

    Yes , Coconut milk is one of the most prime ingredient of this delicious Egg curry. Heat from the spices balances the sweetness of coconut milk in this dish. Try to use freshly extracted coconut milk to get the actual taste in the curry.

    Kerala Egg Curry

    Making this Egg Curry|Mutta Curry is quite easy , only time consuming part is extraction of coconut milk . Whenever I cook from coconut , I make sure to cut open a fresh coconut and use.

    Using fresh coconut always enhances the taste of the dish . Even just sprinkling a tablespoon of grated fresh coconut on few of the dishes , takes the taste of the dish to next level .

    Hence, while making any South Indian Dishes , if recipe calls for coconut /coconut milk , try to use the fresh ones. As it really adds lots of flavours and makes the final dish extremely delicious. Refer notes , to check how to extract Coconut Milk ?

    Coconut Nutrition & Health Benefits : Coconut water , flesh ,milk and oil are highly nutritious, rich in fiber and packed with essential vitamins and minerals. Young coconut water is one of the highest sources of electrolytes. It is also low in calories, carbohydrates, sugars, and almost completely fat-free. Most importantly , it is high in ascorbic acid, B vitamins, and also proteins. Flesh, inside the coconut helps to restore oxidative tissue damage and contains a source of healthy fats, proteins, and various vitamins and minerals. Although coconut oil is a saturated fat , it is rich in a medium-chain fatty acid that can actually help boost metabolism and aid in fat loss. Irrespective of anything ,use coconut to boost your immunity , keep your heart healthy ,to restore thyroid function , to look slimmer and younger with healthy youthful skin and hair.

    Other Similar Egg Delicacies from my blog are : Kolhapuri Egg Masala , Scrambled Egg Curry , Egg Masala and Poached Egg Curry.

    RECIPE CARD FOR KERALA EGG CURRY

    Recipe

    Kerala Egg Curry
    5 from 3 votes

    Kerala Egg Curry

    It is a delicious egg curry prepared with a fresh coconut milk . Sweetness of coconut milk is balanced with hint of heat from spices and is mainly served for breakfast along with Pathiri , Appam or Idiyappam 
    Prep Time15 minutes mins
    Cook Time30 minutes mins
    Total Time45 minutes mins
    Course: Breakfast, Main Course, Side Dish
    Cuisine: Kerala
    Keyword: Egg, Masala
    Servings: 5 People
    Calories: 228kcal
    Author: Muktha H S

    Ingredients

    • 5 no's Egg
    • ½ cup Onion finely chopped / 1 large onion
    • 3 no's Green chillies ,finely chopped
    • ½ tablespoon Garlic paste / 8 garlic cloves crushed
    • ½ tablespoon Ginger Paste / 11/2 " inch ginger crushed
    • ½ teaspoon Mustard Seeds
    • 2 sprigs Curry Leaves
    • 1 no Dried Red Chilli , broken into pieces
    • 1 no Tomato finely chopped
    • ¾ Cup Thick Coconut Milk
    • 1 Cup Thin Coconut Milk
    • ¼ teaspoon Turmeric Powder
    • ¾ - 1 tablespoon Red chilli Powder
    • ¾-1 tablespoon Coriander Powder
    • 1 teaspoon Black Pepper crushed to Powder
    • ½ teaspoon Fennel Seeds Powder
    • ½-3/4 teaspoon Garam Masala Powder
    • 2 tablespoon Coconut Oil or any cooking Oil
    • 1.5-2 teaspoon Salt or as required

    Instructions

    • In a Saucepan , add eggs , add water to cover eggs by 1 inch , on a high heat bring it to boiling. 
    • Let eggs sit in hot water for about 10-12 minutes ,break open the shell , and slice the eggs into 2 halves.
    • In a pan , add 2 tablespoon of coconut oil , add mustard seeds allow it to crackle . 
    • Now add in curry leaves and broken dried chillies and chopped green chilies, saute for a minute.
    • Add ginger garlic paste and saute till the hint of raw smell vanishes.
    • Now add in finely chopped ½ cup of onion and continue to saute till it looks translucent.
    • Finely chop or roughly process 1 large tomato and add this into the onion mixture. 
    • Mix well everything and allow tomatoes to get cooked.
    • Now add all the spices , mix well and saute for 2 minutes.
    • Add 1 ½ cup of thin coconut milk ,mix well such that everything blends well together. 
    • Keep the flame on medium heat, add salt and bring it boil.
    • Add in boiled eggs , gently mix everything such that masala coats everything. 
    • Close the lid and keep in simmer for about 10 minutes .
    • Now add Thick coconut milk and continue to cook in simmer till you reach the desired consistency.
    • Serve it with Appam , Puttu , Pathiri or even with Roti or steamed rice.

    Notes

    For Coconut Milk :
    • Soak 1 ½ Cup  grated coconut in ½ cup lukewarm water for 10 minutes , blend it to fine paste in a Mixer jar , pass coconut paste through the sieve get approx ¾ cup of thick coconut milk.
    • For the same coconut residue , add 1 cup lukewarm water and blend in a mixer jar to get 1 Cup ,Thin Coconut Milk approximately.

    Nutrition

    Calories: 228kcal

    How to make Kerala Egg Curry :

    In a Saucepan , add eggs , add water to cover eggs by 1 inch , on a high heat bring it to boiling. Let eggs sit in hot water for about 10-12 minutes ,break open the shell , and slice the eggs into 2 halves.

    Kerala Egg Curry | Easy Egg Recipes

    In a pan , add 2 tablespoon of coconut oil , add mustard seeds allow it to crackle. Now add in curry leaves and broken dried chillies, chopped green chillies and saute for a minute.

    Kerala Egg Curry | Easy Egg Recipes

    Add ginger garlic paste and saute till the hint of raw smell vanishes.

    Kerala Egg Curry | Easy Egg Recipes

    Now add in finely chopped ½ cup of onion and continue to saute till it looks translucent.

    Kerala Egg Curry | Easy Egg Recipes

    Finely chop or roughly process 1 large tomato and add this into the onion mixture. Mix well everything and allow tomatoes to get cooked.

    Kerala Egg Curry | Easy Egg Recipes

    Now add all the spices , mix well and saute for 2 minutes.

    Kerala Egg Curry | Easy Egg Recipes

    Add 1 ½ cup of thin coconut milk ,mix well such that everything blends well together. 

    Kerala Egg Curry | Easy Egg Recipes

    Keep the flame on medium heat, add salt and bring it boil.

    Kerala Egg Curry | Easy Egg Recipes

    Add in boiled eggs , gently mix everything such that masala coats eggs.

    Kerala Egg Curry | Easy Egg Recipes

    Close lid and keep in simmer for about 10 minutes .

    Kerala Egg Curry | Easy Egg Recipes

    Now add Thick coconut milk and continue to cook in simmer till you reach the desired consistency.

    Kerala Egg Curry | Easy Egg Recipes

    Serve it with Appam , Puttu , Pathiri or even with Roti or steamed rice.

    Kerala Egg Curry | Easy Egg Recipes

    Thandai

    Published : March 20, 2019 | Last Update on September 21, 2022 By Muktha

    Thandai

    Thandai is a refreshing summer beverage ; it's quick , easy to make and tastes super delcioius. To make this recipe , I have used Homemade Thandai Masala powder which is an excellent premix , better than any store brought.

    Traditionally, Thandai is made by soaking spices and nuts in water overnight, ground to fine paste, mixed with milk , filtered , chilled and then served.

    My version of Instant Thandai is made by using Thandai Masala Powder. Rather than just mixing with milk , here tanadai masala is soaked in warm water / milk , blend to fine paste and then mixed with milk .

    Instant-Thandai
    [feast_advanced_jump_to]

    About this recipe

    What makes this drink so refreshing is the aromatic flavours from nuts along with lashings of cardamom, rose petals and saffron . Also the mellow hit of spice and sweetness from black pepper and fennel seeds , never lets you down from drinking this delicious cooling beverage .

    Adding Bhang (cannabis leaves) to drink is the most common practice that is witnessed during Maha shivaratri and Holi festivals.

    But with my version of Instant thandai , no Bhang is added. Prepare thandai a day before , chill it in refrigerator and then serve the next day. As it tastes more good when served chilled , that is how it need to be served.

    Try to use whole fat milk while making this beverage as it tastes extremely delicious. You can also make a Frozen Dessert version of this recipe Thandai Kulfi.

    Ingredients

    If doing Instant Thandai from Homemade Thandai Masala Powder , all you need is just Milk, Sugar and Thandai Premix

    Thandai

    Whole Milk : Full fat whole milk makes this drink super delicious . But you use low fat milk also to make this instant drink. Few even add ice cubes into milk while serving , while doing so if low fat milk is used the its dilute and you may not get the actual taste.

    Thandai Masala Powder : Here I have used homemade instant Thandai Masala powder , its an unsweetened Masala Powder. You can use store bought premix too. But check if its sweetened or unsweetned before using it in the recipe.

    Sugar : Use as required , depending on your taste. If using sweetened Thandai masala powder , then you may need to add less sugar to the drink.

    Rose Water or Rose essence : Though its optional , it's highly recommended to add ½ teaspoon of rose water while serving to get the aromatic and refreshing taste.

    Step by Step directions to make Thandai

    Thandai

    Soak for 15 to 20 minutes.

    Thandai

    Whilst, in a saucepan boil 500ml of full fat whole milk .

    Thandai

    Transfer the soaked thandai masala into a mixer jar

    Thandai

    and blend to a smooth paste.

    Thandai

    Now add this ground paste into 500 ml of boiled milk along with sugar.

    Thandai

    Stir milk continuously and boil on a very low heat for 5 minutes.

    Thandai

    Turn off the stove , remove the sauce pan and set aside for 10-15 minutes for flavours to steep in.

    Thandai

    Now strain milk , and store thandai in a pitcher/ jar and refrigerate.

    Thandai

    Serve chilled Thandai , garnished with rose petals, saffron strands, slivered nuts and few drops of rose water.

    Thandai

    This post has been updated from the archives, was first published in March 2019

    Recipe

    Thandai
    5 from 1 vote

    Thandai

    Thandai is a cooling refreshing summer beverage served during Holi festival.
    Prep Time5 minutes mins
    Cook Time15 minutes mins
    Total Time20 minutes mins
    Course: Beverage, Drinks
    Cuisine: Indian
    Keyword: Festivals, Holi, Summer
    Servings: 2 People
    Calories: 260kcal
    Author: Muktha H S

    Ingredients

    • ¼ cup Thandai Masala Powder
    • 500 ml Whole fat milk , boiled
    • 2.5 tablespoon Sugar or as needed

    For Garnishing

    • 1 tablespoon Slivered nuts
    • ¼ teaspoon Dry Rose Petals or Fresh
    • Saffron strands few
    • Rose Water , few drops ,optional

    Instructions

    • Soak ¼ cup of Thandai masala powder in ¼ cup of warm water or milk for 15 to 20 minutes.
    • Whilst, in a saucepan boil 500ml of full fat whole milk .
    • After 20 minutes, transfer the soaked thandai masala into a mixer jar and blend to a smooth paste.
    • Now add this ground paste into 500 ml of boiled milk along with sugar.
    • Stir milk continuously and boil on a very low heat for 5 minutes.
    • Turn off the stove , remove the sauce pan and set aside for 10-15 minutes for flavours to steep in.
    • Now strain milk and store thandai in a pitcher/ jar and refrigerate.
    • Serve chilled Thandai , garnished with rose petals, saffron strands, slivered nuts and few drops of rose water.

    Video

    Nutrition

    Calories: 260kcal

    You may also like

    • aam-panna-summer-drink
      Aam Panna Recipe
    • gujiya
      Gujiya Recipe|Karanji | Karjikai Recipe
    • Pista badam kulfi on plate
      Kulfi | Pista Badam Kulfi Recipe
    • mango-lassi
      Mango Lassi Recipe

    Masala Peanuts

    Published : March 20, 2019 | Last Update on October 17, 2022 By Muktha

    Masala Peanuts

    Masala Peanuts are spicy and crunchy tea time snacks. To make this delicious addictive peanut snack all you need to do is coat peanuts with chickpea flour and spices. Then gram flour/ besan coated peanuts are dropped in hot oil and fried till crisp.

    Masala Peanuts

    Making Namkeens/ snacks at home are so good and delicious. As we have full control on the quality of ingredients used , amount of spices that gets in to the dish and also the most obvious reason being No Preservatives , artificial colours and flavours. One important thing which I have lately discovered while making these kind of snacks are , its only little time we spend in kitchen to make this delicacies. It's only the mindset ,one should have to do any cooking. Other similar snacks items on my blog which may interest you are : Congress Kadale Beeja| Spiced Peanuts , Avarekalu Mixture and Bhakarwadi

    If you are regular reader of my blogs , you may hardly see deep fried snack recipes . It's mainly because of 2 reason , firstly its high in calories and I really don't have control on eating and the second reason being wasting oil. I really feel clinched to throw off all the oil after first use 🙁 🙁 🙁 . As repeated usage of deep fried oils ,increases the amount of Trans fats and also it becomes rancid using it again in our cooking is a BIG NO. 

    Effects of Reusing cooking oil:

    Re-using the deep fried oil has many harmful effects on body. It is linked to increase bad cholesterol levels and also blocking arteries. As repeated heating of the same cooking oil , changes the chemical compound of oil and creates free radicals. Which are harmful when used in long run and can also be carcinogenic. Some of the other health hazards may include irritable throat , acidity and heart diseases.

    How to reuse cooking Oil : Try as much as not to re use , but incase if you want to store and reuse the oil ,follow these simple steps. Firstly, filter the oil using a muslin cloth or sieve filter to seperate the food particles.

    Use this oil only for sauteing vegetables or while preparing dough for roti . Also try to finish the oil before 15 -20 days. Use only high smoking point cooking oils like sunflower oil , peanut oil , mustard oil and rice bran oil.

    Never use cold pressed oils like EVOO , Flaxseed oils for frying.

    How to make Masala Peanuts:

    Place all the measure ingredients ready. Take a bowl , add besan / chickpea flour/ gram flour , for this add salt , all spice powders , pinch of cooking soda and rice flour.

    masala peanuts

    Mix well everything and add in raw peanuts.

    masala peanuts

    Pour 2 tablespoon of warm cooking oil on peanuts and mix well everything.

    masala peanuts

    Add 4-5 tablespoon of water , part by part and coat peanuts with chickpea flour. Depending on the quality of besan , you may need to adjust the water content. Don't add water at once , if batter becomes thin ,then add some gram flour and try to mix well everything.

    masala peanuts

    With the help of a fork or with hands, gently separate the peanuts and set aside.

    masala peanuts

    Heat oil in a kadai , drop in a peanut to check whether oil is hot enough to fry .If the peanut starts to release bubbles , then oil is hot enough to fry.

    masala peanuts

    Place masala coated peanuts in a deep fry mesh , and gently drop in peanuts into the hot oil.

    masala peanuts

    Allow it to fry on a low to medium heat for about 7-10 minutes and fry till crisp .Remove from the heat and place on a kitchen paper towel to absorb excess oil.

    masala peanuts

    Sprinkle some chilli powder, chat masala powder and mix well. Store it in a airtight container for 20-25 days . 

    masala peanuts

    Serve Masala Peanuts to munch on along with evening Kadak Masala Chai.

    Masala Peanuts

    Recipe

    Masala Peanuts
    No ratings yet

    Masala Peanuts

    Masala Peanuts are spicy and crunchy addictive deep fried tea time snacks made with  peanuts, chickpea flour and spices.
    Prep Time15 minutes mins
    Cook Time20 minutes mins
    Total Time35 minutes mins
    Course: Snack
    Cuisine: Indian
    Keyword: Festivals, Kids Recipes, Namkeen, snacks
    Servings: 2 Cups , approx
    Calories: 2108kcal
    Author: Muktha H S

    Ingredients

    • 1.5 Cup Peanuts
    • ¾-1 cup Besan /Chickpea flour
    • 1.5 tablespoon Rice flour
    • 2 tablespoon Hot Oil
    • 11/2 teaspoon Salt or as required
    • 1 ½ teaspoon Red Chilli powder
    • 2 pinches Asafoetida
    • ¼ teaspoon Turmeric powder
    • ½ teaspoon Dry Mango Powder
    • 4-5 tablespoon Water or as required
    • ¼-1/2 teaspoon Red Chilli Powder , to sprinkle ,Optional
    • ½-1 teaspoon Chat masala , to sprinkle
    • Oil for deep frying

    Instructions

    • Place all the measure ingredients ready. 
    • Take a bowl , add besan / chickpea flour/ gram flour , for this add salt , all spice powders , pinch of cooking soda and rice flour.
    • Mix well everything and add in raw peanuts.
    • Pour 2 tablespoon of warm cooking oil on peanuts and mix well everything. 
    • Add 4-5 tablespoon of water , part by part and coat peanuts with chickpea flour. Don't add water at once , if batter becomes thin ,then add some gram flour and try to mix well everything.
    • With the help of a fork or with hands, gently separate the peanuts and set aside.
    • Heat oil in a kadai , drop in a peanut to check whether oil is hot enough to fry .If the peanut starts to release bubbles , then oil is hot enough to fry.
    • Place masala coated peanuts in a deep fry mesh strainer , and gently drop in peanuts into the hot oil.
    • Allow it to fry on a low to medium heat for about 7-10 minutes and fry till crisp.
    • Remove from the heat and place on a kitchen paper towel to absorb excess oil.
    • Sprinkle some chilli powder, chat masala powder and mix well. 
    • Once it cools down,store it in a airtight container for 20-25 days .
    •  Serve Masala Peanuts to munch on along with evening Kadak Masala Chai.

    Notes

    • Just add water part by part , I added around ¼ cup of water it was too tight , then sprinkled 1-2 more tablespoon to coat the peanuts evenly.
    • Use ¾ cup chickpea flour initially,  you may need another ¼ cup later while adding water to adjust and coat peanuts evenly.
    • For Haldiram Style , masala peanuts use ½ teaspoon of garam masala, coriander powder, jeera powder ,pepper powder and ginger powder.
    • You can adjust spices and flavours finally by sprinkling the spices on top.

    Nutrition

    Calories: 2108kcal

    Thandai Masala Powder

    Published : March 19, 2019 | Last Update on September 27, 2022 By Muktha

    thandai-masala-powder

    Thandai Masala Powder is a quick and easy premix to make a tasty thandai cold drink. Basically , thandai is an Indian cold drink prepared with a mixture of nuts , seeds , spices and milk.

    Traditionally Thandai is made by soaking spices and nuts in milk / water overnight. Then its ground to fine paste, mixed with milk , filtered , chilled and then serve.

    Thandai is specially made during Maha Shivratri and Holi festival , other popular holi recipes are Thandai Kulfi , Basundi , Pista Badam Kulfi , Gujiya and Kesar Badam Milk .

    thandai-masala-powder
    [feast_advanced_jump_to]

    About this recipe

    Holi is incomplete without Thandai , a must drink for the festive of colors. For making traditional Thandai , one needs to plan before to soak nuts and seeds for minimum 6-8 hours or overnight.

    But with this Thandai Masala powder recipe , you can still enjoy delicious beverage at any time of the day by just mixing Thandai Masala Powder with milk.

    Why you need to try this ?

    • Easy to make
    • Simple
    • Better than store bought
    • Economical
    • Scalable
    • Comes handy in many other recipes
    • Most importantly , tastes delicious

    Ingredients

    Thandai masala powder is a combination of nuts , seeds , spices and dry rose petals. You may need quiet a few ingredients to make this homemade thandai premix.

    thandai-ingredients@palates-desire

    Nuts – Almonds and cashews nuts are used along with pistachios to make Thandai. But here I have used only almonds and cashew nuts. If you prefer , you can use pistachios too. Though few adds walnuts too , I personally don't suggest. As it releases oil very easily while blending into powder.

    Spices – Green cardamoms and Peppercorns are main spices that get into Thandai . Green Cardamom adds flavor , whereas black peppercorns give a hint of heat to thandai , making other flavors to pop out!

    Seeds – Traditionally , melon seeds, poppy seeds, and fennel seeds get into this. Though its recommended to add all the ingredients , If any of these spices are unavailable then feel free to skip adding them to the recipe.

    Saffron – Saffron strands adds flavor and hint of color to the drink making it look more beautiful and flavorful.

    Dry Rose Petals – The lingering aroma of rose in this drink makes this thandai drink more flavorful .Though it is optional, I recommend adding it. Incase if it's unavailable be sure to add few drops of rose water to Thandai drink.

    How to make Thandai with premix

    To make Thandai with this premix ,there are 2 methods

    Method 1 : Add Thandai Masala Powder to the boiled milk along with some sugar ,few drops of rose water. That's it , let it sit for some hours for flavors to infuse with milk and later chill in refrigerator until serving.

    Method 2 : Soak thandai masala powder ( premix) in lukewarm water/ milk for 15-20 minutes and grind to fine paste . Mix this fine ground masala with milk , stir well , boil along with milk for 5 minutes . Once it's cools down ,refrigerate and serve chilled garnished with some rose petals , slivered nuts and saffron strands.

    You can check on how to make Instant Thandai drink here

    Tips

    • Always pulse in intervals , as nuts may release oil. Pulse for few seconds , scrape sides with a spoon and again blend. Don't blend too much at a stretch , as nuts release oil and it may form lumps.
    • You can also add ½ cup of sugar and pulse spices and nuts together , this way you can avoid thandai powder turning out sticky.
    • Use 2 tablespoon of Thandai Masala Powder for every 250 ml of milk , to make Thandai Drink or any other dessert !

    Step by step directions to make Thandai Masala

    Keep all the measured ingredients ready .

    Thandai Masala Powder

    Place all the ingredients in a dry mixer jar / blender.

    Thandai Masala Powder

    Blend everything to a powder . Be careful while blending, as nuts may release oil. Blend for few seconds , stir it with a spoon and again blend. Don't blend too much at a stretch , as nuts release oil and it may form lumps.

    Thandai Masala Powder

    Store it in a airtight jar and use it as required.

    Thandai Masala Powder

    This post has been updated from the archives, was first published in March 2019

    Recipe

    thandai-masala-powder
    5 from 1 vote

    Thandai Masala Powder

    Thandai Masala Powder is a blend of dry nuts and spices used to make a cool beverage Thandai , a must drink during Holi Festival
    Prep Time8 minutes mins
    Cook Time0 minutes mins
    Total Time8 minutes mins
    Course: Beverage, DIY, Drinks
    Cuisine: Indian
    Keyword: DIY
    Servings: 200 grams
    Calories: 72kcal
    Author: Muktha H S

    Ingredients

    • ½ cup Almonds
    • ⅓ cup Cashews
    • 25-30 no's Cardamom Seeds
    • 20-25 no's Black peppercorns , around ½ teaspoon
    • 2 tablespoon Poppy Seeds / Khus khus
    • 2 tablespoon Melon Seeds
    • 2 tablespoon Fennel Seeds
    • 2 tablespoon Dry Rose Petals
    • ¼ teaspoon Saffron Stands

    Instructions

    • Transfer all ingredients into a dry mixer jar .
    • Pulse for few seconds , stop the mixer jar and scrape sides .
    • Again start to pulse for few secons and stop. Pepeat this process of pulsing in intervals for few seconds until all nuts and spices are powdered.
    • Don't pulse more or overdo it as nurts and seeds ,starts to release oil and it becomes sticy .
    • Once the seeds and nuts are powdered enough , remove from the jar and store in dry glass jar.
    • Thandai masala powder stays good for upto 3 months in refrigerator ,

    Video

    Notes

    • To make thandai drink , mix 2 tablespoon of thandai masala powder in water/ milk , blend to fine paste and mix with 250 ml of hot milk. Once flavours infuse, strain milk, chill and serve.
    • You can also add ½ cup of sugar and blend spices and nuts , this way you can avoid thandai powder turning out sticky.
    • Use 2 tablespoon of Thandai Masala Powder for every 250 ml of milk , to make Thandai Drink or any other dessert !

    Nutrition

    Serving: 2tablespoon | Calories: 72kcal
    • Kesar-badam-milk
      Kesar Badam Milk
    • Rabdi-dessert
      Rabdi Recipe, how to make best rabri at home
    • sheer-kurma-recipe@palatess-desire
      Sheer Khurma Recipe , How to make sheer khurma
    • gulab-jamun-milkpowder-recipe
      Gulab Jamun | Soft Gulab Jamun with Milk Powder

    Matar Kheer | Green Peas Kheer

    Published : March 15, 2019 | Last Update on October 17, 2022 By Muktha

    matar-kheer-recipe

    Matar kheer - is a smooth , creamy texture milk based  low calorie , healthy dessert made with green peas, flavored with cardamom , saffron and garnished with nuts .

    It's a perfect dessert to indulge during weekends and festivals with family and friends.

    I make this dessert in winter when green peas are in season . Few of my other favorite green peas recipes includes Methi Malai Matar , Paneer Matar and Hara Bhara Kebab

    Matar Kheer
    [feast_advanced_jump_to]

    About this recipe

    Matar Kheer is a easy and delicious Kheer/ milk based dessert prepared from fresh or frozen green peas. This smooth , creamy and healthy dessert is made with just 4 main ingredients milk ,ghee, sugar and cooked green peas . Later flavored and garnished with cardamom , nuts and few strands of saffron.

    Matar Kheer can be served either warm or chilled. But I love chilled dessert with all flavors of cardamom and saffron infused . This beautiful light green colored dessert is so delicious that you'll never realize that healthy tiny green edible emeralds are sneaked into this dessert.

    Ingredients

    To make this delicious and tasty green peas kheer all you need is only 5 basic ingredients an rest all other ingredients are add-ons to make it more delicious.

    matar-kheer-ingredients

    Green Peas - Though fresh green peas are used to make this dessert , in case if it's not available you can always make with frozen green peas also.

    Whole milk - to make any kheer , I always prefer to use full cream milk for more rich and creamy texture. But you can anyways use low fat milk also to make this kheer.

    Ghee / Clarified butter - It adds lots of flavor and makes kheer more tasty. For vegans, you can either use almond oil or coconut oil .

    Sweetener - I used organic white sugar but unrefined sugar or powdered jaggery or any sweetener can be used to make this dessert.

    Salt - Yes, I use a pinch to balance the flavors.

    Flavorings - freshly pound cardamom powder works well in this recipe.

    Nuts - pistachios , almonds and cashews are used.

    Health benefits

    Green Peas are fairly low in calories and contains good amount of antioxidants , vitamins and minerals. They are high in fiber and protein , hence it makes green peas a very filling food.

    Also it has a low glycemic index ( Low GI ) , a most important factor to control blood glucose levels.

    Green Peas should always be cooked well to ensure that the anti-nutrients ( Phytic acid and Lectins ) levels are reduced and doesn't hinders the absorption of nutrients to the body.

    FAQ's

    Can I use condensed milk in the recipe?

    Yes, you can use about 4 tablespoon of condensed milk here . If you using condensed milk then be sure not to use any extra sweetener in the recipe.

    How long can I store this ?

    This recipe is good to stay in fridge for 2-3 days !

    You may also like

    • Makhana-kheer-recipe
      Makhana Kheer Recipe
    • dates kheer
      Dates Kheer | Khajoor Ki Kheer
    • sabudana-kheer-recipe
      Sabudana Kheer Recipe
    • Sweet potato Halwa
      Sweet Potato Halwa | Shakarkandi Halwa

    Step by Step directions to make Matar kheer:

    Boil 1 liter of milk in a thick bottom pot. Keep milk in a low flame and keep stirring and scraping the edges with a spoon , once in between.

    Matar Kheer | Green Peas Kheer

    Condense the milk to about 600 -700 ml , approximately around 3.5 - 4 cups and keep it aside.

    Whilst , wash 1.5 cups of green peas fresh / frozen and place into a pressure cooker . Add ½ cup water and pinch of salt.

    Matar Kheer | Green Peas Kheer

    Close the pressure cooker lid and pressure cook for 2-3 whistles , allow the pressure to settle down on its own. Alternatively , you can also steam or boil it directly in water . Frozen green peas takes less time to cook when compared to fresh peas. I have used fresh green peas to make this kheer.

    Matar Kheer | Green Peas Kheer

    Open the pressure cooker lid , allow green peas to cool down.  Transfer boiled green peas into a blender / mixer jar and blend to smooth puree.

    matar puree

    Take a pan , add 3 tablespoon of Ghee/ Clarified butter  .

    Matar Kheer | Green Peas Kheer

    Add green peas puree and mix well with ghee and sauté for 3-4 minutes, it starts to thicken.

    how to make matar kheer

    Now add above prepared reduced milk , part by part and mix green peas puree with milk , such that there are no lumps. 

    Matar Kheer | Green Peas Kheer

    Keep on low flame and stir the kheer once in between , till you see the specks of ghee on top.

    Matar Kheer | Green Peas Kheer

    Now add in sugar and mix well. Cook for 2-3 minutes and turn off the flame once desired consistency is reached. You can also keep it on stove for long to make it more thick. Mine was of semi thick consistency , not too runny nor too thick.

    Matar Kheer | Green Peas Kheer

    Turn off the stove and add ½ teaspoon of cardamom powder and chopped nuts. Mix in few saffron strands . 

    Matar Kheer | Green Peas Kheer

    Mix well everything and serve warm or chilled. 

    matar kheer recipe

    Recipe

    matar-kheer-recipe
    5 from 5 votes

    Matar Kheer | Green Peas Dessert

    A smooth , creamy texture milk based  low calorie , healthy dessert made with green peas, flavoured with cardamom , saffron and garnished with nuts
    Prep Time5 minutes mins
    Cook Time45 minutes mins
    Total Time50 minutes mins
    Course: Dessert, Sweets
    Cuisine: Indian
    Keyword: Diwali, Festivals, Holi, Sweets
    Servings: 6 People
    Calories: 149kcal
    Author: Muktha H S

    Ingredients

    • 1 ½ Cups Green Peas, Fresh or Frozen
    • ½ cup Water , to pressure cook
    • 1 Salt Pinch , to pressure cook
    • 1 litre Milk
    • 4.5 - 5 tablespoon Sugar or as required
    • 3 tablespoon Ghee / Clarified Butter
    • ½ teaspoon Cardamom powder
    • 1 tablespoon Badam / Almonds Sliced
    • 1 tablespoon Pistachios / Unsalted pista , sliced
    • 1 tablespoon Cashews , chopped , optional
    • Saffron few strands

    Instructions

    • Boil 1 litre of milk in a thick bottom pot. Keep milk in a low flame and keep stirring and scraping the edges with a spoon , once in between.
    • Condense the milk to about 600 -700 ml , approximately around 3.5 cups and keep it aside.
    • Whilst , wash 1.5 cups of green peas fresh / frozen and place into a pressure cooker . Add ½ cup water and pinch of salt.
    • Close the pressure cooker lid and pressure cook for 2-3 whistles, allow the pressure to settle down on its own. Alternatively, you can also steam or boil it directly in water . 
    • Open the pressure cooker lid , allow green peas to cool down. 
    • Transfer boiled green peas into a blender / mixer jar and blend to smooth puree.
    • Take a pan , add 3 tablespoon of Ghee/ Clarified butter .
    • Add green peas puree and mix well with ghee and saute for 3-4 minutes, it starts to thicken.
    • Now add above prepared condensed milk , part by part and mix green peas puree with milk .
    • Make sure to combine puree with milk , such that it gets blended well and lumps are seen.
    • Keep on low flame and stir the kheer once in between , till you see the specks of ghee on top.
    • Now add in sugar and mix well.
    • Cook for 2-3 minutes and turn off the flame once desired consistency is reached. You can also keep it on stove for long to make it more thick. 
    • Add ¼ teaspoon of cardamom powder , chopped nuts and few saffron strands .
    • Mix well everything and serve warm or chilled. 

    Video

    Notes

    • Consistency of this dessert is not too runny nor too thick. Variations in cooking time , yields thin or thick kheer/dessert
    • I used 4.5 tablespoon of Sugar , It was just perfect Not too sweet nor too light. Adjust sugar to suit your taste buds.
    • Condensing milk gives you a richer taste and mild sweetness too. You can use milk without condensing also , but it may not give you that creamy rich flavour.I insist  you to condense the milk.

    Nutrition

    Calories: 149kcal

    Gobi Paratha

    Published : March 13, 2019 | Last Update on July 23, 2022 By Muktha

    Gobi_paratha

    Gobi Paratha is a most popular breakfast in Northern regions of India. Finely grated cauliflower/ gobi along with spices are stuffed inside a whole wheat roti and roasted on a hot griddle with lots of desi ghee. Gobi Paratha is the most common Paratha that can be found in any restaurants and Punjabi dhaba next to Aloo Paratha.

    Gobi Paratha

    There are many methods of doing Gobi Paratha. Few likes to saute and cook gobi before stuffing . But my method of making gobi stuffing is easy , I simply blanch Gobi/Cauliflower to get rid of harmful pesticides. Then finely grate / mince gobi and add into sauteed onion, ginger garlic paste . Throw in some spices and stuffing for paratha gets ready. Few doesn't add onions and ginger garlic paste , but I do add to enhance the taste. Also I saute onions, ginger and garlic in little oil to remove the raw smell , as I find the smell of onion and garlic bit overpowering in a morning meal.

    Adding raw/blanched cauliflower to the stuffing enhances the taste of paratha when compared with sauteed gobi . Though making of all parathas are quite similar , there are few spices and different methods followed for each different stuffings to make the best ever Paratha of that kind. Few Paratha Recipes shared on blog are: Sattu Paratha , Paneer Paratha , Onion Paratha , Aloo Paratha , Chinese Paratha and Mooli Paratha.

    RECIPE CARD FOR GOBI PARATHA

    Recipe

    Gobi_paratha
    5 from 1 vote

    Gobi Paratha

    Gobi Paratha is a most popular Wholewheat Indian Flat bread stuffed with minced cauliflower and spices.
    Prep Time20 minutes mins
    Cook Time35 minutes mins
    Resting Time20 minutes mins
    Total Time55 minutes mins
    Course: Breakfast
    Cuisine: Punjabi
    Keyword: Indian Breads, Lunchbox Recipe
    Servings: 10
    Calories: 168kcal
    Author: Muktha H S

    Ingredients

    For Dough

    • 3 cups Whole Wheat Flour
    • ½ teaspoon Salt or as required
    • ½ teaspoon Ajwain / Carom Seeds
    • 1 cup Water or as required

    For Cauliflower Stuffing

    • 2-2.5 Cups Cauliflower ,grated
    • ½ tablespoon Cooking oil
    • 1 no Onion or ½ cup finely chopped
    • 1 teaspoon Garlic finely chopped or garlic Paste
    • 1.5 teaspoon Ginger grated or ginger paste
    • 2 no Green chillies, finely chopped
    • ½ teaspoon Red chilli powder or as required
    • ½ teaspoon Garam Masala Powder
    • ½ teaspoon Dry Mango Powder / Amchur Powder
    • 1 - 1.5 teaspoon Salt or as required
    • 3 tablespoon Coriander leaves ,chopped

    For Roasting Paratha

    • Ghee / Clarified Butter as required

    Instructions

    For Dough :

    • Take 3 cups of whole wheat flour in a bowl or wide plate. Add ½ teaspoon of salt and ½ teaspoon pf carom seeds /ajwain seeds.
    • Make a well at the centre, add 1 tablespoon of oil and water .
    • Add water part by part and knead the flour to a smooth dough.
    • Cover the dough with a damp muslin cloth and keep it aside for 20-30 minutes. 

    For Gobi Stuffing :

    • Clean and cut the cauliflower into big florets. Add the cleaned gobi into boiling water with pinch of turmeric and salt. 
    • Turn off the heat, keep it aside for 5 minutes and drain water completely .
    • Grate / mince cauliflower in a food processor, set it aside.
    • Heat ½ tablespoon of oil in a kadai , add finely chopped ginger and garlic paste and saute.
    • Add ½ cup finely chopped onions, 2 finely chopped green chillies and saute for 2-3 minutes, until the raw smell goes off.
    • Turn off the heat , add finely grated /minced cauliflower and add all the spice powders, chopped coriander leaves.
    • Mix well everything and set it aside. 

    Rolling Paratha :

    • Dust some flour on rolling board. Pinch a lemon size dough and flatten it , dust some flour on top .
    • Roll the dough into 3-4" diameter circle. Spoon 3-4 tablespoon of gobi stuffing at the centre.
    • Make pleats from the corners, gather the pleated dough at centre .Cover the stuffing completely with dough.
    • Flatten the dough , dust some flour if needed . Using rolling pin , roll the paratha to 6 - 7" inch diameter.

    Roasting/Cooking Gobi Paratha:

    • Heat griddle/tava , place rolled paratha on hot griddle. 
    • Drizzle some ghee on corner and top of the paratha, let it cook for 1 minute.Now, flip paratha and cook on other side.
    •  Keep flipping the paratha evenly and cook on both sides till it is crisp.
    • Serve Gobi Paratha with Curds and pickles. I served it with Fresh Turmeric Pickle.

    Nutrition

    Calories: 168kcal

    Step by Step directions on making of Gobi Paratha:

    For Dough :

    Take 3 cups of whole wheat flour in a bowl or wide plate. Add ½ teaspoon of salt and ½ teaspoon pf carom seeds /ajwain seeds.

    Make a well at the centre, add 1 tablespoon of oil and water .

    Add water part by part and knead the flour to a smooth dough.

    Gobi Paratha

    Cover the dough with a damp muslin cloth and keep it aside for 20-30 minutes. 

    For  Gobi Stuffing :

    Clean and cut the cauliflower into big florets. Add the cleaned gobi into boiling water with pinch of turmeric and salt. Turn off the heat, keep it aside for 5 minutes and drain water completely .

    Gobi Paratha

    Grate / mince cauliflower in a food processor, set it aside.

    Gobi Paratha

    Heat ½ tablespoon of oil in a kadai , add finely chopped ginger and garlic paste and saute.  

    Add ½ cup finely chopped onions, 2 finely chopped green chillies and saute for 2-3 minutes. Till the raw smell goes off.

    Gobi Paratha

    Turn off the heat , add finely grated /minced cauliflower and add all the spice powders, chopped coriander leaves.

    Gobi Paratha

    Mix well everything and set it aside.

    Gobi Paratha

    Rolling Parath :

    Dust some flour on rolling board. Pinch a lemon size dough  and flatten it , dust some flour on top .Roll the dough into 3-4" diameter circle.

    Gobi Paratha

    Spoon 3 tablespoon of gobi stuffing at the centre.Make pleats from the corners, gather the pleated dough at centre .Cover the stuffing completely with dough.

    Gobi Paratha

    Flatten the dough , dust some flour if needed . Using rolling pin , roll the paratha to 6 - 7" inch diameter.

    Gobi Paratha

    Roasting/Cooking Gobi Paratha:

    Heat griddle/tava , place rolled paratha on hot griddle. Drizzle some ghee on corner and top of the paratha, let it cook for 1 minute.

    Gobi Paratha

    Now, flip paratha and cook on other side. Keep flipping the paratha evenly and cook on both sides till it is crisp.

    Serve Gobi Paratha with Curds and pickles. I served it with Fresh Turmeric Pickle. 

    Gobi Paratha

    Fresh Turmeric Pickle

    Published : March 5, 2019 | Last Update on March 16, 2021 By Muktha

    Turmeric _Pickle

    Fresh Turmeric Pickle recipe with step by step photos and video.

    Turmeric Pickle also called as Kachi Haldi ka Achar is quite popular in Gujarat , India. Making this pickle is quite easy as compared to making any other Indian Pickles. This is not a authentic Gujarati , Kachi Haldi ka Achar but it's similar .

    Other Pickles recipe on blog are AmlaPickle ( Nellikai Uppinakayi) and Nellikai Thokku ( Amla Dry Pickle)

    FResh Turmeric Pickle

    About the recipe

    This Haldi Pickle is delicious with blending flavours of ginger roots and lime Juice. Fresh Turmeric Roots ,Ginger roots are cut into juliennes , mixed with lime juice , mustard oil , salt and chilli powder.

    One of my cook book says , Authentic Gujarati Turmeric pickle is made with only turmeric roots, lime juice and salt. I adapted this recipe from Nisha Madhulika's Video and made changes to suit my taste. I must say , it's worth making this simple, easy pickle at home and stock up till next season.

    Checkout the Video !

    As summer is about to start my lunch will be having curd rice and I'll be pairing it with this pickle , Yum. Literally, I'm salivating right now 🙂 . Being a South Indian , its staple at home to have curd rice in our lunch .When it's summer , I end up my lunch always with some curd rice and pickle.

    As mercury is reaping high outside , I have added rice kanji in my afternoon lunch along with this fresh turmeric pickle. No exageration here, coolness and lightness in your stomach can be felt instantly after ending your meals. And it has considerably improved my gut health.

    So whoever want can try this rice kanji and pickle combination for a light summer lunch and notice the changes that it brings in your gut health.Pickles are good probiotics and always helps in improving your gut health. Hence eating pickle in everyday diet is beneficial.

    Turmeric medicinal properties

    Curcumin is the main active ingredient in turmeric. It has powerful anti-inflammatory effects and is a very strong antioxidant. It also helps in reducing the symptoms of Arthritis and Depression. And most common and known home remedy to fight flu , cough and cold.

    But Unfortunately , Curcumin is poorly absorbed by the body . Consuming black pepper , which contains piperine, a natural substance along with Turmeric enhances the absorption of curcumin . Also curcumin is fat soluble, so making a pickle with oil is the idea behind along with improving the shelf life.

    Come lets see on how to make this healthy turmeric pickle.

    Fresh Turmeric Pickle

    Step by Step directions on how to make Fresh Turmeric Pickle:

    Clean , Wash and wipe Fresh Turmeric and Ginger roots dry.

    Fresh Turmeric Pickle

    Peel the skin of both ginger and turmeric roots.

    Fresh Turmeric Pickle

    Make ginger and turmeric juliennes or grate or cut into circles and set it aside.

    Fresh Turmeric Pickle

    Dry roast mustard and methi seeds, once it starts to pop . turn off the heat. Allow it to cool. You can also use ½ teaspoon of Black peppercorns here . Dry roast  and  blend to powder. Adding black peppercorns along with Turmeric enhances the absorption of curcumin .

    Fresh Turmeric Pickle  

    Once cooled , transfer into a dry mixer jar and make powder of it.

    Heat mustard oil in a pan , once it becomes hot . Turn off the flame/stove.

    Fresh Turmeric Pickle

    Add Hing/Asafoetida , red chilli powder ,mustard and methi seeds powder to hot oil.

    Fresh Turmeric Pickle

    Now add in fresh turmeric and ginger juliennes into the above oil.

    Fresh Turmeric Pickle

    Add ½ cup lime juice .

    Fresh Turmeric Pickle

    Now add in salt.

    Fresh Turmeric Pickle

    Mix well everything .

    Fresh Turmeric Pickle

    Store it in a sterilized glass jar.

    Fresh Turmeric Pickle

    Serve as an accompaniment along with food.

    Tastes best when paired with curd rice. But can also be served with paratha, sambar and rice and also rasam rice.

    Recipe Card for Fresh Turmeric Pickle

    Recipe

    Fresh Turmeric Pickle
    4.25 from 4 votes

    Fresh Turmeric Pickle

    A easy pickle recipe made with Fresh Turmeric , Ginger and Lemon is most popular in Gujarati Cuisine.
    Prep Time20 minutes mins
    Cook Time5 minutes mins
    Total Time25 minutes mins
    Course: Accompaniment, Condiments
    Cuisine: Gujarati
    Keyword: Medicinal, Pickles
    Servings: 400 grams Jar
    Author: Muktha H S

    Ingredients

    • 250 grams Fresh Turmeric or 2 cups Turmeric juliennes
    • 50 grams Ginger or ½ cup Ginger juliennes
    • ½ cup Lime Juice
    • 1 tablespoon Mustard Seeds
    • ½ teaspoon Methi seeds
    • ½ cup Mustard Oil
    • 1 tablespoon Red Chilli Powder
    • ¼ teaspoon Hing/ Asafoetida
    • 1 ½ tablespoon Crystal salt or as required

    Instructions

    • Clean ,rinse and wipe Fresh Turmeric and Ginger roots dry. 
    • Peel the skin of both ginger and turmeric roots.
    • Make ginger and turmeric, juliennes or grate or cut into circles and set it aside.
    • Dry roast mustard and methi seeds, once it starts to pop , turn off the heat.Allow it to cool
    • Once cooled , transfer into a dry mixer jar and make powder of it.
    • Heat mustard oil in a pan , once it becomes hot . Turn off the flame/stove.
    • Add Hing/Asafoetida , red chilli powder ,mustard and methi seeds powder to hot oil.
    • Now add in fresh turmeric and ginger juliennes into the above oil.
    • Add ½ cup lime juice and salt.
    • Mix well everything and store it in a sterilized glass jar.
    • Serve as an accompaniment ,condiment along with food.

    Video

    Notes

    • Make sure oil and lemon juice completely covers the juliennes orelse it may get spoilt soon.
    • To avoid deep yellow stains in hands , use gloves.
    • Also you can use big fat pinch of blackpepper powder in the recipe for complete absorption of nutrients . 

    Sicilian Cabbage Orange Salad

    Published : March 2, 2019 | Last Update on November 2, 2024 By Muktha

    sicilian-salad

    Sicilian Cabbage Orange Salad with step by step images and video. This delicious salad with Olive oil and orange juice dressing. The tartness from orange , sweet , tang from cherry tomatoes, crunch from cabbage along with olives makes it so delicious that you get addicted .

    sicilian-salad
    [feast_advanced_jump_to]

    About this recipe

    I'm making this salad for more than a decade and still love to eat it without making any changes to the original recipe. If you are not a salad lover ....., then try making this salad . You'll definitely fall in love and would ask for more and more .....!

    One best this about this salad is , it doesn't have anything creamy , high calories for dressing. Tart taste of Vinaigrette in salad is replaced by oranges and its dressing .

    Sicilian Cabbage Orange Salad

    Watch Video

    Cabbage Health Benefits

    Its rich in Vitamins K , C and B6 . Also it has a good source of dietary fiber , manganese, potassium, vitamin B1, folate , calcium ,iron and niacin making it a most healthiest vegetable during pregnancy. Cabbages are also very low in calories , 1 Cup shredded cabbage yields about just 32 calories. Hence cabbages are most recommended during any weight loss , weight management programs.

    There is no short cuts or fad diets for a successful weight loss. Eat a healthy , nutritious food with portion control and stay active or work out for minimum 30 minutes. Don't wonder , all of a sudden , why I jumped to Weight Loss Topic ? This Sicilian Cabbage Orange Salad is one such recipe in most of my clients diet charts for weight loss . As this salad is nutritious , full of fibre and keeps you satiated for long without any cravings .

    Similar Weight loss Diet Recipes

    • Peanut salad
    • Bean Salad
    • Palak Paneer Salad
    • Beetroot soup
    • Pumpkin Soup
    • Ragi Soup
    • Lemon Coriander chicken Soup .

    Recipe

    sicilian-salad
    4.50 from 2 votes

    Sicilian Cabbage Orange Salad

    Sicilian Cabbage Orange salad is a sweet , crunch and tang salad from Spanish and Sicilian cuisine.
    Prep Time10 minutes mins
    Total Time10 minutes mins
    Course: Salads, Side Dish
    Cuisine: World
    Keyword: Basic, Diet, Healthy
    Servings: 4 People
    Calories: 97kcal
    Author: Muktha H S

    Ingredients

    • 2 cups Cabbage ,shredded
    • ½ cup Cherry Tomatoes or 1 large tomato
    • 10 no Green Olives sliced
    • 1-2 no Oranges, 10 -15 segments

    For Dressing

    • ½ cup Orange Juice ,freshly extracted
    • 2 tablespoon Extra Virgin Olive Oil
    • ¼ -½ teaspoon Salt or as required
    • ¼ teaspoon Black Pepper Powder, freshly crushed
    • ½ teaspoon Chilli flakes

    Instructions

    • In a glass bowl or small glass jar, add ½ cup of freshly extracted orange juice , 2 tablespoon of olive oil , ¼- ½ teaspoon salt , ¼ teaspoon pepper powder , ½ teaspoon Chilli flakes. 
    • Stir and mix well everything, set aside. If using a glass jar , shake well and use it as required.
    • Thoroughly wash and rinse cabbage, shred it thin to get about 2 cups.
    • Take ½ cup of cherry tomatoes and halve into two. If using regular tomatoes , cut into long strips .
    • Take around 10 green olives and slice. Or else use 2-3 tablespoon of sliced green olives.
    • Cut open Orange , remove orange rinds and seeds. Separate orange segments without skin . If the skin is thin , you can directly add orange segments.
    • Add cabbage , tomates, olives and orange to a mixing bowl . 
    • Now drizzle in prepared dressing and gently mix well . 
    • Serve a bowl full of this salad before meal.

    Video

    Notes

    • If you want to cut down calories , you can reduce the amount of extra virgin olive oil to 1 tablespoon .

    Nutrition

    Calories: 97kcal

    How to make Sicilian Cabbage Orange Salad:

    In a glass bowl or small glass jar, extract ½ cup of orange juice .    Sicilian Cabbage Orange Salad

    Add 2 tablespoon of olive oil for this orange Juice and stir well.

    Sicilian Cabbage Orange Salad

    Now  add ¼- ½ teaspoon salt , ¼ teaspoon pepper powder .

    Sicilian Cabbage Orange Salad

    Add ½ teaspoon Chilli flakes. Stir and mix well everything, set aside. If using a glass jar , shake well and use it as required.

    Sicilian Cabbage Orange Salad

    Place all the ingredients ready. Thoroughly wash and rinse cabbage, shred it thin to get about 2 cups.

    Sicilian Cabbage Orange Salad

    Take ½ cup of cherry tomatoes and halve into two. If using regular tomatoes , cut into long strips . Take around 10 green olives and slice. Or else use 2-3 tablespoon of sliced green olives.

    Sicilian Cabbage Orange Salad

    Cut open Orange , remove orange rinds and seeds. Separate orange segments without skin . If the skin is thin ,you can directly add orange segments.

    In a mixing Bowl , add cabbage , tomatoes and olives .

    Sicilian Cabbage Orange Salad

    Add oranges to a mixing bowl . 

    Sicilian Cabbage Orange Salad

    Now drizzle in prepared dressing. Gently stir and mix well everything .

    Sicilian Cabbage Orange Salad

    Serve a bowl full of this salad before meal.

    sicilian-salad

    You might also like

    • Sicilian Cabbage Orange Salad
      Soups-Salads-Raita
    • Sicilian Cabbage Orange Salad
      Side Dish
    • Sicilian Cabbage Orange Salad
      Drinks and Beverages
    • Sicilian Cabbage Orange Salad
      Diet Recipes

    Pav Bhaji Recipe

    Published : March 1, 2019 | Last Update on April 21, 2020 By Muktha

    Pav bhaji

    Pav Bhaji is one of the most popular street food from Mumbai . Bhaji means vegetables and Pav is leavened bread rolls , as both are served together it got the name . This iconic dish from Mumbai, Maharashtra has gained popularity across globe just like Idli-Dosa from South and Paratha from Punjab.

    Pav bhaji

    Factors that influence its taste are : selection of veggies , spice powder and butter. To get the actual street style taste , be generous in using Butter for preparation of Bhaji . Also toast pav with butter and pav bhaji spice mix before serving. And using Byadgi red chillies or kashmiri red chilli powder gives deep red colour to Bhaji. I'm using a pressure cooker to cook veggies and kadai to make bhaji. But street vendors use a large iron griddle/tawa . As it makes no difference to taste , I make it in kadai. You can use anything depending on the quantity. I often follow Pav Bhaji recipe from Dassana with some minute modifications , you can check her recipe here.

    Healthy or Junk : It is not a Junk Food. It is as good as eating roti with sabji. Make sure to use Whole wheat Pav over refined flour Pav. Bhaji is made with good amount of veggies and also green peas is the source of protein here. Adding raw chopped onions and lemon juice avoids bloating , which may happen to many when they consume yeast bread. But be conscious about the amount of butter that goes into this dish.

    Always serve Pav Bhaji topped with butter and accompanied with chopped onions, coriander leaves and lemon wedges. If interested do try other Street Food recipes like Gobi Masala Dosa , Churumuri and Puchka from my blog.

    RECIPE CARD FOR PAV BHAJI

    Recipe

    Pav bhaji
    5 from 4 votes

    Pav Bhaji

    Pav Bhaji is a delicious street food from Mumbai where buttered breads are served with spiced smooth mashed assorted vegetables.
    Prep Time20 minutes mins
    Cook Time25 minutes mins
    Total Time45 minutes mins
    Course: Main Course, Snack, Street Food
    Cuisine: Maharstarian
    Keyword: Mumbai, snacks, Street Food
    Servings: 6 People
    Calories: 256kcal
    Author: Muktha H S

    Ingredients

    For Pressure Cooking

    • 1 tablespoon Butter
    • ½ tablespoon Pav Bhaji Masala
    • 3 no Potatoes , medium size
    • 1 cup Green Peas , fresh or frozen
    • 1 cup Carrot
    • 1 ½ cup Cauliflower Florets
    • ⅓ cup French Beans ,otional
    • 2 ½ cup water
    • ½ teaspoon Salt

    For making Bhaji

    • 3 tablespoon Butter
    • ½ cup Onions,finely chopped
    • 1.5 inch Ginger or 1 teaspoon Ginger paste
    • 6 no Garlic Cloves or 1 teaspoon Garlic Paste
    • 1 no Green Chilli , finely Chopped
    • ½ cup Green Capsicum , finely chopped
    • 2 cups TOmatoes, Finely Chopped ,about 4 tomatoes
    • ½ teaspoon Turmeric Powder
    • 1 teaspoon Red Chilli Powder
    • 2 ½ tablespoon Pav Bhaji Masala
    • 1.5 -1 cup Water , as needed to adjust the consistency
    • 1 teaspoon Salt or as required

    For Serving, Accompaniments

    • 12 No Whole wheat Pav ,
    • 1 ½ teaspoon Pav Bhaji Masala
    • Butter as required
    • Onions Finely Chopped , as required
    • Coriander leaves ,finely chopped , as required
    • Lemon Wedges , as required

    Instructions

    • Clean cauliflower florets and blanch in hot water , drain water and keep it aside.
    • In a pressure cooker , Add 1 tablespoon of butter , ½ tablespoon of pav bhaji masala and mix well.
    • Now, add blanched cauliflowers , green peas , potatoes , carrots and few green beans. Can also add cabbage and other veggies of your choice.
    • Add 2 ½ cups of water , ½ teaspoon of salt and pressure cook all veggies for 2-3 whistles. Allow pressure to settle on its own. 
    • In a large kadai , heat 2 tablespoon of butter . Add chopped onions and fry till it turns translucent.
    • Now ,throw in ginger garlic paste and chopped green chilli , fry well till raw smell of Ginger garlic paste vanishes.
    • Add in chopped tomatoes and cook till tomatoes turns mushy.
    • For this add finely chopped capsicum , mix well and saute for 2-3 minutes.
    • Add turmeric powder , chilli powder and pav bhaji masala , mix well everything.
    • Add in cooked vegetables along with stock , mash lightly using potato masher. You can either mash it smoothly or coarse , its upto your choice.
    • Now add salt and adjust water ,if needed.Simmer it for 5 minutes and turn off the heat.
    • Heat Tava , add butter for this add 2 pinches of pav bhaji masala.
    • Cut open the pav and lightly roast the pav in pav bhaji masala spiced butter.
    • Serve Pav Bhaji hot topped with butter and accompanied with chopped onions, coriander leaves and lemon wedges.

    Notes

    • This is a basic Pav Bhaji Recipe , you can make variations by adding Cheese for Cheese Pav Bhaji , Exclude Onion - Garlic for No ONion NO Garlic Version of Pav Bhaji , Addition of Paneer to Basic Recipe gives Paneer Pav Bhaji

    Nutrition

    Calories: 256kcal

    Step by Step Directions for making Pav Bhaji:

    Clean cauliflower florets and blanch in hot water with a pinch of salt and turmeric powder , drain water and keep it aside.

    Pav Bhaji Recipe

    In a pressure cooker , Add 1 tablespoon of butter , ½ tablespoon of pav bhaji masala and mix well.

    Pav Bhaji Recipe

    Now, add blanched cauliflowers , green peas , potatoes , carrots and few green beans. Can also add cabbage and other veggies of your choice.

    Pav Bhaji Recipe

    Add 2 ½ cups of water , ½ teaspoon of salt and pressure cook all veggies for 2-3 whistles. Allow pressure to settle on its own. 

    Pav Bhaji Recipe

    In a large kadai , heat 2 tablespoon of butter . Add chopped onions and fry till it turns translucent.

    Pav Bhaji Recipe

    Now ,throw in ginger garlic paste and chopped green chilli , fry well till raw smell of Ginger garlic paste vanishes.

    Pav Bhaji Recipe

    Add in chopped tomatoes and cook till tomatoes turns mushy.

    Pav Bhaji Recipe

    For this add finely chopped capsicum , mix well and saute for 2-3 minutes.

    Pav Bhaji Recipe

    Add turmeric powder , chilli powder and pav bhaji masala , mix well everything.

    Pav Bhaji Recipe

    Add in cooked vegetables along with stock.

    Pav Bhaji Recipe

    Mash lightly using potato masher. You can either mash it smoothly or coarse , its upto your choice.

    Pav Bhaji Recipe

    Now add salt and adjust water ,if needed.Simmer it for 5 minutes and turn off the heat.

    Pav Bhaji Recipe

    Heat Tava , add butter for this add ¼-1/2 teaspoon of pav bhaji masala.

    Pav Bhaji Recipe

    Cut open the pav and lightly roast the pav in butter.

    Pav Bhaji Recipe

    Serve Pav Bhaji hot topped with butter and accompanied with chopped onions, coriander leaves and lemon wedges.

    Pav Bhaji Recipe

    Adai

    Published : February 28, 2019 | Last Update on September 27, 2022 By Muktha

    Adai

    Adai is a traditional recipe from South Indian Cuisine. Preparation is similar to Dosa but tastes very delicious. Varieties of dals (lentils) and raw rice are used to make Adai. Soak Dals , Rice separately for 3-4 hours and then grind to coarse batter along with red chillies . Allow batter to sit for 2-3 hours and then prepare Adai Dosa . Shallots (sambar Onions) , green chillies ,curry leaves ,coriander leaves and veggies of your choice can also be used added while making Dosa . Overnight (8-10 Hrs) fermentation is not needed for making Adai.

    Adai

    Variations in Recipe : This is a traditional recipe and every home has their own proportions on lentils and rice. Also addition of spices, herbs and vegetables varies from house to house. But the basic recipe calls for addition of Shallots/ Pearl Onions/Sambar Onions , curry leaves and coriander leaves. As Adai is mainly served with Aviyal , no extra addition of vegetables are needed for making Dosa. But if you are serving with Coconut Chutney and want to make it more nutritious, carrot , cabbage and leafy vegetables can be added in Dosa. Adai is served with Aviyal , Ghee - Jaggery or Coconut Chutney and Sambar .

    Adai
    Nutrition in Adai

    In most of my recipes , I often write about complete and incomplete protein. None of the plant based protein is complete , hence to make it a complete protein proper food combination must be followed. Cereals and Pulses together makes a complete protein. As Adai is a combination of cereals and pulses , it makes for a complete protein rich breakfast. If you are on a diet plan and don't know on how to add protein in your every meal . Then start eating the traditional wholesome meals without any kind of twists , you'll get all nutrients that your body demands for. Keeping simple invokes to eat healthy and stay fit.

    Other South Indian Breakfast recipes that may interest you are: Akki Roti , Pesarattu , Pongal , Bisibele bath , Rava Idli , Semiya Puliyogare and Appe

    RECIPE CARD FOR ADAI DOSA


    Recipe

    Adai
    5 from 1 vote

    Adai

    Adai is a Variety of Dosa prepared using many lentils and rice. A delicious , super healthy , complete protein breakfast from South Indian Cuisine.
    Prep Time15 minutes mins
    Cook Time30 minutes mins
    Soaking, Resting Time6 hours hrs
    Total Time45 minutes mins
    Course: Breakfast, Tiffin
    Cuisine: South India, Tamil
    Keyword: Breakfast_Ideas, Dosa
    Servings: 18 Makes
    Calories: 138kcal
    Author: Muktha H S

    Ingredients

    For Soaking

    • 1 cup Raw Rice
    • 1 cup Idli Rice/ Parboiled Rice
    • ½ cup Channa Dal
    • ¼ cup Urad Dal
    • ¼ cup Moong Dal
    • ¼ cup Toor Dal

    For Grinding

    • 4 no Red Chilli
    • 2 no Byadgi Red Chilli
    • ½ teaspoon Asafoetida

    Additions for Batter

    • ¾-1 Cup Chopped Shallots / Sambar Onion / Pearl Onion
    • 2-3 no Green Chillies
    • 1 inch Ginger grated , optional
    • 4 sprigs Curry leaves chopped
    • 4 tablespoon Coriander Leaves , chopped

    Other Ingredients

    • 1 teaspoon Salt or as required
    • Oil / Ghee for roasting Dosa

    Instructions

    • Rinse and wash 2 cups of raw rice , 1 cup regular rice and 1 cup Idli Rice. Soak in water for 3-4 hours.
    • In a bowl add ½ cup chana dal , ¼ cup urad dal , ¼ cup moong dal , ¼ cup toor dal ,rinse and wash thoroughly. Soak all dals together for 3 hours.
    • After 3 hrs , drain water and keep it aside. Reserve this water to add while grinding the batter.
    • In a wet mixer grinding jar, add rice , 5 dry red chillies, asafoetida and grind to a smooth paste, add the reserved water portion by portion as required. 
    • Transfer the batter to a seperate bowl .
    • Now to the same jar , add all soaked dals and grind to a coarse paste , add little reserved water as needed.
    • Add this coarse grind dal batter to rice batter , add salt , mix well and set it aside for 2-3 hours. Batter consistency should be of regular Dosa consistency , neither too thick nor too thin.
    • Chop shallots ( about ¾ -1 cup) , green chillies (2-3 no's) , curry leaves 4-5 sprigs and 4 tablespoon of coriander leaves . Add this to batter and mix well.
    • Heat griddle/dosa tawa , Pour a ladle full of batter and spread like a dosa. Drizzle some ghee/ clarified butter/oil on top of the dosa , close the lid and cook for 30 - 40 seconds.
    • Open the lid , flip the dosa to other side and continue to cook ,till done.
    • Drizzle some more ghee and serve hot . Adai should be served hot only , it becomes rough once it cools down.

    Notes

    • You can spices like jeera and ajwain too. 
    • Green leafy vegetables like drumstick leaves, dill leaves are also added.
    • You can  also add grated carrot and cabbage to sneak in Kid's meal.
    • Prepare the batter and store it in refrigerator for next day use. Add onions, greens and other veggies at the time of preparing Dosa.
    • Serve it  HOT HOT and only Hot . It drys out when cooled.

    Nutrition

    Calories: 138kcal

    Step by Step directions for making Adai :

    Rinse and wash 2 cups of raw rice , 1 cup regular rice and 1 cup Idli Rice. Soak in water for 3-4 hours.

    Adai

    In a bowl add ½ cup chana dal , ¼ cup urad dal , ¼ cup moong dal , ¼ cup toor dal ,rinse and wash thoroughly. Soak all dals together for 3 hours.

    Adai

    After 3 hrs , drain water and keep rice aside. Reserve this water to add while grinding the batter.Add rice to the mixer jar /grinder.

    Adai

    In a wet mixer grinding jar, add rice , 5 dry red chillies, asafoetida and grind to a smooth paste, add the reserved water portion by portion as required.

    Adai

    Transfer the batter to a seperate bowl .

    Adai

    From soaked Dal , drain water and add dal to the same jar.

    Adai

    Ground to a coarse paste , add little reserved water,part by part as needed.

    Adai

    Add this coarse grind dal batter to rice batter , add salt , mix well and set it aside for 2-3 hours. Batter consistency should be of regular Dosa consistency , neither too thick nor too thin.

    Adai

    Chop shallots ( about ¾ -1 cup) , green chillies (2-3 no's) , curry leaves 4-5 sprigs and 2 -3 tablespoon of coriander leaves . Add this to batter and mix well.

    Adai

    Heat griddle/dosa tawa , Pour a ladle full of batter and spread like a dosa.

    Adai

    Drizzle some ghee/ clarified butter/oil on top of the dosa , close the lid and cook for 30 -40 seconds.

    Adai

    Open the lid , flip the dosa to other side and continue to cook ,till done.

    Adai

    Drizzle some more ghee and serve hot . Adai should be served hot only , it becomes rough once it cools down. Serve it with Coconut Chutney , Ghee- Jaggery or Aviyal.

    Adai

    Carrot Orange Juice

    Published : February 26, 2019 | Last Update on September 27, 2022 By Muktha

    Carrot Orange Juice

    Carrot Orange Juice is the most famous vegetable and fruit juice combination that is used for breakfast. A quick blend of orange , carrots and ginger .

    Adding Vegetable and fruit based Juices in your diet can improve the daily nutritional intake .But before jumping into recipe , please go through the details on who can drink Carrot Orange Juice .

    What are its benefits and side effects of having this juice? Can all healthy Fruits and Vegetables can be mixed together ? There are few basics that should be kept in mind when we combine fruits and vegetables.

    Carrot Orange Juice

    Choices of Fruits /Vegetables / Milk Blends Combinations : Blending the fruits and vegetables juices should be done thoughtfully . Because mixing of Acidic Fruits/ Vegetables with Alkaline Foods and vice versa has negative effects. If interested you can go through this basic article on Acidic Alkaline Food list here.

    Though combination of Carrot Orange Juice is quite popular , it may not be easily digestible by few. Because it's said that Sweet Veggies should not be combined with Citrus fruit . Few may even develop acidic reflux and digestives problems if this kind of combinational juice is consumed. To combat it's negative effect, addition of ginger and black salt is highly recommended. Also add 1.5-2 cups of water to dilute the concentration of the juice.

    By adding water , ginger and black salt not only makes this juice palatable but also makes it a healthy breakfast juice choice . Other similar kind of healthy juices / detox on blog are ABC juice , Kiwi Cucumber Smoothie , Coriander Amla Detox , Beetroot Detox and also Amla Aloevera Nutri blend.

    RECIPE CARD FOR CARROT ORANGE JUICE

    Recipe

    Carrot Orange Juice
    5 from 1 vote

    Carrot Orange Juice

    Carrot Orange Juice is a most popular breakfast juice with sweetness of carrot , tang of orange and zing from ginger.
    Prep Time10 minutes mins
    Total Time10 minutes mins
    Course: Breakfast, Drinks
    Cuisine: World
    Keyword: Beverages, Breakfast_Ideas, Diet, Healthy
    Servings: 2 People
    Calories: 126kcal
    Author: Muktha H S

    Ingredients

    • 200 grams Red Carrot
    • 6 no Oranges
    • 1 inch Ginger
    • ½ teaspoon Black Salt
    • 2 Cups Water

    Instructions

    • Wash and clean 200 grams carrots, trim edges , peel skin ,cut roughly and add into the juicer.
    • Take around 5-6 oranges, cut and remove seeds, remove rind and add the orange segments into the juicer.
    • Clean and peel ginger skin , add 1 inch ginger into juicer , add ½ teaspoon of black salt .
    • Blend everything in a juicer , add 1.5 to 2 cups water if needed to blend well.
    • Serve immediately or else it may turn bitter because of orange juice.

    Nutrition

    Calories: 126kcal

    Step by Step Directions for making of Carrot Orange Juice :

    Wash and clean 200 grams carrots , trim edges , peel skin ,cut roughly and add into the juicer.

    Carrot Orange Juice

    Take around 5-6 oranges , cut and remove seeds , remove rind and add the orange segments into the juicer.

    Carrot Orange Juice

    Clean and peel ginger skin , add 1 inch ginger into juicer , add ½ teaspoon of black salt .

    Carrot Orange Juice

    Blend everything in a juicer , add 1.5 to 2 cups water if needed to blend well.

    Carrot Orange Juice

    Serve immediately or else it may turn bitter because of orange juice.

    Carrot Orange Juice

    Juices for Health

    Published : February 26, 2019 | Last Update on July 23, 2022 By Muktha

    Kiwi Cucumber Smoothie

    This article on Juices for Health reveals the facts and importance of adding homemade fruits and vegetables juices in our regular diet . Detox Drink , Nutritious Punch and Energy Drink are the few names for this healthy juices. Make healthy choices for a healthy lifestyle to stay fit and live stronger.

    Juices for Health
    Whole Fruit, Vegetables or Juices

    Undoubtedly, Whole Fruits and Vegetables are healthier option when compared to Juice because of its fibre content. Fiber helps in digestion and are important for a healthy gut. So all Dietitians and Nutritionist emphasise on eating a whole fruit or vegetable , so that you get your fiber. This is well known fact , but how adding Juice for Health is beneficial ???

    Kiwi Cucumber Smoothie
    Why Juices ???

    We'll let me answer this , Juices helps to increase your water intake. A freshly extracted juice without any sweetener is a Nutritious Rich Water that nourishes the body with essential vitamins and minerals. Juices are good option for picky eaters , elderly persons and also children as it delivers same nutrition as the whole fruit .Also juicing of fruit and vegetables helps body to readily absorb the nutrients. But contradictorily its not recommended for diabetic patients as the fibre is sieve off.

    Juices for Health
    Juices for Health

    My role as Nutritionist and a food enthusiast allows me to look about food and diet with a definitive edge . Juicing fruits and vegetables together , adding in your diet is truly beneficial. It is because while eating a fruit or vegetable , at the maximum one may eat 2-3 fruits , vegetables at a time . But while juicing , more number of fruits and vegetables are added , which boosts the daily nutritional intake. Mixed Fruit and Vegetable Juice is good when its a part of your Balanced diet. Which means get your fibre , protein, carbohydrates and fat from regular diet and add juice for extra nutritional boost. But never go for commercial juices with sweeteners and preservatives.

    Beetroot Amla Detox

    Consume mixed vegetable and fruit juices, as part of your healthy balanced diet for nutritional boost . Consider juicing/blending fruits and vegetables together to make a nutritious drink but not as a replacement for your fruit / vegetable intake.

    Aloevera Amla Juice

    Whole Wheat Pizza Base

    Published : February 21, 2019 | Last Update on July 23, 2022 By Muktha

    Wholewheat Pizza Base
    Wholewheat Pizza Base

    Whole wheat Pizza base is a healthy alternative to the basic all purpose flour Pizza base. The main key for any kind of bread baking is the good quality yeast . A good quality yeast delivers a good bread. Baking our own bread is so much fun . If you're uncomfortable working with yeast or making your own pizza dough at home, then this post is definitely for you.

    Baking our own bread gives us the liberty to play in with flavours . Also homemade pizza is totally a bliss. We actually have control on how thick or thin the crust should be ? Need a cheesy burst pizza or chewy crust or a thin base , everything is with in our hands.

    Whole wheat Pizza base recipe which im sharing is a fool proof recipe. Actually in this recipe I'm sharing you how you can prepare pizza dough and store Pizza base. With this pizza dough recipe , you can freshly bake your pizza directly by adding toppings. In case you want to prepare Pizza Base ahead and use it after a 1-2 days , then you can prepare the base and keep it ready.

    Whole Wheat Pizza Base

    I have added cider vinegar in this recipe because acidic medium in limit helps in gluten development. As Whole wheat flour is used here , I have added ½ tablespoon of vinegar which helped to get a very nice pizza crust with just right amount of chewiness.

    If you are planning for Baking Pizza at home , then do try this homemade Pizza Sauce / Pasta Sauce recipe . Other Kids favorite recipes on blog are Masala Bun , Potato Smiley , Potato Wedges , Spanish Potato Omelette, Cheesy Bell pepper Toast and Pasta .

    RECIPE CARD FOR WHOLE WHEAT PIZZA BASE :

    Recipe

    Wholewheat Pizza Base
    5 from 2 votes

    Whole Wheat Pizza Base

    This Homemade 100% Whole wheat Pizza Base is a healthy alternative for regular Pizza Base with a  nice crust and right amount of chewiness
    Prep Time15 minutes mins
    Cook Time10 minutes mins
    Resting Time1 hour hr
    Total Time25 minutes mins
    Course: DIY, Main Course
    Cuisine: Fusion, Italian, World
    Keyword: Bread, Kids Recipes
    Servings: 2 Makes
    Calories: 307kcal
    Author: Muktha H S

    Ingredients

    • 3 cups Whole wheat flour
    • ½ teaspoon Sugar
    • 1 ½ cup Luke Warm Water
    • 1 ½ teaspoon Instant Yeast / Active Dry Yeast
    • ½ tablespoon Vinegar
    • 2 tablespoon Olive Oil
    • ¾-1 teaspoon Salt
    • Extra Flour for dusting
    • Extra Olive oil for brushing

    Instructions

    • Take ½ cup of warm water and sugar in a bowl , stir well .
    • Add yeast , stir well and keep it aside undisturbed for 10 minutes, till it bubbles.
    • Take 3 cups of whole wheat flour in a wide plate/bowl, add salt ,make a well in the centre .
    • Add vinegar , olive oil and yeast solution in the well and mix it with the wheat flour.
    • Add remaining ¾-1 cup of warm water to the flour and gather the flour together to form a dough.
    • Lightly dust the worktop surface with flour and start kneading the dough.
    • Knead the dough briskly and really well for 5-8 minutes till the dough attains elasticity , becomes smooth and stretchable.
    • Transfer the dough to a bowl , grease the dough with olive oil on top .
    • Close the bowl with a damp muslin cloth and keep it undisturbed for 1 - 2 hours.
    • By 1 hr, the dough would have doubled in volume , punch the dough to release the air. Divide the dough into 2 or 3 parts .
    • Dividing into 2 parts yields 9" inches thick crust Pizza Base , whereas 3 parts yields 6" inches Pizza Base. Gently knead the dough and keep the dough covered for 10-15 minutes.
    • Now, on a lightly floured surface , roll the dough evenly to a round disk of 9" inch diameter and make incisions with fork .
    • Take a pizza pan, grease it with olive oil , dust some flour on oil and carefully place the rolled pizza base into pan.
    • Preheat the Convection Oven to 170 deg celsius and place the pizza base into oven and bake for 8-10 minutes. 
    • Depending on your oven temperature 8-10 minutes should be fine. The base should just become firm and easily move in the pan by the end of 8 minutes. 
    • After baking , allow it to cool on a wire rack . Once cooled , place in a ziplock pouch and refrigerate.Stays good for 3-4 days.

    Notes

    • For Instant dry yeast ,no need to proof. You can directly mix with flour and knead the dough.
    • Active Dry yeast needs proof. Though I have used instant yeast , just for illustration I have let it sit for 10 minutes to bubble and froth(proof)
    • If you don't want to store base for later use , You can directly bake pizza for about 20-23 minutes at 200-220 deg celsius in convection mode oven.
    • Split time for pizza base is 10 minutes and baking pizza is 12 to 13 minutes. So all together it should take 22-23 minutes.

    Nutrition

    Calories: 307kcal

    Step by Step Directions on making of Pizza Base:

    Take ½ cup of warm water and sugar in a bowl , stir well .

    Whole Wheat Pizza Base

    Add yeast , stir well and keep it aside undisturbed for 10 minutes, till it frothy  bubbles. Whole Wheat Pizza Base                  

    Take 3 cups of whole wheat flour in a wide plate/bowl, add salt ,make a well in the centre .

    Whole Wheat Pizza Base

    Add vinegar and olive oil at the centre in well.

    Whole Wheat Pizza Base

    Now for this add prepared yeast solution in the well  .

    Whole Wheat Pizza Base

    Mix it with the wheat flour.

    Whole Wheat Pizza Base

    Add remaining ¾-1 cup of warm water to the flour. 

    Whole Wheat Pizza Base

    Gather the flour together to form a dough.

    Whole Wheat Pizza Base

    Lightly dust the worktop surface with flour and start kneading the dough.

    Whole Wheat Pizza Base

    Knead the dough briskly and really well , using both the hands. (I used my other hand to click the pic, so its not seen in the image) 

    Whole Wheat Pizza Base

    Make a log out of dough , fold both the edges to reach at centre and again knead well. Fold and knead for couple of times.

    Whole Wheat Pizza Base

    After 5-8 minutes till the dough attains elasticity , becomes smooth and stretchable.

    Whole Wheat Pizza Base

    Transfer the dough to a bowl , grease the  dough with olive oil on top .Close the bowl with a damp muslin cloth and keep it undisturbed for 1 - 2 hours.

    Whole Wheat Pizza Base

    After 1 hour, the dough would have doubled in volume.

    Whole Wheat Pizza Base

    Punch the dough to release the air.

    Whole Wheat Pizza Base

    Divide the dough into 2 or 3 parts .Dividing into 2 parts yields 9" inches thick crust Pizza Base  , whereas 3 parts yields 6" inches Pizza Base.

    Whole Wheat Pizza Base

    Gently knead the dough and keep the dough covered for 10-15 minutes.

    Whole Wheat Pizza Base

    After 10 minutes , open the cloth , lightly dust the surface . 

    Whole Wheat Pizza Base

    Roll the dough evenly to a round disk of 9" inch diameter .

    Whole Wheat Pizza Base

    Make incisions with fork .

    Whole Wheat Pizza Base

    Take a pizza pan, grease it with olive oil , dust some flour on oil and carefully place the rolled pizza base into pan.

    Whole Wheat Pizza Base

    Drizzle few drops of olive oil on top of the pizza base and brush it evenly.

    Whole Wheat Pizza Base

    Preheat the Convection Oven to 170 deg celsius and place the pizza base into oven and bake for 9 minutes. Depending on your oven temperature 8-10 minutes should be fine. The base should easily move in the pan by the end of 8 minutes. Don't bake more as it will be again baked along with cheese and toppings.

    Whole Wheat Pizza Base

    After baking , allow it to cool on a wire rack . Once cooled , place in a ziplock pouch and refrigerate.Stays good for 3-4 days.

    Whole Wheat Pizza Base

    I baked Pizza using this base with assorted veg toppings.

    Whole Wheat Pizza Base

    Khaman Dhokla

    Published : February 11, 2019 | Last Update on September 27, 2022 By Muktha Gopinath

    khaman dhokla
    Khaman Dhokla is from Gujarat's glorious cuisine . Dhokla and Khaman are two different but similar looking recipes. Khaman is made up of either fresh ground chana dal or chana flour / besan flour where as Dhokla is made up of fermented batter of rice and lentils . As Khaman looks similar to Dhokla , it is often referred as Khaman Dhokla . This instant Khaman Dhokla not only tastes heavenly but are light on tummy too. It makes a great and healthy  option that can serve as any time snack.
     
    khaman dhokla
     
    These yellow spongy ,fluffy , savory steamed cakes has medley of taste . It is mildly tang with a light sweet tone and that heat from chutney makes it truly delicious. This Instant Khaman is my personal favourite because of 2 main reasons , one being its a healthy delicious snack and other being its very easy to make with no fancy ingredients.
     
    Khaman Dhokla
     
     
    Tips and Tricks : For making a fluffy Khaman , I use little yoghurt . For vegan option you can skip yoghurt and use lemon juice . The main tip to get the perfect spongy Khaman is to beat the batter well . If more air is incorporated in the batter then the resulting Khaman will be soft and airy. As this is a instant Khaman recipe , I have used eno salt to make it soft and fluffy . Once eno fruit salt is added, evenly mix the salt, quick and briskly but don't beat the batter much. Immediately pour to  prepared greased tin and steam it right away . If it sits long outside then khaman will not rise much and will be flat.
     
    Temper these nylon khaman with Mustard seeds , Sesame Seeds, Green chillies , Curry leaves  and serve with Green Chutney . You can garnish with coriander leaves and grated fresh coconut .
     
    RECIPE CARD FOR INSTANT KHAMAN DHOKLA

    Recipe

    Khaman Dhokla
    4.50 from 2 votes

    Khaman Dhokla

    Khaman Dhokla is a soft and fluffy , savory steamed cake made from gram flour is a popular snack from Gujarati Cuisine.
    Prep Time5 minutes mins
    Cook Time12 minutes mins
    Total Time17 minutes mins
    Course: Breakfast, Snack, Tiffin
    Cuisine: Gujarati
    Keyword: Healthy, Instant Breakfast, Tiffin
    Servings: 5 People
    Calories: 170kcal
    Author: Muktha H S

    Ingredients

    • 1.5 Cups Besan/ Gram flour
    • 2 tablespoon Semolina / Fine Sooji / Rava
    • 2 Pinches Turmeric Powder
    • 1 inch Ginger , crushed to paste
    • 2 no's Green Chillies ,crushed to paste
    • 1 teaspoon Sugar
    • 1 teaspoon Salt or as required
    • ¼ teaspoon Hing / Asafoetidia
    • 2 tablespoon Yoghurt
    • 1 Cup Water or as required
    • 2 teaspoon Fruit Salt or eno or ½ teaspoon cooking soda

    For Tempering

    • 2 tablespoon Oil
    • 1 teaspoon Mustard Seeds
    • 1 teaspoon Cumin Seeds / Jeera Seeds ,optional
    • 2 teaspoon White Sesame Seeds
    • 1 No Green Chilli , finely chopped
    • 2 Sprigs Curry Leaves
    • 1 teaspoon Lime Juice
    • 1 teaspoon Sugar
    • ⅓ Cup Water

    For garnishing

    • 2 tablespoon Fresh Coriander leaves chopped
    • 2 tablespoon Fresh grated coconut

    Instructions

    • In a mixing bowl , take besan /gram flour , salt , sugar , hing , 2 tablespoon fine sooji ,pinch of turmeric powder, ginger green chilli paste . Add 2 tablespoon of yoghurt or add 1 teaspoon of lemon juice.
    • Now add ¾ cup - 1 cup water , add water part by part and beat.
    • Beat the batter well , batter should be thick but of spoon dropping consistency. 
    • Now keep the steamer ready , add water to steamer and let it come to boil . Whilst grease the steamer pan / dhokla plates / idli plates or moulds and keep it ready.
    • Add 2 teaspoon of eno fruit salt to the batter and quickly mix well everything evenly. If there is no eno salt use ½ teaspoon of baking salt.
    • Now pour in the batter to prepared greased plates/tin , arrange them and steam it . If using a entire batter in a single tin ,then steam for 18-20 minutes . If using dhokla plates , then steam for 10-12 minutes. 
    • Once steamed , give 5 minutes standing time and then remove .
    • Loosen the corners with a knife and invert it on a plate. Cut into squares.
    • In a bowl take sugar and ⅓ cup of water, let sugar dissolve. For this add 1 teaspoon lemon juice and set it aside.
    • Meanwhile prepare the tempering, Heat 2 tablespoon of oil in a tempering pan, add mustard seeds once it crackles , add jeera , sesame seeds , chopped chillies and curry leaves. 
    • Now pour the tempering over the precut khaman dhokla. Allow it to soak the sugar syrup .
    • Add in prepared sugar syrup carefully and bring it to boil.
    • Garnish with coriander leaves, grated fresh coconut (optional) and serve it with coriander mint chutney.

    Notes

    • Add plain Eno or fruit salt . If there is no fruit salt add ½ -¾ teaspoon of cooking salt,but not more.
    • Water quantity may vary slightly between ¾ to 1 cup or little more by 1 or 2 tablespoon depending on the quality of besan / gram flour and sooji/semolina
    • Cooking time varies depending on the container , in which you are cooking. If all the batter is placed in a single tin ,it takes more time to cook when compared with lesser batter in separate dhokla plates.
    • Once after mixing the fruit salt well , without any delay pour batter to tin and cook immediately.

    Nutrition

    Calories: 170kcal

    Step by Step directions for making Instant Khaman Dhokla

    In a mixing bowl , take besan /gram flour , salt , sugar , hing , 2 tablespoon fine sooji ,pinch of turmeric powder, ginger green chilli paste.  Add 2 tablespoon of yoghurt or add 1 teaspoon of lemon juice.

    Khaman Dhokla

      Now add ¾ cup - 1 cup water , add water part by part  and beat.

    Khaman Dhokla

    Beat the batter well , batter should be thick but of spoon dropping consistency. Just like cake batter.

    Khaman Dhokla

    Now keep the steamer ready , add water to steamer and let it come to boil .I use pressure cooker without vent to steam. 

    Whilst grease the steamer pan / dhokla plates / idli plates or moulds  and keep it ready. 

    Khaman Dhokla

    Add 2 teaspoon of eno fruit salt to the batter and quickly mix well everything evenly. If there is no eno salt use ½ teaspoon of baking salt.

    Khaman Dhokla

    Now pour in the batter to prepared greased plates/tin , arrange them and steam it . If using a entire batter in a single tin ,then steam for 18-20 minutes .

    Khaman Dhokla

    If using  dhokla plates , then steam for 10-12 minutes. Check for its doneness by inserting a toothpick or knife as we do for cake.

    Khaman Dhokla

    Once steamed , give 5 minutes standing time and then remove .

    Khaman Dhokla

    Loosen the corners with a knife and invert it on a plate. Cut into squares.

    Khaman Dhokla

    In a bowl take sugar and ⅓ cup of water, let sugar dissolve. For this add 1 teaspoon lemon juice and set it aside. 

    Khaman Dhokla

    Meanwhile prepare the tempering, Heat  2 tablespoon of  oil in a tempering pan, add mustard seeds , jeera , sesame seeds , chopped chillies and  curry leaves. Add in prepared sugar syrup carefully and bring it to boil.

    Khaman Dhokla

    Now pour the tempering over the precut khaman dhokla. Allow it to soak the sugar syrup .

    Khaman Dhokla

    Garnish with coriander leaves, grated fresh coconut (optional) . 

    Khaman Dhokla

    Serve it with coriander mint chutney.

    Khaman Dhokla

    Virgin Mary

    Published : February 7, 2019 | Last Update on September 27, 2022 By Muktha

    virgin Mary

    Virgin Mary recipe with step by step photos and video. Virgin mary is a savory drink made mainly with Tomato Juice.

    To make this non alcoholic mocktail all you need is Tomato Juice, Celery, Worcestershire Sauce, Tabasco and salt.

    virgin Mary
    [feast_advanced_jump_to]

    About this recipe

    Virgin Mary is a version of Bloody Mary in a non alcoholic form. Skipping Vodka from Bloody Mary recipe yields Virgin Mary with same great flavors without a booze.

    Virgin Mary can be made either spicy or mild depending on your taste. The main ingredients are tomato and Lemon juice , other ingredients are simply there to enhance the taste. Anyone can enjoy this drink at any time of the day . It is a great drink and is considered to be one of the best and nutritious hangover cure .

    Benefits of Tomato Juice

    Tomato Juice boosts digestions and also works wonders in flushing out toxins deposition from the body . Also presence of sulphur and chlorine helps kidney and liver to perform a better detoxification process. Tomato juice contains Potassium which reduces water retention . Tomatoes are rich in antioxidants , beta- carotene , Vitamin C and E with high amount of lycopene , making it good for heart. Lycopene helps in removing cholesterol from the blood and strengthen the walls of blood vessels.

    So adding tomato juice in our daily diet , delivers more health benefits. This red fruit which is an indispensable part of our Indian cuisine not just adds tang to the dish but also offers many health and beauty benefits.

    Other healthy drink recipes on blog are Kiwi Cucumber Smoothie ,Alovera Amla Drink , ABC Drink and Beetroot Detox.

    Watch Video

    Step by step directions to make Virgin Mary :

    Halve 10 large chilled tomatoes and add into juicer / blender to get 2.5 -3 cups of tomato Juice.

    tomato juice

    Add 1 teaspoon of cajun spices or fresh black pepper powder , 1 teaspoon lemon juice, 1 tablespoon Worcestershire sauce , ½ - 1 teaspoon of Tabasco sauce as required and 1 teaspoon chopped celery or ½ teaspoon celery salt.

    Virgin_mary-drink

    Blend it together.

    Virgin Mary

    If juice is too thick add some chilled water or ice cubes , process it.

    Virgin Mary

    Pass it through strainer and collect the juice.

    virgin-mary-recipe

    Stir well everything or shake well in a cocktail/mocktail jar/bottle.

    Take a tall serving chilled glass, dip the rim of the glass in lemon juice . Roll the glass rim in salt , shake off the excess salt and allow the frosting to dry.

    frosting glass rim

    Now shake the prepared juice and pour it into glass.

    virgin-marry-mocktail

    Add some ice cubes and garnish with a celery stalk , lemon wedges and cherry tomatoes.

    virgin-mary-drink
    Virgin Mary

    Recipe

    virgin -mary-recipe
    5 from 2 votes

    Virgin Mary Drink

    A non alcoholic savory drink with intermingling taste of Tomato Juice , Lemon and worcestershire Sauce.
    Prep Time15 minutes mins
    Total Time15 minutes mins
    Course: Drinks
    Cuisine: World
    Keyword: Beverages, Party Mocktails
    Servings: 2 People
    Calories: 68kcal
    Author: Muktha H S

    Ingredients

    • 3 cups Tomato Juice Chilled
    • 1 teaspoon Cajun Spices or Black pepper powder
    • 2 teaspoon Lemon Juice
    • 2 teaspoon Worcestershire Sauce
    • ½ -1 teaspoon Tabasco Sauce or as required
    • 1 teaspoon celery salt or chopped celery
    • salt to taste

    Garnishing

    • 6 Ice Cubes crushed
    • 1 tablespoon Lemon Juice , frosting glass rim
    • 1 teaspoon Salt , frosting glass rim
    • 1 no Celery stalk as stirrer
    • 1 Lemon wedges or cherry tomatoes

    Instructions

    • Halve 10 large chilled tomatoes and add into juicer / blender to get 2.5 -3 cups of tomato Juice. Pass it through strainer and collect the juice.
    • Add 1 teaspoon of cajun spices or fresh black pepper powder , 2 teaspoon lemon juice, 2 teaspoon Worcestershire sauce , ½ - 1 teaspoon of Tabasco sauce as required and 1 teaspoon chopped celery or celery salt. 
    • Stir well everything or shake well in a cocktail/mocktail bottle.
    • Take a tall serving glass, dip the rim of the glass in lemon juice . 
    • Roll the glass in salt , shake off the excess salt and allow the frosting to dry.
    • Now shake well the prepared juice in a bottle and pour it into glass.
    • Add some crushed ice cubes and garnish with a celery stalk , lemon wedges and cherry tomatoes.

    Video

    Notes

    • Black pepper powder or Cajun spices are used alternatively , i love cajun Spices , hence added the same.
    • If Celery salt is not available ,then add chopped celery to the juice . But strain and serve the juice.
    • Can use readymade Tomato juice.
    • Amount Of Tabasco can be increased or decreased ,to alter the heat of the juice.
    • Be careful while adding salt as cajun spices already contains salt in it.
    • Add extra salt only if you are using chopped celery and not Celery Salt.

    Nutrition

    Calories: 68kcal

    Chicken Tikka Masala

    Published : February 6, 2019 | Last Update on September 27, 2022 By Muktha

    Chicken Tikka Masala

    Chicken Tikka Masala is a dish with roasted chicken cubes . Chicken chunks are marinated with yoghurt and spices for few hours and then slow cooked on tandoor . Later roasted chicken cubes are added to a spicy, creamy , onion and tomato masala . Succulent chicken pieces adds lots of flavour to this masala .

    Chicken Tikka Masala

    Chicken Tikka marination for making Tikka masala is slightly different from that of regular Chicken Tikka . It is because the spiciness and flavours from chicken tikka is imparted to the masala. Hence chicken cubes are marinated with lots of spices and cooked. Later added into creamy gravy which gets flavours and heat from chicken tikka.

    Generally the masala / sauce in Chicken Tikka Masala is rich and creamy . Mawa and fresh cream is added to the tomato based curry to make it more rich , creamy and saucy . But I have not used Mawa/ Khoya here instead cashew paste is used to give that nutty flavour and to thicken the masala. Recipe Courtesy : Sanjeev Kapoor , find the original recipe here.

    If there is a feast and need to serve for your clan on weekends , then replace cashews with mawa . Adding mawa makes it more rich and delicious with more calories indeed. Occasionally you can indulge with such rich curries but for regular use adding cashews will make justice .

    Serve Chicken Tikka Masala accompanied with onion rings ,lemon wedges along side with Jeera Rice , Peas Pulao , Garlic Naan , Tandoori Roti or Phulka .

    RECIPE CARD FOR CHICKEN TIKKA MASALA


    Recipe

    Chicken TIkka Masala
    5 from 1 vote

    Chicken Tikka Masala

    Chicken Tikka Masala : Chunks of roasted marinated chicken are added into a creamy spiced curry.
    Prep Time10 minutes mins
    Cook Time45 minutes mins
    Marination1 hour hr 30 minutes mins
    Total Time55 minutes mins
    Course: Main Course
    Cuisine: Indian
    Keyword: Chicken, Non-Vegetarian
    Servings: 6 People
    Calories: 312kcal
    Author: Muktha H S

    Ingredients

    For Marination

    • 2 tablespoon Yoghurt
    • 11/2 teaspoon Ginger Paste
    • 3 teaspoon Garlic Paste
    • 1 tablespoon Kashmiri Red Chilli Powder
    • ½ teaspoon Black Salt
    • ½ teaspoon Turmeric Powder
    • ½ teaspoon Garam Masala Powder
    • ½ teaspoon Carom seeds/ Ajwain
    • ½ tablespoon Gram flour / Besan
    • ½ teaspoon Crushed Red Chilli Flakes
    • ¾ teaspoon Salt or as required
    • 1 teaspoon Mustard Oil or any cooking oil
    • 1 tablespoon Lemon Juice
    • 500 grams Boneless Chicken

    For Gravy

    • 3 tablespoon Oil
    • 1 no Capsicum Large , cut into cubes
    • 1 no Tomato Large ,cut into cubes
    • 1 no Onion Large , cut into cubes
    • 2-3 no's Green Chillies
    • 2 no's Onions , finely Chopped
    • 3 no's Tomatoes , pureed to 1 cup
    • 11/2 inch Ginger crushed to paste
    • 10 no's Garlic cloves , paste
    • 10-15 no's Whole Cashews , paste
    • ⅛ teaspoon Turmeric Powder
    • ½ teaspoon Red Chilli Powder
    • 1 teaspoon Coriander Powder
    • ½ teaspoon Cumin Seeds ,optional
    • ¼ teaspoon Cardamom Powder
    • 1 teaspoon Kasoori Methi /Dried Fenugreek Leaves
    • ¾ teaspoon Salt or as required
    • 2 tablespoon Fresh Cream
    • 1 tablespoon Honey or ½ teaspoon Sugar
    • 2 tablespoon Fresh Coriander leaves to garnish
    • ½-3/4 Cup Water or as required to adjust the consistency

    Instructions

    Preparations

    • Rinse and wash chicken cubes under running water and set aside for extra water to drip down.
    • Place all the ingredients for marination in a bowl and mix well everything.
    • Add cleaned chicken pieces into the marination , rub masala into chicken chunks. Close lid and allow marination to sit in refrigerator for minimum 90 minutes. 
    • Soak 15 whole cashews in warm water for 20 minutes.Blend cashews into fine paste and set aside.
    • Soak 15 whole cashews in warm water for 20 minutes.Blend cashews into fine paste and set aside.
    • DeSeed 1 large Tomato and cut into cubes. You can use this pulp seeds while making Tomato Puree . 
    • Cut onions and Capsicum too into equal size cubes and keep it aside. 
    • Make ginger garlic paste from 10 cloves of garlic and 1 ½ inch ginger piece and keep it ready.
    • Finely chop 2 onions and set aside. 
    • Blend 3 large tomatoes to get 1 cup tomato puree and set aside. 

    Making Gravy

    • In a flat pan , heat 1 teaspoon Mustard oil and add Chicken Pieces . Cook on a high heat for first 5 minutes , reduce the heat to medium and continue to cook. Alternatively , cook chicken in preheated convection oven at 200 deg celsius for 18-20 minutes.
    • After 10 minutes , Check the chicken that is being cooked on pan /oven , turn the chicken pieces to other side and let it cook on other side too.
    • Whilst , heat 3 tablespoon of oil and add cubed onions. Once it turns translucent , add capsicum.
    • Add cubed Tomatoes and also add 2-3 green chillies and saute on high heat , till cooked. 
    • Remove sauteed veggies on an absorbent paper towel and keep it aside.
    • In the same pan, add 1 teaspoon of jeera seeds and allow it to crackle. Add chopped onions and saute well till it looks transparent.
    • Now add ginger garlic paste and fry well , till the raw smell goes off.
    • Add tomato puree and mix well . Also add turmeric powder ,red chilli powder and coriander powder and saute for a minute.
    • Let tomato puree blends with spices and continue to cook
    • When oil starts releasing from corners , add in ½ cup of water , salt and mix well.
    • Add cashew paste and mix well ,bring it to boil.
    • Now keep the masala in simmer , add 2 tablespoon of fresh cream , give a quick stir .
    • Add cardamom powder and kasuri methi to the masala and mix well everything.
    • Now add in cooked chicken cubes and mix well.
    • Finally finish the dish by adding in sauteed veggies ,mix well and garnish with coriander leaves and serve hot.
    • Serve Chicken Tikka Masala with Jeera rice  accompanied with lemon wedges and onion rings.

    Notes

    • Can replace cashews with  ¼ Cup of grated Mawa/ Khoya for a richer taste.
    • It's a thick gravy , ¾ cup water is sufficient . But you can add up to 1 cup to adjust the consistency.

    Nutrition

    Calories: 312kcal

    Step by Step directions for making Chicken Tikka Masala

    Preparations :

    Rinse and wash chicken cubes under running water and set aside for extra water to drip down.Chicken Tikka Masala

    Place all the ingredients for marination in a bowl and mix well everything.Chicken Tikka Masala

    Add cleaned chicken pieces into the marination , rub masala  into chicken chunks .Close lid  and allow marination to sit in refrigerator for minimum 90 minutes. Chicken TIkka Masala

    Soak 10- 15 whole cashews  in warm water for 20 minutes. Blend cashews into fine paste and set aside.

    Chicken TIkka Masala

    DeSeed 1 large Tomato and cut into cubes.  You can use this pulp seeds while making Tomato Puree . Cut onions and Capsicum too into equal size cubes and keep it aside. 

    Make ginger garlic paste from 10 cloves of garlic and 1 ½ inch ginger piece and keep it ready. 

    Chicken Tikka Masala

    Finely chop 2 onions and keep it aside. 

    Blend 3 large tomatoes to get 1 cup tomato puree and set aside. 

    Chicken Tikka Masala

    Making Gravy :

    In a flat pan , heat 1 teaspoon Mustard oil and add Chicken Pieces . Cook on a high heat for first 5 minutes , reduce the heat to medium and continue to cook.  Chicken Tikka Masala

    Alternatively , you can cook  chicken in preheated convection oven at 200 deg celsius for 18-20 minutes.

    After 10 minutes  , Check the chicken that is being cooked on pan /oven , turn the chicken pieces to other side and let it cook on other side too.

    Chicken Tikka Masala

    Whilst , heat 2 tablespoon of oil and add cubed onions. Once it turns translucent , add capsicum.

    Chicken Tikka Masala

    Add cubed Tomatoes and also add 2-3 green chillies and saute on high heat , till cooked. Remove sauteed veggies on an absorbent paper towel and keep it aside.

    Chicken Tikka Masala

    In the same pan, add ½ teaspoon of jeera seeds and allow it to crackle. Add chopped onions . 

    Chicken Tikka MasalaSaute onions till it looks translucent .Now add ginger garlic paste and fry well.

    Chicken Tikka Masala

    Fry well till hint of raw smell goes off.Chicken Tikka Masala

    Add tomato puree and mix well . Also add turmeric powder ,red chilli powder and coriander powder and saute for a minute.Chicken Tikka Masala

    Let tomato puree blends with spices and continue to cook.Chicken Tikka Masala

    When oil starts releasing from corners , add in ½ cup of water , salt and mix well. Chicken Tikka Masala

    Add cashew paste and mix well ,bring it to boil.Chicken Tikka Masala

    Now keep the masala in simmer , add 2 tablespoon of fresh cream ,  give a quick stir .Chicken Tikka Masala

    Add cardamom powder and kasuri methi  to the masala and mix well everything.Chicken Tikka Masala

    Now add in cooked chicken cubes and mix well.Chicken Tikka Masala

    Finally finish the dish by adding in sauteed veggies ,mix well  and serve.Chicken Tikka Masala

    Serve Chicken Tikka Masala accompanied with lemon wedges and onion rings. I served it with Jeera Rice.  

    Chicken Tikka Masala

    Jeera Rice

    Published : February 4, 2019 | Last Update on September 27, 2022 By Muktha

    Jeera Rice

    Jeera Rice is a easy ,simple and common dish which is popular throughout India. Long grain basmati rice is used to prepare Jeera Rice . Rice is cooked along with whole spices and later tempered with cumin seeds and green chillies . Jeera Rice can be paired up with any kind of spicy gravy and also simple Dal Fry with onion rings and lemon wedges as accompaniments.

    Jeera Rice

    Keys for Perfection : Most important thing to note while making Jeera rice is , rice grains should be cooked perfectly with separate grains. But at the same time , make sure its not dry , cooking rice perfectly is must. Also good amount of ghee for tempering cumin seeds and wait till jeera seeds crackles but don't burn jeera seeds . Add chopped green chillies to jeera seeds , give quick stir and then add cooked rice into jeera seeds seasoned pan. Never pour tempering over the rice.

    I had made Chicken Tikka Masala to serve with Jeera Rice . You can serve with Dal Fry , Paneer Butter Masala , Rajma Masala , Shahi Paneer , Dry Peas Masala , Makhani Dal or Chana Masala. Also it tastes yum with Kolhapuri Egg Masala

    Jeera Rice

    RECIPE CARD FOR JEERA RICE

    Recipe

    Jeera Rice
    5 from 4 votes

    Jeera Rice Restaurant Style

    A fluffy mild spice fragrant rice tossed with lots of Jeera Seeds.
    Prep Time30 minutes mins
    Cook Time25 minutes mins
    Soaking Time30 minutes mins
    Total Time55 minutes mins
    Course: Main Course
    Cuisine: Indian
    Keyword: Rice Varities
    Servings: 4 People
    Calories: 287kcal
    Author: Muktha H S

    Ingredients

    • 1 Cup Long Grain Basmati Rice
    • 1 teaspoon Cooking Oil
    • 2 no Bay Leaf
    • ½ inch Cinnamon Stick
    • 2 no Cloves
    • 3 no Green Cardamom
    • 1 no Black Cardamom
    • 1 Strand Mace /Javitri
    • 1 ¾ - 2 Cup Water
    • ½ teaspoon Salt
    • 2 drops Lime Juice
    • 2 tablespoon Chopped Coriander leaves

    For Tempering

    • ¾ tablespoon Jeera Seeds
    • 1 no Green chilli Chopped
    • 1.5 tablespoon Clarified Butter / Oil

    Instructions

    • Wash and rinse basmati rice for 2 -3 times.
    • Once the water runs clear , soak in water for minimum 30 minutes.
    • In a Pressure cooker or open pot , heat 1 teaspoon of oil , add all whole spices and saute for a minute. Add soaked rice , ½ teaspoon salt , 1 ¾ cups water ( for pressure cooking ) and 2 drops of lime juice.
    • Pressure cook on high heat for 2 whistle . Turn off the heat and allow pressure to settle on its own. If cooking on a open pot( add 2 cups of water) , close lid and cook till rice is fully done.
    • Open the Pressure cooker / lid , discard the whole spices , with a fork gently fluff the rice. Make sure not to break the rice grains.
    • In a pan, heat 1.5 tablespoon of clarified butter /ghee or oil . Add ½ tablespoon of Jeera Seeds and allow it to crackle. Now add in chopped green chillies , saute for a minute.
    • Add Cooked rice , mix well on high heat. Turn off the flame, add in chopped coriander leaves , mix and serve hot . Also you add 4-5 torn mint leaves , it adds to taste.
    • Serve with any rich gravy by side with onion rings and lemon wedges as accompaniments.

    Notes

    1. Wash and rinse rice grains 2-3 times so that ,starch washes off and water looks clear. 
    2. Rice can be cooked either in Pressure cooker ,Open Pan , Electric Cooker .
    3. Adding drops of lemon juice , makes the rice grain look white 🙂

    Nutrition

    Calories: 287kcal

    Step by Step Directions to make Jeera Rice

     Wash and rinse basmati rice for 2 -3 times.Jeera Rice

    Once the water runs clear , soak in water for minimum 30 minutes.

    Jeera Rice

    In a Pressure cooker or open pot , heat 1 teaspoon of oil , add all whole spices and saute for a minute. Add soaked rice , mix well. 

    Jeera Rice

    Now add  1 ¾ cups water ( for pressure cooking ) ,½ teaspoon salt , and 2 drops of lime juice.

    Jeera Rice

    Pressure cook on high heat for 2 whistle . Turn off the heat and allow pressure to settle on its own. If cooking on a open pot( add 2 cups of water) , close lid  and cook till rice is fully done.

    Jeera Rice

    Open the Pressure cooker / lid , discard the whole spices .

    Jeera Rice

    With a fork gently fluff the rice. Make sure not to break the rice grains.

    Jeera Rice

    In a pan, heat 1.5 tablespoon of clarified butter /ghee or oil . Add ½ -¾ tablespoon of Jeera Seeds , allow it to crackle.

    Jeera Rice

    Now add in chopped green chillies , saute for a minute. Add Cooked rice .

    Jeera Rice

    Mix well  gently ,on high heat , taking care not to break the rice grains.

    Jeera Rice

    Turn off  the flame, add in chopped coriander leaves , mix and serve hot . Also you can add 4-5  torn mint leaves , it adds to taste.

    Jeera Rice

    Serve with any rich gravy by side with onion rings and lemon wedges as accompaniments.

    Jeera Rice
    • « Previous Page
    • 1
    • …
    • 3
    • 4
    • 5
    • 6
    • 7
    • …
    • 10
    • Next Page »

    Hey ! Nice To Meet You

    Muktha-about-me

    Hi ! I'm Muktha , Blogger , Nutrition Advisor & Recipe Creator behind Palate's Desire . I share tried & tested everyday meal recipes for healthy living and occasional indulgence. Palate's Desire helps even a novice to cook like a pro. Happy Cooking...! Read More about me →

    Stay Connected

    • Instagram

    Baking Recipes

    • pumpkin bread
      Pumpkin Bread
    • coconut-cookie-sandwich
      Cookie Sandwich
    • crispy-coconut-cookies
      Coconut Cookies
    • peanut butter cookies
      Peanut Butter Cookies
    • crinkle-cookies
      Chocolate Crinkle Cookies
    • crispy chicken nuggets
      Chicken Nuggets Recipe

    Baking Recipes→

    Popular Recipes

    • bisi bele bath powder
      Bisi bele bath powder recipe - how to make
    • pineapple-salsa
      Pineapple Salsa - How to make spicy salsa
    • dry gobi manchurian recipe
      Gobi Manchurian Dry | Cauliflower Manchurian
    • okra-peanut-stir-fry
      Moongphali Bhindi | Peanut Okra Stir fry
    • Mangalore Fish Curry
      Fish Curry | Meen Gassi - Mangalore Style
    • moringa-tea-to-burn-fat
      Moringa Tea Recipe | Sip everday to Burn Fat easily

    Rice Recipes

    • bellada-anna-recipe
      Bellada Anna - Gudanna
    • Rice Varities
      Masala Lemon Rice | Nimbehuli Chitranna Recipe
    • huggi anna recipe
      Huggi Anna | how to make Huggi
    • mavinakayi-chitranna
      Mavinakayi Chitranna | Raw Mango Rice
    • chicken-fried-rice-recipe
      Chicken Fried Rice
    • Donne-Biryani-Recipe
      Donne Biryani Recipe
    • chicken-pulao
      Chicken Pulao Recipe
    • vegetable fried rice
      Vegetable Fried Rice | Indo-Chinese Fried Rice Recipe

    Egg Recipes

    • scrambled mushroom eggs
      Scrambled Egg with Mushroom
    • kerala egg curry
      Kerala Egg Curry | Easy Egg Recipes
    • Kolhapuri Egg Masala
      Kolhapuri Egg Masala
    • Mumbai Style Egg Burji
      Mumbai Style Egg Bhurji
    • onion egg bhurji
      Onion Egg Bhurji
    • Oats-omelette-breakfast
      Spicy Masala Oats Omelette Recipe
    • Egg-gravy-recipe
      Egg Gravy
    • mushroom-frittata
      Mushroom Frittata

    Sweets & Desserts

    • bhapa-doi-recipe
      Bhapa Doi
    • Ragi-coconut-milk-pudding-recipe
      Ragi Coconut Milk Pudding
    • easy-shrikhand-recipe-photo
      Shrikhand
    • Thandai-kulfi
      Thandai Kulfi Recipe
    • eggless chocolate mousse
      Eggless Chocolate Mousse
    • Besan halwa recipe
      Besan Halwa Recipe
    • kayi -hollige-obbattu
      Kayi Holige Recipe
    • mango-phirni-topped-with-pistachios-rose-petals
      Mango Phirni Recipe

    Footer

    ↑ back to top

    ABOUT

    • ABOUT MUKTHA
    • MEDIA KIT

    STAY CONNECTED

    • SIGN UP ! FOR E MAILS
    • CONTACT ME

    POLICIES

    • PRIVACY POLICY
    • TERMS & CONDITIONS

    COPYRIGHT © 2025 PALATE'S DESIRE

    Rate This Recipe

    Your vote:


    A rating is required
    A name is required
    An email is required