Palate's Desire

  • Home
  • Recipe Index
  • Diet Recipes
  • Videos
  • Work with me
  • Subscribe
menu icon
go to homepage
  • Home
  • Recipe Index
  • Diet Recipes
  • Videos
  • Contact
    • Facebook
    • Instagram
    • Pinterest
    • Twitter
    • YouTube
  • subscribe
    search icon
    Homepage link
    • Home
    • Recipe Index
    • Diet Recipes
    • Videos
    • Contact
    • Facebook
    • Instagram
    • Pinterest
    • Twitter
    • YouTube
  • ×

    Sattu Paratha

    Published : November 4, 2018 | Last Update on October 8, 2019 By Muktha

    Sattu Paratha

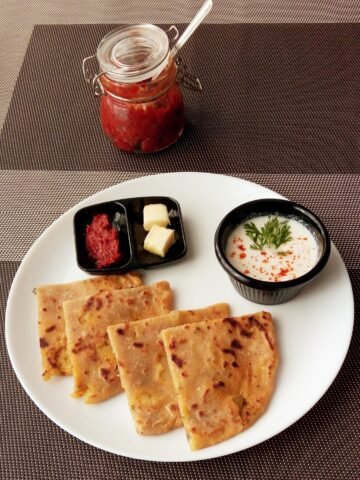
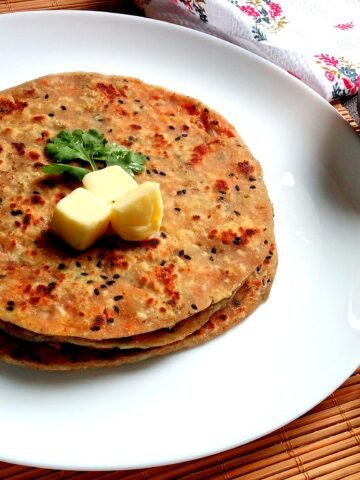
    Sattu Paratha is a non yeast Indian bread which is most popular in Bihar region ,India. Sattu along with some spices ,pickle masala ,chopped onions and coriander leaves are stuff inside whole wheat roti and cooked. My love for Litti Chokha made me to try Sattu Paratha. Sattu paratha can be served either for breakfast or lunch. I find this to be bit on heavier side if served for dinner.

    Sattu Paratha

    Sattu is full of fibre, and essential nutrients like protein thus making it one of the healthiest option.It's often referred as poor's man Protein and is a powerhouse of energy . Sattu is popular in Bihar, Punjab, Madhya Pradesh, UP, and West Bengal. But people from South India hardly knows about it. This underrated food ingredient has received the much deserving recognition in the recent times and is gaining popularity as superfood.

    These days Sattu is easily available in stores ,if not you can still easily prepare it at home. Just powder the roasted chana in a mixer along with its husk, Sattu flour will be ready in minutes.

    Sattu Paratha is a delicious paratha, what I love the most in this Paratha is the pickle masala and mustard oil. Try  making this paratha ,as it is super healthy , delicious and provides instant energy.

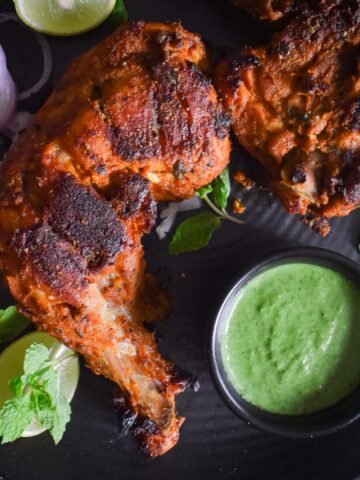
    Other famous delicacies from Sattu include Litti Chokha ,Sattu Drink both sweet and salty. It's a boon for all of us to enjoy the diversified food culture of India.Come lets add in this superfood Sattu to our diet  and #stayhealthy  #humfittohindiafit 🙂 🙂 🙂

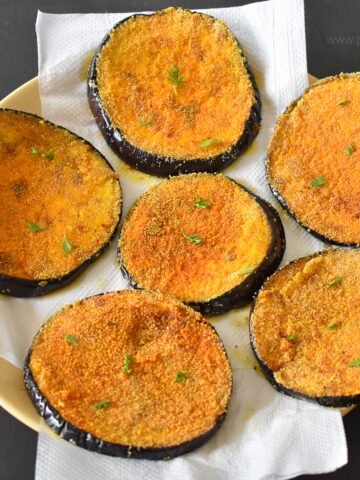
    Other Paratha recipes on blog are  Aloo Paratha , Onion Paratha , Mooli Paratha , Chinese Stuffed Paratha and Savoury Puran Poli

    Recipe Card For Sattu Paratha

    Recipe

    Sattu Paratha
    5 from 4 votes

    Sattu Paratha

    Sattu Ka Paratha - roasted Bengal Gram flour , spices , mustard oil are mixed together , stuffed and rolled to paratha  is a staple food in Bihar 
    Prep Time10 minutes mins
    Cook Time20 minutes mins
    Total Time30 minutes mins
    Course: Breakfast
    Cuisine: Bihar, Indian
    Keyword: Indian Breads
    Servings: 6 makes
    Calories: 168kcal
    Author: Muktha H S

    Ingredients

    For Paratha Dough

    • 2 Cup Whole wheat flour
    • ½ teaspoon Salt
    • ½ teaspoon Ajwain/ Carom Seeds
    • 1 teaspoon Kalonji /onion seeds
    • 1 tablespoon Ghee /Clarified Butter
    • ½ Cup water or as required

    For Filling

    • 1 Cup Sattu / Roasted bengalgram Flour
    • ½ teaspoon Ajwain
    • ½ Tbsp Chopped garlic / 3-4 garlic cloves chopped
    • 1 teaspoon Ginger finely chopped / ½" inch ginger
    • 1 Green Chilli chopped
    • 1 Onion medium size chopped
    • ½ teaspoon Red chilli powder
    • ½ teaspoon Lemon juice
    • 2 teaspoon Achaar Masala / Pickle Masala
    • 2 teaspoon Mustard oil
    • 3 tablespoon Chopped coriander leaves
    • ½ teaspoon Salt or as required
    • ¼ cup Water for binding or as required

    Instructions

    • Take whole wheat flour in a bowl  , add salt,ajwain, kalonji and ghee/oil.Make well shape in the centre, add water and knead dough. Cover the dough with cloth and keep it aside for 15-20 minutes.
    • In a bowl ,take Sattu flour, add chilli powder , salt , mustard oil , finely chopped onions ,ginger, garlic and greens . Mix well.
    • Add little water,part by part and mix the flour ,so that all flour combines together to hold the shape. I added ¼ cup of water. If you add water little or no water ,then it becomes very dry to eat. So i suggest to add water such that flour can just hold shape but it shouldn't be more like a dough.
    • Sprinkle flour over the board ,pinch a small portion of whole wheat flour and roll a medium size paratha.
    • Place sattu mixture at the centre of the rolled paratha, bring the corners together to the centre.
    • Pinch out the excess ,dough. Flatten the stuffed paratha, dust some flour and roll partha to 5-6 cms diameter.
    • Heat a cast iron griddle, place the rolled paratha over a iron griddle.
    • Apply some ghee or oil over the paratha ,flip and cook . You can see paratha puffing while cooking.
    • Flip and cook on both sides till done.
    • Serve Sattu Paratha with Curds and some fresh green salad .

    Nutrition

    Calories: 168kcal

    Steps by Step Directions on making of Sattu Paratha :

    Take whole wheat flour in a bowl  , add salt,ajwain, kalonji and ghee/oil.Make well shape in the centre, add water and knead dough. Cover the dough with cloth and keep it aside for 15-20 minutes.

    Sattu Paratha

    In a bowl ,take Sattu flour, add chilli powder , salt , mustard oil , finely chopped onions ,ginger, garlic and greens . Mix well.

    Sattu Paratha

    Add little water,part by part and mix the flour ,so that all flour combines together to hold the shape. I added ¼ cup of water. If you add water little or no water ,then it becomes very dry to eat. So i suggest to add water such that flour can just hold shape but it shouldn't be more like a dough.

    Sattu Paratha

    Sprinkle flour over the board ,pinch a small portion of whole wheat flour and roll a medium size paratha.

    Sattu Paratha

    Place sattu mixture at the centre of the rolled paratha, bring the corners together to the centre.

    Sattu Paratha

    Pinch out the excess ,dough. Flatten the stuffed paratha, dust some flour and roll partha to 5-6 cms diameter.

    Sattu Paratha


    Sattu Paratha

    Heat a cast iron griddle, place the rolled paratha over a iron griddle.

    Sattu Paratha

    Apply some ghee or oil over the paratha ,flip and cook . You can see paratha puffing while cooking.

    Sattu Paratha

    Flip and cook on both sides till done.

    Sattu Paratha

    Serve Sattu Paratha with Curds and some fresh green salad .

    Sattu Paratha


    Semiya Puliyogare | Vermicelli Pulihora

    Published : October 28, 2018 | Last Update on July 23, 2022 By Muktha

    Semiya Puliyogare

    Semiya Puliyogare  | Vermicelli Pulihora is a delicious and quick and easy recipe similar to Puliyogare.The only difference is main ingredient rice is replaced by Vermicelli. Puliyogare is sweet ,spicy ,tangy and delicious recipe. It's a No Onion , No Garlic recipe . This yummy ,savoury vermicelli recipe, is the best choice for evening Tiffin along with a cup of filter coffee.

    Semiya Puliyogare

    Iyengar Puliyogare is very popular in Karnataka. Puliyogare is a must have on religious ceremonies and festivals. It's considered as auspicious and is even served as prasad in temples.

    Karnataka style Iyengar puliyogare is quite different from pulihora or Tamarind rice from other South Indian states . What makes this Puliyogare different is the use of Puliyogare Gojju / Masala Paste because it's one of the most important key in this recipe. I have shared Puliyogare Gojju / Pulihora Masala Paste recipe , you can refer the post for the same. Or else you can even get MTR Puliyogare Mix from stores. There is nothing much about this recipe , it's basically a tempered rice which inherits its sour taste from Tamarind.

    Main ingredient to prepare Puliyogare is Rice or Barnyard Millet (Samvat ke chawal) . But I prepared the same with vermicelli for my evening tiffin . Prepare Puliyogare with rice , then certainly it becomes one of the best lunch box recipe. Puliyogare and curd rice goes well hand in hand. So do pack curd rice along with Puliyogare for lunch box.

    If you want to try South Indian Breakfast / Tiffin , then try making this Semiya Puliyogare for evening coffee . Its sweet ,spice and sour taste leaves you asking for more . Gojju Avalakki |Spicy Tangy Poha , is almost a similar kind of recipe which can also be prepared with Puliyogare Masala Paste.

    Recipe Card for Semiya Puliyogare | Vermicelli Pulihora

    Recipe

    Semiya Puliyogare
    No ratings yet

    Semiya Puliyogare

    Spicy ,Tangy and Delicious Vermicelli Puliyogare is a no onion no garlic recipe from Karnataka .
    Prep Time5 minutes mins
    Cook Time15 minutes mins
    Total Time20 minutes mins
    Course: Breakfast
    Cuisine: Karnataka
    Keyword: Karnataka, No Onion , No Garlic, Prasadam
    Servings: 3 People
    Calories: 192kcal
    Author: Muktha H S

    Ingredients

    To cook Vermicelli

    • 1 cup Vermicelli
    • 5 cups water
    • 1 teaspoon Oil
    • ½ teaspoon Salt

    For Tempering

    • 2 tablespoon Sesame/Til oil
    • 3 Dry red chillies broken
    • 2 sprigs Curry Leaves
    • 1 teaspoon Mustard seeds
    • 2 tablespoon Ground nuts
    • ½ tablespoon Chana Dal
    • ½ tablespoon Urad Dal
    • 1 Big Pinch Asafoetida
    • ½ teaspoon Jaggery Powder
    • 2 tablespoon Puliyogare Masala Paste -refer notes
    • 1 teaspoon Salt or as required

    For Dry Powder

    • 2 tablespoon Dry Coconut grated
    • ½ tablespoon Black/ White Sesame Seeds

    Instructions

    • In a deep pot ,bring 5 cups of water to boil. Add 1 teaspoon of oil ,½ teaspoon of salt and 1 cup vermicelli.
    • Cook vermicelli to al dente , it may take 6-8 minutes depends on the brand and quality of vermicelli used. Follow the cooking instructions on vermicelli packet. 
    • Once it's cooked to perfection , with the help of colander drain all water and wash vermicelli with cold water.
    • Pour 3 cups of cold water to vermicelli and set aside .This is done to avoid sticking of vermicelli to each other.
    • Dry roast black/ white sesame seeds and set aside.
    • Grate 2 tablespoon of dry coconut , blend it along with roasted sesame seeds to a coarse powder. 
    • Whilst drain water completely from vermicelli , set aside.You can even spread it on a plate with a teaspoon of oil such that each vermicelli strands are well separated.
    • Heat oil in a Kadai /pan , add mustard seeds , curry leaves , dry red chillies , asafoetida , groundnuts , chana dal , urad dal and fry well.
    • Add 2 tablespoon of Puliyogare Gojju / Puliyogare Masala ,1 teaspoon of jaggery powder ,mix well and cook for 4-5 minutes.Turn off the heat/stove.
    • Add cooked vermicelli , dry coconut- sesame powder and salt . Gently mix well everything. Finally ,taste and adjust salt or jaggery powder if needed .
    • Serve Semiya Vermicelli for Breakfast / Tiffin along with a cup of filter coffee.

    Notes

    1. Cooking vermicelli to perfect is very much needed. After draining out water , wash and soak in cold water .Just to ensure it doesn't stick with each other.
    2. You can either use MTR puliyogare Mix from stores or prepare Puliyogare Masala Paste at home.
    3. You can either powder dry coconut and roasted sesame seeds or can add directly.
    4. Usually Black sesame seeds are used for making Puliyogare , if you don't get black then use white sesame seeds.

    Nutrition

    Calories: 192kcal

    Step by Step Directions on making of Semiya Puliyogare:

    In a deep pot ,bring 5 cups of water to boil. Add 1 teaspoon of oil ,½ teaspoon of salt and 1 cup vermicelli.

    Semiya Puliyogare | Vermicelli PulihoraCook vermicelli to al dente , it may take 6-8 minutes depends on the brand and quality of vermicelli used. Follow the cooking instructions on vermicelli packet .

    Semiya Puliyogare | Vermicelli Pulihora

    Once it's cooked to perfection , with the help of colander drain all water and wash vermicelli with cold water.Pour 3 cups of cold water to vermicelli and set aside .This is done to avoiding sticking of vermicelli to each other.

    Semiya Puliyogare | Vermicelli Pulihora

    Dry roast black/ white sesame seeds and set aside.

    Semiya Puliyogare | Vermicelli Pulihora

    Grate 2 tablespoon of dry coconut , blend it along with roasted sesame seeds to a coarse powder.

    Semiya Puliyogare | Vermicelli Pulihora

    Whilst drain water completely from vermicelli , set aside.You can even spread it on a plate with a teaspoon of oil such that each vermicelli strands are well separated.

    Heat oil in a Kadai /pan , add mustard seeds , curry leaves , dry red chillies and asafoetida.

    Semiya Puliyogare | Vermicelli Pulihora

    Add groundnuts , chana dal , urad dal fry well,add 2 tablespoon of Puliyogare Gojju / Puliyogare Masala and 1 teaspoon of jaggery powder.

    Semiya Puliyogare | Vermicelli Pulihora

    Mix well everything and cook for 4-5 minutes.Turn off the heat/stove and add cooked vermicelli .

    Semiya Puliyogare | Vermicelli Pulihora

    Add dry coconut- sesame powder  and salt ,gently mix well everything. Finally ,taste and adjust salt or jaggery powder if needed .

    Semiya Puliyogare | Vermicelli Pulihora

    Finally serve Semiya Vermicelli for Breakfast / Tiffin along with a cup of filter coffee.

    Semiya Puliyogare

    Puliyogare Gojju | Pulihora Masala Paste

    Published : October 26, 2018 | Last Update on April 7, 2021 By Muktha

    Puliyogare Gojju

    Puliyogare Gojju | Pulihora Masala Paste is a spicy Tamarind masala paste is native of Karnataka. Puli means Tangy , ogare means tempering and gojju means paste in Kannada . All together you can translate it as Tangy Tempered masala paste. Puliyogare is popularly known as Iyengar Puliyogare in Karnataka .

    Puliyogare Gojju

    Though making this Puliyogare Gojju seems quite lengthy , it's definitely worth preparing and storing this. Because in times of emergency and non availability of vegetables,it is saviour. All you need to do is , just cook rice and mix with this paste ,within minutes delicious Puliyogare will be ready.

    In Karnataka ,mainly during festivals and religious ceremonies, puliyogare is made .It is also served as Prasada in many temples of Karnataka .You can even get MTR Puliyogare Masala Powder in stores. But Puliyogare prepared from tamarind masala paste ,gives authentic taste and flavours.

    To prepare Puliyogare Masala,first of all tamarind pulp should be boiled .Then other spices are roasted, blended to powder and mixed with tamarind pulp and finally finished by tempering. Puliyogare gojju stays good in airtight glass jar for months.

    Once Puliyogare masala is ready then Puliyogare gets ready in minutes . You can either increase or decrease the measurement of this recipe to twice or half the quantity respectively.

    Its my Mom's recipe from her Kitchen. Large quantity of Masala was prepared hence stepwise pictures are not taken. I had few urgent requests from my readers for this recipe hence posting this recipe without stepwise pictures. Soon, I will update this post with stepwise pictures.

    Using this Puliyogare Mix , you can prepare Tamarind Rice , Semiya Puliyogare and also Instant Spicy Tangy Poha

    Other spice blends/masala from my blog are : Uppsaru Khara / Spicy curry paste , Heralekai Gojju , Bisi Bele Bath Powder , Chai Masala , Biryani Masala Powder  and Tandoori Masala Powder .

    Recipe card for Puliyogare Gojju | Pulihora Masala Paste - Karnataka Style

    Recipe

    puliyogare gojju
    No ratings yet

    Puliyogare Gojju | Pulihora Masala Paste

    Puliyogare Gojju  is a Spicy Tangy Masala paste prepared from Tamarind mainly used for making popular Karnataka Style Iyengar Puliyogare .
    Prep Time30 minutes mins
    Cook Time1 hour hr
    Soaking Hours2 hours hrs
    Total Time1 hour hr 30 minutes mins
    Course: Condiments
    Cuisine: Indian, Karnataka
    Keyword: DIY, Masala, South Indian
    Servings: 750 ml container
    Author: Muktha H S

    Ingredients

    • 100 grams Tamarind
    • 12 Sprigs Curry leaves
    • 3 tablespoon Rock Salt
    • 5 tablespoon Red Chilly Powder
    • 1 teaspoon Turmeric Powder
    • 100 grams Jaggery powder
    • 1 teaspoon Asafoetida / Hing

    For Masala Dry Powder

    • 4 tablespoon Jeera / Cumin Seeds
    • 4 tablespoon Black peppercorns
    • 5 tablespoon Chana Dal
    • 3 tablespoon Urad Dal
    • 1 tablespoon Mustard Seeds
    • 1 teaspoon Fenugreek Seeds
    • 5 tablespoon Coriander Seeds
    • 8 No's Byadgi Red Chilli
    • 12 No's Guntur Red Chilli

    For Tempering

    • 250 ml Sesame Oil /Til Oil
    • 1 teaspoon Mustard Seeds
    • 5 Sprigs Curry Leaves
    • 1 tablespoon Chana Dal Optional
    • 1 tablespoon Urad Dal Optional
    • 1 teaspoon Asafoetida / Hing

    Instructions

    • Wash Tamarind and soak in water for about 2 hours or more. Add water just enough to immerse Tamarind.
    • Squeeze Tamarind, extract the juice and pulp. Strain the juice, pulp and discard the residue.
    • Take a pressure cooker, add tamarind pulp with juice and pressure cook for 3-4 whistles. Allow the pressure to release on its own.
    • For boiled tamarind pulp, add chilli powder, turmeric powder , jaggery, asafoetida, curry leaves,salt and bring to boil
    • Keep it on low flame, and boil till jaggery dissolves completely. Be careful while boiling as it may splutter.
    • Whilst, dry roast all the spices listed under dry masala ingredients separately one after the other. Allow it to cool.
    • Once it cools down, in a blender ground to a coarse powder. Note that it should not be fine or very coarse. It should be blended to medium coarse powder.
    • Add this coarse blended spice powder to boiled tamarind pulp.
    • Keeping on a low flame, bring it to boil, stirring occasionally. It will splutter around so use a deep container.
    • Boil tamarind paste with spices till it thickens and get the consistency of idly batter. Turn of the heat.
    • In a deep kadai , heat 250 ml of cooking oil preferably sesame oil.
    • Add mustard seeds, once it splutters add curry leaves, chana dal(optional) , urad dal(optional),asafoetida and boiled tamarind-spices paste .
    • Mix well and cook on low heat, till oil starts releasing from edges and starts to float above the paste.
    • Turn of the heat, once it cools down .Store it in a dry airtight glass jar.
    • Stays good for 6-8 months when refrigerated. Use it as required.

    How to make Puliyogare Gojju Directions:

    1. Wash Tamarind and soak in water for about 2 hours or more. Add water just enough to immerse Tamarind.
    2. Squeeze Tamarind, extract the juice and pulp. Strain the juice, pulp and discard the residue.
    3. Take a pressure cooker, add tamarind pulp with juice and pressure cook for 3-4 whistles. Allow the pressure to release on its own.
    4. For boiled tamarind pulp, add chilli powder, turmeric powder , jaggery, asafoetida, curry leaves,salt and bring to boil .
    5. Keep it on low flame, and boil till jaggery dissolves completely. Be careful while boiling as it may splutter.
    6. Whilst, dry roast all the spices listed under dry masala ingredients separately one after the other. Allow it to cool.
    7. Once it cools down, in a blender ground to a coarse powder. Note that it should not be fine or very coarse. It should be blended to medium coarse powder.
    8. Add this coarse blended spice powder to boiled tamarind pulp.
    9. Keeping on a low flame, bring it to boil, stirring occasionally. It will splutter around so use a deep container.
    10. Boil tamarind paste with spices till it thickens and get the consistency of idly batter. Turn of the heat.
    11. In a deep kadai , heat 250 ml of  cooking oil preferably sesame oil.
    12. Add mustard seeds, once it splutters add curry leaves, chana dal(optional) , urad dal(optional),asafoetida  and boiled tamarind-spices paste .
    13. Mix well and cook on low heat, till oil starts releasing from edges and starts to float above the paste.
    14. Turn of the heat, once it cools down .Store it in a dry airtight glass jar.
    15. Stays good for 6-8 months when refrigerated. Use it as required.

    puliyogare gojju

    Dates Kheer | Khajoor Ki Kheer

    Published : October 22, 2018 | Last Update on October 18, 2022 By Muktha

    dates kheer

    Dates Kheer - is a thick , creamy and delicious nutty flavored dessert with goodness of natural sweet plum dates.

    Dates Kheer aka Khajoor Ki Kheer is one of my favourite dessert. It's easy to make  delicious and healthy dessert with no added sweetener.

    This has become my healthy swap for other types of sugar added kheer at home.

    date-kheer
    [feast_advanced_jump_to]

    About this recipe

    To make this Dates Kheer, first soak dates in little warm milk or water .Secondly blend to a fine paste , saute with little ghee . I have added soaked cashews and almonds paste here to make it little thick .You can reduce the amount of cashews and almonds here, if you wish.

    This Dates Kheer is rich ,creamy and bit thicker .You can alter the amount of milk to make it more thin. You can serve this dessert during fasting to get instant energy. I also make this whenever I have cravings for sweet because I consider this as a healthy swap for other sugared desserts.

    Health Benefits of Dates

    Dates are rich source of iron and a great blood purifier too . It's also helps in maintaining our bone health and bone density.  Its Vitamin C and D works on your skin elasticity which gives you anti-ageing benefits.

    As it's rich in iron,protein and gives instant energy it said to be one of the best snack.Once after your gym workout grab 3-4 dates,its protein keeps your muscle strong and gives you energy instantly. So it's good to eat dates in small quantity regularly.

    Make sure to add 2-4 dates in your diet ,regularly . May be as a first meal of your day or for snacking ,dates are best. For fussy kids ,try  to make them eat in any form like kheer ,dates halwa , granola bars , Moringa dates laddu , smoothies and more.

    Ingredients

    To make this delciious dessert , you need few basic dry fruits and nuts.

    dates-kheer-ingredients

    Dates - Use dry yet soft variety of dark brown dates, which is naturally sweet on its own.But you can use any variety of dates we need to soak in milk.

    Nuts - I have used cashews and almonds paste in this recipe to give richness and thickness to kheer. I highly recommend to use both nuts, if not available you can add either cahews or almonds. Along with it for garnishing and taste , I have used Pistachios and Chironji . If Chironji is not available , you can just skip it.

    Milk - I prefer using full fat cream milk , having said so you can even use low fat milk too . For vegan version , Almond milk works better in this recipe.

    Sweetner - It's upto your choice to add extra sugar in the recipe. I prefer to add because the sweetness from dates and sugar are different and I love the sweetness from sugar as it helps to balance the sharp sweetness from dates and blends well.

    Clarified Butter / Ghee - This is my prime choice to make dessert . For vegan verion go for coconut oil , It works great.

    Flavouring - Nothing can pops out the flavours as freshly pound cardamom powder in this recipe.

    Optional Add On's - If you want to try , add 2 tablespoon of Dessicate coconut , it tastes great too.

    Watch Video

    How to make Dates Kheer Recipe

    First deseed dates , roughly cut into small pieces.

    Soak dates in ½ cup of warm milk for about 20 minutes.

    soaking dates in milk

    Take about 8-10 cashews and almonds and soak in warm water for 20 minutes.Peel the almond skin.

    In a blender , add soaked dates and blend to a smooth paste ,add little milk (used for soaking ) if needed.

    Dates Kheer | Khajoor Ki Kheer

    Processed dates to make smooth paste

    dates paste

    Add soaked cashews, almonds to a blender

    blend cashews and almonds

    Blend to smooth paste using milk (used for soaking ),set aside.

    blending ingredients to make dates ki kheer

    Heat 1.5 tablespoon of ghee in kadai / pan , add dates paste and saute for a 2-3 minutes.

    sauteing dates paste in clarified butter

    Add 3 cups of boiled and cooled milk to dates paste

    making of dates ki kheer

    mix well everything and bring to boil.

    how to make dates payasam

    Add cashew and almonds paste,

    Dates Kheer | Khajoor Ki Kheer

    stir well and cook for 5 minutes on low flame.

    Dates Kheer | Khajoor Ki Kheer

    Turn off heat , add Chironji , cardamom powder or milk masala powder.

    final flavouring to khajoor ki kheer

    Taste dessert, if you need dessert to be more sweet , add 1-2 tablespoon of sugar , mix well.

    mix eveything while makes kheer

    You can serve this delicious dates kheer either hot or warm.

    Recipe

    Dates-kheer-in-a-bowl
    4.89 from 9 votes

    Dates Kheer | Khajoor Ki Kheer

    Dates Kheer - is a thick , creamy and delicious nutty flavoured dessert with goodness of natural sweet plum dates.
    Prep Time5 minutes mins
    Cook Time20 minutes mins
    Soaking Time20 minutes mins
    Total Time25 minutes mins
    Course: Dessert
    Cuisine: Indian
    Keyword: Diwali, Naivedhyam, Navratri, Sweets
    Servings: 7 People
    Calories: 257kcal
    Author: Muktha H S

    Ingredients

    • 20 no's Dates or 175 grams deseeded dates
    • 3.5 to 4 Cups Milk
    • 10 no's Cashews
    • 10 no's Almonds
    • 1.5 tablespoon Desi Ghee / Clarified Butter
    • ¼ teaspoon Cardamom Powder or Milk Masala Powder
    • 1.5 tablespoon Chironji / Charoli Seeds
    • 1-2 Tbsp Sugar - Optional

    Instructions

    • First deseed dates , roughly cut into small pieces.
    • Soak dates in ½ cup of warm milk for about 20 minutes.
    • Take about 8-10 cashews and almonds and soak in warm water for 20 minutes.Peel the almond skin.
    • In a blender , add soaked dates and blend to a smooth paste ,add little milk (used for soaking ) if needed.
    • Add soaked cashews, almonds to a blender and blend to smooth paste using milk(used for soaking ),set aside.
    • Heat 1.5 tablespoon of ghee in kadai / pan , add dates paste and saute for 3-5 minutes. Till moisture goes off and dates slightly thickens.
    • Add 3 cups of boiled and cooled milk to dates paste , mix well everything and bring to boil.
    • Add cashew and almonds paste, stir well and cook for 5 minutes on low flame. 
    • Turn off heat , add Chironji , cardamom powder or milk masala powder. Taste dessert,if you need dessert to be more sweet , add 1-2 tablespoon of sugar , mix well.
    • Serve dates Kheer hot or warm.

    Video

    Nutrition

    Calories: 257kcal

    You may also like

    • Rabdi-dessert
      Rabdi Recipe, how to make best rabri at home
    • anjeer khajoor roll
      Anjeer Khajoor Rolls | Fig Dates Rolls
    • Kesar-badam-milk
      Kesar Badam Milk
    • matar-kheer-recipe
      Matar Kheer | Green Peas Kheer

    Brinjal Fry | Eggplant Fry

    Published : October 16, 2018 | Last Update on September 27, 2022 By Muktha

    brinjal_rava_fry

    Brinjal Fry  recipe with step by step photos and short video. Eggplant fry aka Brinjal fry is a Crispy and delicious eggplant rava tawa fry. Brinjal /Eggplant also known as Aubergine is used here for making this delicious crisp  baingan rava fry. Its same as the one which is used for making Baingan Bharta .

    If interested , do check my other eggplant recipes : Eggplant Biryani,  Roasted Eggplant Chat and Baingan Bharta.

    brinjal_rava_fry
    [feast_advanced_jump_to]

    About this recipe

    To make this fry , brinjals are sliced , marinated with spices , coated with fine sooji /rava and then its either pan fried or shallow fried. Few uses besan /gram flour or rice flour to coat marinated brinjal slices.

    Many of them even coat with gram flour / rice flour and deep fry or shallow fry it. Though it tastes good , I Just try to avoid unnecessary deep frying of vegetables when you can achieve better taste with minimal oil .

    Here I have used Mustard oil to make this brinjal fry , you can use any cooking oil of your choice. As this recipe is similar to begun bhaja cooked with mustard oil , even I have mustard oil here.

    After tasting this recipe with mustard oil and with regular refined oil , I felt mustard oil adds hint of peculiar flavour to this brinjal rava fry . Hence, I recommend to use mustard oil for enhanced taste.

    Watch Video Recipe

    To make this recipe most importantly , select a large variety of eggplant which are light in weight because they have got less seeds. This kind of eggplants tends to have light sweetish taste and is perfect to marinate with good amount of spices.

    As everyone , as their own preferences you can try out sooji or any flours as per your likings. I love to coat it with rava because it gives a nice crisp outside and soft texture inside.

    You can always alter the amount spices used here to make it more or less spice.The measurement followed here yields you moderate spice brinjal fries . If using large brinjals around 500 grams , then increase the amount of spices.

    Aubergine or Eggplant is very much low in calories and has high dietary fibers. Hence it is highly considered in weight loss diet. It's also rich in potassium and vitamin C which helps to keep a healthy heart by lowering the cholesterol.

    Try adding Eggplant in your diet as much as you can , if you are looking for weight  loss and weight management in a healthy way.

    This Brinjal fry can be served as a side dish with any kind of rice varieties , dal chawal , khichdi or plain khadi.

    brinjal rava fry

    Step by step directions to make Brinjal Fry:

    First wash and clean brinjal. Wipe it dry and cut it into medium thickness slices of about 0.5 cm thickness.

    Brinjal Fry | Eggplant Fry

    In a bowl ,mix turmeric powder ,red chilli powder,salt , garam masala ,jeera powder  amchur powder and rub on brinjal slices.

    Brinjal Fry | Eggplant Fry

    Take each slice of brinjal and place it over fine rava/ semolina such that brinjal slices are evenly coated on both sides.

    Brinjal Fry | Eggplant Fry

    Heat nonstick tawa / griddle , put 1-2 tablespoon of oil and arrange rava coated brinjal slices on tawa. Drizzle few drops of oil on top of the brinjal slices.

    Brinjal Fry | Eggplant Fry

    Fry on medium heat , once the base turns firm and golden in colour , flip and cook on other side .

    Flip couple of times and evenly cook on both sides till both sides are golden in colour.

    Brinjal Fry | Eggplant Fry

    Remove brinjal slices and place them on kitchen paper towels.

    Garnish with coriander leaves and serve it hot or warm as a side dish along with dal rice , khichdi , sambar rice or any other rice varieties.

    It tastes best when it is hot , so make sure to serve only when hot or warm.

    brinjal fry

    Recipe

    Brinjal Fry | Eggplant Fry
    5 from 5 votes

    Brinjal Rava Fry

    Crispy and delicious eggplant rava tawa fry.
    Prep Time10 minutes mins
    Cook Time15 minutes mins
    Total Time25 minutes mins
    Course: Side Dish, Starters
    Cuisine: Indian, konkan
    Keyword: Healthy
    Servings: 4 People
    Calories: 172kcal
    Author: Muktha H S

    Ingredients

    • 250-300 Grams Brinjal / Eggplant / Aubergine
    • ½ teaspoon Turmeric Powder
    • ½ teaspoon Garam Masala
    • ½ teaspoon Jeera / Cumin Powder
    • ½ teaspoon Amchur Powder
    • 1 teaspoon Red Chilli Powder
    • ¾ teaspoon Salt or as required
    • 5 tablespoon Fine Semolina /fine rava
    • 4 tablespoon Mustard Oil or any cooking oil

    Instructions

    • Wash and clean brinjal. Wipe it dry and cut it into medium thickness slices of about 0.5 cm thickness.
    • Sprinkle turmeric powder ,red chilli powder, ,salt , garam masala , amchur powder on brinjal slices, rub well.
    • Take each slice of brinjal and place it over fine rava/ semolina such that brinjal slices are evenly coated.
    • Heat nonstick tawa / griddle , put 1-2 tablespoon of oil and arrange rava coated brinjal slices on tawa. Drizzle few drops of oil on top of the brinjal slices.
    • Fry on medium heat , once the base turns firm and golden in colour , flip and cook on other side .
    • Flip couple of times and evenly cook on both sides till both sides are golden in colour.
    • Remove brinjal slices and place them on kitchen paper towels.
    • Garnish with coriander leaves and serve it hot or warm as a side dish along with dal rice , khichdi , sambar rice or any other rice varieties.

    Video

    Nutrition

    Calories: 172kcal

    Masala Lemon Rice | Nimbehuli Chitranna Recipe

    Published : October 10, 2018 | Last Update on October 7, 2022 By Muktha

    Rice Varities

    Masala Lemon Rice - is a spicy coconut paste based Lemon rice , origin from Karnataka . Herbs, spices and fresh coconut are blend together , tempered and then mixed with cooked rice and lemon juice.

    Masala chitranna is a popular breakfast and lunch box recipe in Karnataka.

    Masala-lemon-rice
    [feast_advanced_jump_to]

    About this recipe

    Lemon rice is a easy and quick tempered rice mixd with lemon juice . But this recipe uses a coconut masala paste hence it is different from regular lemon rice . This is very similar to MTR lemon rice paste  but tastes better as its fresh without any preservatives.

    The name masala is reffered here to a blend of fresh coconut and spices ; later tempered and mixed with lime juice to make masala paste ( nimbehulli gojju ) . It's then mixed with cooked rice to make a delicious Masala Lemon Rice - Nimbehuli chitranna.

    In this recipe, using garlic is optional. You can prepare this with or without garlic , its left to one's preferences.

    Similar recipes

    Wide varieties of chitranna/ lemon rice are prepared because each home has their own recipes . This kind of chitranna / lemon rice generally makes its appearance in religious ceremonies of Karnataka.

    • capsicum-vangi-bath
      Capsicum Bath Recipe
    • Easy Lemon Rice
      Easy Lemon Rice | No Onion No Garlic Recipe
    • mavinakayi-chitranna
      Mavinakayi Chitranna | Raw Mango Rice
    • bisi-bele-bath-with-khara-boondi
      Bisi Bele Bath Recipe

    Storage suggestions

    Lemon masala paste / gojju can be prepared ahead and refrigerated , it stays good upto 7 days. You can even freeze masala paste upto 3 months , use it as and when required. All you need is to thaw before use and follow the recipe for mixing with rice.

    Watch Video

    How to make Masala Lemon Rice:

    Wash and soak 1 cup of rice for 10-15 minutes.You can use any kind of regular rice like sona masoori , jeera rice or basmati rice.

    Cook rice by adding 2 cups of water , 1 teaspoon of oil and 1 teaspoon of salt, keep it aside.You can either pressure cook rice , use rice cooker  or cook in an open pot.

    Masala Lemon Rice | Nimbehuli Chitranna Recipe

    In a mixer chutney jar , add ¼ cup of fresh coconut , 1 teaspoon of jeera / cumin seeds , ¾ inch ginger , 3 medium size garlic cloves , 2 tablespoon of coriander leaves , pinch of turmeric powder and 2-3 green chillies ,depending on the spice level.

    Grind to coarse paste by adding  very little water,if needed.

    Masala Lemon Rice | Nimbehuli Chitranna Recipe

    Take a deep cooking pot/pan or kadhai or wok , heat 2 tablespoon of oil , add mustard seeds . Allow it to crackle , add curry leaves , dry red chilly broken into pieces fry for a while.

    Masala Lemon Rice | Nimbehuli Chitranna Recipe

    Add ground nuts , chana dal , urad dal and fry till it starts changind colour , add grounded masala.

    Masala Lemon Rice | Nimbehuli Chitranna Recipe

    Fry well masala on medium heat , till oil starts releasing from corners.

    Masala Lemon Rice | Nimbehuli Chitranna Recipe

    Turn off the heat, add lemon juice , salt and mix well.

    Masala Lemon Rice | Nimbehuli Chitranna Recipe

    Add in cooked rice ,½ teaspoon of salt ,1 teaspoon of lemon juice and coriander leaves,mix well.

    Masala Lemon Rice | Nimbehuli Chitranna Recipe

    Serve with coconut chutney and potato or raw banana fritters.

    Masala Lemon Rice

    Recipe

    Masala Lemon Rice
    5 from 1 vote

    Masala Lemon Rice | Nimbe huli Chitranna

    Lemon Rice - Origin from Karnataka : Cooked rice is mixed with freshly ground coconut based masala paste and lemon juice.  
    Prep Time5 minutes mins
    Cook Time25 minutes mins
    Total Time30 minutes mins
    Course: Breakfast, Main Course
    Cuisine: Karnataka
    Keyword: Rice Varities
    Servings: 4 People
    Calories: 214kcal
    Author: Muktha H S

    Ingredients

    For Cooking Rice

    • 1 Cup Rice
    • 2 cups Water
    • 1 teaspoon Oil
    • ½ teaspoon Salt

    Ground into Masala Paste

    • ⅓ Cup Fresh coconut
    • 1 teaspoon Jeera / Cumin seeds
    • 2-3 Green chillies or as required
    • 2 tablespoon Coriander leaves
    • ¾ inch Ginger
    • 3-4 Garlic cloves
    • 1 pinch turmeric powder

    For Tempering

    • 2 tablespoon Cooking Oil
    • ½ teaspoon Mustard seeds
    • 1-2 Curry leaves Sprig
    • 1-2 Dry red chilly broken
    • 2 tablespoon Groundnuts / peanuts
    • ½ tablespoon Chana Dal
    • ½ tablespoon Urad Dal

    For Mixing with rice

    • 1 tablespoon Lemon Juice
    • 2 tablespoon Chopped coriander leaves
    • 1 teaspoon salt or as required.

    Instructions

    • Wash and soak 1 cup of rice for 10-15 minutes.You can use any kind of regular rice like sona masoori , jeera rice or basmati rice.
    • Cook rice by adding 2 cups of water , 1 teaspoon of oil and 1 teaspoon of salt, keep it aside.You can either pressure cook rice , use rice cooker or cook in an open pot.
    • In a mixer chutney jar , add ⅓ cup of fresh coconut , 1 teaspoon of jeera / cumin seeds , ¾ inch ginger , 3 medium size garlic cloves , 2 tablespoon of coriander leaves ,pinch of turmeric powder and 2-3 green chillies ,depending on the spice level.Grind to coarse paste without adding water.
    • Take a deep cooking pot/pan or kadhai or wok ,heat 2 tablespoon of oil ,add mustard seeds . Allow it to crackle , add curry leaves ,dry red chilli, ground nuts , chana dal , urad dal and fry till it starts changing colour.
    • Add grounded masala paste and fry well on medium heat , till oil starts releasing from corners. Turn off the heat. Add ½ tablespoon lemon juice , salt and mix well.
    • Mix in cooked rice ,½ teaspoon of salt ,½ tablespoon of lemon juice and coriander leaves . Mix well everything and serve .

    Video

    Nutrition

    Calories: 214kcal

    Green Chutney Recipe

    Published : October 3, 2018 | Last Update on October 16, 2022 By Muktha

    green chutney

    Green Chutney Recipe is a most versatile chutney recipe that can be added to sandwiches and many chaats . It can also be accompanied with many snacks like dhokla,vada pav and fritters.This is a quick chutney recipe ,which can be prepared within 5 minutes .

    green chutney

    As this is quite common recipe ,many have their own preferences for spices and heat from green chillies. Here , I have not used Chaat Powder for preparing this chutney ,but many do . The only reason for not using chaat masala in this recipe is , I didn't wanted to overpower flavour of chaat masala in chaats . As this is the chutney used for preparing many chaats .

    Also this the green chutney recipe  which I follow for preparing Veg Sandwiches  . Chaat Masala flavour in Veg sandwiches is big no for me.As this  green chutney is accompanied with dhokla ,vada pav , batata vada and other snacks too ,I feel there is no need for chaat masala for this chutney. If you wish ,you can definitely add chaat powder to this chutney.

    This chutney stays good for 2-3 days in refrigerator. If you are planning for a chaats or a snack party then you can prepare it in advance and can refrigerate it.

    If interested , do check Mint Chutney recipe for tandoori starters ,which makes uses of chaat masala .

    Recipe card for Green Chutney

    Recipe

    green chutney
    5 from 1 vote

    Green Chutney

    Green Chutney is a blend of coriander and mint leaves with spices ,which is mainly used in preparation of sandwiches and chats
    Prep Time5 minutes mins
    Cook Time0 minutes mins
    Total Time5 minutes mins
    Course: Accompaniment
    Cuisine: Indian
    Keyword: Chutney
    Servings: 1 Small Bowl
    Calories: 26kcal
    Author: Muktha H S

    Ingredients

    • ½ cup Coriander leaves
    • ½ cup Mint leaves
    • 1-2 Green Chilli
    • 2 Garlic cloves
    • ½ Inch ginger
    • ½ teaspoon Cumin powder
    • ½-3/4 teaspoon Rock Salt
    • ½ tablespoon Lemon Juice

    Instructions

    • Wash and clean coriander and mint leaves.
    • Place all ingredients - coriander leaves ,mint leaves ,green chilli , cumin / jeera powder , ginger ,garlic and salt .
    • Blend to a fine paste ,use 1 -2 teaspoon of water if needed to blend to smooth paste.
    • Add lemon juice and use it as required.

    Nutrition

    Calories: 26kcal

    Step By step directions on making of Green Chutney :

    Wash and clean coriander and mint leaves.

    Place all ingredients - coriander leaves ,mint leaves ,green chilli , cumin / jeera powder , ginger ,garlic  and salt .Green Chutney Recipe

    Blend to a fine paste ,use 1 -2 teaspoon of water if needed to blend to smooth paste.Green Chutney Recipe

    Add lemon juice and use it as required .Green Chutney Recipe

    Serve it with dhokla or vada pav or any kind of fritters. I had prepared this green chutney and served with oats dhokla 🙂

    green chutney

    Indian Style Macaroni Chicken Soup

    Published : October 1, 2018 | Last Update on October 19, 2020 By Muktha

    Macaroni Chicken Soup with step by step photos and video.

    Indian Style Macaroni Chicken Soup

    Indian Style Macaroni Chicken Soup is a delicious appetizing bowl of soup. Unlike regular Macaroni Soup , it's not filled with veggies and cream . This bowl of soup is having all Indian spices ,which makes it more palatable and utterly delicious.

    Even while writing this post , I am salivating for the taste it holds.Loads of fresh mint , used here brings out deliciousness for this soup . Believe me , you cant stop yourself  without asking for more and more.

    One may feel I am exaggerating more ,but I really loved the taste . Everyone at home ,love this soup .Though ,it is a very good appetizer  , I often serve this for weekend brunch.

    Chicken Macaroni soup

    Unlike other Pasta or macaroni ,here pasta is not cooked separately. Everything is cooked all together in a pressure cooker. As pasta is cooked ,along with chicken  not extra cornstarch is added here to get soup consistency. My lil boy has given many names for this soup like Biryani Soup and Pasta Soup, as he gets taste of biryani also and pasta too . I really didn't know what to call this soup has ,so named it as Indian Style Macaroni Chicken Soup or Desi  Macaroni Chicken Soup

    It's a perfect appetizer for any kind of parties.Or else you can even serve this for weekend brunch as I do 🙂 One more delicious chicken soup recipe on blog is Lemon Coriander Chicken Soup.

    Recipe Card on Indian Style Macaroni Chicken Soup

    Recipe

    Chicken Macaroni soup
    5 from 3 votes

    Indian Style Macaroni Chicken Soup

    A appetizing bowl of soup with lots of chicken and bursting flavours of fresh mint leaves. 
    Prep Time5 minutes mins
    Cook Time20 minutes mins
    Total Time25 minutes mins
    Course: Appetizer, Soup
    Cuisine: Fusion, Indian
    Keyword: Chicken
    Servings: 5 People
    Calories: 198kcal
    Author: Muktha H S

    Ingredients

    • 250 grams Chicken Breasts
    • 1 Cup Macaroni Pasta Shells
    • ¾ Cup Onion Chopped or 1 Large Onion
    • ½ tablespoon Ginger paste or 1 inch ginger crushed
    • ½ tablespoon Garlic Paste or 6-7 garlic cloves
    • ½ Cup Tomato Chopped or 1 medium sized tomato
    • 1 Cup Mint Leaves firmly pressed
    • 2 tablespoon Chopped Coriander leaves
    • ½ teaspoon Red chilli Powder
    • 1 teaspoon Coriander Powder
    • ¼ Tsp Garam Masala or Biryani masala Powder
    • ½ teaspoon Cumin / Jeera Powder
    • ¼ teaspoon Turmeric Powder
    • ½ teaspoon Black Pepper powder
    • ¾-1 teaspoon Salt or as needed
    • 2 Tsp Oil
    • ½ tablespoon Lemon Juice
    • 1 teaspoon Ginger Julienne for garnishing
    • 2 cups Water

    Instructions

    • Wash and clean chicken breasts (boneless) , cut into small cubes and set it aside.
    • Heat 1 teaspoon oil ,in a pressure cooker, add chopped onions and saute well.
    • Add ginger garlic paste ,chopped green chillies and fry well , till raw smell goes off.
    • Add 1 chopped tomato, turmeric powder ,red chilli powder , cumin powder and garam masala .
    • Mix well everything and allow tomato to cook for 3-4 minutes. Add mint and coriander leaves ,mix well everything.
    • Add boneless chicken , salt and mix well everything . Allow chicken to cook, till raw smell of chicken goes off. It takes around 5-7 minutes.
    • Whilst ,take 1 cup of macaroni pasta ,wash and soak it in ½ cup water for 5 minutes.
    • Now , add 1 ½ cup of water and soaked pasta along with water.
    • Add ½-3/4 teaspoon of salt and pressure cook for a whistle. Give standing time of 5 minutes and carefully release the pressure manually.
    • Give a quick stir , add lime juice , black pepper powder and 1 teaspoon of ginger juliennes.
    • Serve hot , garnish with coriander leaves and ginger juliennes.

    Video

    Nutrition

    Calories: 198kcal

    Step by Step Directions on making of Indian Style Macaroni Chicken Soup :

    Wash and clean chicken breasts (boneless) , cut into small cubes and set it aside.

    Heat 1 teaspoon oil ,in a pressure cooker, add chopped onions and saute well.

    Indian Style Macaroni Chicken Soup

    Add ginger garlic paste  ,chopped green chillies and fry well , till raw smell goes off.

    Indian Style Macaroni Chicken Soup

    Add 1 chopped tomato, turmeric powder ,red chilli powder , cumin powder and garam masala .

    Indian Style Macaroni Chicken Soup

    Mix well everything and allow tomato to cook for 3-4 minutes. Add mint and coriander leaves ,mix well everything.

    Indian Style Macaroni Chicken Soup

    Add boneless chicken , salt and mix well everything . Allow chicken to cook, till raw smell of chicken goes off. It takes around 5-7 minutes.

    Indian Style Macaroni Chicken Soup

    Whilst ,take 1 cup of macaroni pasta ,wash and soak it in ½ cup water for 5 minutes.If possible ,consider using Whole Wheat Pasta

    Indian Style Macaroni Chicken Soup

    Now , add 1 ½ cup of water and soaked pasta along with water.

    Indian Style Macaroni Chicken Soup

    Add ½-3/4 teaspoon of salt and pressure cook for a whistle.

    Indian Style Macaroni Chicken Soup

    Give standing time of 5 minutes and carefully release the pressure manually and give a quick stir.

    Indian Style Macaroni Chicken Soup

    Add lime juice , black pepper powder  and 1 teaspoon of ginger juliennes.

    Indian Style Macaroni Chicken Soup

    Serve hot , garnish with coriander leaves and ginger juliennes.

    Indian Style Macaroni Chicken SOup

    Kiwi Cucumber Smoothie

    Published : September 28, 2018 | Last Update on September 29, 2022 By Muktha

    Kiwi Cucumber Smoothie

    Kiwi Cucumber Smoothie is more of a healthy drink . It's one of the best cooling and refreshing drink to quench your thirst . Also this drinks is super powerful if you are feeling gassy ,bloated or suffering with indigestion .

    Kiwi Cucumber Smoothie

    Parties ,Social Gatherings are increasing these days along with involvement food. Though choosing food selectively is considered ,at times it may not be possible. So we end up eating more than required ,adding more calories and next day ,we do feel lethargic .In such situations,cleansing the system ,following day is what we need to consider.

    This Kiwi Cucumber Smoothie is kind of drink ,which I suggest to all my friends who come with such complaints.

    If you also wish to combat ill effects of previous day ,heavy meals, then this Kiwi Cucumber smoothie is what you should be considering.

    Kiwi Cucumber Smoothie is a quick and easy recipe with basic ingredients. Blend everything together to get a tall glass of healthy ,cool and refreshing drink. Kiwi is a sweet and sour fruit , which is rich in Vitamin C and potassium. Cucumbers are natural diuretic food ,which means they help body produce more urine to carry out toxins and wastes from the body.

    Lemon is an excellent  source of Vitamin C and aids digestion. On the other hand , mint too is an age old remedy for indigestion. Adding all these ingredients together along with pinch of Rock Salt (Sendha Namak) and jeera powder , can be a best home remedy for indigestion.

    Try this Kiwi Cucumber Smoothie as a refreshing drink to cleanse your system . One more detox recipe on blog is Beetroot and Amla Detox

    Recipe Card For Kiwi Cucumber Smoothie

    Recipe

    Kiwi Cucumber Smoothie
    No ratings yet

    Kiwi Cucumber Smoothie

    A refreshing cooler drink which aids digestions.
    Prep Time8 minutes mins
    Course: Drinks
    Cuisine: Indian
    Keyword: Beverages, Diet, Healthy
    Servings: 2 People
    Calories: 63kcal
    Author: Muktha H S

    Ingredients

    • 2 Kiwi Fruits
    • ½ cup Cucumber Chopped
    • 1 sprig Mint leaf
    • ¼ teaspoon Cumin Seeds Powder / Jeera Powder
    • ⅛ teaspoon Rock Salt / Sendha Namak or as required
    • ½ tablespoon Lemon Juice
    • ½ Cup Ice Cubes
    • ½ Cup Water

    Instructions

    • Wash and clean Kiwi , peel the skin and roughly chop into cubes.
    • In blender , add chopped cucumbers and chopped kiwi.
    • Add mint leaves , ¼ teaspoon of jeera powder , pinch of rock salt ,½ cup ice cubes and blend together.
    • Pour it to the glass , adjust water , add lemon juice and serve.
    • Add ice cubes , garnish with mint leaf and serve as a cool refreshing drink.

    Nutrition

    Calories: 63kcal

    Step By Step Directions on making of Kiwi Cucumber Smoothie:

    Wash and clean Kiwi , peel the skin and roughly chop into cubes.

    Kiwi Cucumber Smoothie

    In blender , add chopped cucumbers and chopped kiwi.

    Kiwi Cucumber Smoothie

    Add mint leaves , pinch of jeera powder , pinch of rock salt ,½ cup ice cubes and blend together.

    Kiwi Cucumber Smoothie

    Pour it to the glass , adjust water , add lemon juice  and serve.

    Kiwi Cucumber Smoothie

    Add ice cubes , garnish with mint leaf and serve as a cool refreshing drink.

    kiwi cucumber Smoothie

    Pumpkin Soup | Healthy Easy Pumpkin Soup Recipe

    Published : September 27, 2018 | Last Update on October 9, 2024 By Muktha

    pumpkin-soup-recipe

    Pumpkin Soup recipe with step by step photos and video. Pumpkin soup is a quick , easy and healthy bowl of soup , perfect for fall . It's easy to make with basic ingredients and gets ready under 30 minutes from start to end.

    Most of the pumpkin soup calls for fresh ,but this recipe has no fresh cream other than garnishing. The taste if this no cream pumpkin soup is as good as any cream based soup .

    I'm very fond of pumpkin for it's taste as well as it's health benefits. From chutney, soups , sides, savories , cakes and lattes , I make almost everything from pumpkin. If interested , do check my personal favorite pumpkin recipes like pumpkin chutney , pumpkin khichdi , pumpkin halwa and pumpkin walnut cake .

    Pumpkin Soup | Healthy Easy Pumpkin Soup Recipe
    [feast_advanced_jump_to]

    About this recipe

    This low calorie Pumpkin Soup has no cream added . There by it fits in as one of the excellent low calorie recipe for weight watchers.

    This pumpkin soup is

    • quick and easy to make
    • light on stomach
    • easy to digest
    • low on calories
    • very nutritious
    • mildly sweet to taste and flavorful

    Ingredients

    Pumpkin Soup | Healthy Easy Pumpkin Soup Recipe

    Produce - Yellow pumpkin, onion, garlic and bay leaf

    Dairy - Butter and fresh cream

    Liquid - Water or vegetable stock or chicken stock

    Seasoning -salt and pepper

    Please refer recipe card for actual measurements

    Watch Video

    Step by step directions to make Pumpkin Soup:

    Wash ,rinse and clean pumpkin. Remove skin and pumpkin seeds, chop pumpkin into cubes and set it aside.

    In a pressure cooker , melt 1 tablespoon of butter .Add chopped garlic cloves , onion and a bay leaf .

    Pumpkin Soup | Healthy Easy Pumpkin Soup Recipe

    Saute well till onion starts to brown lightly ,add chopped pumpkin cubes  and mix well.

    Pumpkin Soup | Healthy Easy Pumpkin Soup Recipe

    Add  salt ,1 cup of water or stock ( veg or chicken ) and cover lid.

    Pumpkin Soup | Healthy Easy Pumpkin Soup Recipe

    Pressure cook for 1 whistle and allow pressure to release on its own.

    Pumpkin Soup | Healthy Easy Pumpkin Soup Recipe

    Discard bay leaf ,drain the stock and reserve it. Place the cooked pumpkin in a blender / food processor.

    Pumpkin Soup | Healthy Easy Pumpkin Soup Recipe

    Add ¼ cup of reserved stock and blend it  to get puree.

    Pumpkin Soup | Healthy Easy Pumpkin Soup Recipe

    Adjust the consistency ,if required by adding the reserved stock. Add pepper powder ,1 tablespoon fresh cream(optional) and adjust salt if needed.

    Pumpkin Soup | Healthy Easy Pumpkin Soup Recipe

    Serve it hot , topped with croutons and slice of garlic bread.

    pumpkin-soup-recipe

    Recipe

    pumpkin-soup-recipe
    5 from 3 votes

    Pumpkin Soup

    A thick , delicious , tasty low calorie soup perfect for fall.
    Prep Time5 minutes mins
    Cook Time15 minutes mins
    Total Time20 minutes mins
    Course: Soup
    Cuisine: World
    Keyword: Diet, Healthy
    Servings: 3 People
    Calories: 97kcal
    Author: Muktha H S

    Ingredients

    • 1 tablespoon Butter
    • 500 grams Pumpkin
    • 1 Onion
    • 3 Garlic Cloves,medium size chopped
    • 1 Bay leaf
    • 1 cup water or stock
    • ½ teaspoon Black Pepper powder or as required
    • ½-3/4 teaspoon Salt or as needed
    • 1 tablespoon Fresh Cream optional

    Instructions

    • Clean Pumpkin, remove skin and seeds and chop into cubes.
    • In a pressure cooker , melt 1 tablespoon of butter . Add chopped garlic cloves , sliced onions and a bay leaf ,saute well till onion starts to brown lightly.
    • Add chopped pumpkin cubes , mix well and add salt.
    • Add 1 cup of water/ stock and pressure cook for 1 whistle. Allow pressure to release on its own.
    • Discard bay leaf ,drain the stock and reserve it. Place the cooked pumpkin in a blender / food processor.
    • Add ¼ cup of reserved stock and blend it to get puree.
    • Adjust the consistency ,if required by adding the reserved stock. Add pepper powder ,1 tablespoon fresh cream(optional) ,adjust salt if needed.
    • Serve it hot , topped with croutons and slice of garlic bread.

    Video

    Notes

    • As vegetable stock is not used here , Onion and Bay leaf are added while cooking the Pumpkin . To get the taste similar to that of  vegetable stock.
    • Instead of water ,If you are using Vegetable stock ,then no need to use bay leaf  while sautéing pumpkin.

    Nutrition

    Calories: 97kcal

    Tandoori Chicken Recipe

    Published : September 25, 2018 | Last Update on September 27, 2022 By Muktha

    Tandoori-chicken-with-mint-chutney

    Tandoori Chicken is one of the most popular , succulent , tender and juicy grilled chicken. Chicken thigh pieces are marinated in freshly ground Tandoori Masala Powder, hung curd and other spices for good 6 hours or more . It's then grilled to perfection.

    Serve this delicious Tandoori chicken with Mint chutney , Onion laccha salad and lemon wedges.

    Best thing about this recipe is you can make this on Gas stove , Oven , Air Fryer or Instant pot , no need for traditional tandoor or clay oven .

    Make this flavorful Tandoori chicken for dinner party , outdoor barbeques with family and friends , it can be easily scalable . You can even try my other favorite chicken recipes like Chicken Tikka , Tangadi Kebab in cooker and Chili Chicken.

    Tandoori-chicken-recipe
    [feast_advanced_jump_to]

    About this recipe

    Tandoori chicken is a succulent chicken dish that you will love truly. Chicken thigh pieces are marinated in freshly ground Tandoori Masala Powder, hung curd and other spices for good 6 hours or more .

    The marination is done in two steps ,the double marination process gives the best result.

    Traditionally, it is prepared by rotating the marinated meat in a clay oven or tandoor . But however you can also make it in a oven/ stove top / air fryer or instant pot.

    Secret to get a perfect Tandoori Chicken is a good Tandoor masala , Mustard oil and marination time of about 6 to 12 hrs.

    You can find Tandoor Masala in any Indian stores , but still if you want to make it on your own, then do check the recipe here . Or else , do refer FAQ section for substitutes.

    Most of the Indian restaurants and the dhabas make use of red food color in the marinade to get a nice bright and fiery red Chicken tandoor but this recipe has no artificial color at all. I have used of good quality Kashmiri red chili powder to get that deep red color.

    Let's see on how to make this best ever tandoori chicken recipe at home .

    Ingredients

    Here is the list of ingredients used to make Tandoor Chicken. For actual measurements, refer recipe card.

    tandoori-chicken-marinade

    Chicken Leg Pieces - To make Tandoor chicken , ideally leg piece cut are used ; drumstick with thig attached. If not available, you can make with drumstick too.

    Hung Curd - Drain water from curds using a strainer/ cheese cloth to get thick yogurt. Alternatively you can use Greek Yogurt

    Nothing works as good as freshly pound Ginger and Garlic , it hardly takes a minute to crush in mortar and pestle , so try to make fresh and use.

    Mustard Oil works best for any tandoor but if its not available , go for butter . However, you can make it with any vegetable oil too but mustard oil adds lot of flavor.

    Tandoori Masala powder is what is needed , you can either make it at home or buy it from any Indian stores , if not please check for substitute in FAQ section

    Kasuri Methi -dried fenugreek leaves adds tons of flavor to this , so don't skip.

    Other spices and seasoning - Salt , Turmeric powder and Kashmiri red chili powder is used here. Adding Kashmiri red chili powder gives deep red color to the dish.

    Tips and Variations

    • Double marination process - this really helps chicken to be more flavorful , never skip this.
    • Marination time - most important tip , more peacefully chicken rest for long hours , chicken will become more flavorful . Don't ever compromise in time . If you have time crunch , then minimum would be 30 minutes for first marination and 4 hours for second marination.
    • Mustard oil adds lots of flavor in any tandoor cooking , so try to use it. If not available , the next option is Butter.
    • As a variation , you can Infuse smoke to marination - burn a piece of charcoal to red hot, place it in a bowl and drizzle some ghee over it. Now place this inside marinated chicken bowl and cover the lid for 5 to 10 minutes. Smoke gets infused into to marinade and chicken gets that natural smoky flavor.
    • Use dhungar method ( smoking technique) to infuse smoke to prepared tandoor chicken or to marination , as explained above.

    FAQ's

    How to make in Air Fryer ?

    First, pre-heat the airfryer at 200 degrees. Then, brush the airfryer basket with little oil or butter.

    Arrange the marinated chicken in the basket and air fry it 20 minutes or until charred. (you can flip it once in between).

    How to make on Stove top ?

    Yes , of course you can make this on stove top. On a thick bottom cast iron or non stick pan , heat 1 tablespoon of butter.

    Arrange chicken on a pan. Cook on a medium heat and at regular intervals ,flip and cook chicken on both sides basting butter.

    Finally , with the help of tongs put it over the flame directly. With help of tongs , keep rotating it for 10-12 seconds to get a charred look with smoky flavor.

    Substitute for Tandoori Masala ?

    I have shared recipe on how to make Tandoori Masala , incase if you can't make it or find it in stores; then follow these measurements as a substitute for Tandoori Masala in this recipe:

    •  black pepper powder -  teaspoon
    • turmeric powder - ½ teaspoon
    • cumin powder - ½ teaspoon
    • garam masala powder or kitchen king masala - ½ teaspoon
    • coriander powder -1 teaspoon

    Which Chicken cut to use ?

    Ideally, the best chicken cut to go for is the whole chicken legs (chicken drumsticks with thigh) . If not available, you can go for drumstick pieces also. For healthier version , you can even use chicken breasts but keep a eye on cooking time. As size of chicken varies , cooking time also varies.

    Why was my chicken flavor less?

    Oh No , may be you have cut down on marination time. Honestly, If you do not really want to compromise on it's flavors then go for at least 30 mins of first marination time and 6 hours for second marination time.

    You might also like

    • crispy chicken nuggets
      Chicken Nuggets Recipe
    • chicken-seekh
      Seekh Kebab
    • Chicken Tikka , how to make best chicken tikka
      Chicken Tikka , how to make best chicken tikka
    • crispy fried chicken
      Fried Chicken Recipe | Crispy Fired Chicken

    How to make Tandoori Chicken?

    Wash ,clean and drain water completely from chicken pieces. With a knife , score chicken thigh pieces. This helps spices to get inside the chicken

    how to make Tandoori Chicken

    Place chicken in a bowl , add ¼ tsp  turmeric powder , ½ teaspoon Kashmiri red chilli powder, ½ teaspoon salt , lime juice and mustard oil .

    chicken tandoor first marination

    Rub all the chicken spices over the chicken and marinate for minimum 30 minutes , up to 60 minutes. Keep in refrigerator.

    Tandoori Chicken Recipe

    After 30 minutes , add freshly pound ginger garlic paste , hung curds , mustard oil , chilli powder , tandoori masala powder , salt ,chaat masala and lemon juice.

    chicken tandoor second marination

    Mix marinade well and apply it over the chicken . Don't hesitate to dive in your hands and apply marination over and inside scored chicken .

    Tandoori Chicken Recipe

    Marinate the chicken pieces for minimum 6 hours or overnight in refrigerator. I marinated for good 12 hours .

    Tandoori Chicken Recipe

    After recommended marination time, remove chicken from refrigerator and set aside.

    Tandoori Chicken Recipe

    Preheat the oven to 220 deg Celsius .

    Meanwhile , prepare the baking tray by greasing with some oil. I placed a parchment paper to avoid darkening of my baking tray.

    Arrange the chicken pieces on a tray . Drizzle ½ tablespoon of butter on top of the chicken

    Tandoori Chicken Recipe

    Bake for 25-30 minutes .

    Tandoori Chicken Recipe

    In between ,around 20 minutes, remove the tray from oven ,baste some butter, turn the chicken pieces to other side and put it back in oven.

    Tandoori Chicken Recipe

    Grill chicken 8-10 minutes.

    Tandoori Chicken Recipe

    Serve it hot

    Tandoori Chicken Recipe

    Serve with lemon wedges , mint chutney and onion rings.

    Tandoori Chicken

    This post has been updated from the archives, was first published in September 2018.

    Recipe

    Tandoori Chicken
    5 from 3 votes

    Tandoori Chicken

    Tandoori Chicken is one of the most popular , succulent , tender and juicy grilled chicken. Marinated Chicken leg pieces are grilled to perfection and served with mint chutney
    Prep Time5 minutes mins
    Cook Time25 minutes mins
    Marination Time7 hours hrs
    Total Time7 hours hrs 30 minutes mins
    Course: Main Course, Starters
    Cuisine: Asian, Indian
    Keyword: Chicken, Gluten Free, Non-Vegetarian
    Servings: 2 People
    Calories: 389kcal
    Author: Muktha H S

    Ingredients

    • 400 grams Chicken - 2 thigh leg pieces

    First Marination

    • ½ teaspoon Salt
    • ¼ teaspoon Turmeric Powder
    • ½ teaspoon Kashmiri Red chilli powder
    • 1 teaspoon Lemon juice
    • 1 Tsp Mustard oil

    Second Marination

    • 3 tablespoon Hung Curds
    • ½ teaspoon Red Chilli powder
    • ½ tablespoon Ginger Paste from 1 inch ginger
    • 1 /2 Tbsp Garlic Paste or 6 garlic cloves crushed to paste
    • ½ teaspoon Chaat Masala
    • ½ tablespoon Tandoori Masala Powder refer notes
    • 1 /2 tablespoon Kasuri Methi
    • ½ tablespoon Mustard Oil
    • ½ teaspoon Salt or as required
    • ½ tablespoon Lime Juice , freshly squeezed
    • 1 tablespoon Butter for basting

    Instructions

    • Wash ,clean and drain water completely from chicken pieces.
    • Using a sharp knife , score chicken pieces. This helps chicken marinate to de

    First Marination

    • Place chicken in a marination bowl . Add turmeric powder , Red chili powder and salt ,mustard oil and lime juice.
    • Rub the spices to chicken pieces and marinate for minimum 30 minutes to 60 minutes. Keep in refrigerator.

    Second Marination

    • After 30 minutes , add hung curd, freshly pound ginger paste, freshly pound garlic paste , mustard oil , chilli powder , tandoori masala powder , salt , chaat masala and lemon juice.
    • With your hands in ,rub the marinade over the chicken pieces and inside the scored chicken
    • Cover and marinate chicken for good 6-12 hours or overnight in refrigerator.

    Cooking Methods

      For Stove Top Method

      • For cooking on stove top method : Heat 1 tablespoon oil/ butter in a non stick pan , place the chicken over it and cook on medium heat by flipping it once in between till done .
      • If you are using chicken thigh and leg pieces ,it takes around 30-45 minutes ,to get cooked on low to medium heat . If you are using small chicken pieces ,it cooks faster.
      • Once chicken is cooked perfectly ,put on fire directly for 10-15 seconds, by rotating continuously with help of tongs, to get that charred look.

      For Oven ( Bake and Grill) Method :

      • Preheat the oven to 250 deg Celsius .
      • Grease the oven tray with some oil ( I had placed aluminium foil and greased with oil) ,arrange the chicken pieces and cook for 22 -25 minutes . 
      • In between ,around 15 minutes, remove the tray from oven ,baste some oil flip the chicken pieces and put it back in oven to bake.
      • Once chicken is cooked perfectly , you can grill it for 3-5 minutes to get that charred look. 
      • Serve it hot with lemon wedges , mint chutney and onion rings.

      Video

      Notes

      1.Cooking chicken on grill or Tandoor ,gives you the best flavour and texture. Next alternative is cooking in Oven.
      2. Tandoori Masala Powder is a main key in this recipe , preferably freshly ground spices gives you the best taste. Alternatively, you can use store bought Tandoori Masala powder.

      Nutrition

      Calories: 389kcal

      Tandoori Masala Powder Recipe

      Published : September 24, 2018 | Last Update on September 27, 2022 By Muktha

      Tandoori Masala

      Tandoori Masala Powder is a blend of spices which is used in various tandoori preparations. It's an aromatic deep red coloured masala powder with blend of flavours.I have used Byadgi Red Chilli to get that dark red colour. I am against the use of artificial colours and flavours as it is considered to be not good for health. So I always try to add colours in an natural way.

      Tandoori Masala Powder Recipe

      Byadgi red chillies are non spicy red chillies which are used only to get that deep red colour . I even remember seeing a program featured on television ,few years before where Byadgi Red Chillies where used in making of Lipsticks. So you want red deep colour in your food, then try adding byadgi red chillies it gives that deep red colour same as that of Tandoori Red colour.

      Tandoori Masala Powder ,is very easy to make at home with very few basic ingredients. I bring all the dry whole spices and make all kind of spice blends at home. As it is easy to make and also fresh . Blend some small quantity of spices ,so that it can be used for 5 to 6  times. The measurement I have used here yields approximately 30 grams , use it as required and make fresh batch as and when needed. It hardly takes 20 minutes of your time.

      Other spice blend recipes on blog are Tea Masala Powder , Biryani Masala Powder  and Bisi Bele Bath powder.

      This Tandoori Masala Powder can be used in marination for making tandoori chicken , tandoori paneer tikka , tandoori fish . Also it can be used while preparing paneer tikka masala ,chicken tikka masala ,kebabs and many more delicacies.

      Recipe card for Tandoori Masala Powder

      Recipe

      tandoori masala powder
      4 from 2 votes

      Tandoori Masala Powder

      Tandoori Masala Powder is a bend of spices used in preparations of many tandoori veggies and meat to get that typical colour and flavours
      Prep Time5 minutes mins
      Cook Time8 minutes mins
      Total Time13 minutes mins
      Course: Condiments
      Cuisine: Indian
      Keyword: Basic, Tandoori
      Servings: 30 Grams
      Calories: 186kcal
      Author: Muktha H S

      Ingredients

      • 2 teaspoon Coriander Seeds
      • 5-6 Byadgi Red Chilli
      • 2 Sticks Cinnamon 1 " inch pieces
      • 3 Cloves
      • 1 tablespoon Black Peppercorns
      • 5 Green Cardamom
      • 3 Black Cardamom
      • 1 Bay Leaf
      • 2 teaspoon Cumin Seeds
      • ¾ teaspoon Turmeric Powder

      Instructions

      • Clean all the dry spices .Check for any debris or stones in coriander seeds and peppercorns ,if there discard it.
      • Heat a griddle ,preferable iron griddle or else you can use non stick or anodized skillet too 
      • Dry roast all the ingredients on a low to medium heat ,one by one till you get the pungent smell of each spices.
      • Take measures ,not to burn or brown the spices.
      • Turn off the heat and then at last add Jeera /cumin seeds , heat of the iron griddle is sufficient to crackle the jeera seeds.
      • Once all the ingredients ,cools down . Place it in a dry mixer jar and blend to fine powder.
      • Store it in any air tight dry glass jar and use it as required.

      Nutrition

      Calories: 186kcal

      Step By Step Directions on making of Tandoori Masala Powder :

      Clean all the dry spices , check for any stones and debris if any and discard them.

      Heat a griddle , and slowly on low to medium heat dry roast all the ingredients one by one till you get pungent smell from the spices.

      Tandoori Masala Powder Recipe

      Take measures, not to burn / brown any of the spices.

      Turn off the heat , add cumin seeds ,heat in the iron griddle is enough to crackle cumin seeds.If you are roasting it on an anodized or non stick pan ,roast it on low heat till cumin seeds crackle.

      Once ,all spices cools down .Transfer all the roasted ingredients to dry mixer jar . Add turmeric powder and blend to fine powder.

      Tandoori Masala Powder Recipe

      Store it in an airtight glass jar and use it as required.

      tandoori masala powder

      Vegetable Dum Biryani Recipe

      Published : September 23, 2018 | Last Update on September 27, 2022 By Muktha

      vegetable dum biryani

      Vegetable Dum Biryani is very popular and rich rice preparation. History says that Dum Biryani was introduced to India by Mughals during their period .

      Original Biryani is prepared by marinating meat with freshly ground spices and cooked on a woodfire in an earthenware .Veg Dum Biryani is an adapted recipe by replacing meat with Vegetables for Vegetarian Community .

      vegetable dum biryani

      Biryani is something which I cook with all love and patience ,as it takes some good time of 90 minutes to get a perfect Dum Biryani.

      As I eat non vegetarian ,I prepare different varieties of Biryani like Donne Biryani ,Dum Biryani, Muslim Biryani ,Ambur Star Biryani and many more from Chicken ,Mutton and Fish.

      Veg Dum Biryani  is cooked only when my Vegetarian friends are invited for Lunch 🙂  Or else Vegetable Pulao or Vegetable Bath is what I end up doing. Also one more vegetarian hyderabadi dum biryani , loved by everyone at home is Baingan Dum Biryani | Eggplant Biryani , do check baingan biryani recipe, you may like it .

      To make a perfect biryani , first thing you should note is the quality of rice grain and spices.Always choose a good quality aged long grain basmati rice and premium quality spices. Next is cooking that rice perfectly ,such that each grain is separated well.

      Selection of veggies also plays a important role in Veg dum Biryani Preparation. Vegetables like Carrot ,French Beans , Cauliflower ,Green Peas and Potato are the only vegetables that are recommended in the preparations of Vegetable Dum Biryani.Other vegetables like Mushroom ,Capsicum are used as per their preferences. But ,I personally do not like capsicum in Biryani ,as I always feel it spoils the taste of Authentic Dum Biryani .

      One more key while creating a perfect biryani ,is the Biryani Masala Powder . It's just blend of spices ,and it adds flavour and aroma to the Biryani. You can either get it from stores or freshly blend it at home - Homemade Biryani Masala Powder.

      Recipe Card for Vegetable Dum Biryani

      Recipe

      vegetable dum biryani
      5 from 2 votes

      Vegetable Dum Biryani

      A flavourful and aromatic vegetable  biryani cooked in dum ,popularly known as Hyderabadi Dum Biryani 
      Prep Time10 minutes mins
      Cook Time50 minutes mins
      Total Time1 hour hr
      Course: Main Course
      Cuisine: Indian
      Keyword: Biryani, Hyderabadi, Rice Varities
      Servings: 4 People
      Calories: 685kcal
      Author: Muktha H S

      Ingredients

      Vegetables and Greens

      • 1 Onion finely sliced
      • 1 ½ inch Ginger crushed to paste or ½ tablespoon -¾ tablespoon Ginger paste
      • 10-12 Medium size Garlic cloves crushed to paste or 1 tablespoon Garlic paste
      • 2 Green chillies slit
      • 1 Medium sized carrot ,cut in circles
      • 5-6 French Green Beans , cut 1 ½ inch lengthwise
      • 1 Cup Cauliflower florets
      • 1 Medium size potato cut into chunks
      • ⅓ cup Fresh / frozen green peas
      • ¼ cup Chopped coriander leaves
      • ½ cup Torn mint leaves
      • 1 teaspoon Lemon Juice
      • 1 Onion sliced and fried to brown

      Cooking Rice

      • 11/2 cup Basmati Rice aged
      • ¼ teaspoon Shahi Jeera
      • 1 Bay leaf
      • 2 Green cardamom
      • 1 teaspoon Oil
      • 1 teaspoon Salt
      • 6 cups Water

      Whole Spices

      • 2 inch Cinnamon sticks
      • 2 Green cardamom
      • 1 Black cardamom
      • 2 Strands mace
      • 1 Star anise
      • 6 Cloves
      • 1 Bay leaf
      • ½ teaspoon Shahi jeera

      Other Ingredients

      • 4 tablespoon Ghee /Clarified Butter
      • 1 Cup Curds
      • 2 teaspoon Biryani Masala Powder
      • ½ teaspoon Red chilli powder
      • ⅛ teaspoon Turmeric Powder
      • 5-6 Saffron strands
      • 3 tablespoon Milk
      • 1 tablespoon Raisins or as required
      • 2 tablespoon Cashews or as required
      • 1 teaspoon Salt or as required

      Instructions

      Preparations

      • Wash and rinse rice grains well 3-4 times,till water runs clear.Soak it in water for 30 minutes.
      • Soak 5-6 saffron strands in ¼ cup of hot milk /water , let it sit for few minutes.
      • In a kadai /pan ,heat 1-2 tablespoon ghee /oil ,fry raisins and cashews . Keep it aside. IN the same kadai/pan ,fry onions till brown and crisp. Take care not to burn. Keep  it aside. It's used while assembling the gravy and rice layer.
      • Whilst,wash and clean all vegetables ,slice onions ,slit green chilies lengthwise, cut carrot into circles ,french beans of 1 " inch in length ,cauliflower medium-size florets and medium-sized potato chunks.
      • Prepare ginger garlic paste from one  1 ½ inch ginger and 10-12 garlic cloves ,and keep it aside.

      Preparing Gravy for Biryani

      • In a pressure pan or heavy bottom vessel ,heat 4 tablespoon ,ghee /clarified butter , add all whole spices and fry till aromatic.
      • Add sliced onions , fry well till it turns brown.
      • Add ginger garlic paste, fry well till raw smell vanishes.
      • Add slit green chillies , all chopped veggies ,fresh /frozen green peas and saute for 3-4 minutes.
      • Add turmeric powder ,red chilli powder , biryani masala powder and fry well.
      • Add ¾ cup curds and mix well. Close lid and cook till all vegetables are cooked ,it may take around 8-10 minutes.
      • Open the lid , add salt , ¼ cup curds ,1 tablespoon chopped coriander leaves , 2 tablespoon of mint leaves and mix well.
      • Set aside half portion of the vegetable mix.

      Cooking Rice

      • Bring 6 cups of water to boil, add whole spices ,1 teaspoon of oil , 1 teaspoon of salt and soaked rice.
      • Cook for 6-7 minutes ,such that it is only 70 % cooked. It should be undercooked from inside.
      • Drain water ,rinse with cold water ,drain water completely and spread it on a large wide plate.

      Assembling the rice

      • Now spread half of the parboiled rice over the vegetable gravy , sprinkle 2 pinches of biryani masala powder , ½ tablespoon coriander leaves ,1 tablespoon of mint leaves ,half of saffron milk ,½ teaspoon lemon juice.
      • Now again repeat the above step by adding vegetable gravy followed by parboiled rice , fried raisins and cashews , torn mint leaves ,coriander leaves , saffron milk , lemon juice and biryani masala powder.
      • Cover biryani and seal it with atta or aluminium foil.

      Cooking on Dum

      • Heat iron griddle on high heat and place the biryani vessel over it.
      • Place a huge vessel filled with water above the biryani.
      • Simmer the flame and allow it cook on dum for 30-45 minutes.
      • Serve it hot accompanied with onion tomato raita or onion cucumber raita of your choice and gravy.

      Nutrition

      Calories: 685kcal

      Step by Step Directions on making of Vegetable Dum Biryani :

      Preparations:

      Wash and rinse rice grains well 3-4 times,till water runs clear.Soak it in water for 30 minutes.

      Vegetable Dum Biryani Recipe

      Soak 5-6 saffron strands in ¼ cup of hot milk /water , let it sit for few minutes.

      Vegetable Dum Biryani Recipe

      In a kadai /pan ,heat 1-2 tablespoon ghee /oil ,fry raisins and cashews . Keep it aside. In the same kadai/pan ,fry onions till brown and crisp. Take care not to burn. Keep  it aside. It's used while assembling the gravy and rice layer.

      Whilst ,wash and clean all vegetables ,slice onions ,slit green chilies lengthwise, cut carrot into circles ,french beans of 1 " inch in length ,cauliflower medium-size florets and medium-sized potato chunks.

      Prepare ginger garlic paste and keep it aside.Vegetable Dum Biryani Recipe

      Cooking Gravy for Biryani:

      In a pressure pan or heavy bottom vessel ,heat 4 tablespoon ,ghee /clarified butter , add all whole spices and fry till aromatic.Add sliced onions , fry well till it  turns brown.

      Vegetable Dum Biryani Recipe

      Add ginger garlic paste, fry well till raw smell vanishes.

      Vegetable Dum Biryani Recipe

      Add slit green chillies , all chopped veggies ,fresh /frozen green peas and saute for 3-4 minutes.

      Vegetable Dum Biryani Recipe

      Add turmeric powder ,red chilli powder , biryani masala powder and fry well.

      Vegetable Dum Biryani Recipe

      Add ¾ cup curds and mix well. Close lid and cook till all vegetables are cooked ,it may take around 8-12 minutes.

      Vegetable Dum Biryani Recipe

      Open the lid , add salt , remaining curds , 1 tablespoon chopped coriander leaves , 2 tablespoon of mint leaves and mix well.

      Vegetable Dum Biryani Recipe

      Set aside half portion of the vegetable mix.

      Vegetable Dum Biryani Recipe

      Cooking Rice:

      While preparing gravy parallely , bring 6 cups of water to boil, add whole spices ,1 teaspoon of oil .

      Vegetable Dum Biryani Recipe

      Add 1 teaspoon of salt  and soaked rice.Cook for 6-7 minutes ,such that it is only 70 % cooked.It should be undercooked inside.

      Vegetable Dum Biryani Recipe

      Drain water ,rinse with cold water ,spread it on a large wide plate.

      Vegetable Dum Biryani Recipe

      Assembling rice and gravy :

      Now spread half of the parboiled rice over the vegetable gravy .

      Vegetable Dum Biryani Recipe

      Sprinkle 2 pinches of biryani masala powder , ½ tablespoon coriander leaves ,1 tablespoon of mint leaves ,half of saffron milk ,½ teaspoon lemon juice.

      Vegetable Dum Biryani Recipe

      Now again repeat the above step by adding vegetable gravy followed by parboiled rice , fried raisins and cashews , torn mint leaves ,coriander leaves , saffron milk , lemon juice and biryani masala powder.

      Vegetable Dum Biryani Recipe

      Cover biryani and seal it with atta or aluminium foil.

      Heat iron griddle on high heat and place the biryani vessel over it. Place a huge vessel filled with water above the biryani.

      Vegetable Dum Biryani Recipe

      Simmer the flame and allow it cook on dum for 30 minutes.

      Vegetable Dum Biryani Recipe

      Serve it hot accompanied with onion tomato raita or onion cucumber raita of your choice and  gravy.

      Vegetable Dum Biryani

      Biryani Masala Powder

      Published : September 20, 2018 | Last Update on September 27, 2022 By Muktha

      biryani masala powder

      Biryani Masala Powder is blend of spices ,used in making of Biryani. It's a must for any kind of dum biryani. Adding a pinch of this masala powder during the preparations ,yields a flavourful  and aromatic biryani.

      If you are one among those ,who loves biryani then this is a must keep recipe for you.This Biryani Masala can also be used to make any kind of spicy vegetarian and non-vegetarian gravies.At times, you can even use this masala in place of garam masala powder. However you use,this adds more flavor for your food.

      Biryani Masala Powder

      Biryani Masala Powder is easy to make and can be prepared within 20 minutes . You can store it in dry airtight glass containers and stays fresh for months.So that you can prepare it in advance and use it as required.

      If you are interested ,do check for one more spice blend recipe from my blog Tea Masala Powder .

      How to make Biryani Masala Powder:

      Carefully clean all the ingredients, look for debris,if any.

      biryani masala powder

      On an iron griddle ,dry roast all the ingredients one by one.

      Biryani Masala Powder

      Make sure ,you dry roast slowly on low flame  ,so that none of the ingredients turn black.

      Take measures not to burn Saunf and Shahi jeera. Once it starts to crackle,turn off the heat.Allow ,it to come to room temperature.

      Biryani Masala Powder

      Once it cools down,transfer to dry mixer jar and blend to fine powder.

      Biryani Masala Powder

      Store it in airtight container and use it as required.

      Biryani Masala Powder

      Recipe

      Biryani Masala Powder
      5 from 1 vote

      Biryani Masala Powder

      A Spice Blend ,which is used in preparations of Dum Biryani to get flavourful and aromatic biryani.
      Prep Time10 minutes mins
      Cook Time10 minutes mins
      Total Time20 minutes mins
      Course: Condiments
      Cuisine: Indian
      Keyword: Biryani
      Servings: 50 grams
      Calories: 234kcal
      Author: Muktha H S

      Ingredients

      • 4 tablespoon Coriander Seeds
      • 2 teaspoon Saunf / fennel seeds
      • 1 teaspoon Black Peppercorns
      • 2 tablespoon Shahi Jeera
      • 1 tablespoon Cloves / Lavang
      • 5 pieces Cinnamon 2" inch
      • ½ tablespoon Stone Flowers / Dagad Phool
      • ½ teaspoon Nutmeg/ Jaiphal grated to powder
      • 4-5 Strands of Mace / Javitri
      • 2 Star Anise
      • 12 Green Cardamom
      • 2 Black Cardamom

      Instructions

      • Carefully clean up all the ingredients, look for debris and stones  ,if any and discard them.
      • On an iron griddle ,dry roast all the ingredients one by one.
      • Make sure ,you dry roast slowly on low flame ,so that none of the ingredients turn black.
      • Take measures not to burn Saunf and Shahi jeera. Once it starts to crackle,turn off the heat.
      • Allow ,it to come to room temperature.Once it cools down,transfer to dry mixer jar and grind to fine powder.
      • Store it in airtight container and use it as required.

      Nutrition

      Calories: 234kcal

      Raw Banana Tikki | Kache Kela Ki Tikki Recipe

      Published : September 19, 2018 | Last Update on September 26, 2022 By Muktha

      Raw Banana tikki or Kache Kela ki tikki or Bhalekayi Tikki is simple and easy, vrat recipe. This is a No Onion , No Garlic recipe .

      Here I have used only few fasting ingredients which can be consumed during fasting. But if you are not fasting and making it on any other day ,you can prepare it by using onion ,garlic and chat masala for that extra zing.

      raw banana tikki

      For Kache Kela ki Tikki ,I have used Singhada / singhara (Water Chestnut) flour , but you can even use Kuttu ka atta (Buckwheat Flour) or other any other flour which is used in fasting.

      Flour used here is just for binding . I have just tawa fried it with little Desi Ghee / Clarified Butter . But you can also deep fry it or tawa fry using oil also.

      Raw Banana is rich in fiber and its great for diabetics ,weight loss and heart health. Combination of Water Chestnut Flour and raw banana is great ,keeps you energized for long.So,its mainly used during fasting. If you are not fasting ,then also you can have this at it tastes great and healthy too.

      Other fasting / vrat recipes on blog are Sabudana Vada , Sabudana Thalipeeth, Sabudana Khichdi , Sabudana Kheer , Rajgira Halwa and Kaddu Halwa 

      Recipe

      Raw Banana Tikki | Kache Kela Ki Tikki Recipe
      5 from 1 vote

      Raw Banana Tikki Recipe

      Delicious and Nutrient rich Raw Banana tikki  is a No Onion , No Garlic recipe for fasting
      Prep Time5 minutes mins
      Cook Time18 minutes mins
      Total Time23 minutes mins
      Course: Snack
      Cuisine: Indian
      Keyword: Fasting
      Calories: 68kcal
      Author: Muktha H S

      Ingredients

      • 250 grams Raw banana
      • 1 green chilli finely chopped
      • ½ inch ginger grated
      • 2 tablespoon coriander leaves chopped
      • 1 Big Cardamom pod
      • ½ teaspoon Chilli powder
      • ¼ teaspoon Jeera powder
      • ¼ teaspoon Green cardamom powder
      • 2 teaspoon coriander seeds ,roasted and crushed
      • ¾ teaspoon lemon juice
      • ¾ teaspoon Rock salt powder or as required
      • 2 tablespoon Singhara flour / buckwheat flour

      Instructions

      • Wash and clean, raw banana ,peel the skin .
      • Cut into small circles, add ⅓ cup of water ,1 cardamom pod and pressure cook for just a whistle on high heat, manually release the pressure . Alternatively, you can just steam raw banana.
      • Whilst , dry roast coriander seeds and crush it coarsely using mortar and pestle.
      • Discard cardamom pod , drain water if any . And finely mash banana with help of a fork.
      • Add grated ginger ,chopped green chillies,chopped coriander leaves , ¼ teaspoon cardamom powder ,red chilli powder,jeera powder and powdered rock salt .Add lime juice and mix well everything .
      • Add 2 tablespoon of singhara atta or buckwheat flour or arrowroot powder or any fasting flour. Flour is added for just binding purpose.
      • Take a small portion of the mixture , shape into patties.
      • Heat griddle, brush some ghee on griddle and arrange the patties.
      • Drizzle ghee /oil over the patties, flip and cook on both sides till done. Takes about 3-4 minutes , to cook on each side.
      • Serve hot with a cup of coffee or tea.

      Nutrition

      Calories: 68kcal

      How to make Raw Banana Tikki

      Wash and clean ,raw banana ,peel the skin .

      Raw Banana Tikki | Kache Kela Ki Tikki Recipe

      Cut into small circles ,add ⅓ cup of water ,1 cardamom pod and pressure cook for just a whistle on high heat, manually release the pressure . Alternatively, you can just steam raw banana.Raw Banana Tikki | Kache Kela Ki Tikki Recipe

      Whilst ,dry roast coriander seeds and crush it coarsely using mortar and pestle.

      Raw Banana Tikki | Kache Kela Ki Tikki Recipe

      Discard cardamom pod ,drain water if any . And finely mash banana with help of  a fork.

      Raw Banana Tikki | Kache Kela Ki Tikki Recipe

      Add grated ginger ,chopped green chillies,chopped coriander leaves , ¼ teaspoon cardamom powder ,red chilli powder,jeera powder  and powdered rock salt .Add lime juice and mix well everything .

      Raw Banana Tikki | Kache Kela Ki Tikki Recipe

      Add 2 tablespoon of singhara atta or buckwheat flour or arrowroot powder or any fasting flour. Flour is added for just binding purpose.

      Raw Banana Tikki | Kache Kela Ki Tikki Recipe

      Take a small portion of the mixture ,shape into patties.Raw Banana Tikki | Kache Kela Ki Tikki Recipe

      Heat griddle, brush some ghee on griddle and arrange the patties.Alternatively, you can even deep fry this. Raw Banana Tikki | Kache Kela Ki Tikki Recipe

      Drizzle ghee /oil over the patties ,flip and cook on both sides till done. Takes about 3-4 minutes ,to cook on each side.

      Raw Banana Tikki | Kache Kela Ki Tikki Recipe

      My lil boy had no patience ,he was about to take by then i clicked this pic, so considered to share this image ,with his lil fingers 🙂

      Serve hot with a cup of coffee or tea.

      raw banana tikki

      Gorai kai Kara Chutney | Gavar Ki Chutney Recipe

      Published : September 11, 2018 | Last Update on September 27, 2022 By Muktha

      gorai kai kara

      Gorai kai Kara Chutney aka Gavar ki Chutney is a spicy chutney made from Cluster Beans. It's creamy ,spicy and easy to make . Cluster beans are sauteed in oil along with green chilli ,green tomato and blitz into a smooth mixture.

      gorai kai kara

      Cluster beans is a humble vegetable which is loaded with full of nutrients.It is loaded with 75% of dietary fiber . It is also excellent in maintaining blood sugar levels.Cluster beans are immensely loaded with high levels of folic acid and helps to prevent any birth defects if present in the fetuses.

      Cluster beans helps in strengthening bones and also aid in keeping them healthy. As it is rich in dietary fiber, folate and potassium it prevents many cardiovascular threats too.

      So adding cluster beans in  our regular diet may be beneficial. Adding healthy variations to our diet is must,so is this chutney . It's creamy and delicious ,which you may fall in love with.

      Serve Gorai kai Kara chutney with Chapathi , Roti , Akki Roti, steamed rice and ghee or even Curd rice as an accompaniment.

      Other chutney recipes on blog are Moolangi/Raddish Chutney , Pumpkin Chutney , Coconut Chutney , Peanut Chutney and  Spicy Peanut Chutney.

      Recipe Card for Gorai kai Kara Chutney | Gavar Ki Chutney

      Recipe

      Gorai kai Kara
      5 from 1 vote

      Gorai Kai Kara | Gavar Ki Chutney

      A creamy and delicious spicy chutney prepared with cluster beans.
      Prep Time8 minutes mins
      Cook Time20 minutes mins
      Total Time28 minutes mins
      Course: Accompaniment
      Cuisine: Karnataka
      Keyword: Chutney
      Servings: 6 People
      Calories: 83kcal
      Author: Muktha H S

      Ingredients

      • 1 teaspoon Oil
      • 200 grams Gavar / Cluster beans
      • 2 Green Tomatoes
      • 4-5 Green Chillies
      • 6-8 Garlic Cloves
      • 1 teaspoon Jeera Seeds
      • 1 teaspoon Tamarind firmly pressed
      • 2 tablespoon Fresh Coriander Leaves
      • 1 teaspoon Salt or as required

      For Tempering

      • ½ tablespoon Oil
      • ½ teaspoon Mustard Seeds
      • 1 teaspoon Urad Dal
      • 1 Sprig Curry Leaves
      • 1 Red chilly broken
      • 1 pinch Asafoetidia

      Instructions

      • Wash and clean cluster beans, trim both the pointed ends and remove the fibre, if any.
      • Roughly cut the cluster beans and keep it aside, take two green tomatoes, chop roughly.
      • Heat 2 teaspoon of oil in a pressure cooker ,sauté cluster beans for 3-4 minutes, add green chillies ,tomato mix well .
      • Add salt,mix well and pressure cook for a whistle.Don't add Water
      • Once pressure release on its own, allow it to cool.
      • Transfer it into a mixer chutney jar, add garlic cloves, jeera seeds, tamarind, fresh coriander leaves and grind to get smooth creamy chutney.
      • Heat oil in a Tempering kadai , add all the ingredients under tempering on by one in order and pour it over the Chutney.
      • Serve it with Chapathi , Roti , Akki Roti, steamed rice and ghee or even Curd rice as an accompaniment.  

      Nutrition

      Calories: 83kcal

      Step by step directions on making of Gorai Kai Kara Chutney :

      Wash and clean cluster beans, trim both the pointed ends and remove fiber from sides, if any.

      Gorai kai Kara Chutney | Gavar Ki Chutney Recipe

      Heat 2 teaspoon of oil in a pressure cooker ,sauté cluster beans for 3-4 minutes.

      Gorai kai Kara Chutney | Gavar Ki Chutney Recipe

      Add green chillies ,cut tomatoes ,add salt  and mix well everything.

      Gorai kai Kara Chutney | Gavar Ki Chutney Recipe

      Saute for a minute and pressure cook for a whistle.

      Gorai kai Kara Chutney | Gavar Ki Chutney Recipe

      Once pressure release on its own,open the lid and  allow it to cool.

      Gorai kai Kara Chutney | Gavar Ki Chutney Recipe

      Transfer it into a mixer chutney jar, add garlic cloves, jeera seeds, tamarind, fresh coriander leaves and grind to get smooth creamy chutney.

      Gorai kai Kara Chutney | Gavar Ki Chutney Recipe

      Heat oil in a tempering kadai , add all the ingredients under tempering on by one in order  and pour it over the Chutney.

      Gorai kai Kara Chutney | Gavar Ki Chutney Recipe
      Gorai kai Kara

      Serve it with Chapathi , Roti , Akki Roti, steamed rice and ghee or even Curd rice as an accompaniment.

      Gorai kai Kara Chutney

      Classic French Toast | Easy French Toast Recipe

      Published : September 8, 2018 | Last Update on September 29, 2022 By Muktha

      Classic French Toast

      Classic French Toast is a easy bread toast recipe ,that is made in 15 minutes. It's my Sunday morning ease to laze around breakfast.

      Preparation of French toast is very simple , just by soaking bread slices in milk and egg mixture. Use a day old bread and thick bread slices for making Classic french toast. One more important key to consider while preparing French toast is soaking time of bread slices.

      classic french toast

      Soak bread slices completely ,such that it totally drunk the egg milk mixture and still holds together , a day old bread helps to hold it together. If you use fresh bread from oven then ,there are chances of it falling apart when soaked in the egg milk mixture. If bread slices are not completely soaked ,then you end up getting a dry toast.

      So to get a custardy interior ,soak bread completely . Cook on  medium -to low heat , such that bread slices are golden and crisp outside and thoroughly cooked inside.This toast is just sweet , if you want you can add more sugar.As I was serving with maple syrup,I have not added more sugar.

      Other sunday morning, breakfast which I often do are : Spicy Oats Omelette ,  Spanish Potato Omelette  , Chessy Bell Pepper Toast  and   Scrambled Egg with Mushroom .

      Recipe Card for Classic French Toast

      Recipe

      Classic French Toast
      5 from 1 vote

      Classic French Toast

      Simple and easy morning breakfast made with Bread Slices soaked in milk and egg mixture to get a golden crisp exterior with custardy interior.
      Prep Time8 minutes mins
      Cook Time4 minutes mins
      Total Time12 minutes mins
      Course: Breakfast
      Cuisine: French, World
      Keyword: Bread
      Servings: 2 People
      Calories: 280kcal
      Author: Muktha H S

      Ingredients

      • 4 Thick Bread Slices
      • 4 Eggs
      • ⅓ Cup Milk
      • 1.5-2 tablespoon Sugar
      • ½ teaspoon Cinnamon powder
      • 1 pinch Nutmeg
      • ½ teaspoon Vanilla Essence
      • 1 pinch Salt
      • 2 tablespoon Butter
      • ¼ cup Maple Syrup or Honey ,optional for serving

      Instructions

      • Take a mixing bowl, break eggs. Add pinch of salt, sugar, vanilla essence, pinch of nutmeg and cinnamon powder. Whisk well everything.
      • Add milk and whisk everything.
      • Allow the bread slices to soak in the egg mixture completely for 1 minute with 30 seconds on both sides. Bread should feel heavy and soaked through but hold its shape without breaking apart.
      • Heat non-stick skillet, add butter /oil, place soaked bread pieces on butter.
      • Flip and cook on both sides for 2-3 minutes.
      • Drizzle Maple Syrup or Honey over the toast and serve with a dollop of butter.

      Notes

      • Add 2- 2.5 tablespoon of Sugar ,if you are not serving with Honey or Maple Syrup.
      • Take a day old bread for good results.

      Nutrition

      Calories: 280kcal

      Step by Step Directions on making of Classic French Toast :

      Take a mixing bowl, break eggs. Add pinch of salt, sugar, vanilla essence, pinch of nutmeg and cinnamon powder. Whisk well everything.

      Classic French Toast | Easy French Toast Recipe

      Add milk and whisk everything.

      Classic French Toast | Easy French Toast Recipe

      Allow the bread slices to soak in the egg mixture completely for 1 minute with 30 seconds on both sides. Bread should feel heavy and soaked through but hold its shape without breaking apart.

      Classic French Toast | Easy French Toast Recipe

      Heat non-stick skillet, add butter /oil, place soaked bread pieces on butter.

      Classic French Toast | Easy French Toast Recipe

      Flip and cook on both sides for 2-3 minutes.

      Classic French Toast | Easy French Toast Recipe

      Drizzle Maple Syrup or Honey over the toast and serve with a dollop of butter.

      Classic French Toast

      Puchka - Kolkata Style Pani Puri

      Published : September 6, 2018 | Last Update on September 29, 2022 By Muktha

      Puchka

      Puchka is basically a version of panipuri which is a famous street food in Kolkata. This Kolkata style Puchkas are easy to make and tastes delicious.

      It's the pani , in Puchka that makes all difference . It is a spicy ,tangy and thirst quenching street food that is loved by all generations, throughout India.

      If your are interested in trying out authentic regional chaat / street food at home then you must try one of the best Masala Puri Chaat Recipe from Karnataka, Kolhapuri Misal Pav  and the famous Pav Bhaji from Mumbai

      puchka
      [feast_advanced_jump_to]

      About this recipe

      Puchka is the name given for ubiquitous panipuri in East India. How is this different from regular pani puri ? It is the filling and pani that makes all the difference. Filling used here for puchka is black chickpeas and potatoes.

      Puchka gets its taste and flavors from the special spice blend called Muri masala that is mixed  along with potato and black chick pea filling .

      But in this recipe , I have  not used muri masala  because I didn't had. Instead , I have added different spices to bring out the flavors which are very near to that of authentic Puchka.   Here  assortments added with potato and black chickpeas are truly optional , it depends on your taste.

      Few adds chopped cucumber along with onions and few while others likes to eat it with just imli pani and boiled channa. It's all up to your choice.

      Difference between Pani Puri , Golgappa and Puchka?

      Pani Puri is the generalized word and is vaguely used on all other versions of it.

      Though it seems like Gol gappa and puchka are different regional names given to Pani puri , the filling used in all the 3 versions ( pani puri , gol gappa and puchka ) are different.

      For Puchka the main filling inside puri is black chick peas and tamarind water with spices and assortments.

      While for gol gappe its potato filling with mint corinader pani along with or without boondi .

      And for classic pani puri its green / white peas filling along with assortments and mint coriander spicy pani and tamarind jaggery sweet pani added.

      These are my close observations on our most favorite street food , Pani Puri.

      Puchka

      It's worth trying this delicious Puchkas at home during weekends to enjoy with whole family. I have tried Puchka by using store bought Puri's , you can try with homemade puri's too.

      Apart from the deliciousness of this chat , did you know the imli pani or water with all spices are loaded with medicinal properties and works wonders on your digestive system.

      Roasted jeera powder with black salt , green chili paste and tamarind juice , everything helps in better digestion.

      Hence you can enjoy this puchka pani as your drink at times as a home remedy for your digestion related issues.

      You may also like

      • dry gobi manchurian recipe
        Gobi Manchurian Dry | Cauliflower Manchurian
      • crispy-onions-rings
        Onion Rings Recipe
      • paneer chilli recipe
        Chilli Paneer |Resturant Style Chilli Paneer
      • Onion Pakora
        Onion Pakoda | Crispy Onion Pakora

      How to make Puchka :

      Wash and soak black chickpeas / kala chana for 6 -8 hrs. If soaking for 4-5 hours then use hot water.

      Puchka - Kolkata Style Pani Puri

      Take ¼ cup (40 grams) of tamarind and soak it in a 1 cup of hot water for 30 minutes or more.

      Puchka - Kolkata Style Pani Puri

      After 30 minutes, extract the juice, strain and discard the residue.

      Puchka - Kolkata Style Pani Puri

      Make a paste from 2 green chillies ,I used mortar and pestle for this.

      Puchka - Kolkata Style Pani Puri

      Add ¾ teaspoon red chilli powder, ½ teaspoon salt, roasted jeera powder, green chilli paste, black salt, chopped coriander leaves ,green chilli paste and chopped mint leaves to the tamarind juice and also add 2- 2.5 cups of chilled water.

      Puchka - Kolkata Style Pani Puri

      Refrigerate the pani mixture until you are ready to serve.

      Pressure cook Black Chana with pinch of salt and a cup of water for 2-3 whistles. Drain water (reserve and use it for anything you cook later , as it is nutritious) and keep chana aside.

      Puchka - Kolkata Style Pani Puri

      Steam or boil 2 potatoes.

      Puchka - Kolkata Style Pani Puri

      Peel skin, mash and keep it aside.

      Puchka - Kolkata Style Pani Puri

      In a bowl ,take mashed potatoes, add ½ teaspoon red chilli powder,salt, jeera powder , chat masala ,black salt and  mix everything. Puchka - Kolkata Style Pani Puri

      Add boiled chickpeas to it and mix well .

      Puchka - Kolkata Style Pani Puri

      Tap the Puri at the center lightly to make a half inch hole in it.Add about 1 teaspoon of the potato chickpea filling into the puri.

      Puchka - Kolkata Style Pani Puri

      Fill the puri with spicy tamarind water and serve.

      Puchka

      Recipe

      Puchka
      5 from 6 votes

      Puchka - Kolkata Style Pani Puri

      Puchka - Kolkata style pani puri filled with spicy tangy tamarind water and black chickpeas.
      Prep Time10 minutes mins
      Cook Time30 minutes mins
      Soaking Time6 hours hrs
      Total Time6 hours hrs 40 minutes mins
      Course: Snack
      Cuisine: Bengali, Indian
      Keyword: Street Food
      Servings: 5 serves
      Calories: 140kcal
      Author: Muktha H S

      Ingredients

      For Filling

      • 2 Medium size Potatoes ,boiled
      • ½ cup Dry Black Chickpeas ,boiled
      • ½ Tsp Red chilli powder
      • 1 teaspoon Black salt
      • ½ teaspoon Jeera powder
      • ½ Tsp Dry mango powder
      • ½ teaspoon Chat masala
      • ½ teaspoon Salt or as required

      For Pani

      • ¼ cup Tamarind , refer notes
      • 3.5-4 cups Water
      • 2 Green chilli crushed to paste
      • 1 tablespoon Chopped coriander leaves
      • 1 teaspoon Chopped mint leaves
      • 1 teaspoon Roasted Jeera powder
      • ½ teaspoon Red chilli powder
      • ½ teaspoon Chat masala powder
      • 1 teaspoon Black salt
      • ¾ teaspoon Salt or as required

      Instructions

      For Pani

      • Take ½ cup (40 grams) of tamarind and soak it in a 1 cup of hot water for 30 minutes.
      • After 30 minutes, extract the juice, strain tamarind juice and discard the residue.
      • Add 2- 2.5 cups of chilled water to the tamarind juice.
      • Add ¾ teaspoon red chilli powder, ½ teaspoon salt, roasted jeera powder, green chilli paste, black salt, chopped coriander leaves and mint leaves.
      • Refrigerate the pani mixture until you are ready to serve. 

      For Filling

      • Wash,rinse and soak black chickpeas / kala channa for 6 -8 hrs.
      • Pressure cook Black Chana with pinch of salt and a cup of water for 2-3 whistles. Drain water (reserve and use it for anything you cook later , as it is nutritious) and keep chana aside.
      • Boil 2 potatoes, peel skin, mash and keep it aside.
      • In a bowl ,take mashed potatoes, add ½ teaspoon red chilli powder,salt, jeera powder , chat masala ,black salt and black chick peas, mix everything.

      For Serving Puchka

      • Tap the Puri at the center lightly to make a half inch hole in it
      • Add about 1 teaspoon of the potato chickpea filling into the puri. 
      • Fill the puri with spicy tamarind water and serve.

      Video

      Notes

      • If Tamarind is too sour then use¼ cup and in case if its sweet, use ⅔ cup of tamarind. Actual taste varies depending on the sourness of tamarind , so please test and use tamarind accordingly.
      • No Sweet Chutney is used in Puchka , if you want you can use it.
      • No Onion and sev are used for authentic Kolkata Puchka, its optional.
      • There is no exact measurements for the spices used, as it is altered suit their taste.

      Nutrition

      Calories: 140kcal

      Onion Paratha | easy onion paratha recipe

      Published : September 5, 2018 | Last Update on October 6, 2022 By Muktha

      onion paratha

      Onion Paratha is simple ,easy and quick recipe .Whenever there is no or short of vegetables at home ,I prepare this onion paratha.

      Onion Paratha is a delicious recipe when accompanied with boondi raita and pickle.It tastes so good that ,I'll enjoy eating this till my last bite.

      onion paratha

      Its everyday saga for me to think what to cook for tomorrow's breakfast and lunch box ? So ,this recipe has become a saviour for me ,many times. As I prepare onion paratha for breakfast as well as pack the same for Lunch box too.

      Ease way to laze around once in a while with such kind of 2 in 1 breakfast - lunch box options.Other breakfast-lunch box option ,I often follow are: Aloo Paratha , Chinese Stuffed Paratha, Mooli Paratha , Avarekalu Bath ,Tomato Bath & Moong Dal Rice.

      I personally love this Onion paratha because I add Kalonji (onion seeds) and Ajwain (carom Seeds). Unlike ,other Paratha's don't roll it thin ,roll it bit thick ,so that onions doesn't sneak peek here and there.

      Also roll paratha and cook it simultaneously , as onions may start releasing juices when it comes in contact with salt, if delayed.Fry on hot tava / griddle by drizzling ghee/ oil ,flip and cook on both sides,till crisp.

      Serve Onion Paratha with Boondi Raita / Curds and Pickle.

      Recipe Card for Onion Paratha

      Recipe

      onion paratha
      5 from 1 vote

      Onion Paratha

      Indian flat bread stuffed with onion and spices.
      Prep Time10 minutes mins
      Cook Time27 minutes mins
      Total Time37 minutes mins
      Course: Breakfast
      Cuisine: North Indian
      Keyword: Punjabi
      Servings: 8 Makes
      Calories: 132kcal
      Author: Muktha H S

      Ingredients

      For Paratha Dough

      • 2 cups Wheat flour
      • 1 tablespoon Kasuri Methi / dry fenugreek
      • ½ teaspoon Ajwain /Carom Seeds
      • ¾ teaspoon Salt
      • 1 teaspoon Oil
      • ¾ - 1 cup water ,as required

      For Stuffing

      • 3 large Onions finely chopped
      • 2 tablespoon coriander leaves chopped
      • 1 green chillies finely chopped
      • 1 teaspoon Red chilly powder
      • ½ Tsp Salt or as required
      • ½ teaspoon Amchoor Powder / dry mango powder
      • ¼ teaspoon Garam Masala Powder
      • ¼ - ½ teaspoon Jeera Powder / Cumin Powder

      For rolling and frying

      • 1 tablespoon Kalonji Seeds /onion seeds
      • ¼ cup Wheat flour for dusting
      • 2-3 tablespoon Ghee / Oil for frying

      Instructions

      • Take 2 cups of Wheat flour in a bowl or big plate , add kasuri methi (dry fenugreek) , ajwain ( carom seeds) ,1 teaspoon salt and mix well.
      • Make a well in the center, add water, oil, knead well and prepare the dough.
      • Cover the dough with a muslin cloth, close and keep it aside for minimum 15 minutes.
      • In a bowl, take 1 teaspoon red chilli powder, salt, garam masala , jeera (cumin) powder and amchur (dry mango ) powder, mix well everything and keep the spice powder ready.
      • Finely chop 3 large or 4 medium size onions, 2 tablespoon coriander leaves and 1 or 2 green chillies. Mix well everything and keep aside.
      • Dust the working place, sprinkle some kalonji / onion seeds
      • Pinch a medium size dough , roll over the kalonji seeds and flatten it. Dust some flour and roll it in a circle of around 5" inches in a diameter.
      • Sprinkle some spice powder and place the onion filling at the centre, again sprinkle some spice over on top.
      • Take edges of the dough ,start pleating and bring it to the centre.
      • Press the pleats from centre, dust some flour, sprinkle Kalonji seeds and roll it to a size of around 6 to 7 inches in diameter.
      • On a hot tava /iron griddle ,place the rolled paratha.When the base is partially cooked flip the paratha ,spread some ghee and cook the other side.Flip and cook on both sides.
      • Serve hot with boondi raita / curds and pickle.

      Nutrition

      Calories: 132kcal

      How to make Onion Paratha

      Take 2 cups of Wheat flour in a bowl or big plate , add kasuri methi (dry fenugreek) , ajwain ( carom seeds) ,1 teaspoon salt and mix well.

      Onion Paratha | easy onion paratha recipe

      Make a well in the centre, add water, oil, knead well and prepare the dough.

      Onion Paratha | easy onion paratha recipe

      Cover the dough with a muslin cloth or kitchen towel, close and keep it aside for minimum 15 minutes.

      Onion Paratha | easy onion paratha recipe

      In a bowl, take 1 teaspoon red chilli powder, salt, garam masala , jeera (cumin) powder and amchur (dry mango ) powder, mix well everything and keep the spice powder ready.

      Onion Paratha | easy onion paratha recipe

      Finely chop 3 large or 4 medium size onions, 2 tablespoon coriander leaves and 1 or 2 green chillies. Mix well everything and keep aside.

      Onion Paratha | easy onion paratha recipe

      Dust the working place, sprinkle some kalonji / onion seeds.Onion Paratha | easy onion paratha recipe

      Pinch a medium size dough , roll  over the kalonji seeds and flatten it. Dust some flour and roll it in a circle of around 5" inches in a diameter.Onion Paratha | easy onion paratha recipe

      Sprinkle some spice powder  and place the onion  filling at the centre, again sprinkle some spice over on top.Onion Paratha | easy onion paratha recipe

      Take edges of the dough ,start pleating and bring it to the centre.

      Onion Paratha | easy onion paratha recipe

      Press the pleats from centre, dust some flour, sprinkle Kalonji seeds and roll it to a size of around 6 to 7 inches in diameter.

      Onion Paratha | easy onion paratha recipe

      On a hot tava /iron griddle ,place the rolled paratha.

      Onion Paratha | easy onion paratha recipe

      When the base is partially cooked flip the paratha ,spread some ghee and cook the other side.Flip and cook on both sides.

      Onion Paratha | easy onion paratha recipe

      Serve Onion paratha with boondi raita / curds  and pickle.

      onion paratha

      Instant Oats Idli Recipe | how to make Oats Idli

      Published : September 4, 2018 | Last Update on September 27, 2022 By Muktha

      Instant Oats Idli

      Instant Oats Idli : Step by step photos and recipe details are shared for making soft and fluffy oats Idli.

      For making Instant oats idli ,I have used Quaker Oats , fine sooji and curds. Oats as everyone knows it high in fiber and is a very good option for breakfast. When whole world says , eat high fiber food for morning breakfast ,there is no harm in adapting what is good.

      Instant Oats Idli

      Many of my friends ,make a sad face whenever I say why don't you try oats for breakfast ? We being Indians ,with diversity in our food and culture ,loves to eat food which is more delicious. Ans from west, if we cultivate their habits and say eat Oats for breakfast ,then Obviously a sad face is expected.

      So ,develop a recipe from Oats ,that suits your palate,isn't it simple? Yes, it is but many of us don't actually have time to think and create one ,then only bloggers like us will come into picture.We will make things simple for you with these tried and tested recipes from our kitchen and brings to all readers with right  measurements so that you can enjoy good quality and healthy food  at comfort of your home.

      Other Oats recipes on blog are Oats Omelette , Masala Oats , Methi Matar Oats and Granola Bars.

      Step By Step Directions on making of Instant Oats Idly:

      Grind 1 cup oats into a coarse powder and set aside.

      Instant Oats Idli Recipe | how to make Oats Idli

      Heat 1 tablespoon oil in a pan, add mustard seeds and allow it to splutter.

      Instant Oats Idli Recipe | how to make Oats Idli

      Add chana dal, Urad dal and broken cashew pieces and fry well , till it starts to brown lightly.

      Instant Oats Idli Recipe | how to make Oats Idli

      Add ½ cup fine sooji/rava and fry well for 2-3 minutes on a medium heat.

      Instant Oats Idli Recipe | how to make Oats Idli

      Add oats powder and continue to fry along with sooji for another 2-3 minutes. Turn off the heat.

      Instant Oats Idli Recipe | how to make Oats Idli

      Add ¼ teaspoon Asafoetida/hing , ¾ teaspoon salt and ½ teaspoon Baking Soda (cooking soda) and mix well.

      Instant Oats Idli Recipe | how to make Oats Idli

      Add chopped coriander leaves, curry leaves, green chillies, grated carrot, and grated ginger and mix well.

      Instant Oats Idli Recipe | how to make Oats Idli

      Add ¾ cup water and ¾ whisked curds mix well and allow it to sit for 15 minutes.

      Instant Oats Idli Recipe | how to make Oats Idli

      Mean while, grease the Idly moulds and boil the water in steamer / pressure cooker/idly maker.

      Instant Oats Idli Recipe | how to make Oats Idli

      Using ladle, Pour ¾ of idly batter into the idly moulds, and place in steamer /pressure cooker /idly maker.

      Instant Oats Idli Recipe | how to make Oats Idli

      Cook for 12 minutes ,turn off the heat.Give a resting time of 5 minutes and then remove idlis.

      Instant Oats Idli Recipe | how to make Oats Idli

      Serve hot with Coconut chutney  , sambar or  Bombay saagu

      Instant Oats Idli

      Recipe

      Instant Oats Idli
      5 from 1 vote

      Instant Oats Idli

      Instant Oats Idli - is a easy breakfast made from coarsely powdered oats and curds without fermentation.
      Prep Time5 minutes mins
      Cook Time17 minutes mins
      Resting time15 minutes mins
      Total Time22 minutes mins
      Course: Breakfast
      Cuisine: South India
      Keyword: Instant Breakfast, Oats
      Servings: 12 makes
      Calories: 54kcal
      Author: Muktha H S

      Ingredients

      • 1 cup Oats
      • ½ cup Fine Sooji
      • ¾ teaspoon Salt or as required
      • ¼ Tsp Asafoetidia
      • ½ teaspoon Cooking soda
      • 1 small carrot grated
      • 1 green chilly finely chopped
      • 2 tablespoon Coriander leaves finely chopped
      • 1 Sprig Curry leaves ,finely chopped
      • ½ inch Ginger grated
      • ¾ cup sour curds
      • ¾ cup water

      For Tempering

      • 1 Tbsp Oil
      • ½ teaspoon Mustard Seeds
      • ½ tablespoon Channa Dal
      • ½ tablespoon Urad Dal
      • 1 tablespoon Cashew Pieces

      Instructions

      • Grind 1 cup oats into a coarse powder and keep it aside.
      • Heat 1 tablespoon oil in a pan, add mustard seeds and allow it to splutter.
      • Add chana dal, Urad dal and broken cashew pieces and fry well , till it starts to brown lightly.
      • Add ½ cup fine sooji/rava and fry well for 2-3 minutes on a medium heat.
      • Add oats powder and continue to fry along with sooji for another 2-3 minutes. Turn off the heat.
      • Add ¼ teaspoon Asafoetida, ¾ teaspoon salt and ½ teaspoon Baking Soda (cooking soda) and mix well.
      • Add chopped coriander leaves, curry leaves, green chillies, grated carrot, and grated ginger and mix well. 
      • Add ¾ cup water and ¾ whisked curds mix well and allow it to sit for 15 minutes.
      • Mean while, grease the Idli plates and boil the water in steamer / pressure cooker/idli maker.
      • Using ladle, Pour ¾ of idli batter into the idli moulds, and place in steamer /pressure cooker /idli maker.
      • Cook for 12 minutes and give a resting time of 5 minutes.
      • Remove the idlis and serve hot with Coconut chutney ,sambar or Bombay saagu

      Nutrition

      Calories: 54kcal

      Beetroot Amla Detox | Beetroot Amla Juice Recipe

      Published : September 3, 2018 | Last Update on September 29, 2022 By Muktha

      beetroot amla detox
      Beetroot juice

      Beetroot Amla Detox drink with step by step photos and video with its benefits. Beetroot Detox is what you are in need of ,after a festive weekend. Eating myriad of food and enjoying with family and friends is such a fun. But what about the after effects....? Feeling bloated and gassy the next days ,makes us feel awkward right? So it's always a good habit to drink detox ,flush out and clean our system.

      Beetroot juice is very beneficial ,when you have it on an empty stomach.Beetroot is loaded with all essential nutrients  ,low in calories ,high in fiber and is rich in folate too.So it is a  must vegetable for pregnant ladies.

      If you are anemic , then this Beetroot Amla Juice is what you should be adding to your daily diet. Though it's a  good Detox ,its  a kind of Best Tonic for anemia ,if used regularly.

      beetroot_detox

      In this Beetroot Amla juice ,main ingredients are Beetroot , Amla  and ginger .Jeera powder and pinch of salt is added to make it more palatable,you can totally exclude salt if you don't want .

      Serve Beetroot Amla Detox  ,early morning on empty stomach.

      Other Detox recipe on blog are Coriander Amla Detox , Alovera juice

      How to make Beetroot Amla Detox

      Wash ,clean ,peel and cut beetroot into small cubes.

      Beetroot Amla Detox | Beetroot Amla Juice Recipe

      Cut Gooseberry and remove the pit.

      Beetroot Amla Detox | Beetroot Amla Juice Recipe

      In a Juicer , add beetroot and gooseberry pieces .

      Beetroot Amla Detox | Beetroot Amla Juice Recipe

      Clean and add ½ inch ginger.

      Beetroot Amla Detox | Beetroot Amla Juice Recipe

      Add cumin powder , salt and water.

      Beetroot Amla Detox | Beetroot Amla Juice Recipe

      Blend well and extract the juice.

      Beetroot Amla Detox | Beetroot Amla Juice Recipe

      Add lemon juice and serve.

      Beetroot Amla Detox

      Recipe

      beetroot amla detox
      5 from 2 votes

      Beetroot Amla Detox

      Beetroot and Amla Juice  is made more palatable with Jeera Powder.
      Prep Time10 minutes mins
      Total Time10 minutes mins
      Course: Drinks
      Cuisine: Indian
      Keyword: Diet
      Servings: 2
      Calories: 34kcal
      Author: Muktha H S

      Ingredients

      • 150 grams Beetroot or 1 Cup heaped beetroot chunks
      • 1 Big Amla / Gooseberry , pitted
      • ½ inch fresh ginger
      • ½ teaspoon Cumin Powder / Jeera Powder
      • ¼ teaspoon Salt Optional
      • ½ tablespoon Lemon Juice
      • 1 ½ cup Water or as required

      Instructions

      • Wash , clean , peel and cut the beetroot into small cubes.
      • Cut the gooseberry/amla , remove the pit .
      • Take half inch ginger clean and remove the skin
      • In a Juicer , add beetroot, amla,ginger ,jeera powder ,salt and water.
      • Blend well , and extract the juice, add lemon juice and serve.

      Video

      Nutrition

      Calories: 34kcal

      Puri Unde | Murmura Ladoo Recipe

      Published : September 1, 2018 | Last Update on July 23, 2022 By Muktha

      Puri Unde
      Top post on IndiBlogger, the biggest community of Indian Bloggers

      Puri Unde is a good old traditional recipe that has been passed on from generations. Puri in kannada means Murmura or Puffed rice , Unde means round - which is nothing but ladoo. Poori Undae is a Murmura Ladoo , which I often do during festivals and pooja's. Puri Undae / Murmura ladoo is generally prepared during Tulsi Puja / Karthika Deepam for offerings to Lord . Even Banana Rasayana and Instant Gojju Avalakki are prepared for prasad during festivals in Karnataka.

      puri undae

      I was gearing up for Janmashtami festive celebrations, so thought of preparing this crunchy ,crispy and delicious Puri Undae. Murmura Ladoo is very easy to make and it takes very less time to prepare. It makes use of very few ingredients ,which are easily available at home ,Murmura, jaggery ,peanuts,dry coconut and roasted gram.

      Making of jaggery syrup is the most important thing here.Hence, you should get the right consistency of jaggery syrup,it should not be hard or it should not be thin. How to test the jaggery syrup consistency ? If you drop jaggery syrup inside cold water then jaggery syrup should form a soft and firm ball,it is the right consistency. Prepare the ladoos when the syrup is still hot or else you will not be able to bind ladoo together.

      Other janmashtami/ festival special sweets on blog are : Rasgulla , Rasmalai , Mysore Pak , Kalakand ,Coconut Barfi , Basundi , Besan Ladoo , Mohan Thal , Almond Pista Paneer Roll , Kaju Katli

      Recipe Card for Puri Unde | Murmura Ladoo

      Recipe

      Puri Unde
      5 from 1 vote

      Puri Unde | Murmura Ladoo Recipe

      Puri Unde -  Crisp , Crunchy and Light Ladoo made with Jaggery and Puffed Rice/Murmura
      Prep Time8 minutes mins
      Cook Time15 minutes mins
      Total Time23 minutes mins
      Course: Sweets
      Cuisine: Indian
      Keyword: Festivals
      Servings: 12 Makes
      Calories: 48kcal
      Author: Muktha H S

      Ingredients

      • 3 Cup Puffed Rice / Murmura
      • ½ Cup Jaggery powder
      • 41/2 tablespoon Water
      • 3 tablespoon Groundnuts ,dry roasted, de skinned
      • 3 tablespoon Roasted gram
      • 2 tablespoon Dry Coconut ,cut into thin pieces
      • ¼ teaspoon Cardamom Powder optional

      Instructions

      • Dry roast peanuts , rub between the palms ,remove the skin and make into halves. 
      • Dry roast the murmura on low heat , till it's crisp, test it by eating .
      • Add roasted gram, dry coconut pieces , roasted peanuts to murmura , turn off the heat and keep it aside. 
      • In a pan, add jaggery and water, heat till jaggery is dissolved completely
      • Pass the melted jaggery through sieve and collect the clean jaggery in another container.
      • Now place the clean jaggery syrup on stove, keep on medium heat, once in a while keep stirring the syrup in between and let it to bubble, add cardamom powder and stir.
      • Now check the syrup consistency, by dropping a drop of syrup in cold water. If it solidifies immediately and gets into a soft firm ball. Then the consistency is perfect. Alternatively, you can even check between the fingers, if you get a single string thread between the fingers, then syrup consistency is right.
      • Pour the jaggery syrup into murmura mixture, mix well ,be quick here.
      • Dust your hands with rice flour, and using both your hands prepare a round spherical shape balls, when it’s still hot. 
      • If the mixture cools down by end and hardens up , then put it back on low heat for few seconds and make ladoo.
      • Store it in an dry air tight container and serve it as snacks. 

      Nutrition

      Calories: 48kcal

      Step by step directions on making of Puri Unde:

      Dry roast peanuts , rub between the palms ,remove the skin and make into halves.

      puri unde

      Dry roast the murmura on low heat , till its crisp, test it by eating.

      Puri Unde | Murmura Ladoo Recipe

      Add roasted gram, dry coconut pieces turn off the heat

      Puri Unde | Murmura Ladoo Recipe

      Add roasted peanuts  to murmura , and keep it aside.

      Puri Unde | Murmura Ladoo Recipe

      In a pan, add jaggery and water, heat till  jaggery is dissolved completely.

      Puri Unde | Murmura Ladoo Recipe

      Pass the melted jaggery through sieve and collect the clean jaggery in another container.Puri Unde | Murmura Ladoo Recipe

      Now place the clean jaggery syrup on stove, keep on medium heat, once in a while keep stirring the syrup in between and let it to bubble.

      Puri Unde | Murmura Ladoo Recipe

      Add cardamom powder and stir.

      Puri Unde | Murmura Ladoo Recipe

      Now check the syrup consistency, by dropping a drop of syrup in cold water. If it solidifies immediately and gets into a soft firm ball. Then the consistency is perfect. Alternatively, you can even check between the fingers, if you get a single string thread between the fingers, then syrup consistency is right.

      Puri Unde | Murmura Ladoo Recipe

      Carefully pour the jaggery syrup into murmura mixture.

      Puri Unde | Murmura Ladoo Recipe

      Mix well with a spatula ,be very quick here.

      Puri Unde | Murmura Ladoo Recipe

      Dust your hands with rice flour, and using both your hands prepare a round spherical shape balls, when it’s still hot.

      Puri Unde | Murmura Ladoo Recipe

      If the mixture cools down by end and hardens up , then put it back on low heat for few seconds and make ladoo.

      Store it in an dry air tight container and serve it as snacks.

      Puri Unde
      Puri Unde        

      Mango Cheese Cake | No Bake-Mango Cheese Cake

      Published : August 29, 2018 | Last Update on September 29, 2022 By Muktha

      I signed off this mango season by doing this Mango Cheese cake.This was in my to do list from past year and did this in this season when I got my last cart of mangoes delivered,before I could miss it again in this season .

      mango cheese cake

      The best part about this mango cheese cake is ,its Eggless, No Bake , No Cream Cheese and No Gelatin. The reason for not using Cream Cheese is ,I wanted to make use of easily available ingredients in the kitchen,as cream cheese may not be easily available to everyone in all parts of India and shelling out money to get cream cheese may not be worth for a slice of cake.This is the lesson learnt from my Food and Nutrition Course , Budget Planning 🙂

      Mango Cheese Cake | No Bake-Mango Cheese Cake

      Taste of this Mango cheesecake is just above sweet ,the texture is smooth and silky having a definite shape and structure, just like how a good cheesecake ought to be.Without fear Indulge wholeheartedly with this cheese cake as it is ease on the waist and delicately flavoured with mango glaze. Celebrations becomes extra special when we can make such a sumptuous cheesecake.

      Though this was the post intended for last month ,I somehow didn't find time to write this elborated steps and edit the pictures, so got late in posting this seasonal delicacy. As, I didn't wanted to miss any of the basic details, I had drafted it long before. Though ,procedure looks lengthy because of too many pictures, its not actually ,it's simple to prepare, also if you don't have sprinfoam cake tin , then set it in small dessert cups ,so that you can serve directly , it's much easier that way. This Mango Cheese Cake was so special for me and I didn't wanted to miss this post, so giving that final touch to the draft and posting it now, off season 🙁 🙁 🙁 . Hope you guys would do this for next season ,just like I did ,by bookmarking this 🙂 🙂 🙂

      Recipe card for Mango cheese cake

      Recipe

      Mango Cheese Cake | No Bake-Mango Cheese Cake
      5 from 1 vote

      Mango Cheese Cake Recipe

      Cottage cheese and greek yogurt mixed with mango pulp to get smooth and silky cake filling on a crusty base.
      Prep Time1 hour hr 25 minutes mins
      Cook Time15 minutes mins
      Setting time7 hours hrs
      Total Time1 hour hr 40 minutes mins
      Course: Dessert
      Cuisine: Fusion, World
      Keyword: Gluten Free
      Servings: 500 grams
      Calories: 178kcal
      Author: Muktha H S

      Ingredients

      Measurement Size 1 Cup = 250 ml

      For Crust

      • 1 ½ cup Digestive Biscuits or 18 Marie Biscuits
      • ½ cup Salted Butter or 100 grams
      • 1 tablespoon Honey

      For Filling

      • 1 cup Sugar Powder or 175 grams of sugar,powdered
      • 400 grams Cottage Cheese or 2 cups full
      • 800 grams Full cream yogurt,set curd
      • 375 ml Water or 1 ½ cup
      • 10 grams Agar agar powder or China grass
      • 1 cup Mango puree ( from 2 mangoes,peeled ,chopped and pureed)
      • 1 teaspoon Vanilla Extract

      For Mango Glaze

      • ½ cup Mango puree ,from 1 mango
      • 2 grams Agar Agar Powder or china grass
      • 2 tablespoon Water
      • 2 tablespoon Sugar
      • 1 tablespoon Lime Juice.

      Instructions

      • Place the yogurt in a 4 fold lined cheese cloth in a colander over a container and allow to drain overnight or 4-5 hrs to get half the quantity of thick hung yogurt (400 gm or 1 ½ cups)

      For Preparing the Crust:

      • Crush all the digestive biscuits in a mixer / processor, powder it.
      • In a mixing bowl, add powdered biscuit, softened butter and rub it well from your hand,add honey and mix well, alternatively you can even blend it together in a food processor.
      • Take an 8” deep round spring form pan (detachable base) ,place the biscuit and butter mixture in the bottom of the pan and press it evenly into the base .
      • Chill in the freezer for 15 minutes or in the refrigerator for 30 minutes, till the bottom is set.

      For Filling:

      • Break the china grass into small pieces and soak in 1 ½ cups water for about 10 minutes until it becomes soft, if using agar agar powder just soaks for 5 minutes.
      • In a food processor fitted with the metal blade or blender, place the strained yogurt, paneer/cottage cheese and blend well.
      • Add sugar , process until smooth and creamy. Transfer this to a mixing bowl, stir in the vanilla extract and mix well with a whisk.
      • In a sauce pan, heat the mango puree over a medium flame. Do not allow this to boil.
      • In another saucepan place the chinagrass and water mixture and stir on low heat until it melts completely. This can take about 10 minutes. Do not allow this to boil.
      • After the chinagrass melts completely, pour the hot china grass solution into the hot mango puree, stirring all the while.
      • Slowly add the mango mixture into the yogurt and cheese mixture and beat well with a wire whisk until well blended.
      • Pour this mixture over the prepared crust, level with a spoon and chill in the refrigerator for about an hour. 
      • Allow the cheesecake to set for an hour or so. 
      • For Mango Glaze:
      • Soak 2 grams of china grass in  2 tablespoon of water .It is used to get a glaze only ,if you don't have chingrass ,then you can skip this step and go ahead.
      • Place all the ingredients for the glaze in a saucepan along with china grass solution( if not using china grass ,then add only water) and cook over medium heat. Allow the glaze to set over the cheesecake for 2 to 3 hours or overnight, before slicing it.
      •  When it begins to boil, reduce the flame and cook for 3 to 4 minutes more.
      • Spread the glaze over the already set cheesecake with a spoon. 
      • Allow the glaze to set over the cheesecake for 3 to 4 hours or overnight, before slicing it.

      Notes

      • You can use unsalted butter too, if using unsalted butter then skip Honey.
      • Make sure the water is completely drained and the cottage cheese is dry to get a perfectly set cheesecake.I have used  fresh store bought cottage cheese.
      • Always the dissolved china grass liquid should be immediately mixed with another portion of hot mixture , if either of them is cold, then the dessert won't set properly.

      Nutrition

      Calories: 178kcal

      Step By Step Directions on making of Mango Cheese Cake:

      Measure and keep ,all the ingredients ready.

      Mango Cheese Cake | No Bake-Mango Cheese Cake

      Place the yogurt in a 4 fold lined cheese cloth in a colander over a container and allow to drain overnight or 4-5 hrs;

      Mango Cheese Cake | No Bake-Mango Cheese Cake

      To get half the quantity of thick hung yogurt (400 gm or 1 ½ cups).

      Mango Cheese Cake | No Bake-Mango Cheese Cake

      Crush all the digestive biscuits in a mixer  / processor ,powder it.

      Mango Cheese Cake | No Bake-Mango Cheese Cake

      In a mixing bowl,add powdered biscuit ,softened butter and  rub it well from your hand .Mango Cheese Cake | No Bake-Mango Cheese Cake

      Add Honey and mix well everything,alternatively you can even blend it together in a food processor.

      Mango Cheese Cake | No Bake-Mango Cheese Cake

      Take an  an 8” deep round spring form pan (detachable base) ,place the biscuit and butter mixture  in the bottom of the pan and press it evenly into the base .

      Mango Cheese Cake | No Bake-Mango Cheese Cake

      Chill in the freezer for 15 minutes or in the refrigerator for 30 minutes,till the bottom is set.

      Mango Cheese Cake | No Bake-Mango Cheese Cake

      Break the china grass into small pieces and soak in 1 ½ cups water for about 10 minutes until it becomes soft,if using agar agar powder just soak for 5 minutes (I have used agar agar powder)

      Mango Cheese Cake | No Bake-Mango Cheese Cake

      In a food processor fitted with the metal blade ,place cottage cheese and crumble it well.

      Mango Cheese Cake | No Bake-Mango Cheese Cake

      For this add strained yogurt and process ,it till smooth.

      Mango Cheese Cake | No Bake-Mango Cheese Cake

      Now add sugar and process until smooth and creamy.

      Mango Cheese Cake | No Bake-Mango Cheese Cake

      Transfer this to a mixing bowl, stir in the vanilla extract and mix well with a whisk.

      Mango Cheese Cake | No Bake-Mango Cheese Cake

      Chop mangoes and puree ,to get 1 cup of mango puree.

      Mango Cheese Cake | No Bake-Mango Cheese Cake

      In a sauce pan, heat the mango puree over a medium flame. Do not allow this to boil.

      Mango Cheese Cake | No Bake-Mango Cheese Cake

      In another saucepan place the agar agar / china grass and water mixture and stir on low heat until it melts completely. This can take about 7-10 minutes. Do not allow this to boil.Mango Cheese Cake | No Bake-Mango Cheese Cake

      After the chinagrass/ agar agar solution melts completely, pour the hot china grass solution into the hot mango puree, stirring all the while.

      Mango Cheese Cake | No Bake-Mango Cheese Cake

      Once hot china grass solution is mixed well with hot mango puree,slowly pour into the yogurt and cheese mixture.

      Mango Cheese Cake | No Bake-Mango Cheese Cake

      Add the mango mixture into the yogurt and cheese mixture and beat well with a wire whisk until well blended.Mango Cheese Cake | No Bake-Mango Cheese Cake

      Pour this mixture over the prepared crust.

      Mango Cheese Cake | No Bake-Mango Cheese Cake

      Level with a spoon,tap and chill in the refrigerator for about an hour.

      Mango Cheese Cake | No Bake-Mango Cheese Cake

      Place 2 tablespoon water ( if using china grass /agar agar ,dissolve it in 2 tablespoon water and follow the same procedure) , sugar,lemon juice and mango puree  for the glaze in a saucepan and cook over medium heat. When it begins to boil, reduce the flame and cook for 3 to 4 minutes more.

      Mango Cheese Cake | No Bake-Mango Cheese Cake

      Strain the mixture ,to get smooth  flowing glaze mixture.Allow to come to room temperature.

      Mango Cheese Cake | No Bake-Mango Cheese Cake

      Then spread the glaze over the partially set cheesecake Mango Cheese Cake | No Bake-Mango Cheese Cake  with a spoon.Allow the cheesecake to set for an hour or so before spreading the glaze over it.

      Mango Cheese Cake | No Bake-Mango Cheese Cake

      After set,Place the cake on plate and carefully loosen the spring foam ring and remove.Mango Cheese Cake | No Bake-Mango Cheese Cake

      Decorate with few fresh cherries ,cut mango pieces and fresh mint leaves.

      Mango Cheese Cake | No Bake-Mango Cheese Cake

      I was so excited to see this cake come so well , so one more extra pic just like that for my happiness 🙂 🙂

      Mango Cheese Cake | No Bake-Mango Cheese Cake

      Vegetable Poha Cutlet Recipe | Easy Poha Cutlet Recipe

      Published : August 27, 2018 | Last Update on July 23, 2022 By Muktha

      Vegetable Poha Cutlet

      Vegetable Poha Cutlet recipe with step by step images and video. A spicy tawa fried snack made with gluten free poha/ flattened rice , assorted vegetables and spices.

      Vegetable Poha Cutlet Recipe | Easy Poha Cutlet Recipe

      About this recipe

      Poha/flattened rice/ beaten rice is an easily available ingredient in Indian Kitchen, it is both - tasty and healthy. It is very versatile and can be used to create variety of breakfast, tiffin and snacks. Making Vegetable Poha Cutlet is simple and easy. If you are looking for any easy party ,potluck snacks then nothing can be as good as this Vegetable Poha Cutlet. If you are on a diet , still you can enjoy this delicious without having worry about calories. 

      Why Poha for breakfasts?

      If you are looking for an healthiest Indian breakfasts, then you should consider Poha as it is a wholesome meal. It has a good source of carbohydrates and iron, rich in fibre, a good source of antioxidants and essential vitamins and is gluten free. Poha is a great choice, most importantly for those who want to loose weight as it is very low in calories. It has about 76. 9% of carbohydrates and 23% fat, which makes it one of the most ideal choices for weight loss.

      Other Poha Recipes on blog

      • Diet Poha
      • Gojju Avalakki |Spicy Tangy Poha
      • Sweet Poha

      Recipe card for Vegetable Poha Cutlet

      Recipe

      Vegetable Poha Cutlet Recipe | Easy Poha Cutlet Recipe
      No ratings yet

      Vegetable Poha Cutlet Recipe

      Easy ,Healthy and Tasty snack  with mixed veggies and poha.
      Prep Time20 minutes mins
      Cook Time30 minutes mins
      Total Time45 minutes mins
      Course: Snack
      Cuisine: Indian
      Keyword: Kids Recipes, Party Snacks
      Servings: 18 Cutlets
      Calories: 87kcal
      Author: Muktha H S

      Ingredients

      • 1 Cup Thick Poha / Beaten Rice / Flattened Rice
      • 1 big Potatoe boiled
      • ½ cup Chopped onions
      • ¼ cup Chopped carrot
      • ¼ cup finely shredded cabbage optional
      • ¼ cup Chopped French breans
      • 2 tablespoon Green Peas fresh /frozen
      • 4 no Garlic cloves minced or paste ½ Tsp
      • ¼ inch Ginger grated or paste ½ Tsp
      • 1 no Green chilli chopped
      • 2 tablespoon Coriander leaves chopped
      • 3 Tbsp Oil
      • ¼ teaspoon Redchilly powder
      • ¼ Tsp Garam Masala
      • ¼ teaspoon dry mango / amchoor powder
      • ¾ teaspoon Salt or as required

      Flour Batter

      • 2 tablespoon Corn flour
      • 1 tablespoon Refined Flour
      • ½ teaspoon Pepper powder
      • ¼ teaspoon Salt
      • ½ cup water

      Bread crumbs Mixture

      • 1 cup Bread crumbs
      • ¼ teaspoon Red Chilli powder
      • ¼ teaspoon Salt

      Instructions

      • Take 1 cup of poha and rinse well for 2 times. Soak poha in water for 3-4 minutes.
      • Drain water completely using colander and keep it aside for 15 minutes. Make sure poha is soft and is completely dry.
      • Whilst, boil 1 potato, peel skin and mash. Along with it steam green peas and set aside.
      • Heat 1 teaspoon of oil in a pan, add ginger garlic paste and fry well.
      • Add chopped green chillies, onions and sauté, till raw smell of ginger garlic and onion goes off.
      • Add ¼ cup chopped carrots, chopped French green beans, 2 tablespoon of steamed green peas and sauté for 2 minutes on high heat.Turn off the flame.
      • Add all the spice powders, salt and mix well.
      • Turn off the heat, add mashed potato, softened and dry poha, chopped coriander leaves and mix well.
      • Taste the mixture; adjust salt and spices, if needed.
      • Grease hand with oil, pinch some dough and shape into patties.
      • In a bowl add, 2 tablespoon Corn flour, 1 tablespoon Maida , ¼ teaspoon Pepper Powder, ¼ teaspoon salt , ½ cup water and mix well to for a thin consistency batter.
      • On a plate ,place 1 cup bread crumbs, ¼ teaspoon red chilli powder, ¼ teaspoon salt, mix well and keep it aside.
      • Take patties, dip in the flour batter and coat it with bread crumbs on all sides.
      • Heat a non-stick tawa or iron griddle, put some oil and place the patties, drizzle oil on top of the patties.
      • When base is firm it turns lightly golden and crisp, then turn to other side and cook till golden in colour on medium heat.Flip and cook on both sides ,till you get nice golden colour and its crisp from outside.
      • Serve poha cutlet hot with Tomato ketchup and Tomato Sauce.

      Video

      Nutrition

      Calories: 87kcal

      How to make Vegetable Poha Cutlet

      Take 1 cup of poha and rinse well for 2 times. Soak poha in water for 3-4 minutes.          Vegetable Poha Cutlet Recipe | Easy Poha Cutlet Recipe

      Drain water completely using colander and keep it aside for 15 minutes. Make sure poha is soft and is completely dry.

      Vegetable Poha Cutlet Recipe | Easy Poha Cutlet Recipe

      Whilst, boil or steam 1 potato, peel skin, mash. Steam green peas along with potato and keep it aside.

      Heat 1 teaspoon of oil in a pan, add ginger garlic paste and fry well.

      Vegetable Poha Cutlet Recipe | Easy Poha Cutlet Recipe

      Add chopped green chillies, onions and sauté, till raw smell of ginger garlic and onion goes off.

      For this ,add ¼ cup chopped carrots, chopped French green beans, 2 tablespoon of green peas,¼ cup shredded cabbage and sauté for 2 minutes.

      Vegetable Poha Cutlet Recipe | Easy Poha Cutlet Recipe

      Add all the spice powders, salt and mix well.

      Vegetable Poha Cutlet Recipe | Easy Poha Cutlet Recipe

      Turn off the heat, add mashed potato, softened and dry poha, chopped coriander leaves and mix well.

      Vegetable Poha Cutlet Recipe | Easy Poha Cutlet Recipe

      Taste the mixture; adjust salt and spices, if needed.Grease hand with oil, pinch some dough and shape into patties.

      Vegetable Poha Cutlet Recipe | Easy Poha Cutlet Recipe

      In a bowl add, 2 tablespoon Corn flour, 1 tablespoon Maida , ¼ teaspoon Pepper Powder, ¼ teaspoon salt , ½ cup water and mix well to for a thin consistency batter.

      Vegetable Poha Cutlet Recipe | Easy Poha Cutlet Recipe

      In a big plate take 1 cup bread crumbs, ¼ teaspoon red chilli powder, ¼ teaspoon salt, mix well and keep it aside.

      Vegetable Poha Cutlet Recipe | Easy Poha Cutlet Recipe

      Take patties, dip in the flour batter and coat it with bread crumbs on all sides.

      Vegetable Poha Cutlet Recipe | Easy Poha Cutlet Recipe

      Heat a non-stick tawa or iron griddle, put some oil .

      Vegetable Poha Cutlet Recipe | Easy Poha Cutlet Recipe

      Arrange the patties on hot tawa, drizzle oil on top of the patties and cook for 5-6 minutes.

      Vegetable Poha Cutlet Recipe | Easy Poha Cutlet Recipe

      When base is firm it turns lightly golden and crisp, then turns and cooks on the other side till golden in colour on medium heat.

      Vegetable Poha Cutlet Recipe | Easy Poha Cutlet Recipe

      Serve poha cutlet hot with Tomato ketchup and Tomato Sauce.

      Vegetable Poha Cutlet Recipe | Easy Poha Cutlet Recipe

      Banana Rasayana Recipe | how to make banana rasayana

      Published : August 23, 2018 | Last Update on September 28, 2022 By Muktha

      Banana Rasayana is a simple sweet recipe ,which I usually prepare for Naivedyam (offerings to God), easy recipe with only 5 basic ingredients like ripe  robusta banana , powdered jaggery ,fresh coconut ,honey and cardamom powder.

      Its believed that we need to add at least 5 ingredients ,while preparing any kind of offerings to God. So, I add honey to this while preparing  Banana Rasayana , we also do Jackfruit Rasayana .

      Banana Rasayana Recipe | how to make banana rasayana

      One more method is used in preparing rasayana ,where we make use of Thick Coconut Milk ,instead of Fresh grated Coconut similar to maharashtrian Banana Shikran.This is one of the most easiest Naivedyam recipe prepared in 5 minutes and after performing pooja,its distributed among everyone as prasadam/prashad.

      Apart from eating it as Prashad ,it's very healthy too.Can be a good energising mid day meal snack. It's a common practice that many of Hindu's doesn't eat morning breakfast , until they perform pooja/prayer ,offer Naivedyam to God and then eat it as a Prasadam , this is the reason why our old grandparents have cultivated habit of eating Prasadam on empty stomach in the morning, as eating fruit on empty stomach is good. Now  a days ,Nutritionist ,Dietitians , Fitness Freaks , Gym Instructors ,everyone says ,eat fruit as your first meal of the day to get energised. But it was practiced by our grandma's ,centuries before ,so no one are better than our grandparents to guide us on what to eat, how to eat and when to eat. Respect elders,respect the knowledge they share ,accept it and live healthy.

      Recipe Card for Banana Rasayana

      Recipe

      Banana_Rasayana
      No ratings yet

      Easy Banana Rasayana Recipe

      A simple sweet made with banana ,jaggery and fresh coconut.
      Prep Time5 minutes mins
      Cook Time0 minutes mins
      Total Time5 minutes mins
      Course: Dessert
      Cuisine: Karnataka, South India
      Keyword: Naivedhyam, Prasadam
      Servings: 4
      Calories: 82kcal
      Author: Muktha H S

      Ingredients

      • 2 Long Banana
      • 1 tablespoon Jaggery Powder
      • ¼ cup Fresh coconut grated
      • ½ tablespoon Honey
      • ¼ teaspoon Cardamom Powder

      Instructions

      • Peel and cut the bananas into small chunks
      • In a bowl , add Banana , powdered Jaggery ,fresh coconut ,honey and cardamom powder
      • Mix well,set aside for 5-10 minutes so that jaggery blends well with juices ,serve it.

      Nutrition

      Calories: 82kcal

      Step By Step Directions on making of Banana Rasayana:

      Peel banana and cut into chunks.Banana Rasayana Recipe | how to make banana rasayana

      In a bowl mix banana ,jaggery powder,honey ,cardamom powder and fresh coconut. I have used organic  black palm jaggery powder

      Banana Rasayana Recipe | how to make banana rasayana

      Mix well everything and let it sit for 5-10 minutes before serving.

      Banana Rasayana Recipe | how to make banana rasayana

      Pic Below shows ,the way we get rasayana as prashad from temples .

      Banana Rasayana Recipe | how to make banana rasayana
       

      Besan Ladoo Recipe | Easy Besan Ladoo Recipe

      Published : August 23, 2018 | Last Update on October 17, 2022 By Muktha

      Besan Ladoo is one of the most easiest and popular indian sweet recipe made during festivals.Besan /Gram flour and ghee ,with cardamom flavour ...., it's such a treat ,a thought can make me drool for this Ladoo.As , I always believe Indian Sweets are Healthy and Good,besan ladoo undoubtedly , falls into the category of calling itself has healthy , because of the high protein gram flour and healthy fat from desi ghee

      Besan Ladoo

      With onset of festivals ,I made this delicious melt in mouth ,easy Ladoos.Whenever I eat Besan Ladoo , I remember my college friend Sumangala ,who always used to get Besan Ladoo in a big box while coming to hostel.Whenever her roommates were not around , she used to call me separately and share this sweet to me 🙂 🙂 🙂 ,it tasted awesome. Since then, my  love for Besan Ladoo never vanished. Sumangala , if you are reading this Post , then a Big Thanks for you Dear 🙂

      This is a easy festival sweet recipe , other festival sweet recipes on my blog are: Mohanthal , Special Mysore Pak ,Coconut barfi , Kaju Katli ,Pista-Almond rolls , Rasgulla , Basundi  ,Rasmalai ,Gajar Halwa , Dates Halwa and Pumpkin Halwa.

      Recipe Card for Besan Ladoo

      Recipe

      Besan Ladoo Recipe | Easy Besan Ladoo Recipe
      5 from 2 votes

      Besan Ladoo Recipe

      Popular Indian Sweet made from  gram flour, sugar ,desi ghee and flavoured with cardamom powder.
      Prep Time5 minutes mins
      Cook Time28 minutes mins
      Total Time33 minutes mins
      Course: Sweets
      Cuisine: Indian
      Keyword: Diwali, Festivals
      Servings: 18 ladoo
      Calories: 128kcal
      Author: Muktha H S

      Ingredients

      • 2 Cups Besan / Gram FLour
      • ⅔ Cup Desi Ghee
      • ¾ Cup sugar ,powdered to get 1 Cup
      • 4-5 Green Cardamom , Powdered

      Instructions

      • Take Sugar in a mixer jar, add cardamom and blend it to get a fine powder and set aside.
      • In a deep Kadai / Pan , dry roast the Besan /gram flour continuously on a slow flame, till colour starts changing and you get a nice aroma.
      • It may take up to 12-15 minutes; make sure gram flour is evenly browned. Take precautions, not to burn the flour.
      • Add ⅔ cup of ghee slowly and keep stirring the besan/ gram flour mixture , mix well. 
      • Continue to roast the besan / gram flour,till you get a sweet fragrance and starts to release ghee from edges, this may take 8-10 minutes.
      • At this point, turn off the heat and keep it aside.
      • Add powdered sugar to the roasted besan ,stir well and mix.
      • Allow the besan ladoo mixture to come to room temperature.
      • Scoop out 1 tablespoon of ladoo mixture into your palm and make round ladoo’s with the help for your other hand. 
      • Store it in airtight container.

      Notes

      Dry roasting gram flour till you get sweet fragrance, is the only key to get that perfect Ladoo orelse it smell raw and not taste good.
      Also over roasting may burn it ,which in turn spoil the laddo taste. 

      Nutrition

      Calories: 128kcal

      Step By Step Directions:

      Take Sugar in a mixer jar, add cardamom and blend it to get a fine powder and set aside.

      Besan Ladoo Recipe | Easy Besan Ladoo Recipe

      In a deep Kadai / Pan , dry roast the Besan /gram flour continuously on a slow flame, till  colour starts changing and you get a nice aroma.It may take up to 12-15 minutes; make sure gram flour is evenly browned. Take precautions, not to burn the flour

      Besan Ladoo Recipe | Easy Besan Ladoo Recipe

      Add ⅔ cup of ghee slowly and keep stirring the besan/ gram flour mixture , mix well.

      Besan Ladoo Recipe | Easy Besan Ladoo Recipe

      Continue to roast the besan / gram flour,till you get a sweet fragrance and starts to release ghee from edges, this may take 10-15 minutes.At this point, turn off the heat and keep it aside.

      Besan Ladoo Recipe | Easy Besan Ladoo Recipe

      Add powdered sugar to the roasted besan ,stir well and  mix.

      Besan Ladoo Recipe | Easy Besan Ladoo Recipe

      Allow the besan ladoo mixture to come to room temperature.

      Scoop out 1 tablespoon of ladoo mixture into your palm .

      Besan Ladoo Recipe | Easy Besan Ladoo Recipe

      Make round ladoo’s with the help for your other hand.Besan Ladoo Recipe | Easy Besan Ladoo Recipe

      Store it in airtight container.

      Besan Ladoo Recipe | Easy Besan Ladoo Recipe


      Mutton Keema Matar Masala Recipe

      Published : August 21, 2018 | Last Update on July 23, 2022 By Muktha

      Mutton Keema Matar Masala

      Mutton Keema matar masala is one of my all time favourite. I'm not much fond of Mutton other than this mutton keema.This recipe is from my mom's kitchen , she prepares a very good spicy flavourful delicious Mutton Keema Balls Curry and this mutton keema matar masala.

      Mutton Keema Matar Masala
      Mutton Keema Masala


      Mutton Keema Matar masala is  minced meat cooked along with whole spices  and then mixed with different masala,spices and green peas.

      As mutton is red meat and fat is high , it's not recommended to eat mutton often as it may increase cholesterol. Eating once in a while is no harm , its very rare I cook mutton in my kitchen ,it's the reason you hardly see any mutton recipes on my blog. But ,hereafter you can expect few mouth watering mutton recipes on my blog.

      Serve Mutton Keema Masala with Idli , Dosa, Pav ,Mughlai Paratha ,Roti , Naan  , Rumali Roti , Poori or Jeera Rice.

      Recipe Card for Mutton Keema Matar Masala

      Recipe

      Mutton Keema Matar Masala
      5 from 1 vote

      Mutton Keema Matar Masala

      Spicy Mutton keema masala gravy prepared with fresh coconut masala.
      Prep Time10 minutes mins
      Cook Time45 minutes mins
      Total Time55 minutes mins
      Course: Main Course
      Cuisine: Indian
      Keyword: Eid, Mutton
      Servings: 5 People
      Calories: 240kcal
      Author: Muktha H S

      Ingredients

      For Pressure Cooking Mutton Kheema

      • 500 grams Minced Mutton /Keema
      • 2 Cloves
      • 1 inch Cinnamon Sticks
      • 1 teaspoon Oil
      • ¼ teaspoon Turmeric Powder
      • 1 Bay leaf
      • ½ teaspoon Salt

      For Gravy

      • ¾ Cup Matar /Green Peas
      • ½ Cup Fresh Methi Leaves /Fenugreek Leaves
      • 4 tablespoon Oil
      • 2 Onions Medium Size
      • 2 inch Ginger pieces
      • 15 Garlic Cloves medium SIze
      • ⅓ Cup Coriander Leaves
      • ¼ teaspoon Turmeric Powder
      • 2 Tomatoes Big
      • 1 tablespoon Red Chilly Powder
      • 1 ½ tablespoon Coriander powder
      • ½ Cup Fresh Coconut grated
      • 5 Cloves
      • 11/2 inch Cinnamon Sticks
      • ½ tablespoon Poppy Seeds
      • 8-10 Cashews
      • 11/2-2 Cup Water
      • 11/2 teaspoon Salt or as required
      • ½ tablespoon Lemon Juice

      Instructions

      • Wash and clean mutton, drain water completely and set aside.
      • In a pressure cooker, heat 1 teaspoon oil, add Bay leaf, Cloves and cinnamon sticks.
      • Add Washed Mutton, mix well .Add Turmeric powder, salt and pressure cook for a whistle; allow pressure to release on its own.
      • Soak ½ tablespoon of Poppy Seeds/ khus khus and 10 cashews in ½ cup of warm water for 30 minutes.
      • In a mixer jar, add onions, ginger, garlic , coriander leaves and turmeric, make a fine paste to get a green coriander masala
      • Take Tomatoes, Red chilli powder and coriander powder and blend it in mixer, to get red tomato masala
      • In a Non-stick pan, heat 1 teaspoon of oil and fry coconut, cinnamon and cloves for 5 minutes on a medium flame, allow it to cool.
      • In a mixer jar, add fried coconut, cinnamon, cloves, soaked almonds and khus khus, blend it to very smooth and fine paste using water,to get a white coconut masala
      • In a deep Kadai, Heat 4 tablespoon Oil, add green coriander masala ,and fry well, till aromatic and oil starts releasing from corners.
      • Add methi leaves and fry well.
      • Add cooked kheema, mix well and cook for 5 minutes.
      • Now add blanched, green peas, mix well and continue to cook for 5 minutes
      • Now Add red tomato masala , mix well and continue to cook for 8-10 minutes ,till oil starts to release from edges.
      • Now add White coconut masala, mix well. Add jar rinsed water, about 1.5 -2 cups, add salt, close lid and continue to cook for 8-10 minutes on medium heat.
      • Open the lid, cook on high heat for 4-8 minutes to get the required, thick gravy consistency.
      • Add lemon juice, coriander leaves, mix well and serve.
      • Serve with Mughlai Paratha ,Naan , Roti , Idly , Dosa, Pav ,Rumali Roti,Poori  or Jeera Rice.

      Notes

      • Pressure cooking Mutton keema for a whistle is the easy method,If you are cooking mutton in a open vessel,just make sure all the water content of mutton keema is evaporated before ,adding it into the gravy.

      Nutrition

      Calories: 240kcal

      Step By Step Directions on making of Mutton Keema Matar Masala:

      Wash and clean mutton, drain water completely and set aside.

      In a pressure cooker, heat 1 teaspoon oil, add Bay leaf, Cloves and cinnamon sticks.Mutton Keema Matar Masala Recipe

      Add Washed Mutton, mix well .Add Turmeric powder, salt and pressure cook for a whistle; allow pressure to release on its own.Mutton Keema Matar Masala Recipe

      In a mixer jar, add onions, ginger, garlic , coriander leaves and turmeric, make a fine paste to get a green coriander masalaMutton Keema Matar Masala Recipe

      Soak ½ tablespoon of Poppy Seeds/ khus khus and 10 cashews in ½ cup of warm water for 30 minutes.Mutton Keema Matar Masala Recipe

      Take Tomatoes, Red chilli powder and coriander powder and blend it in mixer, to get red tomato masalaMutton Keema Matar Masala Recipe

      In a Non-stick pan, heat 1 teaspoon of oil and fry coconut, cinnamon and cloves for 5 minutes on a medium flame, allow it to cool.

      Mutton Keema Matar Masala Recipe

      In a mixer jar, add fried coconut, cinnamon, cloves, soaked almonds and khus khus, blend it to very smooth and fine paste using water,to get a white coconut masalaMutton Keema Matar Masala Recipe

      In a deep Kadai, Heat 4 tablespoon Oil, add green coriander masala ,and fry well, till aromatic and oil starts releasing from corners.Mutton Keema Matar Masala Recipe

      Add methi leaves and fry well.Mutton Keema Matar Masala Recipe

      Add cooked keema, mix well and cook for 5 minutes.Mutton Keema Matar Masala Recipe

      Now add blanched, green peas, mix well and continue to cook for 5 minutes.Mutton Keema Matar Masala Recipe

      Now Add red tomato masala , mix well and continue to cook for 8-10 minutes ,till oil starts to release from edges.Mutton Keema Matar Masala Recipe

      Now add White coconut masala, mix well. Add jar rinsed water, about 1.5 -2 cups, add salt, close lid and continue to cook for 8-10 minutes on medium heat.Mutton Keema Matar Masala Recipe

      Open the lid, cook on high heat for 4-8 minutes to get the required, thick gravy consistency.Add lemon juice, coriander leaves, mix well and serve.

      Mutton Keema Matar Masala Recipe

      Serve with Mughlai Paratha ,Naan , Roti , Idly , Dosa, Pav , Rumali Roti , Poori or Jeera Rice.

      mutton keema matar masala


      Hummus Recipe | Easy Homemade Hummus Recipe

      Published : August 14, 2018 | Last Update on February 26, 2020 By Muktha

      Hummus

      For all those who doesn't know what Hummus is....,it's basically a dip /spread made from chickpeas.Its origin is from middle east, it's a very popular dip. Chickpeas ,Tahini,olive oil and garlic are the basic ingredients of Hummus and it's a very healthy dip.

      Hummus

      No Tahini is used in this recipe,as it may not be available in many of our Kitchen. Recipe shred here ,uses  white sesame seeds in place of tahini. This is one of the delicious,easy to make healthy dip used in Shawarma rolls , served with pita bread and also with some steamed veggies. Hummus can even be spread on some whole wheat breads while making cold sandwiches to make it more healthier.


      Chickpea is rich in protein but it is incomplete protein so to make it a complete protein ,it is served with pita bread .Plant based protein are always incomplete protein ,so is the idea of serving legumes/lentils based dishes with cereals ,so that the missing amino acids (protein) from legumes/lentils will be combined with that of cereals amino acids  to make it a complete protein and vice versa.

      So always it's recommended to eat the food that way it is supposed to be eaten ,be it a Dal Chawal , Idly ,Dosa ,Dal Roti.These day I have seen my own friends eating plain /boiled  lentils,legume salads avoiding roti and chawal ....,for losing weight . But ,it such a irony that it can never happen,eating well balanced nutritious food is what one needs to keep a healthy and fit body.

      Hummus is one such healthy dip ,that can be added to your weight loss regime.For all my friends ,who reaches me out for a diet plan ,here is simple recipe which can be beneficial for you.

      Recipe Card for Hummus

      Recipe

      Hummus
      5 from 2 votes

      Easy Hummus Recipe

      Hummus is a chickpea dip /spread from middle east cuisine.
      Prep Time10 minutes mins
      Cook Time25 minutes mins
      Soaking Time8 hours hrs
      Total Time35 minutes mins
      Course: Appetizer, Side Dish
      Cuisine: Mediterranean, Middle East
      Keyword: Healthy
      Servings: 4 People
      Calories: 72kcal
      Author: Muktha H S

      Ingredients

      Measurement Size 1 Cup =200 ml

      • ¾ cup Chickpeas
      • 3 tablespoon Sesame Seeds
      • 4 tablespoon Olive Oil
      • 1 tablespoon Lemon Juice
      • 1 teaspoon Finely Chopped Garlic
      • ½ teaspoon Pepper Powder
      • 1 teaspoon Cumin Powder
      • 1 tablespoon Coriander leaves or cilantro
      • ½ teaspoon Chilli powder for garnishing
      • 1 pinch Baking soda
      • 1 ½ teaspoon Salt or as required

      Instructions

      • Soak chickpeas for 8-9 hrs or overnight,rinse well,drain water and keep it aside.
      • Pressure cook chickpeas with ½ teaspoon salt ,1.5 cup water and pinch of baking soda,for 2-3 whistles. Once pressure releases on its own ,drain water and keep it aside.
      • Dry roast sesame seeds until it crackles and allow it to cool.
      • In a mixer grinder or a food processor,blend sesame to fine powder.
      • Into the same mixer or processor cooked chickpeas,lemon juice,olive oil,cumin powder,garlic,pepper powder,chilly powder ,coriander leaves and salt .
      • Blend to a smooth paste,use 2-3 tablespoon of drained water from cooked chickpeas to blend.Taste and adjust  add lemon juice or salt ,if required.
      • Garnish with chilli powder,drizzle some olive oil and serve with steamed veggies or pita bread.

      Notes

      • Chickpeas should be really cooked well,you should be able to mash it between your fingers.
      • Be careful while adding salt,as cooked chickpeas already contains salt.
      • It may become difficult to blend chickpeas,so add very little water and blend. 

      Nutrition

      Calories: 72kcal

      Step By Step Directions on making of Hummus :

      Soak half cup Dry Chickpeas in water for 8-9 hrs or overnight.Wash well,drain water completely and keep it aside.    Hummus Recipe | Easy Homemade Hummus Recipe

      Pressure cook Chickpeas ,add pinch of baking soda,½ teaspoon salt , 1.5 cups water and pressure cook for 3-4 whistles,till chickpeas are very well cooked,should get mashed when pressed between your fingers.Drain water and keep it aside.

      Hummus Recipe | Easy Homemade Hummus Recipe

      Heat a iron griddle,dry roast sesame seeds on medium heat until it starts crackling.Turn off the heat  and allow it to cool.

      Hummus Recipe | Easy Homemade Hummus Recipe

      In a mixer grinder ,add roasted sesame seeds and grind to a fine powder.

      Hummus Recipe | Easy Homemade Hummus Recipe

      Into the same jar, add cooked chickpeas ,chopped garlic,olive oil,cumin powder,coriander leaves ,lemon juice,salt and blend to a semi-fine paste.(You can add 2-3 tablespoon of  drained water while grinding )

      Hummus Recipe | Easy Homemade Hummus Recipe

      Garnish Hummus with pinch of chilli powder,drizzle olive oil and serve.

      Hummus

      Hummus  can be served with pita bread or steamed veggies like carrot sticks ,cauliflower ,broccoli florets.

      Hummus


      Kaddu Halwa Recipe | Easy Pumpkin Halwa

      Published : August 13, 2018 | Last Update on October 18, 2022 By Muktha

      pumpkin halwa recipe

      Kaddu halwa ( Pumpkin halwa )is mildly sweet dessert , flavored with cardamom powder. It is a delicious pudding made from pumpkin puree.

      Kaddu halwa is a vrat (fasting recipe) that is usually consumed during Navratri fasting .

      If you are looking for similar halwa recipes then don't forget to check this delicious Besan Halwa , Sweet Potato Halwa , Kashi Halwa , Carrot Halwa and Rajgira Halwa recipes. I'm sure that you'll fall in love with these recipes too.

      This post has been updated from the archives, was first published in September 2018.

      pumpkin halwa
      [feast_advanced_jump_to]

      About this recipe

      Pumpkin is one of the healthy vegetable that is used widely all over India to make many delcious sweet and savoury dishes.

      Pumpkin / Kaddu is popularly used during Hindu fasting and vrat periods.

      Hence , kaddu ka halwa is very commonly prepared during religious festivals as offerings to diety.

      Onset of "Shravan Maas"  which is considered as one of the most auspicious month in Hindu calendar welcomes many festivals and fasting on these days is very common.

      On event of "Shravan  Amavasya ", I had  prepared  this delicious sweet pumpkin pudding ,Kaddu Halwa which can be consumed during fasting. Though ,I was not fasting just to satisfy my sweet cravings , I came up with this recipe.

      Health benefits of Pumpkin

      Pumpkin is one of the most healthiest vegetable which needs to be used in our diet regularly as it is rich in vital vitamins and minerals. As Pumpkin is rich in fiber , potassium and vit C , it's popularly known as Heart Healthy Vegetable. Everyone knows that it's important to reduce salt (sodium) in one's diet to reduce blood pressure but many are unaware that it's equally important to eat Potassium rich foods for Healthy heart. 

      Kaddu Halwa

      Few more best of best Pumpkin recipes on my blog are Pumpkin Chutney , Pumpkin Khichadi , Pumpkin Soup and Pumpkin walnut cake .

      Ingredients

      pumpkin halwa ingedients

      Watch Video

      How to make kaddu halwa

      Wash and clean Pumpkin, remove the seeds ,peel the skin .

      Kaddu Halwa Recipe | Easy Pumpkin Halwa

      Cut pumpkin into small cubes and place it in a pressure cooker container.

      Kaddu Halwa Recipe | Easy Pumpkin Halwa

      In a pressure cooker ,add water to the bottom and place the container with pumpkin,sprinkle 1 tablespoon of water and pressure cook for 3-4 whistles.

      Kaddu Halwa Recipe | Easy Pumpkin Halwa

      Whilst ,with mortar pestle crush cardamom ,de husk ,  make cardamom powder  and set aside.

      Kaddu Halwa Recipe | Easy Pumpkin Halwa

      Once the pressure releases on its own ,mash the pumpkin  with the help of masher . Or you can blend it  to smooth puree ,with the help of blender.

      Kaddu Halwa Recipe | Easy Pumpkin Halwa

      Take a thick bottom kadai ,Heat 3 tablespoon ghee ,  add pumpkin puree.

      Kaddu Halwa Recipe | Easy Pumpkin Halwa

      Stir well pumpkin and cook till water content in pumpkin bubbles and dries up completely.

      Kaddu Halwa Recipe | Easy Pumpkin Halwa

      Add sugar and mix well,continue to cook for another 5-8 minutes ,till halwa starts to leave from the edges ,that is the consistency of halwa.

      Kaddu Halwa Recipe | Easy Pumpkin Halwa

      Now add ½ tablespoon of ghee and mix well.

      Kaddu Halwa Recipe | Easy Pumpkin Halwa

      Add all chopped dry nuts and melon seeds,mix well and turn off the heat.

      Kaddu Halwa Recipe | Easy Pumpkin Halwa

      Add cardamom powder ,milk masala powder,mix well .

      Kaddu Halwa Recipe | Easy Pumpkin Halwa

      Serve hot or warm garnished with melon seeds and chopped nuts.

      Kaddu Halwa

      Recipe

      pumpkin halwa recipe
      4.75 from 4 votes

      Kaddu Halwa Recipe | Easy Pumpkin Halwa Recipe

      Easy pumpkin halwa recipe flavoured with cardamom and dry nuts.
      Prep Time10 minutes mins
      Cook Time40 minutes mins
      Total Time50 minutes mins
      Course: Dessert
      Cuisine: North Indian
      Keyword: Fasting
      Servings: 7 People
      Calories: 229kcal
      Author: Muktha H S

      Ingredients

      • 1 Kilogram Pumpkin
      • ¾ Cup Sugar
      • 3 ½ tablespoon Ghee /Clarified Butter
      • 5 Cardamom Pods
      • 1 tablespoon Melon Seeds Optional
      • 1 tablespoon Cashews Chopped
      • 1 tablespoon Almonds Chopped
      • ½ tablespoon Pista Chopped

      Instructions

      • Wash and clean pumpkin,remove seeds and peel the pumpkin skin.Cut pumpkin into small cubes.
      • Using Mortar Pestle ,dehusk the cardamom and powder the seeds ,keep it aside.
      • In a pressure cooker add water, place pumpkin in a pressure cooker separator/container, sprinkle 1 tablespoon of water  and pressure cook for 2-3 whistles.
      • Once pressure releases on its own,remove the container and mash pumpkin well with the help of masher or else you can blend to get puree
      • Take a Thick Bottom Kadai ,heat 3 tablespoon of ghee,add mashed /puree  pumpkin 
      • Mix well and cook ,till all water in the pumpkin dries up.
      • Add sugar, mix well and continue to cook till pumpkin leaves edges (halwa consistency)
      • Add ½ tablespoon ghee,chopped dry nuts mix well. 
      • Turn off the heat ,add cardamom powder and serve hot or warm .

      Video

      Notes

      1. You can grate pumpkin and cook in an open vessel ,if you are not pressure cooking pumpkin.
      2. You can also add milk while cooking pumpkin,but cook till it gets dried up completely and reaches halwa consistency.
      3. If you can't mash pumpkin to smooth , then with the help of blender just blend it to get puree.
      4. Pumpkin puree was about 4 cups and sugar used was about ¾ cup ,it also depends on the sweetness of pumpkin you use. So keep a check on sweetness of pumpkin before adding sugar. 
      5. Milk Masala is optional ,its blend of nutmeg,cardamom ,saffron,mace ,pista,badam and cashews.

      Nutrition

      Calories: 229kcal

      Similar Recipes

      • Sweet potato Halwa
        Sweet Potato Halwa | Shakarkandi Halwa
      • rajgira halwa
        Rajgira Halwa Recipe
      • dumroot recipe
        Dumroot|kashi halwa|ash gourd halwa recipe
      • carrot-halwa-recipe
        Carrot Halwa Recipe | Gajar Ka Halwa Recipe

      Shahi Paneer Recipe | how to make Shahi Paneer

      Published : August 9, 2018 | Last Update on July 23, 2022 By Muktha

      Shahi Paneer

      Shahi Paneer is a Mughlai dish which is delicious creamy onion based gravy made with dry nuts,kesar ,whole spices and paneer.  Shahi means royal ,as the name indicates , its a rich gravy from mughlai cuisine.

      Shahi Paneer is very mild spice aromatic and flavourful gravy without addition of any tomatoes,sources says mughlai dishes doesn't uses any tomatoes as tomatoes were not available during their rule in India. You get tanginess to the dish by adding yogurt , if you wish to add tomatoes you can skip yogurt and add tomatoes to get that tang.

      shahi paneer

      Shahi Paneer  is an creamy aromatic  semi sweet gravy busted with all flavours, you can serve this with Jeera Rice or  any kind of roti. I served it with lacha paratha as well as  Jeera rice, it tasted amazingly good with jeera rice when compared with Lacha Paratha.

      Other savoury paneer recipes on blog are PalakPaneer , PaneerButterMasala ,Palak Paneer Bhurji,Paneer Kalimirch Tikka, PaneerTikka ,PalakPaneer Pulao  and PaneerPepper Dry.

      RECIPE CARD FOR SHAHI PANEER

      Recipe

      shahi paneer
      4.67 from 3 votes

      Shahi Paneer Recipe | Rich Cottage Cheese Masala Recipe

      It's a rich ,creamy , semi sweet and delicious gravy made with paneer , is from Mughlai  Cuisine.
      Prep Time20 minutes mins
      Cook Time30 minutes mins
      Total Time50 minutes mins
      Course: Main Course
      Cuisine: Indian, Mughlai
      Keyword: Paneer
      Servings: 4 People
      Calories: 278kcal
      Author: Muktha H S

      Ingredients

      • 200 Grams Cottage Cheese
      • ½ Cup Thick Curds
      • 1- 1.5 Cup Water
      • ½ inch Ginger
      • 4 Garlic Cloves Medium size
      • ¼ teaspoon Turmeric Powder
      • 1 teaspoon Coriander Powder
      • ½ teaspoon Redchilly powder
      • ½ teaspoon Garam Masala
      • 1 ¼ teaspoon Salt or as required
      • ½ teaspoon Sugar optional
      • 2 tablespoon Ghee/Oil
      • 5 Saffron Strands Optional
      • 1 tablespoon Coriander leaves chopped
      • 1-2 tablespoon Fresh Cream
      • 1 drop Kewra Water

      Whole Spices

      • 1 Bay leaf
      • 1" inch Cinnamon Sticks
      • 3-4 Cloves
      • ½ teaspoon Shahi Jeera / Black cumin seeds
      • 2 Green Cardamom / Chota Elachi
      • 2 Black Cardamom

      Gravy Paste

      • 2 teaspoon Clarified Butter/Ghee
      • 1 Cup Onions Cubed
      • 1 Green Chilly
      • 12 Whole Cashews
      • 10 Almonds
      • 1 tablespoon Melon Seeds Optional
      • 2 Green Cardamom Seeds

      Instructions

      • Heat 2 teaspoon ghee in a pan ,add cardamom seeds,cashews ,almonds and melon saute for a minute,add green chilly and onions ,fry till onions turns transparent and looks golden in colour.
      • Allow it to cool,and make a fine paste using little water if required.
      • In the same pan, add paneer cubes and lightly toss it for a minute ,to get rid of that raw smell [This step is optional ,if you are ok with eating paneer cubes directly,no need to fry it]
      • Soak lightly fried paneer cubes into water for 10 minutes .[skip this step if you are not frying the Paneer]
      • Heat ghee in a pan,add all the whole spices and fry till you get nice aroma.
      • Prepare ginger garlic paste , add paste to ghee and fry well till raw smell goes off.
      • Add the prepared onion  and nuts paste and  saute .
      • Add all dry powder, turmeric,chili ,coriander and garam masala and mix well.
      • Add 1 cup of water and mix well.
      • Add smoothly whisked yogurt ,salt ,sugar,close lid and simmer it for about 15 -20 minutes,till gravy thickens to desired consistency.
      • Lastly add paneer cubes,saffron strands and fresh cream,mix well and continue to sim for 2-3 minutes.
      • Turn off the heat,add 1-2 drops of kewra water.,mix well.
      • Garnish with some coriander leaves and serve hot with Jeera rice or tandoori roti.

      Notes

      1.Sauteing paneer slightly golden brown and adding it to buttermilk or water ,gives you a perfect smooth paneer cubes.This eliminates the raw smell of paneer and tastes good too,but its optional.
      2. If you wish to add Tomatoes,skip yogurt and add tomato puree , cook till oil releases from corners and then add water .
       

      Nutrition

      Calories: 278kcal

      Step By Step Directions nn making of Shahi Paneer

      In a kadhai/pan/wok ,heat ghee add cardamom seeds,cashews ,badam and fry well.

      Shahi Paneer Recipe | how to make Shahi Paneer.

      Add 1 green chilly and onions and fry till onions turns slightly brown.

      Shahi Paneer Recipe | how to make Shahi Paneer

      Allow it to cool ,and  make a fine paste of it.Shahi Paneer Recipe | how to make Shahi Paneer

      In the same pan,add paneer cubes and toss well. Add tossed paneer into water and keep aside for 10-15 minutes. After 10 minutes ,drain water and paneer cubes aside.

      Shahi Paneer Recipe | how to make Shahi Paneer

      Heat 2 tablespoon of ghee,add all whole spices and fry well,till you get nice aroma.

      Shahi Paneer Recipe | how to make Shahi Paneer

      Add the prepared ginger garlic paste and fry till raw smell vanishes.Shahi Paneer Recipe | how to make Shahi Paneer

      Now add prepared masala paste and saute for a minute.Shahi Paneer Recipe | how to make Shahi Paneer

      Add red chilli , turmeric,coriander and garam masala powder and mix well.Shahi Paneer Recipe | how to make Shahi Paneer

      Mix water ,whisked yogurt and stir well.Shahi Paneer Recipe | how to make Shahi Paneer

      Add salt and sugar ,close the lid and simmer for 15 minutes.Shahi Paneer Recipe | how to make Shahi Paneer

      Now add paneer cubes,saffron strands mix well and continue to cook on simmer for 2-3 minutes.Shahi Paneer Recipe | how to make Shahi Paneer

      Add  fresh cream and mix well.Shahi Paneer Recipe | how to make Shahi Paneer

      Turn off the heat, also add kewra water / essence ,mix well. Shahi Paneer Recipe | how to make Shahi Paneer

      Garnish with chopped coriander leaves and serve.Shahi Paneer Recipe | how to make Shahi Paneer

      Serve hot with jeera rice or roti.

      Shahi Paneer

      Potato Wedges Recipe | Easy Baked Potato Wedges

      Published : August 7, 2018 | Last Update on July 23, 2022 By Muktha

      Potato Wedges

      Baked Potato wedges alongside with whole wheat pasta is perfect for your weekend dinner. Also it can be a easy to make snack for kids.Involving kids in food preparations along with parents is one of the Active Parenting Method ,where kids learn to focus on what they do .Sahishnu ,my 4 year old always comes running behind me to help me in kitchen and feels proud and accomplished 🙂

      Potato Wedges

      Potato is one such vegetable liked by everyone from kids to adults.Though ,these days potatoes are considered to be fattening and is being avoided by weight watchers ,it's not actually so.Other than deep frying potatoes ,if you can roast or bake potatoes with proper seasoning and methods ,then still you can enjoy yummy crunchy potatoes ,which tastes great.

      Potato Wedges can be a quick after school evening snack for children as it very takes less time for preparation.Even elders can enjoy this baked potatoes as its light on waistline also 🙂 I have  shared baked  potato recipe ,if you don't mind deep frying potatoes ,you can fry it without fear ,it yields a very good result. For one of my friend's kid bday party at home,I had prepared fried Potato Wedges using same recipe  ,it had turned equally good . So if you wish ,you can follow the same recipe to fry the potatoes.

      I had prepared this for friday night dinner along with some wholewheat Penne Rigate Pasta in Spicy Tomato Sauce.

      Recipe Card for Potato Wedges

      Recipe

      Potato Wedges
      5 from 1 vote

      Baked Potato Wedges | Crispy Baked Potato Wedges

      Baked Potato wedges tossed with Cajun spices can be a perfect evening snack.
      Prep Time5 minutes mins
      Cook Time30 minutes mins
      Total Time35 minutes mins
      Course: Snack
      Cuisine: World
      Keyword: Baking
      Servings: 3
      Calories: 78kcal
      Author: Muktha H S

      Ingredients

      • 250 grams Potatoes
      • 1 tablespoon Rice flour or Corn Flour
      • 2 tablespoon Olive Oil
      • ½ tablespoon Garlic minced
      • ½ Tsp Black Pepper powder
      • 1 teaspoon Cajun Spices or pasta seasoning
      • 11/2 teaspoon Salt or as requires

      Instructions

      • Rinse and wash potatoes,peel the skin
      • Cut it lengthwise to thick 8 pieces wedges of uniform size
      • Boil 2 liters of water ,Turn of heat.Add 1 teaspoon salt , cut potato wedges  close lid and keep it aside for 5 minutes
      • Drain  hot water,rinse potatoes with cold water.Wipe and dry the potatoes with a kitchen towel.
      • In a mixing bowl add,oil,minced garlic,cajun spices ( or pasta seasoning like thyme,basil,oregano,pepper powder ) and ¼ teaspoon salt,mix well
      • Add potatoes and mix well ,so that potatoes are coated with the spice mixture.
      • Preheat oven to 200 deg celsius  and bake it for 25-30 minutes
      • Half way through the baking,remove the tray from oven and with the help of tong turn over the wedges to other side and put back in the oven.
      • Bake till the potatoes bake completely and looks crisp and  slightly golden.
      • Oven temperature varies, so keep a check while baking. Serve with cheesy dip or tomato ketchup

      Notes

      Select less starchy potatoes.
      You can add any spices  and herbs for seasoning. All together it should come up to 1 or 1 ½ teaspoon only ,don't overpower it.
      Take care to blanch the potatoes and rinse in cold water to get those perfect and crisp wedges.
       

      Nutrition

      Calories: 78kcal

      Step By Step Directions on making of  Potato Wedges:

      Take 3-4  potatoes medium size,around 250  grams.Wash well ,peel skin.

      Potato Wedges Recipe | Easy Baked Potato Wedges

      Cut potatoes into 2 halves lengthwise and slit lengthwise to get 8 wedges.

      Potato Wedges Recipe | Easy Baked Potato Wedges

      Take 2 liters of water and bring it to boil.

      Potato Wedges Recipe | Easy Baked Potato Wedges When water starts to boil, add  1 teaspoon of salt ,potatoes . Turn off the heat ,close the vessel with a lid and keep aside for 5 minutes undisturbed.

      Potato Wedges Recipe | Easy Baked Potato Wedges

      Drain the water completely,wash it with cold water and wipe and dry potatoes with the help of clean kitchen towel.(If you want you can place this dried potatoes in ziplock cover and freeze it ,till your next use)  .Potato Wedges Recipe | Easy Baked Potato Wedges

      In a mixing bowl ,add minced garlic, rice flour ,olive oil,salt ,cajun spices and herbs for seasoning, prepare the spice mix.

      Potato Wedges Recipe | Easy Baked Potato Wedges


      Mix potatoes very well with the spices and seasoning . Line the baking tray,and arrange the potato wedges.

      Potato Wedges Recipe | Easy Baked Potato Wedges

      Preheat the oven to 200 deg celsius,and bake it for  25-30 minutes.

      Potato Wedges Recipe | Easy Baked Potato Wedges

      Halfway through baking ,remove the tray  from oven and with the help of tongs turn the wedges to other side ,put it back in the oven and continue to bake till it turns slightly brown (Keep checking the potatoes, after 22 minutes,as each oven temperature varies)Potato Wedges Recipe | Easy Baked Potato Wedges

      Serve hot or warm with tomato sauce or cheese dip of your choice.Potato Wedges Recipe | Easy Baked Potato Wedges


      Aloo Paratha Recipe | Easy Stuffed Aloo Paratha

      Published : August 3, 2018 | Last Update on December 17, 2019 By Muktha

      Aloo Paratha

      Aloo Paratha is popular North Indian ,Punjabi wholesome breakfast. Boiled potatoes ,mixed with spices and then stuffed inside a roti and cook with oil/ghee till slightly crisp on outside. Well,  Who doesn't like aloo paratha..... , I guess none, it's one of the most favorite Indian paratha of all time.

      Though it's meant to have it in breakfast ,as it is heavy and keeps us energised  for rest of the day,I don't mind eating this aloo paratha any time of the day because it's so very delicious.

      Aloo Paratha
      Aloo Paratha

      This is one of The Best ,Aloo paratha i have ever ate. Wherever I eat Aloo Paratha , I always comment "I do better aloo paratha".Few other Paratha which I cook regularly are Mooli Paratha , Chinese Paratha , Gobi Paratha ,Paneer Paratha , Onion Paratha  and Methi Paratha,few recipes are already shared ,rest i'll be posting it soon.

      I served hot crisp aloo paratha with butter , Upsaaru khara and curds.

      These days I have seen and heard people avoiding Paratha ,especially Aloo Paratha ,considering it to be fattening. But ,is it really so.....?No ,Its not at all.Potatoes are wrongly tagged has "fattening ",but the  fact is ,it's not potatoes that are fattening ,but its the amount of oil you use along with potatoes to deep fry them,can make anyone fattening.

      Potatoes are rich in complex carbohydrates, it's perfect to add boiled potatoes in one's breakfast.Hot  crisp Aloo Paratha with dollop of butter ,homemade curds and pickles is what one needs to start their day with.For all those who are on a bland  diet, Never say ,No  to Paratha ......,right amount of fat(ghee/ clarified butter) ,fiber , complex carbohydrates  and protein is all you need. It's a perfect breakfast when you have it along with homemade curds(protein). Eat Parathas , the way it should be Eaten,without skipping ghee and curds and stay healthy 🙂

      Serving suggestions :serve it hot with white butter , curds and mango or lemon pickle.

      Recipe Card for Aloo Paratha

      Recipe

      Aloo Paratha
      No ratings yet

      Aloo Paratha Recipe | Easy Stuffed Aloo Paratha Recipe

      A typical north indian breakfast ,indian flat bread made of whole wheat with spicy potato filling.
      Prep Time10 minutes mins
      Cook Time20 minutes mins
      Resting time30 minutes mins
      Total Time30 minutes mins
      Course: Breakfast
      Cuisine: North Indian
      Keyword: Punjabi
      Servings: 5 Parathas
      Calories: 220kcal
      Author: Muktha H S

      Ingredients

      For Paratha Dough

      • 1 Cup Whole Wheat Flour
      • ½ teaspoon Salt
      • ½ teaspoon Ajwain /Carrom seeds
      • 1 tablespoon Oil
      • Water as needed

      For Potato Stuffing

      • 250 grams Potato
      • 2 tablespoon Oil
      • 1 teaspoon Jeera/Cumin seeds
      • 1 inch Ginger or 1 teaspoon Ginger paste
      • 5 cloves Garlic or 1 teaspoon Garlic paste
      • 1 no Green Chilly
      • ¼ teaspoon Turmeric powder
      • ¼ teaspoon Red Chilli powder
      • ¼ teaspoon Coriander powder
      • ½ Tsp Amachur/dry mango powder
      • 1 teaspoon Garam masala powder
      • 1 teaspoon Salt or as required
      • 1 tablespoon Coriander leaves finely chopped
      • 1 tablespoon Fresh mint leaves finely chopped
      • Ghee /Oil for roasting paratha,as required

      Instructions

      • In a wide bowl,add whole wheat flour,salt,ajwain ,oil  and water as required and make a firm dough,keep it covered for 30 minutes.
      • Pressure cook potatoes for 2-3 whistles ,peel potato skin and mash the potatoes and set aside.
      • Prepare ginger,garlic and chilly paste in mortar  and pestle.Chop onions,coriander leaves and mint leaves.
      • Heat oil in a pan,add jeera seeds,ginger garlic and chilli paste ,fry for a minute.
      • Add chopped onions and fry well.
      • Add turmeric powder, red chilli powder, ,coriander powder ,garam masala powder and amachur/dry mango powder.
      • Add mashed potatoes,chopped greens and salt,mix well and turn off the heat.Allow it to cool completely
      • Pinch a medium size ball dough,roll the dough and flatten it .Dust some flour and roll it in a circle of about 5 inch diameters. 
      • Place potato stuffing at the centre of the rolled dough ,from the edges bring the pleats to the centre .
      • Press the pleats from the centre and roll the paratha into a circle of about 7-8 inches in diameter
      • On a hot tava,place the rolled paratha ,drizzle some ghee ,flip and cook on both the sides.
      • Serve hot with butter ,pickles and curds.

      Notes

      1.Dough should be properly kneaded and should be firm.Rest it minimum for 20 minutes.
      2.Prepared stuffing should be at room temperature ,before rolling the paratha.
      3.Tava/Iron Griddle should be HOT  and should be cooked on high-medium temperature only.

      Nutrition

      Calories: 220kcal

      Step By Step Directions on making of Aloo Paratha:

      1.Add pinch of salt and pressure cook potatoes ,for 2 whistles.

      Aloo Paratha Recipe | Easy Stuffed Aloo Paratha

      2.Take wheat wheat flour,add ½ teaspoon salt ,1 tablespoon oil,½ teaspoon ajwain/carom seeds and water.Knead a firm dough and keep it covered ,aside for 30 minutes.

      Aloo Paratha Recipe | Easy Stuffed Aloo Paratha

      3.Prepare ginger,garlic and green chilly paste.Finely chop onions and keep it aside.

      4.By now pressure would have been released,peel potato skin ,mash the potatoes and set aside.

      Aloo Paratha Recipe | Easy Stuffed Aloo Paratha

      5.Heat oil in a pan,add jeera seeds,when it starts to changing  colour,

      Aloo Paratha Recipe | Easy Stuffed Aloo Paratha

      Add ginger garlic green chilly paste ,finely chopped onions and fry well.

      Aloo Paratha Recipe | Easy Stuffed Aloo Paratha

      6.Add turmeric powder,red chilli powder,amachur powder ,garam masala.

      Aloo Paratha Recipe | Easy Stuffed Aloo Paratha

      7.Add mashed potato,salt ,fresh coriander leaves,mint leaves and cook for a minute.Allow it to cool completely.

      Aloo Paratha Recipe | Easy Stuffed Aloo Paratha

      8.Pinch a medium size dough ,roll and flatten it. Dust some flour and roll it in a circle of around 5" inches in a diameter.

      Aloo Paratha Recipe | Easy Stuffed Aloo Paratha

      8.Place the potato filling at the center ,take edges start pleating and bring it to the centre.

      Aloo Paratha Recipe | Easy Stuffed Aloo Paratha

      10.Press the pleats from centre,dust some flour and roll it to a size of  around 7 to 8 inches in diameter.

      Aloo Paratha Recipe | Easy Stuffed Aloo Paratha

      1. On a hot tava /iron griddle ,place the rolled paratha.When the base is partially cooked flip the paratha ,spread some ghee and cook the other side.Flip and cook on both sides.Aloo Paratha Recipe | Easy Stuffed Aloo Paratha

      13.Serve hot with butter ,ghee and pickle.

      Aloo Paratha

      Mixed Chutney Powder | Dry Chutney Powder Recipe

      Published : August 2, 2018 | Last Update on September 24, 2022 By Muktha

      mixed chutney powder

      Mixed Chutney powder is a accompaniment that is used along with Idli,Dosa,Roti ,Akki Roti ,Chapathi and even steamed rice.

      There are wide varieties of chutney powder like ,groundnut ,flax seeds, dry coconut ,garlic ,curry leaves, dal  and many more chutney powders option is endless ,left to one's  likes, dislikes and balancing of flavours.

      mixed chutney powder
      Chutney Powder

      The recipe I'm posting here is a simple ,mixed chutney powder  with few basic and easily available ingredients and spices from our kitchen. I call this as mixed chutney powder as I have used groundnuts,dry coconut ,garlic,curry leaves as main ingredients  and few others spices for blending. If stored in airtight container,stays good for about 15 days or more.Serve as an accompaniment along with sambar or chutney for Dosa ,Idly ,Akki Roti and even Chapathi.

      Recipe card for Mixed Chutney Powder

      Recipe

      mixed chutney powder
      5 from 2 votes

      Mixed Chutney Powder Recipe

      A Perfect Accompaniment for Idly/Dosa/Akki Roti
      Prep Time5 minutes mins
      Cook Time7 minutes mins
      Resting Time15 minutes mins
      Total Time12 minutes mins
      Course: Accompaniment
      Cuisine: South India
      Keyword: Basic, Karnataka
      Servings: 250 Grams
      Calories: 40kcal
      Author: Muktha H S

      Ingredients

      • 1 Cup Groundnuts or 175 grams
      • ½ Cup Dry Coconut or 50 grams
      • ¼ cup Garlic cloves
      • 8 Sprigs Curry leaves
      • 15 no's Dry Red Chilly Kashmiri or Guntur
      • 1 tablespoon Cumin Seeds / Jeera Seeds
      • 1.5 tablespoon Tamarind Firmly pressed
      • 1.5 tablespoon Jagger Powder Organic
      • 1.5 tablespoon Rock Salt

      Instructions

      • On an iron griddle/tawa ,dry roast groundnut skin starts peeling, keep it aside.
      • Dry roast dry coconut ,followed by dry red chilly, roast it till crisp.
      • Add curry leaves,let it crisp and jeera seeds and turn of the heat and keep all the previously roasted ingredients on tawa ,allow it to cool for 15-20 minutes.
      • Take a dry mixer jar, add all the roasted ingredients ,garlic ,tamarind,jaggery and rock salt. Blend to a  fine powder.
      • Store it in a airtight container.

      Notes

      1.Do not brown /over roast any of the ingredient.It should be perfectly roasted and should be crisp.
      2.While blending in jar,blend  periodically by giving 1 minute break between ,as groundnut and coconut both start releasing oil, scrape the edges and blend.

      Nutrition

      Calories: 40kcal


      Step By Step Directions on making of Mixed Chutney Powder:

      1.Keep all the ingredients ready.

      Mixed Chutney Powder | Dry Chutney Powder Recipe

      2.On a Iron tava /griddle ,dry roast groundnuts ,till skin starts to peel.Once down keep it aside.

      Mixed Chutney Powder | Dry Chutney Powder Recipe

      3. Keep flame low and add roughly sliced dry coconut on hot griddle ,dry roast it followed by dry red chillies.Roast red chillies ,till you get pungent smell of red chillies.

      Mixed Chutney Powder | Dry Chutney Powder Recipe

      4.Now ,add curry leaves and allow it till crisp.Add jeera seeds , and turn off the heat.

      Mixed Chutney Powder | Dry Chutney Powder Recipe

      5. Place all the roasted ingredients on the hot tawa. Let it cool down completely .Takes about 15-20 minutes. (No need to dry roast garlic, i just kept  it on hot griddle with all other ingredients).

      Mixed Chutney Powder | Dry Chutney Powder Recipe

      6.Once it cools, put all the ingredients along with tamarind ,salt , jaggery and blend to  powder . As coconut and groundnut release oil while grounding, give 1 minute gap ,scrape the edges of grinder with clean dry spoon and  again continue to blend ,till it done.

      Mixed Chutney Powder | Dry Chutney Powder Recipe

      Store it in an airtight container and use it as required.Mixed Chutney Powder | Dry Chutney Powder Recipe

      Rajma Masala | Restaurant Style Rajma Masala Recipe

      Published : August 1, 2018 | Last Update on September 28, 2022 By Muktha

      rajma-masala-recipe

      Rajma Masala is creamy , buttery , melt in mouth, , onion tomato based curry with perfect balance of spices. This post shares details and directions on how to make a flavorful restaurant style Rajma Masala at home. Serve this tasty rajma masala with , onions, lemon wedges and steamed rice or Jerra Rice , Saffron rice or any flavorful herbed rice.

      Rajma Chawal is one of the most popular recipe from Punjabi cuisine . Along with being a comfort food this kidney bean curry is a wholesome and nutritious meal .

      I love Punjab Cuisine for its flavors and richness , few of my classic favorites includes Paneer Butter Masala , Dal Makhani and Aloo Paratha

      Rajma-masala-recipe
      [feast_advanced_jump_to]

      About this recipe

      Rajma masala is a daily affair in any Punjabi house, as rajma masala originates from proud Punjab and its their cuisine. Anything homemade is always Big Yes  ,if you want to be really healthy.

      Though every house hold has their own versions to make rajma chawal, this version is my favorite. Because its simple to make , no much spices and finally the taste it delivers is lip smacking good.

      Why opt for any take away or restaurant orders , when you can cook this classic rajma masala , easily at home without any special blend of spices .

      You must try this kidney bean curry , because

      • It's wholesome
      • Tasty
      • No fancy ingredients
      • Easy to make
      • Nutritious and Healthy

      Ingredients

      Have a glimpse on the ingredients used to make this tasty restaurant style , Punjabi Rajma masala .

      rajma-masala-ingredients

      Rajma Bean / Kidney Beans - You can use light , dark or any variant of Kidney bean to make this curry . I have used dark bean , you can make it with anything available. Though , I recommend to soak rajma bean but you can use canned beans also.

      Whole Spices - Bay leaf , cinnamon , cloves , green cardamom and black cardamom are used to pressure cook along with kidney beans. I have also used Cumin seeds while making the curry.

      Onions - Use 2 to 3 medium sized red or white onions as this curry base is made with Onions and Tomatoes. Either you can grate onions or finely chop to make this curry.

      Tomatoes - 3-4 , medium sized tomatoes are either finely chopped or pureed to use in this recipe. This is a onion tomato based curry.

      Ginger, Garlic and Green Chilies - a coarse paste of this is add to make a any typical Indian curry and it's a must. You can add ginger and garlic paste and use finely chopped green chilies also.

      Butter and Mustard Oil - these two fats all together adds so much of aroma to this dish. When you say its Punjabi cuisine , by default Mustard oil and butter takes their places.

      Spices and seasoning -This includes basic spices like red chili powder , turmeric powder, coriander powder , garam masala and salt for seasoning.

      Other Ingredients -It includes kasuri methi ( dry fenugreek leaves) , Fresh cream and fresh coriander leaves for garnishing

      Tips

      • Nothing works as best as soaking dry Kidney beans for 8-10 hours and then cooking . Though you can cook with canned kidney beans also , for ultimate rajma masala , I strongly recommend soaking beans.
      • Adding in whole spices and butter while pressure cooking kidney beans , imparts lots of flavor to cooked beans as well as stock . So , I insist to add whole spices while pressure cooking beans.
      • To cut short time , pressure cooking is done. If you can cook in a traditionally way for hours on a wood fire then it's amazing.
      • Incase you forget to soak rajma beans overnight , then you can soak rajma beans in a casserole in hot water and cover casserole lid. It gets ready within 3 hours.

      Variations

      You can make rajma masala as No Onion , No Garlic Recipe . Just exclude onions and garlic in this recipe . And add some cashew paste to get thickness and sweetness to the dish.

      You can make it Vegan free, just feel free to skip butter and add extra 1 tablespoon of mustard oil.

      FAQ's

      Can I use canned rajma to make Punjabi rajma masala?

      Yes, definitely! Use the liquid along with the canned beans as it makes the curry thick and creamy.

      Can I store leftover rajma masala ?

      Leftover rajma masala tastes great the following day . Store any left over in a air tight container and refrigerate it. Stays good in fridge for 2-3 days.

      Is it freezer friendly?

      Rajma Masala freezes well up to 30 days. Store in a freezer friendly container . Before planning to serve thaw it in the refrigerator overnight and reheat to serve again.

      Health benefits of Rajma

      Rajma / Kidney Beans are known for their extraordinary health benefits ,its nothing short of amazing. Adding it in our diet may prove beneficial for weight loss , lowering the cholesterol and also good for diabetics and heart health.

      Rajma/ Kidney beans are fully packed of proteins ,complex carbohydrates , low glycemic index and high quantities of folic acid ,manganese ,fiber and other essential nutrients.

      If you go through any healthy site or speak to any nutritionist/ dietician ,and ask for Vegetarian Protein ,Complex Carbohydrates, Fibre Rich, Low GI .... etc, for all those questions, the only answer is include Beans in your diet .

      Now here comes Rajma/Kidney beans "King of Beans". So it's a must in our diet . I also recommend you to try my Kidney Bean Salad for it's nutrition and taste it offers.

      Watch Video

      How to make Rajma Masala

      Wash 1 cup rajma/kidney beans thoroughly,3-4 times. Soak rajma with enough water for 8-9 hrs or overnight. Next day, drain all water, rinse well and keep it aside.

      Rajma Masala | Restaurant Style Rajma Masala Recipe

      In a pressure cooker add soaked rajma , whole spices and 2-3 cups of water, 1 teaspoon butter and ½ teaspoon rock salt.

      Rajma Masala | Restaurant Style Rajma Masala Recipe

      Pressure cook for 9-10 whistles . Let pressure release on its own kidney beans /rajma should be cooked really well. It should mash easily when pressed between the fingers.

      Whilst crush ginger, garlic and green chilies in a mortar and pestle . And make other prep work of finely chop onions and puree tomatoes .

      Once pressure releases on its own , remove pressure cooker lid and discard the whole spices and set aside rajma bean and stock.

      Rajma Masala | Restaurant Style Rajma Masala Recipe

      Heat mustard oil and butter in a kadai/pan . Add cumin seeds and let it crackle.

      Rajma Masala | Restaurant Style Rajma Masala Recipe

      Now add ginger , garlic and green chilli paste and fry well. Add chopped onions and fry until it turns brown.

      browning onion to make rajma masala

      When onion turns brown , add turmeric powder, red chilli powder, coriander powder, garam masala and mix well. saute for 1-2 minutes

      Rajma Masala | Restaurant Style Rajma Masala Recipe

      Now add tomato puree and cook until water content of tomato dries up completely .

      Rajma Masala | Restaurant Style Rajma Masala Recipe

      Oil starts to release from edges.

      Rajma Masala | Restaurant Style Rajma Masala Recipe

      Add cooked rajma beans along with stock.

      Rajma Masala | Restaurant Style Rajma Masala Recipe

      Add water as required , salt to taste and bring it to boil .

      Once it comes to boil ,regulate flame to simmer and cook until it reaches desired consistency.

      Rajma Masala | Restaurant Style Rajma Masala Recipe

      When it reaches desired consistency , finally end with kasuri methi , fresh cream / butter and coriander leaves .Mix well and serve with steamed rice.

      rajma masala restaurant style

      Serve Rajma Masala with steamed rice, Saffron rice, Herbed jeera rice or Roti, Naan or Lachha Paratha.

      This post has been updated from the archives, was first published in August 2018

      Recipe

      rajma-masala-recipe
      5 from 1 vote

      Rajma Masala Restaurant Style

      Creamy Buttery Melt-in-Mouth Punjabi Rajma Masala
      Prep Time10 minutes mins
      Cook Time50 minutes mins
      Soaking Time9 hours hrs
      Total Time10 hours hrs
      Course: Main Course, Side Dish
      Cuisine: North Indian
      Keyword: Punjabi
      Servings: 5 Serves
      Calories: 226kcal
      Author: Muktha H S

      Ingredients

      To Pressure Cook

      • 1 cup Dry Rajma /Kidney Beans , soaked overnight
      • 2 cups Water for soaking rajma
      • 2 inch Cinnamon Sticks
      • 4 Clovees
      • 1 Bay Leaf
      • 2 Green Cardamom pods
      • 1 Black Cardamom
      • 1 teaspoon Butter
      • ½ teaspoon salt

      To make Rajma Masala

      • 1.5 teaspoon Butter
      • 2 tablespoon Mustard Oil
      • 2 no's Onions finely Chopped to get 1 Cup
      • 1 cup Tomato puree or 3-4 large tomatoes
      • 2 no's Green Chillies
      • 1 inch Ginger
      • 8 Garlic cloves , medium sized
      • 1 teaspoon Jeera Seeds
      • ¼ teaspoon Turmeric Powder
      • ½ teaspoon Red Chilly Powder
      • 1 teaspoon Coriander Powder
      • ½ teaspoon Garam Masala
      • 1 tablespoon Kasuri Methi /Dry Fenugreek
      • 1 tablespoon Fresh Cream or Butter
      • 2 Cups Water for pressure cooking rajma
      • 2 teaspoon Salt or as required
      • 2 Tbsp Fresh Coriander leaves

      Instructions

      • Wash Rajma 3-4 times ,and soak in enough water for 8-10 hrs or overnight.
      • Next Day,drain water completely ,thoroughly rinse rajma ,drain and keep it aside. 
      • Take pressure cooker,add bay leaf,cinnamon,cloves ,washed rajma,1 tablespoon butter,salt and water. Pressure cook for 9-10 whilstels.
      • Whilst prepare ginger , garlic and green chilly paste, chop onions and puree tomatoes.
      • Once pressure releases on its own, Discard whole spices and set aside rajma bean and stock
      • Heat oil and butter in Kadai , add cumin seeds . Let it crackle 
      • Add ginger ,garlic and green chilly paste, chopped onions and fry well till onions turns brown in color.
      • Add turmeric powder, red chilli powder , coriander powder and garam masala. Mix well everything.
      • Add tomato puree and cook until water content of tomato dries up completely and oil starts to release from edges.
      • Now, add well cooked rajma and stock together , mix well.
      • Add water as required , salt to taste and bring it to boil .
      • Once it comes to boil ,regulate flame to simmer and cook until it reaches desired consistency.
      • When it reaches desired consistency , add kasuri methi , fresh cream / butter and coriander leaves ,
      • Mix well and serve with steamed rice

      Video

      Notes

      1.Any variety of Rajma can be used.
      2.Soak rajma overnight or minimum 8 hrs with enough water.
      3.Make sure Rajma is cooked well , it should mash easily when pressed between the fingers.Uncooked rajma causes abdominal discomfort as its hard to digest.


      Nutrition

      Calories: 226kcal

      You may also like

      • chana-pulao-recipe
        Chana Pulao | Chickpea Pilaf
      • Palak-paneer
        Palak Paneer | Spinach and Cottage Cheese Gravy
      • gravies-sides-curries
        Paneer Butter Masala
      • hara bhara recipe
        Hara Bhara Kabab

      Carrot Halwa Recipe | Gajar Ka Halwa Recipe

      Published : March 19, 2018 | Last Update on October 17, 2022 By Muktha Gopinath

      carrot-halwa-recipe

      Carrot Halwa is a Classic Indian Dessert ; Carrots are slow cooked in whole milk , desi ghee and sugar , flavored with cardamom and garnished with nuts.

      Carrot halwa popularly known as gajar ka halwa is a popular Indian dessert , it's made on festivals , get togethers , religious ceremonies and also marriages.

      I'm a great fan of these vegetable based desserts , few of my favorites includes - Sweet Potato halwa , Kashi Halwa ( Ash gourd halwa ) and Pumpkin halwa (Kaddu Halwa ) , you may check these recipes , I'm sure you'll love it as much as I do.

      carrot-halwa-recipe@palates_desire
      [feast_advanced_jump_to]

      About this recipe

      The recipe post shares traditional , slow cooked carrot halwa recipe made with full fat milk , ghee ,carrot and dry fruits. In India, as gajar halwa is one of the loved dessert among all generations , every house has their own likings and variations to the classic dessert.

      You can make carrot halwa by adding khoya or with condensed milk. Though adding khoya/mawa gives a rich texture and taste , I found it to be too heavy. Hence , I prefer slow cooking carrots in full fat whole milk for subtle taste and flavor.

      Classic gajar halwa is so popular in India that many fusion recipes like carrot halwa cakes , gajar halwa mousse , carrot halwa triffles , gajar halwa ice cream and many more exists.

      If you ever wonder , why they eat Gajar halwa in winters, here is the little science behind this tradition. In North India , Decembers are really cold and body needs more fat to withstand the cold temperature.

      And during winters sweet Red carrots are in season , carrots are rich in beta-carotene Vit A and Vit K , fat soluble vitamins . When carrots are cooked in desi ghee ( fat ) , nutrients are well absorbed and assimilated to the body. Also it helps to keep skin soft and supple without drying or breaking the skin in winters. Hence gajrela is so very popular ! Though most of them aren't aware of this , it's the taste of gajar ka halwa that makes it so popular.

      So don't ever think about the calories it carries, just eat at the right time and enjoy the goodness of this dessert guilt free.

      Ingredients

      These are the ingredients that got in to make this classic Gajar ka Halwa

      carrot-halwa-ingredients@palates_desire

      Carrots - Always pick seasonal red carrots to make this gajar halwa . As red carrots gives the authentic taste in this dessert. You can also make this with black carrots , if available.

      Milk - Use full fat whole milk to make this dessert. Never compromise on using full fat milk , as it gives a very rich taste . Here I have not used Khoya , hence I have used more milk in this recipe. In case khoya is added , you can reduce the amount of milk used.

      Ghee ( Clarified butter ) - Nothing can beat the taste of desi ghee in this recipe. So without compromising, feel free to add ghee in this recipe.

      Cardamom Powder - Freshly pound cardamom powder is what I prefer while making desserts , if using store brought cardamom powder then increase the amount by 1 extra pinch !

      Nuts and raisins - You can miss on raisins but not on nuts, it gives a nice crunchy taste to this dessert.

      Tips

      Always use red carrots to make this halwa as you can get real taste from red carrots. Even black carrots can be used to make this halwa . You can find black carrots in winters in some regions of East India

      Grate carrots to medium thickness. If you grate them too thin, the halwa will become mushy , to speed up the process use food processor to grate carrots.

      Keep stirring the halwa at regular intervals or else it scorches from the bottom.

      You can easily double or triple this recipe .

      Carrot halwa is freezer friendly recipe , transfer it in a freezer safe box and freeze.  Thaw before using and warm in microwave. You can freeze the halwa for 1-2 months. 

      You can make this gajar halwa with khoya also. Add 50 grams of Khoya once carrots are well cooked and follow the remaining process exactly.

      Watch Video

      How to make Carrot Halwa Dessert

      Rinse carrots, pat it dry ,trim the edges , peel the skin , grate and keep it aside

      grated carrots

      In a heavy bottom thick pan /kadai (don't use Nonstick), add 2 tablespoon of ghee/clarified butter and add grated carrot

      how-to-make-carrot-halwa

      Saute the carrot till the rawness of carrot goes,it takes around 6-8 minutes.

      Carrot Halwa Recipe | Gajar Ka Halwa Recipe

      Now add boiled milk and let the carrots cook in the milk.

      Carrot Halwa Recipe | Gajar Ka Halwa Recipe

      Cover lid and cook on low flame .

      Carrot Halwa Recipe | Gajar Ka Halwa Recipe

      When carrot is completely cooked, open lid and cook on low heat , stirring occasionally until milk reduces.

      Carrot Halwa Recipe | Gajar Ka Halwa Recipe

      Once milk is almost reduced to 90% , add sugar , mix well and let it continue to cook on low flame

      Carrot Halwa Recipe | Gajar Ka Halwa Recipe

      Whilst, heat 4 tablespoon of ghee and fry all chopped nuts until it turns golden in color. Add raisins at last and remove from stove.

      Carrot Halwa Recipe | Gajar Ka Halwa Recipe

      To carrot halwa , add cardamom powder , fried nuts , raisins along with ghee.

      Carrot Halwa Recipe | Gajar Ka Halwa Recipe

      Mix well ; when everything comes together leaving the pan from edges , gajar halwa is ready.

      Carrot Halwa Recipe | Gajar Ka Halwa Recipe

      Serve Carrot Halwa hot, warm or cold . Can also serve with Ice cream.

      Recipe

      carrot-halwa-recipe
      5 from 1 vote

      Carrot Halwa | Gajar Ka Halwa Recipe

      Carrot Halwa is a Classic Indian Dessert ; Carrots are slow cooked in whole milk , desi ghee and sugar , flavored with cardamom and garnished with nuts .
      Prep Time10 minutes mins
      Cook Time1 hour hr 5 minutes mins
      Total Time1 hour hr 15 minutes mins
      Course: Dessert
      Cuisine: Indian
      Keyword: Diwali, Festivals
      Servings: 5 People
      Calories: 312kcal
      Author: Muktha H S

      Ingredients

      • 4.5- 5 Cups Red Carrot grated
      • 2 Cups Full Fat Milk
      • 8 tablespoon Sugar or as required
      • 6 tablespoon Ghee /Clarified Butter
      • ½ teaspoon Green cardamom Powder ,4-5 cardamom pods , de husked and powdered
      • 1 tablespoon Raisins
      • 2 tablespoon Cashews
      • 2 tablespoon Almonds, slivered
      • 1 tablespoon Pistachios , chopped

      Instructions

      • Rinse carrots, pat it dry ,trim the edges , peel the skin , grate and keep it aside
      • In a heavy bottom thick pan /kadai (don't use Nonstick), add 2 tablespoon of ghee/clarified butter and add grated carrot,
      • Saute the carrot till the rawness of carrot goes,it takes around 6-8 minutes.
      • Now add boiled milk and let the carrots cook in the milk. Cover lid and cook on low flame .
      • When carrot is completely cooked, open lid and cook until milk reduces.
      • Once milk is almost reduced to 90% , add sugar , mix well and let it continue to cook on low flame
      • Whilst, heat 4 tablespoon of ghee and fry all chopped nuts until it turns golden in color. Add raisins at last and remove from stove.
      • To carrot halwa , add cardamom powder , fried nuts , raisins along with ghee.
      • Mix well ; when everything comes together leaving the pan from edges , gajar halwa in ready.
      • Serve Carrot Halwa hot, warm or cold .Can also serve with Ice cream.

      Video

      Notes

      • Always use red carrots to make this halwa as you can get real taste from red carrots. Even black carrots can be used to make this halwa . You can find black carrots in winters in some regions of East India
      • Grate carrots to medium thickness. If you grate them too thin, the halwa will become mushy , to speed up the process use food processor to grate carrots.
      • Keep stirring the halwa at regular intervals or else it scorches from the bottom.
      • You can easily double or triple this recipe .
      • Carrot halwa is freezer friendly recipe , transfer it in a freezer safe box and freeze.  Thaw before using and warm in microwave. You can freeze the halwa for 1-2 months. 
      • You can make this gajar halwa with khoya also. Add 50 grams of Khoya once carrots are well cooked and follow the remaining process exactly.

      Nutrition

      Calories: 312kcal

      You may also like

      • Besan halwa recipe
        Besan Halwa Recipe
      • rajgira halwa
        Rajgira Halwa Recipe
      • gulab-jamun-milkpowder-recipe
        Gulab Jamun | Soft Gulab Jamun with Milk Powder
      • moongdal-barfi-recipe
        Moongdal Barfi | how to make moongdal burfi

      Lemon Coriander Chicken Soup Recipe

      Published : December 1, 2017 | Last Update on October 14, 2020 By Muktha Gopinath

      Lemon_Coriander _chicken_soup

      Lemon Coriander Chicken Soup  recipe with step by step photos and short video. This is a delicious Chicken soup made from chicken stock and lots of fresh coriander and lemon juice. Vitamin C enriched soup with protein can be your BFF during winter in your weight loss journey . Step by step photos and recipe details are shared here, so that you can make a healthy soup at comfort of your home within few minutes.

      Lemon Coriander Chicken Soup

      Nothing beats winter months like warming soup ,winter dinners can be made complete with a hot bowl of soup.Lemon Coriander Chicken soup helps us to stay warm and cozy on a cold day.Lemon and Coriander both are loaded with Vitamin C and helps to fight against cold and cough during winters.

      It's my favourite bowl of comfort for dinner,nothing can comfort me like wrapping hands around a warm bowl of soup.Why don't you try it for a winter dinner to warm up yourself and boost your immunity with loaded Vitamin C.

      One more quick and easy , fusion desi style chicken soup I often prepare at home is Chicken Macaroni Soup , you can try this simple soup with loaded desi flavours. 

      RECIPE CARD FOR LEMON CORIANDER CHICKEN SOUP

      Recipe

      Lemon_Coriander _chicken_soup
      5 from 1 vote

      Lemon Coriander Chicken Soup

      Lemon Coriander Chicken Soup : A delicious bowl of soup with loaded Vitamin C and protein is perfect for a winter dinner.
      Prep Time5 minutes mins
      Cook Time15 minutes mins
      Total Time20 minutes mins
      Course: Soup
      Cuisine: Fusion, Indian
      Keyword: Chicken, Diet
      Servings: 3
      Calories: 186kcal
      Author: Muktha H S

      Ingredients

      • 1 tablespoon Cooking oil
      • ½ tablespoon Clarified Butter / oil
      • 11/4 Cup Fresh Coriander Leaves finely chopped
      • 1 tablespoon Carrot ,finely chopped
      • 1 tablespoon Green beans, finely chopped
      • 1 teaspoon Green Chilly, finely chopped
      • 1 teaspoon Garlic , finely chopped
      • 1 Tsp Ginger ,finely chopped
      • 3 tablespoon Onion finely chopped
      • 1 tablespoon Celery stalk
      • 5 cups Chicken Stock , refer notes
      • ½ cup Cooked chicken , small pieces/ shredded
      • 1 tablespoon Cornflour
      • 2 tablespoon Water
      • 21/2 -3 tablespoon Lemon Juice
      • 1 tablespoon Pepper Powder or as required
      • 1 teaspoon Salt or as required

      Instructions

      • Heat 1 tablespoon of oil,add chopped garlic,ginger,onion and all other chopped veggies and saute for a minute.
      • Add ¾ Cup chopped coriander leaves and saute for a minute.
      • Add chicken stock/Broth and bring it to boil.Add cooked shredded chicken,cook for a minute.
      • Add 1 tablespoon of celery stalks chopped , optional
      • Dissolve 2 teaspoon of cornflour in 2 tablespoon Water,add to the above chicken stock,cook for 2 minutes and turn off heat.
      • Add remaining coriander leaves, lemon juice,salt and pepper. Serve Hot

      Video

      Notes

      • For chicken stock , find the recipe here.
      • Always add lime juice just before serving the soup , keeping it for longer time period may turn bitter.
      • Never reheat soup once after adding lime juice.

      Nutrition

      Calories: 186kcal

      Step -By- Step Directions To make Lemon Coriander Chicken Soup

      Heat 1 tablespoon of oil and ½ tablespoon of butter.

      Lemon Coriander Chicken Soup Recipe

      Add chopped onion ,garlic and ginger. Saute till raw smell goes off.

      Lemon Coriander Chicken Soup Recipe

      Now add in finely chopped vegetables and saute for a minute.

      Lemon Coriander Chicken Soup Recipe

      Add ¾ cup chopped coriander leaves and saute till coriander leaves wilts.

      Lemon Coriander Chicken Soup Recipe

      Add  5 cups of chicken stock and bring to boil. You can check chicken stock recipe here. (If you don't have chicken stock,You can cook chicken bones /chicken with a bay leaf,1 " inch cinnamon stick, 1 clove ,half onion,celery and 5 ½ cups of water ,simmer and cook till water reduces to 4 ½ cups. Strain the stock and use it.)

      Lemon Coriander Chicken Soup Recipe

      Add celery stalks chopped , optional

      Lemon Coriander Chicken Soup Recipe

      Add ½ cup of cooked , shredded or small pieces of chicken .Mix well and bring it to boil.

      Lemon Coriander Chicken Soup Recipe

      Dissolve 1 tablespoon cornflour in 2 tablespoon water , add it to the above chicken stock.

      Lemon Coriander Chicken Soup Recipe

      Cook for 2-3 minutes , till reaches the desired consistency and turn off the stove.

      Lemon Coriander Chicken Soup Recipe

      Add ½ cup chopped coriander leaves and 3 tablespoon of lemon juice.

      Lemon Coriander Chicken Soup Recipe

      Add pepper powder and salt to taste.

      Lemon Coriander Chicken Soup Recipe

      Mix well and serve.Lemon Coriander Chicken Soup Recipe

      Serve hot .

      Lemon_Coriander _chicken_soup

      Dates Halwa | Khajoor Ka Halwa Recipe

      Published : November 20, 2017 | Last Update on October 18, 2022 By Muktha Gopinath

      dates halwa

      Dates halwa is a natural sweet made with ghee ,cashews, milk and flavoured with cardamom .Which is delicious and can be served to any for instant energy.

      Dates are best eaten by themselves,it works well as quick snack because it contains natural sugar.All women,girls and kids out there ,never miss to add this date in your regular diet. Why women,girls and kids, even men can eat it but as we all know Women are more beauty conscious 🙂

      Dates Halwa

      We all know that Dates are rich in iron,so it's very much recommended for all girls and ladies,along with it, it's great blood purifier too ,to get that good glowing face.Its Vitamin C and D works on your skin elasticity which gives you anti-ageing benefits.So was the reason ,i mentioned ladies and girls.

      Dates are rich in many minerals,which helps in maintaining our bone health.Many of elderly woman suffers from osteoporosis,eating dates regularly now may help in preventing osteoporosis, as bone density would be maintained.So it's good to eat dates in small quantity regularly.

      As it's rich in iron,protein and gives instant energy it said to be one of the best snack.Once after your gym workout grab 3-4 dates,its protein keeps your muscle strong and gives you energy instantly.

      For all mothers,out there.....,I suggest to Eat and Give your Kids Dates,to build a strong immune system. This dates halwa recipe is for those ,who doesn't like to eat dates on its own.

      Other Halwa recipes on blog are Carrot Halwa and Pumpkin Halwa.

      Recipe Card

      Recipe

      dates halwa
      5 from 1 vote

      Dates Halwa | Khajoor Ka Halwa

      A natural sweet pudding made with dates ,milk ,ghee and flavoured with cardamom.
      Prep Time5 minutes mins
      Cook Time20 minutes mins
      soaking time30 minutes mins
      Total Time25 minutes mins
      Course: Dessert
      Cuisine: Indian
      Keyword: Sweets
      Servings: 7 people
      Calories: 68kcal
      Author: Muktha H S

      Ingredients

      • 250 grams Dates
      • ⅔ cup Milk
      • 3-4 tablespoon Ghee / Clarified Butter
      • 2 tablespoon Cashew pieces
      • 1.5 -2 tablespoon Sugar Optional
      • ½ teaspoon Cardamom Powder

      Instructions

      • Heat 125 ml of milk , add sugar(if needed only ) to milk ,and keep aside.
      • Roughly chop deseeded dates and soak dates in milk and keep it closed aside for 30 minutes.
      • Drain milk and keep it aside. Add Dates to a blender and blend it to a smooth paste ,by adding milk.
      • Take a nonstick pan, heat 1 tablespoon ghee/clarified butter,fry cashew pieces till golden brown ,keep it aside.
      • In the same pan,add blended dates paste and cook for 8-10 minutes,when colour starts changing add ghee,mix well,till ghee gets incorporated with dates cook for another 5-8 minutes,till done.
      • Turn off heat,add ½ tablespoon of ghee fried cashews and cardamom powder,mix well.

      Nutrition

      Calories: 68kcal

      Step -By- Step Directions  on making of  Dates Halwa  Recipe:

      1.Heat 125ml of milk ,add sugar to milk ,and keep aside.(As Dates have natural sugar,don't add more sugar. 1-3 tablespoon sugar is enough,depends on the type of dates used. I have used Lion Dates and have added 1 ½ tablespoon Sugar.)

      2.Roughly chop deseeded dates and soak dates in milk and keep it closed aside for 30 minutes.

      Dates Halwa | Khajoor Ka Halwa Recipe

      3.Drain milk and keep it aside.Add Dates to a blender and blend it to a smooth paste ,by adding milk.

      Dates Halwa | Khajoor Ka Halwa Recipe

      4.Take a nonstick pan, heat 1 tablespoon ghee/clarified butter,fry cashew pieces till golden brown ,keep it aside.

      Dates Halwa | Khajoor Ka Halwa Recipe

      5.In the same pan,add blended dates paste and cook for 8-10 minutes,when colour starts changing to dark brown add 1 tablespoon of ghee,mix till it's well incorporated with dates.

      Dates Halwa | Khajoor Ka Halwa Recipe

      Again add 1 tablespoon of ghee add cook for another 5-8 minutes,when it forms mass and starts to leaving the edges,it's done.

      Dates Halwa | Khajoor Ka Halwa Recipe

      Turn off the heat,add ½ tablespoon of ghee,fried cashews and cardamom powder,mix well.

      Dates Halwa | Khajoor Ka Halwa Recipe

      Serve it hot , warm or cold ,it tastes good in all form.

      Dates Halwa

      Special Mysore Pak | Soft Mysore Pak Recipe

      Published : October 12, 2017 | Last Update on October 17, 2022 By Muktha Gopinath

      special mysore pak
      Special Mysore Pak is a taste of Mysore.As this Sweet is originated from Royal palace of Mysore,it's named after it and "Pak" basically means sugar syrup.Gram flour ,ghee and sugar are the only ingredients used in this sweet.
      Special Mysore Pak | Soft Mysore Pak Recipe
      There are two versions of Mysore Pak,one is the hard Mysore pak which will be brittle, porous texture, uses oil for the preparation and usually distributed during weddings or other ceremonies.
      Other version is the soft Mysore Pak, it's one of the ultimate sweet. All you need to do is just put it in your mouth and close your eyes...., Awwww  it just melts in mouth,it's so very delicious.
      We get one of the best  Special Mysore Pak from New Bombay Tiffanys  in Sayyaji Rao Road ,Mysore. Its called Special Mysore Pak because,it's different from regular Mysore Pak in texture, taste as well and pure desi Ghee is used in preparations.
      To get the real taste of Special Mysore Pak use freshly ground Besan / Gram Flour and Desi Ghee.As festival of lights is ahead, you can prepare this sweet for Diwali Celebrations ,and I am sure you'll be loving this.


      Other festival sweets recipes shared on blog are : Mohanthal , Besan Ladoo,Coconut barfi , Kaju Katli ,Pista-Almond rolls , Rasgulla , Basundi  ,Rasmalai ,Gajar Halwa , Dates Halwa and Pumpkin Halwa.


      Recipe Card for Special Mysore Pak

      Recipe

      special mysore pak
      No ratings yet

      Special Mysore Pak

      Special Mysore Pak is a simple and delicious traditional sweet from Mysore made from gram flour . ghee and sugar. 
      Prep Time5 minutes mins
      Cook Time35 minutes mins
      Total Time40 minutes mins
      Course: Dessert, Sweets
      Cuisine: South India
      Keyword: Diwali, Festivals
      Servings: 15 Pieces
      Calories: 145kcal
      Author: Muktha H S

      Ingredients

      • ½ Cup Gram Flour / Besan
      • 1 Cup Clarified Butter / Desi Ghee
      • 1 Cup Sugar
      • ¾ Cup Water

      Instructions

      • Sieve Gram flour twice and roast on a medium heat till you get nutty aroma and gram flour turns light golden colour.
      • Add 1 tablespoon of Ghee to gram flour ,mix well such that no lumps are formed and turn of the heat.
      • Take sugar in a deep thick bottom kadai /pot ,add water just to immerse sugar. Keep on high heat,let sugar dissolve once it starts to boil ,reduce the flame to medium heat and boil till you get 1 string consistency.
      • Divide the roasted gram flour into 4 equal parts and add roasted gram flour into sugar syrup part by part and whisk well,so that no lumps are formed.
      • Divide clarified butter /ghee into 4 equal parts and start adding it to gram flour sugar syrup part by part, keep stirring and mix well till ghee incorporates with gram flour.
      • Once it starts leaving the edges,add 1 tablespoon of ghee. Turn of the heat . And pour the mixture to prepared greased tin ,once warm predefine the shapes and cut it when cools completely.

      Nutrition

      Calories: 145kcal

      Step By Step Details on Making of Special Mysore Pak:

      1. Sieve gram flour and roast it well,until you  get nutty aroma.Gram flour colour turns light golden colour. Roast it on a medium to low heat ,take measures not to burn it.
      Special Mysore Pak | Soft Mysore Pak Recipe
      Once it's almost done add 1 /2 tablespoon of ghee mix it well, again add ½ tablespoon mix it well ,such that no lumps are formed and turn of the heat.
      Special Mysore Pak | Soft Mysore Pak Recipe
      2. Take Sugar in a heavy bottom deep kadai ( Don't use nonstick ware ) add water just enough to immerse sugar (Around ¾ Cup). Keep it on a high flame,once it starts to boil reduce the heat to medium low and boil sugar syrup till you get 1 string consistency.
      When you touch the sugar syrup between the fingers,you should get  1 String, that's the right consistency. This is called as "Pak" Now reduce the heat to low flame/ sim.Meanwhile grease the pan /tray/plate and keep it aside.
      Special Mysore Pak | Soft Mysore Pak Recipe
      3.Divide the roasted gram flour/ besan into four parts and add one part of the  gram flour into sugar syrup and whisk well so that no lumps are formed. It starts to froth,add 2nd part of the flour ,whisk well and again repeat it for remaining flour.
      Just make sure you add roasted gram flour part by part rather than adding it all together,just to ensure that no lumps are formed .
      Special Mysore Pak | Soft Mysore Pak Recipe
      4.Take 1 cup Ghee and divide into 4 parts , add ghee part by part thoroughly and whisk , once ghee is absorbed  add one more part of ghee and mix well,repeat the process till you complete all 4 parts of ghee.
      Special Mysore Pak | Soft Mysore Pak Recipe
      5. Keep Mixing so that Ghee is well incorporated within the besan. When it starts leaving the edges and looks like foam mass ,add 1-2 tablespoon of ghee mix well .
      Special Mysore Pak | Soft Mysore Pak Recipe
      6. Transfer the mixture to a prepared greased pan,When its still warm,cut into rectangle/desired shapes. When it cools down completely,cut the precut mysore pak and store it in a airtight container.It stays good for 15 days ,you can refrigerate it too.
      Special Mysore Pak | Soft Mysore Pak Recipe
      But before serving just microwave it for 20 seconds ,so that ghee melts down and tastes good.
      Special Mysore Pak | Soft Mysore Pak Recipe

      Medu Vada | Uddina Vada

      Published : September 4, 2017 | Last Update on October 6, 2022 By Muktha Gopinath

      Medu Vada

      Medu Vada , Uddina Vade, Toothu Vade are few names given to this Vada. It gets the name Medu vada cause of its soft texture , it's crisp and crunchy outside and soft inside. Medu word literally means soft in Kannada. In Kannada, Toothu means hole hence it is also called as Toothu Vade. A garland of this Vada will be offered to Lord Ganesha during festivals. Urad Dal is the main ingredient and hence the name Uddina Vade in Kannada.

      Medu Vada | Uddina Vada

      Urad Dal Nutrition : Urad Dal is rich in vitamin B and minerals like iron , calcium ,folic acid and manganese. As it's rich in protein, dietary fibre, vitamins and minerals it's given to girls when they attain menarche to compensate the blood loss and also to strengthen the bones. Urad dal is also given to lactating mothers as it improves the milk secretion. Urad Dal is good for men too for increasing the sperm count and motility.

      This healthy pulse has find its place in almost every South Indian house, without which our breakfast will be incomplete. Urad Dal is rich in plant protein, when lentils is used along with cereals, one gets complete protein. hence urad dal is used in combination with rice (Cereal) to prepare most of the breakfast like Dosa, Idli, Kichadi.

      Though eating Medu vada regularly will make you fattening ,indulge once in awhile and stick to the saying "Eat fat to burn fat ". One more popular vada recipe from South Indian menu is Chana Dal Vada also known as Masala Vada. 

      Other South Indian Breakfasts Recipes that may interest you are : Pongal , Rava Idli , Rava Paddu , Pesarattu , Akki Roti , Lemon Rice, Bisi Bele Bath, Idli and Dosa. 


      RECIPE CARD FOR MEDU VADA | URAD VADA | UDDINE VADA

      Recipe

      Medu Vada
      No ratings yet

      Medu Vada

      Medu Vada is a crispy , fluffy , fritter made from Urad Dal is a popular breakfast item from South India.
      Prep Time10 minutes mins
      Cook Time20 minutes mins
      Soaking Time3 hours hrs 30 minutes mins
      Total Time30 minutes mins
      Course: Breakfast, Snack, Tiffin
      Cuisine: South India
      Keyword: Breakfast_Ideas
      Servings: 13 Makes
      Calories: 163kcal
      Author: Muktha H S

      Ingredients

      • 1 cup Whole Blackgram / Urad Dal
      • 2 tablespoon Channa Dal
      • 1 no Onion Medium Size or Onion Shallots 5 no's
      • 2 no Green Chilli chopped
      • 2 tablespoon Coconut Pieces
      • 1 inch Ginger Grated
      • 3-4 pinches Asafoetidia
      • 4-5 no Black Peppercorns ,roughly crushed
      • 1 spring Curry leaves
      • 2 tablespoon Coriander leaves chopped
      • ¾ - 1 teaspoon Salt
      • Oil for deep frying

      Instructions

      • Wash and soak Urad dal for 3-4 hours.
      • Drain water completely and transfer to mixer and grind. Just sprinkle some cold water if required and grind to a thick, smooth batter. 
      • Whilst keep oil for heating.
      • Chop onions, green chillies, greens and add to the batter. Add asafoetida, salt, rice flour mix everything.
      • Once oil is hot enough, wet your hands, take a big lemon size batter in right hand ,weigh and make round, at the centre of the batter press from thumb to make a hole and slowly slide into hot oil.
      • Fry on medium high heat till it turns nice golden colour.
      • Serve hot with coconut chutney and sambar.

      Notes

      • Use ice cold water to grind the urad dal to smooth batter.
      • Keep the batter in refrigerator for minimum 30 minutes ,this makes you to shape well the urad vada and makes crisp too.

      Nutrition

      Calories: 163kcal

      Step by Step directions to make Medu Vada: 

      Wash and soak  Urad dal  for 3-4 hours. 

      Medu Vada | Uddina Vada
       
      Drain water completely and transfer to mixer and grind. Just sprinkle some cold water if required and grind to a thick, smooth batter.  
       
      Medu Vada | Uddina Vada
       Whilst keep oil for heating.

      Chop onions, green chillies, greens and add to the batter. Add asafoetida, salt, rice flour mix everything. 

      Medu Vada | Uddina Vada
       
      Once oil is hot enough, wet your hands ,take a big lemon size batter in right hand ,weigh and make round. At the centre of the batter press from thumb to make a hole  and slowly slide into hot oil. 
       
      Medu Vada | Uddina Vada
       
      Fry on medium high heat till it turns nice golden colour.
      Medu Vada | Uddina Vada
       
       
      Serve hot with coconut chutney and sambar.
       
      Medu Vada | Uddina Vada
       

      Pumpkin Chutney | Kaddu Ki Chutney Recipe

      Published : August 30, 2017 | Last Update on September 28, 2022 By Muktha Gopinath

      kaddu-ki-chutney

      Pumpkin chutney recipe with step by step photos and video. Pumpkin Chutney is a typical South Indian Style mildly spiced, creamy textured chutney made with yellow pumpkin , fresh coconut and spices.

      Served with any kind of Dosa as accompaniments.

      sweet-pumpkin-chutney

      Its a typical South Indian style is served as an accompanied with Idli / Dosa.  

      [feast_advanced_jump_to]

      About this recipe

      Yellow Pumpkin Chutney also popularly known as Parangi chutney / Kumbalkai Chutney in South India . Like most of South Indian style Chutney ,fresh coconut is used in this recipe.

      Pumpkin , Coconut , spices are roasted in little oil and blend together to make this tasty chutney. And a basic tempering of mustard seeds , cumin seeds, curry leaves and hing is added to this chutney .

      Trust me this chutney is tasty and goes well with any kind of Dosa. I normally serve this chutney with any millet based Dosa . Because millet based Dosa have a kindy of earthy flavor which needs a strong , tasty accompaniments . And chutney of this kind pairs well with any kind of millet's based Dosa .

      Other similar kind of chutney that goes well with millet based dosa are Tomato Chutney , Gorikai Chutney / Cluster Beans chutney , Spicy peanut Chutney and Bombay saagu chutney.

      Pumpkin Chutney


      Health Benefits of Pumpkin

      Pumpkin is an extremely nutrient dense food ,full of vitamins and minerals with very low calories. Good for heart ,eyes and also a immunity booster. Good for kids, pregnant and lactating women as it is rich in Vitamin A. Its rich Vitamin C  and Potassium keeps your heart healthy and its fiber helps in easy bowel movement.

      Pumpkin seeds are also rich in iron and zinc. Hence its considered to be one of the super food. Including this in our daily diet in one or the other form is highly recommended.

      Ingredients , Tips and Variations

      Pumpkin Chutney | Kaddu Ki Chutney Recipe

      Pumpkin : Yellow pumpkin works best for this recipes. Some pumpkin has more water content and few has less. I always choose pumpkin with green skin , comparatively water content in this variety of pumpkin will be less .

      Coconut : Fresh coconut works best here, incase if its unavailable you can use dry coconut also here. But make sure to soak dry coconut for about 30 minutes in warm milk or water before using in this recipe. You can also use desiccated coconut if fresh coconut or dry coconut is unavailable.

      Oil : I have used coconut oil in this recipe but you can use any vegetable oil to make this pumpkin chutney.

      Tempering: Basic tempering is used here , if you want you can use urad dal ( split black gram ) in tempering.

      Watch Video

      Every house has either growing children, adults or aged people, everyone requires nutrients for healthy living.

      It becomes a real challenge to the lady of the house to prepare a nutritious meal to the family to meet the daily dietary requirement. Adding this kind of healthy chutneys/ dips to the meal will definitely gives a satisfaction of making family eat right.

      This post goes to all those mothers who want make their kids eat pumpkin in hidden form 😃😊😉. This is how I make my boy eat pumpkin.....! This Pumpkin chutney is not only nutrient rich and healthy it's equally good in taste ,it can accompanied with Dosa /Idli/ Chapathi / Rice Sambar and even curd-rice in place of pickle 😛 .

      Its high time to include this plum nutritious orange veggie to your diet. Eat right, stay healthy !

      Pumpkin Chutney

      Step by step directions to make Pumpkin Chutney

      Clean, peel skin and cut the pumpkin into small pieces .

      In a pan , heat 1 teaspoon of oil roast chana dal( bengal gram ), Urad dal (black gram) and red chilies  , till aromatic.

      how-to-make-pumpkin-chutney

      Add fresh coconut and pumpkin to the same pan. Add salt to taste.

      how-to-make-pumpkin-chutney

      Saute for a minute and let it cook on medium heat for 8-10 minutes.

      how-to-make-pumpkin-chutney

      Cook until pumpkin turns soft. You should be able to cut pumpkin with spatula easily.

      Pumpkin Chutney | Kaddu Ki Chutney Recipe

      Turn off the stove. Let it cool down completely. Now transfer cooked pumpkin into a blender.

      how-to-make-pumpkin-chutney

      Add coriander leaves and tamarind

      Pumpkin Chutney | Kaddu Ki Chutney Recipe

      Blend well everything. You may no need to add water if pumpkin has released lots of water . Incase if it has no much water released then just add about 1 tablespoon of water only to blend , if required.

      Transfer to a bowl .

      Heat 1 tablespoon of coconut oil (or any vegetable oil ), add mustard seeds, cumin seeds, curry leaves and hing.

      Pumpkin Chutney | Kaddu Ki Chutney Recipe

      Pour temping over chutney and serve as an accompaniment with Idli / Dosa.

      how-to-make-pumpkin-chutney

      Recipe

      kaddu-ki-chutney
      5 from 3 votes

      Pumpkin Chutney | Parangikai Chutney

      Pumpkin Chutney - A typical South Indian Style mildly spiced, creamy textured chutney made with yellow pumpkin , fresh coconut and spices. Served with any kind of Dosa as accompaniments.
      Prep Time5 minutes mins
      Cook Time15 minutes mins
      Total Time20 minutes mins
      Course: Accompaniment
      Cuisine: Karnataka, South India
      Keyword: Chutney
      Servings: 4 People
      Calories: 55kcal
      Author: Muktha H S

      Ingredients

      • 250 grams Pumpkin
      • ¼ Cup Fresh Coconut or 50 grams
      • 2-3 Kashmiri Red Chilli
      • 1 teaspoon Chana Dal / Bengal Gram
      • 1 teaspoon Urad Dal / Split Black Gram
      • 1 teaspoon Tamarind firmy pressed
      • 2 tablespoon Coriander Leaves
      • 1 teaspoon Salt or as required

      For Tempering

      • 1 tablespoon Oil
      • ½ teaspoon Mustard Seeds
      • 1 Sprig Curry leaves
      • 1 Asafoetidia , big pinch
      • ½ teaspoon Jeera / cumin Seeds

      Instructions

      • Clean, peel skin and cut the pumpkin into small pieces .
      • In a pan , heat 1 teaspoon of oil roast chana dal( bengal gram ), Urad dal (black gram) and red chilies  , till aromatic.
      • Add fresh coconut and pumpkin to the same pan. Add salt to taste.
      • Saute for a minute and let it cook on medium heat for 8-10 minutes.
      • Cook until pumpkin turns soft. You should be able to cut pumpkin with spatula easily.
      • Turn off the stove. Let it cool down completely. Now transfer cooked pumpkin into a blender.
      • Add coriander leaves and tamarind
      • Blend well everything. You may no need to add water if pumpkin has released lots of water . Incase if it has no much water released then just add about 1 tablespoon of water only to blend , if required.
      • Transfer to a bowl .
      • Heat 1 tablespoon of coconut oil (or any vegetable oil ), add mustard seeds, cumin seeds, curry leaves and hing.
      • Pour temping over chutney and serve as an accompaniment with Idli / Dosa.

      Video

      Nutrition

      Calories: 55kcal

      More Pumpkin Recipes

      • pumpkin-khichdi-with-pickle-ghee
        Pumpkin Khichdi , Best ever Weight Loss Recipe
      • pumpkin-soup-recipe
        Pumpkin Soup | Healthy Easy Pumpkin Soup Recipe
      • pumpkin halwa recipe
        Kaddu Halwa Recipe | Easy Pumpkin Halwa
      • pumpkin-walnut-cake-recipe
        Pumpkin Walnut Cake
      • « Previous Page
      • 1
      • …
      • 5
      • 6
      • 7
      • 8
      • 9
      • 10
      • Next Page »

      Hey ! Nice To Meet You

      Muktha-about-me

      Hi ! I'm Muktha , Blogger , Nutrition Advisor & Recipe Creator behind Palate's Desire . I share tried & tested everyday meal recipes for healthy living and occasional indulgence. Palate's Desire helps even a novice to cook like a pro. Happy Cooking...! Read More about me →

      Stay Connected

      • Instagram

      Baking Recipes

      • pumpkin bread
        Pumpkin Bread
      • coconut-cookie-sandwich
        Cookie Sandwich
      • crispy-coconut-cookies
        Coconut Cookies
      • peanut butter cookies
        Peanut Butter Cookies
      • crinkle-cookies
        Chocolate Crinkle Cookies
      • ragi-cookies
        Ragi Almond Cookies with Jaggery

      Baking Recipes→

      Popular Recipes

      • bisi bele bath powder
        Bisi bele bath powder recipe - how to make
      • pineapple-salsa
        Pineapple Salsa - How to make spicy salsa
      • dry gobi manchurian recipe
        Gobi Manchurian Dry | Cauliflower Manchurian
      • okra-peanut-stir-fry
        Moongphali Bhindi | Peanut Okra Stir fry
      • Mangalore Fish Curry
        Fish Curry | Meen Gassi - Mangalore Style
      • moringa-tea-to-burn-fat
        Moringa Tea Recipe | Sip everday to Burn Fat easily

      Rice Recipes

      • bellada-anna-recipe
        Bellada Anna - Gudanna
      • Rice Varities
        Masala Lemon Rice | Nimbehuli Chitranna Recipe
      • huggi anna recipe
        Huggi Anna | how to make Huggi
      • chicken-fried-rice-recipe
        Chicken Fried Rice
      • Donne-Biryani-Recipe
        Donne Biryani Recipe
      • chicken-pulao
        Chicken Pulao Recipe
      • vegetable fried rice
        Vegetable Fried Rice | Indo-Chinese Fried Rice Recipe
      • vegetable dum biryani
        Vegetable Dum Biryani Recipe

      Egg Recipes

      • scrambled mushroom eggs
        Scrambled Egg with Mushroom
      • spanish-potato-omelette-cut-into-wedges
        Spanish Potato Omelette
      • scrambled Egg Curry
        Scrambled Egg Curry
      • kerala egg curry
        Kerala Egg Curry | Easy Egg Recipes
      • shakshuka recipe
        Shakshuka | How to make Shakshuka recipe
      • Kolhapuri Egg Masala
        Kolhapuri Egg Masala
      • Mumbai Style Egg Burji
        Mumbai Style Egg Bhurji
      • onion egg bhurji
        Onion Egg Bhurji

      Sweets & Desserts

      • bhapa-doi-recipe
        Bhapa Doi
      • Ragi-coconut-milk-pudding-recipe
        Ragi Coconut Milk Pudding
      • easy-shrikhand-recipe-photo
        Shrikhand
      • Thandai-kulfi
        Thandai Kulfi Recipe
      • eggless chocolate mousse
        Eggless Chocolate Mousse
      • kayi -hollige-obbattu
        Kayi Holige Recipe
      • Makhana-kheer-recipe
        Makhana Kheer Recipe
      • mango-phirni-topped-with-pistachios-rose-petals
        Mango Phirni Recipe

      Footer

      ↑ back to top

      ABOUT

      • ABOUT MUKTHA
      • MEDIA KIT

      STAY CONNECTED

      • SIGN UP ! FOR E MAILS
      • CONTACT ME

      POLICIES

      • PRIVACY POLICY
      • TERMS & CONDITIONS

      COPYRIGHT © 2025 PALATE'S DESIRE

      Rate This Recipe

      Your vote:


      A rating is required
      A name is required
      An email is required