Palate's Desire

  • Home
  • Recipe Index
  • Diet Recipes
  • Videos
  • Work with me
  • Subscribe
menu icon
go to homepage
  • Home
  • Recipe Index
  • Diet Recipes
  • Videos
  • Contact
    • Facebook
    • Instagram
    • Pinterest
    • Twitter
    • YouTube
  • subscribe
    search icon
    Homepage link
    • Home
    • Recipe Index
    • Diet Recipes
    • Videos
    • Contact
    • Facebook
    • Instagram
    • Pinterest
    • Twitter
    • YouTube
  • ×

    Aloevera Amla Juice

    Published : January 30, 2019 | Last Update on July 23, 2022 By Muktha

    Aloevera Amla Juice

    Aloevera Amla Juice is one of the most healthiest juice that one can start the day with . Both Aloevera and Amla are powerhouse of nutrients. Aloevera Amla juice is a quick blend of Aloevera pulp and Amla pieces. Adding cumin/jeera powder , Saunf/fennel seeds powder along with pinch of black salt ,not only make it palatable but also add ons health benefits.

    Aloevera Amla Juice

    Health Benefits - Amla : There is no mystery about the goodness of Amla and Aloe Vera on Skin and Hair Health. Amla also known as Indian Gooseberries are tangy, sweet-sour fruit with large amount of Vitamin C . It contains Vitamin C , 8 times more than that of Orange. Also it has amino acids, iron, Vitamin A, fiber, potassium, magnesium and calcium. All of these essential nutrients are great for improving skin and scalp health. Amla also acts as a chelating agent that binds copper and iron which strengthens hair at the root. Amla is rich in Vitamin C and it improves metabolism, immunity and avoids all the bacterial and viral ailments like cough and cold .

    Aloevera: Aloe Vera is really beneficial for hair and skin as it is a storehouse of 32 vitamins and minerals along with hundreds of enzymes and trace nutrients. It has anti-inflammatory and antifungal properties that soothe acneic skin and an irritated scalp by treating dandruff. Also proteolytic enzymes in Aloe Vera juice can remove dead skin cells that block hair follicles . And encourages new hair growth and makes skin glow. The alkaline quality of aloe vera juice balances your scalp’s pH levels to arrest hair loss and treat conditions such as seborrhea and psoriasis.

    Aloevera Amla Health Benefits

    Apart from beauty regime , having aloevera amla juice on empty stomach is very beneficial and helps to reduce blood sugar levels , helpful for patients suffering from Type 2 ,Diabetics. Also Amla juice is traditional remedy to control high blood sugar levels. Thus both combined together act as marvellous drink to improve the overall health . It increases metabolism , improves immunity , controls blood sugar , reduces blood pressure ,reduces acidity, improves digestion and also relieves constipation. I run short of space here , to write its benefits, can read more about it here . Hence add in your diet to get the most of its benefits.

    Aloevera Amla Juice

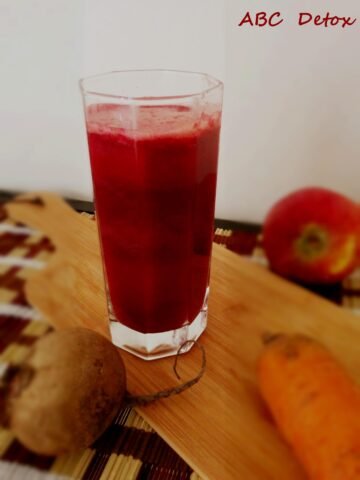
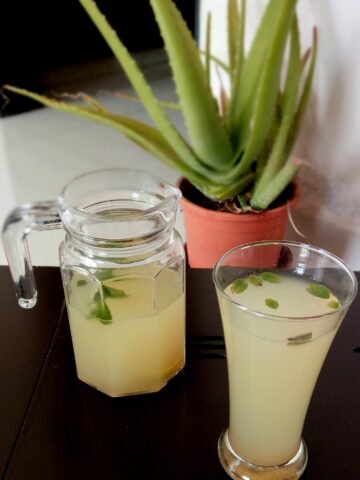
    Serve Aloevera Amla Beverage as a detox drink ,early morning on empty stomach . Orelse as a nutritious healthy cooler juice during the day . However you drink ,it delivers you with all the nutrients. Other healthy detox beverages on blog are Beetroot Amla Detox , Kiwi Cucumber Smoothie , Amla Coriander Leaves Detox and ABC Juice.

    RECIPE CARD FOR ALOEVERA AMLA JUICE


    Recipe

    Aloevera Amla Juice
    5 from 3 votes

    Aloevera Amla Juice

    Aloevera Amla Juice is a Nutritious , Detox Drink with Medicinal properties .
    Prep Time8 minutes mins
    Total Time8 minutes mins
    Course: Drinks
    Cuisine: Indian
    Keyword: Detox, Diet, Healthy
    Servings: 2 People
    Calories: 11kcal
    Author: Muktha H S

    Ingredients

    • ¼ Cup Aloe vera Gel from aloevera leaf
    • 2 no Amla / Indian Gooseberries
    • 1 pinch Black Salt / Kaala Namak
    • ¼ teaspoon Fennel Seeds Powder / Saunf Powder
    • ½ teaspoon Jeera Powder / Cumin Powder
    • 500 ml Water

    Instructions

    • Wash and clean Aloevera with running water and pat it dry with a kitchen paper napkin .
    • Trim the edges and with a sharp knife ,cut open one side of the aloe vera leaf. With a spoon , scoop the aloevera gel (pulp) . 
    • Gel should be transparent and clear without any traces of yellow or green tinge.
    • Cut open amla, remove pit and make small pieces of amla.
    • Place aloevera gel and amla pieces in a Mixer/ Blender (not Juicer), and blend to a smooth paste.
    • Pass the pulp through a strainer and collect the juice.
    • Place back the pulp into mixer , add some water and blend to extract the juice completely.
    • Repeat this for 2-3 times , till pulp looks transparent and all juice is extracted.
    • Add ¼ teaspoon saunf powder, ½ teaspoon of jeera powder ,pinch black salt ,add in water and stir well.
    • Serve with few fresh torn mint leaves.

    Nutrition

    Calories: 11kcal

    Step by Step Directions for making Aloevera Amla Juice:

    Wash and clean Aloevera with running water and pat it dry with a kitchen paper napkin .

    Trim the edges and with a sharp knife ,cut open one side of the aloe vera leaf.

    With a spoon , scoop the aloevera gel (pulp) . Gel should be transparent and clear with no traces of  yellow or green tinge.

    Cut open amla, remove pit and make small pieces of amla.

    Place aloevera gel and amla pieces in a Mixer/ Blender (not Juicer), and blend to a smooth paste.

    Pass the pulp through a strainer and collect the juice. 

    Place back the pulp into mixer , add some water and blend to extract the juice completely.

    Repeat this for 2-3 times , till pulp looks transparent and all juice is extracted.

    Add  ¼ teaspoon saunf powder, ½ teaspoon of jeera powder ,pinch black salt ,add in water and stir well.

    Serve with few fresh torn mint leaves.

    Aloevera Amla Juice

    Palak Chicken| Spinach Chicken

    Published : January 27, 2019 | Last Update on September 27, 2022 By Muktha

    Palak Chicken

    Palak Chicken | Spinach Chicken is a chicken preparation made with Spinach puree and Indian Spices . It is a hearty, healthy and outrageously delicious dish with goodness of spinach .

    Like most of the chicken dishes ,this too is an onion tomato base gravy with extra addition of spinach puree. The earthy flavours of spinach along with chicken and spices makes it more delicious.

    Palak Chicken

    Pairing Chicken : It's a known fact that chicken is a complete protein . But chicken lacks fiber , so it's always a good idea to eat lots of salad while having any non vegetarian food. To improve the nutritional values, its important to pair meat with veggies. Hence meat is always paired with veggies either in salad or sauteed form in most of the countries. Cooking meat in greens improves its fibrous portion making it more nutritious.

    Variations to the Dish : To give a rich taste and nutty flavour , cashew paste can be used . Also cream can be added to make it more rich and also to give that restaurant finish. But here I have used curds to keep the calories in check . Also I have used both oil and clarified butter to cook . For more delicious and rich taste , you can use only desi ghee / clarified butter. Mutton can also be cooked similarly , but cooktime varies. With these minute changes , there will be slight change in taste but everything tastes good.

    Other similar chicken recipes on blog are : Chicken Sukka , Chicken Bhuna Masala ,Coriander Chicken gravy , Pepper Chicken and Chicken Ghee roast.

    How to make Palak Chicken :

    Preparations:

    Clean and wash Palak/spinach leaves and set aside.

    Bring water to rolling boiling and add palak and green chillies . Turn off the heat. Let it sit for a 5 minutes.

    palak murgh

    With the help of tongs remove spinach , green chillies and into cold water ,allow it for 5 minutes.Drain water and keep spinach leaves aside.

    palak murgh

    Add spinach and green chillies into a blender / mixer and make puree .Set aside.

    palak murgh

    Take 2 medium size onions,cut it quarterly, add into blender/mixer and make fine paste without adding water, to get half cup onion paste.

    palak chicken

    Make ginger garlic paste from from 6-8 garlic cloves and 1 ½ inch ginger, keep it aside.

    palak chicken

    Blend 2-3 large tomatoes in a blender/mixer to get 1 cup  tomato puree.

    palak chicken

    Keep all the whole spices ,ready.

    Palak Chicken
    For Making Gravy: 

    Heat oil and ghee in a kadai , add all the whole spices and saute till spices leaves aroma.

    palak chicken

    Add prepared onion paste and fry well for 5 minutes on medium heat .

    palak chicken

    Now add in ginger garlic paste and fry till raw smell goes off , let the onion ginger garlic paste turn light brown.

    palak chicken

    Add chicken pieces and mix well with onion,ginger garlic paste and cook for 5 minutes.

    palak chicken

    Now add turmeric powder and ½ teaspoon salt ,mix well everything.

    palak chicken

    Close the kadai/pan ,with a lid and cook chicken till raw smell goes off and its water dries up.

    palak chicken

    Now add tomato puree, mix well everything .

    palak chicken

    Add chilli powder , coriander powder , jeera powder and garam masala , mix well everything.Let this be cooking on medium heat.

    palak chicken

    Add ½ cup whisked curds and mix well everything. Continue to cook for 5 more minutes such that everything gets well incorporated .

    palak chicken

    Add spinach puree , blender rinsed water about ½ cup ,stir in everything.

    palak chicken

    Once spinach puree is well mixed with chicken ,add in ½- ¾ teaspoon of salt .

    palak chicken

    Cover and cook till it starts to bubble.

    palak chicken

    Open the lid , turn off the heat , add lemon juice from half lemon. Garnish with coriander leaves.

    palak chicken

    Serve it hot along with Steamed Rice or Roti.

    palak chicken

    Recipe

    Palak Chicken
    5 from 2 votes

    Palak Chicken | Spinach Chicken Curry

    Palak Chicken is a outrageously delicious chicken curry made with Spinach Puree and Whole Spices.
    Prep Time20 minutes mins
    Cook Time50 minutes mins
    Total Time1 hour hr 10 minutes mins
    Course: Main Course, Side Dish
    Cuisine: Indian
    Keyword: Chicken, Curries
    Servings: 6 People
    Calories: 187kcal
    Author: Muktha H S

    Ingredients

    • 750 grams Chicken ,skinless
    • 500 grams Palak / Spinach ,about 2 cups puree
    • 3-4 no's Green Chilli ,mild spice
    • 2 no's Onions, medium size
    • 6-8 no Garlic Cloves
    • 1 ½ inch Ginger
    • 3 no's Tomatoes Large
    • 1.5 tablespoon Cooking Oil
    • 1.5 tablespoon Ghee / Clarified Butter
    • ½ teaspoon Turmeric Powder
    • 1 Tsp` Chilli Powder
    • 1 teaspoon Coriander Powder
    • ½ Tsp Garam Masala
    • ½ teaspoon Jeera / Cumins Seeds
    • ¼ cup Yoghurt/Curds or cashew paste
    • ½ cup Water
    • 1 ½ teaspoon Salt or as required
    • 1 tablespoon Lime juice
    • 2 tablespoon Chopped Coriander seeds

    Whole Spices

    • 2 no Bay leaf
    • ½ teaspoon BlackPeppercorns
    • 2 inch Cinnamon Stick
    • 5 no Cloves
    • 4-5 no Green Cardamoms
    • 1-2 no Black Cardamom
    • 2 Mace strands

    Instructions

    Preparations:

    • Clean wash and keep chicken aside in a colander for excess water to drip off.
    • Clean and wash Palak/spinach leaves and set aside.
    • Bring water to rolling boiling and add palak and green chillies . Turn off the heat. Let it sit for a 5 minutes.
    • With the help of tongs remove spinach , green chillies and into cold water ,allow it for 5 minutes.Drain water and keep spinach leaves aside.
    • Add spinach and green chillies into a blender / mixer and make puree to get about 2 cups and set aside.
    • Take 2 big onions,cut it quarterly, add into blender/mixer and make fine paste without adding water.
    • Make ginger garlic paste from from 6-8 garlic cloves and 1 ½ inch ginger, keep it aside.
    • Blend 2 large tomatoes in a blender/mixer to get 1 cup puree.

    For Making Gravy:

    • Heat oil and ghee in a kadai , add all the whole spices and saute till spices leaves aroma in oil.
    • Add prepared onion paste and fry well for 5 minutes on medium heat .
    • Now add in ginger garlic paste and fry till raw smell goes off , let the onion ginger garlic paste turn light brown.
    • Add chicken pieces and mix well with onion,ginger garlic paste and cook for 5 minutes.
    • Now add turmeric powder and ½ teaspoon salt ,mix well everything.
    • Close the kadai/pan ,with a lid and cook chicken till raw smell goes off and its water dries up.
    • Now add tomato puree, mix well everything .
    • Add chilli powder , coriander powder , jeera powder and garam masala , mix well everything.Let this be cooking on medium heat.
    • Add ¼ cup whisked curds and mix well everything. Continue to cook for 5 more minutes such that everything gets well incorporated .
    • Add spinach puree , blender rinsed water about ¾ cup ,stir in everything.
    • Once spinach puree is well mixed with chicken ,add in ½- ¾ teaspoon of salt .
    • Cover and cook till it starts to bubble.
    • Open the lid , turn off the heat , add lemon juice from half lemon. Garnish with coriander leaves.
    • Serve it hot along with Steamed Rice or Roti.

    Notes

    • You can add either curds or add cashew paste made from 10 soaked cashews
    • Can exclude adding water and make a semi coated  thick chicken gravy.

    Nutrition

    Calories: 187kcal

    Moong Dal Payasam

    Published : January 26, 2019 | Last Update on October 17, 2022 By Muktha

    moongal-payasam-image

    Moong Dal Kaskas Payasam is a delicious and a healthy dessert made with split yellow lentils, poppy seeds , coconut and jaggery. Gets ready under 30 minutes and it's healthy too. You can serve this as a dessert or pair with chana dal vada for a feast celebration.

    Payasa or Payasam is a semi liquid consistency dessert traditionally sweetened jaggery and flavored with cardamom powder.

    moongdal-payas--withcashews-cardamom--and-spoon
    [feast_advanced_jump_to]

    About this recipe

    Payasa (Payasam ) is a South Indian kheer made with rice, lentils and jaggery . For traditional and authentic payasam, jaggery is used as sweetener and not sugar.

    Payasam is a simple dessert made during festivals and religious ceremonies in South India.

    With split yellow lentils desserts like Moongdal Halwa and Moongdal Barfi are popular during festivals in North India and moving down to South , Jaggery Rice, Payasa and Sweet Pongal are commonly seen.

    In this recipe adding roasted poppy seeds and raw rice to Payasam , improves the texture and flavour of the desert . Addition of poppy seeds , makes you to get a good sound sleep. If you are sleep depreived then eat poppy seeds as it improves the quality , duration and tranquility of sleep.

    This moongdal payasam is

    • Easy to make
    • No monitoring
    • Basic ingredients
    • Healthy & Tasty
    • Quick & Simple

    Ingredients

    To make moongdal payasam , you need only few basic ingredents which are easily available in any Indian Kitchen pantry.

    moongdal-payasam-ingredients@palates-desire

    Moongdal -Yellow split lentils is the main ingredients to make Moongdal Payasam .

    Rice - We at home usually add rice as it gives texture and thickens payasa. You can use any variety of rice , short ot long grain rice.

    Poppy Seeds - If you get it in your kitchen pantry or stores , it's good. If not, you can skip. THis adds lot of flavour and thickness to payasam.

    Jaggery - I prefer to use organic powdered jaggery , but you can use jaggery blocks too. If using jaggery blocks , crush and soak it in water until it dissloves , filter and use it in the recipe.

    Others - For flavours cardamom and ginger powder are used. Also , you need ghee, cashews and raisins to make parappu payasam.

    Watch Video

    How to make Moong dal payasam

    Preparations

    Rinse and wash split yellow moong dal , soak for 10 -15 minutes.

    In pan, dry roast 1 tablespoon of raw rice for 2-3 minutes on low heat . Add fresh coconut and continue to roast until aroma wafts in air.

    Now add 1.5 tablespoon of poppy seeds and roast until , poppy seeds starts to splutter.

    dry-roast-spices

    Trasfer all roated ingredients into a bowl and add ¼ cup of warm water . Soak for 10 -15 minutes.

    soaking roasted spices in water

    Add ¼ cup of warm water to it and soak it for about 15 minutes.

    Add soaked coconut , poppyseeds , roasted rice alongh with water into a blender,

    Also add 3 green cardamom pods , ginger powder and blend to a smooth fine paste.

    rice-coconut-poppyseeds-paste

    To make Payasam

    In a pressure cooker, add 1 tablespoon of ghee/clarified butterand roast soaked moong dal on low heat for 5 minutes, till you get nice aroma.

    sauting-moongdal-in-ghee

    Add 1 cup of water and pressure cook for 2 whistles.

    pressure cook moong dal adding water

    When pressure releases on its own , remove lid and check if lentils are cooked to soft and should mash easily . If not cooked , cook until soft .

    yellow-lentils-cooked-softly

    Lightly mash moongdal ( yellow lentils) from backside of a spoon . It should not be completely mushy , it should just be mashed gently for about 50 %.

    mix-cooked-dal-with blend-paste

    Now add coconut-rice--poppyseeds-paste and powdered jaggery.

    add-powdered-jaggery

    Add 1.5-2 cups of water and stir well.

    add-water-mix-well-everything

    Bring it to gentle boil . When it starts to thicken , set aside from the stove.

    moongdal payasam coming to boil

    Bring it to boil, finally add fried raisins and cashews ,mix well everything and serve hot or warm ,topped with chopped nuts .

    frying cashews and raisins in ghee

    In a seasoning pan , heat 1 tablespoon of clarified bueer . Fry cashews and raisins and pour over the payasam. Mix well everthing and serve hot or warm.

    moongdal payasam with fried nuts and cashews

    Serve payasam hot or warm.

    Recipe

    moongdal-payasam-with-cashews-raisins
    5 from 3 votes

    Moong dal payasam recipe

    A traditional , healthy and tasty dessert made with yellow split lentils , fresh coonut and poppy seeds . Sweetened with jaggery and flavoured with cardamom powder.
    Prep Time5 minutes mins
    Cook Time25 minutes mins
    Total Time30 minutes mins
    Course: Dessert
    Cuisine: Indian
    Keyword: Gluten Free, South Indian
    Servings: 4 People
    Calories: 337kcal
    Author: Muktha H S

    Ingredients

    • ½ cup Split yellow Moong dal
    • 1 tablespoon Rice
    • 1.5 tablespoon Poppy Seeds
    • ¼ cup Fresh Coconut
    • ⅔ - ¾ cup Organic powdered Jaggery or as required
    • 3 no Green Cardamom seeds
    • ½ Tsp Dry ginger
    • 2 tablespoon Ghee/Clarified Butter
    • 2 tablespoon Fried Cashews and Raisins
    • 3 Cups Water,as required to adjust consistency

    Instructions

    Preparations

    • Rinse and wash split yellow moong dal , soak for 10 -15 minutes.
    • In pan, dry roast 1 tablespoon of raw rice for 2-3 minutes on low heat . Add fresh coconut and continue to roast until aroma wafts in air.
    • Now add 1.5 tablespoon of poppy seeds and roast until , poppy seeds starts to splutter.
    • Trasfer all roated ingredients into a bowl and add ¼ cup of warm water . Soak for 10 -15 minutes.
    • Add ¼ cup of warm water to it and soak it for about 15 minutes.
    • Add soaked coconut , poppyseeds , roasted rice alongh with water into a blender,
    • Also add 3 green cardamom pods , ginger powder and blend to a smooth fine paste.

    To make Payasam

    • In a pressure cooker, add 1 tablespoon of ghee/clarified butterand roast soaked moong dal on low heat for 5 minutes, till you get nice aroma.
    • Add 1 cup of water and pressure cook for 2 whistles.
    • When pressure releases on its own , remove lid and check if lentils are cooked to soft and should mash easily . If not cooked , cook until soft .
    • Lightly mash moongdal ( yellow lentils) from backside of a spoon . It should not be completely mushy , it should just be mashed gently for about 50 %.
    • Now add coconut-rice--poppyseeds-paste and powdered jaggery.
    • Add 1.5-2 cups of water and stir well.
    • Bring it to gentle boil . When it starts to thicken , set aside from the stove.
    • Bring it to boil, finally add fried raisins and cashews ,mix well everything and serve hot or warm ,topped with chopped nuts .
    • In a seasoning pan , heat 1 tablespoon of clarified buteer . Fry cashews and raisins and pour over the prepared payasam.
    • Serve payasam hot or warm.

    Video

    Notes

    • Payasa will be of semi liquid consistency neither thick nor thin, but you can adjust water as per your preferences .
     

    Nutrition

    Calories: 337kcal

    You may also like

    • rava-pongal-recipe
      Rava Pongal
    • sweet pongal recipe
      Sihi Pongal |Sweet Pongal
    • khara pongal recipe
      Khara Pongal
    • huggi anna recipe
      Huggi Anna | how to make Huggi

    Matar Paneer

    Published : January 24, 2019 | Last Update on September 29, 2022 By Muktha

    Matar Paneer

    Matar Paneer is one of the most regular yet classic North Indian recipe. This recipe turns out similar to the restaurant style matar paneer . The combination of cottage cheese , green peas and a smooth motley of tomatoes , onions and spices make this a supremely lip smacking curry. This is easy to make with no fancy ingredients .

    Matar Paneer

    Matar Paneer is a healthy , decadent Punjabi Dish that pairs up well with most of the Indian flat breads like Roti , Paratha ,Naan and Phulka . It goes well with Jeera rice also. As it is less time consuming , you can serve your clan with this delicious recipe during weekends. Though this recipe is my way of cooking Matar Paneer , the actual credits for measurements goes to the famous Indian food blogger Dassana Amit, you can find her family recipe of matar paneer here.

    Other Punjabi restaurant style recipes on blog are : Methi Matar Malai , Rajma Masala , Dal Makhani , Paneer Butter Masala , Chole pindi and Channa Masala

    RECIPE CARD FOR MATAR PANEER

    Recipe

    Matar Paneer
    5 from 1 vote

    Matar Paneer Recipe

    A Classic Punjabi Dish made with Cottage cheese and fresh Green Peas.
    Prep Time10 minutes mins
    Cook Time30 minutes mins
    Total Time40 minutes mins
    Course: Main Course
    Cuisine: North Indian
    Keyword: Punjabi
    Servings: 5 People
    Calories: 218kcal
    Author: Muktha H S

    Ingredients

    • 250 grams Paneer / Cottage Cheese
    • 1 cup Green Peas
    • ⅓ cup Onions finely chopped
    • ½ teaspoon Cumin Seeds
    • ½ teaspoon Red Chilli Powder
    • ½ teaspoon Garam Masala
    • ¼ teaspoon Turmeric Powder
    • ½ teaspoon Sugar / honey or as required
    • 1 tablespoon Fresh Cream
    • 2 tablespoon Coriander leaves chopped
    • 2 tablespoon Oil
    • 1 ½ teaspoon Salt or as required
    • ½ teaspoon Sugar / Honey
    • 1- 1 ½ cup water , as required to adjust the consistency

    For Masala Paste

    • 1 Cup Onion , about 2 Medium size onions
    • 1 Cup Tomatoes . about 2 large size
    • 2 no Green chillies
    • 1 inch ginger
    • 5-6 no garlic cloves
    • 1 tablespoon cashew bits / melon seeds
    • 2 no cloves
    • ½ inch cinnamon
    • 4 no Black Peppercorns
    • 1 teaspoon Coriander seeds
    • 2 tablespoon Coriander leaves

    Instructions

    • Bring water to boil and add in 1 cup of fresh green peas, boil and keep it aside.
    • Whilst , heat ½ - 1 teaspoon of oil in a kadai/pan , add paneer cubes and fry till it turns golden brown.
    • With the help of slotted spoon remove the paneer cubes and add in to water or buttermilk . Allow it to stand for 10-15 minutes. Discard water/buttermilk and set aside paneer cubes.
    • In a blender /mixer jar , add 1 cup chopped onions , 1 cup chopped tomatoes ,garlic , ginger , green chilli, cinnamon sticks , cloves , coriander seeds , black peppercorns, melon seeds/cashews and coriander leaves, blend to a smooth paste.
    • In a Kadai / Pan , heat 2 tablespoon of oil , add 1 teaspoon of jeera /cumin seeds and allow it to crackle.
    • Add in ⅓ cup of finely chopped onions and fry till it become brown.
    • Now add in the blended masala and fry well , till oil starts to release from the edges.
    • Add turmeric powder , chilli powder and garam masala , mix well everything .
    • Rinse mixer jar /blender with 1 cup water and add this water to the curry.
    • Add in salt , boiled green peas and continue to cook on medium heat.
    • Also add paneer cubes and gentle mix everything.
    • Close the lid and continue to cook for 5 minutes.
    • Now add fresh cream ,keep on simmer for 2-3 minutes . 
    • Turn off the heat, add sugar/honey, garnish with fresh coriander leaves.
    • Serve hot with any Indian Flat bread.

    Notes

    • You can add either cashews or melon seeds or both. I have used melon seeds , to cut down calories , using cashews gives a richer taste.
    • Sauteing Paneer and soaking in water , gives a good soft textured paneer. 

    Nutrition

    Calories: 218kcal

    How to make matar paneer

    Bring water to boil and add in 1 cup of fresh green peas, boil and keep it aside.

    Matar Paneer

    Whilst , heat 1 teaspoon of oil in a kadai/pan , add paneer cubes and fry till it turns golden brown.

    matar paneer

    With the help of slotted spoon remove the paneer cubes and add in to water or buttermilk . Allow it to stand for 10-15 minutes. Discard water/buttermilk and set aside paneer cubes.

    matar paneer

    In a blender /mixer jar , add 1 cup chopped onions , 1 cup chopped tomatoes ,garlic , ginger , green chilli, cinnamon sticks , cloves , coriander seeds , black peppercorns, melon seeds/cashews and coriander leaves, blend to a smooth paste.

    matar paneer

    In a Kadai / Pan , heat 2 tablespoon of oil , add 1 teaspoon of jeera /cumin seeds and allow it to crackle.

    matar paneer

    Add in ⅓ cup of finely chopped onions and fry till it become brown.

    matar paneer

    Now add in the blended masala and fry well , till oil starts to release from the edges.

    matar paneer

    Add turmeric powder , chilli powder and garam masala , mix well everything .

    matar paneer

    Rinse mixer jar /blender with  1 cup water and add this water to the curry.

    matar paneer

    When it comes to boil, add in salt , boiled green peas and continue to cook on medium heat.

    matar paneer

    Also add paneer cubes and gentle mix everything.

    matar paneer

    Close the lid and continue to cook for 5 minutes.

    matar_paneer

    Now add fresh cream ,keep on simmer for 2-3 minutes.

    matar Paneer

    Turn off the heat, add sugar/honey and garnish with fresh coriander leaves.

    matar paneer

    Serve hot with any Indian Flat bread or Jeera Rice.

    Matar Paneer

    Drumstick Sambar

    Published : January 23, 2019 | Last Update on July 23, 2022 By Muktha

    Drumstick sambar

    Drumstick Sambar is one of the delicious South Indian Sambar . Drumsticks also called as Nuggekai or moringa is a most common vegetable that is used in preparations of Sambar. In this recipe I have used only Drumsticks to make Sambar . But other vegetables like carrot , potato , brinjal and pumpkin can also be used in combination with Drumstick to make Sambar .

    Drumstick Sambar

    Drumsticks along with shallots (sambar onion ) makes a wonderful combination and sambar tastes delicious. Its very easy to make delicious sambar , provided you have a good Sambar Powder. The most important ingredient to make as tasty sambar is its sambar powder . You can dry roast the spices , instantly , grind to fine powder and use it or else can use readymade store bought Sambar Powder . I too have shared the recipe of easy homemade sambar powder , you can refer for making a small batch.

    Health Benefits:  Drumsticks are a boon for diabetics as they are known to reduce spiked blood sugar levels . Also it is high content in calcium and iron, promotes a healthy bone structure . Rich in B vitamins help breaking down the foods and make it easier to digest them smoothly .The vitamin C content helps stave off various infections, boosts immunity , relieves respiratory disorders and also helps in purifying blood. So add more drumsticks to your diet and make the most of it!

    Other Varieties of Sambar recipes on blog are : Massida Soppu Saaru , Urali Bassaru and also Tiffin Sambar .

    RECIPE CARD FOR DRUMSTICK SAMBAR

    Recipe

    Drumstick Sambar
    No ratings yet

    Drumstick Sambar

    Most Popular and a typical South Indian Sambar prepared with Drumsticks and Shallots.
    Prep Time15 minutes mins
    Cook Time30 minutes mins
    Total Time45 minutes mins
    Course: Main Course, Side Dish
    Cuisine: Indian, South India
    Keyword: Curries, Gluten Free
    Servings: 5 People
    Calories: 167kcal
    Author: Muktha H S

    Ingredients

    For Pressure cooking Dal

    • ¾ Cup Toor Dal
    • 2 cups Water
    • ½ teaspoon Turmeric powder
    • ½ teaspoon Oil

    For Sambar

    • ½ Cup Shallots / Sambar Onions , roughly sliced
    • 250 grams Drumsticks
    • 1 no Tomato large , finely chopped
    • 2 no Green Chillies
    • ¼ teaspoon Asafoetida
    • ½ teaspoon Turmeric Powder
    • 2 tablespoon Sambar Powder
    • ½ Cup Tamarind juice Extract from 1 tablespoon Tamarind
    • ½ tablespoon Oil
    • ½ teaspoon Mustard seeds
    • 2 sprigs Curry leaves
    • 1 ½ teaspoon Salt or as required
    • ¼ teaspoon Methi Seeds
    • ½ teaspoon Jaggery
    • 1.5 - 2 Cup Water or as required to adjust the consistency

    For Tempering

    • 1 tablespoon Clarified Butter / Ghee
    • ½ teaspoon Mustard seeds
    • ½ teaspoon Jeera Seeds ,optional
    • 2 Sprigs Curry Leaves
    • 1-2 no Dry Red Chilli
    • 1 pinch Asafoetida

    Instructions

    • Rinse and wash ¾ cup toor dal with water twice.
    • Add 2 cups of water , ½ teaspoon turmeric powder and ½ teaspoon oil and pressure cook for 4-5 whistles.
    • Allow pressure to settle down on its own, dal should be cooked completely , lightly mash and keep aside.
    • Soak 1 gooseberry size tamarind in ½ cup hot water for 15-20 minutes , extract the juice and set aside.
    • Whilst ,heat ½ tablespoon of oil in a broad pan or vessel ,add ½ teaspoon mustard seeds , ¼ teaspoon methi seeds allow it to crackle and add 2 sprigs curry leaves .
    • Now add ½ cup roughly sliced shallots and fry for 3-4 minutes till shallots looks transparent. If using regular onion , use 1 medium size onion, chopped.
    • Add 1 chopped tomato and 2-3 slit green chillies and continue to saute for 2-3 minutes.
    • Clean the drumsticks ,trim the edges, remove the fibre and cut into 21/2 -3 inch long . Add drumsticks and saute for 5 minutes.
    • Now add ½ teaspoon turmeric powder , ¼ teaspoon asafoetida , 2 tablespoon sambar powder and mix well.
    • Now add in ½ cup of extracted tamarind juice and mix well .
    • Add salt and bring it to boil.Once it comes to boil , add in cooked dal ,1.5 cups of water and mix well.
    • Add ½ teaspoon of jaggery powder and bring it to boil.Turn off the heat and add in fresh chopped coriander leaves .
    • In a season pan ,heat 1 tablespoon of Ghee, add ½ teaspoon of mustard seeds , ½ teaspoon jeera seeds , curry leaves ,dry red chilli and pinch of Asafoetida , mix well and pour it over the prepared sambar.
    • Serve it hot along with steamed rice ,papad and pickle.

    Nutrition

    Calories: 167kcal

    Step by step directions for making Drumstick Sambar:

    Rinse and wash ¾ cup toor dal with water twice.

    drumstick sambar

    Add 2 cups of water , ½ teaspoon turmeric powder and ½ teaspoon oil and pressure cook for 4-5 whistles.

    Drumstick Sambar

    Allow pressure to settle down on its own, dal should be cooked completely , lightly mash and keep aside.

    Drumstick Sambar

    Soak 1 gooseberry size tamarind in ½ cup hot water for 15-20 minutes , extract the juice and set aside.

    Drumstick Sambar

    Heat ½ tablespoon of oil in a broad pan or vessel ,add ½ teaspoon mustard seeds , ¼ teaspoon methi seeds allow it to crackle and add 2 sprigs curry leaves .

    Drumstick Sambar

    Now add ½ cup roughly sliced shallots and fry for 3-4 minutes till shallots looks transparent.

    Drumstick Sambar

    Add 1 chopped tomato and 2-3 slit green chillies and continue to saute for 2-3 minutes.

    Drumstick Sambar

    Clean the drumsticks ,trim the edges, remove the fibre and cut into 21/2 -3 inch long  . Add drumsticks and saute for 5 minutes.

    Drumstick Sambar

    Now add ½ teaspoon turmeric powder , ¼ teaspoon asafoetida , 2 tablespoon sambar powder and mix well.

    Drumstick Sambar

    Now add in ½ cup of extracted tamarind juice and mix well .

    Drumstick Sambar

    Add salt and bring it to boil.

    Drumstick Sambar

    Once it comes to boil , add in cooked dal ,1.5 cups of water and mix well.

    Drumstick Sambar

    Add ½ teaspoon of jaggery powder and bring it to boil.Turn off the heat and add in fresh chopped coriander leaves .

    Drumstick Sambar

    In a season pan ,heat 1 tablespoon of Ghee,  add ½ teaspoon of mustard seeds , ½ teaspoon jeera seeds , curry leaves ,dry red chilli and pinch of Asafoetida , mix well and pour it over the  prepared sambar.

    Drumstick Sambar 

    Serve it hot along with steamed rice ,papad and pickle.

    Drumstick sambar

    Sambar Powder

    Published : January 22, 2019 | Last Update on July 23, 2022 By Muktha

    Sambar Powder

    Sambar Powder is a blend of spices and lentils used in preparing authentic South Indian Sambar. It is very easy to make and comes handy while preparing Sambar . Most of the Sambar powder , uses the same ingredients with addition or deletion of 1-2 ingredients. The recipe which I have shared here is similar to that of MTR Sambar Powder .

    Sambar Powder

    I often prepare this powder at home itself using dry mixer jar . The recipe yields about 75 grams of sambar powder , which can be doubled , tripled or scaled up to kilograms. That's how it is prepared at my home. But I had few requests from my readers to prepare Sambar powder at home in small quantities for regular use, so I'm posting this recipe. Also the main key to any Sambar is its , Sambar powder , if it is fresh , then sambar tastes utterly delicious and aromatic. Hence I do it in small quantities , so that it stays fresh and aromatic till it lasts.

    Using this powder , any kind of Sambar can be prepared . Either mixed vegetables sambar or else single vegetable sambar can be prepared. In my future posts I'll share 2-3 different types of sambar recipes by making use of this powder . Bassaru and Masidda Soppu saaru also makes use of this Sambar powder.

    Also ,other DIY recipes on blog are: Biryani Masala Powder , Tandoori Masala Powder , Puliyogare gojju , Bisi Bele Bath Powder , Tea Masala Powder and Dry Chutney Powder .

    RECIPE CARD FOR SAMBAR POWDER:

    Recipe

    Sambar Powder
    No ratings yet

    Sambar Powder

    Sambar Powder is a blend of spices used to make authentic South Indian Sambar.
    Prep Time7 minutes mins
    Cook Time10 minutes mins
    Resting Time45 minutes mins
    Total Time1 hour hr 2 minutes mins
    Course: Condiments, DIY
    Cuisine: Indian, South India
    Keyword: Basic, DIY, South Indian
    Servings: 70 grams
    Author: Muktha H S

    Ingredients

    • 30 grams Coriander Seeds ,about ½ cup
    • 18-20 no's Guntur red chillies
    • 8 no's Byadgi Red Chillies
    • 1 teaspoon Chana Dal
    • 1 teaspoon Urad Dal
    • 1 teaspoon Toor Dal
    • 11/2 teaspoon Jeera/ Cumin Seeds
    • ½ teaspoon Methi Seeds
    • 2 Sprigs Curry Leaves
    • ½ Inch Cinnamon Sticks
    • 1 teaspoon Turmeric Powder
    • ½ teaspoon Hing/ Asafoetida

    Instructions

    • Dry roast ½ cup , about 30 grams of coriander seeds on a skillet till aroma wafts. Transfer it to a plate and set it aside.
    • Now dry roast about 25 grams of dry red chillies, around 18 Guntur Chillies (Spicy Chillies) and around 8-10 Byadgi Dry red chillies . Roast it on low heat, till you get the pungent smell. Transfer it to the plate and set aside.
    • Dry roast 1 teaspoon Chana Dal , 1 teaspoon Urad dal and 1 teaspoon Toor dal slowly on a low heat one after the other preferably , till it turns golden brown (Don't burn the spices .Transfer the roasted dal to plate and keep it aside.
    • Dry roast methi seeds followed by jeera seeds , till jeera seeds starts to crackle.Transfer to the plate with coriander seeds and red chillies, set aside.
    • Dry roast 2 sprigs of curry leaves and ½ inch cinnamon stick and transfer it to the plate.
    • Keep the roasted spices plate under sun for 30 - 60 minutes.
    • Take all the dry roasted spices in a dry mixer jar , add turmeric powder and hing/asafoetida and blend to fine powder.(If doing it in a large quantity can mill it a Flour Mill).
    • Store it in a airtight glass jar and use it as and when required.

    Notes

    • If you are doing for large quantities , then separately dry roast, each ingredient .
    • As it is for less quantity , I have dry roasted all dal's together. 
    • You can also dry roast ½ tablespoon of raw rice and blend it , its optional.

    Step by Step directions on making of Sambar Powder:

    Dry roast ½ cup , about 30 grams of coriander seeds on a skillet till aroma wafts. Transfer it to a plate and set it aside.

    sambar powder   

    Now dry roast about 25 grams of dry red chillies, around 18 Guntur Chillies (Spicy Chillies) and around 8-10 Byadgi Dry red chillies . Roast it on low heat, till you get the pungent smell. Transfer it to the plate and set aside.

    Sambar powder

    Dry roast 1 teaspoon Chana Dal , 1 teaspoon Urad dal and 1 teaspoon Toor dal slowly on a low heat one after the other preferably  , till it turns golden brown (Don't burn the spices , my spices burnt while clicking the pic , changed it made a new batch again  : (  )

    sambar powder

    If you are doing for large quantities , then separately dry roast , as it is for less quantity , I have dry roasted all dal's together. Transfer the roasted dal to plate and keep it aside. 

    Dry roast methi seeds followed by jeera seeds , till jeera seeds starts to crackle.Transfer to the plate with coriander seeds and red chillies, set aside.

    sambar powder

    Dry roast 2 sprigs of curry leaves and ½ inch cinnamon stick  and transfer it to the plate.

    sambar powder

    Keep the roasted spices plate under sun for 30 - 60 minutes.

    sambar powder

    Take all the dry roasted spices in a dry mixer jar , add turmeric powder and hing/asafoetida and blend to fine powder.(If doing it in a large quantity can mill it a Flour Mill)

    sambar powder

    Store it in a airtight glass jar and use it as  and when required.

    Sambar Powder

    Methi Matar Malai

    Published : January 21, 2019 | Last Update on September 29, 2022 By Muktha

    Methi Malai Matar

    Methi Matar Malai is a flavourful aromatic Punjabi Dish with richness of cream and cashews. As the name indicates Methi -Fenugreek leaves , Matar - Green peas and Malai - Fresh cream are the 3 main ingredients in the recipe.

    Methi Matar Malai is a winter special dish as fresh fenugreek leaves and green peas are in season. A slight bitterness of methi is balanced with sweet tone of green peas. Also the sweetness from cashews , onions and cream brings balance and flavours to the dish.

    Methi Malai Matar

    Health Benefits: Nutritionally speaking Fenugreek is rich in fiber , protein, magnesium and manganese. Fibre content in fenugreek seeds improves functioning of insulin . As it is fiber rich it can help with several gastrointestinal issues. Also studies says that fenugreek can reduce production of bad (LDL) cholesterol and triglycerides. Hence it helps to maintain heart health.

    Green Peas are excellent source of protein , fiber and antioxidants . Also green peas are fairly low in calories and is most suited for weight loss and weight management. Protein works together with fiber to slow digestion and promote feelings of fullness . Green Peas have a relatively low glycemic index (GI), which is a measure of how quickly your blood sugar rises after eating a food. The low glycemic index (GI) rank of green peas makes them a diabetic-friendly food. Overall, green peas are an incredibly healthy food to incorporate into your diet.

    Eating anything seasonal is good and provides with all the necessary nutritional requirements. Choose your food wisely as per the season to make your body adapt to the season and improve immunity. Winter veggies based dishes on blog are Cholai Ka Saag , Carrot Halwa , Beetroot egg Bhurji , Mooli Paratha , Aloo Methi , Paneer Matar Masala and Methi Dal.

    You may also be interested in other restaurant style recipes like : Pindi Chole , Rajma Masala , Dal Makhani , Palak Paneer , Shahi Paneer , Chana Masala, Dry Peas Masala and Paneer Butter Masala.

    How to make Methi Matar Malai

    Clean methi leaves , remove stems ,rinse and wash well,sprinkle some salt , wash and chop greens and keep it aside.

    Methi Matar Malai

    Keep water in a pot , bring it boil . Add 1 cup fresh green peas,½ teaspoon salt and boil the green peas. Once boiled, drain water and set it aside.

    Methi Matar Malai

    Whilst ,in a Pan/ Kadai ,heat ½ tablespoon of oil add 1 teaspoon cumin seeds , 1 clove , ½ inch cinnamon stick , 1 green cardamom seeds , 3-4 black peppercorns and fry 2 minutes.

    Methi Matar Malai

    Add onion, ginger , garlic , green chilli and fry well till raw smell goes off and onions look translucent.

    Methi Matar Malai

    Now add in 1 teaspoon Poppy seeds and 2 tablespoon of cashew pieces, mix well and and saute for 2-3 minutes.

    Methi Matar Malai

    Turn off the heat and allow it to cool . Once it cools down , transfer it into a blender or mixer jar and blend to a smooth paste.

    Methi Matar Malai

    Take the same pan/kadai, heat 1 tablespoon of oil/clarified butter  ,add in the onion cashew paste .

    Methi Matar Malai

    Fry well for 4-5 minutes on a medium heat , till oil starts to release from edges.

    Methi Matar Malai

    Now add in chopped methi/fenugreek leaves and mix well and cook till methi wilts and starts to release water , saute for a 3-4 minutes.

    Methi Matar Malai

    Add ½-3/4 cup of blender /mixer rinsed water and mix well.

    Methi Matar Malai

    Now add ¼ cup of milk  ,salt and mix well everything. Keep the on the low flame.

    Methi Matar Malai

    Add in the cooked green peas ,mix well and continue to cook.

    Methi Matar Malai

    Close the lid and cook for 5 minutes .

    Methi Matar Malai

    Now open the lid and add in fresh cream ,mix well everything. Let the flame be on simmer for 3-5 minutes.

    Methi Matar Malai

    Add ½ teaspoon of sugar , pinch of nutmeg powder, mix well everything. Turn off the heat ,garnish with coriander leaves .

    Methi Matar Malai

     Serve hot with Naan ,Tandoori Roti  or Phulka.

    methi malai matar

    Recipe

    Methi Malai Matar
    5 from 2 votes

    Methi Matar Malai

    Methi Matar Malai is a flavourful aromatic Punjabi Dish with richness of cream and cashews. 
    Prep Time10 minutes mins
    Cook Time30 minutes mins
    Total Time40 minutes mins
    Course: Main Course
    Cuisine: North Indian
    Keyword: Punjabi
    Servings: 4 People
    Calories: 232kcal
    Author: Muktha H S

    Ingredients

    • 1 ½ cup Methi/ fenugreek leaves, roughly chopped
    • 1 cup Green peas , boiled
    • 1 no Onion , medium size
    • 4-5 no Garlic cloves
    • 1 inch Ginger
    • 2 no Green Chillies
    • 1 no Green cardamom Seeds
    • 3-4 no's Black Peppercorns
    • 1 teaspoon Jeera / Cumin Seeds
    • 1 no Clove
    • ½ inch Cinnamon Stick
    • ¼ cup Fresh Cream , 30 % fat
    • 2 tablespoon Cashew pieces
    • 1 teaspoon Poppy Seeds /Kas kas
    • ¼ Cup Milk
    • ½ -¾ Cup Water
    • 1.5 tablespoon Oil
    • 1- 1.5 teaspoon Salt or as required
    • ½ teaspoon Sugar
    • 1 pinch Nutmeg powder ,optional
    • 1 tablespoon Coriander leaves , chopped

    Instructions

    • Clean methi leaves , remove stems ,rinse and wash well,sprinkle some salt , wash and chop greens and keep it aside.
    • Keep water in a pot , bring it boil . Add 1 cup fresh green peas,½ teaspoon salt and boil the green peas and set it aside.
    • Whilst ,in a Pan/ Kadai ,heat ½ tablespoon of oil add 1 teaspoon cumin seeds , 1 clove , ½ inch cinnamon stick , 1 green cardamom seeds , 3-4 black peppercorns and fry 2 minutes.
    • Add onion, ginger , garlic , green chilli and fry well till raw smell goes off and onions look translucent.
    • Now add in 1 teaspoon Poppy seeds and 2 tablespoon of cashew pieces, mix well and saute for 2-3 minutes.
    • Turn off the heat and allow it to cool . Once it cools down , transfer it into a blender or mixer jar and blend to a smooth paste.
    • Take the same pan/kadai, heat 1 tablespoon of oil/clarified butter ,add in the onion cashew paste and fry well for 4-5 minutes on a medium heat , till oil starts to release from edges.
    • Now add in chopped methi/fenugreek leaves and mix well and cook till methi wilts and starts to release water , saute for a 3-4 minutes.
    • Add ½ cup of blender /mixer rinsed water and mix well.
    • Now add ¼ cup of milk ,salt and mix well everything. Keep the flame on sim.
    • Add in the boiled green peas ,mix well and continue to cook.
    • Close the lid and cook for 5 minutes , now open the lid and add in fresh cream ,mix well everything. Let the flame be on simmer for 3-5 minutes.
    • Add ½ teaspoon of sugar , pinch of nutmeg powder, mix well everything. Turn off the heat ,garnish with coriander leaves .
    • Serve hot with Naan ,Tandoori Roti or Phulka.

    Notes

    • If methi leaves are bitter , sprinkle some salt over the methi leaves set aside for 15 minutes , squeeze the excess water from leaves and use it.
    • For variations , you can use almonds or melon seeds in place of cashews. 
    • You can skip milk and increase the cream , to make a less calorie version , I have reduced fresh cream and cashews. 

    Nutrition

    Calories: 232kcal

    Murmura Upma | Puri Uppittu

    Published : January 18, 2019 | Last Update on September 29, 2022 By Muktha

    Murmura Upma | Puri Uppittu recipe with step by step photos . Puri uppittu is a tasty low calorie evening tiffin prepared by tempering puffed rice . Its one of the quick and easy recipe to satiate your 5:00pm cravings.

    It's simple to make and tastes good along with evening coffee/ tea. There is no much recipe here , it's very similar to making Poha.

    Murmura Upma | Puri Uppittu
    [feast_advanced_jump_to]

    About this recipe

    Puffed rice aka murmura is very low in calories. And its on of the most easily available ingredient in any Indian households. For a quick and easy evening tiffin , this recipe is very apt.

    To make murmura upma , give a quick rinse to murmura and keep in colander for extra water to drip off. In a pan , heat oil, add all tempering ingredients, onions ,green chillies and saute it .Lastly, at the end add freshly grated coconut , squeeze lime juice and garnish with chopped coriander leaves. Its very quick and gets ready within 15 minutes from start to end.

    Why you need to try Murmura upma?

    • Its simple and easy to make with basic ingredients.
    • Low in calories and pretty filling as a evening tiffin.
    • Takes just 15 minutes
    • Tastes good with filter coffee or Masala Chai
    • Helps to have light dinner

    The basic idea of having a filling and tasty evening tiffin between 3:30pm to 5:30pm is to have light dinner . Also having homemade fresh evening tiffin along with a cup of filter coffee/ masala Chai , doesn't make us to crave for high fat and sugary food. Which in turn will make you more Healthier , Happier and Slimmer .

    Few more puffed rice murmura recipe on blog are murmura ladoo and churmuri

    Step by step directions to make Murmura Upma| Puri Uppittu :

    Take murmura in a colander and rinse and wash . Keep it aside in a colander for extra water to drip.

    Murmura Upma | Puri Uppittu     

    In a pan, heat 1.5 tablespoon of oil , add mustard seeds , jeera/cumin seeds , split urad dal ,chana dal , curry leaves and saute.

    Murmura Upma | Puri Uppittu

    Add in green chillies , chopped onions and fry till onions turns translucent. Now add ¼ teaspoon of turmeric powder and mix well.

    Murmura Upma | Puri Uppittu

    Add washed murmura and mix it well on medium to high heat for 3 minutes. 

    Murmura Upma | Puri Uppittu

    Adjust salt , as puffed rice will be having salt already. Turn off the heat , add freshly  grated coconut .

    Murmura Upma | Puri Uppittu

    Add chopped coriander leaves and lime juice , mix well and serve.

    Murmura Upma | Puri Uppittu

    Serve hot  along with a cup of hot Masala Chai or Filter coffee.

    Murmura Upma | Puri Uppittu

    Recipe

    Murmura Upma | Puri Uppittu
    No ratings yet

    Murmura Upma | Puri Uppittu

    Murmura Upma - is a tasty low calorie tiffin recipe prepared with puffed rice
    Prep Time5 minutes mins
    Cook Time10 minutes mins
    Total Time15 minutes mins
    Course: Snack
    Cuisine: Indian
    Keyword: Tiffin
    Servings: 3 People
    Calories: 141kcal
    Author: Muktha H S

    Ingredients

    • 5 cups Murmura / Puffed rice
    • 2 no Onion , finely chopped
    • 2 no Green chilli , finely chopped
    • 2 Sprigs curry leaves
    • ¼ teaspoon Turmeric Powder
    • 1.5 tablespoon cooking oil
    • ½ teaspoon Mustard Seeds
    • ½ teaspoon Jeera Seeds / Cummin Seeds
    • 1 teaspoon Chana Dal
    • 1.5 teaspoon Split Urad Dal
    • 2 tablespoon fresh grated coconut
    • 1 tablespoon fresh coriander leaves chopped
    • 1 teaspoon Lime Juice squeezed
    • ½ teaspoon Salt or as required

    Instructions

    • Take murmura in a colander and wash it for 30 seconds -1 minutes . Keep it aside for extra water drip.
    • In a pan, heat 1.5 tablespoon of oil , add mustard seeds , jeera/cumin seeds , split urad dal ,chana dal , curry leaves and saute.
    • Add in green chillies , chopped onions and fry till onions turns translucent. Now add ¼ teaspoon of turmeric powder and mix well.
    • Add washed murmura and mix it well on medium to high heat for 3 minutes. Adjust salt , as puffed rice will be having salt already.
    • Turn off the heat , add freshly grated coconut , chopped coriander leaves and lime juice.
    • Serve hot along with a cup of hot Masala Chai or Filter coffee.

    Nutrition

    Calories: 141kcal

    Similar Recipes

    • cornflakes-upma-with lemon
      Cornflakes upma | how to make cornflakes upma
    • Bread Upma
      Bread Upma Recipe
    • Savoury Bread Toast
      Savoury Bread Toast
    • vegetable-diet-poha
      Vegetable Poha | Diet Poha

    Gobi Masala Dosa

    Published : January 17, 2019 | Last Update on July 23, 2022 By Muktha

    Gobi masala Dosa

    Gobi Masala Dosa is a masala dosa recipe with step by step images. In gobi Masala dosa stuffing is made out of cauliflower. Dosa needs no explanation , as it famous world wide . When there is a prefix Masala with Dosa , it refers to the kind of filling that is placed inside the Dosa. Basically Dosa is a rice and dal combination , overnight fermented batter. A regular Masala Dosa is one with Potato filling. So depending on the Dosa filling various names like Gobi Masala Dosa , Paneer Masala Dosa , Schezwan Masala Dosa and Cheese Dosa comes to existence.

    Gobi masala Dosa

    Dosa is regular breakfast in any South Indian home . One may see varieties of Dosa like Mysore Masala Dosa , Set Dosa , Methi | Vendhaya Dosa , Rava Dosa ,Paper Dosa, Neer Dosa , Adai and Pesarattu . I often do all the varieties of Dosa for breakfasts but never thought of clicking the pictures. As there was ,requests from many , thought of posting a Dosa Recipe. I'll share all the Dosa varieties recipes soon.

    At home , we prepare different kind of batter for making different Dosa's. Masala Dosa should be crispy from outside and soft inside. I have shared the Masala Dosa Batter recipe in Mysore Masala Dosa Post . Here I'm sharing the recipe of Gobi Masala / Cauliflower Masala that is used as a filling for Gobi Masala Dosa.

    Gobi Masala Dosa

    Other South Indian Breakfast recipes on blog are : Pesarattu , Instant Oats Dosa , Rava Idli ,Medu Vada , Instant Paddu , Pongal , Bisi Bele Bath , Poori Saagu , Lemon Rice and Puliyogare .

    RECIPE CARD FOR GOBI MASALA DOSA

    Recipe

    Gobi Masala Dosa
    5 from 1 vote

    Gobi Masala Dosa

    Gobi Masala Dosa - Dosa is prepared with regular masala dosa batter and has a delicate spicy cauliflower filling.
    Prep Time10 minutes mins
    Cook Time30 minutes mins
    Total Time40 minutes mins
    Course: Breakfast
    Cuisine: Indian, South India
    Keyword: South Indian, Street Food
    Servings: 5 Dosa
    Calories: 189kcal
    Author: Muktha H S

    Ingredients

    • 5 cups Masala Dosa Batter
    • 2 cups Cauliflower small florets
    • 2 no Onions , medium size , finely chopped
    • 1 no Tomato , regular size , finely chopped
    • 1 no Potato , medium size ,boiled and mashed
    • 2 no Green chillies
    • 1 inch Ginger
    • 6-7 no Garlic Cloves
    • 5-6 no Whole cashews
    • ¼ teaspoon Turmeric Powder
    • ½ teaspoon Red chilli powder
    • 1 teaspoon Coriander powder
    • ½ teaspoon Fennel Seeds Powder
    • ½ teaspoon Garam Masala
    • 1.5 tablespoon Cooking Oil
    • 1 teaspoon Salt or as required
    • ½- ¾ Cup Water
    • 2 tablespoon Coriander leaves Chopped
    • Ghee / Oil for roasting Dosa , as required

    Instructions

    Preparations

    • Clean and cut the cauliflower , separate into small florets about 2 cups and set aside.Bring water to rolling boiling and add cauliflower florets.
    • Add ¼ teaspoon turmeric water and ½ teaspoon salt , cook for 2 minutes and turn off the heat.
    • Using a colander drain all water and keep the cauliflower florets aside.
    • Soak 5 cashews in little water for 10 minutes , drain water and blend cashews into fine paste.
    • Boil 1 medium size potato , peel skin and mash into very smooth and set aside.
    • In a blender or mixer jar , blend 2 green chillies , 1 inch ginger and 6-7 medium size garlic cloves into fine paste , keep it aside.

    To make Gobi/ Cauliflower Filling

    • In a pan , heat 1.5 tablespoon of oil, add ¾ cup finely chopped onions, fry them till translucent.
    • Add in prepared green chilli ,ginger and garlic paste , fry till raw smell goes off.
    • Now add in ½ cup finely chopped tomatoes, mix well.
    • Add in turmeric powder , red chilli powder , coriander powder , fennel powder and garam masala , mix well everything .
    • Now add blanched cauliflower florets and mix well.
    • Take about ½ cup of water and add into the the masala , add salt and continue to cook on medium heat.
    • Add in the prepared cashew paste , blender rinsed water ( about ¼ cup) and mix well.
    • Now add in well mashed boiled potato, mix well everything .
    • Close the lid and cook on a medium heat ,till water gets absorbed and looks like a thick gravy. ( It still thickens once after it cools down)
    • Turn off the heat , add chopped coriander leaves and mix well.

    Preparing Dosa and Assembling

    • Heat a Dosa Griddle / Non Stick tawa , Pour ladleful of batter and swirl and spread the batter ,to make round Dosa.
    • Drizzle a spoonful of ghee / oil to roast dosa and allow it to cook on medium to high heat.
    • Once it's cooked completely and base looks crispy and golden brown colour , take ⅓ cup of gobi filling , place at center and spread to half of the dosa
    • Fold the Dosa and serve hot with Chutney and Sambar.

    Nutrition

    Calories: 189kcal

    Step by Step Directions for Making of Gobi Masala Dosa:

    Preparations:

    Clean and cut the cauliflower , separate into small florets and set aside.

    Gobi Masala Dosa

    Bring water to rolling boiling and add cauliflower florets. Add ¼ teaspoon turmeric water and ½ teaspoon salt.

    Gobi Masala Dosa

    Cook for 2 minutes, once it comes to boil turn off the heat.

    Gobi Masala Dosa

    Using a colander drain all water and keep the cauliflower florets aside.

    Gobi Masala Dosa

    Soak 5 cashews in little water for 10 minutes , drain water and blend cashews into fine paste.

    Gobi Masala Dosa

    Boil 1 medium size potato , peel skin and mash into very smooth and set aside.

    Gobi Masala Dosa

    In a blender or mixer jar , blend 2 green chillies , 1 inch ginger and 6-7 medium size garlic cloves into fine paste , keep it aside.

    Gobi Masala Dosa

    To make Gobi Filling:

    In a pan , heat 1.5 tablespoon of oil, add ¾ cup finely chopped onions, fry them till translucent.

    Gobi Masala Dosa

    Add in prepared green chilli ,ginger and garlic paste , fry till raw smell goes off.

    Gobi Masala Dosa

    Now add in ½ cup finely chopped tomatoes, mix well.

    Gobi Masala Dosa

    Add in turmeric powder , red chilli powder , coriander powder , fennel powder and garam masala , mix well everything .

    Gobi Masala Dosa

    Now add blanched cauliflower florets  and mix well.

    Gobi Masala Dosa

    Take about ½ cup of water and add into the the masala , add salt and continue to cook on medium heat.

    Gobi Masala Dosa

    Add in the prepared cashew paste , blender rinsed water ( about ¼ cup) and mix well.

    Gobi Masala Dosa

    Now add in well mashed boiled potato, mix well everything .

    Gobi Masala Dosa

    Close the lid and cook on a medium heat ,till water gets absorbed and looks like a thick gravy. ( It still thickens once after it cools down)

    Gobi Masala Dosa

    Turn off the heat , add chopped coriander leaves and mix well.

    Gobi Masala Dosa

    Make Dosa and Assemble:

    Heat a Dosa Griddle / Non Stick tawa , Pour ladleful of batter and swirl and spread the batter ,to make round Dosa. 

    Gobi Masala Dosa

    Close the lid and cook for a minute , open the lid drizzle a spoonful of ghee / oil to roast dosa and allow it to cook on medium to high heat.

    Gobi Masala Dosa

    Once its cooked to crispy golden brown , take ¼ cup of gobi filling and place at center .

    Gobi Masala Dosa

    Fold the Dosa and serve hot with Chutney and Sambar.

    Gobi Masala Dosa

    Til Gul Ladoo

    Published : January 16, 2019 | Last Update on July 30, 2022 By Muktha

    til-gul-ladoo

    Til Gul Ladoo is a sweet made with just 2 ingredients sesame seeds and jaggery but other ingredients are add ons and are truly optional. This sesame seeds energy balls are nutritious and gets ready under 30 minutes.

    Til ke laddu or Til gud ladoo are the different names given to this winter special energy balls which are popular during harvest festival in India.

    And also if you are exclusively looking for winter special ladoo then you must try this Moringa Ladoo . OMG , these ladoo's are awesome ; it's just like adding nutritious supplement into your diet.

    til-gul-ladoo
    [feast_advanced_jump_to]

    About this recipe

    Til gul ladoo is made on occasion of harvest festival in India . Sesame seeds and Jaggery are the main ingredients used to make this Ladoo. You can also use add on's like roasted peanuts and dry coconut to get extra crunchy and taste , but any how it's optional.

    Til Gul Ladoo is a Maharashtrian sweet . It is exchanged with family and friends on the day of Makara Sankranti , with a saying " Til Gul ghya , goad goad bola " which means " Accept TiGul and Speak Sweat " .

    Irrespective of region , harvest festival is celebrated across India with different names like Makar Sankranti ,Pongal, Bihu , Lohri and Uttarayan . Lohri is essentially a festival dedicated to fire and the sun god. It is the time when the sun transits the zodiac sign Makar (Capricorn), and moves towards the north.

    As it is a traditional time to harvest Sugarcane ; Jaggery and sugarcane are widely exchanged on the festive day . Munchies likes sesame, peanuts , dry coconut along with jaggery are associated with the festival .

    In winter , sesame , peanut ,dry coconut along with jaggery keeps us warm within . Hence these winter foods are exchanged during this festival.

    Along with Sesame Ladoo other recipes which are regular on Sankranti festival are Khara Pongal and Chakkare Pongal . Do find few of the best Sankranti recipe collections here

    Nutritional Benefits

    Sesame is very nutritious . Its calcium and mineral rich, which is great for bones. It reduces inflammation and improves fertility, hence its given to girls when they reach menarche . Also its essential fatty acids are good for cardiovascular health . As its low on GI , improves insulin sensitivity . So adding Til to regular diet , has many health benefits.

    Ingredients

    Though only 2 main ingredients are used to make this til laddu , I have used some peanuts and dry coconut for crunchy taste . And also flavored with some spices which is optional and you can totally skip if it's unavailable.

    til laddu ingredients

    Sesame Seeds - Try to use organic sesame seeds ,these seeds are creamish in color , unpolished and as that typical nutty taste when compared with nylon sesame seeds . Where as Nylon sesame seeds are refined and has nice white color. Making til ladoo with nylon sesame seeds makes it look really beautiful but will be low in nutrients and taste. Choice is up to you ,use whichever is available.

    Peanuts and Dry coconut - I recommend using it as I find nutty tasty of sesame seeds overpowering . Adding peanuts adds some crunch and balances the flavors as well.

    Jaggery Powder - I have used organic jaggery powder , depending on the color of the jaggery powder , you get a lighter or darker shade ladoo's . Always buy organic jaggery powder from known sources.

    Flavors - I have used cardamom powder , dry ginger powder and pinch of nutmeg . You can use only cardamom powder and skip other two. As I love these flavors together , I prefer to use .

    Water- few tablespoon of water is required to make jaggery syrup .

    Clarified butter - I recommend using 1 tablespoon of clarified butter in jaggery syrup to make the process of making syrup fail proof.

    Top Tip

    Use clarified butter /ghee while making a jaggery syrup , this helps not to solidify jaggery syrup quickly and helps to bind sesame balls easily.

    Watch Video

    How to make Til Gul Ladoo:

    In a pan or iron griddle ,dry roast ½ cup of regular sesame seeds( cream colour ) on a low heat ,till it starts to crackle. Once it crackles , transfer it to plate and keep it aside. 

    Til Gul Ladoo

    In the same pan dry roast ¼ cup peanuts , until peanuts becomes crunchy and gets dark brown spots. Remove from the pan and set it aside to cool.

    Til Gul Ladoo

    Again , in the same pan continue to dry roast , ¼ cup of dry coconut on a low heat until it starts to change colour to light golden brown. Turn off the heat and keep it aside to cool.

    Til Gul Ladoo

    In a blender / mixer jar , add dry roasted peanut and dry coconut . Just blitz for a 5 seconds to get a coarse powder.

    Til Gul Ladoo

    Now take a wide pan ,add sesame seeds , powdered groundnuts and dry coconut .

    Add in ¼ teaspoon elaichi/ cardamom powder ,pinch of nutmeg powder (optional) , ¼ teaspoon dry ginger powder (optional) and mix well everything and set it aside.

    Til Gul Ladoo
    Making Jaggery Syrup:

    Take ½ cup of jaggery powder in a sauce pan / pot , add 3 tablespoon of water and 1 tablespoon of clarified butter /ghee.

    Til Gul Ladoo

    Heat the jaggery mixture on a low  to medium flame , keep stirring the mixture in between. Let it bubble and then it starts to froth.

    Til Gul Ladoo

    Now add a drop of jaggery syrup into cold water for testing. If jaggery syrup forms a soft ball , then right consistency has reached. Turn of the heat. It takes about 7-8 minutes.

    Til Gul Ladoo
    Mixing and making Ladoos

    Now add this jaggery syrup slowly into the already prepared sesame, groundnut mixture and mix well. 

    Til Gul Ladoo

    You can also keep pan on a very low heat and mix this with jaggery syrup. So that it becomes easy to mix while maintaining the temperature. Once everything is well mixed ,turn off the heat and keep it aside.

    Til Gul Ladoo

    When the mixture is still hot , grease the palm with ghee , scoop 1 tablespoon of mixture to  the palm and make balls out of it. Til Gul Ladoo is ready to serve.

    Til Gul Ladoo

    Store it in a air tight jars , stays good for 10-15 days . 

    Til Gul Ladoo

    This post has been updated from the archives, was first published in January 2019

    Recipe

    til-gul-ladoo
    5 from 3 votes

    Til Gul Ladoo

    Til Gul Ladoo - is a Sesame seeds and Jaggery ladoos made during Sankranti Festival .
    Prep Time10 minutes mins
    Cook Time20 minutes mins
    Total Time30 minutes mins
    Course: Dessert
    Cuisine: Maharstarian
    Keyword: Festivals, Sweets
    Servings: 12 Ladoos
    Calories: 102kcal
    Author: Muktha H S

    Ingredients

    • ½ cup Sesame seeds
    • ¼ cup Dry coconut grated ,optional
    • ¼ cup Peanuts , optional
    • ½ cup Jaggery Powder
    • 3 tablespoon Water
    • 1 tablespoon Clarified Butter /Ghee
    • ¼ teaspoon Cardamom Powder
    • ¼ teaspoon Dry Ginger powder , optional
    • Nutmeg powder pinch , optional

    Instructions

    • In a pan or iron griddle ,dry roast ½ cup of regular sesame seeds( cream colour ) on a low heat ,till it starts to crackle. Once it crackles , transfer it to plate and keep it aside.
    • In the same pan dry roast ¼ cup peanuts , until peanuts becomes crunchy and gets dark brown spots. Remove from the pan and set it aside to cool.
    • Again , in the same pan continue to dry roast , ¼ cup of dry coconut on a low heat until it starts to change colour to light golden brown. Turn off the heat and keep it aside to cool.
    • In a blender / mixer jar , add dry roasted peanut and dry coconut . Just blitz for a 5 seconds to get a coarse powder.
    • Now take a wide pan ,add sesame seeds , powdered groundnuts and dry coconut.
    • Add in ¼ teaspoon elaichi/ cardamom powder ,pinch of nutmeg powder (optional) , ¼ teaspoon dry ginger powder (optional) and mix well everything and set it aside.

    Making Jaggery Syrup:

    • Take ⅔ cup of jaggery powder in a sauce pan / pot , add 2 tablespoon of water and 1 tablespoon of clarified butter/ghee .
    • Heat the jaggery mixture on a low to medium flame , keep stirring the mixture in between.
    • Once it comes to boil and starts to froth , take jaggery syrup in a spoon and drop syrup into a bowl of cold water for testing.
    • If jaggery syrup forms a soft ball , then right consistency has reached . It takes about 8-10 minutes to get the .  Turn of the heat. 

    Mixing and making Ladoos

    • Now add this jaggery syrup slowly into the already prepared sesame, groundnut mixture and mix well. You can also keep pan on a very low heat and mix this with jaggery syrup. So that it becomes easy to mix while maintaining the temperature. Once everything is well mixed ,turn off the heat and keep it aside.
    • When the mixture is still hot , grease the palm , scoop 1 tablespoon of mixture to the palm and make balls out of it. Til Gul Ladoo is ready to serve.
    • Store it in a air tight jars , stays good for 10-15 days.

    Video

    Nutrition

    Calories: 102kcal

    You may also like

    • pumpkin bread
      Pumpkin Bread
    • vegan mayo
      Vegan Mayonnaise
    • bhapa-doi-recipe
      Bhapa Doi
    • Ragi-coconut-milk-pudding-recipe
      Ragi Coconut Milk Pudding

    Guava Dipping Sauce

    Published : January 12, 2019 | Last Update on September 27, 2022 By Muktha

    guava-dipping-sauce

    Guava Dipping Sauce recipe with step by step photos and videos. Guava dipping sauce is a sweet and spicy sauce with mild tangy taste.

    Fully ripen guava are used to make this dipping sauce .The sweetness of Guava is well balanced with the heat of pepper and chili powder. A mild tang from apple cider vinegar balances the flavors .

    I loved the taste of this delicious dipping sauce. Serve it along with Nachos or Tortilla chips for evening snack or party nights.

    Note this post contains old images too, I have updated post and new images too.

    Guava Dipping Sauce
    [feast_advanced_jump_to]

    About this recipe

    This Guava dipping sauce was a thought that came to my mind while eating a fully ripened Guava. If Guava turns fully ripened , it turns yellow and it will be more sweet and fully soft. I prefer to eat guava , when its hard rather than eating ripen fruit. As there was a batch of over ripened Guava , I turned it into a dipping sauce . First time when I tried , it was good. Later , over the period of time tried it several 2-3 times to balance out flavors and texture. I must say , this fruit dip blows off your mind, Its a bomb. Tastes really good. Try it !

    Guava-dipping-sauce

    Facts about Guava

    The known fact about guava is it's a nutrition packed fruit. But do you that , its a Negative Calorie Fruit . A single medium size Guava fruit contains about 68 calories but the amount of energy released when the body breaks down (digests and absorbs) food is more than 68 calories. Hence its called a Negative Calorie Fruit and is the best for Weight Loss .

    Guavas are a low GI fruit and do not raise blood sugar levels. It is the best fruit for hormonal imbalances. Diabetics and heart patients can also enjoy this fruit.

    Watch Video

    Other recipes which I prepare from Guava are Green Guava Chutney and Guava Salad . Will share the recipe soon. If you are looking for similar dip recipes , do check Spicy Tomato Salsa , Pineapple Salsa and Hummus recipe .

    Step By Step directions to make Guava Dipping Sauce:

    Take 3 medium size , fully ripe guava. Place it in a blender / chutney jar , add ⅛ cup water and blend into a smooth paste to get about 1.25 to 1.5 cups smooth guava pulp puree.

    Guava-dipping-sauce

    Transfer the blended guava puree into a mixing bowl , 

    guava-dip

    Also add 1 tablespoon of Apple cider vinegar  and mix well everything. Now add ¼ teaspoon chlli powder , ¼ teaspoon pepper powder , salt and 1.5 tablespoon of Extra virgin olive oil .

    how to make dipping sauce

    Add in 1-2 teaspoon of chopped celery or coriander leaves . Give a nice stir and mix well everything.

    dipping sauce

    Serve with Nachos / Tortilla chips.

    guava dipping sauce

    Recipe

    guava-dipping-sauce
    5 from 5 votes

    Guava Dipping Sauce

    Guava Dipping Sauce - is a Sweet , Spicy and Tang Dip that can be served with Tortilla Chips for party snacks.
    Prep Time8 minutes mins
    Total Time8 minutes mins
    Course: Condiments
    Cuisine: Fusion, World
    Keyword: Gluten Free, Kids Recipes, Party Snacks, Vegan
    Servings: 5 People
    Calories: 79kcal
    Author: Muktha H S

    Ingredients

    • 3 no's Over Ripened Guava ,medium size
    • ⅛ cup Water
    • ½ tablespoon Apple Cider Vinegar
    • ½ teaspoon Red Chili Powder
    • ¼ teaspoon Black Pepper Powder
    • 1.5 tablespoon Extra Virgin Olive oil
    • ½-3/4 teaspoon Salt or as required
    • 1.5 tablespoon Coriander leaves / celery chopped

    Instructions

    • Take 3 medium size , fully ripe guava. Place it in a blender / chutney jar and blend into a smooth paste to get about 1,25 to 1.5 cups of  guava pulp puree.
    • Transfer the blended guava puree into a mixing bowl , add in ⅛ cup water.
    • Also add ½ to 1 tablespoon of Apple cider vinegar and mix well everything.
    • Now add ¼ teaspoon chilli powder , ¼ teaspoon pepper powder , salt and 1.5 tablespoon of Extra virgin Olive oil
    • Add in 2 tablespoon of chopped celery , with a spoon , mix well everything.
    • Serve with Nachos / Tortilla chips.

    Video

    Notes

    • You can add up to ¼ cup of water , adjust water as per the required consistency , not too thick nor too thin.
    • You can adjust the spices , to suit your taste. If serving with Tortilla chips , add less salt.

    Nutrition

    Calories: 79kcal

    Iyengar Puliyogare Recipe

    Published : January 9, 2019 | Last Update on January 6, 2022 By Muktha

    Iyengar Puliyogare also popularly known Puliyogare . It is a spicy , sweet and tangy rice recipe prepared with Tamarind Paste. Iyengar is a community in South India and their style of making Puliyogare is very famous and delicious. The Iyengar Puliyogare recipe shared here is from Karnataka Iyengar's . Puliyogare is a No Onion , No garlic Recipe . It is also considered as auspicious , hence prepared during many festivals and other religious ceremonies of Karnataka.

    Iyengar Puliyogare

    The main key for making a delicious Puliyogare is Sesame Oil , Dry coconut , Sesame seeds, Jaggery and Hing/ Asafoetida . Rice is mixed along with Puliyogare Masala and tempered with spices to make Puliyogare. I have already shared the authentic Puliyogare masala paste recipe you can refer it or else you can even find MTR Puliyogare Powder or Paste in stores .

    This is one of the easiest recipe and I often prepare it when ever I have short of time to cook anything elaborate . Because Puliyogare Masala will be available at home throughout the year. As shelf life of Puliyogare masala is more than 4-6 months . Other recipes that uses Iyengar Puliyogare Masala are Semiya Puliyogare and Gojju avalakki | Spicy and Tangy Poha.

    Puliyogare is easy to make and also best for lunch box. But make sure to pack curd rice along with Puliyogare to balance the heat and also to make it a balanced meal.

    Other easy rice based lunch box recipes on blog are : Tomato Bath , Vegetable Bath , Moong Dal Rice , Masala Lemon Rice and Sabut Masoor Dal Rice.

    RECIPE CARD FOR IYENGAR PULIYOGARE

    Recipe

    Puliyogare
    5 from 1 vote

    Iyengar Puliyogare

    Iyengar Puliyogare is a spice , tangy and sweet Tamarind rice 
    Prep Time5 minutes mins
    Cook Time10 minutes mins
    Total Time15 minutes mins
    Course: Breakfast
    Cuisine: Karnataka
    Keyword: Rice Varities
    Servings: 4 People
    Calories: 272kcal
    Author: Muktha H S

    Ingredients

    • 4 Cups Cooked Rice
    • 3 tablespoon Puliyogare Masala Paste
    • 2 tablespoon Sesame Oil
    • ½ teaspoon Mustard Seeds
    • 3-4 no Dry Red Chilly
    • 2 Sprigs Curry leaves
    • ½ teaspoon Asafoetida
    • 2 tablespoon Peanuts
    • 1 tablespoon Chana Dal
    • 1.5 tablespoon Urad Dal
    • 1 teaspoon Sesame Seeds
    • 2 tablespoon Dry coconut
    • 1 teaspoon Jaggery Powder or as required
    • 1 ½ teaspoon Salt or as required

    Instructions

    • Rinse, wash and soak ¾ cup rice for 10 minutes. Cook rice and keep it aside. Leftover rice or warm or cold rice works best for Puliyogare. 4 cups of cooked rice is used in the recipe
    • Dry Roast sesame seeds black or white . Black sesame seeds are preferred but if you don’t get black sesame seeds , you can use white sesame/ til seeds also.
    • In a mixer jar , blend roasted sesame seeds and dry coconut to a coarse powder.
    • Heat 2 tablespoon Sesame oil in a Kadai /pan , add mustard seeds , curry leaves , dry red chillies and asafoetida.
    • Add peanuts and fry till it turns golden brown. Then add chana dal , urad dal and fry well till it turns golden in colour.
    • Now add 3 tablespoon of Puliyogare Gojju / Puliyogare Masala and 1 teaspoon of jaggery powder.
    • Mix well everything and saute for 4-5 minutes.
    • Turn off the heat/stove and add cooked rice.
    • Mix well everything with a help of spatula or hand.
    • Add dry coconut- sesame powder and salt, gently mix well everything.
    • Finally, taste and adjust salt , jaggery powder if needed .
    • Garnish with grated dry coconut and serve.

    Nutrition

    Calories: 272kcal

    Step By Step Directions on making of Iyengar Puliyogare:

    Rinse, wash and soak rice ¾ cup rice for 10 minutes. Cook rice and keep it aside. Leftover rice or cold rice works best for Puliyogare. I'm using 4 cups of cooked rice here in the recipe.

     Dry Roast sesame seeds black or white . Black sesame seeds are preferred but if you don’t get black sesame seeds , you can use white sesame/ til seeds also.

    Iyengar Puliyogare Recipe

    In a mixer jar , blend roasted sesame seeds and dry coconut to a coarse powder.

    Iyengar Puliyogare Recipe

    Heat 2 tablespoon Sesame oil in a Kadai /pan , add mustard seeds , curry leaves , dry red chillies and asafoetida.

    Iyengar Puliyogare Recipe

    Add peanuts and fry till it turns golden brown.

    Iyengar Puliyogare Recipe

    Then add chana dal , urad dal  and fry well till it turns golden in colour.

    Iyengar Puliyogare Recipe

    Now add 3 tablespoon of Puliyogare Gojju / Puliyogare Masala and 1 teaspoon of jaggery powder.Mix well everything and saute for 4-5 minutes.

    Iyengar Puliyogare Recipe

    Turn off the heat/stove and add cooked rice.Mix well everything with a help of spatula or hand.Add dry coconut- sesame powder and salt, gently mix well everything.

    Iyengar Puliyogare Recipe

     Finally, taste and adjust salt , jaggery powder if needed .

    Iyengar Puliyogare Recipe

     Garnish with grated dry coconut and serve.

    Iyengar Puliyogare Recipe

    Egg Gravy

    Published : January 6, 2019 | Last Update on September 27, 2022 By Muktha

    Egg-gravy-recipe

    Egg Gravy is a onion and tomato based egg masala with additional coconut and poppy seeds / cashews . All you need is just 30 minutes to make this delicious egg masala.

    This egg curry is mildly spiced and with every bite you can expect to get a aromatic flavors of whole spices and hint of coconut flavor. Serve this for lunch / dinner along with Jeera rice , Khushka or Roti , Laccha Paratha / Malbar paratha.

    If you love egg curries as I do , then don't forget to check my favorite egg recipes , who knows even you may fall in love with Scrambled Egg curry , Spicy Kolhapuri Egg Masala or Kerala Egg Curry.

    Egg-gravy-recipe
    [feast_advanced_jump_to]

    About this recipe

    This is a Karnataka ( South Indian) style , mildly spiced egg masala and gets ready under 30 minutes.

    Every region has their own touch for every recipe and this Egg Gravy is a Karnataka style recipe made with fresh coconut and poppy seeds. Basically it's a onion and tomato based gravy with whole spices and coconut.

    Most of the curry recipes from Karnataka make use of fresh coconut, which adds thickness to the curries with a hint of rich coconut flavor.

    To make this curry using a mixer grinder becomes essential as it is really important to blend coconut and poppy seeds into really smooth paste. So make sure to blend coconut to fine paste .

    This egg curry is mildly spiced and with every bite you get taste , aromatic flavors of spices and hint of coconut flavor. It has a medium consistency and goes well with steamed rice too.

    Ingredients

    Eggs : You need 6 large range eggs. 5 boiled eggs and 1 whisked egg is used to make this tasty egg gravy.

    Whole Spices : Bay leaf , Black cardamom, Green Cardamom pods , cloves , cinnamon, Shah Jeera , Fennel Seeds , Poppy seeds are used.

    Nuts : I use Coconut and cashew nuts . You can also use melon seeds in place of cashews . Coconut is one of the main ingredient to make this curry. Refer FAQ's section

    Produce : You need Onion ,Tomatoes , Garlic , Ginger , Green chilies and few sprigs of coriander leaves.

    Other Ingredients includes Turmeric powder , red chili powder , coriander powder , garam masala , pepper powder , salt and oil.

    Do refer recipe card for actual measurements.

    FAQ's

    Can I use Dry or desiccated coconut ?

    Yes, you can use it as an alternative. Soak dry / desiccated coconut in warm water for 10 minutes , blend it to smooth paste and follow the recipe.

    Can I use coconut milk instead of coconut ?

    Yes, feel free to use. In that case just add cashews and poppy seeds paste.

    You may also like

    • beet-root-egg-bhurji
      Beetroot Egg Bhurji | Scrambled Egg with Beetroot
    • Egg-biryani-recipe@palates-desire
      Egg Biryani Recipe | Anda Biryani
    • Mumbai Style Egg Burji
      Mumbai Style Egg Bhurji
    • Classic Egg Salad recipe
      Classic Egg Salad

    Watch Video

    How to make Karnataka style Egg Gravy

    Hard Boil 5 eggs for 12 minutes. Break open the shell and pierce the eggs with fork or slide a knife and set aside.

    In a kadai / pan , heat 2 tablespoon of oil. Add all listed whole spices and saute for a minute until aroma wafts in air.

    Add 1 teaspoon of garlic paste , 1 teaspoon of ginger paste , chopped green chilies and finely chopped onions . Sauté until raw smell goes off and onions turns translucent.

    Now add turmeric powder , red chili powder , pepper powder and coriander powder . Mix well everything and sauté for a minute.

    Roughly cut 2 tomatoes and blend to get ¾ - 1 cup of tomato puree.

    Add in tomato puree , stir well and cook until water content dries up completely and oil starts to release from edges.

    Now , make some space at the center and add 1 whisked egg.

    Scramble egg and mix well . To this add 1 cup hot water. Mix well and bring to boil .

    Whilst , into a mixer jar , take ¼ cup of fresh coconut , 1 teaspoon of Poppy seeds . ½ teaspoon fennel seeds and 6-7 cashews , and blend to a fine paste using little water .

    Add this coconut paste into the curry , mix well. Add salt to taste and bring to boil.

    Once it comes to boil, add boiled eggs . Cover tight lid and cook on simmer for 7-8 minutes.

    After 8 minutes , turn off the stove. Finally , add 2 tablespoon of chopped coriander leaves and sprinkle ½ teaspoon of garam masala( optional).

    Mix well and Serve hot with Ghee rice or Chapati / Phulka .

    Recipe

    egg-gravy-recipe
    5 from 3 votes

    Egg Gravy Recipe - Karnataka Style

    A Simple Egg Gravy prepared in an South Indian Style with minimal spices , fresh coconut , cashews and poppy seeds.
    Prep Time10 minutes mins
    Cook Time25 minutes mins
    Total Time35 minutes mins
    Course: Side Dish
    Cuisine: Indian, South India
    Keyword: Curries, Egg, Gravy
    Servings: 5 People
    Calories: 184kcal
    Author: Muktha H S

    Ingredients

    Whole Spices

    • 1 Bay leaf
    • 2 Green Cardamom Pods
    • 1 Black Cardamom pod
    • 1 teaspoon Shahi Jeera
    • 4 Cloves
    • 2" inch Cinnamon sticks

    For Coconut Masala Paste

    • ¼ cup Fresh Coconut pieces
    • 1 teaspoon Poppy Seeds
    • ½ teaspoon fennel seeds
    • 5 no's Whole Cashews optional

    To make Egg Gravy

    • 5 no's Boiled Eggs
    • 1 Egg whisk
    • 2 tablespoon Cooking Oil
    • 2 no's Onion medium size finely chopped
    • 1 Green chili chopped
    • 3-4 no's garlic cloves minced or 1 teaspoon Garlic Paste
    • ¾ inch ginger minced or 1 teaspoon Ginger Paste
    • 2 no's Tomatoes medium- large size puree
    • ¼ teaspoon Turmeric Powder
    • ½ teaspoon Pepper powder
    • 1 teaspoon Red Chili Powder
    • 1.5 teaspoon Dhania Powder
    • 1.2-2 teaspoon Salt or as required
    • Fresh Coriander Leaves to garnish
    • ½ teaspoon Garam Masala Powder , optional

    Instructions

    • Hard Boil 5 eggs for 12 minutes. Break open the shell and pierce the eggs with fork or slide a knife and set aside.
    • In a kadai / pan , heat 2 tablespoon of oil. Add all listed whole spices and saute for a minute until aroma wafts in air.
    • Add 1 teaspoon of garlic paste , 1 teaspoon of ginger paste , chopped green chilies and finely chopped onions . Sauté until raw smell goes off and onions turns translucent.
    • Now add turmeric powder , red chili powder , pepper powder and coriander powder . Mix well everything and sauté for a minute.
    • Roughly cut 2 tomatoes and blend to get ¾ - 1 cup of tomato puree.
    • Add in tomato puree , stir well and cook until water content dries up completely and specks of oil is seen.
    • Make some space at the center and add 1 whisked egg.
    • Scramble egg and mix well . To this add 1 cup hot water. Mix well and bring to boil.
    • Whilst , into a mixer jar , take ¼ cup of fresh coconut , 1 teaspoon of Poppy seeds . ½ teaspoon fennel seeds and 6-7 cashews , and blend to a fine paste using little water .
    • Add this coconut paste into the curry , mix well. Add salt to taste and bring to boil.
    • Once it comes to boil, add boiled eggs . Cover tight lid and cook on simmer for 7-8 minutes.
    • After 8 minutes , turn off the stove. Add 2 tablespoon of chopped coriander leaves and sprinkle ½ teaspoon of garam masala( optional).
    • Mix well and Serve hot with Ghee rice or Chapati / Phulka .

    Video

    Notes

    1.  If coconut is unavailable , then skip it. Soak 8-10 cashews and poppy seeds in warm water for 15 minutes.
    2. Discard water and blend cashews and poppy seeds to a smooth paste.

    Nutrition

    Calories: 184kcal

    Dal Makhani

    Published : December 31, 2018 | Last Update on September 29, 2022 By Muktha

    Dal Makhani

    Dal Makhani is a most popular Dal preparation from Punjab region. Makhani dal is prepared with Whole Black Gram / black lentil , Kidney Beans , Butter, Spices and fresh cream. The creaminess of this dal , mild flavours of spices and smokiness from charcoal make this a super delicious and finger licking good . By looking at my intro for this Dal Makhani one can easily say that it's one of my favourite Dal recipe.

    Dal Makhani

    Dal is one of the staple food in Indian Kitchen. So varieties of dal based dishes will be prepared in Indian house regularly. Dal (lentils) and Rice , Wheat (cereals) combination provides a complete protein . Other Dal recipes which I often do at home are : Dal Fry , Methi Dal , Moong Dal Rice , Bisibele bath and Pongal.

    Authentic Dal Makhani is cooked on woodfire in a claypot overnight . But as there is no provision for this in modern kitchens , I do this in a short cut method by using pressure cooker. To get a perfect Dal Makhani , dal should be cooked well , it should melt in mouth. Also using smoking technique , makes this makhani dal utterly delicious.

    Though Dhungar Method / Smoking technique used here is optional but I highly recommend to follow this procedure. As it gives you a very nice smokey flavour and takes the dish to a next level. This Dal Makhani is a restaurant style and I bet you will definitely love this . Dal Makhani tastes more good the following day . Slow cooking of Dal makes this dish more tastier.

    Try making this restaurant style creamy delicious Dal Makhani for your weekend lunch. Serve it with Phulka , Roti , Naan , Chapati or steamed rice. Other Restaurant Style recipes on blog are Rajma Masala , Pindi Chole , Chana Masala , Shahi Paneer , Palak Paneer and Paneer Butter Masala.

    RECIPE CARD FOR DAL MAKHANI RESTAURANT STYLE

    Recipe

    Dal Makhani
    5 from 1 vote

    Dal Makhani

    Most popular lentil preparation from punjab region is lip smackingly good which rich and creamy in texture.
    Prep Time10 minutes mins
    Cook Time50 minutes mins
    Soaking Time8 hours hrs
    Total Time1 hour hr
    Course: Main Course
    Cuisine: Punjabi
    Keyword: Gluten Free, Legumes
    Calories: 292kcal
    Author: Muktha H S

    Ingredients

    • ¾ Cup Whole Black Lentil / Urad Dal
    • ¼ Cup Rajma / Kidney Beans
    • 3 Cups Water for pressure cooking
    • ½ Cup onions finely chopped or 1 medium size
    • 1 teaspoon Garlic Paste or 6-7 garlic cloves minced
    • 1 teaspoon Ginger Paste or 1 inch ginger grated
    • 2-3 no's Medium size tomatoes or 1 cup tomato puree
    • 2 no's green chilli less spice , finely chopped
    • ½ teaspoon Cumin Seeds / Jeera Seeds
    • 3 no Cloves/lavang
    • 3 no Green Cardamom / Choti Elaichi
    • 1 no Black Cardamom / Bada Elaichi
    • 1 no Bay Leaf / Tej Patta
    • 1 Inch Cinnamon Stick / Dalchini , optional
    • ½ teaspoon Red Chilli Powder
    • 1-2 pinch Jaiphal Powder / Nutmeg Powder
    • ½ teaspoon Kasuri Methi / Dry fenugreek powder
    • 3 tablespoon Butter
    • ¼ Cup Low fat cream
    • 11/2 -2 teaspoon Salt or as required
    • 1 Piece Charcoal
    • ½ teaspoon Oil

    Instructions

    • Wash, rinse and soak ¾ cup Whole Black Urad Dal and ¼ cup Rajma/ Kidney beans overnight or 8 hours.
    • Next day , drain all water , rinse well, In a pressure cooker add Urad dal , Rajma and 3 cups of water together . 
    • Pressure cook for 10-12 whistles . Dal and rajma should be cooked completely and mushy. Allow the pressure to settle on its own.
    • Blend 2-3 medium size tomatoes in a blender/ mixer jar to a fine puree and set aside.
    • In a deep pan , kadai , heat 3 tablespoon Butter . Add in all the whole spices and fry till the spices leaves fragrant smell.
    • Now add chopped onions , fry well till they look golden brown. Add ginger garlic paste , saute well till raw smell goes off.
    • Then add chopped green chillies and tomato puree , mix well and cook till tomato changes colour.
    • Now add red chilli powder , pinch of nutmeg powder and stir well . Cook on a medium flame till fat starts to release from the corners.
    • Add cooked dal and rajma ,stock and 1.5 cups of water . Mix well and cook on a low flame till dal thickens , it takes about 15- 20 minutes on slow flame.
    • Add salt ,stir well and continue to cook ,till it reaches the desired consistency. Dal makhani should be not runny nor thick , it should have a medium consistency.
    • Add crushed Kasuri Methi and ¼ cup of fresh cream .
    • Mix well everything. This is ready to serve , if you are not following Smoking technique / dhungar method

    For Smoking Technique

    • Heat a piece of Charcoal to red hot on a direct flame . Turn it all around with the help of tongs till it become red hot evenly.
    • Then place this Red hot charcoal in a small bowl and add ½ teaspoon of oil/ghee over the hot charcoal.
    • Place this bowl inside the prepared Dal Makhani and close the lid tightly for 2 minutes such that smoke flavour infuse into the food.
    • Open the lid , remove the charcoal bowl. Stir well dal and serve hot accompanied with onion rings and lemon wedges.

    Nutrition

    Calories: 292kcal

    Step by Step Directions on making of Dal Makhani :

     Wash, rinse and soak ¾ cup Whole Black Urad Dal and ¼ cup Rajma/ Kidney beans overnight or 8 hours.          Dal Makhani

    Next day , drain all water , rinse well, In a pressure cooker add Urad dal , Rajma and 3 cups of water together . Pressure cook for 10-12 whistles . Dal and rajma should be cooked completely and mushy. Allow the pressure to settle on its own.

    Dal Makhani

    Blend 2-3 medium size tomatoes in a blender/ mixer jar to a fine puree and set aside.

    In a deep pan , kadai , heat 3 tablespoon Butter . Add in all the whole spices and fry till the spices leaves fragrant smell.

    Dal Makhani

    Now add chopped onions , fry well till they look golden brown. Add ginger garlic paste , saute  well till raw smell goes off.

    Dal Makhani

    Then add chopped green chillies and tomato puree , mix well and cook till tomato changes colour.

    Dal Makhani

    Now add red chilli powder , pinch of nutmeg powder and stir well . Cook on a medium flame till fat starts to release from the corners.

    Dal Makhani

    Add cooked dal and rajma ,stock and 1.5 cups of water .

    Dal Makhani

    Mix well and cook on a low flame till dal thickens , it takes about 15- 20 minutes on slow flame.

    Dal Makhani

    Add salt ,stir well and continue to cook ,till it reaches the desired consistency.

    Dal Makhani

    Dal makhani should be not runny nor thick , it should have a medium consistency. Add crushed Kasuri Methi and ¼ cup of fresh cream .

    Dal Makhani

    Mix well everything. This is ready to serve , if you are not following Smoking technique / dhungar method.

    Dal Makhani

    For Smoking Technique

    Heat a piece of Charcoal to red hot on a direct flame . Turn it all around with the help of tongs till it become red hot. Then place this Red hot charcoal in a small bowl and add ½ teaspoon of oil/ghee.

    Dal Makhani

    Place this bowl inside the prepared Dal Makhani and close the lid tightly for 2 minutes such that smoke flavour infuse into the food.

    Dal Makhani

    Open the lid , remove the bowl and stir well .

    Dal Makhani

    Serve hot accompanied with onion rings and lemon wedges.

    Dal Makhani

    Avarekalu Mixture

    Published : December 29, 2018 | Last Update on July 23, 2022 By Muktha

    Avarekalu Mixture | Vaal Namkeen is a shallow fried snack made using Hyacinth Bean. This bean is also referred as Field Bean or Surti Papdi. Avarekalu or Field Bean is much loved Bean in South Karnataka , especially around regions of Bangalore and Mysore. Avarekalu is seasonal and is available during winter season. During this season one can find Avarekalu from Idli , Dosa , Pulao , Bisibelebath , Upma , Roti , Namkeens , sweets and halwa too . Sarcastically it's referred as Raining Avarekalu everywhere.

    Avarekalu Mixture

    Avarekalu Mixture is basically a namkeen ,where de skin avarekalu is fried in oil ,mixed with fried peanuts , dry coconut , fried gram and tossed in with spices. This is a crunchy flavourful namkeen of the season . Avarekalu Mixture is my all time favourite and Mom never misses to do this for me during this winter season.

    Making this avarekalu mixture is not at all difficult but the real tedious task is to peel the outer skin of Hyacinth Bean . Need to soak the avarekalu/field bean in water for minimum 6-8 hrs . Then press the bean between the fingers to remove the skin of the bean. Its fried in oil and then tossed with spices.

    Other namkeen recipes on blog are : Congress Kadale Beeja , Baked Bhakarwadi and Roasted Makhana

    RECIPE CARD FOR AVAREKALU MIXTURE | VAAL NAMKEEN

    Recipe

    Avarekalu Mixture
    4 from 1 vote

    Avarekalu Mixture | Vaal Namkeen

    A crispy , spicy and flavourful fried snack prepared with Hyacinth Bean
    Prep Time30 minutes mins
    Cook Time40 minutes mins
    Soaking Time8 hours hrs
    Total Time1 hour hr 10 minutes mins
    Course: Snack
    Cuisine: Indian, Karnataka
    Keyword: Namkeen
    Servings: 375 grams
    Author: Muktha H S

    Ingredients

    • 2 cups Avarekalu / Hyacinth Bean ,de skin
    • ⅓ cup Peanuts
    • ¼ Cup Sliced Dry Coconut
    • 3 tablespoon Fried Gram
    • 4 sprigs Curry Leaves
    • 3 no's Dry Red Chilly
    • 2 big pinch Hing / Asafoetida
    • ¼ teaspoon Turmeric Powder
    • 2 teaspoon Red Chilli Powder
    • 1 teaspoon Sugar
    • 1 teaspoon Salt or as required
    • 100 ml Oil for frying or as required

    Instructions

    • Split open the Avarekai / Surti Papdi and separate the beans.
    • Soak Avarekalu / beans in water for minimum 6-8 hrs.
    • Press the bean between the thumb and forefinger , to deskin the bean
    • Heat oil in pan , add beans into the hot oil. Add oil just enough to immerse the beans. Allow it to cook on medium heat. 
    • When its about to done, oil starts to froth and beans becomes crunchy, it takes about 25- 30 minutes .
    • Remove the fried beans from oil and place it on a kitchen paper towel to absorb excess oil.
    • In the same pan , remove the excess oil . With just 1 teaspoon of Oil , add peanuts , fried gram and fry well.
    • Once peanuts are fried , add curry leaves , dry coconut pieces and fry well till golden brown.
    • Add in fried avarekalu to the above mixture, add hing , salt , turmeric powder, sugar and red chilli powder, gently stir on low flame and mix well.
    • Store in airtight jar .

    Step by step directions on making of Avarekalu Mixture:

    Split open the Avarekai / Surti Papdi and separate the beans.

    Avarekalu Mixture

    Soak Avarekalu / beans in water for minimum 6-8 hrs.

    Avarekalu Mixture

    Press the bean between the thumb and forefinger, to de skin the bean.

    Avarekalu Mixture

    Heat oil in pan , add beans into hot oil. Add oil just enough to immerse the beans. Allow it to cook on medium heat. 

    When its about to done, oil starts to froth and beans becomes crunchy, it takes about 25- 30 minutes.

    Avarekalu Mixture

    Remove the fried beans from oil and place it on a kitchen paper towel to absorb excess oil.

    Avarekalu Mixture

    In the same pan, remove the excess oil . With just 1 teaspoon of Oil , add peanuts , fried gram and fry well. Once peanuts are fried, add dry coconut pieces , curry leaves and fry well till golden brown.

    Avarekalu Mixture

    Add in fried avarekalu to the above mixture , add  hing , salt ,sugar, turmeric powder and red chilli powder. Gently stir on low flame and mix well. 

    Avarekalu Mixture

    Store in airtight jar .

    Avarekalu Mixture

    Stuffed Bhindi Recipe

    Published : December 27, 2018 | Last Update on July 23, 2022 By Muktha

    Stuffed Bhindi

    Stuffed Bhindi | Bharwa Bhindi is a delicious and tasty recipe of Bhindi / Okra stuffed with spices. Though Stuffed Bhindi recipe originates from Punjab , it is quite common throughout India . And each family has their own preferences of spices for stuffing . This recipe of mine is easy and simple with No Onion and NO Garlic.

    Stuffed Bhindi

    For making this stuffed Bhindi , Dry coconut , puffed gram and spices are blended and then stuffed inside Bhindi and cooked . The only time time consuming job here is drying the bhindi after rinsing it with water. Its very important for bhindi to be completely dry before stuffing the the spices or else it may become very slippery.

    Bhindi| Okra is one of my favourite vegetable. Not because it is extremely nutritious but I love the taste of this vegetable. Its known that okra is a high fiber food. But how does this fiber helps ? Okara has soluble fibres in the form of pectins which helps in lowering bad cholesterol levels. Also fiber intake is highly recommended for patients with diabetes because it boosts digestion and also keeps satiated for a long time. Also folate in Okra is beneficial during pregnancy.

    Always try using tender and fresh okra for making this Stuffed Bhindi.One more Bhendi Recipe which I often do at home is Tangy Stir Fried Okra . As 5 types of vegetables is recommended per day , try adding wide varieties of recipes in your diet. So that you don't get bored of eating same taste and crave to eat restaurant food often.

    Other Vegetarian Side Dishes recipes on blog are Aloo Methi , Brinjal Fry ,Tangy Okra , Sauteed Spring Onions and Palak Paneer Bhurji

    RECIPE CARD FOR STUFFED BHINDI

    Recipe

    Stuffed Bhindi
    5 from 2 votes

    Stuffed Bhindi | Bharwa Bhindi

    Stuffed Bhindi / Stuffed Okra is a delicious vegetable side dish where Okra is stuffed with spices and cooked in open pan .
    Prep Time20 minutes mins
    Cook Time25 minutes mins
    Total Time45 minutes mins
    Course: Side Dish
    Cuisine: Indian
    Keyword: No Onion , No Garlic
    Servings: 2 People
    Calories: 123kcal
    Author: Muktha H S

    Ingredients

    • 250 grams Okra / Bhindi
    • 2 tablespoon Dry Coconut
    • 2 tablespoon Fried Gram
    • 1 teaspoon Red Chilli Powder
    • 1.5 teaspoon Coriander Powder
    • ½ teaspoon Turmeric Powder
    • 1 teaspoon Dry Mango Powder
    • ½ teaspoon Jeera Powder / Cumin Powder
    • ½ teaspoon Kitchen King Masala or Garam Masala
    • ¾ teaspoon Salt or as required
    • 1.5 - 2 tablespoon Mustard Oil or any cooking oil

    Instructions

    • Rinse and Wash bhindi/ okra , wipe it completely dry using a soft kitchen towel. Its very important orelse okra will be slippery.
    • Trim the edges of the okra, slit okra lengthwise without breaking or cutting into 2 halves , set aside.
    • In a blender , add dry coconut , roasted gram , red chilli powder , coriander powder , turmeric powder , jeera powder , dry mango powder , salt and garam masala powder . Blend to fine powder.
    • Fill the blended spice powder inside the slit bhindi.
    • Heat 1-2 tablespoon of mustard oil , arrange the spice stuff bhindi .
    • If any extra spice is remaining just sprinkle it over the bhindi and cook on medium heat for 10-12 minutes.
    • With the help of spoon or spatula , turn the bhindi / okra to other side and continue to cook for another 8-10 minutes or till done.
    • Garnish with coriander leaves and lemon wedges.Serve it hot as a side dish along with Rice-sambar , Dal Chawal , Khichdi or Roti Dal. 

    Nutrition

    Calories: 123kcal

    Step by step directions on making of Stuffed Bhindi :

    Rinse and Wash bhindi/ okra , wipe it completely dry using a soft kitchen towel. Its very important orelse okra will be slippery.

    Stuffed Bhindi Recipe

    Trim the edges of the okra, slit okra lengthwise and set aside.

    Stuffed Bhindi Recipe

    In a blender , add dry coconut , roasted gram , red chilli powder , coriander powder , turmeric powder , jeera powder , dry mango powder , salt and garam masala powder . Blend to fine powder.

    Stuffed Bhindi Recipe

    Fill the blended spice powder inside the slit bhindi.

    Stuffed Bhindi Recipe

    Heat 1-2 tablespoon of mustard oil , arrange the spice stuff bhindi .

    Stuffed Bhindi Recipe

    If any extra spice is remaining just sprinkle it over the bhindi and cook on medium heat for 10-12 minutes.

    Stuffed Bhindi Recipe

    With the help of spoon or spatula , turn the bhindi / okra to other side and continue to cook for another 8-10 minutes or till done.

    Stuffed Bhindi Recipe

    Garnish with coriander leaves and lemon wedges.Serve it hot as a side dish along with Rice-sambar , Dal Chawal , Khichdi or Roti Dal.

    Stuffed Bhindi

    Diet Consultation Form

    Published : December 26, 2018 | Last Update on March 5, 2020 By Muktha

    Hi All,

    For all those who are serious about Health - Lifestyle Changes and if you are keen about enrolling yourself for any kind of consultation for Weight loss | Weight Management | Weight Gain diet plans. Then please download the below pre-consultation form , fill and mail it to mukthagopinath@gmail.com

    Diet Consultation Form

    Download Pre-Consultation Form

    For any concerns , you can write & contact me directly . Happy to share my piece of knowledge with you all. NO CHARGES are demanded.

    Whole Wheat Biscuits

    Published : December 24, 2018 | Last Update on September 27, 2022 By Muktha

    whole-wheat-biscuits

    Crispy and crunchy whole wheat butter biscuits are perfect with cup of tea and fits well into kids snack box too. Hardly needs 10 minutes for preparations !

    Tea times gets better with these biscuits , its healthy , tasty and buttery . This easy to make whole wheat butter biscuits are simple to make with just handful ingredients from pantry.

    I always try to avoid all purpose flour where ever it's possible , I'll swap APF with whole wheat flour. And this recipe is no exception . If you are in mood to bake some cookies then do try one of my favorite Ragi Almond Cookies , Crinkle Cookies and Peanut Butter cookies.

    wholw-wheat-butter-biscuits
    [feast_advanced_jump_to]

    About this recipe

    Whole wheat butter biscuits are tasty crunchy butter biscuits with or without extra nuts added to it. These delicious biscuits are simple to make with minimal ingredients from the kitchen pantry.

    I used to do lot of baking few years before , but these days I have stopped it completely. Whether we use whole wheat or refined flour , along with it the amount of sugar and butter that gets into making goodies are my concern . Just trying to cultivate clean eating habits these days, so you may find very little posts on cookies and cakes categories.

    But I make sure , whenever I bake cookies / biscuits / cakes , it should be really delicious. So this is one such recipe which is utterly delicious .

    Many of us , use these terms cookies and biscuits synonymously . But difference between cookies and biscuits are Cookies are moist and chewy crumble texture with more ingredients . Whereas Biscuits are thin, crunchy and uses butter , flour and sugar has main ingredients.

    These Whole wheat biscuits

    Uses minimum ingredients

    Healthy and fits well into kids snack box

    Easy and simple to make

    Tastes best along with Tea

    Recipe can be easily scalable

    Ingredients

    To make biscuits , main ingredients are butter , flour and sugar . Salts are used as rising agents and any flavorings can be used.

    Whole-wheat-biscuits-ingredients

    Flour - I have used whole wheat flour , you can use all purpose flour also.

    Sugar - I have used brown sugar here as a sweetener. You can use either white sugar or powdered jaggery in the recipe.

    Butter - Softened but cold butter is used here. You can even use ghee / clarified butter which is in semi solid state. You can use either salted or unsalted butter. I have used unsalted butter hence added salt separately in the recipe. If you are adding salted butter then you can skip adding salt.

    Cooking soda, Baking powder and Salt helps to raise and gives perfect texture to biscuits.

    Apple Cider Vinegar (ACV) - Acetic acid with soda works well in baking goodies. If ACV is not available feel free to add 2 tablespoon of curds in the recipe.

    Flavoring - Nutmeg and cardamom is what I used to flavor these biscuits. As an alternative you can use 2 drops of Vanilla essence to make this.

    Refer recipe card for actual measurements.

    Tips and Variations

    You can make this recipe with all purpose flour also.

    For variations, you can sprinkle add some chopped nuts or chocolate chips over the biscuits before baking.

    Instead of butter , you can use ghee/clarified butter in this recipe.

    Can play with flavors too, you can swap cardamom powder with 1-2 drops of vanilla essence.

    FAQ's

    What can I substitute for ACV ?

    You can use curds as a substitute for ACV in this recipe . Use 2 tablespoon of curds , reduce the amount of milk by 2 tablespoon and follow the same recipe.

    Can I use All purpose flour?

    Of course , just swap wheat flour with APF. In this case you may need less milk. Just start by adding 2 tablespoon of milk and use extra if required to form dough.

    Can I use jaggery instead of sugar ?

    Yes, you can use . Just make sure jaggery is fine powdered and sieve it before using in the recipe.

    What's the shelf -life of these biscuits?

    Store these biscuits in a air tight jar, stays fresh up to 15 days.

    You may also like

    • lamingtons
      Lamington - how to make Australian Lamington Cake
    • fruit-cake
      Plum Cake
    • cup cake recipe
      Eggless Cup Cake Recipe
    • ragi-cookies
      Ragi Almond Cookies with Jaggery

    How to make whole wheat biscuits

    In a mixing bowl, take wheat flour, add baking powder, pinch of cooking soda, nutmeg powder and cardamom powder. Mix well everything.  

    Whole Wheat Biscuits

    Add 100 grams of softened or chilled butter to the flour mixture and mix everything either with a blender (if using chilled butter) or hands.

    whole wheat biscuit flour with chilled butter

    It should be crumbly in texture and looks like bread crumbs.

    crumble texture

    In a mixer jar , blend ½ cup sugar to fine powder.

    Now add powdered sugar, 1-2 tablespoon of Milk at a time and apple cider vinegar. Gather everything together; mix well to form dough.

    Whole Wheat Biscuits

    Don’t knead the dough, just mixing to form a dough is sufficient

    whole wheat cookie dough

    Cover the dough with a cling film and refrigerate for minimum 30 minutes.

    cookie dough chilling time

    After 30 minutes, remove dough from the refrigerator, open the cling film. Divide the dough into2- 3 parts.

    divide cookie dough

    On a working top , roll the dough into 0.50 cms thick

    how to roll cookie dough

    and with help of cookie cutter , cut into desired shapes.

    Whole Wheat Biscuits

    Alternatively you can also make dough in a log shape and slice it into round discs. Place it on a cookie sheet in a baking tray and pierce with a fork .

    Whole Wheat Biscuits

    Preheat the oven to 180 deg C and bake for 18-20 minutes, till the top looks golden colored. Each oven temperature will be different, so make sure to check the biscuits from 16 minutes onwards (refer notes).

    Cool it on a wire rack , store in a airtight container.

    whole wheat biscuits

    Recipe

    whole-wheat-biscuits
    4.67 from 3 votes

    Whole Wheat Butter Biscuits

    Crispy and crunchy whole wheat butter biscuits are perfect with cup of tea and kids snack box too.
    Prep Time10 minutes mins
    Cook Time18 minutes mins
    Resting Time30 minutes mins
    Total Time58 minutes mins
    Course: Snack
    Cuisine: Fusion, World
    Keyword: Baking, Cookies, Eggless
    Servings: 28 makes
    Calories: 52kcal
    Author: Muktha H S

    Ingredients

    • 1.5 cups Whole Wheat Flour
    • 100 grams Softened butter
    • ½ cup brown sugar or regular sugar
    • 4-5 tablespoon Milk
    • ½ teaspoon Apple Cider Vinegar
    • 1 pinch Salt
    • ½ teaspoon Baking Powder
    • ¼ teaspoon Cooking soda
    • ¼ teaspoon Nutmeg powder
    • ½ teaspoon Green Cardamom Powder

    Instructions

    • In a mixing bowl, take wheat flour, add baking powder, pinch of cooking soda, salt , nutmeg powder and cardamom powder. Mix well everything.
    • Add 100 grams of softened chilled butter to the flour mixture and mix everything either with a blender (if using chilled butter) or hands. 
    • It should be crumbly in texture and looks like bread crumbs.
    • Take ½ cup sugar in a blending jar and fine powder it.
    • Now add powdered sugar, 2-3 tablespoon of milk and apple cider vinegar
    • Gather everything together to form dough. If unable to form dough then just add 1 or 2 tablespoon extra milk to form dough.
    • Cover dough with a cling film and refrigerate for minimum 30 minutes.
    • After 30 minutes, remove dough from the refrigerator, open the cling film. Divide the dough into 2-3 parts.
    • On a working top , roll the dough into 0.50 cms thick disc and with help of cookie cutter , cut into desired shapes.
    • Alternatively you can also make dough in a log shape and slice it into round discs.
    • Preheat the oven to 180 deg C and bake for 18-20 minutes, till the top looks cooked . Refer Notes *
    • Each oven temperature will be different, so make sure to check the biscuits from 16 minutes onwards (refer notes).
    • Cool it on a wire rack and  store in a airtight container.

    Video

    Notes

    • As it's a whole wheat biscuits , adding ACV is essential . If not ACV , you can add 2-3 tablespoon of curds.
    • Depending on the flour texture , it may take more or less milk , so start from adding 2  tablespoon of milk at a time.
    • Butter should be chilled or just softened , Don't melt the butter 
    • Don't knead the dough , just mix everything together to form dough.
    • Temperature varies from oven to oven , while baking do check for the doneness. When you touch the biscuits , it should be cooked on top and should very lightly be soft inside.  Then remove from the oven and allow it to cool , it hardens once it cools down completely. 

    Nutrition

    Calories: 52kcal

    Aloo Methi Recipe

    Published : December 19, 2018 | Last Update on September 27, 2022 By Muktha

    aloo-methi-recipe

    Aloo Methi is a dry sabji recipe made with Potatoes , fresh fenugreek leaves and spices. Fresh fenugreek leaves and potatoes goes hand in hand .

    Mild flavour and bitterness of methi complements the sweet taste of potatoes with a dash of spices on it.

    This delicious Aloo Methi recipe is very simple and easy to make with minimal spices . And also this is an No Onion , NO Garlic recipe with lots of flavors.

    Easy Aloo Methi Recipe
    [feast_advanced_jump_to]

    About this recipe

    Aloo methi recipe is a popular Indian side dish . Every home has their own recipe but my version of Aloo methi is simple , quick and easy to make with No Onion and No Garlic recipe.

    Though one can add onions if you need , I like this recipe this way without any onions.

    Potatoes are sauted until crisp and golden and then fresh fenugreek leaves are cooked until leaves wilt and then seasoned to perfection.

    You can serve methi aloo as a side dish with chapathi , roti or rice sambar.

    You must try this aloo methi recipe because , it's

    • Healthy
    • Nutritious
    • Quick and Easy
    • Tasty

    Green Leafy Vegetables Importance in Balanced Diet

    Greens are rich in Vitamins , Minerals and Fibers  but very low in calories. Greens are considered to be one of the best food for weight loss. As it contains nitrites , it is associated with increasing the fat burning ability. Hence low calories , nitrites and fibre rich makes leafy vegetables a best choice in losing weight.

    Apart from weight loss , Green leafy vegetables has incredible effects on our body. Most important health benefits of green leafy vegetables includes treating anemia, improving digestive health, maintaining weak eyesight,. It also helps in balancing cholesterol levels, supporting cardiovascular health and also enhancing skin and hair quality.

    Green leafy vegetables are integral part of an healthy diet . Consume wide variety of greens regularly to reap all the positive health benefits.  One of the easiest way of incorporating greens in our diet is by adding leafy vegetables in everything we cook from dals , gravies to curries , rice's to rotis and parathas.

    Fenugreek being one of my favourite leafy vegetable , I have tendency to add it in my curries as well a rice recipes.

    It gives a unique flavour in rice dishes like Tomato Bath and Vegetable Bath . Also curries like Sprouted Horsegram Curry and Massida Soppu saaru ,gets all its flavours from this fenugreek leaves.

    Ingredients

    Apart from potatoes and fenugreek leaves , you just need basic spices for seasoning to uplift the taste of this methi aloo recipe.

    aloo-methi-ingredients

    Fenugreek Leaves - Always choose tender , green small fenugreek leaves which are fresh , don't use matured, broad leaves or if leaves are turned yellow in colour. Clean and pluck fenugreek leaves , discarding stems. If you wish ,you can consider to add top tender stems . Rinse well and set aside.

    Potatoes - Red skinned potatoes, baby potatoes, yukon gold and new potatoes are good options. Avoid potatoes that mushes easily once after they cook

    Oil - I prefer mustars oil to make this delicious aloo methi recipe , as it gives a flavourful dish. Though I recommend using mustard oil , you can use any vegetable oil too.

    Others - I prefer to keep the spices minimal in this recipe . Salt , green chilies for spiciness , cumin seeds , asafoetida and dry mango powder is all you need. I insist to use dry mango powder as it adds tartness to the mildly bittered methi leaves , which helps to enhance the flavours.

    Watch Video

    How to make Aloo Methi Recipe

    Clean Methi leaves , separate the leaves from stems. You can use tender stems . Wash leaves thoroughly in running water . Chop the leaves and keep it aside.

    Wash well potatoes , peel the skin and cut the potatoes.

    diced-potatoes

    Heat mustard oil in a pan , add jeera seeds ,allow it to crackle.

    Add chopped potatoes and asafoeteida

    diced-potatoes-into-mustard-oil

    Mix well everything , continue to cook till potatoes looks golden and crisp.

    sligthly-crisped-potatoes

    Add green chillies , chopped fenugreek leaves , salt and amchur powder .

    add-chopped-methi-leaves

    Methi leaves will release water and wilts completely.  Lower the flame and continue to cook till water dries up completely.

    cook-methi-leaves-until-it-wilts

    FInally add salt and dry amachur powder.

    add-salt-dry-mango-powder

    Mix well and serve Aloo Methi has side dish along with Roti-Dal or Dal Chawal or Kichadi in lunch for a complete balanced meal.

    aloo-methi-no-onion-no-garlic

    Recipe

    aloo-methi-recipe
    5 from 2 votes

    Aloo Methi Recipe

    Aloo Methi Sabji is a dry vegetarian dish prepared with fresh fenugreek leaves and potatoes. ,
    Prep Time15 minutes mins
    Cook Time20 minutes mins
    Total Time35 minutes mins
    Course: Side Dish
    Cuisine: Indian, Punjabi
    Keyword: Punjabi
    Servings: 3 People
    Calories: 226kcal
    Author: Muktha H S

    Ingredients

    • 4 Cups Fenugreek Leaves , firmly pressed
    • 2-3 no's medium sized potatoes or 250 grams Potatoes
    • 1-2 no's Green Chilies , chopped
    • ¼ teaspoon Asafoetida/ Hing
    • ½ teaspoon Dry Mango Powder
    • 1 teaspoon Jeera / Cumin Seeds
    • 2 tablespoon Mustard Oil or any cooking oil
    • Salt to taste

    Instructions

    • Clean Methi leaves , separate the leaves from stems. You can use tender stems . Wash leaves thoroughly in running water . Chop the leaves and keep it aside.
    • Wash well potatoes , peel the skin and cut the potatoes.
    • Heat mustard oil in a pan , add jeera seeds ,allow it to crackle.
    • Add chopped potatoes , sauté at intervals and cook until it turns lightly golden in color.
    • Now add chopped green chilies and asafoetida, saute for 2-3 minutes. Potatoes crisps further.
    • Add chopped fenugreek leaves , mix well and cook until methi leaves wilts and water content dries up completely.
    • Methi leaves will release water and wilts completely. Lower the flame and continue to cook till water dries up completely.
    • When there is no more water content from fenugreek leaves, add salt to taste and amchur powder ( dry mango powder)
    • Mix well completely and turn off the stove.
    • Serve Aloo Methi has side dish along with Roti-Dal or Dal Chawal or Kichadi in lunch for a complete balanced meal.

    Video

    Notes

    • I have used mustard oil because this Aloo Methi Sabji is a punjabi style dry sabji . 
    • I emphasize on using different types of oil for cooking as per the cuisine ,so that our body will be benefited from each kind of fatty acids . You can understand more about this in my article Balanced Diet .
     

    Nutrition

    Calories: 226kcal

    You might also like

    • Karela-chips-with-coffee
      Karela Chips Recipe | Bittergourd Chips
    • Ragi_ambli_recipe
      Salted Ragi Ambli
    • palak-dal-recipe
      Dal Palak | how to make palak dal recipe
    • Methi Thepla
      Methi Thepla Recipe | Gujarati Thepla Recipe

    Balanced Diet

    Published : December 14, 2018 | Last Update on December 17, 2018 By Muktha

    Balanced Diet

    Everyone is aware of the terminology Balanced diet . Even my school going kid explains me very well on what to eat and what not to eat. But still let me put it in a line that balance diet is eating right amounts of carbohydrates , protein , fat , Vitamins and minerals. This is a globally known fact. But are you wondering on why am I blogging this , when it's a universal known fact? It's only because to unmask the awareness that is already existing within us. Trying to emphasize on pick , pair and eat right .

    Balanced Diet

    All the nutrients are derived through combination of major food groups. Cereals and Pulses , Meat and Dairy Products , Fruits & vegetables , Fats & oils. 

    Understanding Food Pyramid

    Cereals like whole wheat , rice , ragi ,oats and millets makes up for complex Carbohydrates in our diet . Half of our calories should come from carbohydrates. The above food pyramid shows the pictorial representation on how food needs to be consumed . Along with carbohydrates vegetables are added . Because both soluble and insoluble fibres helps with digestion.

    Also most of fruits and vegetables are in low glycemic index which means it don't cause sudden spikes in blood sugar levels. Fruits, vegetables ,Green leafy vegetables , Nuts, meat, fish and eggs are good sources of minerals and vitamins. Vegetables lose out nutrients while cooking , so proper cooking methodologies should be adapted. 

    Protein about 30- 35 % of our diet should be from protein. Protein is nothing but chain of 9 amino acids. Animal protein is considered as complete protein when compared with that of Plant based protein. PULSES/ LENTILS SHOULD ALWAYS BE COMBINED WITH CEREALS , to get COMPLETE PROTEIN. So only Dal - Chawal , Dal - Roti , Dosa , Idli , Puran Poli combinations exits which is nothing but a complete protein. But Animal Protein like Milk , Cheese , Meat , Egg , Paneer , Yogurt are complete protein.

    Fats provides energy , stores vitamins and synthesize hormones. About 20% of our diet should be devoted to fats. All kinds of fat like polyunsaturated , monounsaturated and omega 3 fatty acids should be present in our diet. Try different kinds of fats like coconut oil , vegetable oil , mustard oil, peanut oil , olive oil , butter and ghee while preparing different cuisines and get benefited with all good fat. 

    Diet Influencing factors

    Globally all are more health conscious . Everyone looks for an healthy , nutritious and tasty diet. One may browse through internet for 1000's of healthy and nutritious recipes. But one of the most important thing to observe is , what type of diet suits our body ? Western food and their diet plan may not be easier to follow for Asians and vice versa. Season , Regions, Genes, Body type and also socio economic factors plays a important role while choosing a diet.

    So thoughtfully choose your food according to your gene, season,region and socio economic conditions . Eat any kind of diet , but make sure it is well balanced and suits your body. For an Balanced Diet ,every Indian main meal should atleast have Rice or Roti with ghee , Dal and Veggies , egg or curd . Don't indulge much on pakora / fritters ,saying fat is essential 🙂 🙂 , however veg and dal preparations has oil with it and it's more than sufficient for our body to synthesize hormones 🙂 .  As you see fat is on Top of the Pyramid and needs minimal amount.  

    Balanced Diet

    Tailor your food as per your needs and build your own balanced diet chart. Wait for my next article on food and calories , Until then......, bye bye . Eat healthy , Stay Fit 🙂

    Instant Oats Dosa

    Published : December 14, 2018 | Last Update on September 29, 2022 By Muktha

    instant oats dosa

    Instant Oats Dosa is a quick Dosa recipe that is made with oats flour (powdered oats) , rice flour and sooji / rava. Instant breakfast comes to my rescue many time and this Dosa too , falls under the same category.  I don't claim that this oats dosa is super yum to taste . But it's easy to make breakfast, tastes fine and nutritious too .

    instant oats dosa

    Being a South Indian its needless to say that Dosa and Idli are our main breakfast . Varieties of Dosa and Idli are regular at home with varieties of chutney and sambar , but unfortunately none is there in my blog yet. Soon i'll share all my regular recipes .

    After me being a Nutritionist my view towards few food has totally changed. Few years before I always used to bring big packets of Oats regularly along with my groceries . But nowadays it's only  500 grams I bring , that too for emergencies when I can't prepare long elaborate breakfast . Because now  I know the fact that there is nothing nutritious left in OATS as hyped . Processing Oats rip off most of its fiber and nutrients . So make oats preparation more nutritious by adding lots of veggies and also paneer.

    Combinational Eating

    Regular Dosa preparations need Lentils .But for Instant Oats Dosa,  No lentils are required hence this dosa lacks protein. So its necessary to pair this Dosa with any  Tiffin Sambar , dal or any curries like Kala Chana Masala , Chole Masala , Rajma Masala or Makhani Dal. Chutneys like Spicy Peanut Chutney  or Mixed Chutney Powder make this Instant Oats Dosa a balanced meal.  Hence Oats is always paired with milk , nuts and fruits , it's done for the protein portion. If we are bringing western food to east then pairing of food should also be done thoughtfully.

    To speak about this particular  Instant Oats Dosa , Oats has invaded our markets. Undoubtedly it has many health benefits. But How to eat it right ? If I'm not having Oats with Milk ? Then from where do I get my Protein portion in my Meal ?If it is a dosa like this ,where are nutrients from vegetables? So when you choose a food which is not from our region focus on how it is consumed ? Make Proper combinations as I have already mentioned above.

    Globally all are more health conscious . Everyone looks for an healthy , nutritious and tasty diet.  Like me there are crores who browse through internet for healthy and nutritious recipes. But one of the most important thing here to observe is , which food suits our body ? Western food and their diet plan may not be easier for Asians to follow and vice versa. Season , Region , Genes, Body type and also Socio Economic factors plays a important role while choosing a diet.

    Whichever food you choose ,eat it in such a manner that it is a well Balanced Diet. Means there should be carbohydrates , protein, vitamins , minerals and fat in right amounts. Everything is important for a body to function normally. For more information on this check my article Balanced Diet in Health and wellness Category. 

    This is a kind of information I always want to share with my readers. If my readers can understand the fundamentals of eating and pairing right food together, then motto of running this food blog will be achieved. 

    RECIPE CARD FOR INSTANT OATS DOSA

    Recipe

    instant oats dosa
    5 from 1 vote

    Instant Oats Dosa

    Instant Oats Dosa - Is a quick breakfast prepared with oats flour , rice flour , rava and curds.
    Prep Time10 minutes mins
    Cook Time15 minutes mins
    Resting Time15 minutes mins
    Total Time25 minutes mins
    Course: Breakfast
    Cuisine: Fusion, Indian
    Keyword: South Indian
    Servings: 6 Dosa
    Calories: 88kcal
    Author: Muktha H S

    Ingredients

    • 1 cup Oats
    • ⅓ cup Rice Flour
    • 3 tablespoon Rava /Sooji / Semolina
    • 3 tablespoon Curds
    • ¾ teaspoon Salt or as required
    • Water as required
    • Oil ? Ghee for roasting Dosa

    Instructions

    • Dry Roast 1 cup of Oats on medium heat for 4-5 minutes.
    • Add dry roasted oats to a blender and powder the oats.
    • In a mixing bowl add powdered oats , ⅓ cup rice flour, 3 tablespoon Sooji/rava and salt.
    • Add 3 tablespoon of curds and ½ -¾ cup of water, it may take upto 1 cup also , as it depends on the oats , flour and rava.mine took ¾ cup of water.
    • With wired whisk mix well everything such that no lumps are formed and batter is of smooth flowing consistency.
    • Heat griddle ,pour a ladle full of batter and swirl round as we do for dosa.Once the top look lightly cooked.
    • Put some oil/ ghee all over and on edges, close the dosa with a lid and cook for 2-3 minutes or till done.
    • Serve Oats dosa hot with ghee on top and any Tiffin Sambar or Peanut Chutney.

    Notes

    1. It doesn't turn dark golden brown like other Dosa  as oats and rice flour both are gluten free.
    2. You can also make the batter more thin and add onion , jeera seeds, coriander leaves and green chilies to prepare Oats- Rava dosa .

    Nutrition

    Calories: 88kcal

    Step by Step Directions on making of Instant Oats Dosa:

    Dry Roast 1 cup of Oats on medium heat for 4-5 minutes.

    Instant Oats Dosa

    Add  dry roasted oats to a blender and powder the oats.

    Instant Oats Dosa

    In a mixing bowl add powdered oats , ⅓ cup rice flour, 3 tablespoon Sooji/rava and salt.

    Instant Oats Dosa

    Add 3 tablespoon of curds and ½ -¾ cup of water, it may take upto 1 cup also , as it depends on the oats , flour and rava.mine took ¾ cup of water.

    Instant Oats Dosa

    With wired whisk mix well everything such that no lumps are formed and batter is of smooth flowing consistency.

    Instant Oats Dosa

    Heat griddle ,pour a ladle full of batter and swirl round as we do for dosa. Once the top look lightly cooked.

    Instant Oats Dosa

    Put some oil/ ghee all over and on edges, close the dosa with lid and cook for 2-3 minutes or till done.

    Instant Oats Dosa

    Serve Oats dosa hot with ghee on top and any Tiffin Sambar or Peanut Chutney.

    I served Instant Oats Dosa with Peanut Chutney powder and Mixed Veggies and Chana Dal Palya. Palya in kannada means sauteed veggies dry side dish just like poriyal in Tamil.

    Instant Oats Dosa

    Vegetable Bath

    Published : December 12, 2018 | Last Update on September 27, 2022 By Muktha

    vegetbale-bath-with-raita

    Vegetable Bath is a spicy and tasty rice dish cooked with assorted vegetables , fresh coconut and spices . It's popular in Karnataka , South India. Get's ready in 30 minutes and tastes good when had with simple onion raita .

    My version of vegetable bath is simple to make ,it's one pot recipe and best to pack for lunch box .

    vegetable-bath-with-beetroot-pachadi-raita
    [feast_advanced_jump_to]

    About this recipe

    Vegetable bath also popular as rice bath is a native recipe of Karnataka, South India . This recipe is quite similar to Vegetable Pulao. Vegetables like Carrot , Beans , Potato , Cabbage and green peas are used to make this tasty rice bath . This is a one pot recipe and is one of the best lunch box recipe. 

    Though every house has their own proportion and choices of spices , this recipe is subtle on spices , melds well with other co-existing vegetables and ingredients to bring out the best fluffy and tasty vegetable rice bath .

    Why you need to try this recipe?

    I want you to try this recipe because it is tasty , easy to make and healthy too. Assorted vegetables of your choice can be used .

    And most importantly like many rice dishes , excess oil /fat is not used in this recipe still it tastes the best !

    Though rice bath of any kind needs bit more oil , I have tried to give a minimum required amount of Oil and Clarified butter here.

    As using little more will definitely enhance taste , it adds lot on calories too . So without being partial on taste nor health, I have tried to use the right amount here.

    Using less oil in the recipe may make you feel dryness in the rice and more may grease your plates along with helping you to increase your waistline.

    So with the right measurements given you can cautiously make changes depending on whether its a occasional indulgence or a regular dining.

    Most of the Karnataka based recipes makes use of fresh coconut . If you have no access to fresh coconut then you can soak dry coconut in warm milk or water for 30 minutes and use it . Alternatively you can even use coconut milk , but it slightly differs in taste.

    What I like most about this Vegetable bath is, it is a main meal and can be served either for weekend brunch , lunch and gatherings.

    We even prepare this as one of the dish during family and friends gatherings at home. As it is easy to cook and one pot recipe , it is common in gatherings just like any other Pulao and Biryani's.

    Watch Video

    How to make Vegetable Bath

    Rinse and wash 2 cups of rice , soak it in water for 20- 30 minutes.

    Vegetable Bath

    Meanwhile , do the preparations like cutting vegetables and blend masala.

    For masala paste , add fresh grate coconut ½ cup , 4 cloves , 1 inch cinnamon stick , coriander leaves , turmeric powder , ginger ,garlic , green cardamom , green chillies , cumin seeds and saunf . Blend to a coarse paste by adding 2-3 tablespoon of water.

    Vegetable Bath

    Heat 1 Tbsp ghee/ clarified butter and 3 Tbsp oil in a pressure pan or any deep pan/pot . Add 2 tablespoon chopped mint leaves  .

    Vegetable Bath

    Now add chopped onions and fry till it turns translucent.

    Vegetable Bath

    Add in 1 cup of chopped methi leaves and saute till it wilts.

    Vegetable Bath

    Add  blended masala paste and mix well . Allow it to cook on medium heat for 5-8 minutes . Cook masala well till you get nice aroma and oil starts to release from the corners.

    Vegetable Bath

    Add in fresh green peas ( or overnight soaked dry green peas)  and mix well.

    Vegetable Bath

    Now add all roughly chopped vegetables  and mix well.

    Vegetable Bath

    Add 1 chopped tomato and stir in .Add ½ teaspoon salt .

    Vegetable Bath

    Drain soaked rice and add in to the vegetables , stir well and continue to cook for 4-5 minutes .

    Vegetable Bath

    Now add hot water, salt 1.5 teaspoon or as per taste and pressure cook for 1 whistle.

    Vegetable Bath

    Allow pressure to settle down on its own. If you cooking in an open pot , close the lid and cook till done.

    Vegetable Bath

    Add chopped coriander leaves , lemon juice

    Vegetable Bath

    add1 tablespoon of ghee , mix well.

    Vegetable Bath

    Serve hot with cucumber raita or any other raita of your choice. In frame, vegetable bath along with cucumber raita and beetroot pachadi.

    Vegetable Bath

    Recipe

    vegetbale-bath-rice-bath-recipe
    4.80 from 5 votes

    Vegetable Bath - Rice Bath Recipe

    Vegetable Bath is a spicy and tasty rice dish cooked with assorted vegetables , fresh coconut and spices . It's popular in Karnataka , South India.
    Prep Time20 minutes mins
    Cook Time25 minutes mins
    Total Time45 minutes mins
    Course: Main Course
    Cuisine: Indian, Karnataka
    Keyword: Rice Varities
    Servings: 6 people
    Calories: 263kcal
    Author: Muktha H S

    Ingredients

    • 2 cups Rice , any old age rice
    • 2 no's Medium size onion
    • 1 no Large Carrot or ⅓ cup carrots diced
    • 12-15 no's French green beans or ⅓ cup beans chopped
    • ⅔ cup Cabbage
    • ½ cup fresh or frozen green peas
    • 1 cup fresh fenugreek leaves ,optional
    • 1 no large tomato chopped , optional
    • 2 tablespoon Chopped mint leaves
    • 2 Tbsp Coriander leaves
    • 1.5 - 2 teaspoon Lemon Juice
    • 2 tablespoon Ghee/ clarified butter
    • 3 tablespoon Oil
    • 2 teaspoon Salt or as required
    • 3.5 cups Hot water , see notes

    For Blending Masala

    • ½ cup fresh coconut , see notes
    • ⅓ cup coriander leaves
    • 2 inch ginger
    • 12-15 garlic cloves , medium size
    • ½ teaspoon jeera/ cumin seeds
    • 2 no green cardamom
    • ½ tsp saunf / fennel seeds
    • 4 no cloves
    • 1 ½ inch cinnamon stick
    • 6-8 no green chilli , less spice variant
    • ¼ teaspoon turmeric powder

    Instructions

    • Rinse and wash 2 cups of rice , soak it in water for 20- 30 minutes.
    • Whilst cut vegetables and blend masala
    • For masala paste , add fresh grate coconut ½ cup , 4 cloves , 1 inch cinnamon stick , coriander leaves , turmeric powder , ginger ,garlic , green cardamom , green chillies , cumin seeds and saunf . Blend to a coarse paste by adding 2-3 tablespoon of water.
    • Heat 1 tablespoon ghee/ clarified butter and 3 tablespoon oil in a pressure pan or any deep pan/pot . Add 2 tablespoon chopped mint leaves .
    • Now add chopped onions and fry till it turns translucent.
    • Add in 1 cup of chopped methi leaves and saute till it wilts.
    • Add blended masala paste and mix well . Allow it to cook on medium heat for 5-8 minutes . 
    • Cook masala well till you get nice aroma and oil starts to release from the corners.
    • Add in fresh green peas ( or overnight soaked dry green peas) and mix well.
    • Now add all roughly chopped vegetables and mix well.
    • Add 1 chopped tomato and mix well. Also add ½ teaspoon salt
    • Drain soaked rice and add in to the vegetables , stir well and continue to cook for 4-5 minutes .
    • Now add hot water and pressure cook for 1 whistle. Add 1.5 teaspoon , allow pressure to settle down on its own. If you cooking in an open pot , close the lid and cook till done.
    • Open the lid , add chopped coriander leaves , lemon juice and 1 tablespoon of ghee , mix well.
    • Serve hot with cucumber raita or any other raita of your choice.

    Video

    Notes

    1. If fresh coconut is not available then you can soak dry coconut soak in warm milk or water for 30 minutes and use.
    2. Or else you can even use , coconut milk . ½-3/4 cup of coconut milk can be used. Add coconut milk after , rice is added and before water .
    3. If using coconut milk then adjust the amount of water accordingly to cook rice. 
    4. As pressure cooker is used here for cooking rice , 3.5 cups of water is sufficient. As masala and vegetables also has water content.
    5. You can also reduce the amount of green chillies to 4 and add ½ teaspoon of red chilli powder and ½ teaspoon of coriander powder ,while blending the masala.

    Nutrition

    Calories: 263kcal

    You may also like

    • bisi-bele-bath-with-khara-boondi
      Bisi Bele Bath Recipe
    • khara pongal recipe
      Khara Pongal
    • capsicum-vangi-bath
      Capsicum Bath Recipe
    • mavinakayi-chitranna
      Mavinakayi Chitranna | Raw Mango Rice

    Besan Chilla Recipe

    Published : December 10, 2018 | Last Update on July 23, 2022 By Muktha

    besan_chilla

    Besan Chilla is a delicious savory pancake made with  besan/ gram flour , vegetables and spices. Few even refer Besan Chilla as Veg Omelette . Quick and easy to make Besan Chilla can be made for either breakfast or evening tiffin. It is so tasty that you don't need anything for accompaniment , can eat this on its own . Orelse you can serve with Coriander Chutney or Tomato Sauce.

    besan_chilla

    It is easy to make , hence I often do it for breakfast .Basic besan chilla is made with spices, onions and tomatoes .But to increase the nutritional value , capsicum , grated carrot , grated cabbage can also be added. I even stuff this with paneer bhurji or with sauteed veggies at times to make it more nutritious , delicious and complete breakfast .

    Besan chilla is an healthy afterschool snack option .It also makes for a tiffin box snack . Many times I send this in my kid snack box along with tomato Ketchup . This is his favourite Tasty Savory Tiffin box snack and also mine 🙂 🙂 🙂 . As Besan Flour / Gram Flour alone doesn't make up for complete protein . So any kind of  plant based protein should be added along with cereals to make it complete protein. It is just a piece of information for those who aren't aware .

    Other Chilla recipes which I often do for breakfast are moong dal chilla and Oats Chilla,will share the recipe soon. Shortly i'll share the recipe as it becomes easy for morning hours. Few more easy breakfast and lunch box recipes are : Onion Paratha , Paneer Paratha , Masala Lemon Rice , Moong Dal Rice and Puliyogare.

    RECIPE CARD FOR BESAN CHILLA | VEG OMELETTE 

    Recipe

    besan_chilla
    No ratings yet

    Besan Chilla | Veg Omelette

    A savoury and delicious pan cake made with gram flour and spices .
    Prep Time5 minutes mins
    Cook Time20 minutes mins
    Total Time25 minutes mins
    Course: Breakfast
    Cuisine: Indian
    Keyword: Tiffin
    Calories: 128kcal
    Author: Muktha H S

    Ingredients

    • 1 cup Besan / gram flour
    • 3 tablespoon Onions finely chopped
    • 3 tablespoon Tomatoes finely chopped
    • 1 no Green chilly finely chopped ,less spice variant
    • 2 tablespoon Coriander leaves chopped
    • ½ inch Ginger grated
    • ⅛ teaspoon Turmeric Powder
    • 1-2 pinch Hing / asafoetida
    • ½ teaspoon Carom seeds / ajwain
    • ¼-1/2 teaspoon Red Chilli powder
    • ¾ teaspoon Salt or as required
    • ½-3/4 cup Water
    • Oil as required for roasting chilla

    Instructions

    • In a mixing bowl take besan/ gram flour, spices and herbs .
    • Add onion , tomato ,green chillies and add water part by part . It depends on the quality of besan , so adjust water accordingly . Mine took  between ½- ¾ cup water .
    • Mix well with wired whisk, it should be a free smooth flowing consistency , not too thick nor too think.
    • Heat tawa / griddle , spread oil and rub it with onion or tissue paper as we do while preparing dosa.Take a ladle full of batter and pour on tawa.
    • Spread the batter using the backside of the ladle and cook till the top looks dry and cooked .Cook cheela on medium flame /heat.
    • Drizzle ½ teaspoon of oil all around the cheela, continue to cook for a 30 - 60 seconds ,till base is firm and golden colour.
    • Flip and cook on other side , till golden spots appears .
    • Serve Besan cheela hot or warm . Can eat on its own but tastes even delicious with Coriander Chutney or Tomato Sauce.

    Nutrition

    Calories: 128kcal

    Step By Step Directions for making  Besan Chilla :

    In a mixing bowl take besan/ gram flour, spices .

    Besan Chilla Recipe

    Add vegetables and herbs, add water part by part.

    Besan Chilla Recipe

    Mix well with wired whisk, batter should be a free smooth flowing consistency , not too thick nor too think.

    Besan Chilla Recipe

    Heat tawa / griddle , spread oil and rub it with onion or tissue paper as we do while preparing dosa.Take a ladle full of batter and pour on tawa.

    Besan Chilla Recipe

    Spread the batter using the backside of the ladle and cook till the top looks dry and cooked .Cook cheela on medium flame /heat.

    Drizzle ½ teaspoon of oil all around the cheela, continue to cook for a 30 - 60 seconds ,till base is firm and golden colour.

    Besan Chilla Recipe

    Flip and cook on other side , till golden spots appears .

    Besan Chilla Recipe

    Serve Besan cheela hot or warm . Can eat on its own but tastes even delicious with Coriander Chutney or Tomato Sauce.

    Besan Chilla

    Tiffin Sambar Recipe

    Published : December 8, 2018 | Last Update on October 6, 2022 By Muktha

    Tiffin Sambar

    Tiffin Sambar is a typical South Indian homestyle sambar prepared with moong dal and vegetables using freshly prepared sambar powder.

    It's one of the easiest sambar recipe that can be prepared for morning breakfast.

    Most importantly the aroma of freshly ground spice powder adds flavours to this Sambar. Vegetables used for this sambar are mainly Carrot , Beans , Potato, Brinjal and Drumsticks . You can use any  mixed vegetables as per availability.

    Tiffin Sambar

    This sambar is not similar to the sambar that is served along with Idli in Restaurants as Idli - Sambar.  Because Toor Dal is used to prepare restaurant style Sambar for Idli  but here moong dal is used as main ingredient. But this is a kind of Tiffin sambar which is a most generic sambar hence it can be served as a side dish with any kind of South Indian Breakfast like Idli , Pongal , Dosa or even Upma.

     I often prepare this Tiffin Sambar for morning breakfast as a side dish for Rice Idli or Dosa or Pongal. This is a very mild sambar and kids would love this sambar. Also the amount of  tamarind paste used here is very less when compared with regular sambar. 

    After being a Nutritionist , my view towards food and eating habits has totally changed. Clean eating and right cooking methods are what I have learnt , adapted and developed these days .

    Sambar is most healthiest dish to incorporate in diet  because spices and tamarind juice has has its own set of health benefits. Sambar , is an elixir of health . It benefits the health by better digestion , relief from gas and flatulence. Also good source of protein by lentils , immunity boosters like turmeric, cumin seeds and also vitamin, minerals from vegetable stew.

    Other typical Karnataka Style South Indian Curries / Saaru  recipes shared on my blog are : Molake Hurali Kaalu Saaru | Spicy Horsegram Curry , Massoppu Saaru | Assorted Greens Sambar and  Hurali Bas Saaru | Stewed Horsegram Curry .

    RECIPE CARD FOR TIFFIN SAMBAR

    Recipe

    Tiffin Sambar
    5 from 2 votes

    Tiffin Sambar - Moong Dal Sambar

    Tiffin Sambar is a typical  South Indian homestyle sambar prepared with lentils and vegetables. 
    Prep Time15 minutes mins
    Cook Time25 minutes mins
    Total Time40 minutes mins
    Course: Side Dish
    Cuisine: Indian, South India
    Keyword: Curries, Sambar
    Servings: 5 People
    Calories: 113kcal
    Author: Muktha H S

    Ingredients

    For Pressure Cooking Dal

    • ⅓ cup Moong Dal
    • ¼ teaspoon Turmeric Powder
    • ½ teaspoon Oil
    • 1.5 Cups Water

    For Sambar

    • 1 No Onion chopped , medium size
    • 1 No Tomato ,medium size
    • 2 No's Green Chillies
    • 1 No Potato medium size
    • 1 No Carrot Small
    • 4-5 No's Beans
    • 1 teaspoon Tamarind firmly pressed and juice extracted
    • 2 tablespoon Coriander leaves chopped
    • ¼ teaspoon Organic Jaggery Powder
    • 1 ½ teaspoon Salt or as required
    • Water as required

    For Tempering

    • 2 teaspoon Oil / Ghee
    • ½ teaspoon Mustard Seeds
    • 1 teaspoon Jeera/ Cumin seeds
    • 1 Sprig Curry Leaves
    • ¼ teaspoon Asafoetida / Hing

    For Sambar Powder

    • 1 ½ tablespoon Chana Dal
    • 1 ½ Tsp Coriander Seeds
    • 4 No's Dry Red Chillies Guntur
    • ½ teaspoon Fenugreek Seeds
    • ½ teaspoon Jeera seeds , Optional

    Instructions

    • Soak 1 teaspoon of tamarind in  ½ cup water for 15-20 minutes . Extract the juice and set aside.
    • Whilst rinse and wash moong dal , add turmeric powder , oil and water .
    • Pressure cook for 3 whistles , allow pressure to settle down on its own . Open the lid and mash dal lightly.
    • Meanwhile dry roast all the chana dal , coriander seeds , red chillies and methi seeds till fragrant . Don't burn the spices.  
    • In a small mixer jar , blend the dry roasted spices to fine powder.
    • Heat oil / ghee in a kadai  ,add mustard seeds once it crackles , now add jeera seeds , curry leaves and hing.
    • Add chopped onion and green chillies , saute till onions turn translucent.
    • Now add in all chopped veggies , tomatoes  , turmeric powder and  cook for 3-4 minutes
    • Pour extracted tamarind juice and continue to cook for 2-3 minutes. 
    • Add 1 cup water to the sambar powder , mix well and  this into the vegetables. 
    • Bring it to boil , now add cooked dal ,salt as required and  mix well .
    • Add water as required , adjust the consistency , continue to cook  for 5 more minutes and turn of the heat.
    • Garnish with coriander leaves and serve with Pongal , Idli  or Sambar.

    Nutrition

    Calories: 113kcal

    Step by Step directions to make Tiffin Sambar :

    Soak 1 teaspoon of tamarind in  ½ cup water for 15-20 minutes . Extract the juice and set aside.

    Tiffin Sambar Recipe

    Whilst rinse and wash moong dal , add turmeric powder , oil and water .

    Tiffin Sambar Recipe

    Pressure cook for 3 whistles , allow pressure to settle down on its own . Open the lid and dal should be mushy.

    Tiffin Sambar Recipe

    Meanwhile dry roast allthe chana dal , coriander seeds , red chillies and methi seeds till fragrant . Don't burn the spices.  

    Tiffin Sambar Recipe

    In a small mixer jar ,blend the dry roasted spices to fine powder.

    Tiffin Sambar Recipe

    Heat oil / ghee in akadai  ,add mustard seeds once it crackles , now add jeera seeds , curry leaves and hing.

    Tiffin Sambar Recipe

    Add chopped onion and green chillies , saute till onions turn translucent.

    Tiffin Sambar Recipe

    Now add in all chopped veggies , tomatoes  , turmeric powder and  cook for 3-4 minutes.

    Tiffin Sambar Recipe

    Pour extracted tamarind juice and continue to cook for 2-3 minutes. 

    Tiffin Sambar Recipe

    Add 1 cup water to the sambar powder , mix well and add this into the vegetables. 

    Tiffin Sambar Recipe

    Bring it to boil , now add cooked dal ,salt as required and  mix well .

    Tiffin Sambar Recipe

    Add water as required ,adjust the consistency , continue to cook  for 5 more minutes and turn of the heat.

    Tiffin Sambar Recipe

    Finally , garnish with coriander leaves and serve with Pongal , Idli  or Sambar.

    Tiffin Sambar

    Amritsari Fish Fry

    Published : December 7, 2018 | Last Update on October 7, 2022 By Muktha

    Amritsari Fish Fry is a batter dipped delicious fish Fry . But as I don't often prepare deep fried fishes , I have prepared a Tawa Fish Fry in Amritsari style.

    Fish is marinated with spices and then tawa fried by sprinkling roasted gram flour/ besan. Flavours of mustard oil and ajwain/ carom seeds make this a delicious fish fry.

    This is not a authentic Amritsari Fish Fry , if you are looking for a authentic Amritsari fish , then marinate fish with all ingredients listed below and then deep fry it in Mustard Oil . Refer notes for deep frying Fish.

    This is Swasthi's recipe but tweaked a bit to suit my taste.

    amritsari fish fry

    Fish is the most liked sea food at home but finding a good  fresh sea water fish is  always difficult . So you can hardly find find recipes on my blog. But I must say , I have few unique fish tawa fry recipes which are really delicious . Hoping to share few fish related posts shortly.

    Fish is one of the healthiest food and  It is loaded with essential nutrients , protein , Vitamin D and omega 3 fatty acids. Omega-3 fatty acids DHA are absolutely essential for growth and development because it accumulates in the developing brain and eye. Hence IQ of people from coastal regions is directly related to eating Fish. Fish oil capsules are also given as supplements to kids during growth phase.  Which helps in overall brain and physical development of the body .

    Fishes are of 2 categories , one is seawater fish and other is inland /freshwater fish . Seawater fishes like seer fish , trout ,salamon , mackerel , sardines are fatty fish. Fatty fishes are rich in fat based nutrients and omega 3 fatty acids . Fatty fishes have more health benefits. Rohu and Katla are most popular inland fishes. Though it's not as rich as Seawater fish in fat based nutrients it delivers all nutrients .

    One more fish recipe , I love the most is Chettinad Style Fish Fry ,recipe is already shared in blog.

    Recipe

    Amritsari Fish Fry
    5 from 2 votes

    Amritsari Fish Fry | Tawa Fish Fry - Amritsari Style

    Amritsari Style Fish Tawa Fry - Marinated Fish slices are tawa fried along with roasted gram flour using mustard oil.
    Prep Time10 minutes mins
    Cook Time10 minutes mins
    Marination Time30 minutes mins
    Total Time20 minutes mins
    Course: Side Dish, Starters
    Cuisine: Indian, Punjabi
    Keyword: Fish, Non-Vegetarian
    Calories: 297kcal
    Author: Muktha H S

    Ingredients

    For Marination

    • 500 grams Fish slices
    • 1 teaspoon Ginger Paste from ½ inch ginger
    • 1 teaspoon Garlic Paste from 5-6 garlic cloves
    • ½ teaspoon Ajwain / Carom Seeds
    • 1.5 teaspoon Red Chilli Powder
    • 1 teaspoon Kasuri Methi / Dried fenugreek leaves
    • ½ teaspoon Black Pepper Powder
    • ½ Tsp Dry Mango Powder / Amchur powder
    • 1 teaspoon Tandoori Masala Powder or Garam Masala Powder
    • ⅛ teaspoon Turmeric Powder
    • ½ tablespoon Lemon Juice
    • 2 tablespoon Mustard oil
    • 1- 1.5 teaspoon Salt or as required

    For Tava Fry

    • 2.5 tablespoon Besan / Gram Flour
    • 2-3 tablespoon Mustard Oil or as required
    • ½ teaspoon Ajwain / Carom Seeds

    For Serving and Garnishing

    • ½ teaspoon Chat Masala
    • 1 No Onion Cut into Rings
    • 1 No Lemon Cut into wedges
    • 1 tablespoon Chopped Coriander leaves ,optional

    Instructions

    • Dry roast the gram flour/ besan ,till nice aroma waft .Take measures not to darken the flour.
    • Wash and clean fish slices, let water drain completely , set aside.
    • Place fish in a bowl / container , add ginger garlic paste , salt , mustard oil , lemon juice, tandoori masala, ½ teaspoon ajwain and all other spices listed in ingredient list except Besan/ gram flour.
    • Rub in all masala to fish , such that its well coated with spices. Allow the marination to stand for minimum 30 minutes or upto 6-8 hrs .
    • Heat a tawa , drizzle 1 tablespoon of oil , add ajwain seeds , once it crackles arrange marinated fish pieces on tawa . 
    • Allow fish to cook for 5-6 minutes on medium heat ,flip and cook on other side for another 2-3 minutes.
    • Sprinkle roasted gram flour / besan over the fish ,such that its coated well .Flip and again sprinkle some gram flour on other side of the fish.
    • Drizzle some oil on top , flip and cook on both sides ,till crisp.Sprinkle some chat masala on top of fried fish and serve.
    • Serve Amritsari Fish Tawa Fry , with lemon wedges ,onion rings and mint chutney.

    Notes

    • For deep frying ,  make a besan flour batter ,by adding little water ,salt ,½ teaspoon chilli powder and ½ teaspoon ajwain seeds .Dip marinated fish  and deep fry in mustard oil. 
    • Besan flour batter should be thick enough to coat the fish.Similar to that of bhajia mix.

    Nutrition

    Calories: 297kcal

    How to make Amritsari Fish Fry

    Dry roast the gram flour/ besan ,till nice aroma waft .Take measures not to darken the flour. Amritsari Fish Fry

    Wash and clean fish slices, let water drain completely , set aside.

    Place fish in a bowl / container , add ginger garlic paste , salt , mustard oil , lemon juice , Tandoori Masala and all other spices listed in ingredient list except Besan/ gram flour.

    Amritsari Fish Fry

    Rub in all masala to fish , such that its well coated with spices. Allow the marination to stand for minimum 30 minutes or upto 6-8 hrs .

    Amritsari Fish Fry

    Heat a tawa , drizzle 1  tablespoon of oil , add ajwain seeds , once it crackles arrange marinated fish pieces on tawa .

    Amritsari Fish Fry

    Allow fish to cook for 5-6 minutes on medium heat ,flip and cook on other side for another 2-3 minutes.

    Sprinkle roasted gram flour / besan over the fish ,such that its coated well .

    Amritsari Fish Fry

    Drizzle some oil on top ,flip and again sprinkle some gram flour on other side of the fish.

    Amritsari Fish Fry

    Flip and cook on both sides ,till crisp.Remove and place on a kitchen paper towel . Sprinkle ½ teaspoon of Chaat Masala on top.

    Amritsari Fish Fry

    Serve Amritsari Fish Tawa Fry with lemon wedges ,onion rings and Mint chutney.

    Amritsari Fish Fry

    Paneer Paratha

    Published : December 6, 2018 | Last Update on July 4, 2020 By Muktha

    Paneer Paratha
    Top post on IndiBlogger, the biggest community of Indian Bloggers

    Paneer Paratha is a easy to make ,quick recipe from Punjab repertoire needs no introduction .Grated Paneer along with spices , herbs and green chilies are stuffed inside a wheat flour roti and roasted with ghee .Eating this Paratha delivers the daily dose of complete protein that is much needed for the body. Though bit higher on calories , it's totally fine to have this delicious Paneer Paratha for heavy Breakfast.

    Paneer Paratha

    If it's Paratha then Punjab will be either prefixed or suffixed just like Idli and Dosa from South India . Paratha are one of the healthiest and easiest breakfast recipe. As its globally said, eat a wholesome heavy breakfast , for me it's Paratha. Because all your nutrition requirements are present in Paratha. Protein , Fiber , Fat , Vitamins and Minerals ,everything will be present in a serving of Paratha. So I consider it to be the best.

    Apart from health quotient , it's easy to make , tasty and the best for lunch box  . Everyday before going to bed , first thought of mine is What for Breakfast and Lunch Box ,tomorrow??? At times, deciding on these 2 menu is the most difficult job for me. Because I should make justice for all the 3 at home without compromising on health and taste.Especially my fussy eater Sahishnu  , who is so selective and eats only if its advertised. So these days , I open my own blog Breakfast Category and ask him what he wants to eat ...., he picks one or two and my work will be half done.

    Well , coming back to Paneer Paratha ,there are 2 different ways of doing paneer Paratha . One method is similar to Aloo Paratha , a spicy paneer mixture is sauteed along with onions ,green chillies ginger garlic paste  is stuffed inside, rolled and cooked. Other method is what I have shared here. A simple recipe where crumbled paneer is mixed with spices ,rolled and cooked.

    Other Partha recipes which may interest you are : Aloo Paratha , Mooli | Radish Paratha , Onion Paratha , Sattu Paratha and Chinese Paratha .

    Recipe Card for Paneer Paratha

    Recipe

    Paneer Paratha
    5 from 1 vote

    Paneer Paratha

    Paneer Paratha - Stuffed Indian flat bread made with grated cottage cheese, spices and herbs.
    Prep Time10 minutes mins
    Cook Time15 minutes mins
    Total Time25 minutes mins
    Course: Breakfast
    Cuisine: Indian, Punjabi
    Keyword: Indian Breads, Protein Rich
    Servings: 8 Makes
    Calories: 182kcal
    Author: Muktha H S

    Ingredients

    For Stuffing

    • 200 grams Paneer /Cottage Cheese
    • 2-3 No's Green chillies finely chopped , less spice variety
    • 2 tablespoon Coriander Leaves chopped
    • ½ teaspoon Dry Mango Powder / Amachor Powder
    • 1 teaspoon Grated ginger or ½ inch ginger
    • ½ teaspoon Garam Masala
    • ½ teaspoon Chilli Powder ,optional
    • ½ teaspoon Ajwain /Carom seeds
    • ½ teaspoon Salt or as required

    For Paratha Dough

    • 1 ½ Cup Wholewheat Flour
    • 1 teaspoon Ghee / Clarified Butter / Oil
    • ½ teaspoon Salt
    • ½ - ⅔ cup Water or as required
    • Wheat flour as required for dusting
    • Ghee / Oil as required for roasting Paratha

    Instructions

    • In a bowl or wide plate , add 1 ½ cups of of whole wheat flour , 1 teaspoon of ghee, ½ teaspoon of salt , ½-2/3 cup of water . 
    • Mix well everything and knead a smooth dough , Cover dough with a muslin cloth and set aside for minimum 20-30 minutes.
    • Take1 cup of crumbled/ grated paneer , add chopped green chillies , chopped coriander leaves , 1 teaspoon grated ginger ,½ teaspoon dry mango powder ,½ teaspoon of ajwain , ½ teaspoon garam masala ,salt .Mix well everything.
    • Pinch a small ball from dough , flatten between the palms,dust some flour on worktop and roll a roti of 3 inch diameter.
    • Place a spoonful of paneer mixture on rolled roti , make pleats and bring the edges together to centre .
    • Pinch off extra dough . Dust some flour on worktop , flatten the stuffed dough and roll into a roti of 5 inch diameter.
    • Heat iron griddle , place the rolled roti . Drizzle some ghee/ clarified butter / oil on edges and on top.
    • Flip and cook on both sides till done.
    • Serve Paneer paratha hot with Mango or Lemon Pickle and Curds.

    Nutrition

    Calories: 182kcal

    Steps by Step directions on making of Paneer Paratha :

    In a bowl or wide plate , add 2 cups of of whole wheat flour , 1 teaspoon of ghee, ½ teaspoon of salt , ¾ - 1 cup of water . Mix well everything and knead a smooth dough , Cover dough with a muslin cloth and set aside for minimum 20-30 minutes.

    Paneer Paratha

    Take1 cup of crumbled/ grated paneer , add chopped green chillies , chopped coriander leaves , 1 teaspoon grated ginger ,½ teaspoon of ajwain , amchoor powder ,½ teaspoon garam masala ,salt .Mix well everything.

    Paneer Paratha

    Pinch a small ball from dough , flatten between the palms,dust some flour on worktop and roll a roti of 3 inch diameter.Place  a spoonful of paneer mixture on roti , make pleats and bring the edges together to centre .

    Paneer Paratha

    Pinch off extra dough . Dust some flour on worktop , flatten the stuffed dough and roll into a roti of 5 inch diameter.

    Paneer Paratha

    Heat iron griddle , place the rolled roti . Drizzle some ghee/ clarified butter / oil on edges and on top.

    Paneer Paratha

    Flip and cook on both sides till done.

    Paneer Paratha

    Finally ,serve Paneer Paratha hot with Mango or Lemon Pickle and Curds.

    Paneer Paratha


    Methi Dal Recipe

    Published : December 5, 2018 | Last Update on July 23, 2022 By Muktha

    methi dal

    Methi Dal is a tasty dal preparation made from fresh fenugreek leaves and Toor dal. As its winter , fresh greens are in season , so making this dal preparation is most common at home. Methi dal preparation is similar to any other dal preparations but with addition of some tomatoes and amchoor powder .Tanginess of tomatoes and amchoor powder brings balance to bitterness of Methi/ Fenugreek leaves .

    Methi Dal

    I add Methi / Fenugreek leaves in almost everything from spicy non veg mutton curry to humble dal - roti . Flavors of Methi leaves gets along well with many spicy curries, both vegetarian and non vegetarian dishes. Dishes in which I use methi leaves are Molake Hurali Saaru | Horsegram curry , Keema Matar Masala , Meat Ball Curry . Also I use fresh Methi leaves in Tomato Bath , Vegetable Bath and Avarekalu Bath | Surti Papdi Pulao .

    Eating green leafy vegetables regularly is very important .Addition of Leafy vegetables along with Dal is one of the simplest way of incorporating greens in our diet. Dal fry and different dal preparations are regular at my home. So that body gets protein and other nutrients from both dal and greens together. Also Massida Soppu Saaru| Assorted Greens Sambar is a combination toor dal with assorted greens , a most common South Indian regional sambar . Recently I had also done Cholai Ka Saag | Amaranth Greens Gravy which was finger licking good.

    I also add chopped fresh methi leaves in Akki Roti | Rice Flour Bhakri  and Ragi Roti | Nachni Bhakri . Also Methi Paratha , Methi Thepla and Methi Khakhra are my all time favourite.

    Methi leaves nutritional benefits needs no introduction. Fenugreek leaves , as well as seeds, are a rich source of dietary fiber and also protein content is high in them. Also it contains major vitamins  and minerals like folic acid, thiamin, vitamins A, B6 and Vit C , potassium, iron, phosphorus and calcium. Most importantly Fenugreek leaves are acclaimed worldwide for the cure of arthritis.

    Recipe card for Methi Dal

    Recipe

    methi dal
    5 from 1 vote

    Methi Dal

    Simple , Healthy and Delicious dal fry with fenugreek leaves 
    Prep Time10 minutes mins
    Cook Time25 minutes mins
    Total Time35 minutes mins
    Course: Main Course
    Cuisine: Indian
    Keyword: Diet, Healthy
    Servings: 5 People
    Calories: 212kcal
    Author: Muktha H S

    Ingredients

    For Pressure cooking Dal

    • 1 Cup Toor dal
    • 2.5 Cups Water
    • ⅛ teaspoon Turmeric powder
    • ½ teaspoon Oil

    For Methi Dal Fry

    • 2 tablespoon Ghee/clarified butter /oil
    • 1 tablespoon Garlic finely chopped about 5-6 garlic cloves
    • ½ tablespoon Ginger grated about ½ inch ginger
    • 2-3 No's Green chillies slit and roughly cut
    • 1 No Medium size onion chopped about ½ cup
    • 1 No Large Tomato
    • 1 Cup Methi / Fenugreek leaves firmly pressed
    • ½ teaspoon Amchoor powder / Dry mango powder
    • 1 teaspoon Salt or as required

    For Tempering

    • 1 tablespoon Ghee
    • 1 teaspoon Cumin Seeds / Jeera Seeds
    • 1-2 No Dried Red chilli
    • 1 pinch Asafoetida
    • ½ teaspoon Red Chilli powder
    • ½ teaspoon Garam Masala powder

    Instructions

    • Rinse and wash Dal , place dal in a pressure cooker add 2.5 cups water ,pinch of turmeric and ½ teaspoon oil .
    • Pressure cook for 2-3 whistles, allow pressure to settle on its own.Open the lid,mash the lentils and set aside.
    • In a deep kadai/pot/pan , heat 2 tablespoon ghee / oil , add chopped garlic and ginger , fry well.
    • Add slit green chillies and chopped onions , fry well till onions turns translucent.
    • Then add in chopped tomatoes ,pinch of salt ,½ teaspoon amchoor powder stir well and saute for 2-3 minutes
    • Add chopped methi leaves , mix well ,till the methi leaves wilt and oil starts releasing from corners.
    • Now add cooked dal and ¾ to 1 cup of water ,¾ teaspoon of salt and mix well and simmer dal for 4-5 minutes.
    • Whilst Heat 1 tablespoon of ghee in a seasoning pan , add 1 teaspoon jeera/cumin seeds once it crackles , add broken red chillies .
    • Turn off the heat ,add hing / asafoetida , ½ teaspoon red chilli powder and ½ teaspoon garam masala.Dont burn the spices 
    • Pour the tempering on cooked methi dal , mix well and cook for a 1-2 minutes. Serve hot with Roti or steamed rice.

    Nutrition

    Calories: 212kcal

    Step by step directions on making of Methi Dal:

    Rinse and wash Dal , place dal in a pressure cooker add 2.5 cups water ,pinch of turmeric and ½ teaspoon oil .

    Methi Dal Recipe

    Pressure cook for 2-3 whistles, allow pressure to settle on its own.Open the lid,mash the lentils and set aside.

    Methi Dal Recipe

    In a deep kadai/pot , heat 2 tablespoon ghee / oil , add chopped garlic and ginger , fry well.

    Methi Dal Recipe

    Add slit green chillies and chopped onions , fry well till onions turns translucent.

    Methi Dal Recipe

    Then add in chopped tomatoes ,pinch of salt ,½ teaspoon amchoor powder stir well and saute for 2-3 minutes.

    Methi Dal Recipe

    Add chopped methi leaves , mix well ,till the methi leaves wilt and oil starts realising from corners.

    Methi Dal Recipe

    Now add cooked dal and ¾ to 1 cup of water ,¾ teaspoon of salt and mix well and simmer dal for 4-5 minutes.

    Methi Dal Recipe

    Whilst Heat 1 tablespoon of ghee in a seasoning pan , add 1 Tsp  jeera/cumin seeds once it crackles , add broken red chillies .Turn off the heat ,add  hing / asafoetida  , ½ teaspoon red chilli powder and ½ teaspoon garam masala.Dont burn the spices

    Methi Dal Recipe

    Pour the tempering on cooked methi dal , mix well and cook for a 1-2 minutes.

    Methi Dal Recipe

    Serve hot with Roti or steamed rice.

    methi Dal


    Pindi Chole Recipe

    Published : December 2, 2018 | Last Update on September 29, 2022 By Muktha

    pindi chole

    Pindi chole is one of the most classic dish from Punjab . In this recipe Chloe/ Kabuli Chana / White Chickpeas /Garbanzo beans is cooked along with whole spices and tea decoction.There are several speculations about this dish preparation. Some say, no onion and tomatoes should be added. But few emphasize on adding Onion and Tomatoes.

    Pindi Chole Recipe

    I searched many recipes on google . Finally ,decided on one with addition of onion paste and tomatoes. As , I thought this recipe yields a more flavourful  pindi chole. But I'm extremely sorry I don't actually remember from which blog I picked this recipe . Searched on google many times ,but couldn't find it back again. I know its not ethical to write others recipe without giving them credits and back links. 🙁 🙁 🙁

    Pindi Chole is a semi dry dish ,it gets distinct flavours from anardana seeds / pomegranate seeds and unique brown hue from tea decoction. This is a simple recipe with whole lot of flavours . I have used Chole Masala here which has anardana seeds as one of the ingredient . So I have not added any extra anardana seeds powder. If you don't have Chole masala then alternatively garam masala along with anardana seeds , dry mango powder can be used. Refer notes below for easy alternative of chole masala.

    In my view , the famous Chana Masala is entirely different from Pindi Chole. Different lies in main ingredient : chana -chole , consistency of the dish : gravy- semi dry , colour : red -brown and of course the taste respectively . Why I'm highlighting these differences are ,the dishes Punjabi Pindi Chole and Chana Masala synonymously used sometimes by few.

    Chickpeas are rich in protein and fiber, both helps in weight loss. Also Chickpeas are excellent vegan and gluten-free source of protein and fiber .It also contain exceptional levels of iron,vitamin B-6, and magnesium. It's a known fact that fibre keeps us fuller for longer and protein satiates hunger. Hence add  Chickpeas along with veggies to have a balanced diet.

    Serve Pindi Chole garnished with onion rings and lemon wedges alongside Bhatura , Tandoori Roti ,Kulcha , Naan  or  Poori .Other Punjabi delicacy I love the most are Dal Makhani , Paneer Butter Masala , Rajma Masala , Chana Masala , Palak Paneer , Dry Peas Methi Masala , Chicken Butter Masala and Amritsari Fish Tawa Fry.

    Recipe

    pindi chole
    5 from 1 vote

    Pindi Chole

    A classic dish from Punjab made out of Kabuli chana steeped in tea decoction and flavourful spices.
    Prep Time10 minutes mins
    Cook Time45 minutes mins
    Soaking Time8 hours hrs
    Total Time55 minutes mins
    Course: Main Course
    Cuisine: Indian, Pakistan, Punjabi
    Keyword: Gluten Free, Gravy, Punjabi
    Calories: 293kcal
    Author: Muktha H S

    Ingredients

    For Pressure Cooking

    • 1 Cup Dry Kabuli Chana
    • 1 No Bay Leaf
    • 3-4 no Green Cardamom
    • 1 no Black Cardamom
    • 4-5 Cloves
    • 2 inch Cinnamon Sticks
    • 1.5 tablespoon Tea Powder or 2 Tea bags
    • 2 cups Water for pressure cooking
    • 1 pinch Baking soda
    • 1 teaspoon Salt

    For Gravy

    • 2 no's Onions medium size
    • 6-7 no's Garlic cloves
    • 1" inch Ginger
    • 4-5 no's Large Tomato
    • 2 tablespoon Mustard Oil
    • 1 teaspoon Red Chilli Powder
    • 1 teaspoon Coriander Powder
    • 1 teaspoon Chole Masala , Refer Notes
    • 1 teaspoon Kasuri Methi
    • ¾ teaspoon Salt or as required

    For Seasoning

    • 1 tablespoon Ghee / Clarified Butter
    • ½ inch Ginger ,cut into Julienne
    • 2 no's Green Chilli , roughly cut and slit
    • ½ teaspoon Garam Masala

    For Serving / Garnishing

    • 2 tablespoon Coriander Leaves
    • 1-2 no Lemon Wedges
    • Few Onion Rings

    Instructions

    Preparations

    • Rinse and wash Kabuli Chana . Soak Kabuli Chana / Garbanzo beans for 8 hrs or overnight . Drain water ,wash and keep it aside.
    • Boil 1 cup water with 1.5 tablespoon Tea powder. Strain and keep tea decoction aside.
    • In a mixer jar , add roughly chop onions and blend to smooth paste . Around ½-2/3 cup onion paste is obtained.
    • Make fresh ginger garlic paste from 6-8 garlic cloves and 1 inch  ginger,makes around 2 teaspoon of ginger garlic paste 
    • In the same jar ,blend 4-5 tomatoes smoothly to get around 1 Cup of tomato puree. You can  also blanch tomato and puree them.

    For Semi Dry Gravy

    • In a pressure cooker along with Soaked chana, add 1 Bay leaf , 3-4 cloves , 1.5 inch cinnamon stick , 3-4 green cardamom , 1 Black cardamom and 2 tea bags or 1 cup tea decoction (I have used tea 1 cup tea decoction made from 1.5 tablespoon of tea powder ).
    • Add 2 cups of water ( or 1 cup water + 1 cup tea decoction) ,pinch of baking soda and salt . Pressure cook for 2-3 whistles, Allow pressure to release on its own.
    • Discard whole spices , strain and separate boiled chana and stock , set aside.
    • Heat mustard oil in a Kadai , add onion paste and fry till brown.
    • Add ginger garlic paste and saute ,till raw smell goes off.
    • Add red chilli powder , coriander powder and Chole masala powder ( Refer Notes if you are not using Chole masala ) , mix well .
    • Now ,add 1 cup of tomato puree and saute and allow it cook till oil starts to release from the corners.
    • Now add cooked chole , mix well . Add stock and ½ cup of water , add salt (remember salt is already added to chhole while cooking) and bring to boil.
    • Once it comes to boil , simmer the flame allow it to thicken.Once it reaches the required consistency, add Kasuri methi / dried fenugreek and mix well.

    For Seasoning

    • Heat 1 tablespoon of ghee in a seasoning pan , add ginger juliennes fry well.
    • Now add green chillies , fry and add ½ teaspoon of garam masala .
    • Pour this seasoning over the chole .Mix well everything and garnish with coriander leaves .

    For Serving

    • Serve hot with lemon wedges and onion rings, along with Poori / Bhatura / Kulcha / Naan or Tandoori Roti.
    •  I served it along with Aloo Puri , was a killer combination 🙂 

    Notes

    • If you don't have Chole Masala , alternatively for shortcut method , use 1 teaspoon of garam masala along with ½ teaspoon of Dry mango powder / amchur powder , ¾ teaspoon of Anardana seeds / pomegranate seeds powder and ½ teaspoon of Black salt. 
    • You can even add tamarind juice extracted from 1 teaspoon of firmly pressed tamarind soaked in ½ cup of warm water.
    • Also cooking in a cast iron skillet ,gives a dark hue to the final outcome of the dish.

    Nutrition

    Calories: 293kcal

    How to make Pindi Chole

    Rinse and wash Kabuli Chana . Soak Kabuli Chana / Garbanzo beans for 8 hrs or overnight . Drain water ,wash and keep it aside.

    Pindi Chole Recipe

    Boil 1 cup water with 1.5 tablespoon Tea powder. Strain and keep tea decoction aside.

    In a pressure cooker along with Soaked chana, add 1 Bay leaf , 3-4 cloves , 1.5 inch cinnamon stick , 3-4 green cardamom , 1 Black cardamom and 2 tea bags or 1 cup tea decoction (I have used tea 1 cup  tea decoction made from 1.5 tablespoon of tea powder ). Add 2 cups of water ( or 1 cup water + 1 cup tea decoction) ,pinch of baking soda and salt .

    Pindi Chole Recipe

    Pressure cook for  2-3 whistles, Allow pressure to release on its own.Discard whole spices , strain and separate boiled chana and stock , set aside.

    Pindi Chole Recipe

    Add 2 onions into a mixer jar and blend to a smooth paste.

    Pindi Chole Recipe

    Also prepare ginger garlic paste by blending 6-7 garlic cloves and 1 inch of ginger.

    Pindi Chole Recipe

    Blend 4-5 tomatoes to get 1 full cup ,tomato puree. You can either blanch and blend orelse blend directly.

    Pindi Chole Recipe

    Heat mustard oil in a Kadai , add onion paste and fry till brown.

    Pindi Chole Recipe

    Add ginger garlic paste and saute ,till raw smell goes off.

    Pindi Chole Recipe

    Add red chilli powder , coriander powder and Chole masala powder ( Refer Notes if you are not using Chole masala ) , mix well .

    Pindi Chole Recipe

    Now ,add 1 cup of tomato puree and saute and allow it cook till oil starts to release from the corners.

    Pindi Chole Recipe

    Now add cooked chole , mix well .

    Pindi Chole Recipe

    Add stock and ½ cup of water , add salt (remember salt is already added to chole while cooking) and bring to boil.

    Pindi Chole Recipe

    Once it comes to boil , simmer the flame,close lid and  allow it to thicken.Once it reaches the required consistency, add Kasuri methi / dried fenugreek and mix well.

    Pindi Chole Recipe

    Heat 1 tablespoon of ghee/ clarified butter ( use oil for vegan option) in a seasoning pan , add ginger juliennes fry well.

    Pindi Chole Recipe

    Now add green chillies , fry and add ½ teaspoon of garam masala .

    Pindi Chole Recipe

    Pour this seasoning over the chole .Mix well everything and garnish with coriander leaves .

    Pindi Chole Recipe

    Serve with lemon wedges and onions, along with Poori / Bhatura / Kulcha / Naan or Tandoori Roti. I served it along with Aloo Puri , it was an awesome combination 🙂 Forgot all my diet and had whole heartedly 🙂 🙂 🙂

    pindi chole

    Churumuri Recipe

    Published : November 30, 2018 | Last Update on September 27, 2022 By Muktha

    Churumuri recipe with step by step photos and video . Churumuri is a tasty and very popular street food snack /bhel recipe from Karnataka. It's made out of puffed rice and assorted vegetables like onion , tomato , cucumber, carrot , mango, pineapple along with spices and green chutney .

    Other street style chats which are popular are Masala Puri and Pani Puri ...,must try recipes if you haven't tried yet.

    Churumuri Recipe
    [feast_advanced_jump_to]

    About this recipe

    Churmuri is a version of Bhel Puri , made with puffed rice , assorted vegetables, spiced peanuts and some namkeen / mixture/sev . Bhel Puri is popular Indian Street food , native of Mumbai.

    Bhel puri has 2 versions one is wet and other one is dry referred as sukha bhel. To make Bhel puri , sweet and spice , 2 different chutneys are used . Where has sukha bhel is made without any chutney.

    Churmuri and Jhalmuri are versions of sukha bhel. Jhalmuri is famous in eastern part of India and Churmuri in South India.

    Jhal muri is quite similar to Churumuri  but the differences lies in the pungent flavor of mustard oil and muri masala used in Jhalmuri . But in Churmuri sesame oil or coconut oil is used . Oil used in these bhel recipes are purely on regional preferences.

    In India ,one can find Bhel stalls in every nook and corner of a road . Its so very popular and loved among all age groups and also its a low calorie snack that is very very inexpensive.

    Ingredients , Tips and Variations

    Puffed Rice / Murmura is the main ingredient to make this dish. You can find puffed rice in any Indian stores.

    Sev / Mixture / Farsan is a fried crispy ready to eat snack made with gram flour. There are varieties of sev is available. Spicy mixture of different kinds of sev works well for this recipe. You can also use other crunchy namkeen's like Nippattu / Masala puri ,but its optional.

    Peanuts - Congress kadle beeja or any spicy roasted peanuts works well in this recipe. iBut if its not available , you can roast peanuts and use in this recipe.

    Assorted Vegetables : Onions and Carrots are must for this recipe. Along with it you can also use tomatoes and cucumber. I personally don't use tomatoes and cucumber as it juices quickly gets absorbed with puffed rice making it soft.

    Seasonal fruits : Can use 2 tablespoon of raw mangoes in season . You can also use small pieces of pineapple to make tasty churmuri but its optional.

    Green Chutney : Blend coriander leaves , green chilies, cumin powder , 1 garlic clove , salt and lime juice together . Don't add water to make this chutney. Because water content gets absorbed by puffed rice and looses its crispiness.

    Spices and Herbs : Adjust as per your likings.

    Note : Making Churumuri is simple and easy but you should be really quick in mixing puffed rice with veggies and chutney. If you are not quick enough , then juices from veggies and chutney mix with murmura making it soft. So its very important to briskly mix everything . Serve immediately.

    Watch Video

    Step by Step directions on making of Churumuri :

    Firstly, heat 1.5 tablespoon of sesame oil in a small tadka / seasoning pan and turn off the stove. Set it aside to cool down.

    Prepare green chutney in a small chutney jar , add 2 tablespoon of coriander leaves , 1-2 green chilies , 1 garlic clove , ½ teaspoon jeera powder, 1 teaspoon lime juice  and salt.

    Churumuri Recipe

    Blend to a smooth paste as much as possible ,without adding water.

    Churumuri Recipe

    Finely chop onions , grate carrots and chop coriander leaves . In a large mixing bowl , take puffed rice.

    Churumuri Recipe

    Add peanuts, mixture ( sev +namkeen) and veggies .

    Churumuri Recipe

    Take 1.5 tablespoon of sesame oil ( or any vegetable oil) , ½ teaspoon of chili powder and green chutney.

    Churumuri Recipe

    Mix well everything . Pour this ladle of chutney ,oil and chilli on murmura .

    Churumuri Recipe

    Now , briskly quick stir everything.

    Churumuri Recipe

    Serve it immediately in paper cones lined with parchment paper or banana leaf.

    Churumuri Recipe

    Recipe

    Churmuri
    5 from 1 vote

    Churumuri Recipe

    Churumuri - Karnataka's Tasty and delicious light snack made out of puffed rice and assorted vegetables ,spiced peanuts and spices  .
    Prep Time10 minutes mins
    Total Time10 minutes mins
    Course: Snack
    Cuisine: Indian, Karnataka
    Keyword: Basic, Karnataka, Street Food
    Servings: 5 People
    Calories: 149kcal
    Author: Muktha H S

    Ingredients

    • 4 Cups Puffed Rice Murmura
    • ½-3/4 Cup Onions chopped
    • ½ Cup Carrots grated
    • 2 tablespoon Coriander leaves
    • ¼ Cup Spiced peanuts / Masala Peanuts
    • ½ Cup Sev Mixture / Farsan
    • 1 ½ teaspoon Sesame Oil / Til Oil
    • ½ teaspoon Chilli powder
    • 2 no's Nippattu or Masala Puri optional

    For Green Chutney

    • 2 tablespoon Coriander Leaves
    • 1-2 No's Green Chilli (less spice Green Chillies)
    • 1 Garlic Clove
    • ½ teaspoon Jeera Powder
    • ½-3/4 teaspoon Salt or as required
    • 1 teaspoon Lime juice

    Instructions

    • Heat 1.5 tablespoon of sesame oil in a small tadka / seasoning pan and turn off the stove. Set it aside to cool down.
    • Whilst ,prepare green chutney in a small chutney jar , add 2 tablespoon of coriander leaves , 1-2 green chillies , 1 garlic clove , ½ teaspoon jeera powder, 1 teaspoon lime juice  and salt. 
    • Finely chop onions , grate carrots and chop coriander leaves . Take everything in a wide vessel. Add veggies with puffed rice or murmura .
    • Blend to a smooth paste as much as possible ,without adding water.
    • Add ¼ cup Congress Kadale Beeja or Masala Peanuts and ½ cup Mixture / Sev/ Farsan. 
    • Place green chutney in a ladle , add 1.5 tablespoon of cooled sesame oil / til oil and ½ teaspoon of chilli powder 
    • Add ¼ cup Congress Kadale Beeja or Masala Peanuts and ½ cup Mixture / Sev/ Farsan. Take green chutney in a ladle , add 1.5 tablespoon of sesame oil / til oil and ½ teaspoon of chilli powder .
    • Pour this ladle of chutney ,oil and chilli on murmura and give a quick stir.
    • Serve it immediately in paper cones lined with parchment paper or banana leaf.

    Video

    Notes

    1. If Puffed rice/ Murmura is old or not crisp enough, dry roast puffed rice for 2-3 minutes, this yields a good crisper puffed rice.
    2. Prepare green chutney without adding water. Grind to as smooth as possible to make a paste out of it.
    3. Puffed rice will be having salt , so add very little salt.
    4. Directly adding salt ,makes onion to release juice fast.  Hence add salt to chutney only, quick stir with murmura and serve immediately
    5. Heat sesame oil , cool and then use in the recipe .

    Nutrition

    Calories: 149kcal

    Similar recipes

    • Masala Puri
      Masala Puri Chaat | Karnataka Style Masala Puri
    • Puchka
      Puchka - Kolkata Style Pani Puri
    • Pav bhaji
      Pav Bhaji Recipe
    • Kolhapuri Misal Pav
      Kolhapuri Misal Pav | Kolhapuri Usal Recipe

    Mushroom Soup

    Published : November 27, 2018 | Last Update on June 30, 2022 By Muktha

    creamy-of-mushroom-soup

    Mushroom Soup with step by step photos and video . Mushroom soup is a delicious bowl of soup with little cream . Like Cream of Mushroom Soup high fat milk cream or half & half aren't used in this recipe .

    To recreate this cream of mushroom soup , just ⅓ cup of low fat cream is enough without compromising on taste .

    If interests, do check other mushroom recipes on blog : Mushroom masala , Mushroom spinach cutlets , scrambled egg with mushrooms

    mushroom-soup
    [feast_advanced_jump_to]

    About this recipe

    Browsed over internet for Mushroom Soup and finally decided on one with less cream . But was bit skeptical about following the same recipe as my palate may disapprove the taste . So tweaked the recipe to suit my taste accordingly.

    If you want to try original recipe of this soup , you can check the the original recipe here Hurrythefoodup.

    Though this soup is not much creamy and buttery like cream of mushroom soup but its equally good in taste. I personally don't like creamy soups so wanted to try something subtle and low calorie soup for dinner. I prepare soups mainly for my dinner as I want it to be light on stomach . So is the reason of not using high fat milk and cream in this soup. But believe me , you'll never go back for high calorie cream of soup after tasting this bowl of warm soup.

    There are many methods of doing cream of mushroom soup but here I have followed the basic method.  Made alterations with cooking, flavours and prepared this comforting soup. Instead of Corn Flour ,Whole Wheat flour is used here for thickening soup.

    Try this quick soup recipe and for sure you'll be loving this . Serve this less creamy Mushroom Soup as a first course of meal in dinner. And definitely you'll be asked to serve more and more.

    Watch Video

    Step by step directions to make Mushroom Cream Soup:

    Clean and wash Mushrooms, Slice thinly and keep it aside.

    In a saucepan, heat 1 .5 tablespoon of butter . Add bay leaf / Tej Patta and saute for 3-4 minutes.

    Mushroom Soup

    Add chopped garlic ,fry well till onion turns transparent.

    Mushroom Soup

    Add chopped or sliced mushrooms and cook on low heat ,till mushrooms start releasing water. Allow mushroom to cook further ,let  mushroom turns light brown in colour and water dries up.

    Mushroom Soup

    Now add Whole Wheat flour or Cornflour or all purpose flour and mix well.

    Mushroom Soup

    Add 2 cups Vegetable stock / Chicken Stock or Water ,stir well and  cook for 7-8 minutes, bring it to boil.

    Mushroom Soup

    Put the flame to simmer ,add ⅓ cup fresh cream , mix well .

    Mushroom Soup

    Add pepper, salt and 1 teaspoon parsley leaves . Mix well and turn of the heat.

    Mushroom Soup

    Serve Mushroom Cream Soup garnished with parsley leaves and few drops of extra virgin olive oil on top.

    Mushroom Soup

    Recipe

    mushroom-soup-with-drizzled-olive-oil
    5 from 1 vote

    Mushroom Cream Soup

    A quick and easy one pot soup recipe - Mushroom Cream Soup .
    Prep Time10 minutes mins
    Cook Time20 minutes mins
    Total Time30 minutes mins
    Course: Side Dish, Starters
    Cuisine: World
    Keyword: Soup
    Servings: 3 People
    Calories: 163kcal
    Author: Muktha H S

    Ingredients

    • 200 grams Button Mushroom
    • 1.5 tablespoon Butter
    • 1 No Bay leaf /Tej Patta
    • 4 No Garlic Cloves medium size ,finely chopped
    • 1 No Onion medium size ,chopped
    • 2 tablespoon Whole Wheat flour or All purpose flour
    • ⅓ Cup Low Fat Fresh cream 25% -30% fat
    • ½ teaspoon Salt or as required
    • ½ -¾ teaspoon Pepper Powder or as required
    • 2 Cups Water or Vegetable Stock or Chicken Stock
    • 1 teaspoon Parsley or Coriander leaves
    • 1 teaspoon Extra virgin Olive Oil

    Instructions

    • Clean and wash Mushrooms, Slice thinly and keep it aside.
    • In a saucepan, heat 1 .5 tablespoon of butter . Add bay leaf / Tej Patta and saute for 3-4 minutes. 
    • Add chopped garlic and ginger ,fry well till onion turns transparent.
    • Add chopped or sliced mushrooms and cook on low heat ,till mushrooms start releasing water. Allow mushroom to cook further ,let mushroom turns light brown in colour and water dries up.
    • Now add Whole Wheat flour or Cornflour or all purpose flour and mix well.
    • Add 2 cups Vegetable stock / Chicken Stock or Water ,stir well and cook for 7-8 minutes, bring it to boil.
    • Put the flame to simmer ,add ⅓ cup fresh cream , mix well . 
    • Add pepper, salt and 1 teaspoon parsley leaves . Mix well and turn of the heat.
    • Serve Mushroom Cream Soup garnished with parsley leaves and few drops of extra virgin olive oil on top.

    Video

    Notes

    1. I have used 2 cups of water , You can use either Vegetable stock or Chicken stock here.If using stock ,then no need of using bay leaf.
    2. You can also add 1 cup of milk and 1 cup of water /stock for a rich and thick creamy soup.
    3. To cut calories , I have used ⅓ cup of low fat fresh cream .I have used Amul fresh cream , it has 25% fat.
    4. Whole Wheat flour is used as thickening agent , you can use either all purpose flour or corn flour as substitute.
    5. For vegan option, Coconut milk can be used.

    Nutrition

    Calories: 163kcal

    Similar recipes

    • pumpkin-soup-recipe
      Pumpkin Soup | Healthy Easy Pumpkin Soup Recipe
    • Indian Style Macaroni Chicken Soup
      Indian Style Macaroni Chicken Soup
    • Beetroot Soup
      Beetroot Soup , Weight Loss is now more easier
    • Lemon_Coriander _chicken_soup
      Lemon Coriander Chicken Soup Recipe

    Potato Smiley

    Published : November 26, 2018 | Last Update on July 23, 2022 By Muktha

    Potato Smiley

    Potato Smiley

    Potato Smiley is a easy recipe which can bring smile on your kid's frown face. This potato based snack is Kids all time favorite recipe. Taste wise it's very similar to that of potato chips. What makes this homemade potato smiley better than McCain Smiles is , its fresh and no preservatives are added .

    My lil boy was behind me for this Potato Smileys so gave a thought on doing this . I did it in large batch and even freezed it , so that I can thaw and use it as required. Recipe measurement can be easily reduced or even doubled .I have used 500 grams of potato for making potato smiley ,it yields around 45-50 potato smiles .

    Potato Smile snacks are deep fried in oil  . I baked as well as deep fried it. Baked smiles very not appealing to look ,it looked dry but taste wise it was similar to baked wedges 🙂 🙂 🙂 The pic below shows Baked Potato smiles. But my boy is very much like me and said baked smiles are much better than deep fried ones 😉 😉 😉 .Frankly speaking deep fried smiles tasted as good as crispy potato fritters but only drawback I found was , it drinks more oil .

    potato smiley

    So if you think of not adding more calories to your diet , you bake Potato smiley . If you are OK with eating deep fries once in a while go ahead with deep fried Smiley's. Here the recipe i have followed is a basic one with only minimal spices . But you can add  flavours of your choice like Cheese , Oregano , Garlic or Rosemary . Anything will taste good here , as main ingredient potato itself is fool proof here 🙂

    Other Kids friendly recipes on blog are : Potato Wedges , Masala Bun , Cheesy Bell Pepper Toast , Poha Cutlets , Bourbon Biscuits

    Recipe card for Potato Smiley | Mc Cain's Style Potato Smiles

    Recipe

    Potato Smiley
    5 from 2 votes

    Potato Smiley | Mccain Style Potato Smiles

    Kid's all time favourite potato based snack with a smiley face.
    Prep Time20 minutes mins
    Cook Time20 minutes mins
    Resting Time30 minutes mins
    Total Time40 minutes mins
    Course: Snack
    Cuisine: World
    Keyword: Kids Recipes, Party Snacks
    Servings: 30 Smileys
    Calories: 160kcal
    Author: Muktha H S

    Ingredients

    • 300 grams Potato or 5-6 medium size potato
    • 2 tablespoon Cornflour
    • 3 tablespoon Breadcrumbs
    • ½ teaspoon Chilli powder
    • ½ teaspoon Pepper Powder
    • ¾ teaspoon Salt or as required
    • 1 pinch cooking soda ,optional
    • Oil for deep frying

    Instructions

    • Take 300 grams of potato  ,wash clean and boil.Peel the skin and grate the potatoes to get around 2 cups 
    • In a large mixing bowl take grated potatoes , add 3 tablespoon bread crumbs, 2 tablespoon corn flour, ½ teaspoon chilli powder , ½ teaspoon pepper powder, pinch cooking soda and salt to taste.
    • Combine all the ingredients and mix well .Knead well to form a soft non sticky dough.
    • Cover and refrigerate for minimum 30 minutes or till use .This step is important because it helps smiley to retain its shape while frying in oil.
    • Now take dough ,knead well and pinch a large ball sized prepared potato dough .
    • On a butter paper , flatten potato dough using hands. Now using a rolling pin roll potato dough slightly thick .
    • Using a cookie cutter or any round mould make round shapes on dough. For making eyes , use straw and spoon to make smile .
    • For baking : Preheat the oven , grease the oven tray , brush potato smiles with oil and bake in preheated oven for 20-22 minutes or till it turns golden and crisp
    • Deep Frying : Heat oil in a frying pan and deep fry potato smiles on medium heat, fry on both sides till golden brown.
    • Finally, serve potato smiley with mayonnaise and tomato sauce.

    Notes

    1. Make sure that potatoes are not overcooked .
    2. Add more breadcrumbs ,if there is moisture in the prepared dough.
    3. Main key for getting potato smiley is ,it shouldn't have moisture in the dough.
    4. Refrigerating the potato dough is very important ,this prevents potato smiles from breaking while frying in oil.

    Nutrition

    Calories: 160kcal

    Step by step directions on making of Potato Smiley:

    Take 300 grams of potato ,wash clean and boil.Peel the skin and grate the potatoes.

    Potato Smiley

    In a large mixing bowl take grated potatoes , add 3 cup bread crumbs, 2 tablespoon corn flour, ½ teaspoon chilli powder , ½ teaspoon pepper powder, pinch cooking soda and salt to taste.

    Potato Smiley

    Combine all the ingredients and mix well .Knead well to form a soft non sticky dough.
    Cover and refrigerate for  minimum 30 minutes or till use .This step is important because it helps smiley to retain its shape while frying in oil.
    Potato Smiley
    Now take dough ,knead well and pinch a large ball sized prepared potato dough .On a butter paper , flatten potato dough using hands. Now using a rolling pin roll potato dough slightly thick .
    Potato Smiley
    Using a cookie cutter or any round mould make round shapes on dough.
    Potato Smiley
    For making eyes , use straw and spoon to make eyes and smile respectively.
    Potato Smiley
    For baking : Preheat the oven to 180 deg celsius , grease the oven tray , brush potato smiles with oil and bake in preheated oven for 22-25 minutes or till it turns golden and crisp.
    Potato Smiley
    Deep Frying : Heat oil in a frying pan and deep fry potato smiles on medium heat, fry on both sides till golden brown.
    Potato Smiley
    Finally, serve potato smiley with mayonnaise and tomato sauce. My boy had no patience , till I click 🙂
    potato smiley

    Seekh Kebab

    Published : November 24, 2018 | Last Update on May 25, 2022 By Muktha

    chicken-seekh

    Seekh Kebab are scrumptious, juicy smoke flavored cylindrical shape kebabs . Minced meat is mixed with Indian spices, shaped into cylinders on skewers and grilled to perfection. Gets ready within 30 minutes and best for weekend and dinner parties with family and friends. Serve this delicious seekh kebab with Mint Chutney , Onion Salad and lemon wedges.

    Either Lamb meat or Chicken meat can be used to make this recipe. But this recipe post shares chicken seekh kebab recipe.

    Also other Chicken recipes which are often enjoyed at weekend party at home with kids are Crispy Fried Chicken , Chicken Nuggets , Chicken Lollipop and Chicken Hakka Noodles

    Chicken sheekh kebab
    [feast_advanced_jump_to]

    About this recipe

    Seekh Kebab is a type of kebab originating from India. Making of Seekh Kebabs are similar to Shami kebabs. But spices used are different and also the shape of the Kebabs. Shami Kebabs are circular and Sheek Kebab are cylindrical in shape .

    Traditionally , minced lamb meat is mixed with spices and herbs , wrapped around a iron skewer to form a cylindrical shape and then grilled to perfection. But ,I have used chicken breast to make this delicious Seekh Kebab . You can use any minced meat but cooking time varies depending on meat .

    These juicy chicken seekh kebabs are easy to make with no marination .You can make this in Oven , Gas stove , Air fryer or even on Instant Pot .

    Also to get smoky flavor , I infused smoke using charcoal smoking technique (Dhungar Method ) and it works really well.

    You must try this Chicken Seekh Kebab because , they are

    • Scrumptious
    • Easy to make
    • Healthy
    • Low Calories
    • Under 30 minutes

    Ingredients

    Minced chicken - You can use any boneless chicken to mince or use minced meat directly in the recipe

    You need Cashew nuts , it helps to give a smooth, rich texture and mild sweetness to kebabs.

    Use Roasted Gram Flour / Chickpea flour / besan to absorb little moisture in minced chicken. This helps chicken to hold cylindrical shape around skewers.

    Herbs - Ginger , Garlic , green chilies , Coriander leaves , lime juice and Onion are used to make green spice blend to mix with chicken.

    Other Spices and seasoning - Other spices includes blackpepper powder , salt , chaat masala , garam masala , red chilli powder and turmeric . Increase or decrease the spices as per your likings and heat tolerence.

    You need Mustard oil and butter to make this.

    Tips and Variations

    • Infuse smoke makes this dish more flavorful , so smoking technique is highly recommended.
    • Though chicken breast , lean meat is used here you can even use boneless chicken thigh pieces to make this seekh kebab
    • Depending on your spice and heat tolerance , you can increase or decease the spices in the recipe , as recipe is highly customizable.

    Serving Suggestions

    You can serve this delicious chicken seekh kebab along with Mint Chutney / Mint Dip with a side of some sliced onions and lemon wedges. Also sprinkle some lemon juice and chaat masala over it , while serving.

    You can also make a wrap out of it ; remove skewer gently and cut seekh kebab into roundels . Placing some chicken roundels in a wrap along with mint dip , sliced onions , chopped coriander leaves and sprinking some chaat masala.

    You can also make a salad by placing some chicken seekh kebaba on lettuce berg leaves along with cucumber and julliences of carrot , beetroot and cabbage with simple Vinaigrette dressing .

    FAQ's

    How to make in Air Fryer ?

    First, pre-heat the airfryer at 200 degrees. Then, brush the airfryer basket with little oil or butter.

    Arrange the marinated chicken in the basket and air fry it 20 minutes or until charred. (you can flip it once in between).

    What went wrong , I was unable to make cylindrical shape ?

    It happens if there is some more water content in chicken . So always make sure to pat dry chicken before starting the recipe .

    Even after that , if you find it difficult to shape - then be sure to add some roasted gram flour just to bind the minced meat to hold shape.

    Why did my Seekh Kebab dry ?

    May be you have cooked it for long . Make sure to baste with some more butter / oil while making as chicken breast is very low in fat.

    Watch Video

    How to make Chicken Seekh Kebab :

    In a small mixer jar / blender . add 1 medium size onion ,6 garlic cloves , 1 inch ginger , 4 green chillies , 2 tablespoon coriander leaves and 10 whole cashews.

    Seekh Kebab

    Blend to smooth paste without adding water.

    Seekh Kebab

    Wash and clean chicken breast and pat it to dry completely.

    Place chicken in a food processor and ground meat to smooth.

    Seekh Kebab

    For this minced meat , add chilli powder ,turmeric, salt , pepper powder , chat masala , garam masala ,above prepared spice blend , roasted gram flour and lemon juice.

    Seekh Kebab

    Blend everything once again , such that masala and spices are well incorporated with meat. Don't add water

    Seekh Kebab

    Soak wooden skewers prior 30 minutes in water and then use the sticks. If using metal skewers , you can use directly .

    Shape meat around the skewers in a cylindrical shape .

    Seekh Kebab

    Place this in refrigerator for 30 minutes.

    Seekh Kebab

    To make in Oven

    Preheat the oven to 200 deg celsius.

    Grease the oven tray with oil and arrange the skewers . Drizzle some oil / butter on top of the meat .

    Bake in the oven for 15 minutes . Half the way around 10 min , take out the tray from oven ,turn the skewers to other side ,baste some oil/ butter and put it back in oven . Continue to bake.

    Once done ,change to grill mode and grill for another 4-5 minutes to get that charred look. 

    If you are not infusing smoke flavour ( charcoal smoking or dhungar method) then you can serve Seekh Kebab straight away or else proceed to next step for Dhungar Method.

    To cook on Stove Top

    If making on stove top , in a frying pan , grease ½ teaspoon of mustard oil .

    Seekh Kebab

    Arrange skewers on frying pan

    chicken seekh kebab on stove

    Cook on medium heat rotating skewers at equal intervals.

    Seekh Kebab

    Let it cook evenly and turn golden brown on both sides . Once done , proceed to infuse smoke using Dhungar Method ( smoking technique)

    Charcoal Smoking Technique / Dhungar Method :

    Initially , heat a small piece of charcoal on a flame till red hot, with the help of tongs , keep rotating the charcoal piece till it evenly burns .

    In a small bowl , place red hot charcoal and add ½ teaspoon of oil .

    Seekh Kebab

    Now ,place it immediately inside the Seekh Kebab pan and finally close it tightly with lid. Allow smoke to infuse for a 2-3 minutes.

    Seekh Kebab

    Serve Seekh Kebab garnished with coriander leaves , lemon wedges and mint chutney.

    seekh kebab
    Chicken Seekh Kebab from oven

    This post has been updated from the archives, was first published in Nov 2018.

    Recipe

    chicken-seekh
    5 from 4 votes

    Seekh Kebab | Easy Chicken Seekh Kebab

    Spiced and Flavourful  minced chicken skewered to cylindrical shape and grilled. 
    Prep Time13 minutes mins
    Cook Time25 minutes mins
    Resting Time30 minutes mins
    Total Time38 minutes mins
    Course: Starters
    Cuisine: Indian
    Keyword: Chicken, Diet
    Servings: 5 People
    Calories: 168kcal
    Author: Muktha H S

    Ingredients

    For Green Masala paste

    • 1 no Onion medium size
    • 6 no Garlic Cloves
    • 1 inch Ginger
    • 3-4 no Green Chillies , Use less spice Chillies
    • 10 no Whole Cashewnuts
    • 2 tablespoon Coriander Leaves

    To make seekh kebab

    • 500 grams Chicken Breast or Minced Chicken
    • 1 teaspoon Chat Masala
    • ¼ teaspoon Turmeric Powder
    • 1 teaspoon Garam Masala
    • ½ teaspoon Red Chilli powder
    • 1 teaspoon Black Pepper Powder
    • 1 tablespoon Lemon Juice
    • prepared green masala blend
    • 2 tablespoon Roasted Gram Flour / Besan
    • 1 teaspoon Salt or as required
    • 1 teaspoon Butter / Oil
    • 1 teaspoon Mustard Oil to grease pan

    Instructions

    For Green Masala Paste

    • In a small mixer jar / blender . add 1 medium size onion ,6 garlic cloves , 1 inch ginger ,4 green chillies , 2 tablespoon coriander leaves and 10 whole cashews. Blend to smooth paste without adding water.

    To make seekh Kabab

    • Wash chicken breast and pat it dry . Place in a food processor and ground the meat to smooth.
    • Add above prepared green masala paste and spices to minced meat . Blend everything once again ,such that masala and spices are well incorporated with meat.
    • Take skewers ,shape meat around the skewers in a cylindrical shape . Place this in refrigerator for 30 minutes.If you are using bamboo skewers , soak in water prior 30 minutes and then use the sticks.

    To bake in Oven

    • Preheat the oven to 200 deg celsius.
    • Grease the oven tray with oil , and arrange the skewers . Drizzle some oil / butter on top of the meat .
    • Bake in the oven for 15-18 minutes . Half the way around 10 min , take out the tray from oven ,turn the skewers to other side ,baste some oil/ butter and put it back in oven . Continue to bake.
    • Once done ,change to grill mode and grill for another 4 minutes to get that charred look. If you are not infusing smoke flavour ( charcoal smoking or dhungar method) then you can serve Seekh Kebab straight away or else proceed to next step for Dhungar Method.

    To make on stove top

    • In a frying pan , grease ½ teaspoon of mustard oil .
    • Arrange skewers on frying pan and cook on medium heat rotating skewers at equal intervals.
    • Once everything is evenly cooked and turns golden brown on both sides , proceed to infuse smoke using Dhungar Method( Smoking technique)

    Charcoal Smoking Technique / Dhungar Method :

    • Heat a small piece of charcoal on a flame till red hot, with the help of tongs ,keep rotating the charcoal piece till it evenly burns .
    • In a small bowl , place red hot charcoal and add ½ teaspoon of oil .
    • Place it immediately inside the Seekh Kebab tray and close it tight , so that smoke gets infused with kebab. Allow smoke to infuse for a minute.
    • Serve Seekh Kebab garnished with coriander leaves , lemon wedges and mint chutney.

    Video

    Notes

    1. If you don't have oven or tandoor or barbeque , alternatively you can cook on grill pan or tava.
    2. Add 1 teaspoon of butter on grill pan , place the skewers and cook on a medium heat ,rotating once in between , cook for around 15- 20 minutes.
    3. In case if water content in chicken and onion is higher and after mincing the meat , if it becomes difficult to hold the shape , then adding cashew powder or little roasted gram flour will help to hold the shape.

    Nutrition

    Calories: 168kcal

    You might also like

    • Tandoori-chicken-with-mint-chutney
      Tandoori Chicken Recipe
    • Chicken Tikka , how to make best chicken tikka
      Chicken Tikka , how to make best chicken tikka
    • chicken-tangdi-onion-rings-lemon-wedges
      Tangdi Kebab Recipe
    • Chilli Capsicum Chicken
      Chilli Capsicum Chicken

    Roasted Makhana | Roasted Fox Nuts

    Published : November 22, 2018 | Last Update on September 27, 2022 By Muktha

    Roasted_Makhana

    Roasted Makhana with step by step photos and short video. Roasted Makhana is a quick  and healthy 10 minutes snack . Makhana also known as phool makhana ,lotus seeds and fox nuts .There is no much of recipe in making Roasted Makhana . All you need to do is roast with little ghee on medium heat ,till it turns crisp and crunchy. Makhana is neutral in taste hence it can be flavoured or spiced as per your choice. Once they are cool , store in airtight containers ,it stays good for a week.

    Roasted_Makhana

    Apart from munching as a snack , roasted Makhana are used for making Makhana  Kheer , Makhana gravy , Makhana Raita and also Makhana Namkeen. All recipes calls for roasted makhana hence you can roast it and keep in advance and use it as required.

    Few other flavours that you can try for flavoursome Roasted Makhana are : Caramel Makhana , Herbed Makhana ( 3 flavours - Mint , Oregano , Mixed Pasta Seasoning ) , Cheese powder Makhana , Onion and Sour Cream  , Peri peri , Cajun Spices . You can try different flavours of your choice.

    Makhana or Fox nuts are nutrients  rich and good source of protein , calcium and iron. These low calories fox nuts are best munch for weight loss. Obviously , Roasted Makhana are healthy snack option better than Popcorn and its addictive too.

    Usage of Makhana in South India is not much when compared with rest of India. Its only a decade from now , its known to all because of its nutritious value. It's gaining much popularity these days globally as Super food.  Adapting a good lifestyle and introducing nutritious food in diet is a key for healthy living. Incase if you are new to this Makhana ,please start adding it in diet . It's a very healthy snack option.

    Makhana are used during fasting ,its one of the best Vrat recipe . So next  time when you fast , you know what you should munch on to keep those hunger pangs at bay 😉 😉 😉

    Recipe Card for Roasted Makhana | Roasted Fox Nuts

    Recipe

    Roasted Makhana
    5 from 2 votes

    Roasted Makhana | Roasted Foxnuts

    Healthy Snack to munch at anytime of the day - Roasted Makhana or lotus seeds or foxnuts
    Cook Time12 minutes mins
    Total Time12 minutes mins
    Course: Snack
    Cuisine: Indian
    Keyword: Diet, Weight Loss
    Servings: 6
    Calories: 87kcal
    Author: Muktha H S

    Ingredients

    • 100 grams Makhana
    • 2 tablespoon Ghee / Clarified Butter
    • ¾ teaspoon Rock Salt / Sendha Namak or as required
    • ½ teaspoon Red Chilly Powder
    • ½ teaspoon Chaat Masala

    Instructions

    • Heat 2 tablespoon of ghee / Clarified butter/oil in a deep kadhai.
    • Add Makhana and roast on a low heat for about 10-12 minutes .
    • Allow it to become crispy and crunchy , check the doneness by popping makhana into your mouth 🙂
    • Once it's Crisp and crunch ,add all the spice powders ,stir well and turn off the heat . Alternatively you can also heat 1 teaspoon of ghee in a tadka pan , add spice powders to it and pour it over the roasted makhana .
    • Stir well , once its cools down ,store it in a air tight container.Stays good for 7-10 days.

    Video

    Notes

    Video on Roasted Foxnuts | Roasted Phool Makhana

    Nutrition

    Calories: 87kcal

    Step by Step directions on making of Roasted Makhana:

    Heat 2 tablespoon of ghee / Clarified butter/oil in a deep kadhai.

    Roasted Makhana | Roasted Fox Nuts

    Add Makhana and roast on a low heat for about 10-12 minutes .

    Allow it to become crispy and crunchy , check the doneness by popping makhana into your mouth 🙂

    Roasted Makhana | Roasted Fox Nuts

    Once it's crisp and crunch ,add all the spice powders ,stir well and turn off the heat . Alternatively you can also heat 1 teaspoon of ghee in a tadka pan , add spice powders to it and pour it over the roasted makhana .

    Roasted Makhana | Roasted Fox Nuts

    Stir well , once its cools down ,store it in a air tight container.Stays good for 7-10 days.

    Roasted Makhana

    Cholai ka Saag |Amaranth Greens Gravy

    Published : November 19, 2018 | Last Update on September 27, 2022 By Muktha

    Cholai Ka Saag | Dantu Soppu Gojju | Green Amaranthus Gravy is nutritious ,healthy and tasty gravy made with Green Leafy Vegetables. This recipe is similar to that of sarso ka saag but with different greens. Along with green amaranthus , spinach , fenugreek and dill leaves are used for making this delicious gravy.

    Cholai ka Saag |Amaranth Greens Gravy

    Its winter and lot of greens are in season . In South India we don't get Mustard leaves and Bathua easily with vegetable vendors as in North and Central India . So with available greens which are locally available , I prepared similar Saag . Tastewise its entirely different from sarso ka saag as greens useds are different but this too tastes extremely good.

    This recipe is same as that of Masoppu Sambar | Assorted Greens Curry  the only difference lies with the exclusion of Toor dal . I have used 1 big bunch of Green Amaranthus Leaves / Dantu Soppu / Cholai , 1 medium bunch Spinach/ palak , 1 Cup fenugreek leaves/ methi and 1 small bunch Dill leaves/sabbasige / Shepu .

    Adding dill leaves is very much recommended here , as it gives a mild flavour . The flavour of dill leaves is subtle and not overpowering hence adding dill leaves is must . I'm emphasising here to add dill leaves because many complaints saying that they don't like the flavour of dill leaves. But this recipe calls for dill leaves ,so please don't skip if you want to get the actual taste of Cholai ka Saag | Dantu Soppu Gojju

    cholai_ka_saag

    Amaranthus leaves and seeds are very nutritious and need to a part of our daily diet. Amaranth leaves are one of the richest sources of Vitamin C , Vitamin K , B Complex Vitamins ,Iron , antioxidants and minerals. It contains higher values of minerals than spinach such as calcium , magnesium and zinc .

    Amaranth leaves and seeds are one of the Indian Superfood. So try adding this leaves and seeds ( rajgira) in your diet which is locally found. Select healthy Indian foods , cook your own food ,stay healthy and fit .

    Other greens recipes on blog are : Masida Soppu Saaru | Assorted Greens Sambar , Aloo Palak , Palak Paneer , Palak Paneer Bhurji , Palak Paneer Pulao  ,  Spinach Mushroom Soya Cutlets.

    Recipe card for Cholai Ka Saag | Dantu Soppu Gojju | Green Amaranth Gravy

    Recipe

    cholai_ka_saag
    5 from 2 votes

    Cholai Ka Saag | Amaranth Greens Gravy | Dantu Soppina Gojju

    A mild spice thick gravy made with assorted greens is very Flavourful ,Nutritious and Healthy.
    Prep Time20 minutes mins
    Cook Time25 minutes mins
    Total Time45 minutes mins
    Course: Main Course
    Cuisine: Indian
    Keyword: Gravy, Healthy
    Servings: 6 People
    Calories: 82kcal
    Author: Muktha H S

    Ingredients

    • 1 Large Bunch Amaranth Greens / Dantu Soppu
    • 1 Medium Bunch Spinach / Palak
    • 1 Small Bunch Dill / Shepu / Sabassigge Leaves
    • 1 Cup Fenugreek leaves / Menthya Soppu
    • 2 No's Onion medium
    • 2 No's Tomato
    • 4 No's Green Chilly
    • 1 inch Ginger
    • 5 no's Garlic Cloves,medium size
    • 1.5 tablespoon Besan / Gram flour
    • ½ Cup Water
    • 2 teaspoon Oil
    • 1 teaspoon Salt

    For Tempering

    • 1 teaspoon Ghee /Clarified Butter
    • 1 teaspoon Garlic Chopped
    • ½ teaspoon Red Chilli Powder
    • 1 pinch Asafoetidia

    Instructions

    • Clean and  thoroughly wash all the greens.
    • In a pressure cooker , add all the greens , green chillies , garlic ,ginger ,1 onion , tomato ,salt and a cup of water.
    • Just pressure cook for 1 whistle or around 6-7 minutes till whistle is about to come.Allow pressure to release on its own.
    • Once it's cool , drain the water(stock) and reserve it. Add all the cooked greens and veggies to a blender / processor and blend till smooth .
    • In a pressure pan or deep kadai ,heat 2 teaspoon of oil ,add chopped onions and fry till brown.
    • Add pureed veggies ,mix well and allow it to cook for 3-4 minutes.
    • Mix 1.5 tablespoon of besan / gram flour to the reserved stock and whisk well, such that no lumps are formed.
    • Add this mixture to the above greens, mix well and bring it to boil , once it starts to bubble. Turn off the heat
    • Heat 1 teaspoon of ghee in a Tadka pan , add 1 teaspoon of chopped garlic,fry till brown. Turn off the heat . Add asafoetida and red chilly powder ,mix well.
    • Pour tadka over the cooked greens ,mix well and serve hot along with Bajra Bhakri , Chapati , Rice flour Roti , Ragi roti or Jowar Roti

    Nutrition

    Calories: 82kcal

    Step by Step directions on making of Cholai Ka Saag | Dantu Soppu Gojju

    Clean and  thoroughly wash all the greens.

    Cholai ka Saag |Amaranth Greens Gravy

    In a pressure cooker , add all the greens , green chillies , garlic ,ginger , onion , tomato ,salt and ½ cup of water.

    Cholai ka Saag |Amaranth Greens Gravy

    Just pressure cook for 1 whistle  or around  6-7 minutes till whistle is about to come.Allow pressure to release on its own.

    Cholai ka Saag |Amaranth Greens Gravy

    Once it's cool , drain the water(stock) and reserve it. Add all the cooked greens and veggies to a blender / processor and blend till smooth .

    Cholai ka Saag |Amaranth Greens Gravy

    In a pressure pan  or deep kadai ,heat 2 teaspoon of oil ,add chopped onions and fry till brown.Cholai ka Saag |Amaranth Greens Gravy

    Once onions turn brown ,add pureed veggies ,mix well and allow it to cook for 3-4 minutes.Cholai ka Saag |Amaranth Greens Gravy

    Mix 1.5 tablespoon of besan / gram flour to the reserved stock .

    Cholai ka Saag |Amaranth Greens Gravy

    Whisk well, such that no lumps are formed.Add this mixture to the above greens.

    Cholai ka Saag |Amaranth Greens Gravy

    Mix well and bring it to boil , once it starts to bubble. Turn off the heat

    Cholai ka Saag |Amaranth Greens Gravy

    Heat 1 teaspoon of ghee in a Tadka pan , add 1 teaspoon of chopped garlic.

    Cholai ka Saag |Amaranth Greens Gravy

    Fry well till brown. Turn off the heat . Add asafoetida and red chilly powder ,mix well.

    Cholai ka Saag |Amaranth Greens Gravy

    Pour tadka over the cooked greens ,mix well .

    Cholai ka Saag |Amaranth Greens Gravy

    Serve hot along with Bajra Bhakri , Chapati , Rice flour Roti , Ragi roti or Jowar Roti. I served along with Bajra Bhakri accompanied with lemon wedges and onions rings

    Cholai ka Saag |Amaranth Greens Gravy

    Masala Vada

    Published : November 17, 2018 | Last Update on September 27, 2022 By Muktha

    masala-vada-chana-dal-vada@palates-desire

    Masala Vada recipe with step by step photos and short video. Chana Dal Vada or Paruppu vadai is a popular South Indian snack. Undoubtedly these vada's are deep fried snack .

    You can rarely see deep fried snacks on my blog 🙂 🙂 🙂 But this one is my all time favorite , so how can I miss something which I love the most ?

    Masala_vada
    Masala Vada
    [feast_advanced_jump_to]

    About this recipe

    Masala Vada is anonymously one of the most favourite tea time snack for South Indians. This crunchy fritters are made with chana dal, greens and few spices. Greens used are coriander leaves ,curry leaves , dill leaves or drumstick leaves . I love the one with drumstick leaves more than with dill leaves .Anyhow with dill leaves also it tastes , equally good.

    For masala , red chillies , green chillies , curry leaves , jeera seeds , ginger, garlic , cloves, cinnamon are blended together and added .Though using cloves and cinnamon are truely optional , adding a small amount of it gives a better taste . Even  fresh grated coconut  is used for blending with masala but again it's optional and I don't use it.

    I love to eat this Masala Vada more spicy , so I always add extra chillies for last batch of vada while frying. The recipe here is with medium spicy , go ahead and add more chillies ,if you want just like me . LOL 🙂 🙂 🙂

    Masala Vada is served along with coconut chutney for evening coffee or else with morning breakfast along with Chitranna| Lemon Rice and chutney. This is how we used to get Masala Vade in our hostel , also in many Darshini's of Bangalore and in street food trucks .

    One more Vada recipe on my blog is Uddina Vade | Thuthu Vade | Medu Vada . Try following this Medu Vada recipe as it is a fool proof  recipe.

    Watch Video

    Step by step directions to Masala Vada

    Wash and rinse well Chana Dal. Soak Chana Dal for 2-3 hrs in water.

    Masala Vada

    After 2 hrs , rinse well chana dal , drain water and keep it aside.

    Masala Vada

    Add drained chana dal to a blender and make a coarse paste without adding water.

    Masala Vada

    In a chutney jar of a mixer, add garlic, ginger,cumin seeds, 4 sprigs curry leaves,2 green chilli, red chillies, cinnamon and cloves. Make a paste as smooth as possible without adding water.

    Masala Vada

    Add this masala paste to chana dal and blend it once again,such that it mix well.

    Masala Vada

    Take the chana dal mixture in a vessel, add salt, chopped onions, 2 sprigs of curry leaves chopped, 1 green chilli,chopped coriander leaves and dill leaves.Mix well everything together.

    Masala Vada
    Masala Vada

    Whilst in a deep kadai,keep oil for heating. Once it's hot enough. Pinch a small amount of chana dal mixture,shape into vadas and put in hot oil.

    Masala Vada

    Fry on medium heat,flip and fry on both sides.

    Masala Vada

    Once it turns into nice golden colour,remove from oil and place on kitchen paper towel.

    Masala Vada

    Repeat the same procedure of frying for remaining chana dal mixture.

    Serve hot with a cup of masala chai or filter coffee.

    masala_vada

    Recipe

    chana-dal-masala-vada
    4.67 from 3 votes

    Masala Vada | Kadlebelle Vada | Paruppu Vadai Recipe

    A spicy crunchy fritter made from chana dal is a popular snack from South India
    Prep Time10 minutes mins
    Cook Time25 minutes mins
    Soaking TIme2 hours hrs
    Total Time35 minutes mins
    Course: Snack
    Cuisine: Indian
    Keyword: Festivals, Karnataka, South Indian
    Servings: 24 Makes
    Calories: 87kcal
    Author: Muktha H S

    Ingredients

    • 250 grams Chana Dal
    • 1 no Garlic pod large ( around 22 garlic cloves)
    • 2 inch ginger
    • 3 no Guntur or Kashmiri Red Chilli
    • 3 no Green chillies
    • 6 sprigs Curry leaves
    • 1 inch Cinnamon Stick
    • 2 Cloves
    • 1 teaspoon Cumin Seeds
    • ¾ Cup Onions Chopped or 2 onions medium size
    • ½ Cup Chopped Dill leaves
    • ⅓ Cup Coriander Leaves
    • 1 ½ teaspoon Salt or as required
    • Oil for Frying

    Instructions

    • Soak Chana Dal for 2-3 hrs in water, rinse well, drain water and keep it aside.
    • Add chana dal to a blender and make a coarse paste without adding water.
    • In a chutney jar of a mixer, add garlic, ginger,cumin seeds, 4 sprigs curry leaves,2 green chilli, red chillies, cinnamon and cloves. Make a paste as smooth as possible without adding water.
    • Add this masala paste to chana dal and blend it once again,such that it mix well.
    • Take the chana dal mixture in a container, add salt, chopped onions, 2 sprigs of curry leaves chopped, 1 green chilli,chopped coriander leaves and dill leaves.Mix well everything together
    • Whilst in a deep kadai,keep oil for heating. Once it's hot enough. Pinch a small amount of chana dal mixture,shape into vadas and put in hot oil.
    • Fry on medium heat,flip and fry on both sides.
    • Once it turns into nice golden colour,remove from oil and place on kitchen paper towel.
    • Repeat the same procedure of frying for remaining chana dal mixture.
    • Serve hot with a cup of masala chai or filter coffee.

    Video

    Notes

    1. Drain water completely from Chana dal and grind to medium coarse paste . 
    2. If there is water content in the mixture,then it takes more oil . And vada's will be drenched with too much of oil.
    3. If you don't want to add dil leaves or drumstick leaves , then add 1 more extra onion and add  ½ cup coriander leaves .
    4. Add little salt around 1 ¼ teaspoon while mixing and immediately prepare vada's for frying or else it releases water and becomes difficult to make vada's and also it drinks more oil.

    Nutrition

    Calories: 87kcal

    You may also like

    • khara pongal recipe
      Khara Pongal
    • bisi-bele-bath-with-khara-boondi
      Bisi Bele Bath Recipe
    • Goli Baji Recipe
      Goli Baje | Mangalore Bajji Recipe
    • kayi -hollige-obbattu
      Kayi Holige Recipe

    ABC Juice

    Published : November 15, 2018 | Last Update on September 29, 2022 By Muktha

    ABC Juice

    ABC Juice or the Apple , Beet , Carrot juice is globally known as next generation endurance drink . All the hype for this drink is worth as it delivers amazing benefits.Its also popularly known as a miracle drink .

    Whats the miracle all about .....? It is making waves as a cancer-fighting drink. Initially introduced by a Chinese herbalist to treat lung cancer and other diseases. Presently, it has gained a lot of attention for its magic like properties that benefit the body and brain.Source : Practo- Healthfeed ABC Juice

    But don't know whether I fights cancer or not , but definitely a tasty detox drink . Works wonders on your body ,skin and hair.  The two vegetables along with the goodness of apple, helps to  lower the levels of bad cholesterol , keeps blood pressure in control and also maintain blood sugar levels.

    If you need a flawless skin then include it in your diet . And also its a great way to get necessary nutrients to our body  and boost immunity.

    Try this detox  drink everyday on empty stomach to get benefited from what it claims.But I served it has fresh juice along with Avocado Toast for morning breakfast.Just to ensure I eat nutritious and tasty meal everyday 🙂

    All you need to make this detox is equal proportions of Apple ,Beet and Carrot  . As everyone's taste differ and friends of mine asked for a better tasty drink for their weight loss regime ,I have varied the proportions in 3:2:1 to get a Yummy ABC Juice.

    Other Detox Drink from my blog are : Beetroot Amla Juice , Kiwi Cucumber Smoothie , Coriander leaves and Amla Detox.

    Recipe Card for ABC JUice

    Recipe

    ABC Juice
    No ratings yet

    ABC Juice

    A Miracle Detox Drink  is a blend of Apple , Beetroot and Carrot.
    Prep Time5 minutes mins
    Total Time5 minutes mins
    Course: Drinks
    Cuisine: World
    Keyword: Detox, Diet
    Servings: 1
    Calories: 116kcal
    Author: Muktha H S

    Ingredients

    • 125 grams Apple
    • 80 grams Beetroot
    • 40 grams Carrot
    • 1 cup Water

    Instructions

    • Clean and wash Apple .beetroot and carrot.
    • Roughly cut  beetroot , carrot and apple into chunks , discard apple seeds.
    • Place apple , beetroot and carrot in a juicer , add cup of water and blend well together.
    • Collect juice and serve immediately.

    Nutrition

    Calories: 116kcal

    Step by Step Directions on making of ABC Juice:

    Wash rinse and clean apple ,beetroot and Carrot. Cut into apple into chinks and discard seeds. Roughly cut beetroot as well as carrot.

    ABC Juice

    Add all the three ingredients into a juicer and a cup of water.

    ABC Juice

    Blend well together ,till juice is extracted  ABC Juice

    Serve Immediately. ABC Juice

    I served for breakfast along with Avocado Toast , all that I needed was nutritious drink 🙂  rather than Detox !!!!

    ABC Juice

    Basic Avocado Toast

    Published : November 13, 2018 | Last Update on September 29, 2022 By Muktha

    Basic Avocado Toast

    Basic Avocado Toast is a easy toast recipe for hassle free morning breakfast .This can be prepared within 10 minutes and is nutritious too. Ditch Mayonnaise and use Avocado spread for toast which indeed is a healthy swap. Toppings of your choice can also be loaded on this to make it more nutritious . Scrambled Egg ,Boiled Eggs , Pickled Jalapenos , Cheese- Chilli , Chopped Tomatoes Onions and cucumber are few choices of toppings that can be added on this Toast .

    Basic Avocado Toast

    Toast are undoubtedly a easy quick fix for morning breakfast , which can be made nutritious too . Always try using a good quality, whole wheat bread for preparing toast . It's even better ,if you can bake your own bread as I do.Paired with either milk or egg , will also gives the necessary protein . Choosing toppings wisely helps to fix the essential nutrients needed to make a balanced diet .

    As Avocados are rich in fat ,of course good fat it's still a calorie dense fruit . One slightly larger avocado of 200 grams contains approximately 318 calories .So while toasting a slice of bread ,try using minimal amount of butter . Also , I personally don't like to use cheese toppings over Avocado toast because of its dense calories. So use the toppings and butter wisely.

    Globally toasts are meant to be easy breakfast ,so making it healthy is in our hands. Being Indians with a versatile range of meal options ,one may not be interested with toasts on a regular basis. But can have this kind of toasts once in a while to avoid early morning rush.

    Just make sure to make any simple toast , more nutritious by adding veggies , sprouts and eggs . Pair with a fruit or veg juice to make a balanced diet.

    I served this simple avocado toast along with ABC Drink : Apple Beet Carrot juice as a part of balanced diet.

    Other Yeast Bread based recipes on blog are : Cheesy Bell Pepper Toast , Grilled Veg Sandwiches , Whole Wheat Masala Bun and  Classic French Toast

    Recipe Card for Basic Avocado Toast

    Recipe

    Basic Avocado Toast
    5 from 1 vote

    Basic Avocado Toast

    A Healthy Breakfast for hassle free mornings
    Prep Time2 minutes mins
    Cook Time6 minutes mins
    Total Time8 minutes mins
    Course: Breakfast
    Cuisine: World
    Keyword: Bread
    Servings: 3 People
    Calories: 178.3kcal
    Author: Muktha H S

    Ingredients

    • 6 Slices Whole Wheat Bread
    • 15 grams Salted or unsalted Butter
    • 1 No Avocado Ripen
    • ½ teaspoon Salt or as required
    • ½ teaspoon Pepper powder or any herb seasoning
    • 1 teaspoon Lemon Juice
    • 1 teaspoon Chilli flakes optional

    Instructions

    • Lightly apply very little butter on both sides of bread and toast it till lightly golden brown.
    • Whilst , cut open the avocado. Scoop out the pulp into a bowl.
    • Mash the pulp to smooth using a fork or spoon.
    • Add salt , black pepper powder ( you can use oregano , basil or mixed herbs seasoning too ) and lime juice. Mix well to smooth. If you are using salted better , do check the amount and adjust accordingly.
    • By now ,toast would be ready . Generously apply 2 tablespoon of avocado spread on to each toast .
    • By now ,toast would be ready . Generously apply 2 tablespoon of avocado spread on to each toast .

    Nutrition

    Calories: 178.3kcal

    Step by step Directions on making of  Basic Avocado Toast:

    Lightly apply very little butter on both sides of bread and toast it till lightly golden brown.

    Basic Avocado Toast

    Whilst , cut open the avocado. Scoop out the pulp into a bowl.

    Basic Avocado Toast

    Mash the pulp to smooth using a fork or spoon.

    Basic Avocado Toast

    Add salt , black pepper powder ( you can use oregano , basil or mixed herbs seasoning too ) and lime juice. Mix well to smooth. If you are using salted better , do check the amount and adjust accordingly.

    Basic Avocado Toast

    By now ,toast would be ready . Generously apply  2 tablespoon of avocado spread on to each toast .

    Basic Avocado Toast

    Sprinkle some red chilli flakes on top and serve immediately.

    Basic Avocado Toast

    Coriander Leaves and Amla Detox

    Published : November 12, 2018 | Last Update on September 29, 2022 By Muktha

    Corinader leaves and amla Detox

    Hope everyone had a wonderful diwali binge just like me . So here comes my detox drink for after effects. Coriander Leaves and Amla Detox is a marvellous detox drink that helps to flushes out all the toxins from the body. Especially the metallic toxins . It's a simple Detox recipe , where coriander leaves are boiled in water and mixed with fresh amla and ginger juices. To make it more palatable cumin powder and black salt is added.

    coriander leaves and amla detox

    Coriander leaves and Amla Detox drink is a simple recipe which is loaded with essential nutrients .Amla - Indian Gooseberry is undeniably a powerhouse of nutrients which boosts immunity . Coriander leaves and Amla is a great combination in terms of nutrients , taste and cleansing the system .

    This detox drink is loaded with Vitamin C and is a very great way to start your day with. Drinking Amla Juice on empty stomach is very beneficial , helps to clear the system and aids digestion. It's a well known fact that Amla is good for skin and hair.

    The best way to include amla in diet is in its juice form on empty stomach . If it's not possible  then you can always grate it  on your poha , sauteed veggies and sabji .

    I have one shorba recipe with this Amla , which i'll be sharing soon .

    If you are interested , do check my other Detox Drink recipes from my space are: Aloe vera Detox , ABC Juice , Beetroot Amla Detox  and Kiwi Cucumber Smoothie.

    Recipe Card  for Coriander Leaves and Amla Detox

    Recipe

    coriander leaves and amla detox
    5 from 1 vote

    Coriander Leaves and Amla Detox

    A blend of Amla ,Ginger with Coriander leaves water loaded with Vitamin C  helps in cleansing the system.
    Prep Time6 minutes mins
    Cook Time10 minutes mins
    Resting time30 minutes mins
    Total Time16 minutes mins
    Course: Drinks
    Cuisine: Indian
    Keyword: Detox
    Servings: 2 People
    Calories: 12kcal
    Author: Muktha H S

    Ingredients

    • 1 Cup Coriander Leaves Chopped
    • 750 ml Water
    • 2 no's Amla / Indian Gooseberries
    • 1 ½ inch Ginger
    • ½ teaspoon Jeera Powder
    • ¼ teaspoon Black Salt
    • 1 Tsp Basil Seeds / Sabja Seeds /Falooda seeds

    Instructions

    • Clean , wash and chop coriander leaves.
    • In a vessel ,take 750 ml of water and add 1 cup of chopped coriander leaves.
    • Bring it to boil, once it comes to rolling boiling ,turn off the heat . Close and keep it aside. Allow it to cool
    • Remove the seeds and cut 2 amla - Indian Gooseberries .Take 1 inch of ginger, clean ,peel skin and cut.
    • Soak 1 teaspoon of Sabja / Basil seeds / Falooda seeds in ¼ cup of water and set aside for 5 minutes.
    • Whilst ,blend amla and ginger pieces together in a blender , add ¼ cup of coriander water.
    • Add jeera powder and black salt and blend to a smooth paste.
    • Mix amla past with coriander water. Strain the juice .Discard coriander leaves and amla ginger pulp extract.
    • Add soaked Falooda / sabja seeds to glass, add juice and serve.

    Nutrition

    Calories: 12kcal

    Step by Step Directions on making of Coriander and Amla Detox :

    Clean , wash and chop coriander leaves.

    Coriander Leaves and Amla Detox

    In a vessel ,take 750 ml of water and add 1 cup of chopped coriander leaves.

    Coriander Leaves and Amla Detox

    Bring it to boil, once it comes to rolling boiling ,turn off the heat .

    Coriander Leaves and Amla Detox

    Close and keep it aside. Allow it to cool

    Coriander Leaves and Amla Detox

    Remove the seeds and cut 2 amla - Indian Gooseberries .Take 1 ½ inch of ginger, clean ,peel skin and cut.

    Coriander Leaves and Amla Detox

    Soak 1 teaspoon of Sabja / Basil seeds / Falooda seeds in ¼ cup of water and set aside for 5 minutes.

    Coriander Leaves and Amla Detox

    Whilst ,blend amla and ginger pieces together in a blender , add ¼ cup of coriander water.

    Coriander Leaves and Amla Detox

    Add jeera powder and black salt and blend to a smooth paste.

    Coriander Leaves and Amla Detox

    Mix amla past with coriander water. Strain the juice .Discard coriander leaves and amla ginger pulp.

    Coriander Leaves and Amla Detox
    Coriander Leaves and Amla Detox

    Add  soaked Falooda / sabja seeds to glass, add juice and serve.

    Coriander Leaves and Amla Detox
    Corinader leaves and amla Detox

    Wheat Coconut Milk Pudding | Godhi Halbai

    Published : November 10, 2018 | Last Update on October 17, 2022 By Muktha

    godhi-halbai-recipe

    Wheat Coconut Milk Pudding | Godhi Halbai is one of the traditional recipe of Karnataka. It is only a 5 ingredient recipe ,which is utterly delicious and healthy too. In Kannada , Godhi means Wheat and Haal means milk  . Meaning , a dessert made by extracting wheat milk and coconut milk . Its a vegan recipe too.

    godhi-halbai-recipe

    You can use either rice or ragi or in combination along with wheat to prepare this Halbai. As I always love the taste of wheat milk extract ,I consider using only Wheat as the main ingredient . Along with wheat extract , fresh coconut milk is used here . Jaggery is mixed along with coconut milk and cooked on a very low flame ,stirring it continuously. And finally flavoured with cardamom powder and garnished with poppy seeds .

    This Wheat Coconut Milk Pudding is such delicacy that you can never stop at 2 or 3. How much ever you eat this sweet , you will never feel heavy. It's a very light , delectable dessert that can be served for any kind of occasion.I made this dessert for this festive season.

    Though it's only 5 ingredient recipe without any fancy ingredients ,one might find extracting wheat milk and coconut milk bit difficult . Apart from that , while making this dessert ,you should keep on stirring the milk continuously till it thickens.These are the only 2 factors because of which I don't do it often. If measurements are in right proportions then cooking time will be reduced . So that , stirring will reduced and your hands will be saved 🙂

    This recipe can be easily doubled or tripled but make sure the time taken to cook and stirring the coconut milk continuously may be bit more strenuous.

    This sweet is also an addition to my healthy sweets recipe . It is a authentic as well as as traditional recipe that has been passed down through generations . Hence this recipe is a treasure and goes to my repository.

    You can serve this dessert on any occasions like festivals , parties or  even for post lunch sweet cravings as this is very light on stomach and has a jelly kind of texture.Be sure to finish the batch of sweets on same day or else please refrigerate ,if you are using it for the next day.

    Other Healthy Sweet recipes on my blog are Dates Halwa, Dates Kheer , Millet Carrot Kheer  and Anjeer Khajoor Roll

    This recipe is going for Cookpad India Diwali Mega Contest  🙂 🙂 🙂

    Recipe Card for Wheat Coconut MIlk Pudding | Godhi Halbai - Karnataka Style

    Recipe

    halbai-recipe
    5 from 3 votes

    Godhi Halbai Recipe

    A traditional and authentic vegan recipe from Karnataka ,delectable in taste prepared from extracting milk from whole wheat  and coconut.   
    Prep Time15 minutes mins
    Cook Time45 minutes mins
    Soaking Time8 hours hrs
    Total Time45 minutes mins
    Course: Dessert
    Cuisine: Indian, Karnataka
    Keyword: Diwali, South Indian, Sweets
    Servings: 50 pieces
    Calories: 47kcal
    Author: Muktha H S

    Ingredients

    • 250 grams Whole wheat (1.25 cups)
    • 125 grams Fresh Coconut Grated (¾ cup)
    • 4 Cups Water
    • 250 grams Organic Jaggery Powder (1 cup approx) , adjust to taste
    • ½ teaspoon Cardamom Powder
    • 1 Tsp Coconut Oil or clarified butter
    • 1 teaspoon Poppy Seeds

    Instructions

    • Soak 1 cup of whole wheat for 8-10 hours or overnight. After 8 hours , rinse well, drain water from wheat and set aside.
    • Into a blender, add soaked wheat and fresh coconut .
    •  Add 2 cups of water and process well, such that it becomes easy to extract milk.
    • Pass the blend coconut and wheat paste through muslin cloth. Squeeze well to extract the first milk ( thick milk)
    • Now add back the coconut wheat paste into a blender, add 2 cups of water and process again. Pass it through the muslin cloth and squeeze to extract thin milk ( 2nd milk) .
    • You'll get approximately 1 litre of milk .
    • Take a heavy bottom kadai / non stick kadai , dry roast 1 teaspoon of poppy seeds and set aside.
    • In the same kadai , add 1 teaspoon of coconut oil or clarified butter. Add wheat- coconut milk . Keep the flame on medium low and stir the milk.
    • When milk becomes warm , add 1 cup of organic jaggery powder , stir well and continue to stir the milk. By the end of 15 minutes ,milk starts to thicken. Never let your hands down, keep stirring such that no lumps are formed.
    • Add ½ teaspoon of cardamom powder and mix well.
    • Once it reaches the idli batter / thick cake batter consistency , taste and adjust sweetness if required ,turn of the heat.
    • Grease the tray/ plate with ghee. For vegan option grease it with vegetable oil.
    • Pour the cooked pudding mixture to the tray, tap it. Sprinkle roasted poppy seeds on top and allow it to cool. It gets set within 15-20 minutes.
    • Cut into desired shapes and serve it .Tastes best when served chilled.

    Notes

    1. You can extract wheat milk and coconut milk separately and later mix together for cooking .
    2. You can add more water for extracting coconut milk and wheat milk . If more water is added it takes more time to cook.
    3. If you are increasing the measurement ,then I insist you to extract whole wheat milk  and coconut milk separately.
    4. Never let your hands down ,keep stirring , if lumps forms in between  then add little water and whisk it using a wire whisk to beat the lumps. 
     

    Nutrition

    Serving: 25grams | Calories: 47kcal

    Step By Step Directions on Making of Wheat Coconut Milk Pudding

    Soak ½ cup of whole wheat for 8-10 hours or overnight.Rinse well ,drain water and set aside.

    Wheat Coconut Milk Pudding | Godhi Halbai

    Take 150 grams / 1 Cup heap of grated fresh coconut .In a blender , add soaked wheat and coconut .

    Wheat Coconut Milk Pudding | Godhi Halbai

    Add 1-2 cups of water and blend well such that milk can be extracted easily.

    Wheat Coconut Milk Pudding | Godhi Halbai

    Pass the blended coconut and wheat mixture through sieve and extract the milk . Discard the residue.There is no need of thick milk ,you can dilute it with water and extract both thick and thin milk from coconut and wheat , all together .

    Wheat Coconut Milk Pudding | Godhi Halbai

    You'll get approximately 3 cups of milk , dilute it by adding 11/2  to 2 cup of water. If its more diluted ,then cooking time increases.

    Wheat Coconut Milk Pudding | Godhi Halbai

    Take a heavy bottom kadai / non stick kadai , dry roast ½ teaspoon of poppy seeds and set aside.

    Wheat Coconut Milk Pudding | Godhi Halbai

    In the same kadai , add extracted wheat- coconut milk . Keep the flame low and stir the milk.

    Wheat Coconut Milk Pudding | Godhi Halbai

    For this add 1 cup  organic jaggery powder , mix well and continue to stir the milk.

    Wheat Coconut Milk Pudding | Godhi Halbai

    By the end of 15 minutes ,milk starts to thicken. Never let your hands down , keep stirring such that no lumps are formed.

    Wheat Coconut Milk Pudding | Godhi Halbai
    Wheat Coconut Milk Pudding | Godhi Halbai

    Once it reaches the idli batter / Cake batter consistency,check the taste and adjust sweetness, if required.I added ¾ cup jaggery powder initially and then adjusted with 1 tablespoon of jaggery,mix well and turn of the heat. Add cardamom powder and mix well.

    Wheat Coconut Milk Pudding | Godhi Halbai

    Grease the tray/ plate with ghee . For vegan option grease it with vegetable oil.

    Wheat Coconut Milk Pudding | Godhi Halbai

    Pour the cooked pudding mixture to the tray ,tap it gently, sprinkle some roasted poppy seeds on top and allow it to cool.

    Wheat Coconut Milk Pudding | Godhi Halbai

    Once it cools a bit and when you can handle the heat ,grease hand with ghee (oil for vegan option) and tap the pudding mixture gently. This step is optional but it gives a nice glossy look once it set.

    Wheat Coconut Milk Pudding | Godhi Halbai

    Allow it set for 45 minutes to 1 hr ,you can even refrigerate it. Once set ,cut into desired shapes and serve it .

    Wheat Coconut Milk Pudding | Godhi Halbai

    Tastes best when served chilled.

    Wheat Coconut Milk Pudding | Godhi Halbai

    Anjeer Khajoor Rolls | Fig Dates Rolls

    Published : November 5, 2018 | Last Update on October 24, 2022 By Muktha

    anjeer khajoor roll

    Anjeer Khajoor Rolls are gluten free, vegan healthy nutty sweet with natural sweetness from dry figs and dates with added nuts and roasted poppy seeds. Share this sweet with family, friends and eat guilt free.

    You can also serve this to diabetic person without any fear of glucose spike when had mindfully.

    As Diwali welcomes winter ,this dry fruit roll makes it a perfect healthy sweet to share with family and friends for this season .

    anjeer-khajoor-roll
    [feast_advanced_jump_to]

    About this recipe

    Anjeer Khajoor Roll is easy to make recipe ,with no added sugar and vegan too. Soak dry figs and dates in warm water ,drain water ,blend to fine paste . Mix it well with nuts and cook . Finish with poppy seeds on top . A delicious and healthy rolls will be ready to serve.

    Festivals are for feasting  and celebrations are pleasurable experience with whole family and friends. When its Diwali , there comes lots and lots of sweets. Making healthy sweets to celebrate festivals is always in our hand. Forget about the amount of calories this dessert count ,think about the nutrition and the goodness it provides.

    The concept of Diwali Sweets - Sweets and Namkeens is so very logical . Diwali always falls during the onset of winters and so comes lots of desi ghee in sweets and Namkeens in India.

    During winter season ,skin starts cracking and gets dry , nourishing our body well within from inside helps to avoid such effects. So lots of ghee (clarified butter ) gets in while making Indian Diwali Sweets . Dry fruits , millets are also used in preparations of Namkeens and sweets ; this helps to generate heat within the body to combat the effect of winter cold. So welcoming a festival and season ,goes hand in hand with our food and culture.

    Few healthy desserts  recipes with no sugar or minimal sugar on my blog are : Ragi Coconut Pudding , Wheat Coconut Milk Pudding| Godhi Halbai ,  Dates Halwa, Dates Kheer ,  

    Other fail proof recipes on blog , which you may like are : Mysore Pak , Kalakand , Pista Almond Rolls , Rasgulla ,  Moongdal Burfi , Coconut Barfi , and Kaju Katli  . If you are looking for Diwali recipes , do check diwali recipe collections here.

    Ingredients

    To make this sweet you just need minimum ingredients dates, figs , nuts and poppy seeds.

    anjeer-dates-roll-sweet-recipe-ingredients

    Figs and Dates - These two are the main ingredients of this recipe. You can use any type of dates , deseed and use.

    Nuts - I have used pistachios, cashews and almonds , you can choose to add any nuts of your choice.

    Ghee / clarified butter - a small amount of ghee or oil is needed to sauté , in this recipe. Vegan's can choose coconut oil in this recipe, as it tastes the best.

    Poppy seeds - this add look, texture and nutty aromatic flavor to the sweet dish.

    Optional Add on's

    Salt and lime juice - adding salt and lime juice helps to balance out the sweetness. At times , depending on the quality of figs and dates ; together they may turn out too sweet. So to cut down over sweetness adding lime juice and salt helps.

    Watch Video

    How to make Anjeer Khajoor Rolls

    Deseed dates , soak fig and dates in warm water for 30-60 minutes.

    soak dates and figs

    After 30 minutes, drain water ( don't waste it , you can drink it as it tastes really sweet) and add soaked dates and fig to a blender

    soak fig and dates

    and blend to a very fine smooth paste without adding water.

    fig dates paste

    Soak Pista and almond on warm water for 15-20 minutes, drain water.

    Peel the skin of pista and almonds, add cashews and finely chop everything and set aside.

    finely chop nuts

    In a nonstick pan, add ½ tablespoon of poppy seeds and dry roast until you get nice aroma and keep it aside.

    dry roast poppy seeds

    Heat 1 tablespoon of Ghee/ Clarified Butter in a nonstick pan and add chopped nuts, fry well for 1-2 minutes on medium heat but it shouldn't change colour.

    fry chopped nuts

    Now add fig-dates paste , mix well and cook .

    add dates paste

    Add salt and lime juice , stir well and cook for about 15-20 minutes on medium heat. Adding lime juice and salt is optional but it helps to balance the over sweetness from figs and dates.

    add few drops of lime juice

    Cook fig dates mixture till it thickens and becomes really heavy to stir .Turn of the heat and set aside, let it cool down a bit.

    cook until it becomes hard

    When it becomes warm and you are able to handle the temperature ,knead fig dough on a parchment paper and roll into a cylindrical shape.

    roll fig dates into log

    Roll fig dates log on roasted poppy seeds.

    roll on poppy seeds

    Wrap it a parchment paper and set in refrigerate for 4-5 hrs to set. Then remove from refrigerator , cut into circles and serve.

    cut into roundels

    Share Healthy Diwali Sweets with family and friends.

    anjeer roll

    Recipe

    anjeer khajoor roll
    5 from 2 votes

    Anjeer Khajoor Rolls

    No sugar , gluten free, vegan sweet is healthy sweet rolls from dry fruits and nuts is tasty and gives energy instantly.
    Prep Time10 minutes mins
    Cook Time20 minutes mins
    Soaking Time30 minutes mins
    Total Time30 minutes mins
    Course: Sweets
    Cuisine: Indian
    Keyword: Diwali
    Servings: 12 Pieces
    Calories: 82kcal
    Author: Muktha H S

    Ingredients

    • 75 grams Dried Figs / Anjeer or 8-10 Figs
    • 100 grams Dates deseeded or 12-15 dates
    • 5- No Almonds
    • 10 No Pistachios
    • 5 No Cashews
    • 4-5 drops Lime Juice
    • ¼ teaspoon Salt
    • ½ tablespoon Poppy seeds
    • 1 tablespoon Ghee / Clarified Butter

    Instructions

    • Deseed dates , soak fig and dates in warm water for 30-60 minutes.
    • After 30 minutes, drain water ( don't waste it , you can drink it as it tastes really sweet) and add soaked dates and fig to a blender and blend to a very fine smooth paste without adding water.
    • Soak Pista and almond on warm water for 15-20 minutes,drain water.
    • Peel the skin of pista and almonds, add cashews and finely chop everything and set aside.
    • In a nonstick pan, add ½ tablespoon of poppy seeds and dry roast until you get nice aroma and keep it aside.
    • Heat 1 tablespoon of Ghee/ Clarified Butter in a nonstick pan and add chopped nuts, fry well for 1-2 minutes on medium heat but it shouldn't change colour.
    • Now add fig-dates paste , mix well and cook .
    • Add salt and lime juice , stir well and cook for about 15-20 minutes on medium heat. Adding lime juice and salt is optional but it helps to balance the over sweetness from figs and dates.
    • Cook fig dates mixture till it thickens and becomes really heavy to stir .
    • Turn of the heat and set aside, let it cool down a bit.
    • When it becomes warm and you are able to handle the temperature ,knead fig dough on a parchment paper and roll into a cylindrical shape.
    • Roll fig dates log on roasted poppy seeds.
    • Wrap it a parchment paper and set in refrigerate for 4-5 hrs to set.
    • Then remove from refrigerator , cut into circles and serve.
    • Share Healthy Diwali Sweets with family and friends.

    Video

    Notes

    1. Lime juice is added to balance the sweetness from dates and fig , its optional ,you can skip if you need.
    2. Nuts can be chopped directly and added without soaking and de-skin the same.If you are adding nuts directly without soaking in water then you can dry roast nuts and add directly at last ,once after date figs are cooked completely.
    3. Adding poppy seeds is again optional ,I prefer adding it cause of its crunchy texture and appealing look for rolls. Also it keeps body warm during cold season.

    Nutrition

    Calories: 82kcal

    You may also like

    • coconut-cookie-sandwich
      Cookie Sandwich
    • crispy-coconut-cookies
      Coconut Cookies
    • bellada-anna-recipe
      Bellada Anna - Gudanna
    • easy-shrikhand-recipe-photo
      Shrikhand
    • « Previous Page
    • 1
    • …
    • 4
    • 5
    • 6
    • 7
    • 8
    • …
    • 10
    • Next Page »

    Hey ! Nice To Meet You

    Muktha-about-me

    Hi ! I'm Muktha , Blogger , Nutrition Advisor & Recipe Creator behind Palate's Desire . I share tried & tested everyday meal recipes for healthy living and occasional indulgence. Palate's Desire helps even a novice to cook like a pro. Happy Cooking...! Read More about me →

    Stay Connected

    • Instagram

    Baking Recipes

    • peanut butter cookies
      Peanut Butter Cookies
    • crinkle-cookies
      Chocolate Crinkle Cookies
    • crispy chicken nuggets
      Chicken Nuggets Recipe
    • crispy fried chicken
      Fried Chicken Recipe | Crispy Fired Chicken
    • banana-bread-recipe
      Easy Banana Bread | Eggless Bread Recipe
    • pumpkin-walnut-cake-recipe
      Pumpkin Walnut Cake

    Baking Recipes→

    Popular Recipes

    • bisi bele bath powder
      Bisi bele bath powder recipe - how to make
    • pineapple-salsa
      Pineapple Salsa - How to make spicy salsa
    • dry gobi manchurian recipe
      Gobi Manchurian Dry | Cauliflower Manchurian
    • okra-peanut-stir-fry
      Moongphali Bhindi | Peanut Okra Stir fry
    • Mangalore Fish Curry
      Fish Curry | Meen Gassi - Mangalore Style
    • moringa-tea-to-burn-fat
      Moringa Tea Recipe | Sip everday to Burn Fat easily

    Rice Recipes

    • Rice Varities
      Masala Lemon Rice | Nimbehuli Chitranna Recipe
    • chicken-fried-rice-recipe
      Chicken Fried Rice
    • Donne-Biryani-Recipe
      Donne Biryani Recipe
    • chicken-pulao
      Chicken Pulao Recipe
    • vegetable fried rice
      Vegetable Fried Rice | Indo-Chinese Fried Rice Recipe
    • chana-pulao-recipe
      Chana Pulao | Chickpea Pilaf
    • vegetable dum biryani
      Vegetable Dum Biryani Recipe
    • Jeera Rice
      Jeera Rice

    Egg Recipes

    • scrambled mushroom eggs
      Scrambled Egg with Mushroom
    • spanish-potato-omelette-cut-into-wedges
      Spanish Potato Omelette
    • scrambled Egg Curry
      Scrambled Egg Curry
    • kerala egg curry
      Kerala Egg Curry | Easy Egg Recipes
    • shakshuka recipe
      Shakshuka | How to make Shakshuka recipe
    • Kolhapuri Egg Masala
      Kolhapuri Egg Masala
    • onion egg bhurji
      Onion Egg Bhurji
    • Oats-omelette-breakfast
      Spicy Masala Oats Omelette Recipe

    Sweets & Desserts

    • Thandai-kulfi
      Thandai Kulfi Recipe
    • eggless chocolate mousse
      Eggless Chocolate Mousse
    • Besan halwa recipe
      Besan Halwa Recipe
    • Makhana-kheer-recipe
      Makhana Kheer Recipe
    • mango-phirni-topped-with-pistachios-rose-petals
      Mango Phirni Recipe
    • Shahi Tukda
      Shahi Tukda Recipe
    • Sweet potato Halwa
      Sweet Potato Halwa | Shakarkandi Halwa
    • Rabdi-dessert
      Rabdi Recipe, how to make best rabri at home

    Footer

    ↑ back to top

    ABOUT

    • ABOUT MUKTHA
    • MEDIA KIT

    STAY CONNECTED

    • SIGN UP ! FOR E MAILS
    • CONTACT ME

    POLICIES

    • PRIVACY POLICY
    • TERMS & CONDITIONS

    COPYRIGHT © 2025 PALATE'S DESIRE

    Rate This Recipe

    Your vote:


    A rating is required
    A name is required
    An email is required